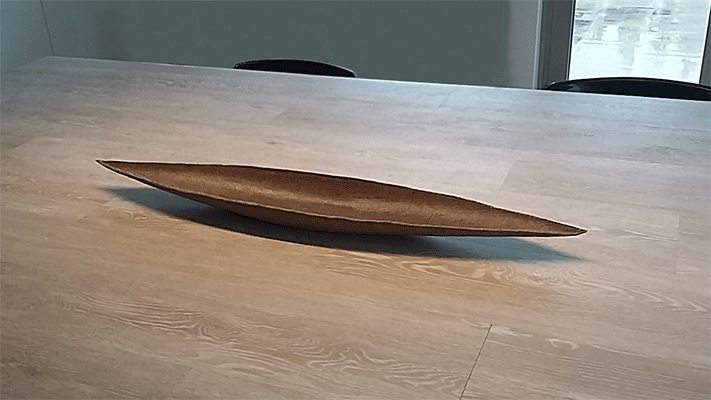
The aim for this week’s assignment was to machine a 3d mould and produce a fibre composite part in it. I was thinking how I could incorporate this assignment to y final project but I had nothing to apply for it so I decided to do a canoe shape plate
DESIGNING THE MOULD
The first thing before starting to design the mould I had to take into account the different materials that I was going to use. In the FabLab we only had insulating green foam to machine our mould so I had to fit my design to the foam board. It wasn’t a problem for me so I adapted the design to the foam measures (1,20m long x 0,60m width x 0,06m thick).
As the mould was going to be machined I also had to take into account the limitations of doing it this way. As in the moulding and casting assignment I couldn’t design something in cantilever because it is impossible to mill it with a three axis machine. Also I had to take into account the tool I was going to use (a round mill or an end mill).
Also choosing the correct materials was very important. I decided to use as the fibre some fabric but it can be very different the finishes depending on the fabric that we use: it is not the same doing it with thick cloth than with a thinner one. Doing it with thinner cloth can be adapted to a more detailed mould rather than with a thick one that doesn’t get the details.
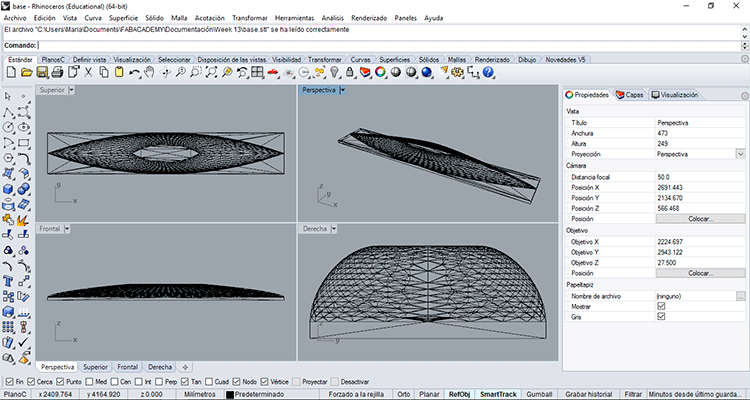
Once I had in mind all these things I designed the 3d model.
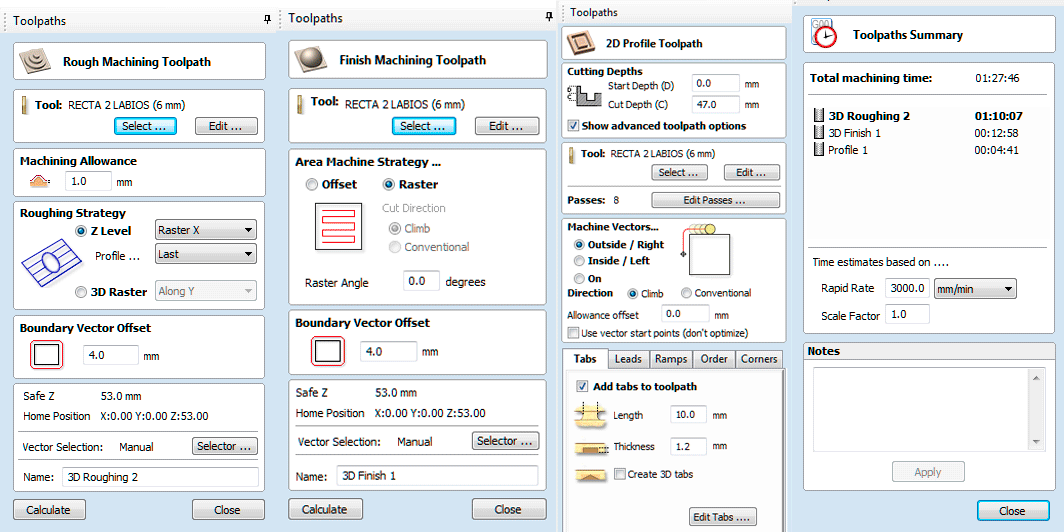
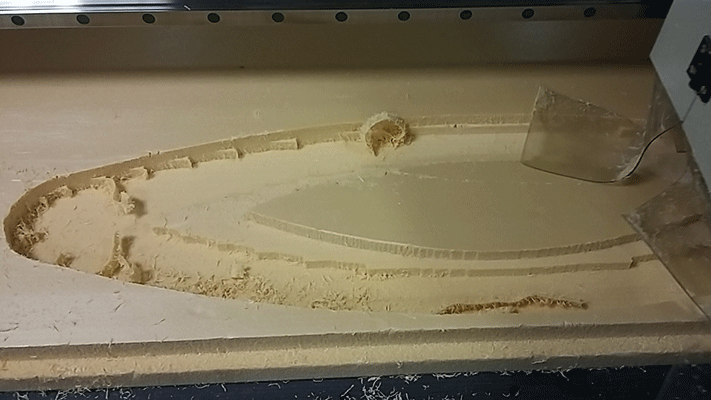
For milling the mould, I used the CNC milling machine because I was going to use a very big block of expanded polypropylene. I did the same things than for the moulding and casting assignment, I prepared the file with three different toolpaths: the roughing one, the finish and the final cut. For each toolpah I used the same tool a 6mm end mill.
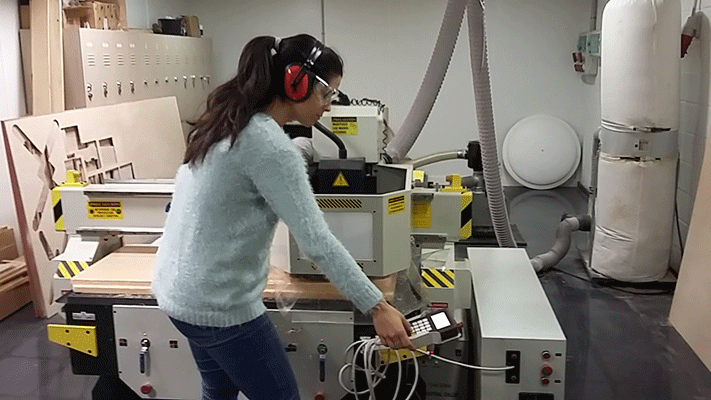
Rough toolpath: I prepared the files with all the parameters that we normally use in the Fablab for this type of material and tool. I gave it a cut depth of 6mm and then I sent it to the machine. When milling the work I paused the machine in order to see if the tool was milling it well, I saw that everything was correct to a modify the toolpath giving it a cut depth of 12mm instead of 6mm to save time because it lasted too long.
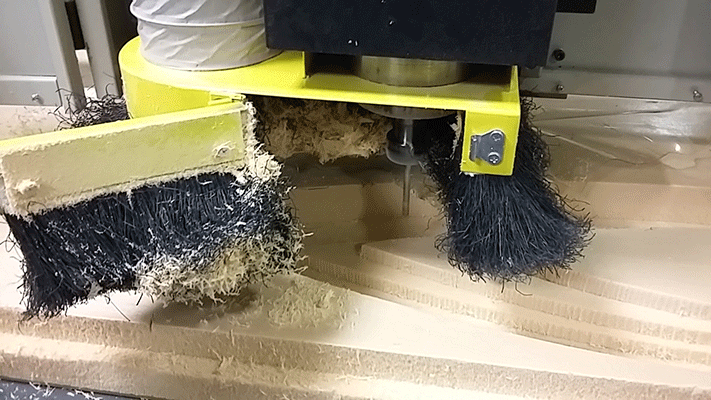
I had some problems when milling the rough toolpath, as you can see in the following video the mandrel did some strange movements that’s why my .stl mesh wasn’t exported well. I exported it in Autocad and Autocad hasn’t got good resolution when exporting to .stl files. It is recommendable to export it with rhinoceros because it’s a program for meshes.
Composites. Rough toolpath from msantisteban on Vimeo.
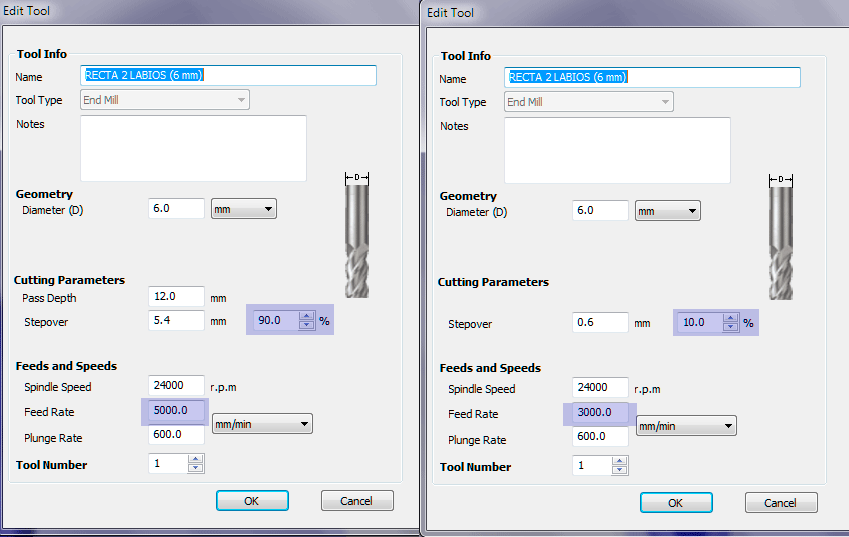
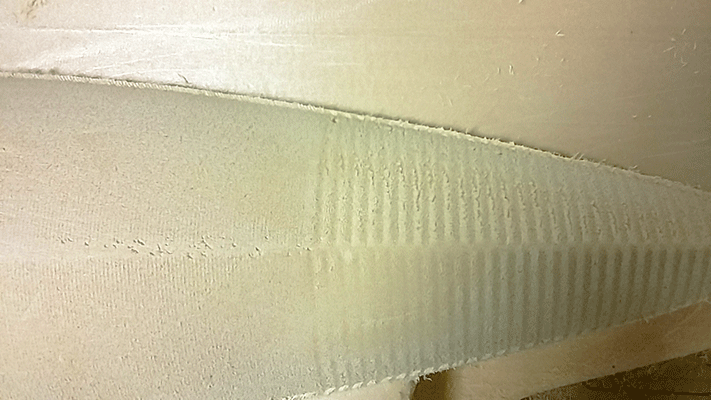
Finish Toolpath:When milling the finish toolpath, at the beginning I gave it a stepover value of 40% but when I paused the machine to check if everything was OK I realize that 90% wasn’t enough for having a smooth finish so I had to modify the parameters of the toolpath again. I gave it a 10% of step over and it worked, the finish was much better. It can be appreciate in the pictures from below the differences between the 90% and the 10% stepover. The reason for this is that when my instructor asked the manufacturer if the material had the same properties as the material we use to order normally, the manufacturer told him yes but the real thing it wasn’t the same material. Also I modified the feed rate from 5000 to 3000 because it was very fast.
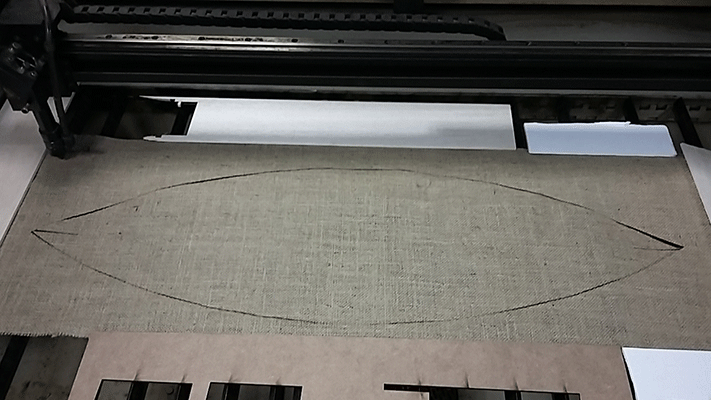
Doing the fabric pattern
After the milling process the next step was doing the fabric pattern. I decided to use jute instead of linen because it is thicker and it gives consistency to the composite. I didn’t knew how I was going to do the cloth pattern and what I did was marking the shape of the mould in the cloth, this way I had an idea of how I had to cut the cloth. Once I did this, as I never cut cloth in the laser cut machine I thought it was a good time for me to practice this type of cut with the cloth pattern. I designed the pattern and then I did some tests to see witch parameters the laser cut machine needed to cut and mark the cloth. After finding the parameters the next thing was holding the cloth to a frame without stretching it because this could cause a shrinkage of the pattern. I also took into account that the fibres of the cloth had to be in different directions because this way it gives roughness to the composite.
heating the mould
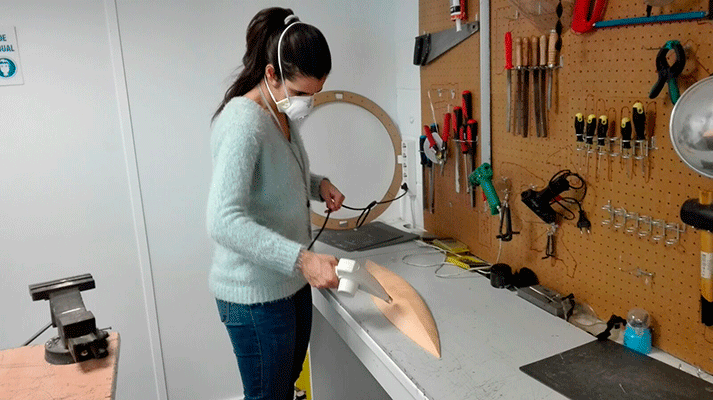
As I milled the mould in polypropylene and this material is porous, I heated the surface with the hot air gun to smooth it out in order to have the surface as smooth as possible to prevent it from being stuck to the composite.
Mixing the resin components
I founded this part the most difficult part of the process because I had to mix both components of the resin (base and catalyst), soak the cloth on the resin, and place all the different layers and vacuum it in a short period of time. For doing this quickly what I did was to practice the process before doing it finally in order to calculate the time.
I used epoxy resin. First of all I read the datasheet of its components and founded that the hardener part causes severe irritation if inhaled, severe skin irritation, severe eye irritation, and may cause skin and eye burns and also can cause allergic respiratory reaction and allergic skin reaction. That’s why I protected myself with a face mask, and gloves.
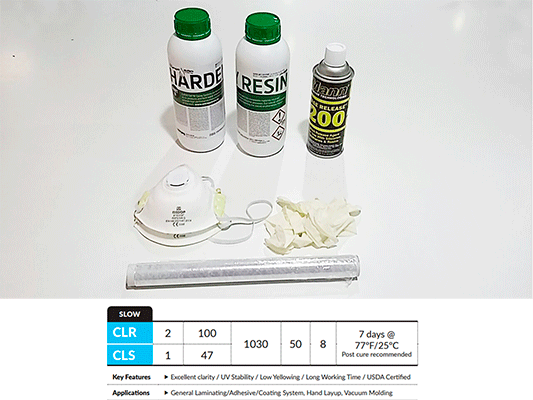
After protecting myself and organizing the work area I did the mixture. This type of resin is made with two parts of base and one part of catalyst (hardener). I calculated the volume of resin I needed and then I added a 30% more just in case because this was my first time doing it and something could happen. I soak the different cloth layers in the resin and put it over the mould, and then I put another layer of cloth on the top, a layer of perforated plastic, and another layer of a thicker cloth.
LAYERS:
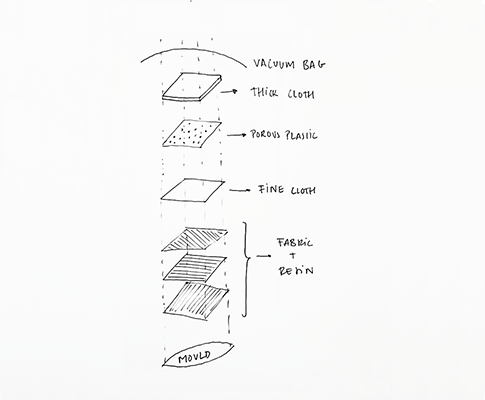
3 layers of fabric + Resin: the relation fabric resin is 50% fabric and 50% resin so I calculate the volume for 3 layers of cloth in order to know the quantity of resin.
Fine cloth: this cloth goes over the fabric and allows the resin go through this cloth.
Porous plastic: it also allows squeeze out excess of resin.
Thick cloth: collects all the resin and allows the suction to extract all the air.
Vacuum bag: I used it to extract all the air from inside. I put a wooden board under the mould to ensure that the mould didn’t bend with the suction of the air.
After this, I introduced the mould with the different layers of plastic and cloth in a vacuum bag and then I extracted all the air from inside.
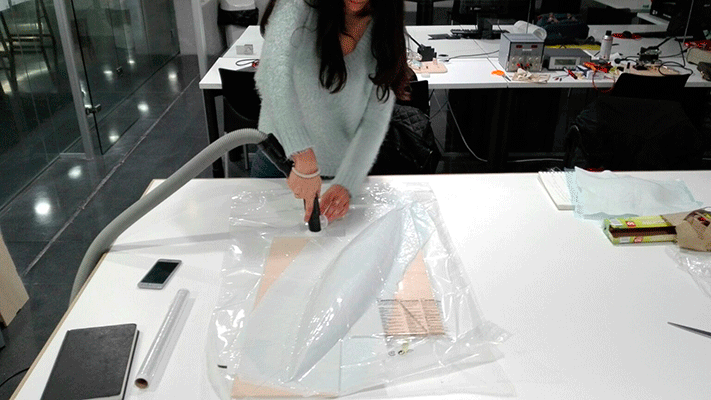
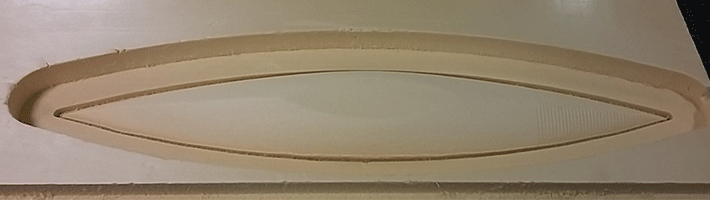
I waited 5 hours and the result:
FILES: