
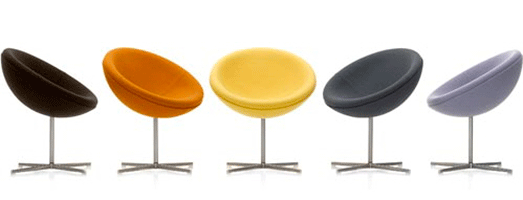
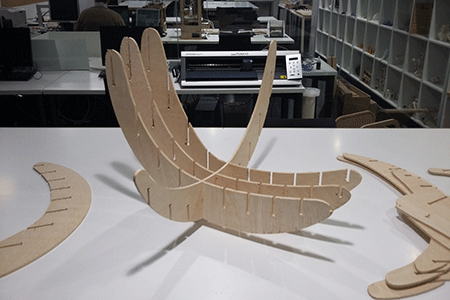
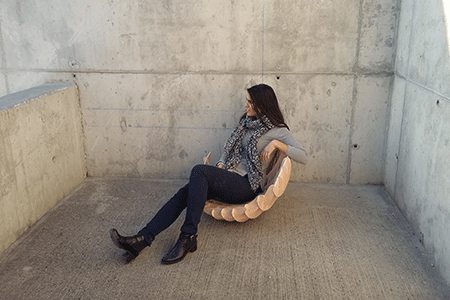
The aim for this week assignment was to construct something big on the CNC machine. I always wanted to create a chair so I based my project on the C1 chair from Vitra.
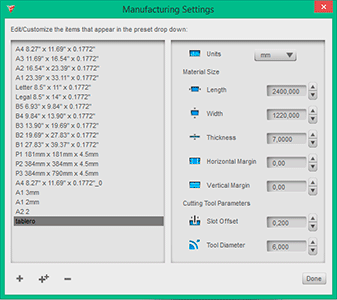
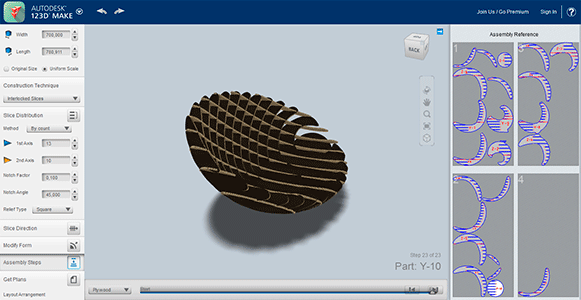
The chair model that I chose was very simple so I decided to model the chair in AutoCAD because that’s the program that I normally use for modelling in 3D. Once I finished the design I exported the .stl file to 123Dmake, the parametric program that allows us to prototype our design for our CNC machine. Working with this program is very simple but you have to take into account the different parameters that affects to our structure (manufacturing settings). These values depends on the material that we will work with (length, width, thickness, margins) and the cutting tool parameters (slot offset, tool diameter). Once we have introduced these values, we select the custom technique, in my case I chose interlocked slices with a specific slice direction that will give stoutness to my chair. Once I had the desired slice distribution, I exported the plans to a .dxf file. The program will give you the quantity of material that you will need, in this case, the number of boards needed for our structure but this will not fit the different pieces to take advantage of the board space.

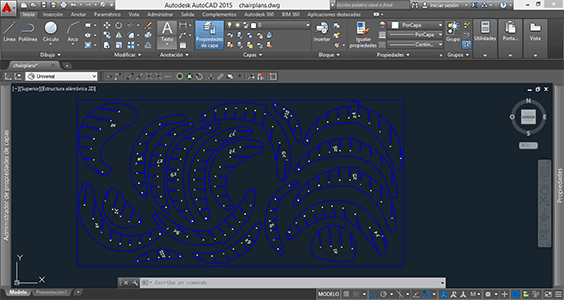
In my case I only had one board and the program said that I was going to need two boards so when I exported my file to .dxf, I modified the position of the pieces in AutoCAD making the pieces of my chair fit on a single board. I also had to modify the .dxf file because sometimes the lines are duplicated and are not joined in one polyline. This means that having a file with duplicated lines and lines that are not joined together can cause problems when milling the file.
To do a good cutting job various factors must be taken into account. It all depends on the material that we will be using, in my case I used a plywood board.
Measures:the maximum measures for our milling machine are (2440mm long x 1220mm width).
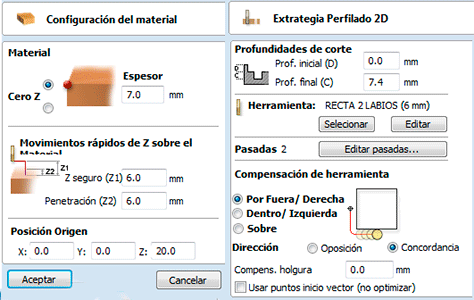
Thickness: our plywood board is 7mm thick.
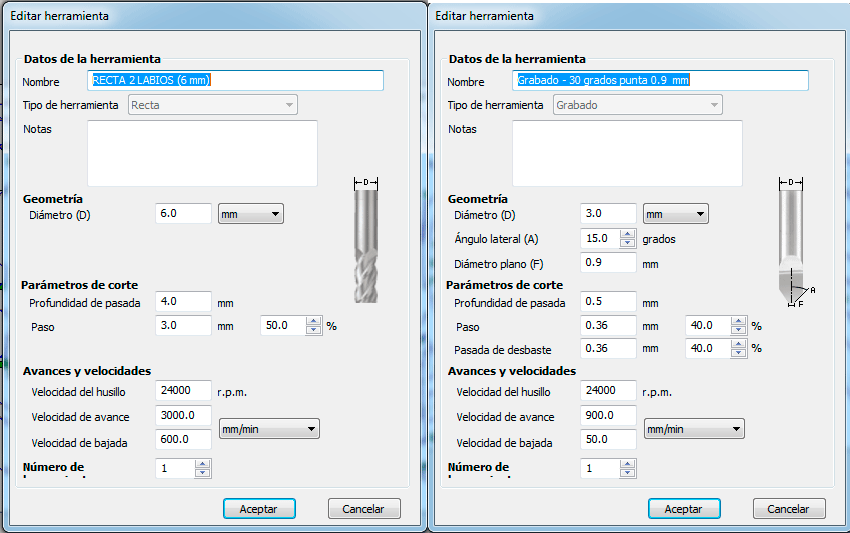
Mill: the mill varies depending on the material that we will be using. For each type of material there is one specific mill for that. They are different parameters that makes a mill being good for each material: Cut distance, mill distance, handle diameter and cut diameter. It is stronger a mill that has a bigger handle diameter with less cut diameter
There are different mills depending on the cut type that we want to do. There are mills for flatten, wood cut, engraving, V cut…
Number of cutting edges: 1,2,3,4…. The more cutting edges, better results but it also has disadvantages : the more cutting edges, the thinner they are these edges so it is more difficult to evacuate the shavings when milling the board. The shavings must be evacuated otherwise the mill can generate high temperatures and the material can be burnt. The evacuation of the shavings is essential because it helps keeping the correct temperature in the tool when milling. The ideal would be when the tool is cold after milling our work.
Type of metal: is the type of metal of our tool. It depends on the manufacturer.
External coating: can be ceramic compounds, widia, diamond...
Type of cutting edge: It depends on each type of material (the angle of the cutting edge). According to an angle would be for a different type of material.
Type of cut: end mill: for engraving (2d), bold nose: for cutting (3d).
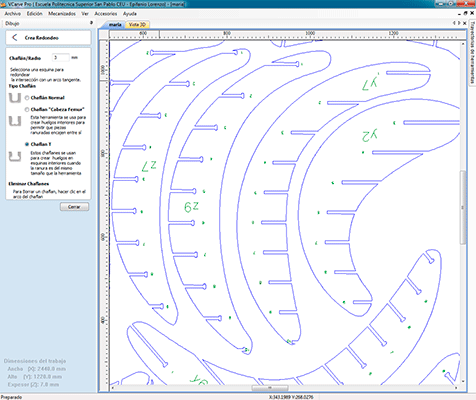
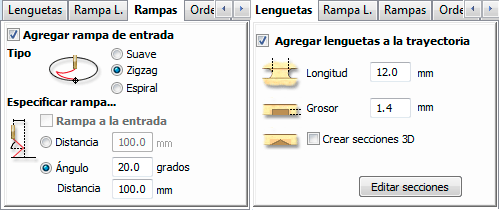
When we have the correct mill and our material we select different parameters based on the information of the mill manufacturer. These parameters depends on the material and the type of mill. We introduce these parameters on the software VcarvePro.
• Revolutions(rpm): rounds per minute.
• Speed on axes Y and X.
• Speed on axe Z.
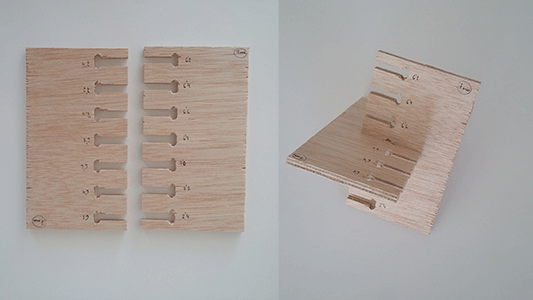
First of all I did an assembly test to see what tolerances the machine has. In my case I had a board of 7mm and I realize that the assembly of 6,8mm were the best for that type of union.
I used two types of mills: one for engraving and another for cutting. I introduced all the parameters for each mill.
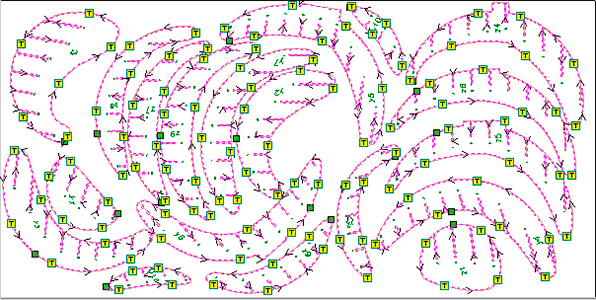
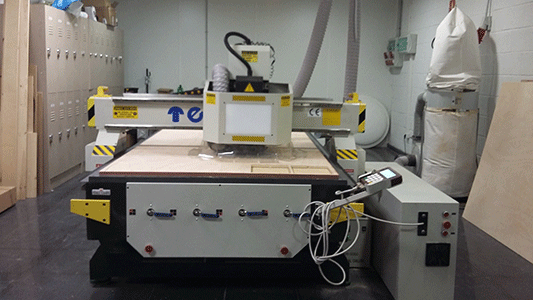
Once I introduced all the parameters on the VcarvePro program it was time to send the files to the milling machine:
1) Switch on the machine.
2) Switch on the vacuum pump to prevent our board from moving.
3) Make Z=0
4) Switch on the hoover.
5) The machine is ready to mill
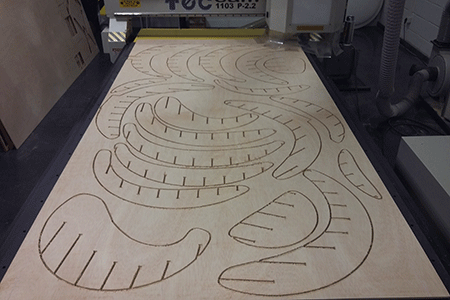

After milling the board I realise that the wood was splintered. This could have been avoided with another cut orientation and with another type of mill.
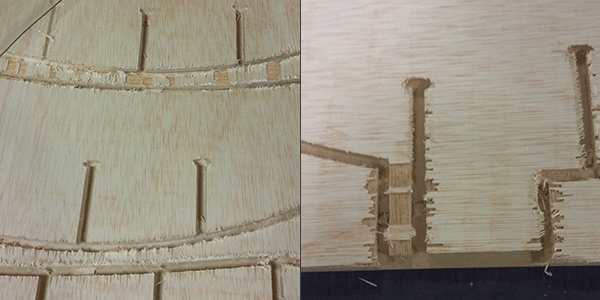
Also it was really hard to fit all the pieces together although I gave a 0,2mm of tolerance. I had to sand down all the joints more than I expected.
FILES: