
ADITYA BHATT

week-16 Networking and Communication
Assignment
write an application that interfaces with a device used in final project.
What will I do?
I am using dc- motors in my final project so I thought of Interfacing Bluetooth with the motor and switch it on and off
through a mobile application
A brief about the process(I am using the master/slave model here)
When I send 1 from mobile to the bluetooth, the motor will turn on and on sending 0 it will turn off. The logic behind this is that 1 will comand for +5v and 0 will command 0v.(I am not mentioning negaitve volts anywhere because I have one terminal of motor connected to ground all the time.)
Bluetooth Module
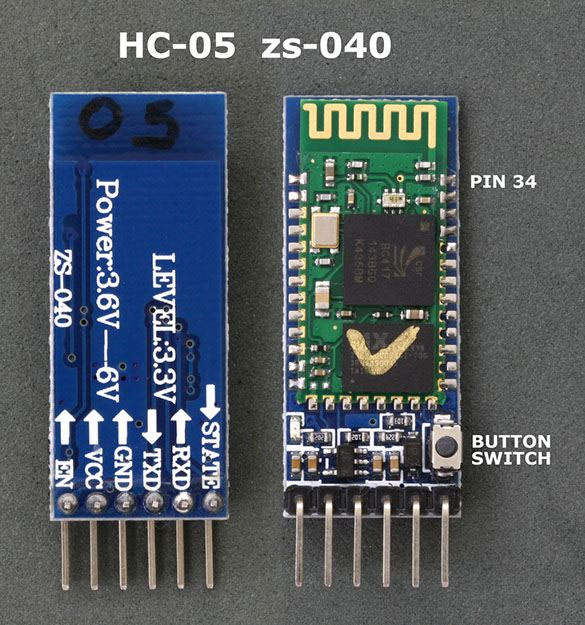
I am using HC-05 Bluetooth Module as it is a commonly used bluetooth module .
HC-05
Features of Bluetooth-
-2.4GHz ISM Band Frequency
-Short Range
-Low Power
-Piconets
Bluetooth Addresses and Names
Every single Bluetooth device has a unique 48-bit address in the form of a 12-digit hexadecimal value,24 Most Significant Bit represent manufacturer and remaining is the Address .
Power Class
There are Three Power Classes available in bluettoth depending upon the power .
Class Number Power (dBm) Max Output Power (mW) Max Range
Class 1- 20 dBm 100 mw 100m
Class 2- 4 dBm 2.5mw 10m
Class 3- 0 dBm 1mw 10cm
Interfacing Bluetooth with Dc-motor-
To programme and power my Blutooth module I have used Arduino Uno.
The connections of Module with Arduino are as follows-
1) Gnd-Gnd
2)5v-Vcc
3)Rx(pin 0)- Txd
4)Tx(pin 1) -Rxd
After this connect one terminal of the motor to pin 13 and the other terminal to Gnd.
Now upload the following code in the arduino-
char data = 0; //Variable for storing received data
void setup()
{
Serial.begin(9600); //Sets the data rate in bits per second (baud) for serial data transmission
pinMode(13, OUTPUT); //Sets digital pin 13 as output pin
}
void loop()
{
if(Serial.available() > 0) // Send data only when you receive data:
{
data = Serial.read(); //Read the incoming data and store it into variable data
Serial.print(data); //Print Value inside data in Serial monitor
Serial.print("\n"); //New line
if(data == '1') //Checks whether value of data is equal to 1
digitalWrite(13, HIGH); //If value is 1 then Motor will turn on
else if(data == '0') //Checks whether value of data is equal to 0
digitalWrite(13, LOW); //If value is 0 then Motor will turn off
}
}
Developing the mobile Application-
I don't have much experience in the App development feild but I have made a few apps prior to this in a few competitions.
App Development Technologies
1)Native
a)Android Studio - (JAVA,XML)
b)Ios Xcode -Objective C /Swift
c)Windows -Visual Studio C#/HTML5
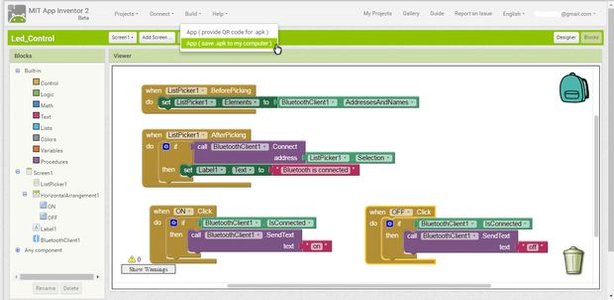
I have chosen Mit app ineventor as it is easy to use and debug.
I will now guide you how to make the app.
First go to the App Inventor site http://ai2.appinventor.mit.edu/ and then it'll ask for your email and password and enter that in. Next, go to "Projects" and click "Start new project" and call it Motor control.
Coding the app-
There are many ways to run this application..but the easiest way is to download the MIT Ai Companion from the Google Play Store.
check this link for more details-
http://appinventor.mit.edu/explore/ai2/setup-devic...
Send the App to your android device,install it and begin control.
You can find the apk of the app here-
The source code link, apk and code can be found here in zip file-
After making proper connections and downloading the application, open the app and click on connect.
You will see HC-05 there. If it asks for password write 1234 and pair it. Now you can control the motor by switching it on and of. I have made a video of this process which can be seen at the end of the page.( when the bluetooth is not connected the light in the module will continuosly blink and after it is connected it will stop blinking.)
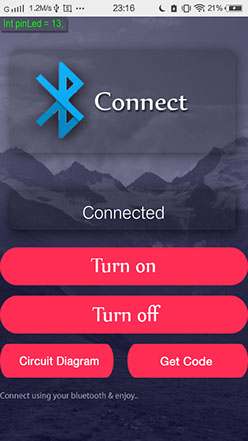
Press this to see the nearby bluetooth devices.
For me things have worked as I have expected it to be.
Just a note to be kept in mind is that when you are uploading a code to the bluetooth, diconnect the tx and rx pins or else you may recieve an error in uploading the code
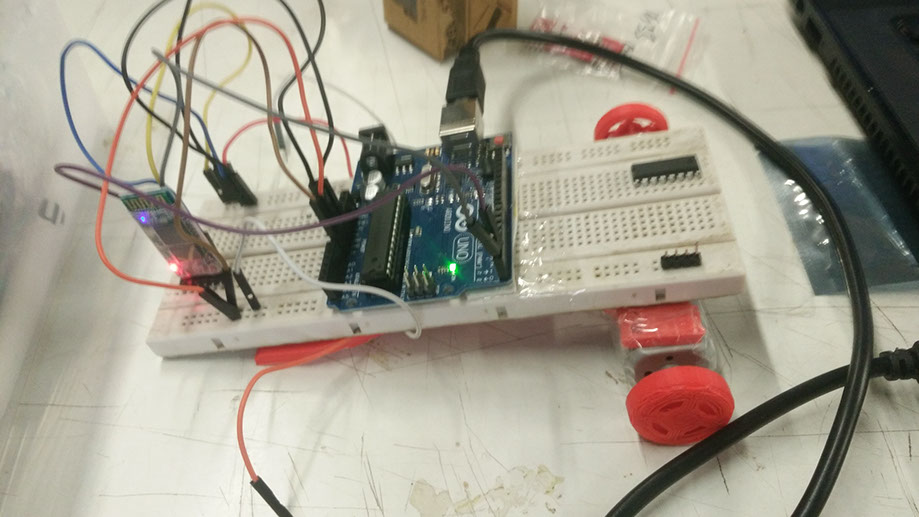
As I am making my final project right now so I just place the Breadboard with Arduino and Bluetooth on my car chassis to test my assignment and stuff.
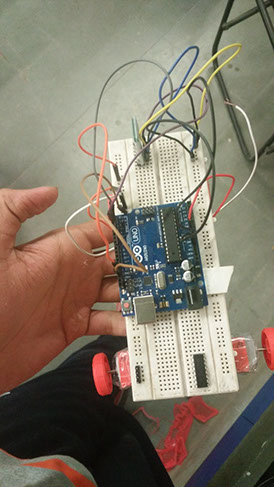
The pins of the arduino have been connected and the breadboard is also attached to the chassis.
The connections of arduino with Bluetooth module are as follows-
1) Gnd bluetooth- gnd
2) Vcc bluetooth- 3.3v
3)Rxd-tx(1)
4)Txd-rx(0)
The connection of drduino with Motor are as follows-
1) Digital pin 13- One terminal of motor
2) Gnd- Other terminal of motor.
I connected the arduino to my laptop and then uploaded the code. One think to keep in mind is to disconnect the tx and rx pin of bluetooth while uploading the code.
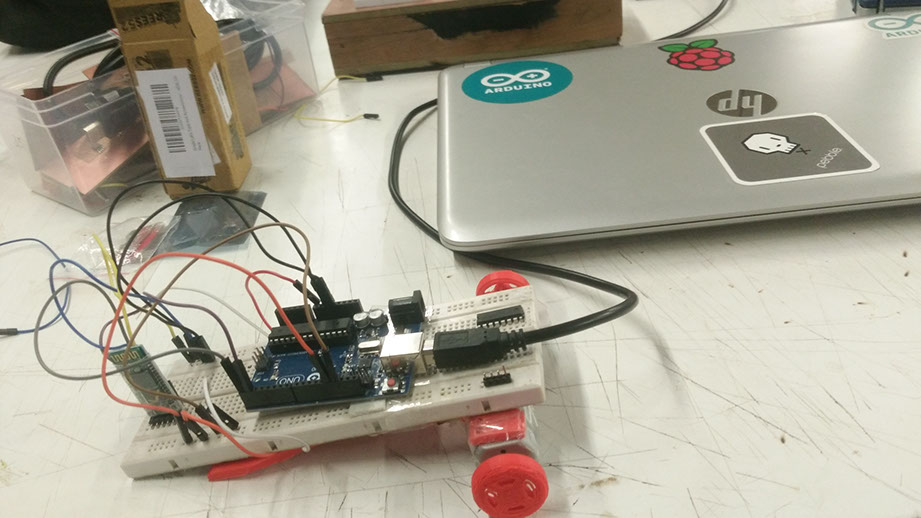
Before we start testing, just assure that the pins are connected properly.
The video of my testing is given below.