Week 1 - Principles and practices, project management.
work through a git tutorial
build a personal site in the class archive describing you and your final project
Using GitLab as a version control system
The first thing to setup is a routine for uploading all our files to the Fabacademy archive. This will allow the instructors to review our work but also to keep track of all the changes we've made all along the project. This will also be useful when we will work and collaborate on our group project. For that, we will use a fancy version of git, the platform GitLab.
Basically, we will create a folder locally on our computer that we will synchronize with an online platform that will keep track of all the changes that we've made.
Setting up GIT.
Here is the procedure that I have followed.- I have installed GIT on my computer
- I have created an account on GitLab
- I have generated an SSH key using my terminal
ssh-keygen -t rsa -C "your_email"
- I have chosen a folder on my computer and have linked it to the remote repository.
Using GIT.
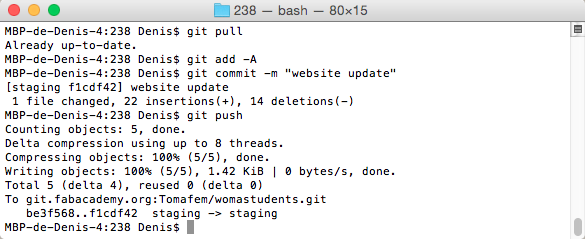
Here are the main procedures that I use. First navigate using the terminal to the local folder that will have to be sync with the remote repository. git status - This command is used to see the difference between your local folder and the remote repository.git pull - Clone the last version of your work on the remote repository into your local working folder. Before working on my project locally, I use this command. git add -A - Before uploading your work to the remote repository, this command will update the index and prepare the content for the next commit. Any untracked files in the working area will be updated to the staging area. git commit -m "my_comment" - This will record changes to the remote repository. A version of the changed files will be added with the comment between brackets.
git push - This command pushes commit files to the remote repository.
A great way to learn more about GIT that I will definitely use along this class is to navigate through the GIT help here. GIT cheatsheet here
Building a personnal website
In this part, I explain how I have set up this website. This was the easiest part (but it still takes time) as I have already have some experience at setting up blogs and wordpress website. Wordpress is a great tool to manage content but it is pretty rigid and apparently not so secured. Directly working in the html file is a great learning experience.
First, I installed a really nice text editor Atom that I use to edit the html files. Secondly, I have downloaded the bootstrap template, and installed it at the root of my working folder. Using git, I'll be able to upload the website on the remote repository. From this template I have adapted the different sections so I'll have an assignments section, a final project section and a about me section. All along the project, I expect to make this website evolve in terms of content and style.

Using the default bootstrap agency theme, my different week by week assignments pages were showing up on modal screens on a subpage which can be annoying. To make navigation easy and open each week assignment page on a new html page, I followed the great and well explained tutorial of Thomas here . Thanks.
Customizing the bootstrap theme
Adding the Bootstrap tooltip plugin
While navigating on different Fabacademy websites, I found really cool details that I wanted to add to my website. This one comes from Thomas (our remote fablab instructor in Paris). I found these little tooltips, that you can activate when you hover over me.
It is also useful, to explain a term with a question mark such as this one
For more information on how to do that, go here.
Sketching my final project
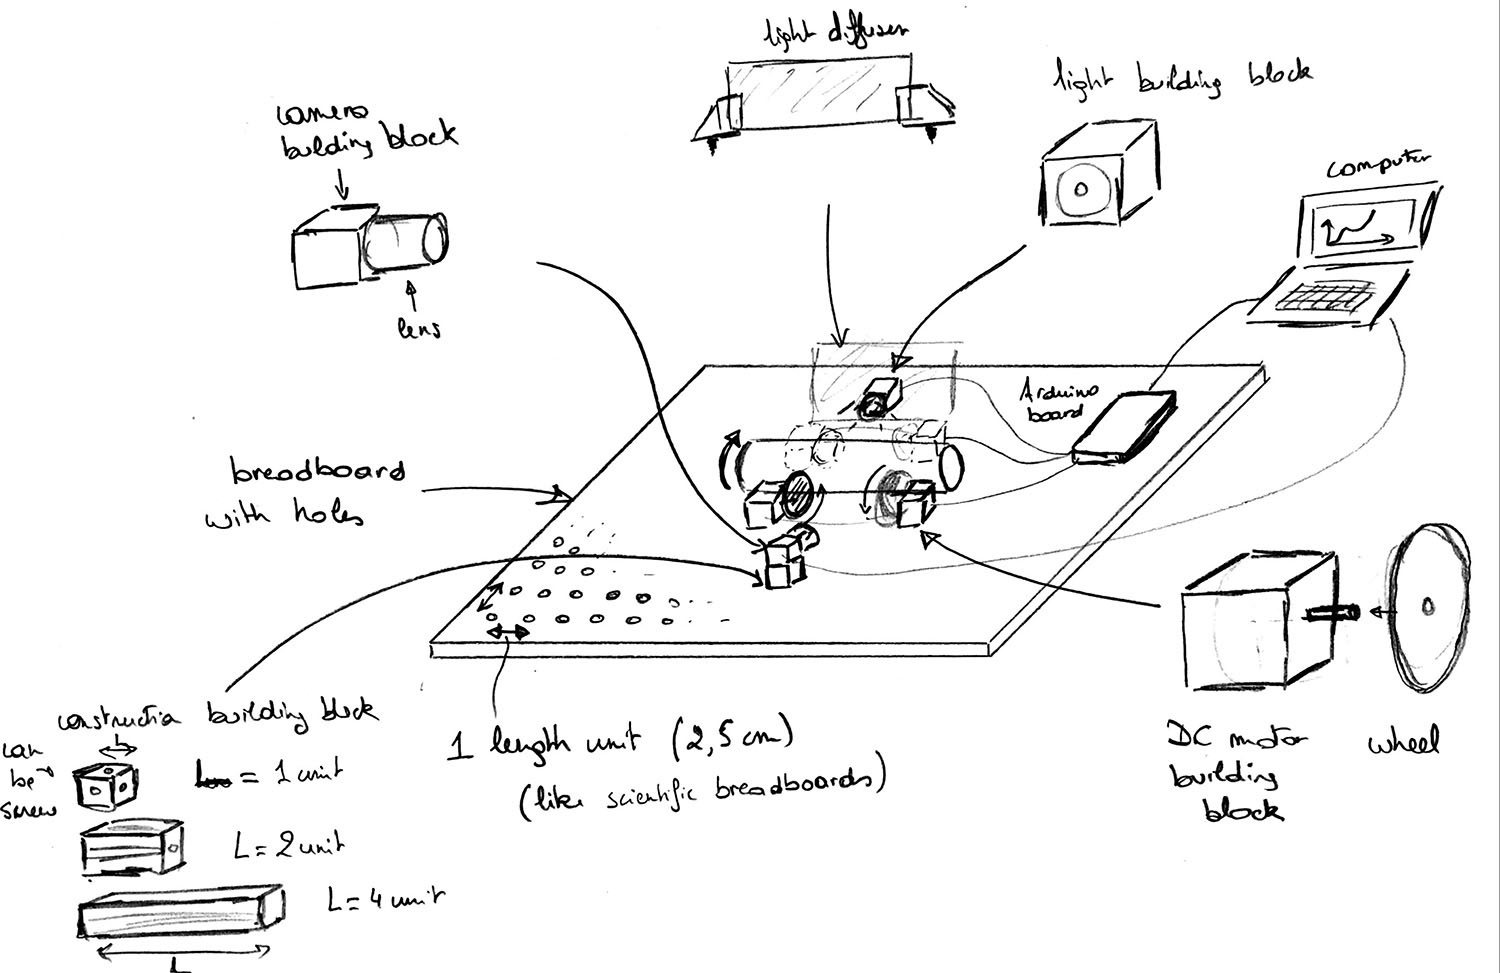
I am planning on building a construction kit for physics tinkering. As a physics professor, I would like to make not only my students but anybody to play with physics experiments. The plan is to design and construct simple building blocks that can be assemble together to make a working experiment. These building blocks will consist of construction, actuators and sensors that can be assembled easily. The goal is to make a kit that is easy to assemble, fun to play, allow enough freedom to invent new things and allow new ways to quantify and observe the invisible.
I have multiple experiments in mind about granular media or complex fluid. Here are a sketch of some experiments that can be perform using the kit that I'm planning to make.
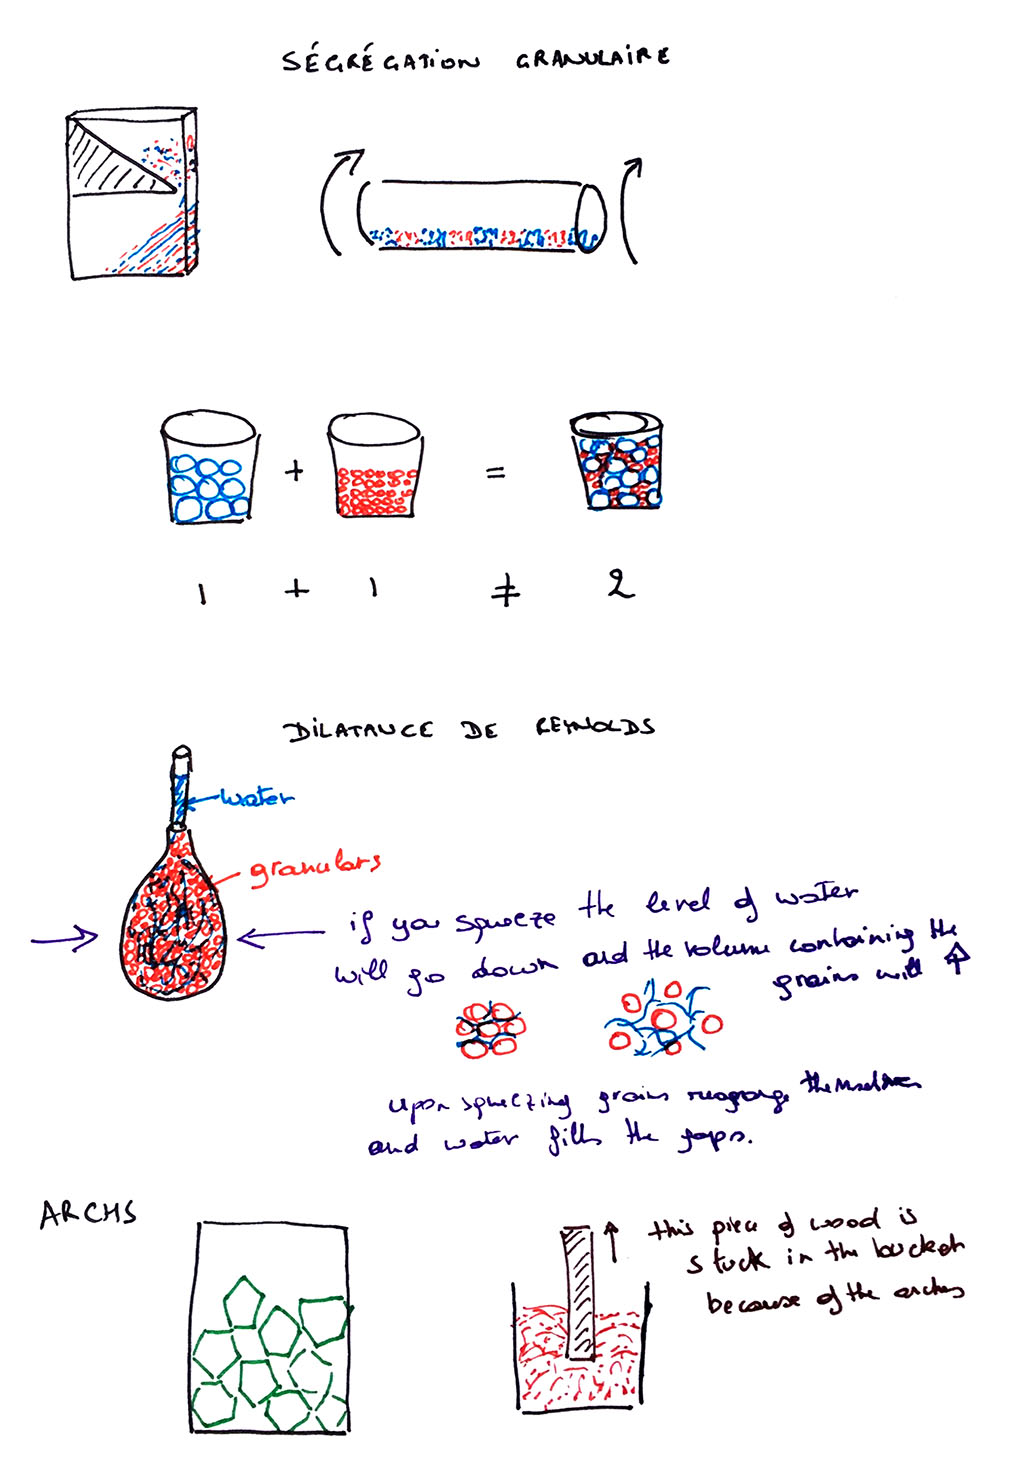
If I take the first experiment that I have in mind. A glass tube in which there are two types of grains (smaller one and bigger one). Making the cylinder to turn around its long axis, we will observe grain segregation: several stripes of small and big grains perpendicular to the long axis. The rotation of the tube can be set by 4 dc motors that are embedded in a building block that can be easily assembled and connected. Light, camera, light diffuser can also be embedded in a building block that can be easily assembled and connected to an Arduino board or a computer. Everything will be set up on a breadboard that has holes displayed on a square grid. Each hole being separated by one unit of length which I choose to be 2.5cm so it is compatible with scientific metric breadboard that I use in the lab. I have several inspiration for the design of my project: they are little bits , lego bricks and scientific optical breadboards.