The aim of this week’s assignment was to model a possible final project but I decided to create something new with a program that I’ve never used for modelling. I’ve been reading about the different programs that Neil show to us in the class and I decided to know more about 123d programs that they are from Autodesk and as I always work with Autocad I thought it could be similar.
First of all, I downloaded 123D family programs that all of them are very intuitive programs which everybody can use for modelling basic forms and shapes. The reason why I’ve chosen this family of programs is because it gives you the possibility of exporting the files very easily between them, that is to say, you can design your model in one program, edit it in another program and if you want, it gives you the chance to prototype it.
My idea was designing a basic 3d model in 123D Design and then export the file to Meshmixer that is also a program from 123D family. Meshmixer is a program for repairing and transforming 3D meshes, it’s very funny to edit different models and transforming them into strange things.
I started designing my model with 123D Design as I said before, it’s a very intuitive program that has the basic tools for modelling. For me it was easy to use it because I’m used to model things with other types of programs that have more options but are more complicated.
The interface is very simple and clean easy to find the different options:
It has the Main Toolbar to start creating 2D shapes or 3D models using the tools in this toolbar. Transform, construct and modify objects using tools.
Application Menu: Create new, open, save, import and export files from here. Directly send the files to different applications like 123D Make and Meshmixer or simply send your model to 3D Print to your desktop 3D Printer or to Online Print Service Bureaus.
Navigation bar.
Grid is the place to build the model. Switch on/off the grid with the icon on the Navigation bar.
Viewcube is the easy way to navigate on the screen. Just by clicking on different angles, view the model in different angles.
Sign in: Log on to check your projects, models and social connections from your account.
Help: Find shortcut keys information. Learn more about the product through the videos, tutorials, forums and website.
Parts Bin: Choose from the wide library of Kits that contain several useful models that you can use and modify in 123D Design.
Snapping: nudging is easy way to bring precision while creating. Use arrows on the keyboard to nudge object.
Edit Grid: Change the grid size to the preset sizes or specify your own custom grid size.
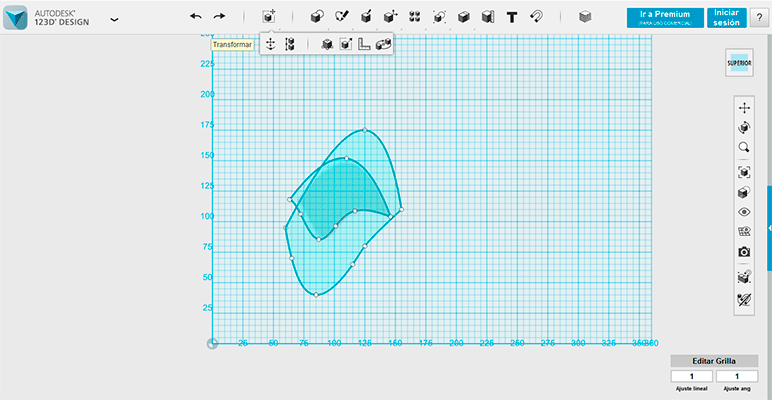
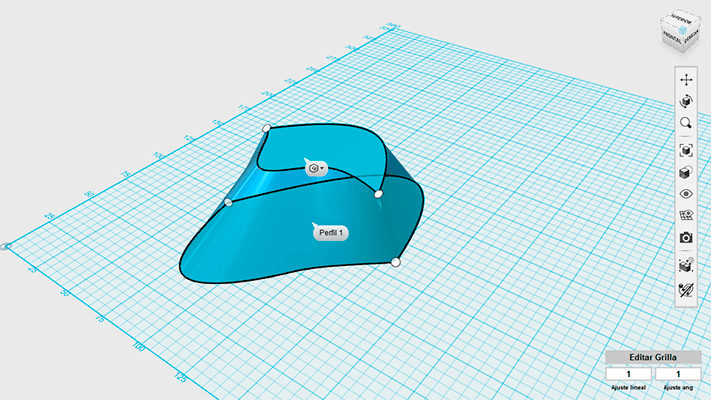
I drew two different polylines which is a continuous line composed of one or more line segments. I selected one of them, in the program it’s really easy to move and spin around because when you select the element it appears the different possibilities. I really liked this because it makes things easier when manipulating these elements appearing a sphere with all the axes in which you can move or spin the element.
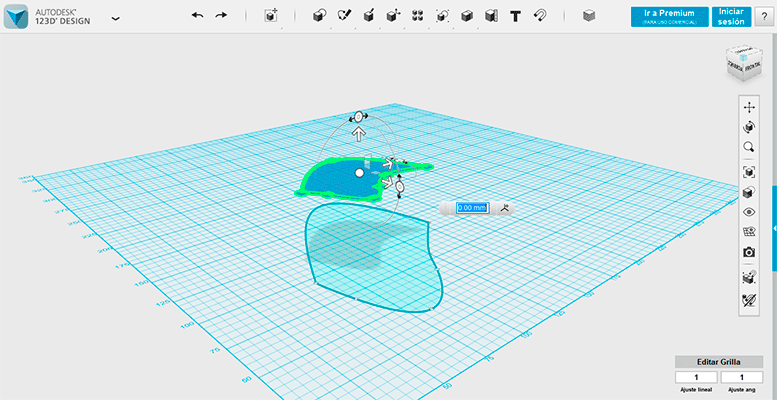
I decided to do a loft between these two polylines in order to create a 3d model and as you can see in the following image the element was a bit more complicated. 123D design has more options of 3d modelling than making a loft such as revolving, extruding faces, sweep...etc. It also gives you the possibility of editing the basic 3D forms such as a torus, a sphere, semi sphere, cube, hexagon...etc , you have access to editing faces and edges of any object
In the video you can apreciate how I also gave the model different textures, a metallic one.
Mi película from msantisteban on Vimeo.
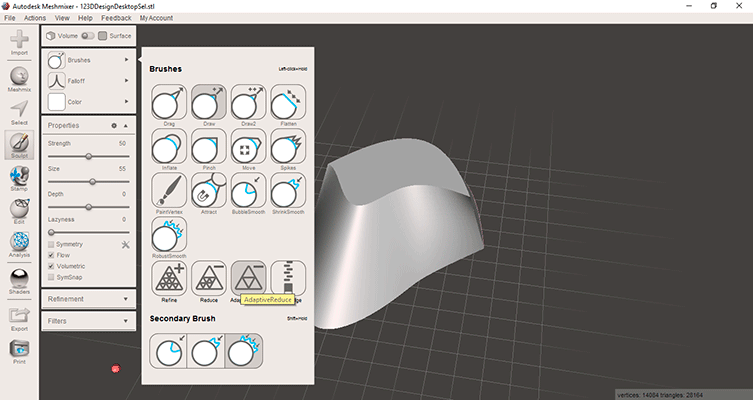
Then I exported the model to Meshmixer in an STL format. Meshimxer is a more complicated program because it’s not a program for editing 3D models but for editing 3D meshes so the options and possibilities are different than other 3D modelling programs.
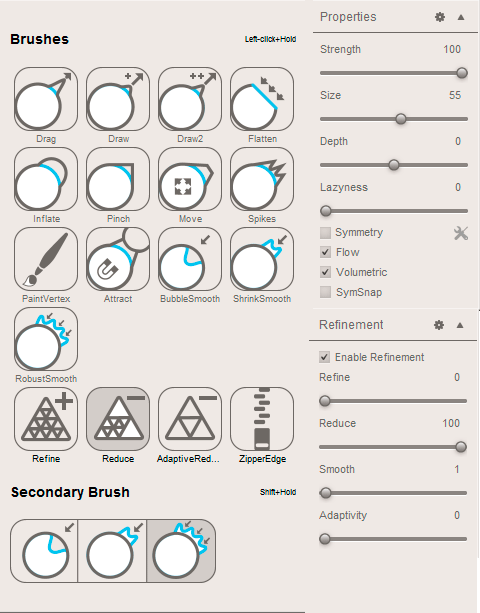
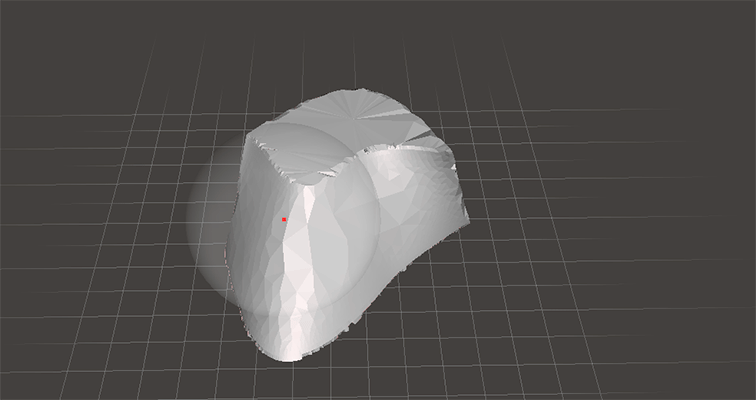
The interface is very similar to the Autodesk programs and it has the basic options as well. I stated using the sculpt option to modify the surface. It has lot of options for editing the meshes such as drag, draw, flatten, spikes...etc I used the brushes and I reduced the quantity of triangles in the mesh. I opted for using the brush for reducing the quantity of triangles in the mesh. You can modify the properties of the brushes giving a bigger size, strength... etc
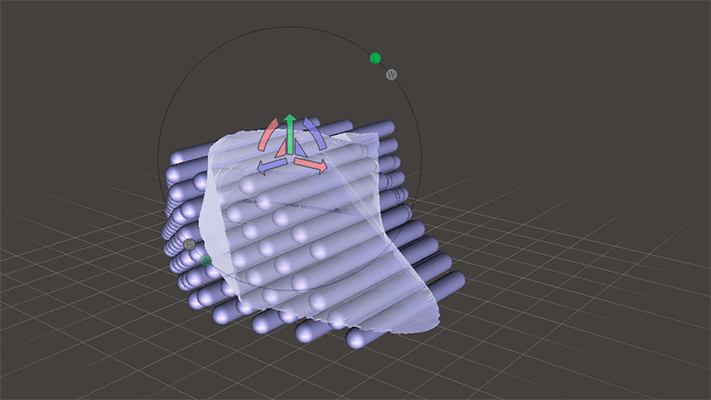
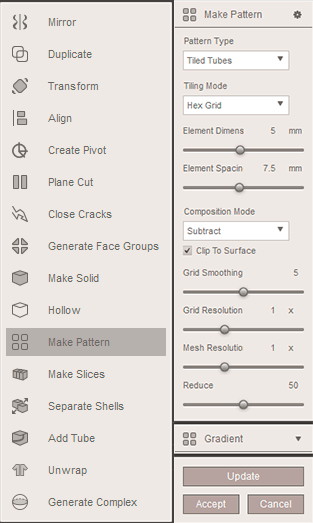
After reducing the mesh I started playing with the editing options: I wanted to do different patterns in my model: with the aid on “make pattern” tool I selected making a pattern of tiled tubes, I modified the possible options such as the element dimension, element spacing, grid smoothing... when you click in Update the whole model changes and the results are pretty cool.
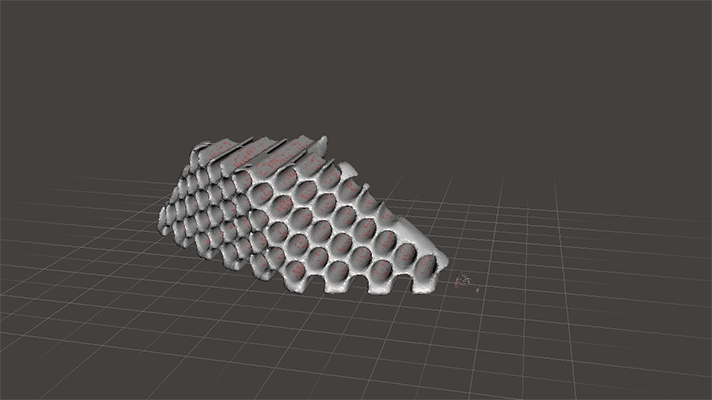
This is the result for the tiled tubes; the result is the difference between the original model and the tubes.
The result for the lattice pattern it’s different. You can do lots of different patterns. Meshmixer is a program for editing meshes and it also gives you the possibility of editing them for replicating them in a 3d printer. It’s very useful if you want to replicate it because there are some options for analyzing the meshes. The inspector option is used to create a closed mesh that has no holes or non-manifold areas so it fills the holes that it found in the mesh.

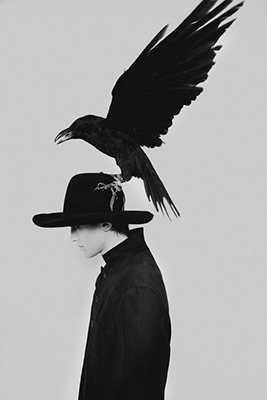
For the 2D design I wanted to use another type of 2d vector program instead of Autocad this program is Adobe illustrator that is a very useful program for editing pictures, vectors, images, PDF...etc. I decided to modify and edit a picture that I founded in the internet in order to prepare it for the vinyl cutter machine.
First of all I edit the work space modifying the size of the document because my image was too large for it. The options for editing the size o the document are on top of the document. There is another option in which you can adjust the size of the document to the size of the picture moving the selection square, that’s what I did.

The picture that I selected was with a grey background. Illustrator has an option for vectorizing the pictures that is very simple to use, it converts rasters to vectors with the live trace button. You select your raster image in the illustrator document and then click on Live trace. Illustrator comes with different tracing presets, each optimized for different kinds of images and desired result but also you can edit these presets using the editing panel:
These are the different presets that come with the program; I choose the one on the right: black and white logo.
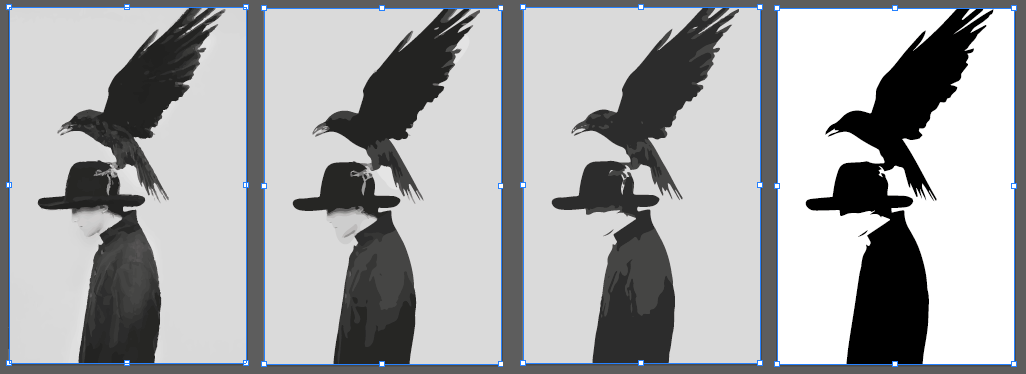
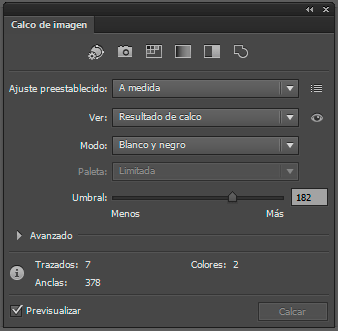
As the final result of the black and white logo didn’t convinced me I modify the properties with the editing panel giving more “threshold”.
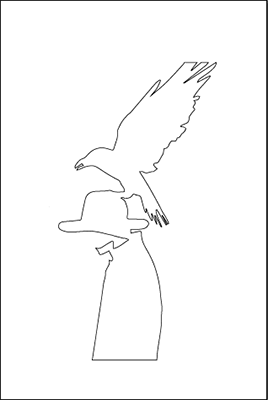
When I had the result I wanted to have I expanded it, that means that it converts the picture to closed vectors edges. In the following picture we can observe that now my picture has edges made by different points united with each other.

As the final result had some details that I didn’t want I edit this part of the image to smooth it down because these types of details are very difficult to be cut on the vinyl cutter machine. As the object was a vector it was very easy to modify the path. All I did was modifying the points I wanted to smooth. In the picture you can observe the process I made for doing it: I erased the nose and the mouth.

This is the final result:
FILES:
3d design
2d design