Computer-Controlled-Machining
Portal milling machines are cnc-machines milling small and big size pieces in 2D,2.5D and 3D. Their have a bridge like construktion and are equipped up to 6 achses. FabLab Kamp-Lintfort has a big size 'Easyworker' from 'elsign'. CNC-machines in general one has to handle carfully and watchful. In the following section I will explain some basic security advises.Safty Instructions
- Keep the work bench clean, to prevent failure in milling. Sometimes you can´t fix the material quite well because there are chips sticking around.
- Before milling start an air cut first to see if everything is well constructed. Sometimes it is even helpfull to use manual feed, especially vor complex small parts.
- Take care about your outfit: Avoid roomy clothes. They can get entangled in the machine.
- Same with jewellery.
- Tie you long hair back and stuff it into your clothes. It is not enough to just tie it back if your hair is quiete long. The plat will fall to the front as soon as you lean forward.
- Never, grab into a working milling machine, it can cut of your fingers.
- Before starting your machine, be aware of all caution advises and look for emergency stop switch. Sometimes you have to react very fast to prevent big damages. If you see something is going wrong, usually you can even hear it, first hit the emergency button. The machine will stop immediatly. Afterwards you can lean forward and grab into the working area.
Working Preparations
- Before you can mill something, you have to tell your machine what and how to mill.
- There are two ways of programming the machine: 1. You draw and model the object with a cnc-machine compatible software. After finishing your drawing and prepare it for milling it will turns into a machine readable g-code. So you can send your file via serial interface to the machine. Later more. 2.You program directly e.g. with g-code. If you are good in this it is even quicker, because you can optimize milling process individually.
- You have to buy your material and the right milling tools depending on what you want to do.
- As mentioned above, the machines work bench has to clean to be able to fix your piece properly. In Kamplintfort they have a vakuum table. You just lay down your board (wood, acrylic, metal... . And a vakuum machine will suck the piece to the table, very convenient. You can also fix your piec with screws. Then you have to take care about the milling path. Small piece you clamp between chuck jaws or with brackets.
- Choose the right milling flut fitting to your drawing and to the milling depth.
- The size of the material should be chozen depending on the way of fixation and the size of your milling tool to prevent collisions.
- A cnc-machine can read following file formats: 2D- svg, dxf, ai, pdf. 3D- stl, obj
- If you prepare your object for milling within your cad software you should have an idea about the milling prozess and terms. Just some points you can take care of..
- Chip removing process: As the chip removing is varying depending on rotation bearing you should know about the effects of rotation directions. Good are for outeline cuts antiroutation cuts, especially when getting out of the material. Rotation in same direction as the milling head moves will rip out a piece at the end but the chips within the material will be smaller. The chips are bigger as the rotion bearing is against the material but it will keep the endings clean. Inline cuts should be done with same direction of feed.
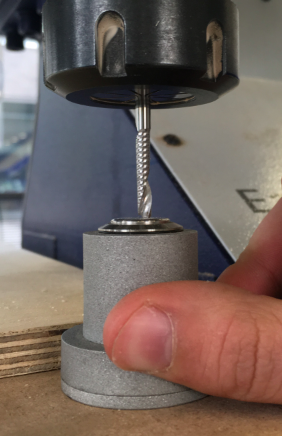
- Flut dimension: The flut is the cutting part of a milling cutter. Choose as short as possible but long enough to cut as deep as you need. Fix the milling cutter as deep into the cutting head as possible. But consider your cutting depth and the clamps, the head could interfere.
- Flut types: Flutes vary in the amount of blades. The less the number of blades the more space to throw out the chips but also the surface is getting slightly rough. The more blade the smother the surface but it increases the risk that chips will stuck or glue. But also we have to consider that the abrasion of the blades will reduce as more blades a flute has.
- For wood machining it is recommendable to use one or two blade milling cutter. More blades increase the risk of heat and burning chips.
- In general one can say: one blade tool is good for soft Material like soft wood, soft plastics and soft aluminum, because the big gab in the cutting profil helps getting out the chips. More blades increase the risk of sticking to the blades. Two blade tool is good for stronger material like strong Aluminum, and Plastics and wood too. Tools with 3 blades are mor for strong nonferrous metals and iron.
- Do not cut deeper then two to three times the diameter of the flute.
- Calculate the operating factors: the faster the cutting speed the smoother the surface, but also it increases erosion of blades.
You calcutate: V=π x ØFlute x n(revolution speed)
that means: ((revolution speed) n (rpm) = Vc x 1000 / 3.14 x ØFlute ....
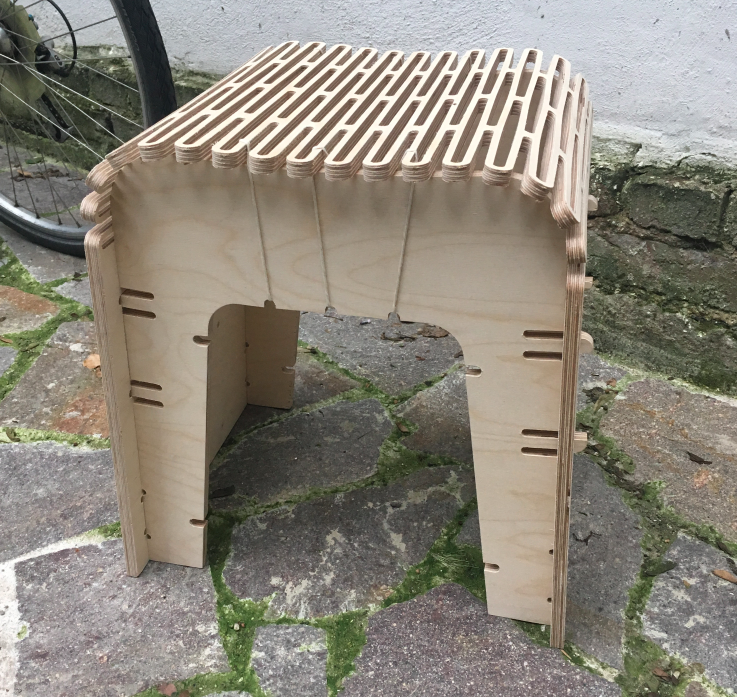
Designing a chair
In the shortness of time I wanted to build something easy. But I like bendable and folding elements very much. So I thought about a chair with bendable seat. I underestimated the processing power you need for bending structures. My small computer frequently crashed down.Now, about the features: The main feature I used was setting parameters. I didn´t know exatly which tool I would use and I wanted to be free in changing the materialthickness:
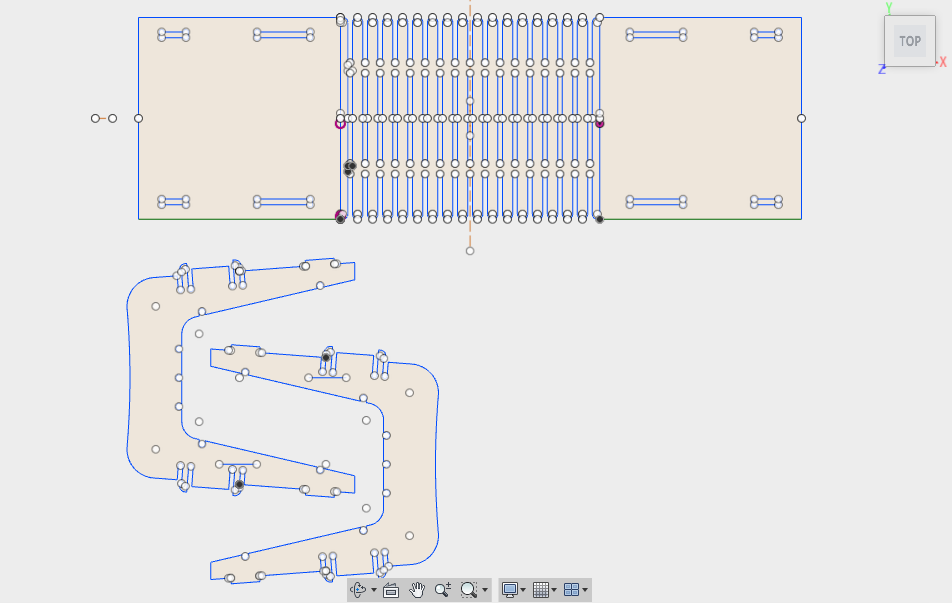
Sketch of my chair.

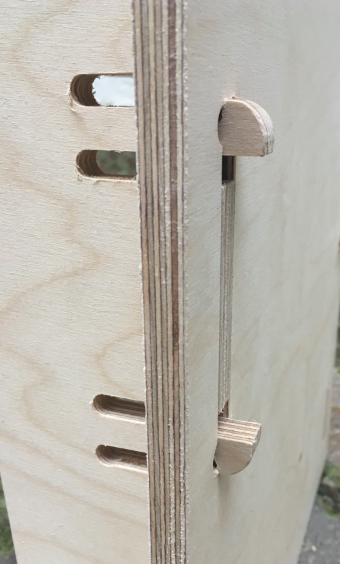
A wooden fastening.

Under 'Modifiy' you will find a Sigma sign for the parameter window.

If you click on the sign a window will pop up, where you can set, modify and name the drawing lines. Here you will find all lines.
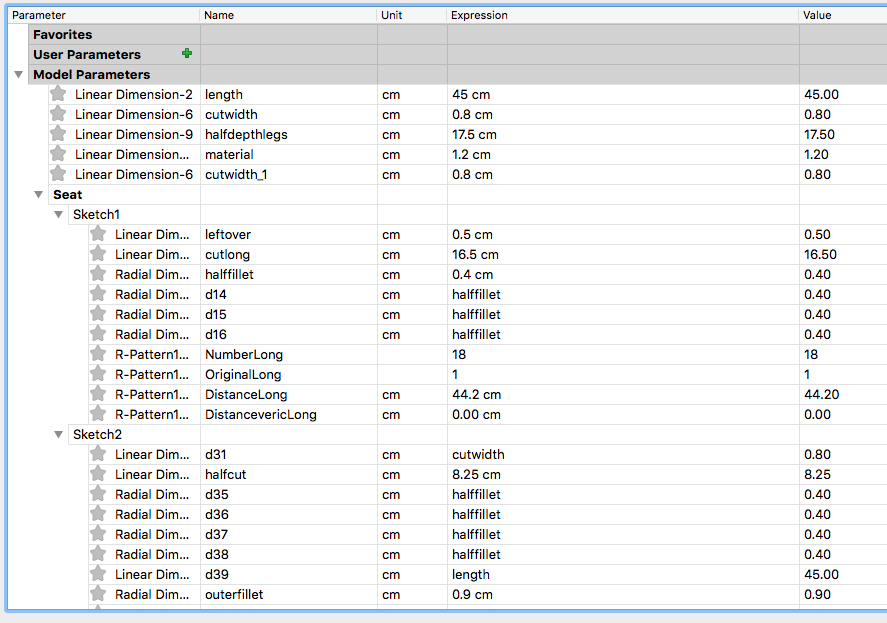
You can change 'name', 'unit', 'value'. And your drawing will adapt all linked lines.
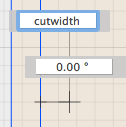
If you draw new lines whith same sizes e.g. depending on flut diameter of a milling cutter. You don´t need to write the length you just write the name of your specification you set before in 'parameter'.
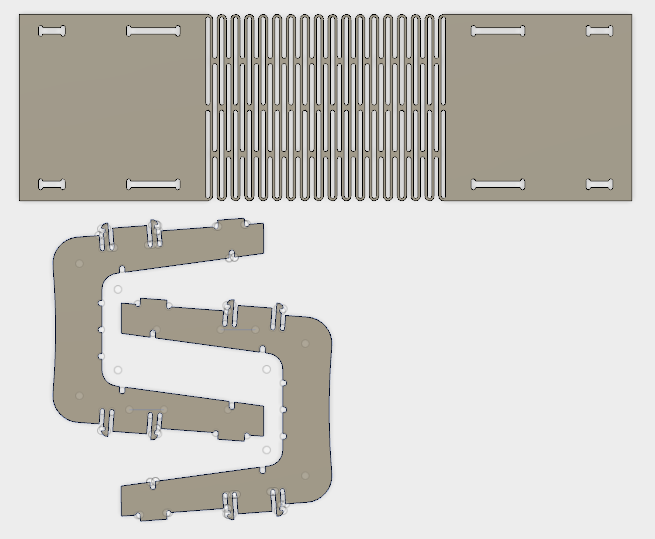
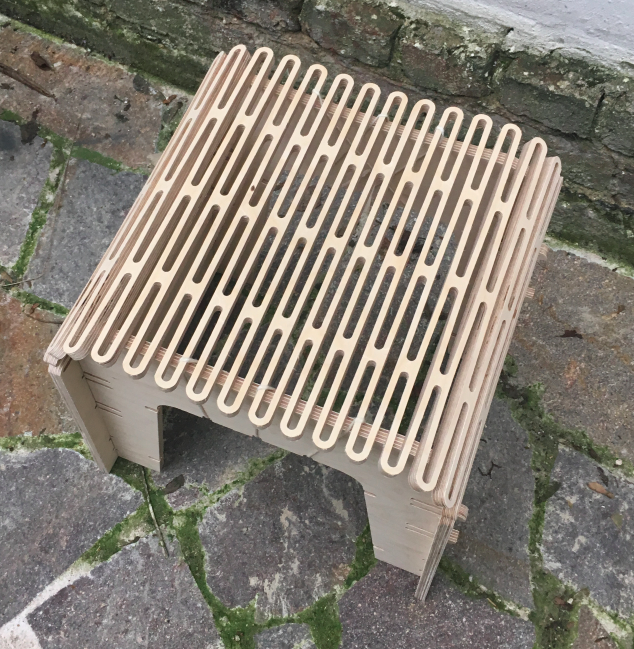
The top view of ready to cut stool.
Downloadfile Aleks' Stool
CAM Processing
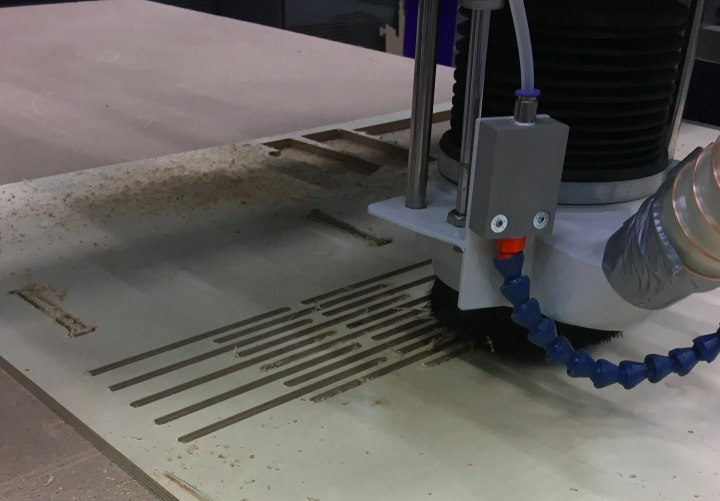
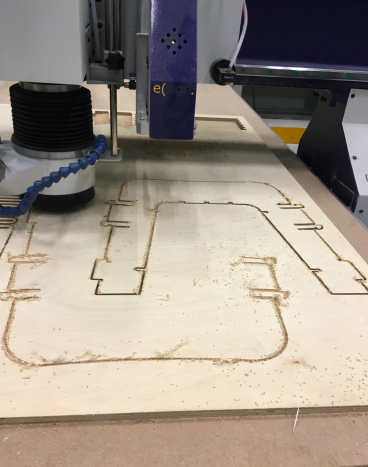
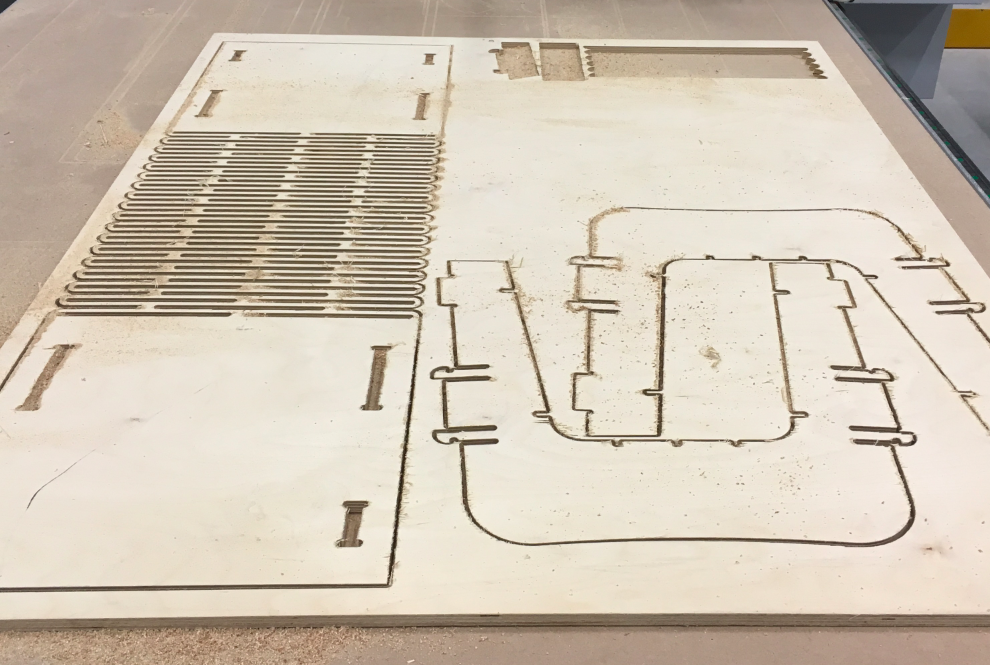
For milling your object all lines need to be joined. They should not overlap. We opened my file in Rhino to prepare it for milling and for a long time we couldn´t find all overlapped and loose lines. Even if Fusion 360 shows everything is o.k., Rhino software denied. But if you want to mill in one line and only one line is loose the milling machine can´t start milling. After finding all loose ends we could prepare the file for milling and transfere the data to the milling machine via stick.Additional preparations: As the milling computer can read the colored lines we marked all inlines green and all outlines red. Also, we wanted to check out first if the bending will work with 12mm Multiplexmaterial and if the click joint will function. We cut out a piece of bending structure and just one click joint. Both we transfered to the machine to.


After transfering it to the machine we located the lines by color. In Properties we created layers assigned to colors.
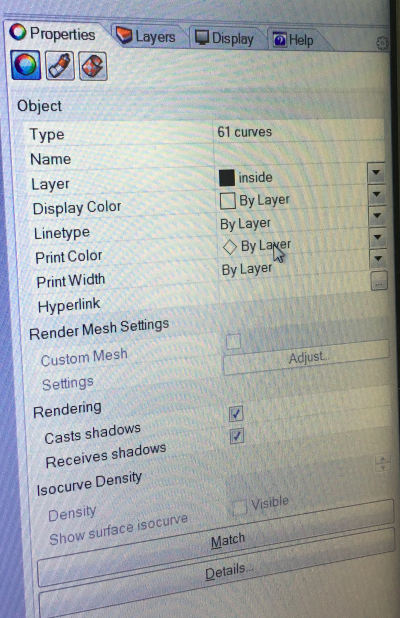
By this we could choose an actual layer for milling.

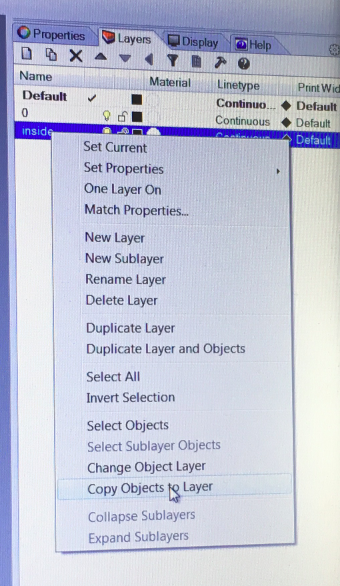
In 'Layers' we can change layer settings or copy objects to define layers.
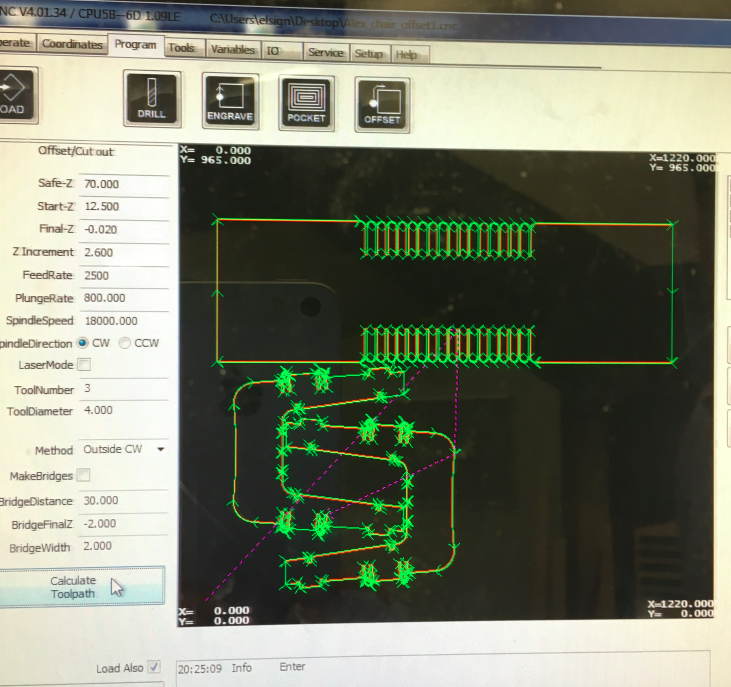
Afterwards we chose the process type: Offset. Because we wanted to cut out just along the lines. No engraving, no pocket process.

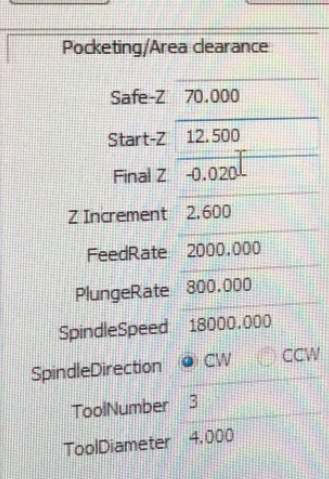
Then we set more preferences like 'Safe-Z' or 'Start-Z' and 'FeedRate' and 'SpindelDirection'.
We calculated the toolpath:
It was time to set home coordinates for the milling head. By using the hand control we could set the starting points for xy quite easy.
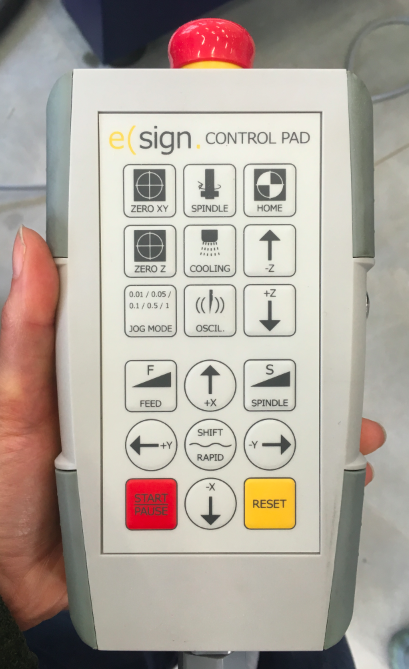
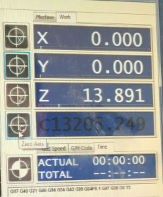
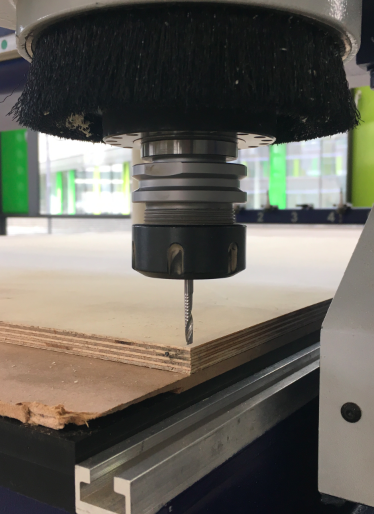
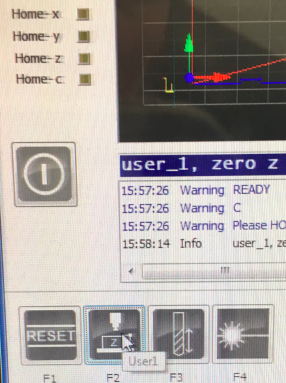
Z-achsis we set seperatly in the following way:
 After everything was done I had to start the milling process.
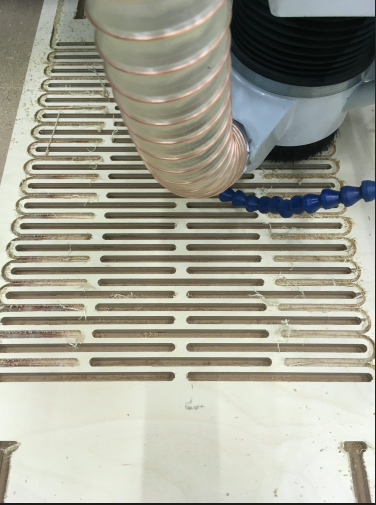
Cutting process: First inside cuts,

afterwards outside cuts. Inside cuts means the milling flute stays inside the line. And outside cuts means the milling flute stays all time outside the line, to preserve the material thickness.
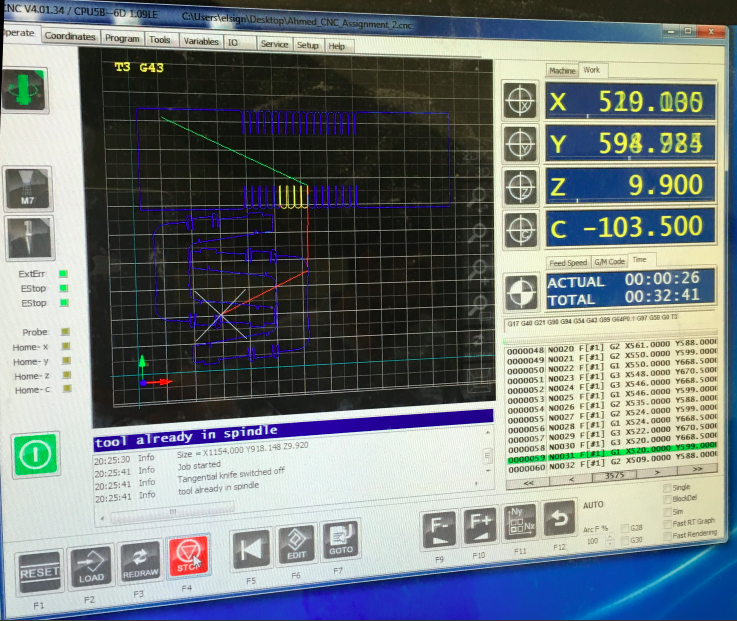
In the picture above you can see the G-code (G1..., G2...,G3...) running for each process.
Milling Process
First we had to turn on the vakuum for all parts the plate is overlying. Press the green lights.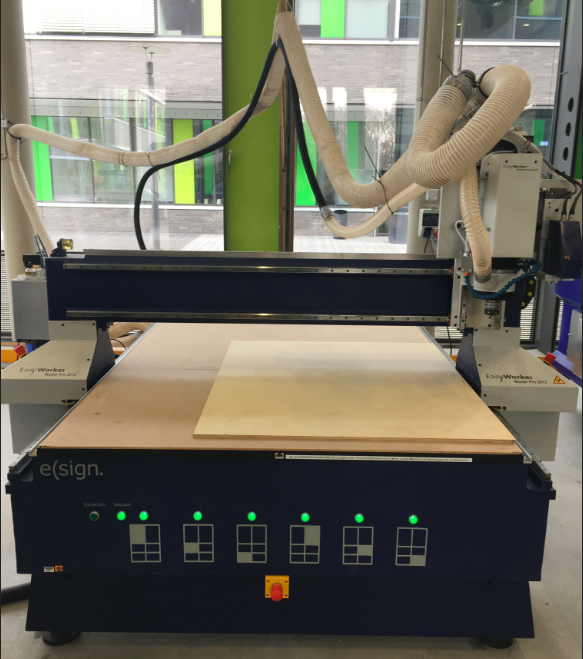
First tests:
I wasn´t sure if 12mm Multiplex will bend as I wanted to bend nearly 90°.
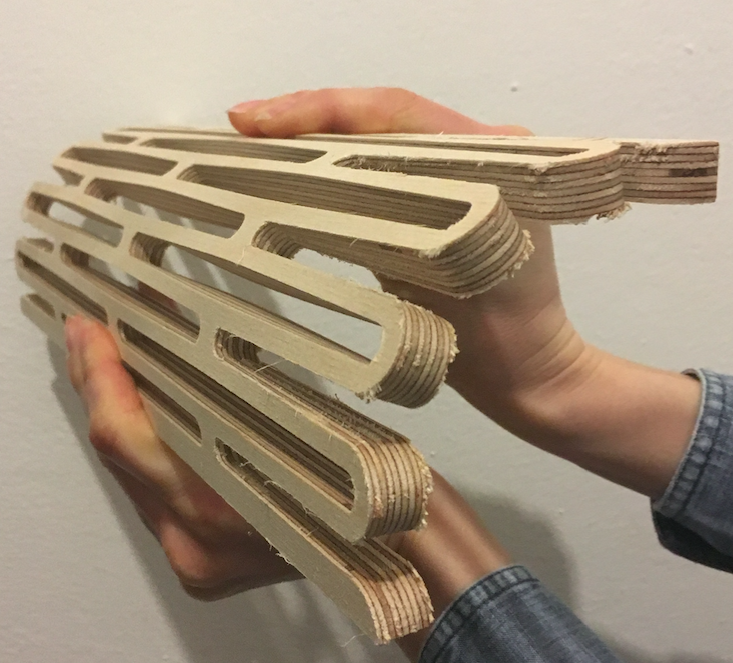
Also, the click joint I had to try because of only 4cm cut. It worked out.

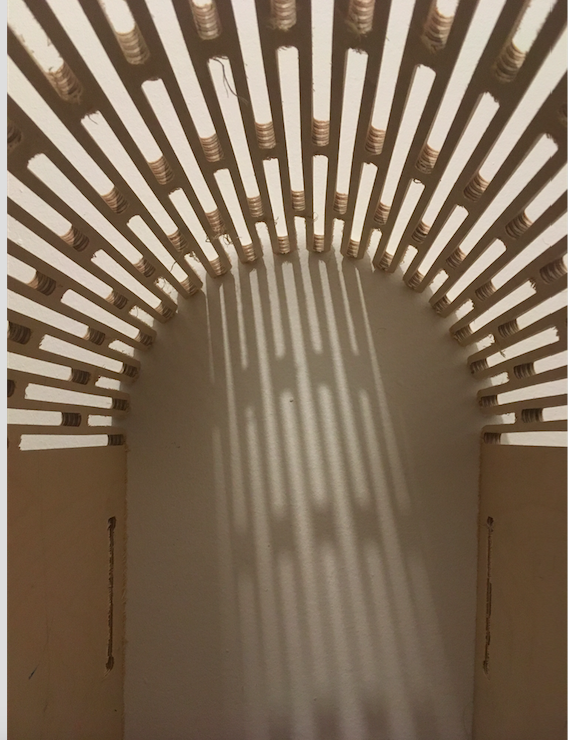
The hole seat is enormous flexible:
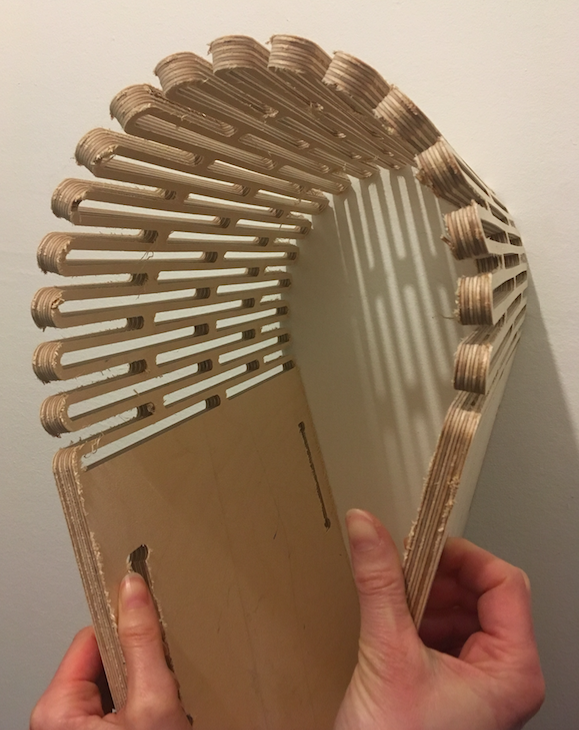
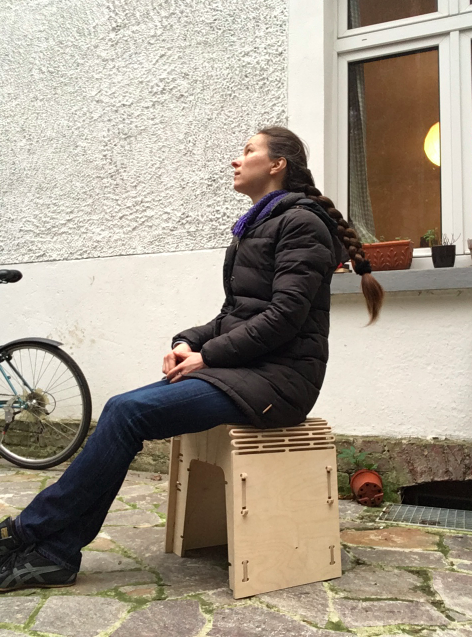
Finally, I' assembled my stool without any glue and screw. The click joint is very strong.
Downloadfile for milling:
Aleks'Stool DXF-File