3D Scanning and Printing
The way of 3d printing is similar to laser cutting. First of all, you design a model or take a scan of an object. Then send it to a 3d printing software and print it with 3d printer. That means mostly three steps. I have used the software Cura from Ultimaker, because I have printed all my models on Ultimaker 2 and Ultimaker 2 Go. Cura can open following files: .STL , .OBJ , .DAE , .AMG but also it is able to create a 3d model from picture file ectxtensions like: .jpg , .bmp , .png .Group assignment 3D printing test
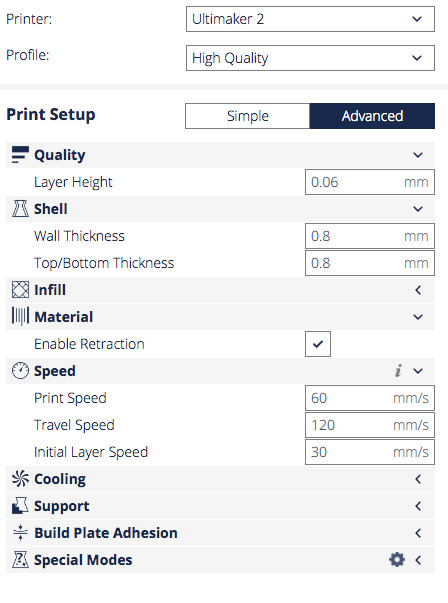
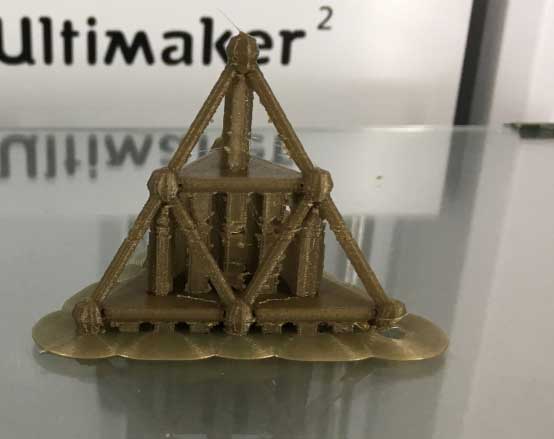
Im interested in beam structures and I thougtht it could be interesting to test some beam structures. I found out that fast printing is better than high quality printing, as the material starts sticking to the nozzle and getting out of shape. You can see below a high quality printing of an 3cm tetrahedron. The beams are 1mm in aperture.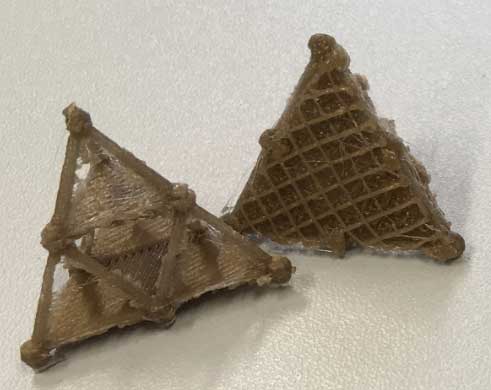
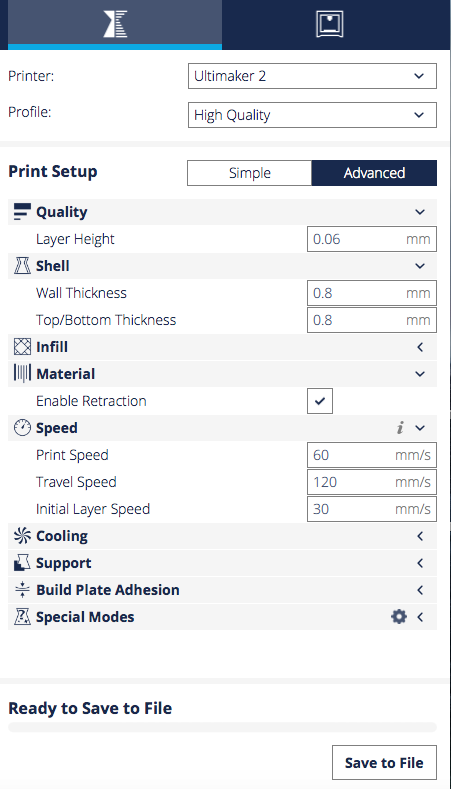
The setting was just high quality:
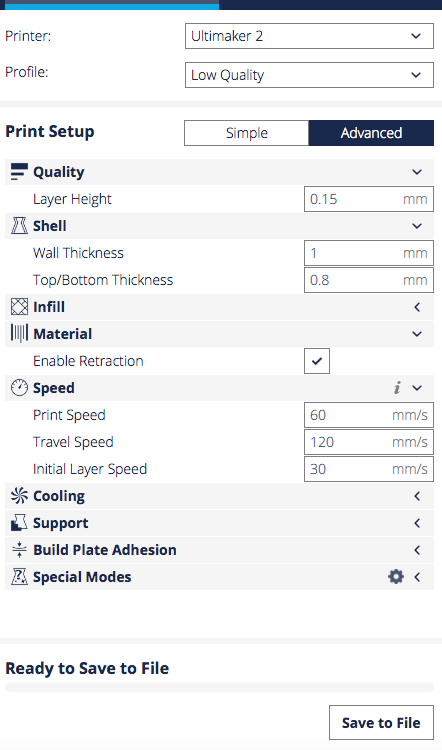
I skipped the normal print because I was curious about the low printing quality, same size 3cm and 4cm:
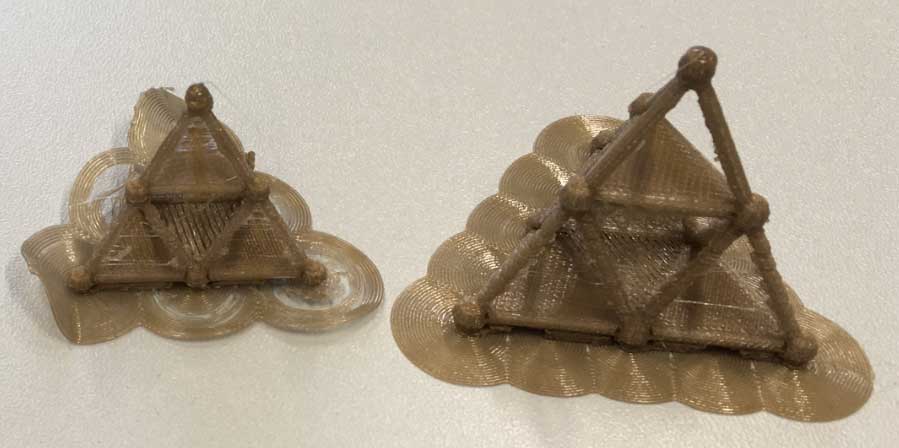
The settings:
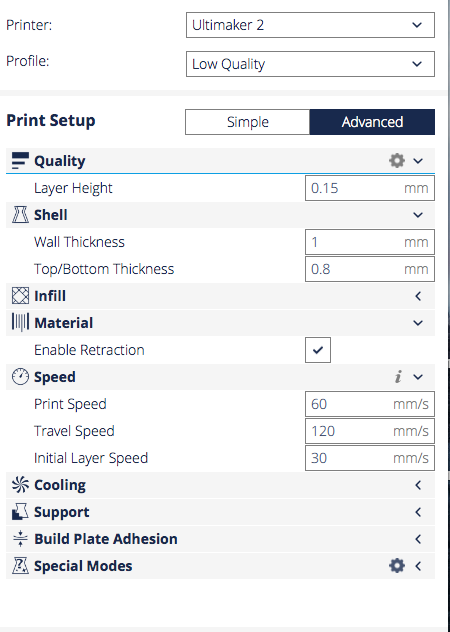
It was really astonishing for me. On the one hand it is logic on the other hand it shows how loose it is. Afterwards, I wanted to know how it will be if I increase the tetrahedron to 5cm low quality print:
One can see that the bigger beams are getting cleaner, they are 2mm in aperture in comparison to the smallest ones with 1mm diameter.
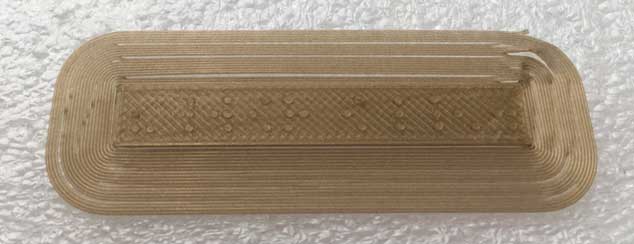
An other question I wanted to solve how it will work with Braille script. Braille is a script for blind or nearly blind people. And these very small dots are really challenging.
First I have tried the defaults for low, normal and high printing quality. I have used .jpg files and converted them in Cura to 3d objects. The dots are about 1mm in diameter.

High Quality Print
Medium Quality Print
Low Qality Print
They do not differ from each other as much as I expected but at least the low printing modus couldn´t set the dots properly and the high quality print started to melt them again.
Please visit our Group Assignment Page to explore more about the limits in 3d printing with Ultimaker.
My own 3d printing object
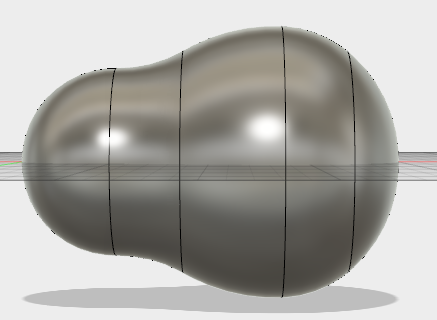
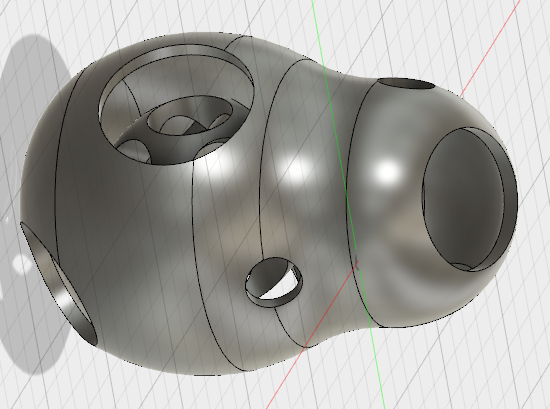
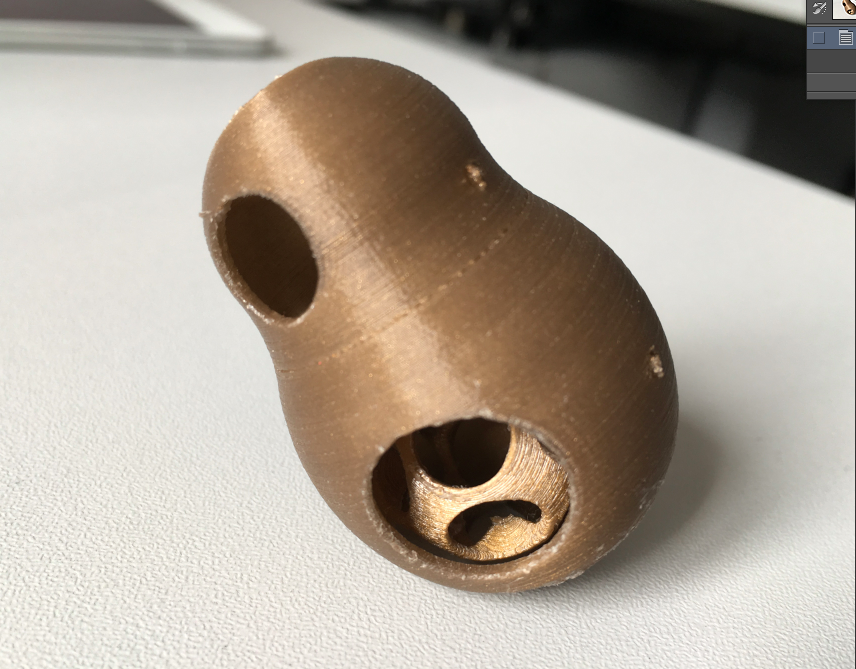
I have designed an organic shape in Fusion 360 which is not easy to produce in other technics. As I have explained Fusion 360 before I will write a short abstract about the design process of this organic shape I have called Bubblebean: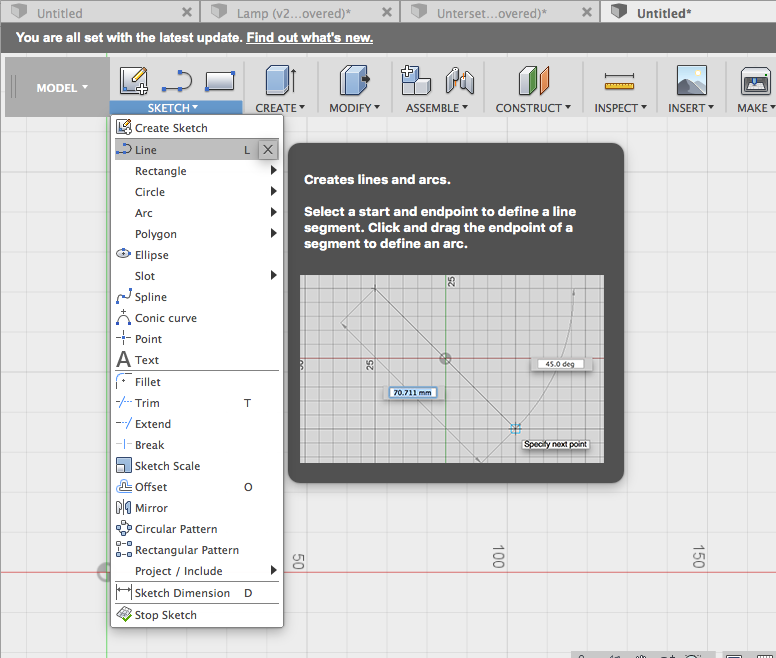
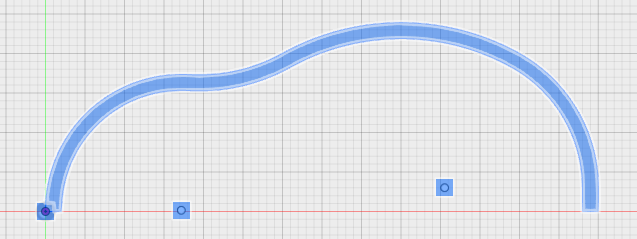
Choose sketch plane and create a curved line with line tool.
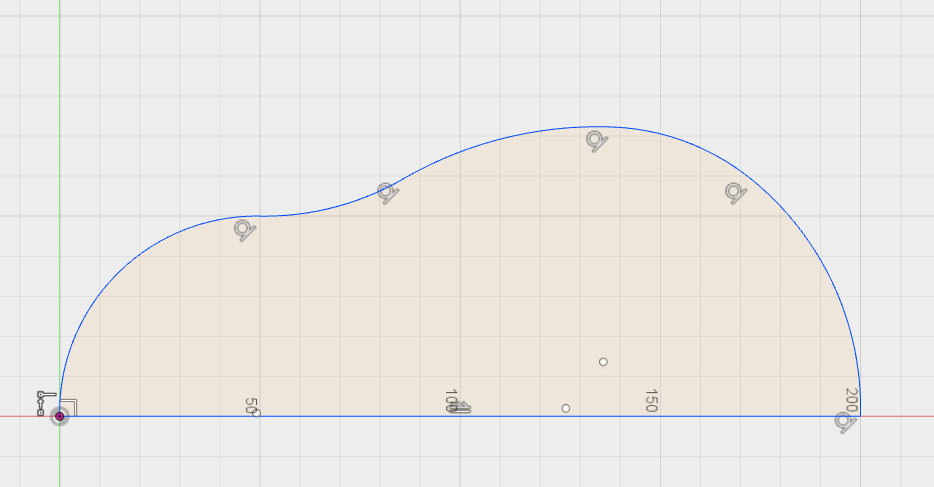
If you don´t want to get a hole around the center line after relvolving set the centerline as revolving line e.g. on axis.
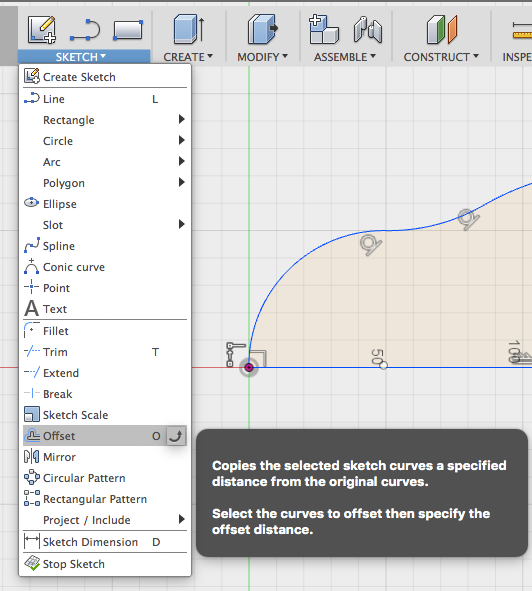
Select Offset tool.
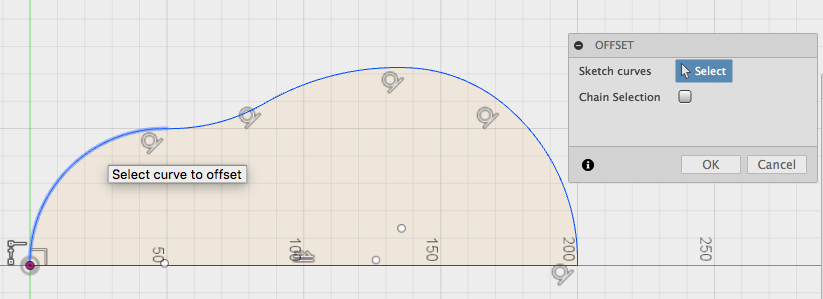
Select the lines you want to offset.
If you choose the lines to offset take care not to choose the center line. The offset line will mesh into your object still touching the center line. Then delete center line and draw two line parts to create a curving stripe.
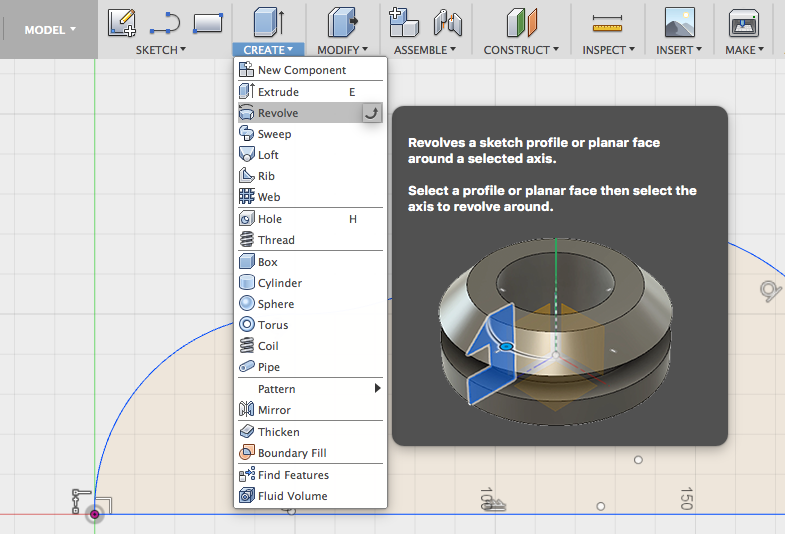
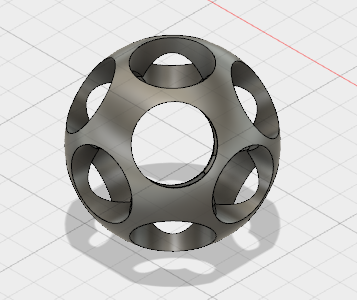
Choose revolve to create a 3d object.
Now, the first step is done.
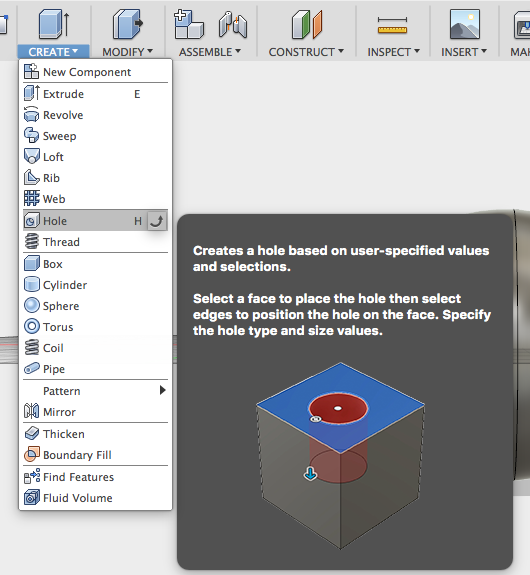
Select Holes for creating some holes.
Follow the instructions for holes, you will get a perforated bean.
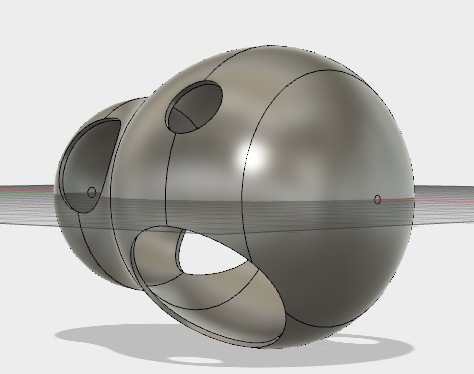
Now, create an inclusion.
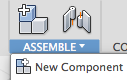 After building the spherical structure you have two bodies. First create components out of these bodies.
Then in Browser pull one compenent into the other.

Then send object to 3d printer:
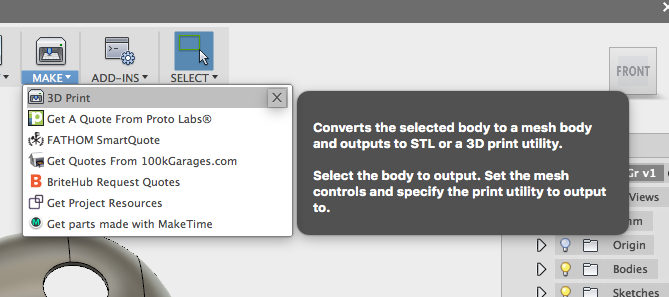
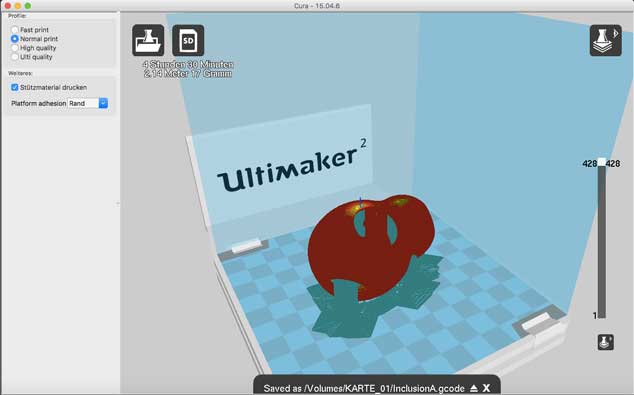
Cura will open automatically. Adjust the settings as follows.
In our FabLab we have a discussion about old Cura version 15.04.6 and the new version 2.3.0. Some of us stick to the old version, some like the new version more. I decided to try both.
First settings I did in old Cura version.
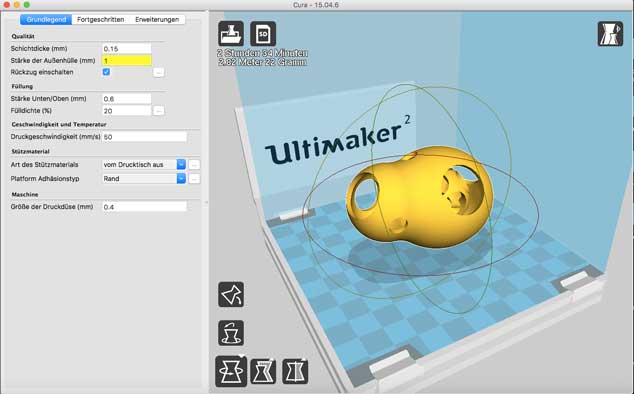
After adjusting some settings like speed, Plate adhesion, upport structure, quality and Layer hight in general it started printing.
To compare both Cura vesions, the new one has much more settings. So you can adjust very differentiated, printing speeds for infill, wall, Top/Bottom e.g. . On the other hand to get into the situation of making precise multiple settings you need to get really into it. If you are interested to get into it, it is worth thinking about building your own printer and participating in developing 3d printing. With old cura you have less settings but may be also less possibilities to solve printing problems.
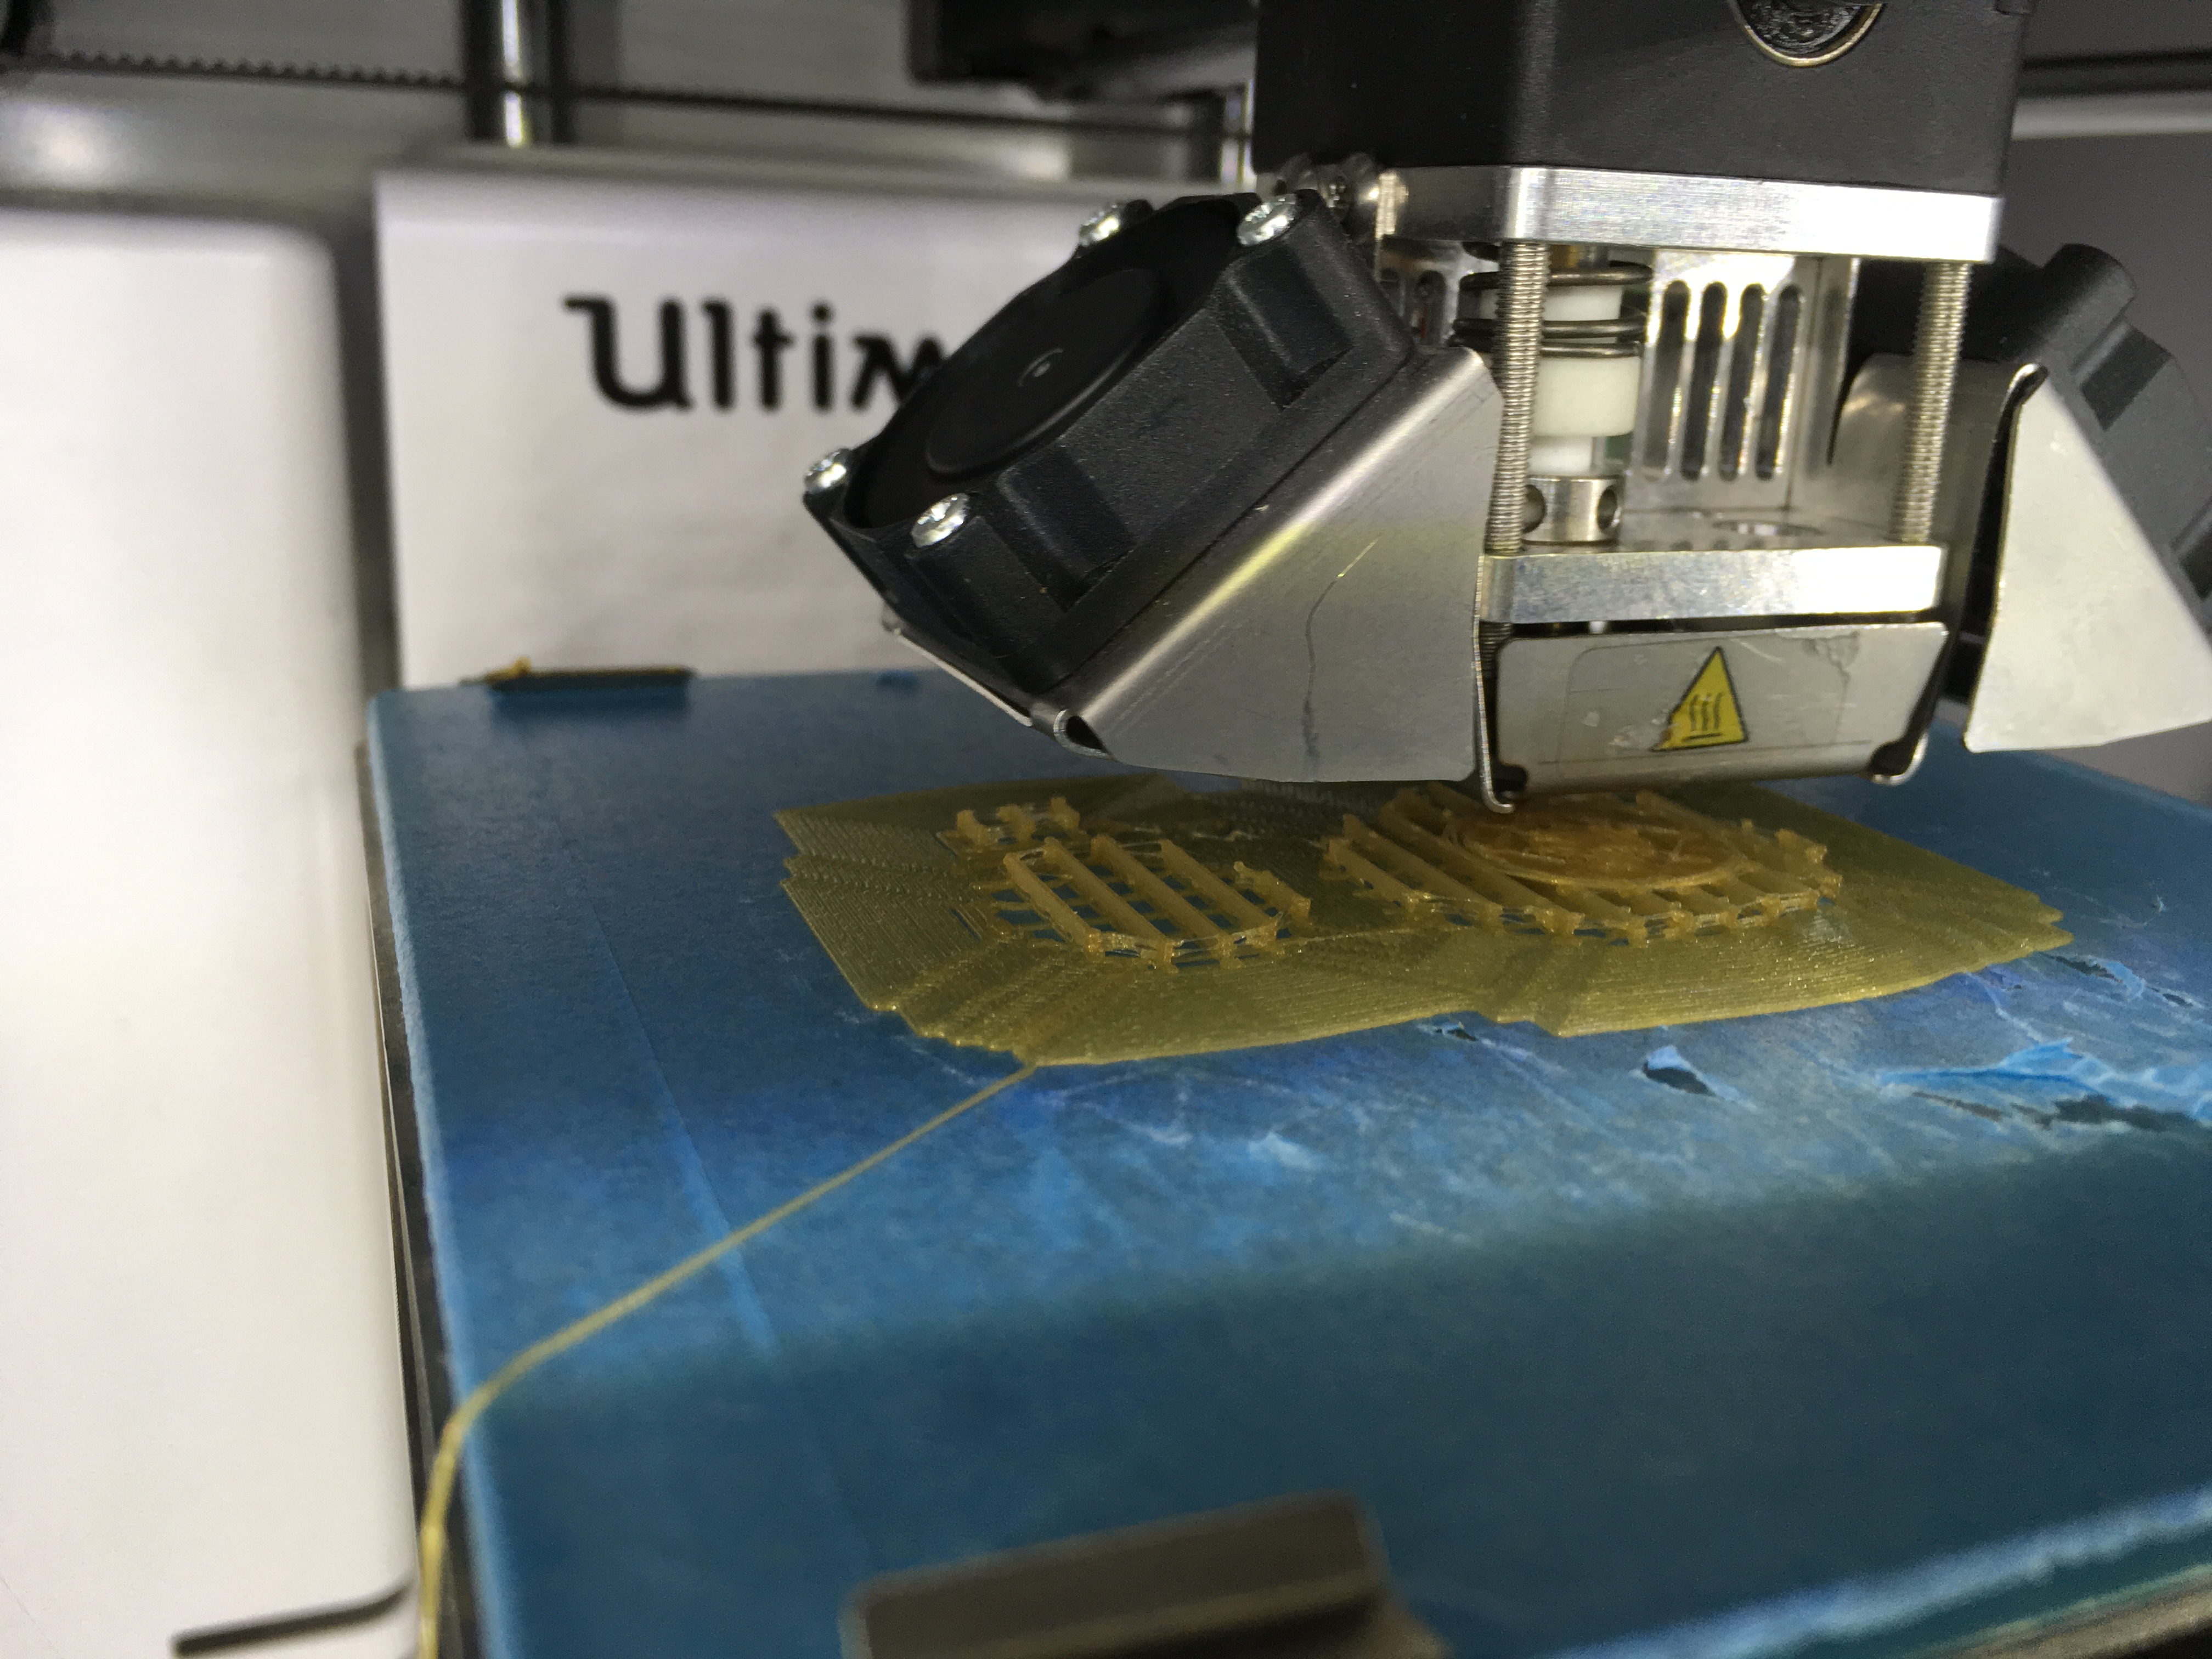
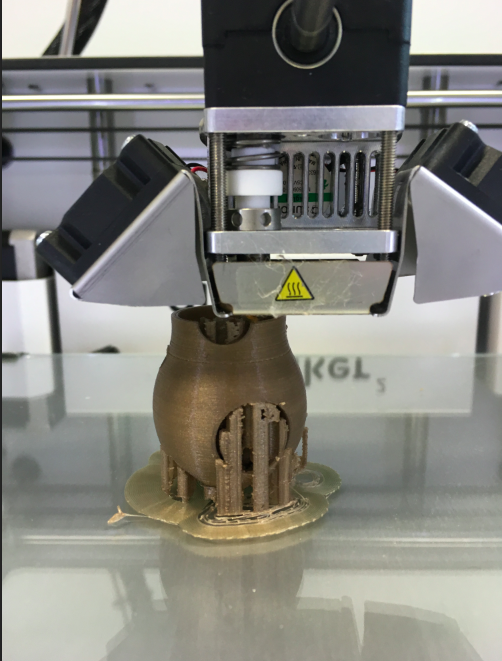
Start printing with old cura on Ultimaker 2.
After running two times the Ultimaker 2 got problems with the inclused sphere. It ripped of and destroyed the whole Object. It was important two slow down the speed two times:
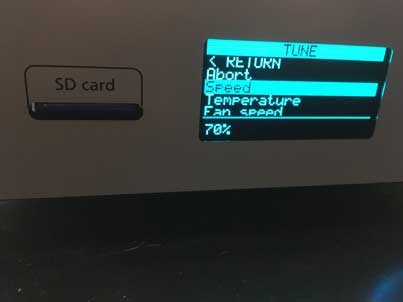
Following settings have been made: Speed=70 after half printing =60, just before finishing the inclusion =50.
Further settings:Support structure from Buildplate in Ultimaker 2.
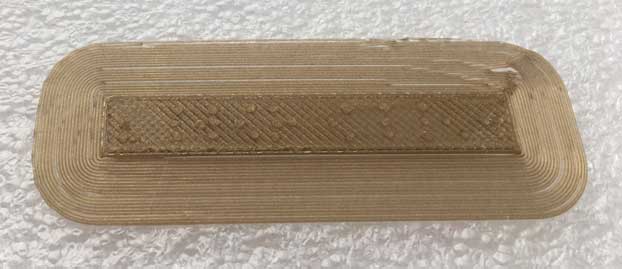
Please, see below how it worked out:
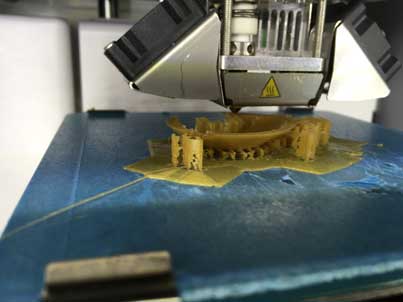
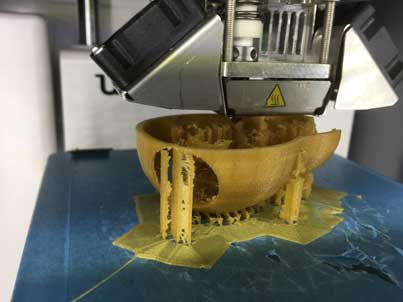
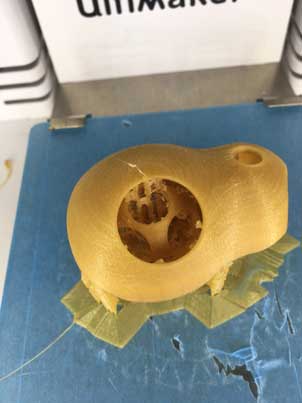
Here, you can see the support structure from buildplate.
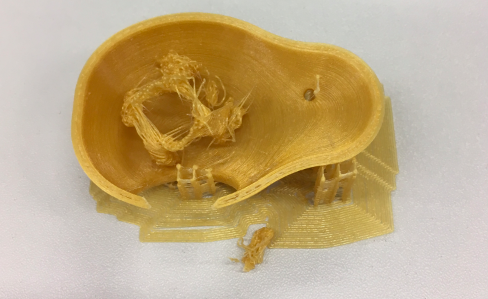
And here, you can see the finished bean with support structure everywhere. It was very difficult to remove the support structure and I couldn´t get it clean from inside
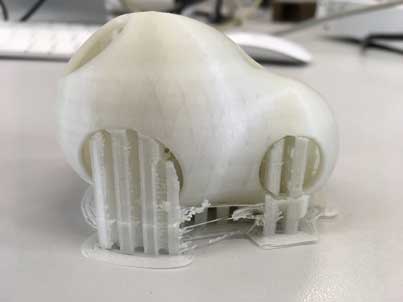
I decided to print a third one:
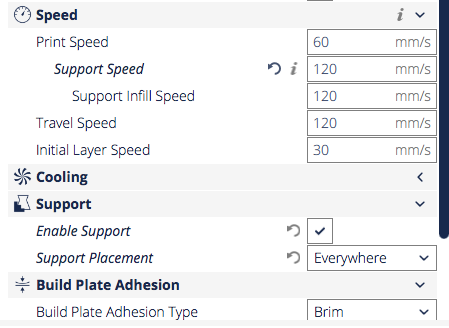
The difference was that I was using the normal quality setting in new Cura version and adjusted Support speed and Support structure everywhere.
Download Bubblebean
Download Inclusion Video(small)
3D Scanning
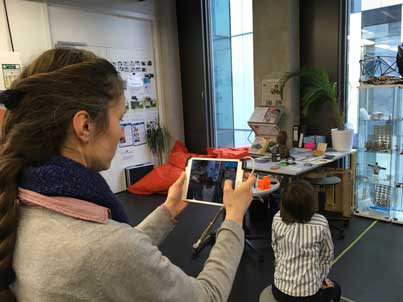
For 3d scanning I have used iSense sticked to an iPad.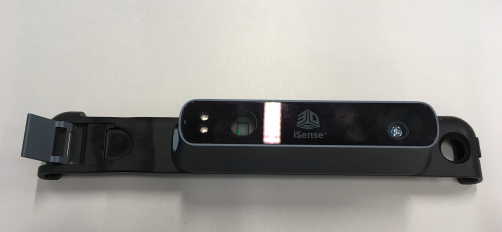
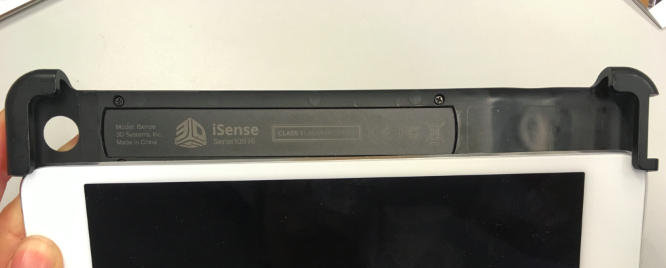
This product and software is really very easy and convenient to use. You just fix it with two clamps and wire it with your ipad. Then download iSense app and install it. Follow the instruction for installation
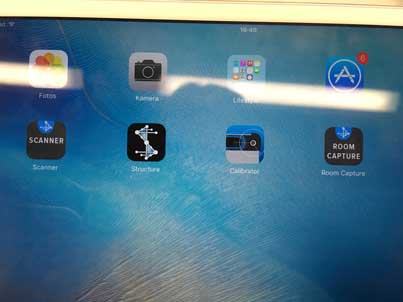
On screen above you can see four iSense icons: Scanner, Structure, Calibrator, Room Capture. With Room Capture you are able to scan a furnished room with measurements if you like. With Scanner you scan smaller ojects until full bodies. Operating distance of iSense is between 45 cm and 350cm. I have tried to scan very small objects where I needed to go closer but it didn´t work out, as expected.
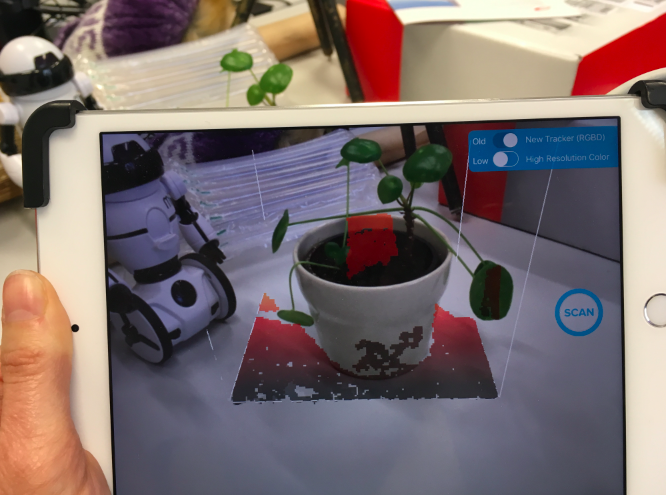
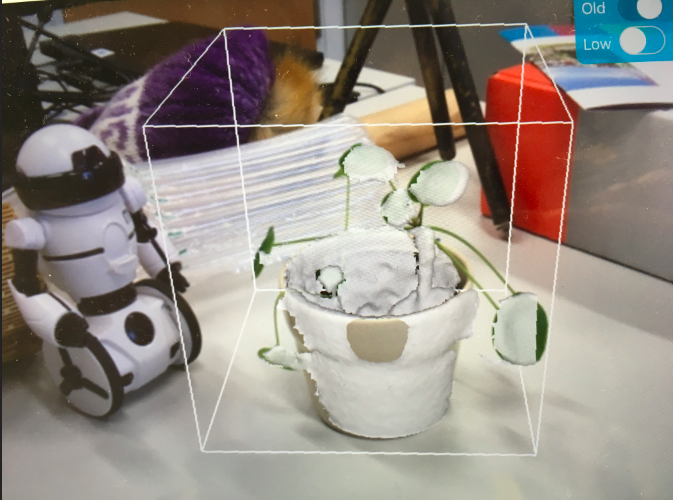
 If you touch the Scan icon the application for body scanning will start. You will see an outlined cubus you can increase or minimize with two fingers sliding over the touch screen.
Then you just walk around your scanning object, keep the the distance.The face is getting red if you get to close, as you can see below:
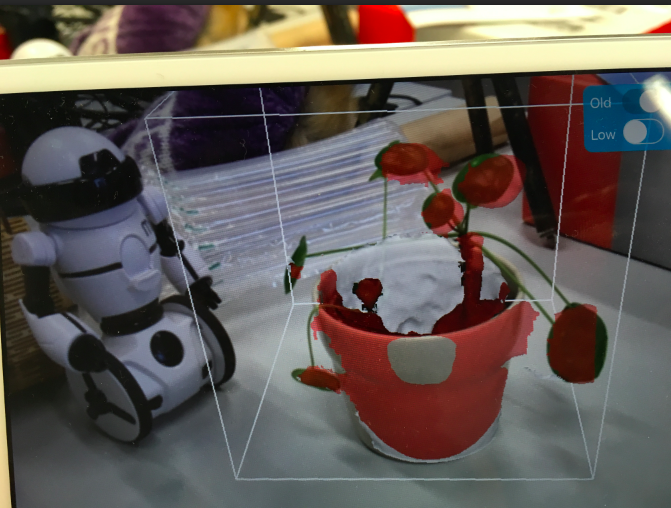
If everything is going well your object is getting white. As you can see below some parts are allready white some are still red like the leaves:
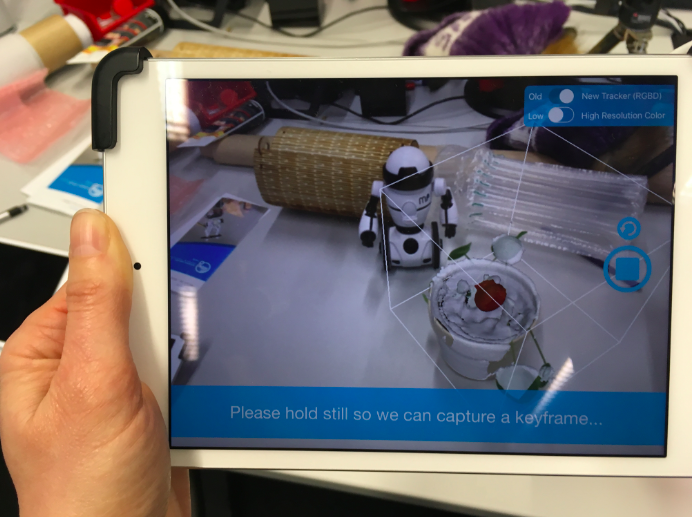
If you walk around your object take care not to move too fast. The sensor needs time to catch all parts:
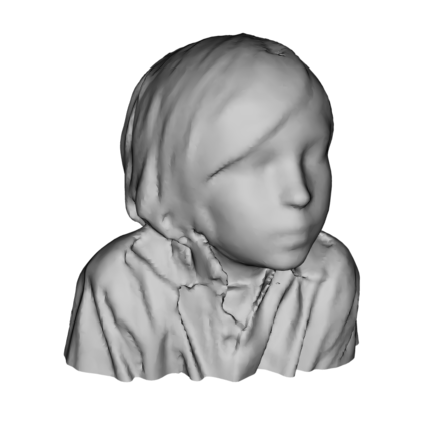
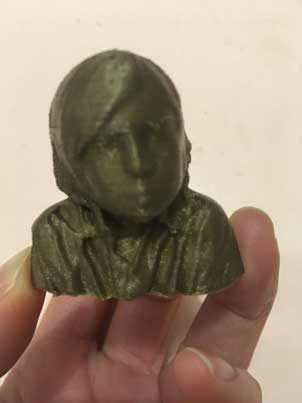
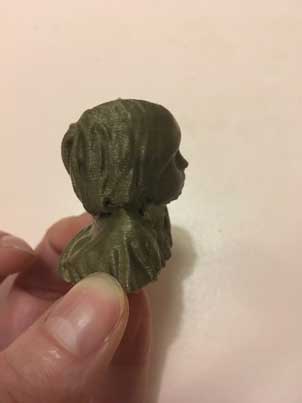
My scanning object was a head to get a bust:
Bevor scanning be aware of the pictured body or head is inside this cubus, then select start.Go slowly around the body, keeping the same distance.Sometimes the software tells you to wait for a moment and you can observe the mapping process. The pictured body becomes white like plaster.
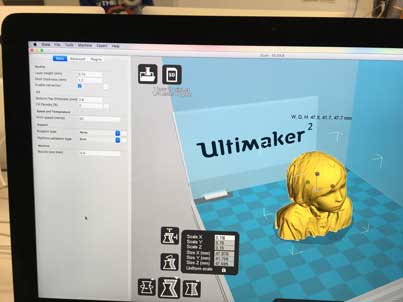
After scanning you just stop and send the file via e-mail to your e-mail address. Then you can open .OBJ in Cura.
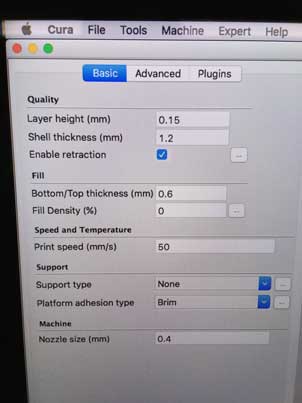
Adjust the settings as follow:
Finished head:
Concluding, I believe iSense is a very user friendly tool for normal scales, but still iSense is quite expensive, nonetheless 400 Euro.
Download head:scan stl
Download head:scan obj