Computer-controlled cutting
Week 3
Testing lasercut parameters
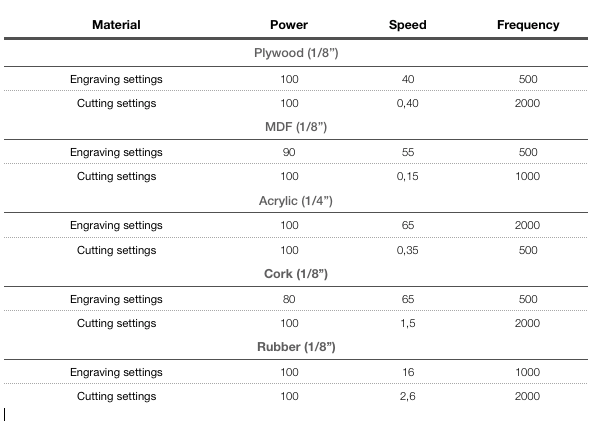
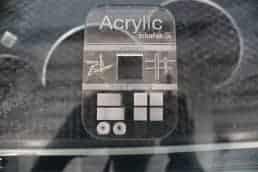
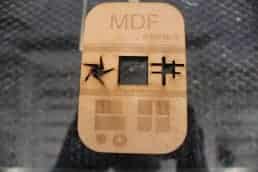
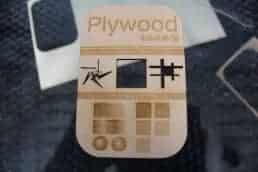
As a group assignment, we had to make tests with the laser cut machine. So, with François Auclair, we prepared a test sheet that shows a lot of functions and possibilities as: cutting, engraving and the use of gray scales on different materials. The sheet model is available on the download button at the bottom of the page. Here are the results:
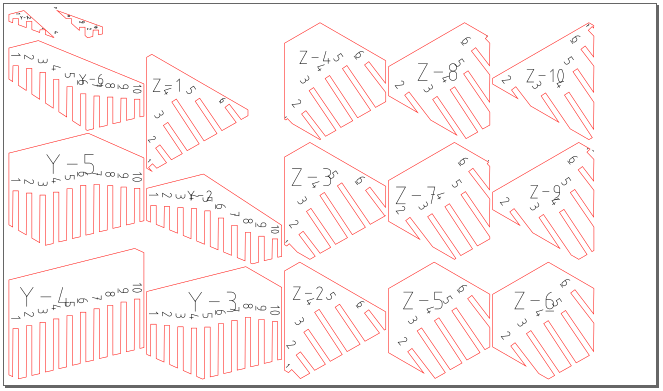
Sheet plan:
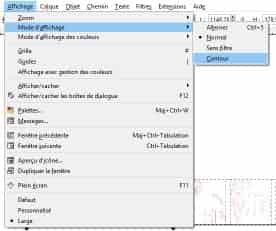
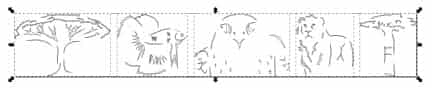
We prepared it with Inkscape and here's what it looks like before being processed. To have an easy to cut file, we chose to use a tree colors technique because we didn't want the graphic elements to be as deep as the greyscales elements. So, for the bleu elements, you have to put your color editor on RBG and set the blue at 255. It's going to be a 255 of intensity for the greyscales. To have a good contrast in the rendering, you have to set the laser at the deepest point you want and let the greyscales do their job.
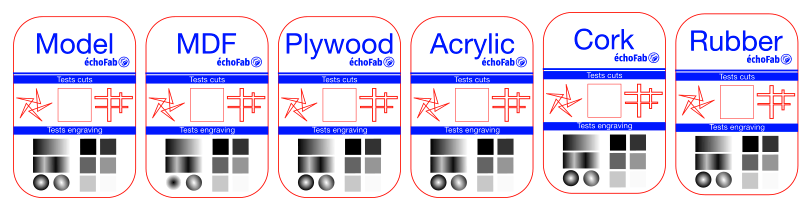
It's really important to set the settings right. For every new material go on with a testing process to make sure they are perfect. On plywood, for example, the side should be honey brown and not black! Also, it shouldn't mark your hand with cinder. If it does, the settings are wrong.
Ideally, I'd very much like to be able to manipulate Fusion360. I'll try to use it for the next week assignment.


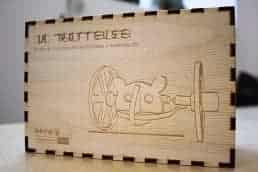
Also, here's some work I did in the past with the laser cut at échoFab. I have to say that it was love at first sight between me and this machine. As it is for a lot of users I guess.


On that last project, La Trotteuse, we create at the lab a small fabrication project for kids. I have to specified that it was a group project with me, François Auclair, à Annie Ferlatte and Thomas Cortina.


Vinyl cutter project
échoFab team and I already did some project with the vinyl cutter. Here's one of our funny project. We had a hard time at first to place it nicely but the trick here is to put a lot of water on the glass and layers so it doesn't stick right away. It'll let you time to place it.

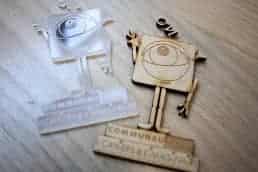
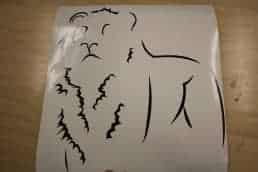
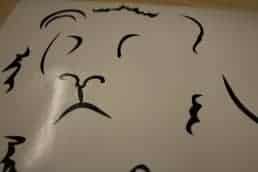
For this week assignment, I chose to make some sticker with a vectorial design I made. It's always nice to see them come to life in some fabrication project. I have to say that it was a real pain in the ass to peel it, but the result is good. Here's how I made it:
- 1. Trace the design in Inkscape.
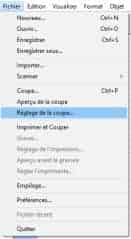
- 2. Verify that all the strokes are connected and in a good shape
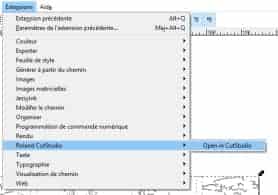
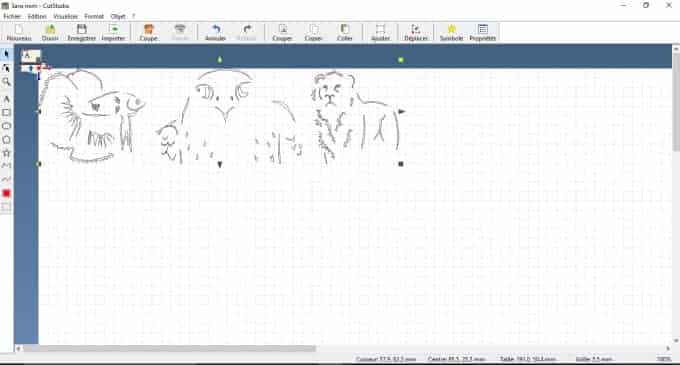
- 3. Open Roland Studio Cut
- 4. Choose the vinylcutter settings
- 5. Prepare the machine by choosing a type of sheet
- 6. Place the origin point
- 7. There you go !


Parametric Design
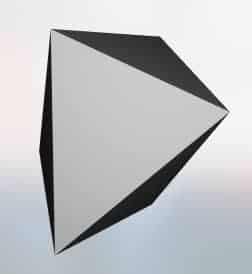
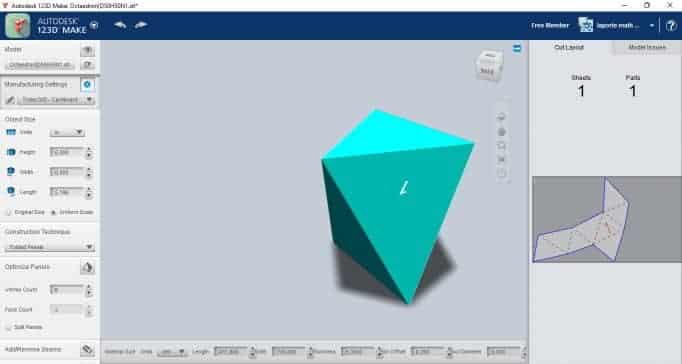
The first step, to begin with, was to have a 3D model that I could process in that two different software that Neil made me discover this week: Autodesk 123D and Pepakura. As my 3D modeling skill aren't that good, I took this Octaedron model from Thingiverse. Also, I used Autodesk's software because it could do much more than the other so I chose to concentrate on this one.
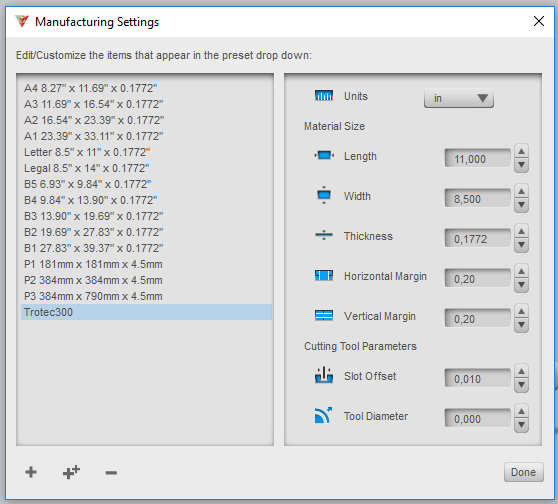
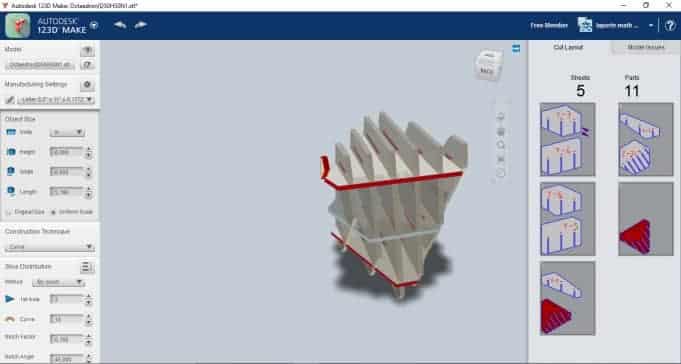
I began by choosing the right settings in Autodesk 123D Make. First, to make sure that the design and slicing take into consideration the thickness of my material, cardboard in that case. From what I understood from the class, this is one of the characteristics that makes it parametric: the fact that it can adapt itself to different material specification automatically without having to make touch ups to the original design as we have to do with Inkscape.
Also, as I'm going to use a specific machine to cut the pieces, a Trotec Speedy 300 60watts, I can already give de dimension of the cutting table so the plan that comes out of the software is already friendly to my machine. So, no placement to do! That's a very good new!
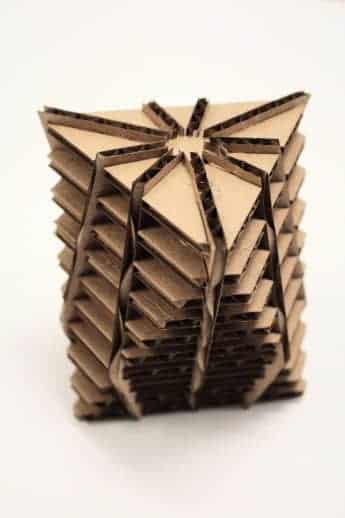
Cardboard cutting and slicing
For that assignment, I decided not only to explore parametric design and press fit assembling technique but also the different way of slicing models. 123D Make gives you some option regarding the way it'll slice your model. I decided to show 5 of them in this week's documentation.
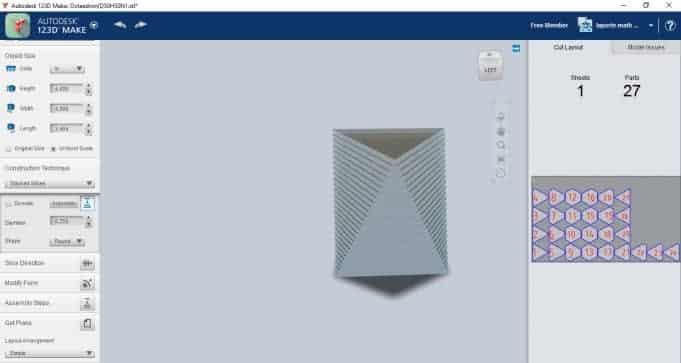
All the five techniques that I'll show, will be presented in three pictures. One will be the CAD of the slicing method, the second one the laser cut friendly file and the last one a picture of the result.
1. Stacked slices


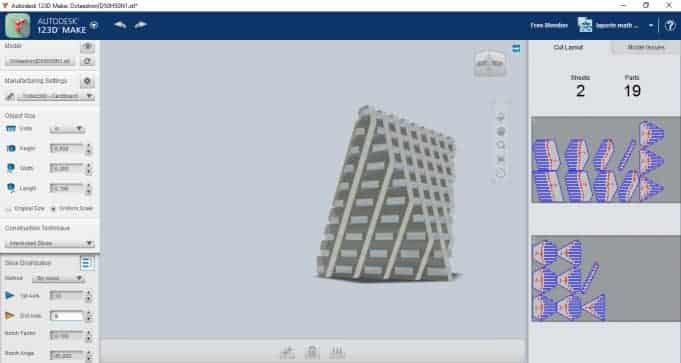
2. Interlocked slices
My first try wasn't that good, It was about 1,04mm to tight. I changed it from 3,38mm to 4,42mm. This time, I'm about to assemble it, but it's a bit too loose. For the next sample, I'll try with 4,30mm.


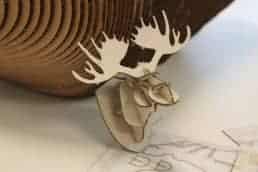
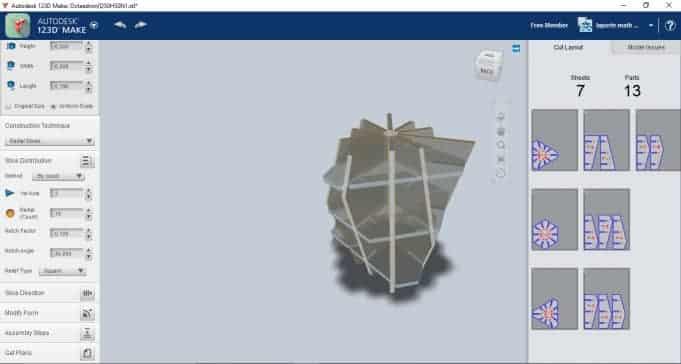
3. Radial slices
4. Curve

5. Folded panels

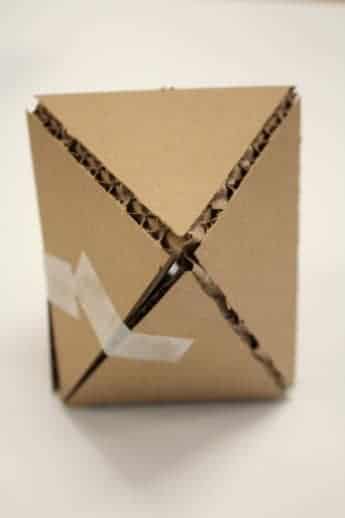
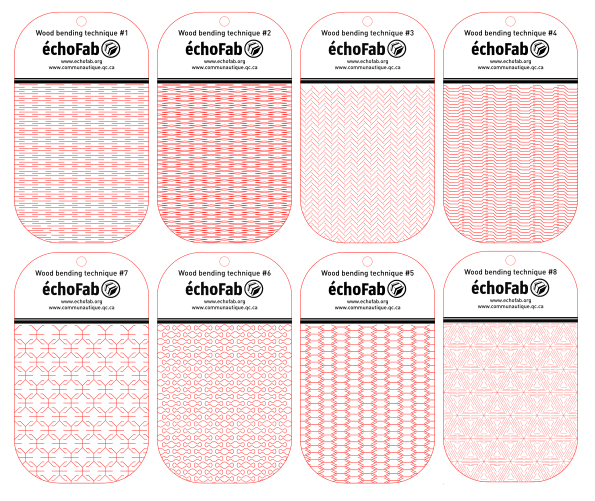
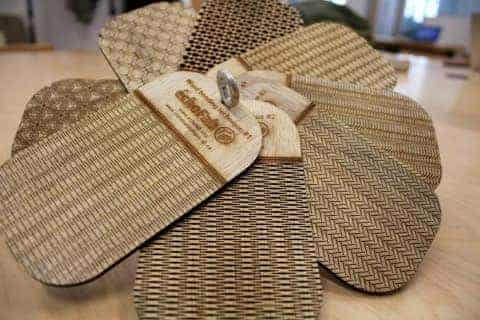
Bending materials with lasercutting
For this small project, i'll use Inkscape to design it. I tried to see what has been done for bending materilas on the Internet. Here's what I found and the file I made with it. The 3rd, 6th and 7th ones were realy bad. They don't bend at all. My favorites are the 5th and 8th ones.
Parametric design update
Well it seemed that I understood wrong the assignment here. So, after talking to my instructor, I saw that I've made parametric design in other assignement and for my final project too. I'll just you what I made then. I has to make a screw cover for my final project and I parametricly designed it. You can change the dimension of the whole and the other setting will change with it. I seems to me that this is parametric design ! There's some picture of it :
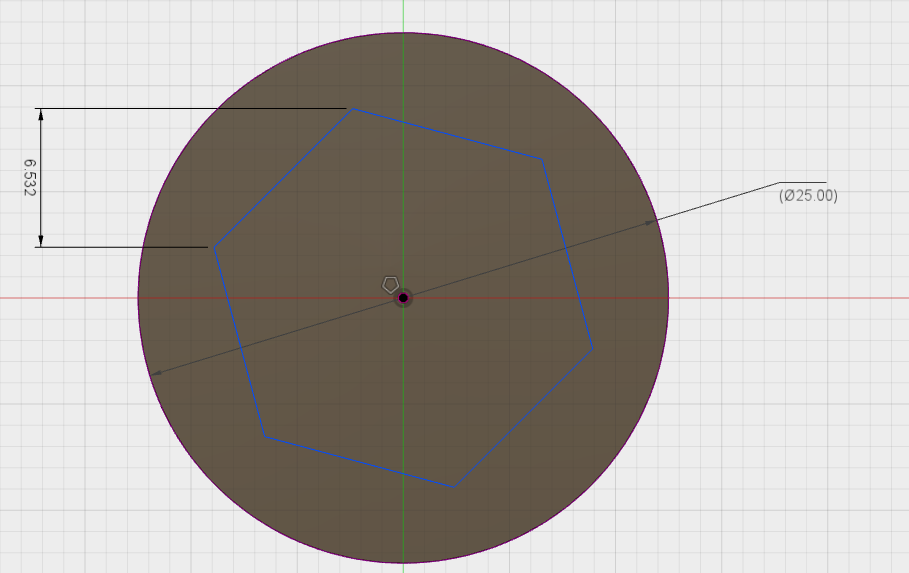
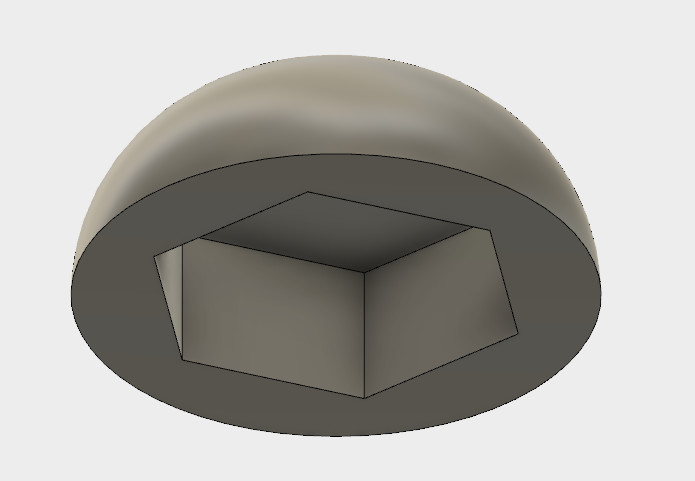

You can change one of the settings and the rest of them will follow ! This object is made only made by entering data and sizes in Fusion360. I could make the same cover for a smaller screw and it'd work. Also, in 3D printing and 3D scanning week, there's a very good example if another parametric design I made with Fusion360. I've also designed screw for the machine design week that'll show that I'm capable of doing parametric design. I this point I hope it enough for you :).
Parametric design update phase two
Well, it seems that it still didn't completly get what the assignement was. Here's a second update ! I'll make a press fit modules to create structures. I'll fisrt need to make the press fit. Here a little test ocject I made. The cardborad is about 4,47mmm. The question is about what's the right mesure to get the perfect press fit. This little test object will do it.