Molding and casting
Week 12
Experiment with the profesionals from : Revolution prototypes
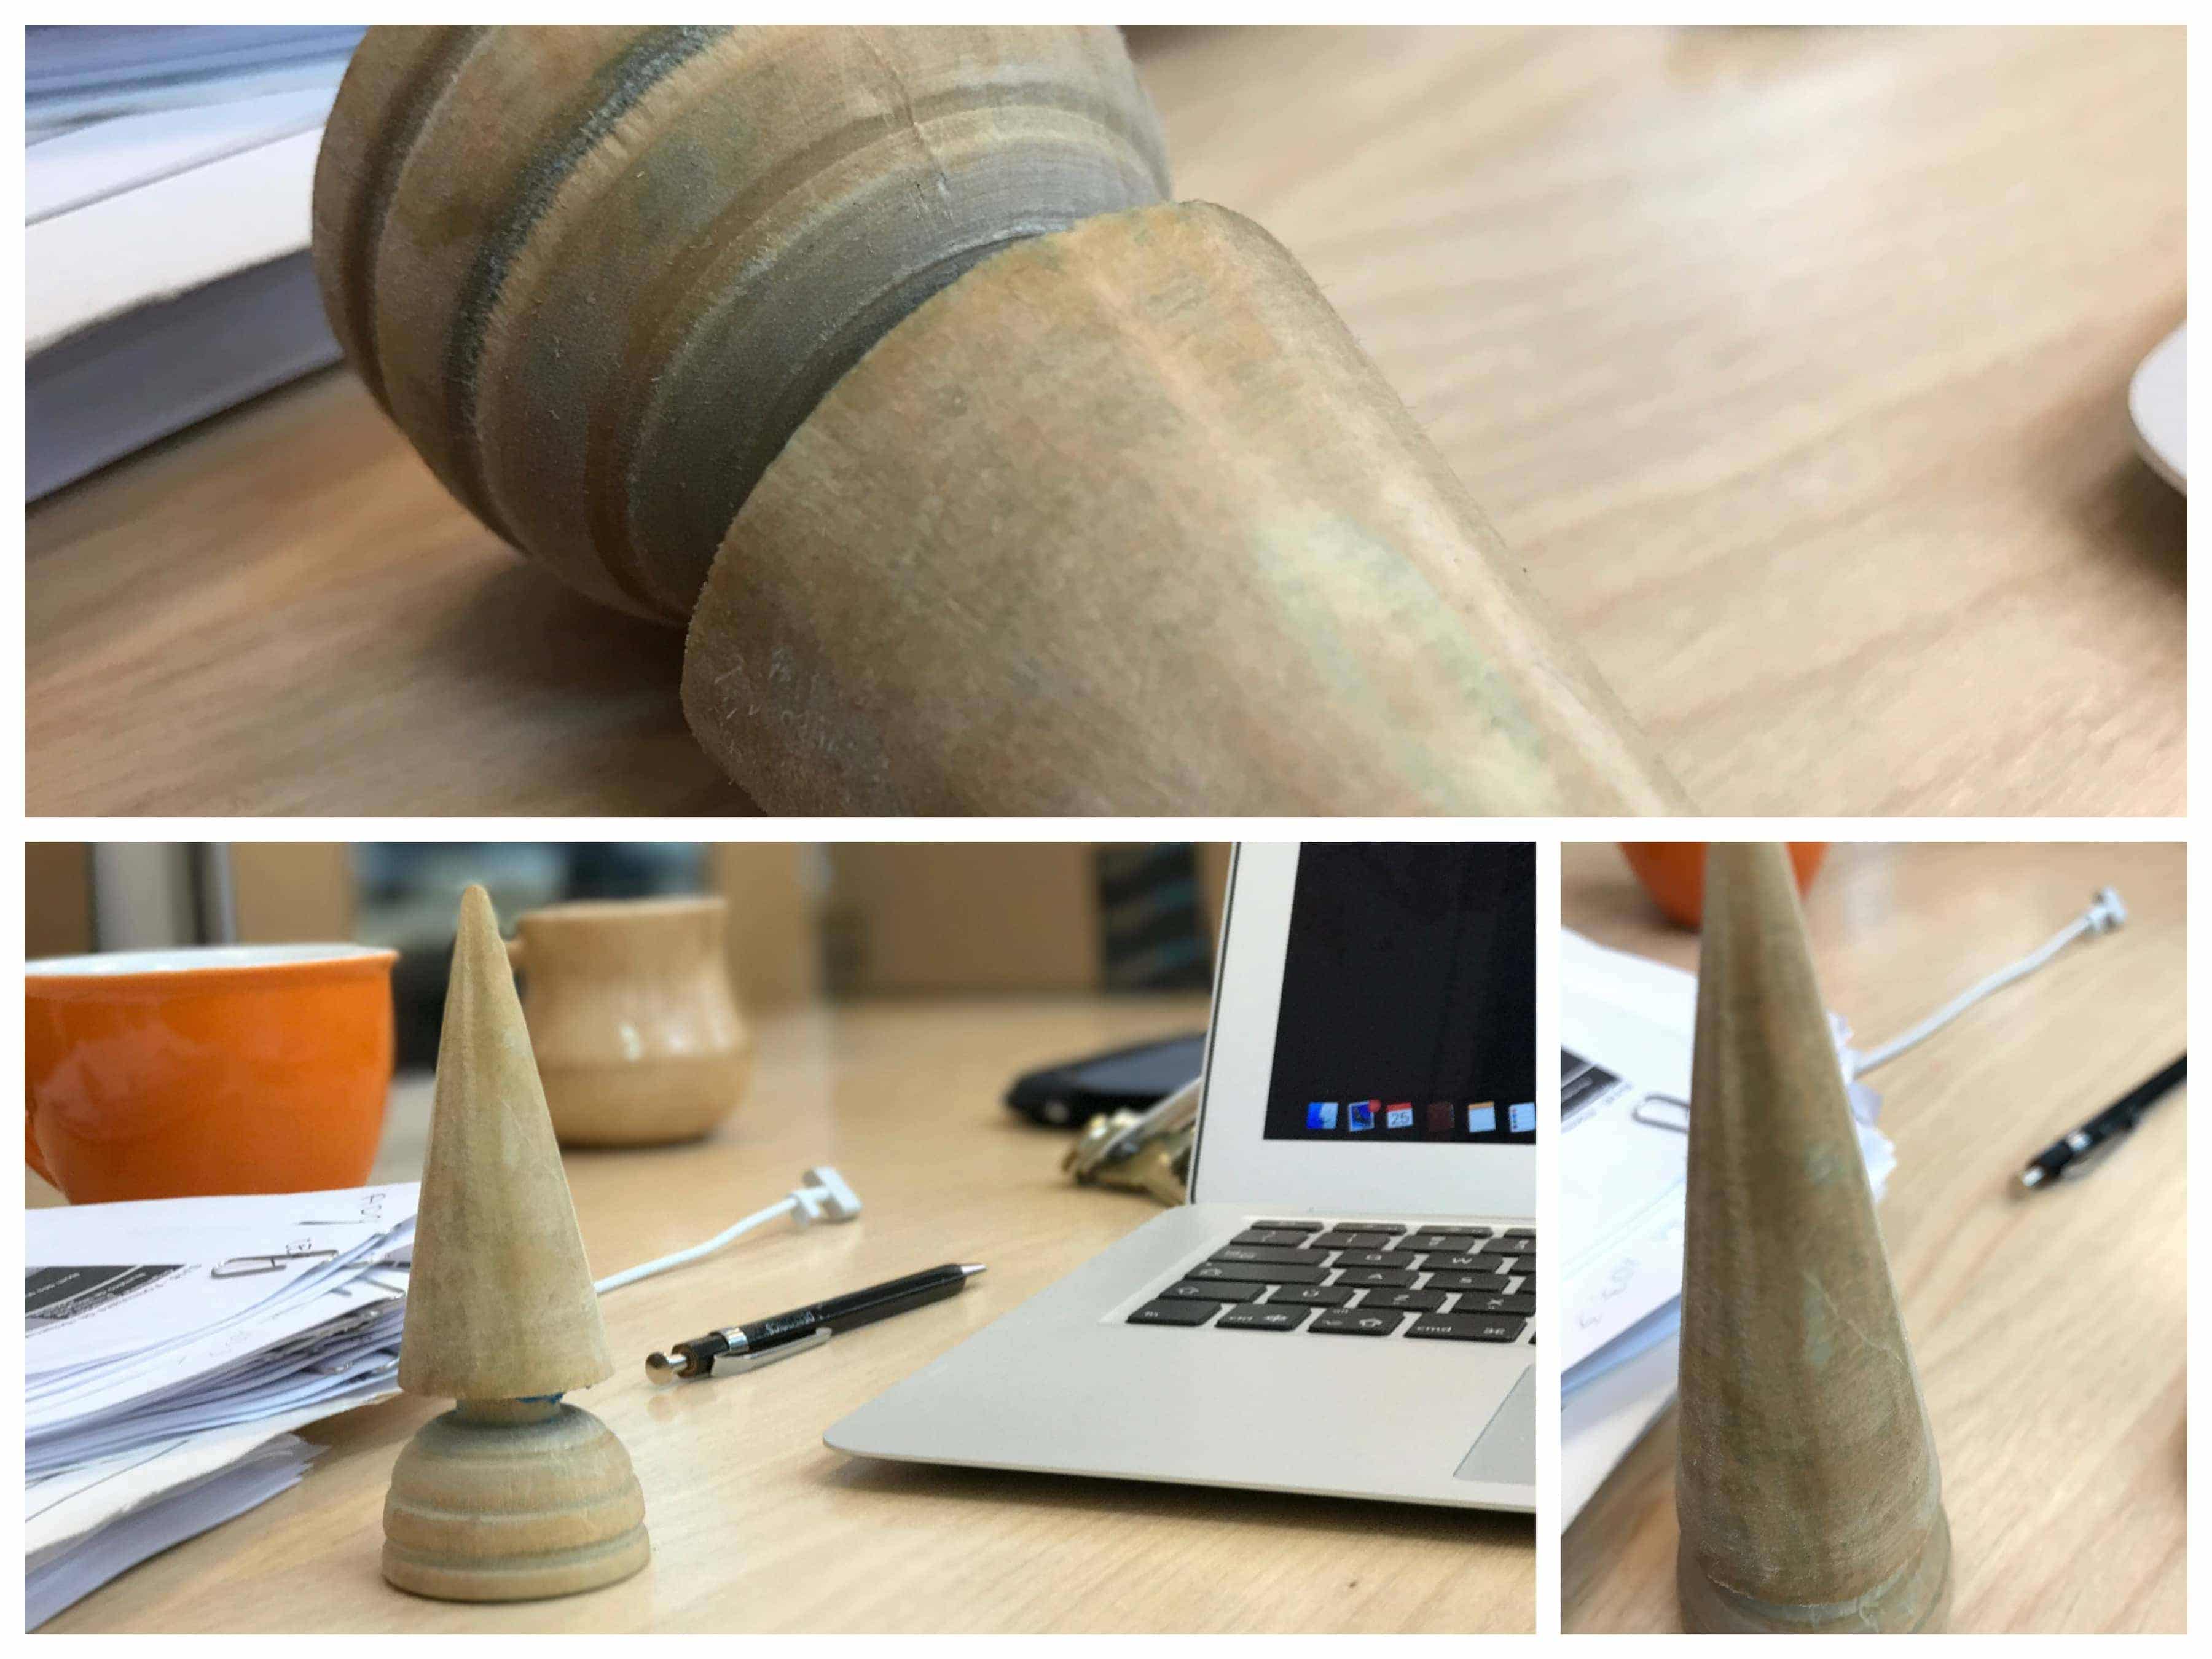
Here’s a small object that has sentimental value to me. So, this is why I chose this one. I'll do the process in two different ways. As I've been trained by professionals, I'll present a bit of how I made it with them and then, I'll show how I did with 3D milling and machinable wax molding.
1. The first step is to make a box that'll hold the flexible
silicon that'll use to make the mold. For that, I used the laser
cutter and an online software named MakerCase.
It is recommended to make the box a bit bigger than the object so there's
enough space around to work after.

 Do not glue the box, put some electrical tape instead to be
able to unmold the mold with more ease. I'm saying that because
I just glued it ! and now my fingers are full of crazy glue!
Do not glue the box, put some electrical tape instead to be
able to unmold the mold with more ease. I'm saying that because
I just glued it ! and now my fingers are full of crazy glue!
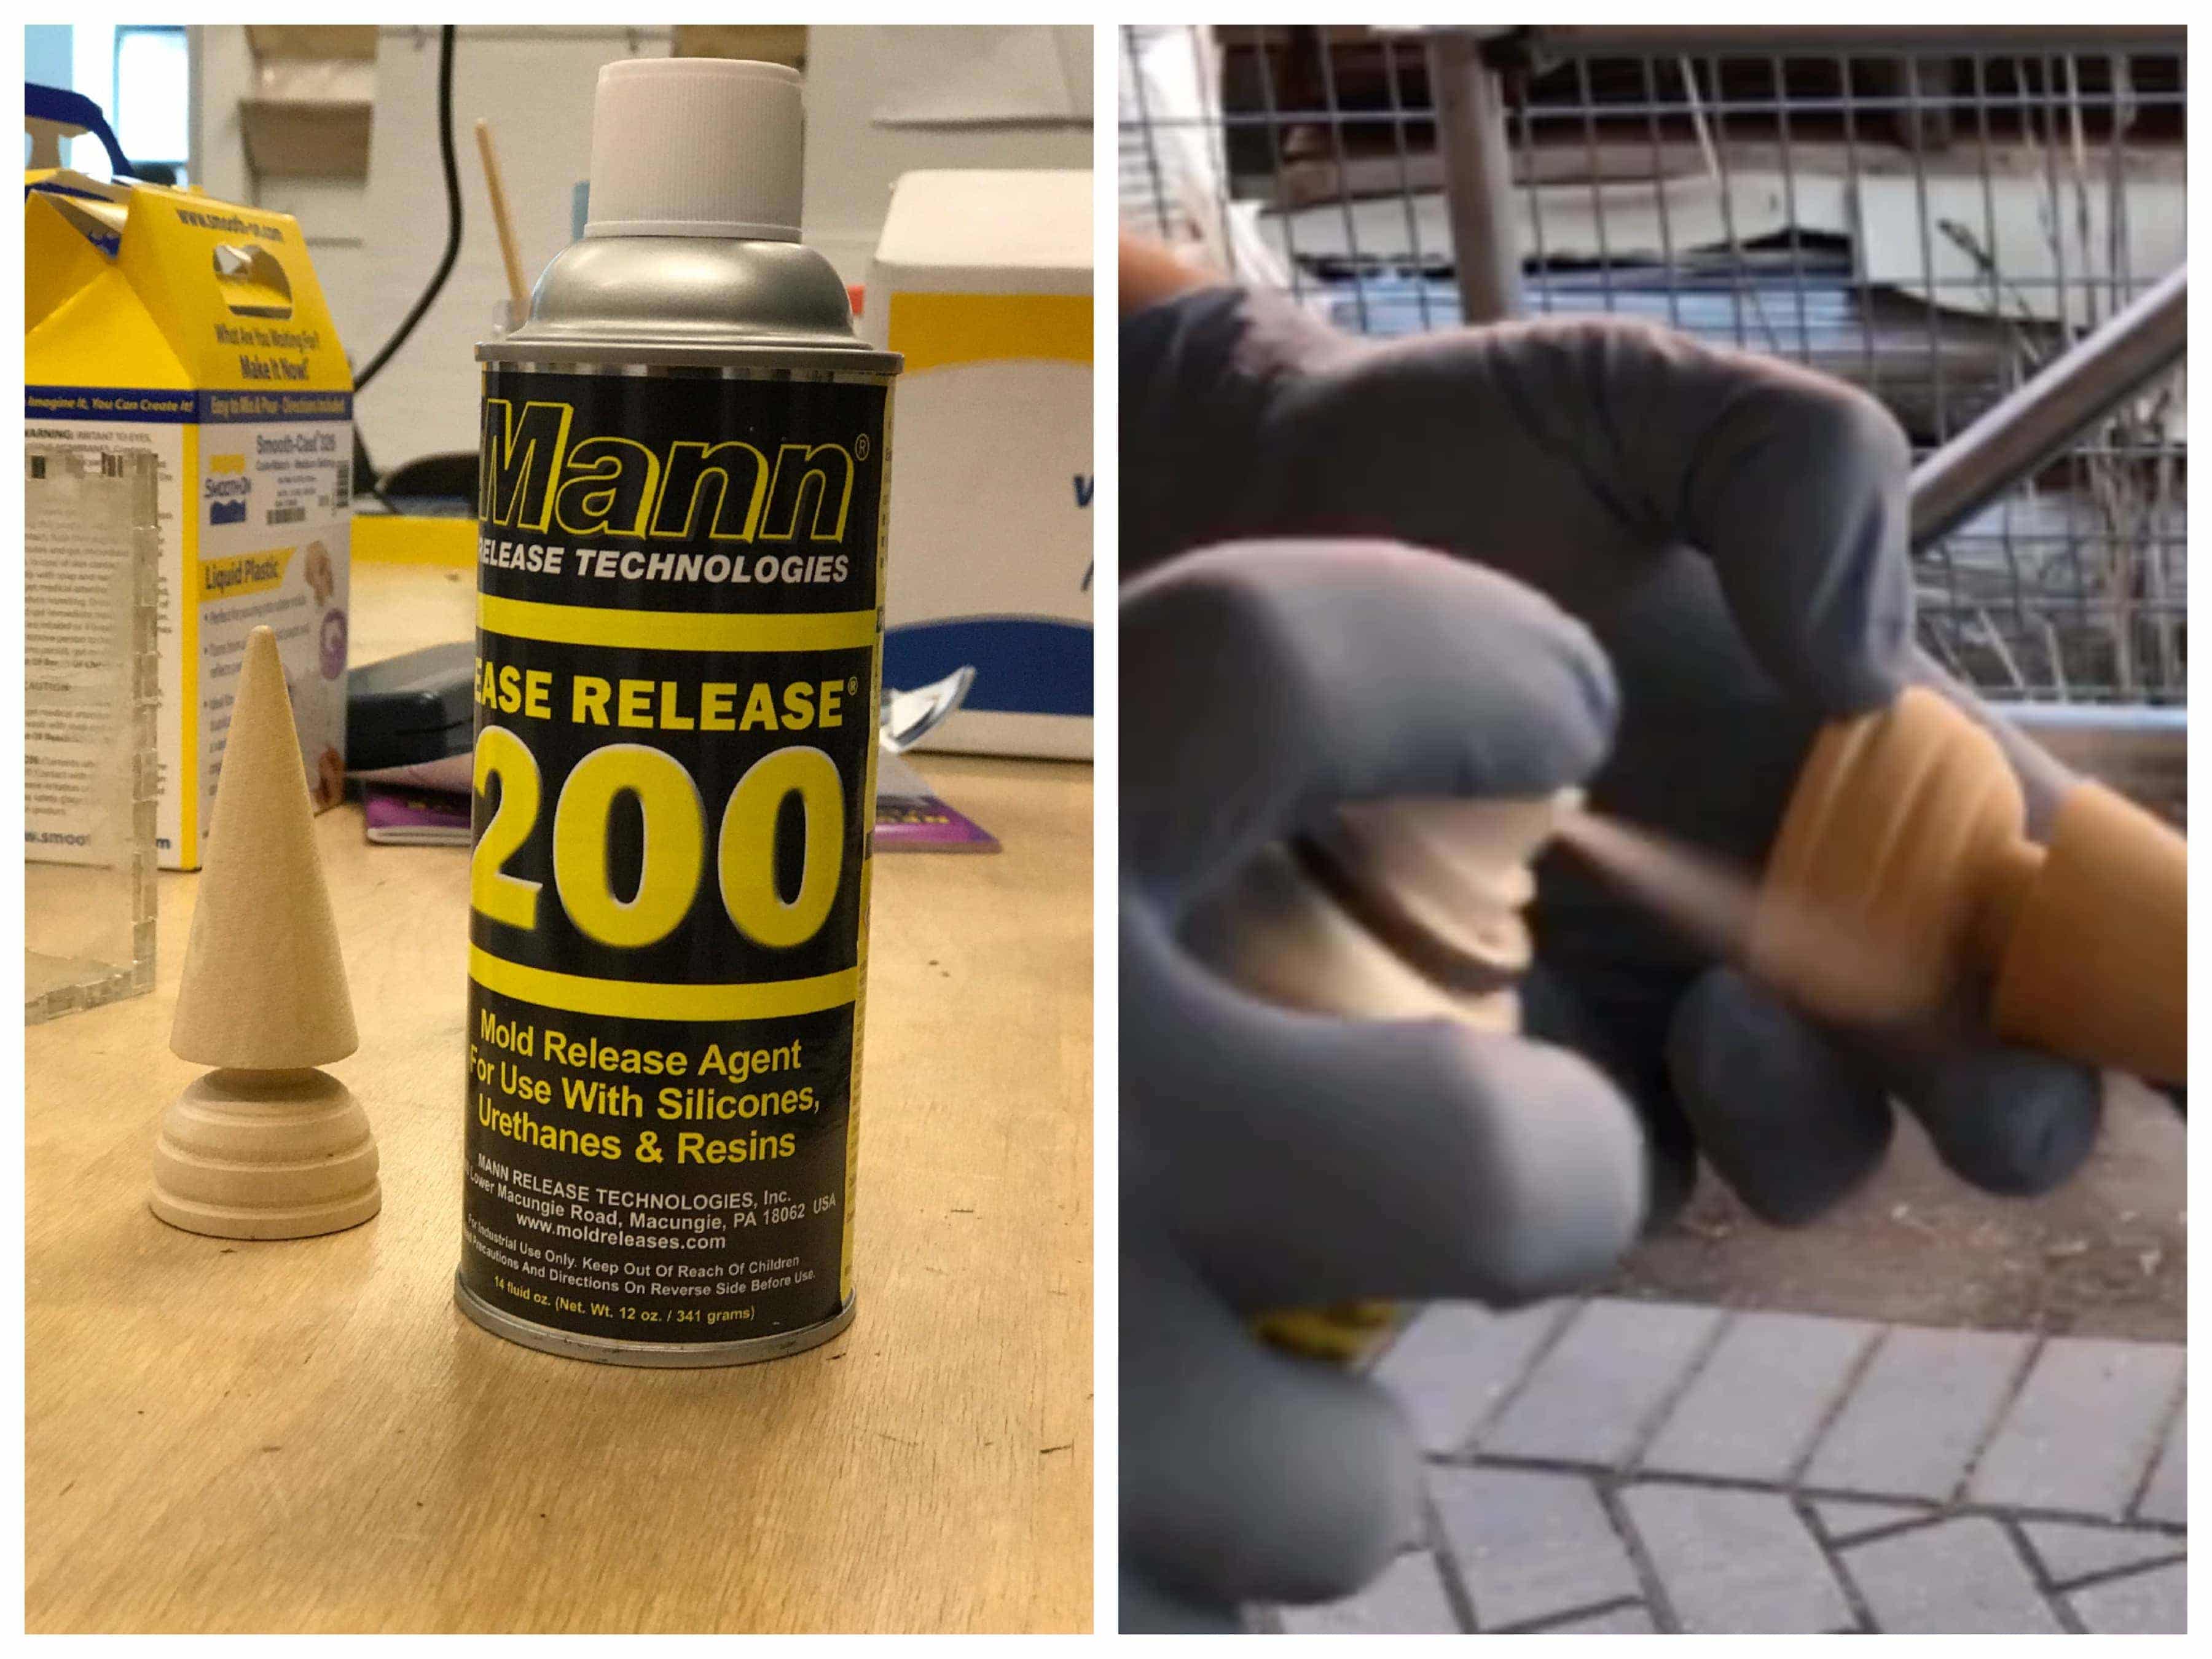
 Then, you have to put some mold release agent so the silicon does not stick to the model.
Considering that mine is made of wood, the silicon would definitely have the tendency to stick on it.
If my box was made in wood to, I’d have to put some on it too.
Also, I put some double sided tape underneath my model to stick it in the bottom of my box
so it doesn’t float in the mixture. Another hint to keep in mind, is that the silicon reacts
badly to the tape, it does not solidify well … in my case it’s not a problem, but in other cases,
it could be. Also, before to put the object in the box we calculated the volume of the box and
the volume of the object to evaluate the quantity of silicon we'd need.
Then, you have to put some mold release agent so the silicon does not stick to the model.
Considering that mine is made of wood, the silicon would definitely have the tendency to stick on it.
If my box was made in wood to, I’d have to put some on it too.
Also, I put some double sided tape underneath my model to stick it in the bottom of my box
so it doesn’t float in the mixture. Another hint to keep in mind, is that the silicon reacts
badly to the tape, it does not solidify well … in my case it’s not a problem, but in other cases,
it could be. Also, before to put the object in the box we calculated the volume of the box and
the volume of the object to evaluate the quantity of silicon we'd need.
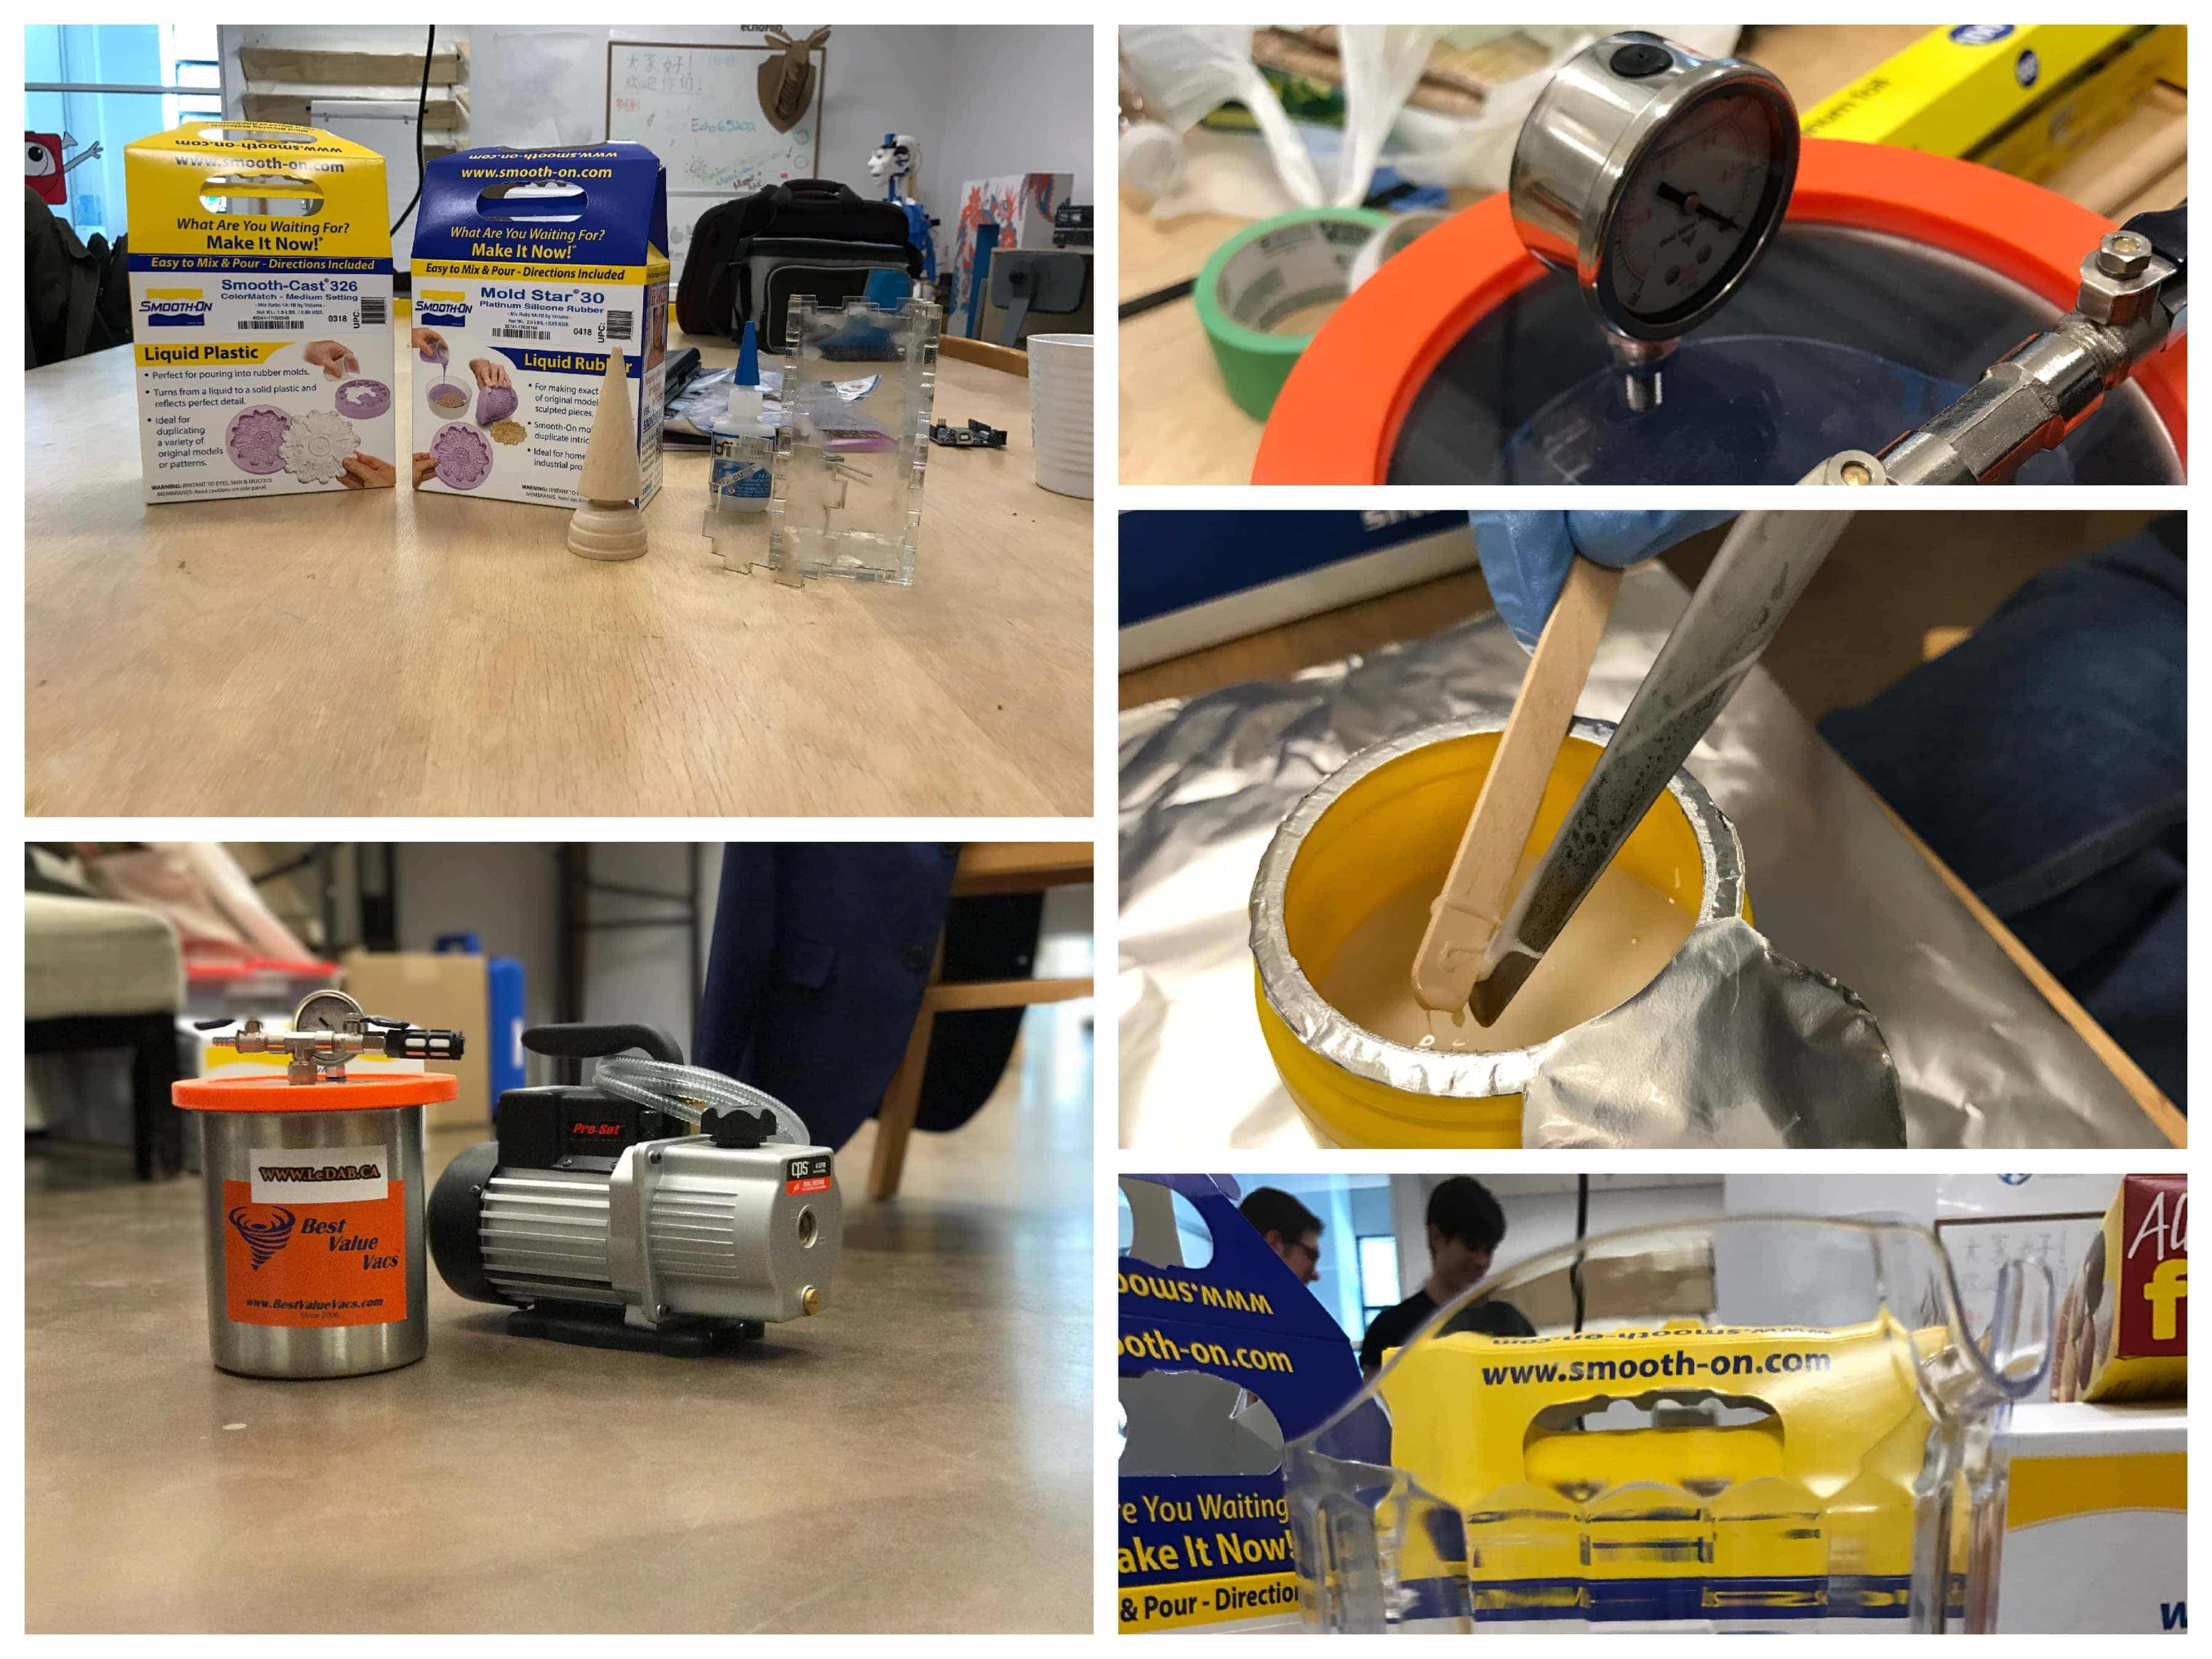
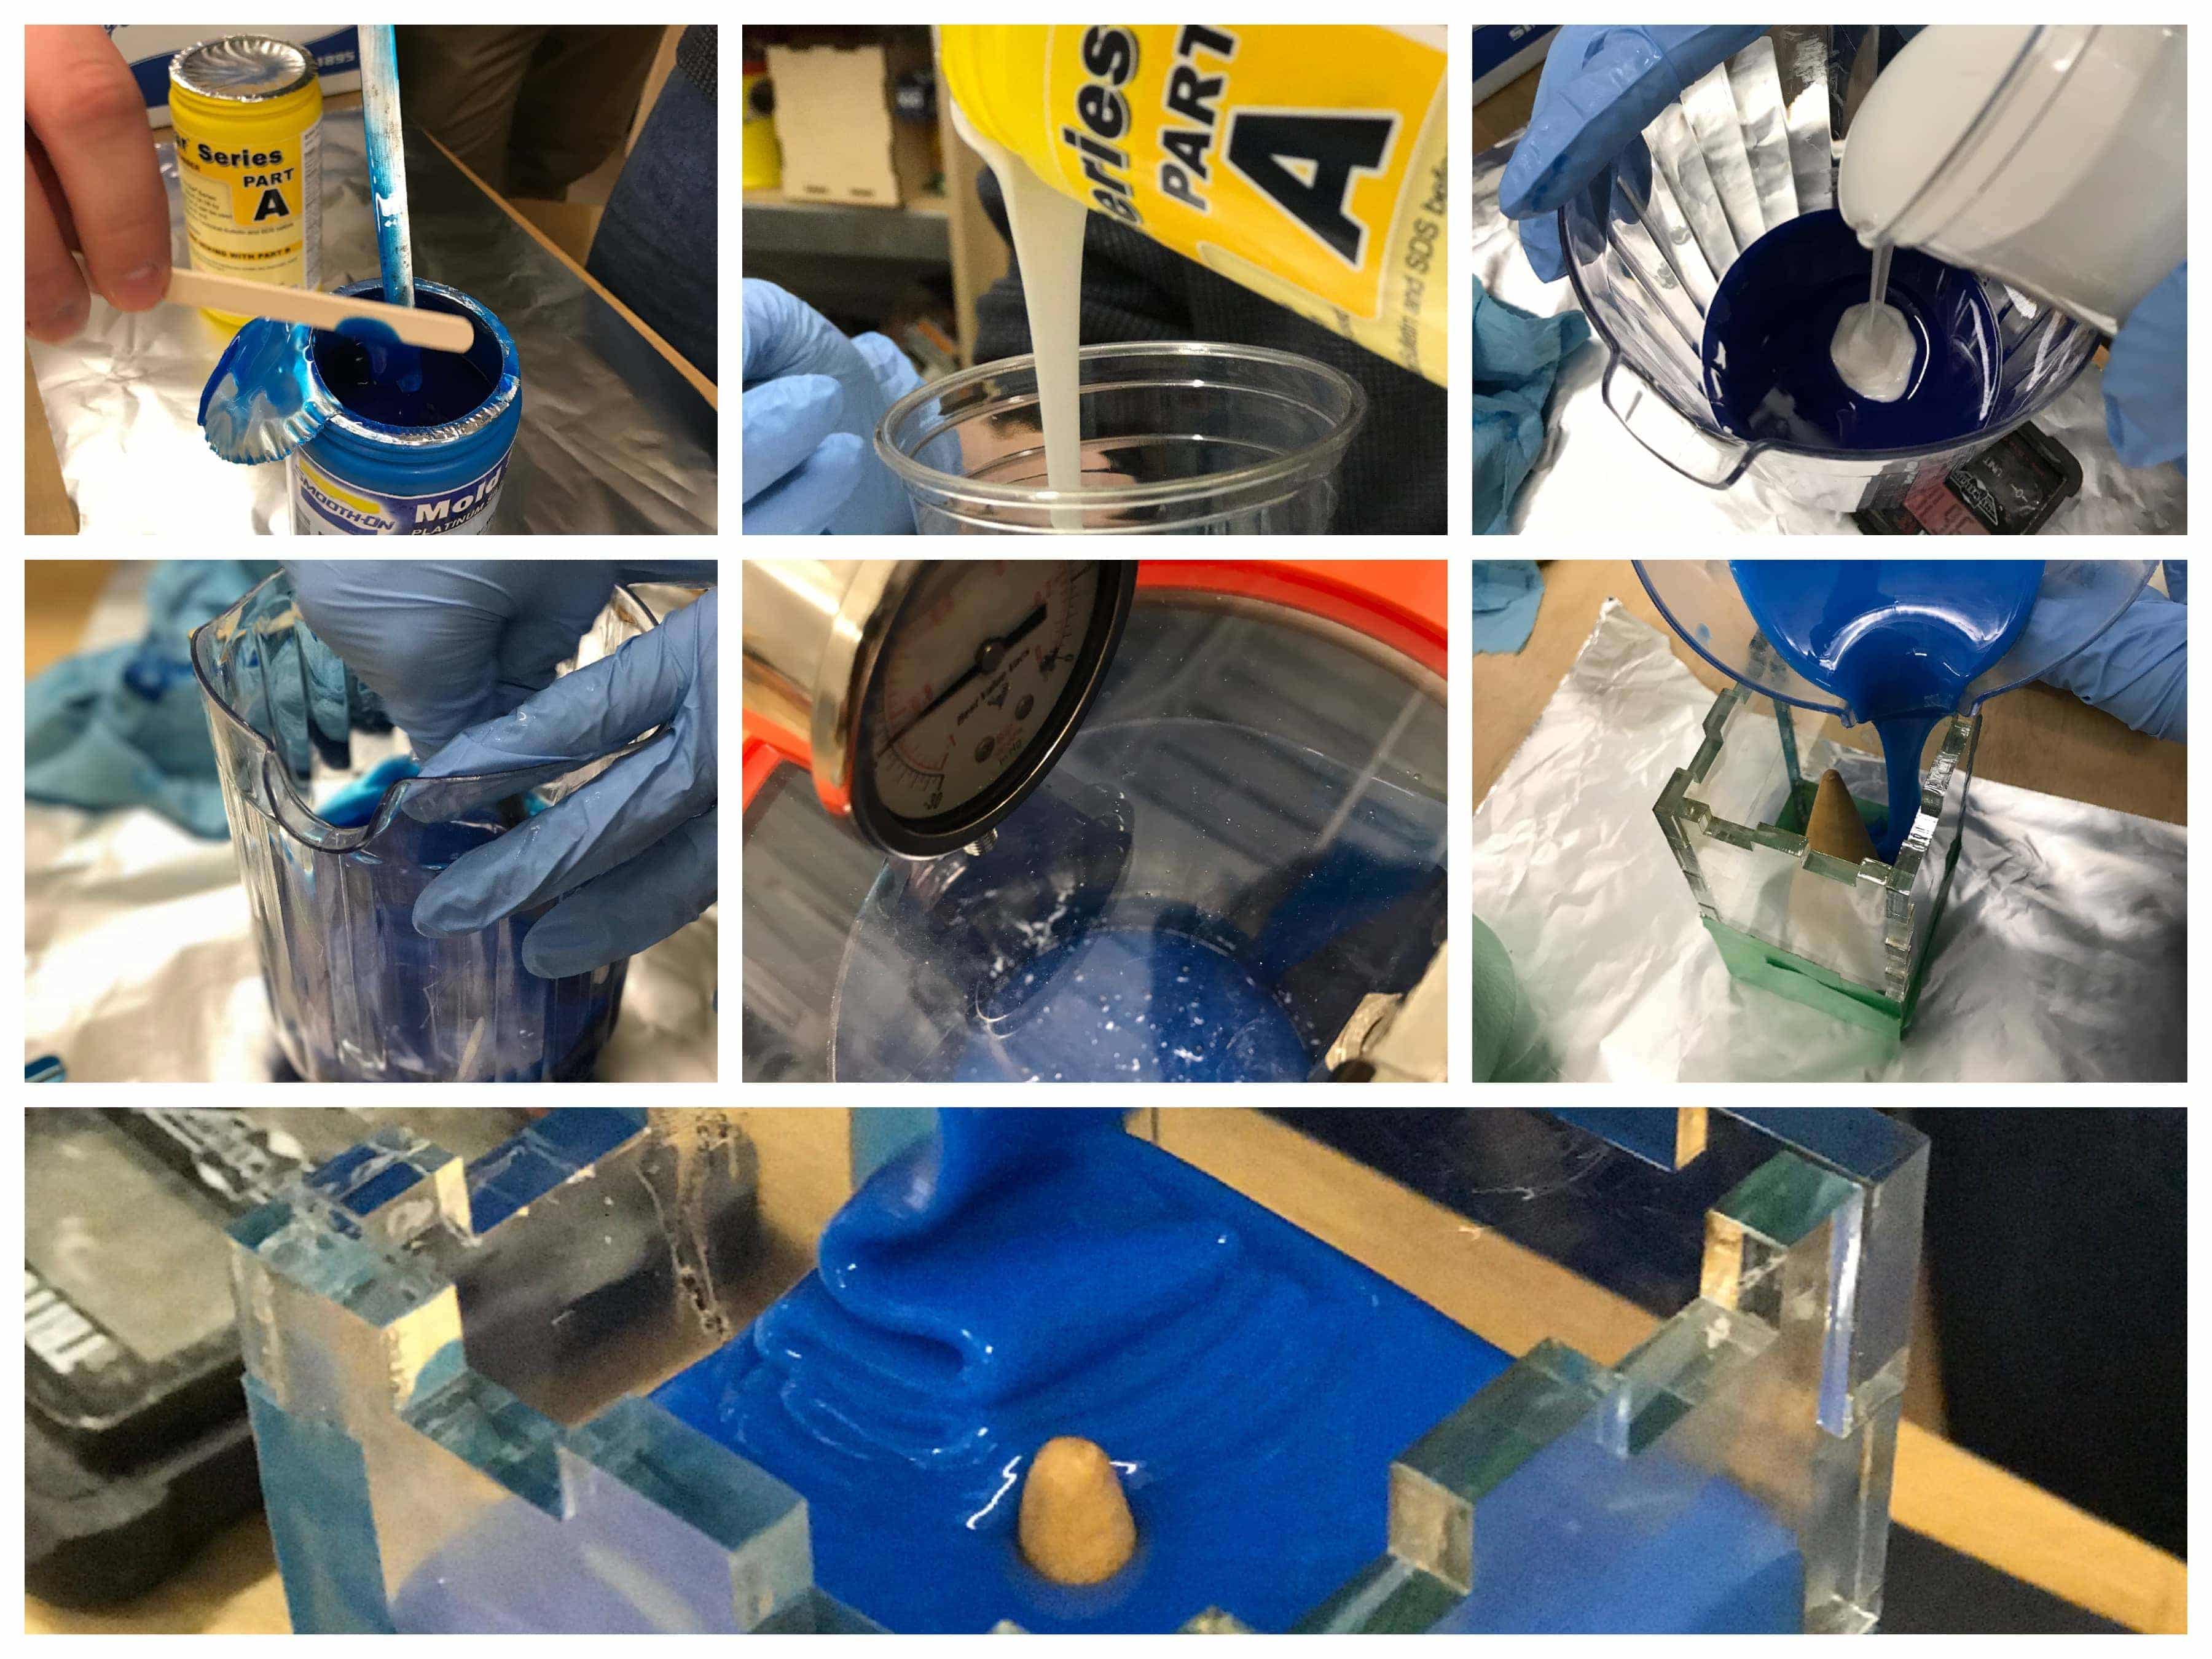
We brew the B part very vigorously for a long time and poured
some into a container. We did the same with part A and then
mixed them together a long time again to have a very homogenous
mixture. We put the mixture in an equipment which completely
removes the air to have a silicon without any bubbles. We filled
the box with the silicon carefully and waited 6 hours.
Yesterday morning I opened my mold slicing it. I did it with
a scalpel in a shape of a lighting, to facilitate the assembling.
Even with the spray, it did glue on the wood. I damaged my mold a
little bit because of that, it was very hard to put it out. The machinable
wax mold will absolutely resolve this problem. Then we mixed the resin,
the same way than de first two liquids, reassembled the mold put
it into the box again, taped it, tint it and poured the mixture
in carefully. This time we waited 1 hour and a half. I knew already
that the piece wouldn't be perfect but at this point, there was no
way I could do another one. The only solution would be to reshape
it manually or do the process with machinable wax, which I'll do.

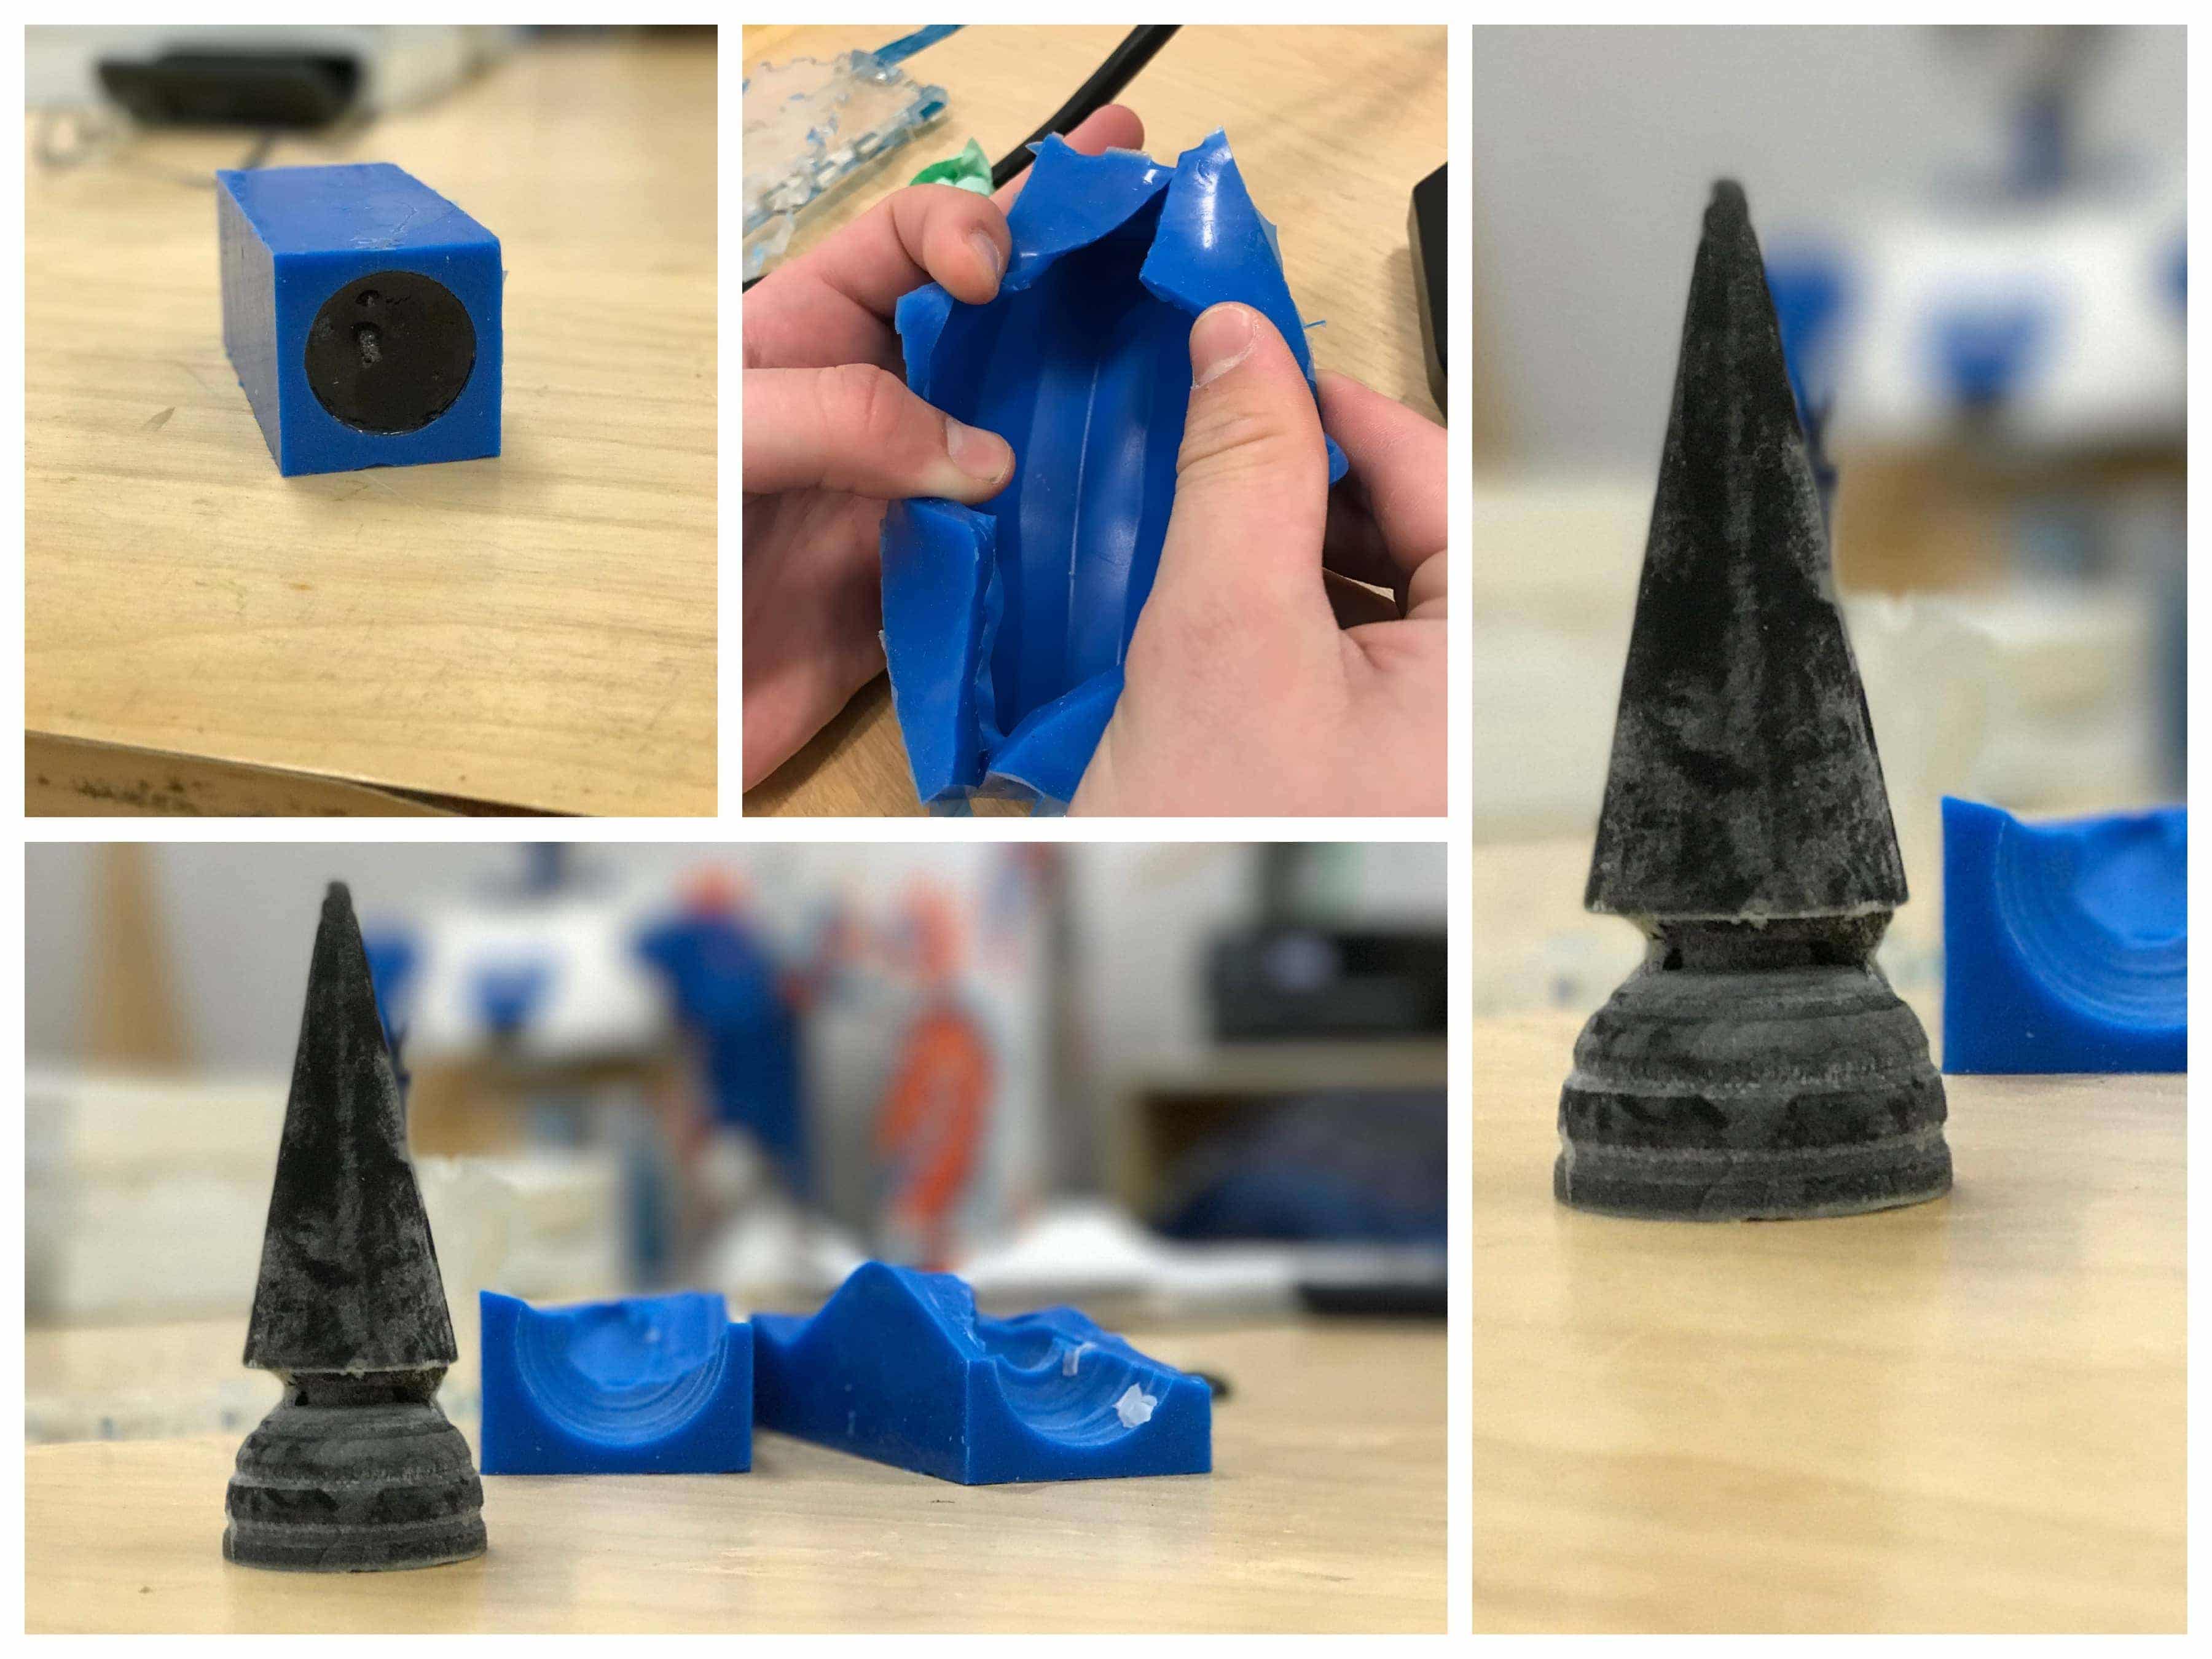 Not bad for a first try. The unmolding difficulties had effectivly made imperfections
in the final object. The resin is harder than I expected it'd be difficul to
reshape it manually. I'm continuing with the machinable wax.
Not bad for a first try. The unmolding difficulties had effectivly made imperfections
in the final object. The resin is harder than I expected it'd be difficul to
reshape it manually. I'm continuing with the machinable wax.
Molding and casting with machinable wax
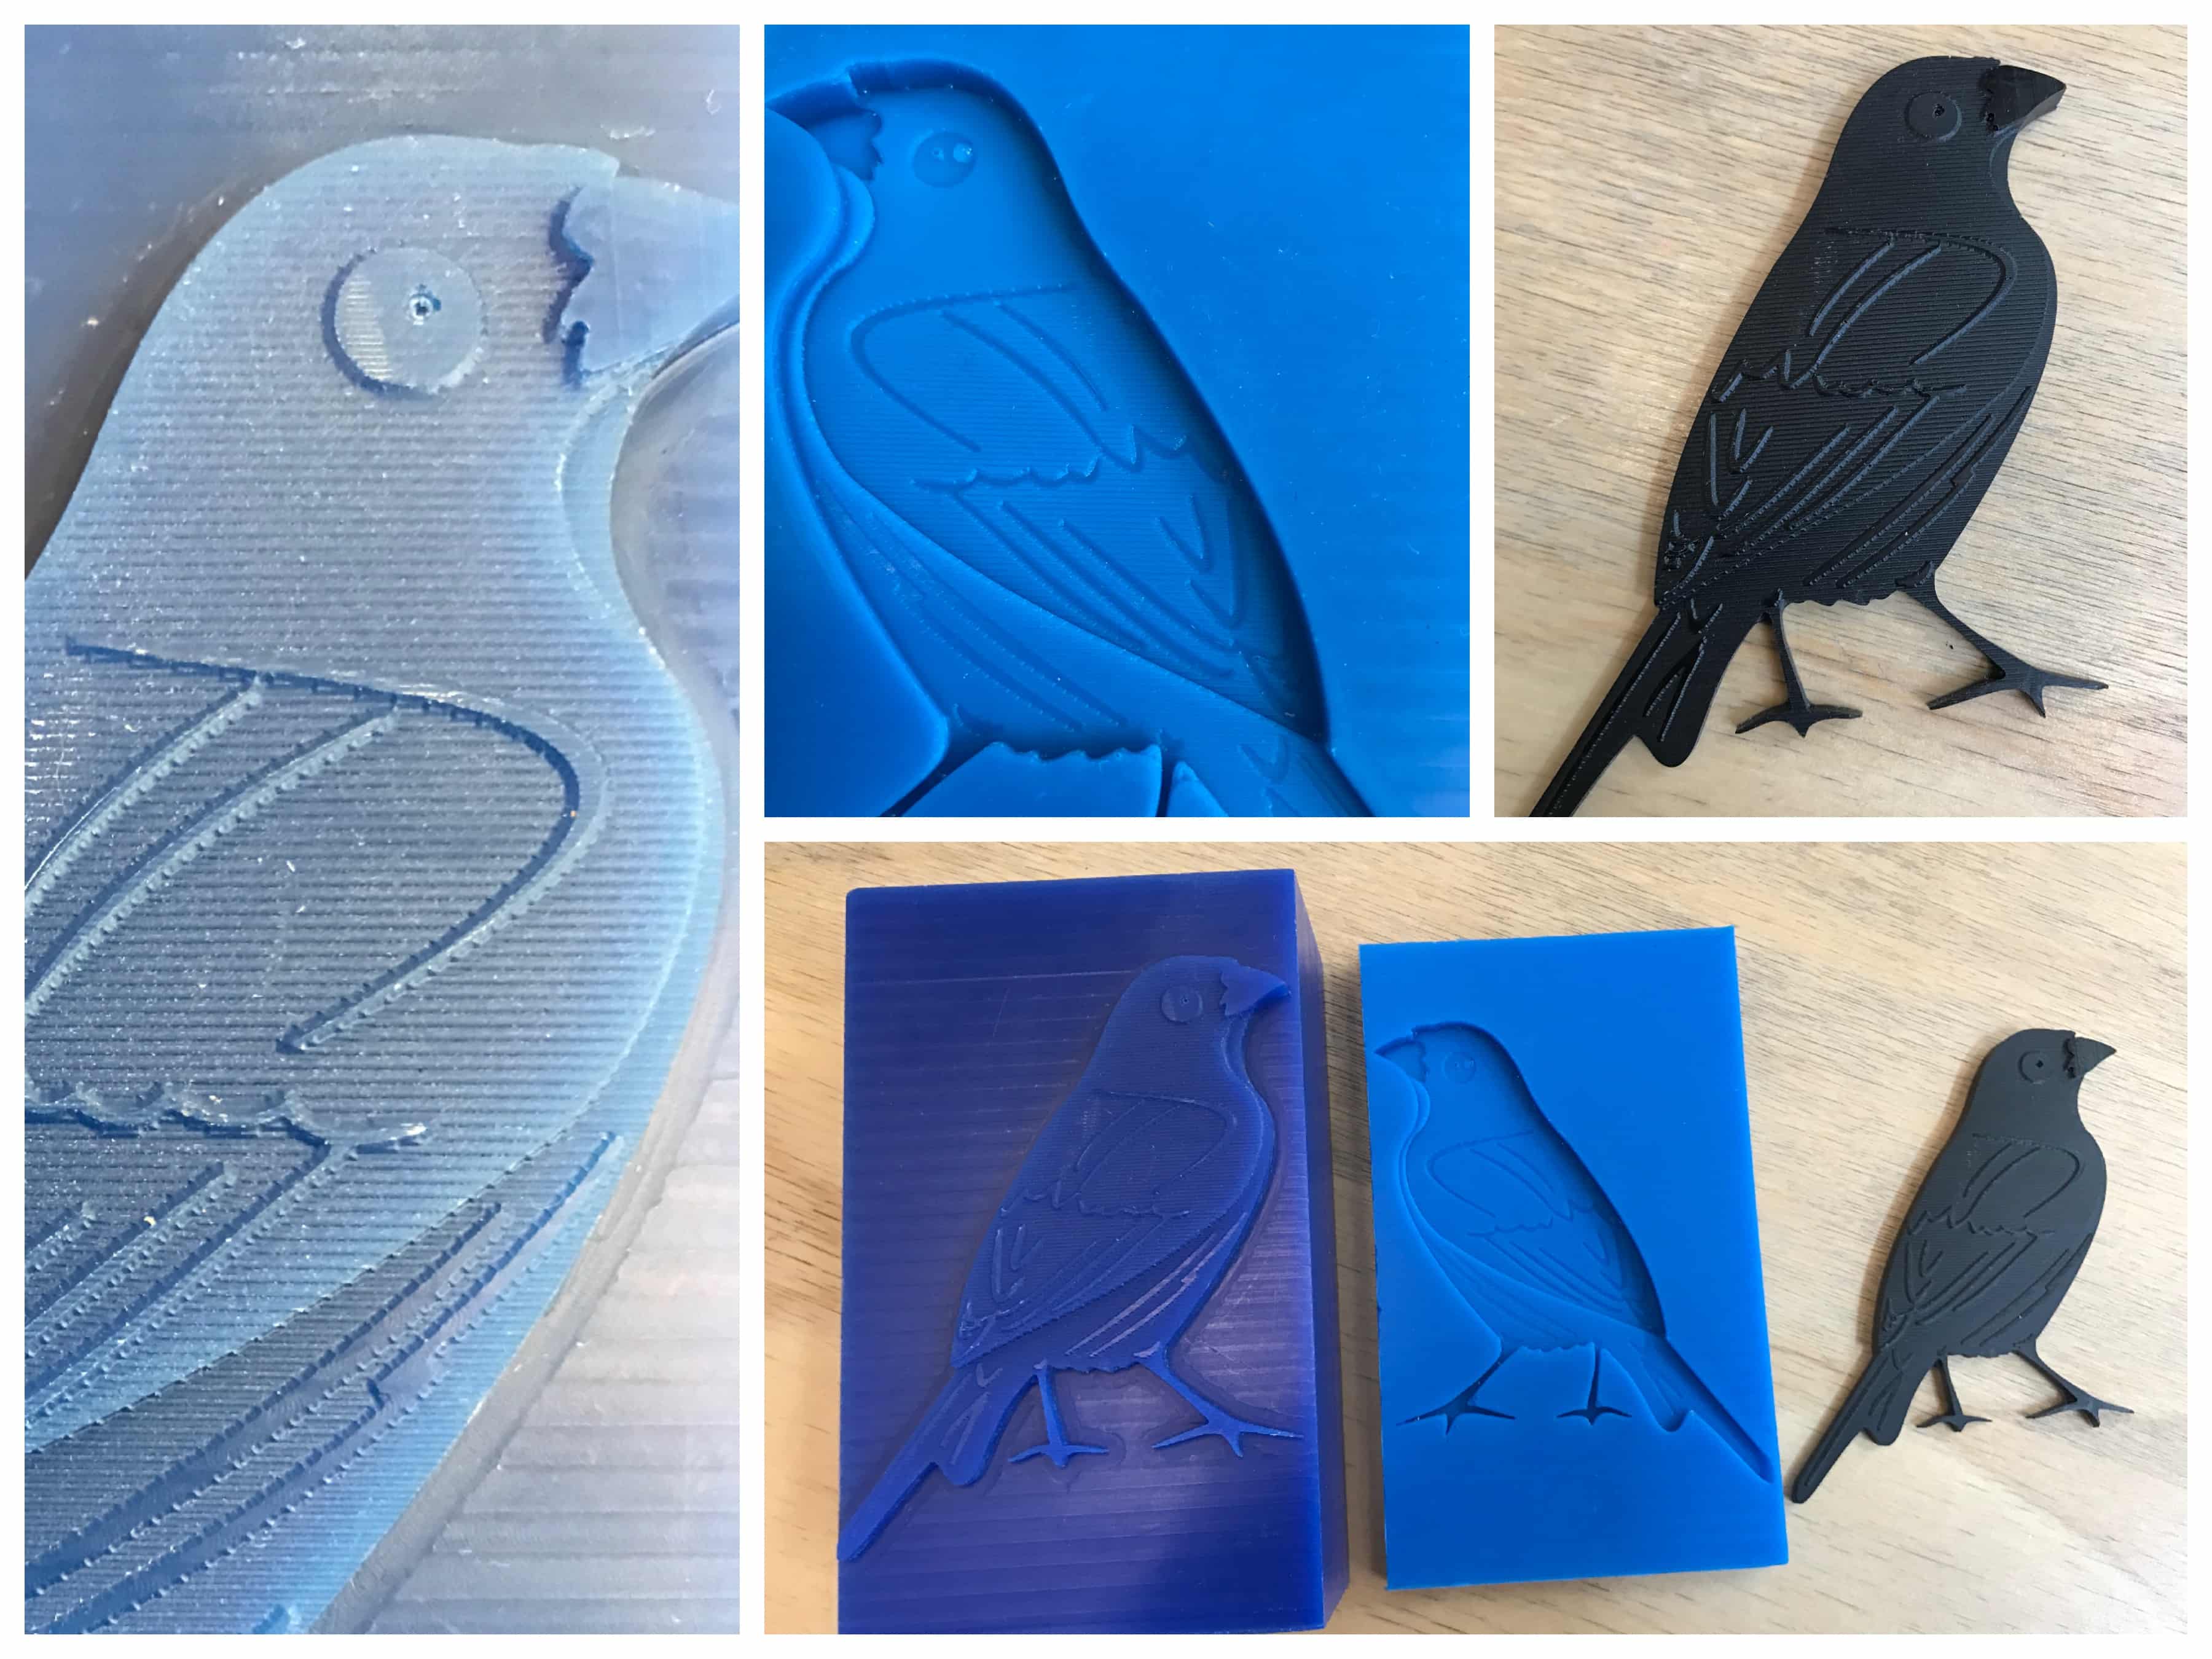
For this part of the assignment, I decided to make a mold that I'll cast with the same resin then the first one. I wanted to make ice cube at first but the legs of the bird were too thin so it broke.
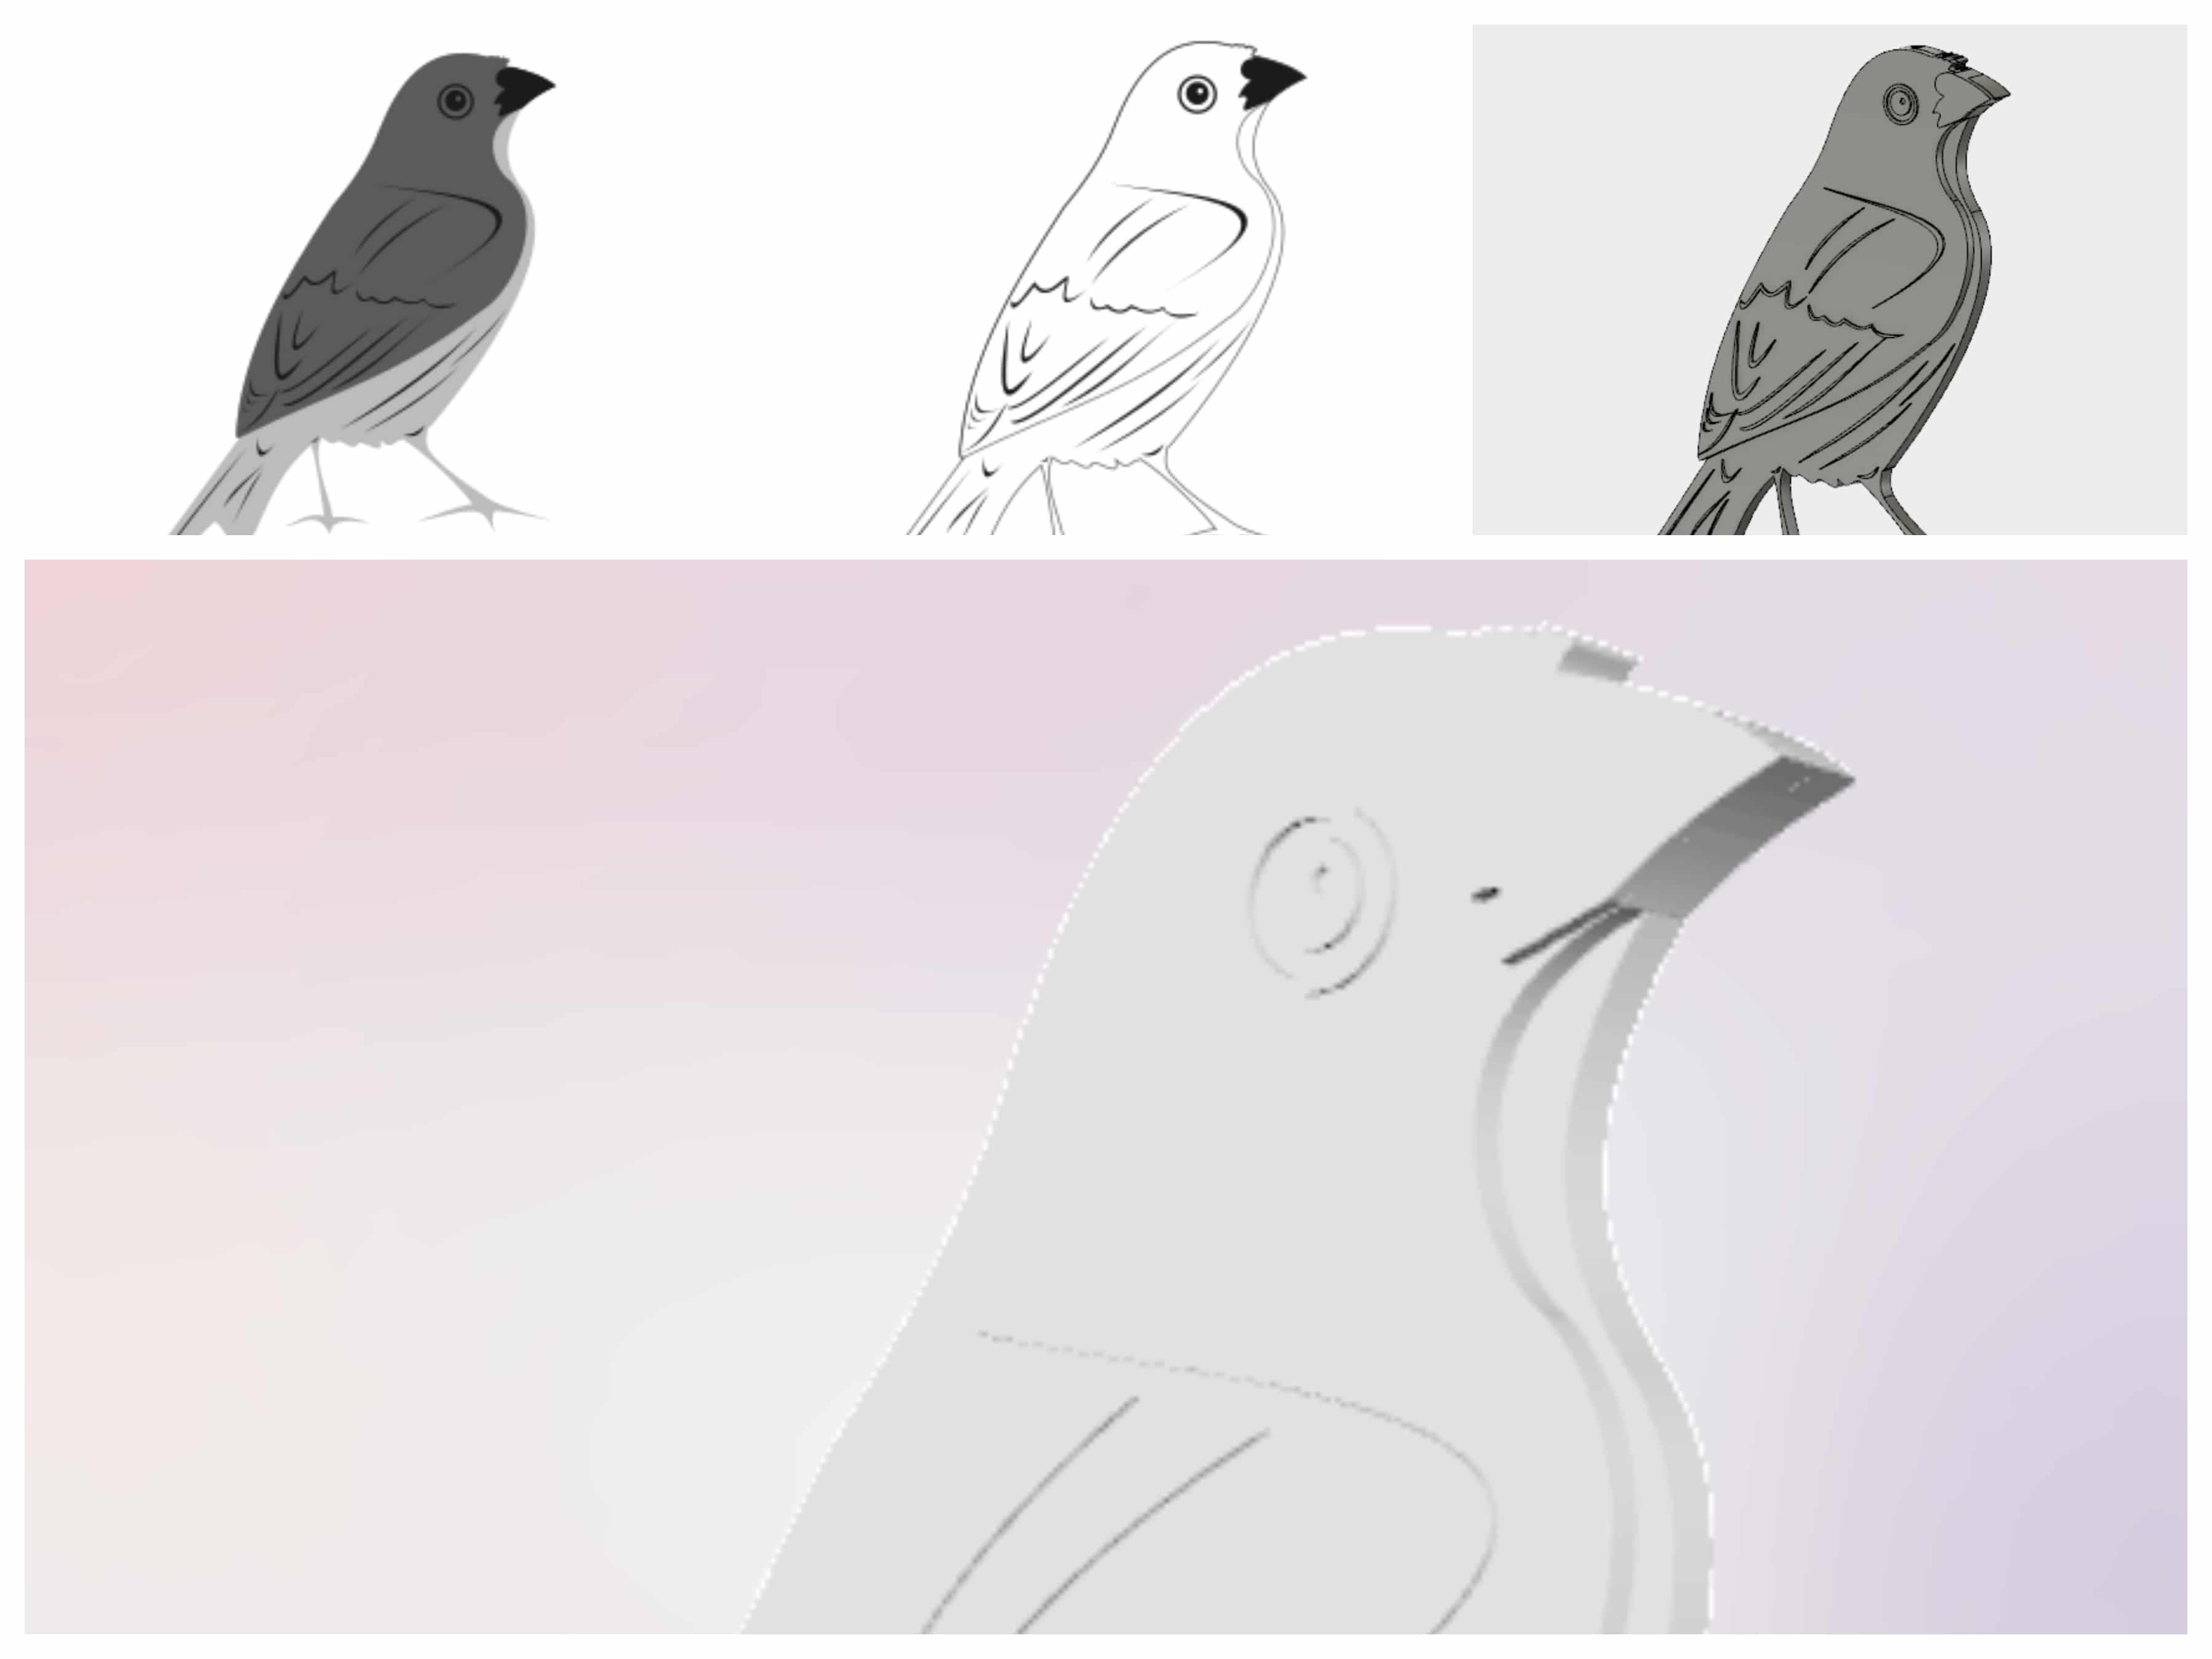
Design
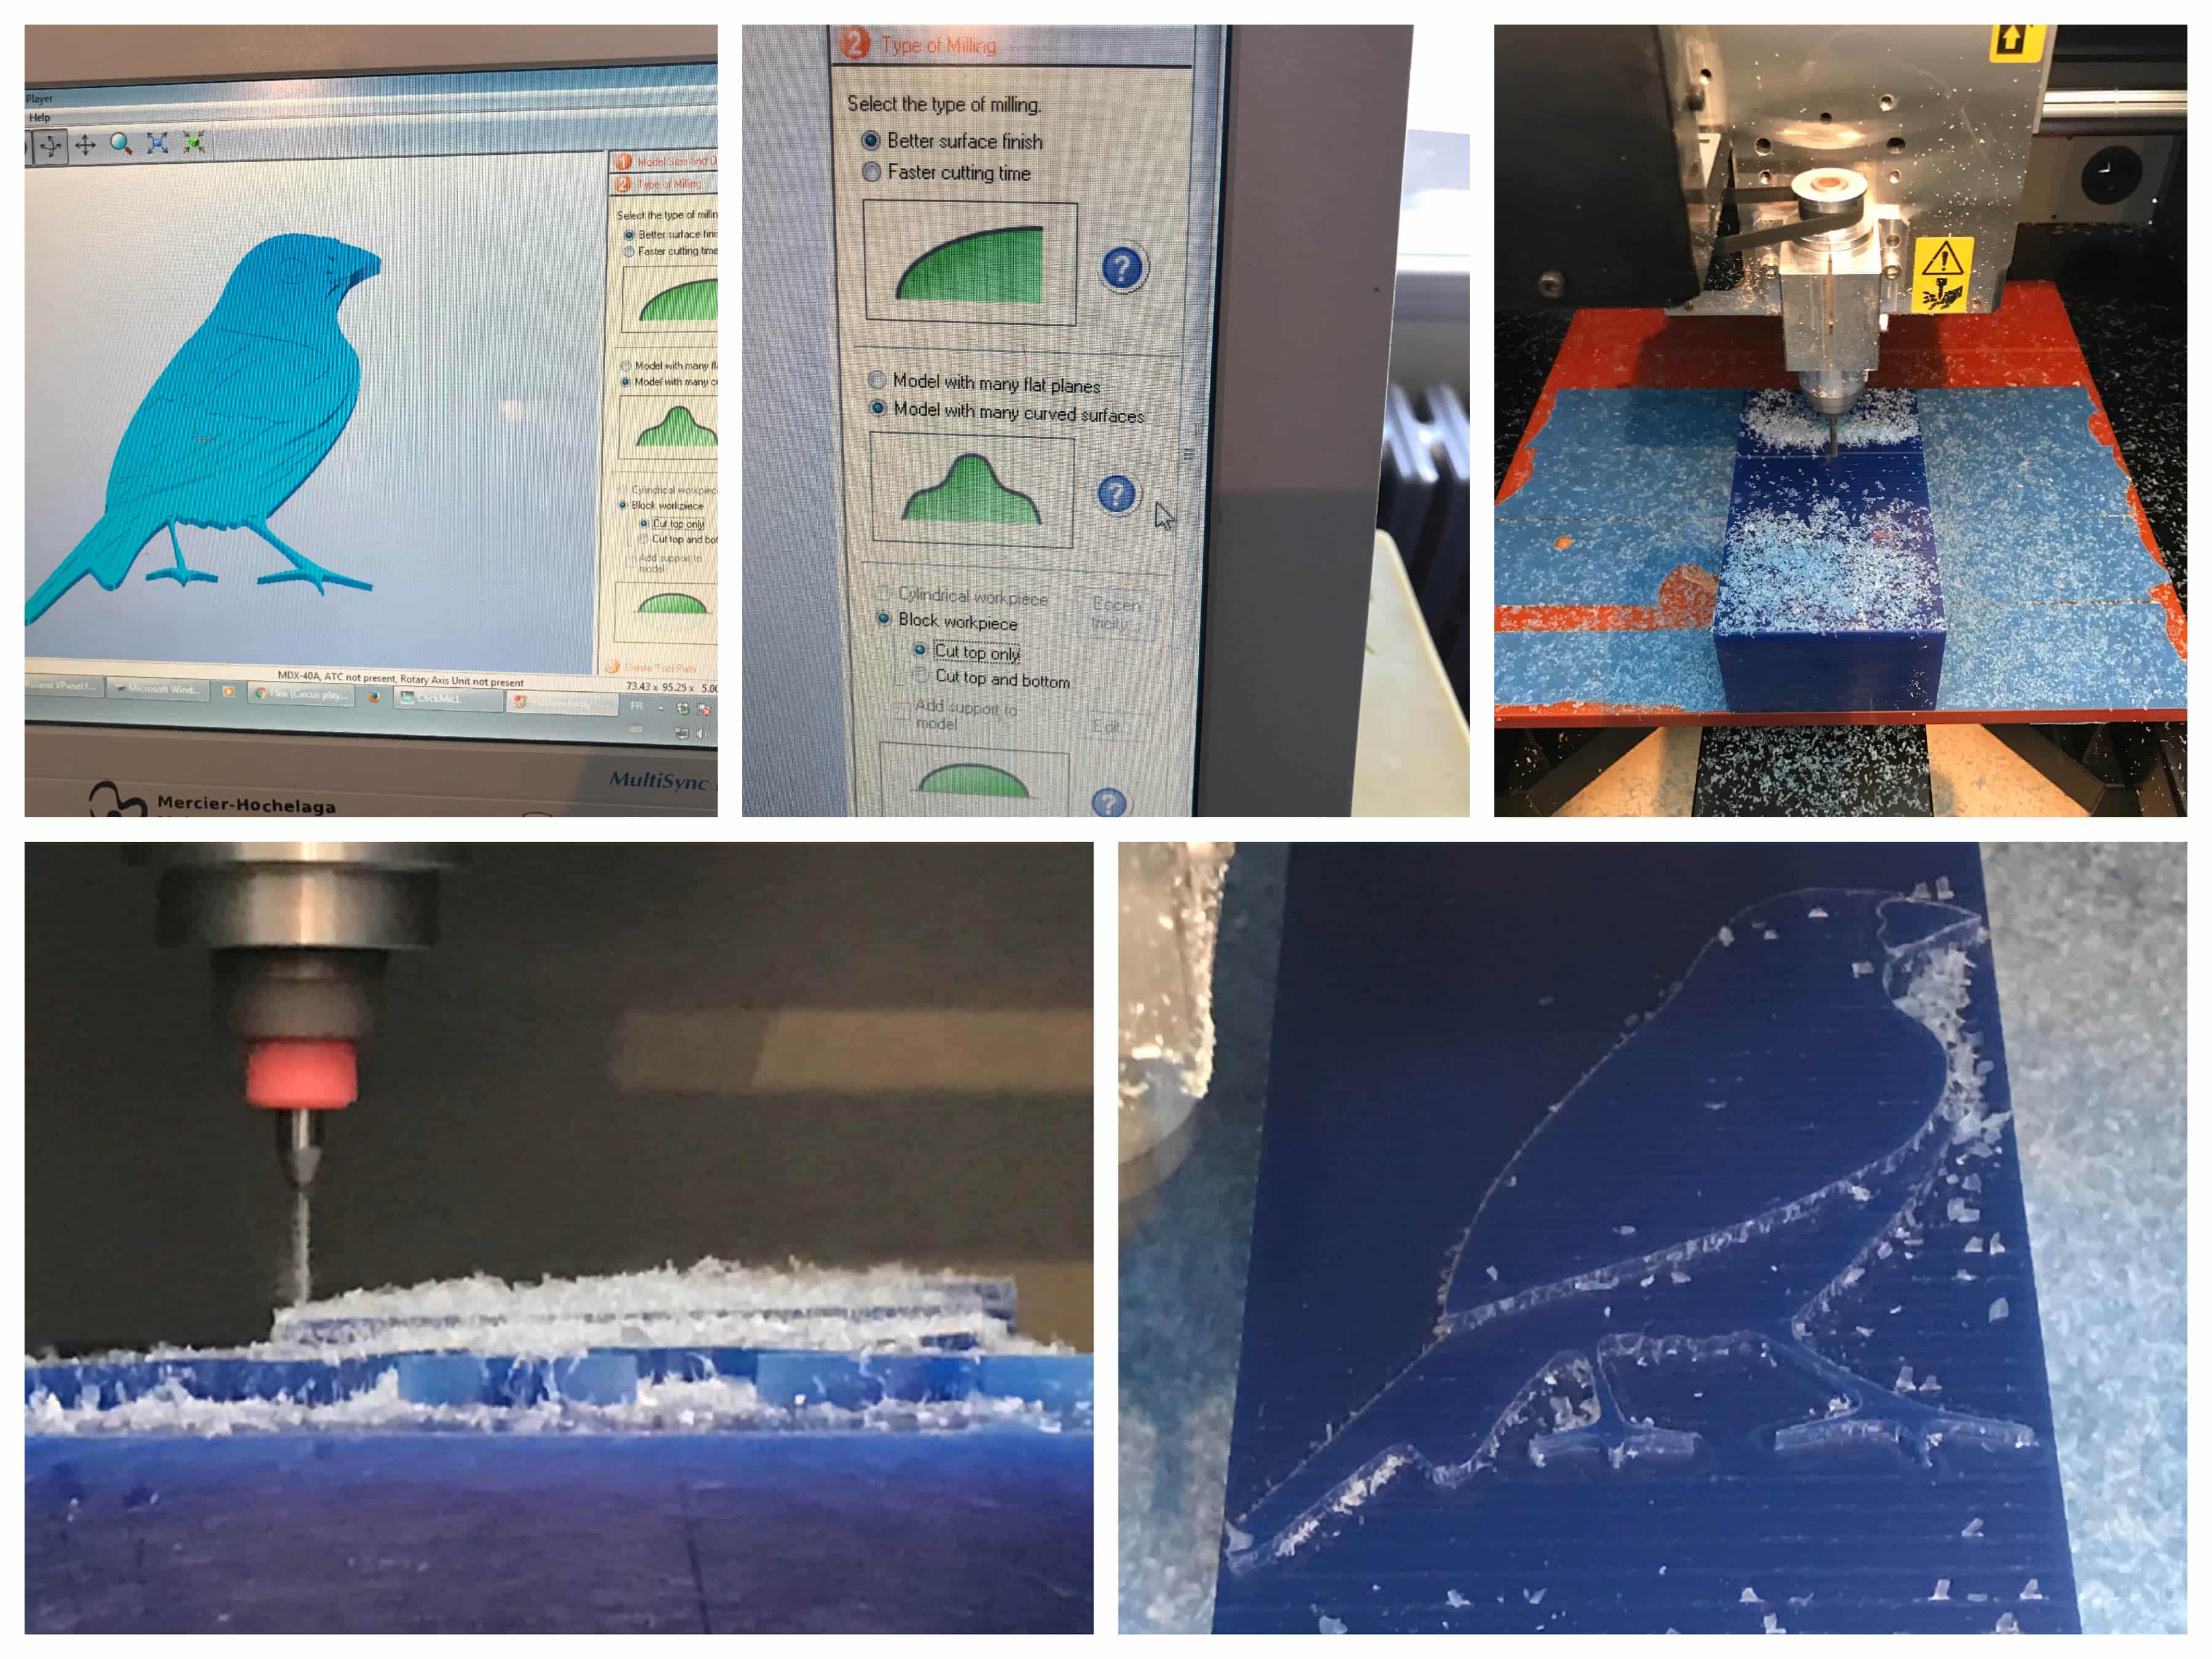
The first step here was, for me, to design the mold was to design it in 2D with Inkscape, because it's much more easy for me and I wanted to make a flat mold so this technic would definitely be useful to me. Then, I imported the .svg into Fusion 360 to extrude the design. To be able to do it properly I realized that I needed to import every layer of the design separately to be able to give them different thickness. To make that possible, it was important to draw a square around each of the layers to serve as a reference point to center all of them in Fusion360. The picture below shows the process from an Inkscape drawing to contours, then Fusion360 and at the end, the big one, the .stl that I exported from Fusion360 to continue to the next step.
 Generating the Gcode and milling the wax
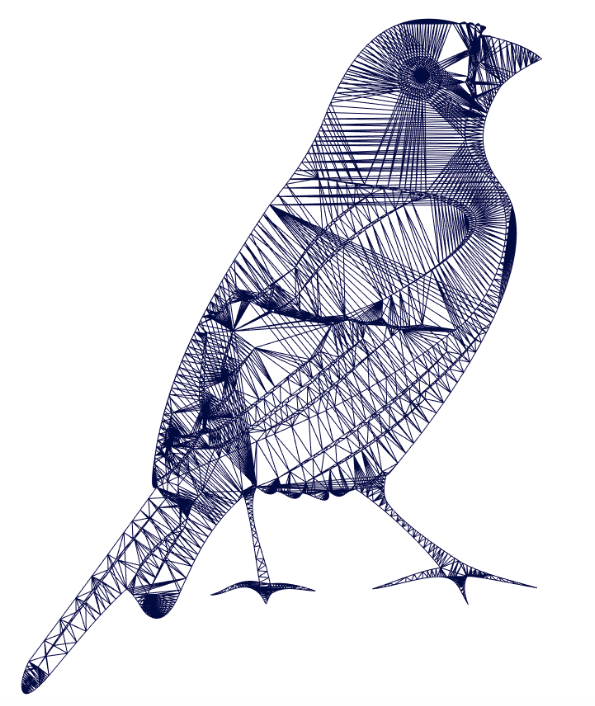
At first, I tried to generate the Gcode within the FabModules as we can import .STL files. I made the process but was wondering if the process would be the same then with 2D milling like with the PCBs. I was doubting because Neil told us that the process might be different. Even if I didn't use this specific process at the end, the visual representation of it in the FabModules was awesome! I'd make an awesome tattoo I guess.
It was time to go see my instructor! He explained to me that the specific milling machine, the one I presented in earlier weeks, was better with its owner's software. He showed me the process. The pictures for this phase are not very good but you can see the chosen settings. Then, you export it to the other software, which I present in week4, chose a tool (1/8 bit), place the 0 in X, Y and Z axes start the machine.
Casting the silicon and the resin
Here, it is pretty much the same process than for the first project so I'm not going to repeat myself. Quickly, I made an acrylic case with makercase which I taped, mixed the parts of the silicon and then pour it carefully. For the resin, the process again is the same than earlier. The results are pretty nice I think.
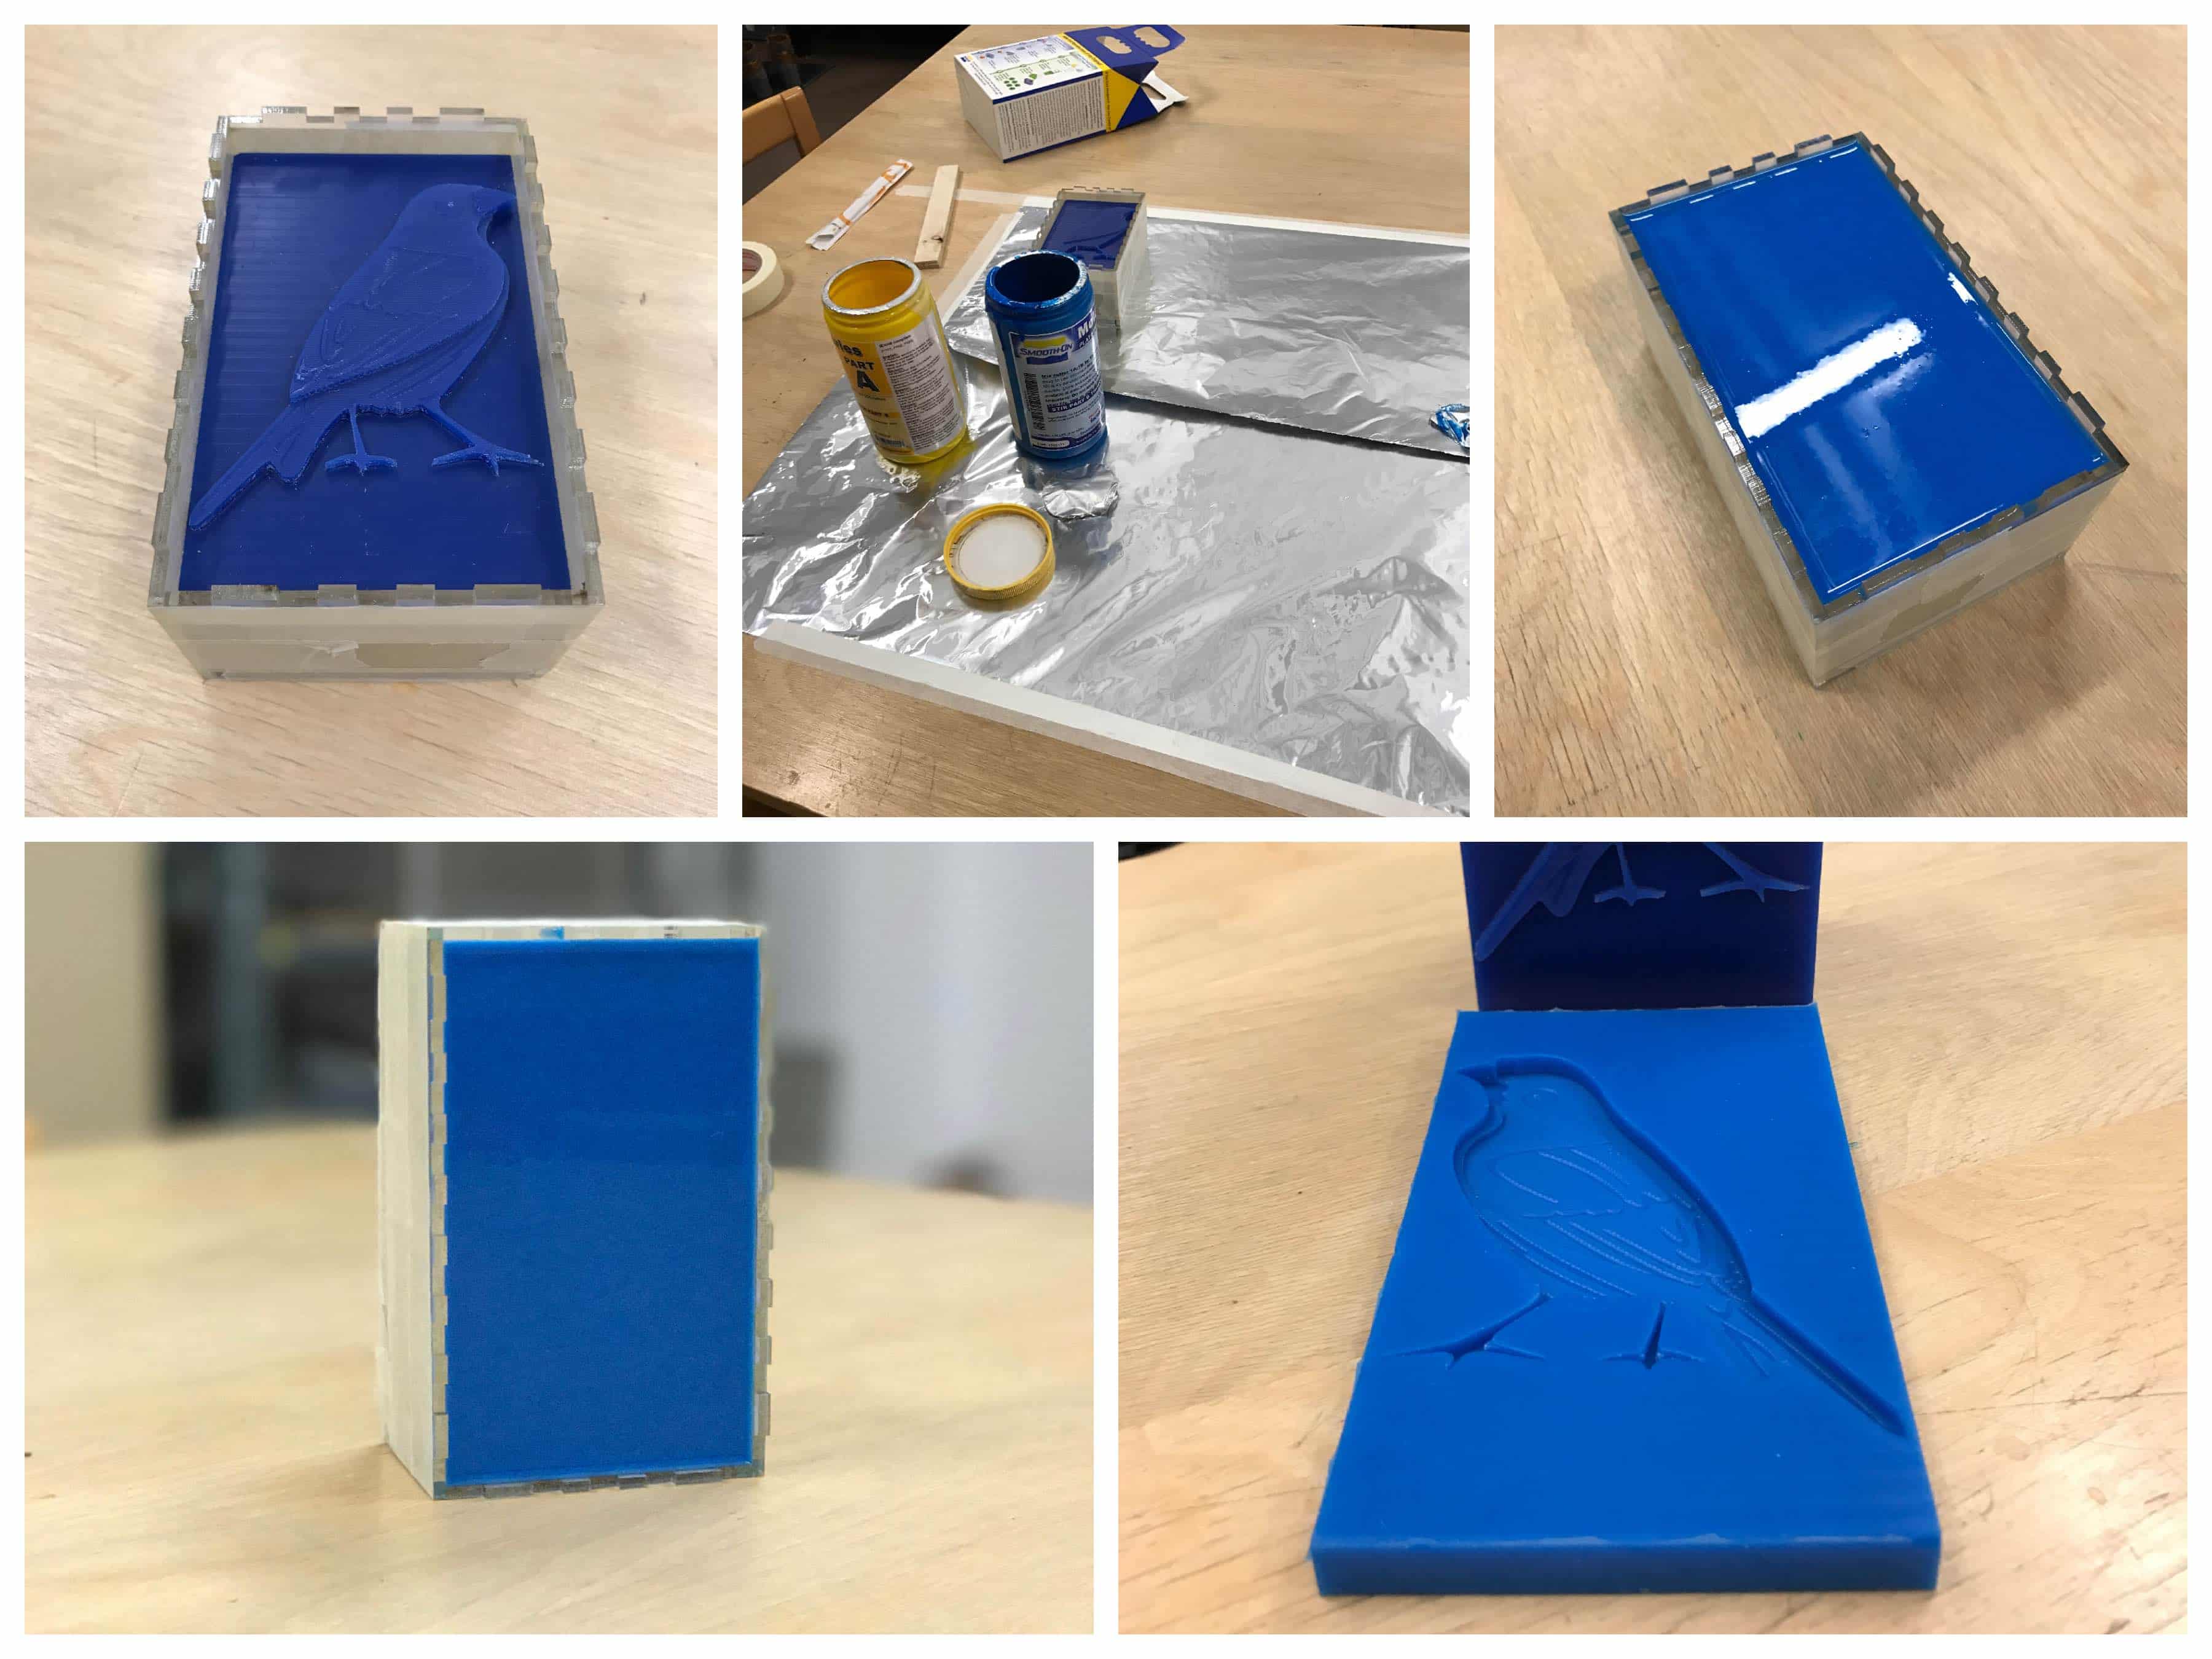
Here's the result !