4. Computer controlled cutting
Week 04: Had some fun this week, coming up will cool designs to cut on the vinyl cutter and laser cutter. Got very comfortable with using FreeCAD to do ‘Parametric Modeling’.
Group assignment page detailing kerf testing of the laser cutter here
Individual Assignment
- Vinyl cutter…make a laptop sticker design, vectorize, cut using vinyl cutter
- Laser Cutter…Parametric modeling of Press-Fit Kit, cut Press-Fit pieces out of cardboard
Vinyl cutter
Plan:
- Use Inkscape to draw up a laptop sticker for cutting on a vinyl cutter
- Used circle, text, Path difference…to create cutouts…and union to combine circle outlines


- Converted from Inkscape’s SVG format to DXF format using “SVG to DXF CloudConvert”…just ‘Select File’ then ‘Start Conversion’ at the bottom of the screen.
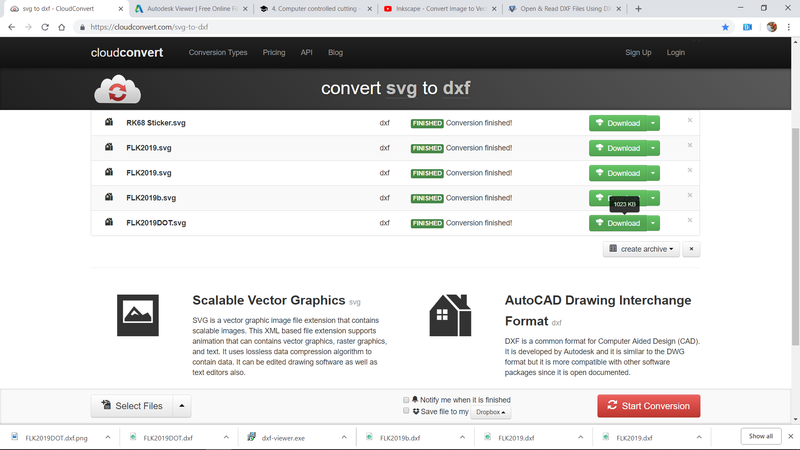 SVG to DXF CloudConvert link
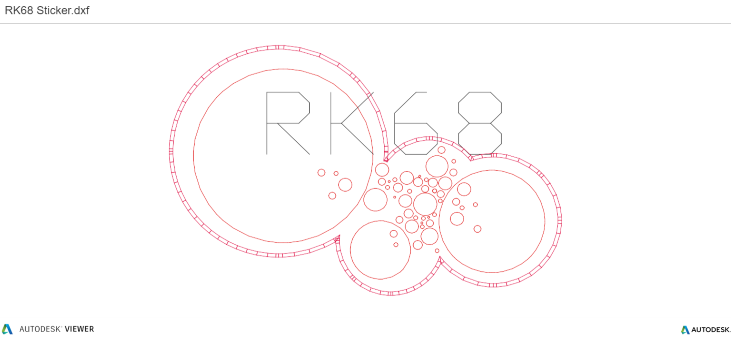
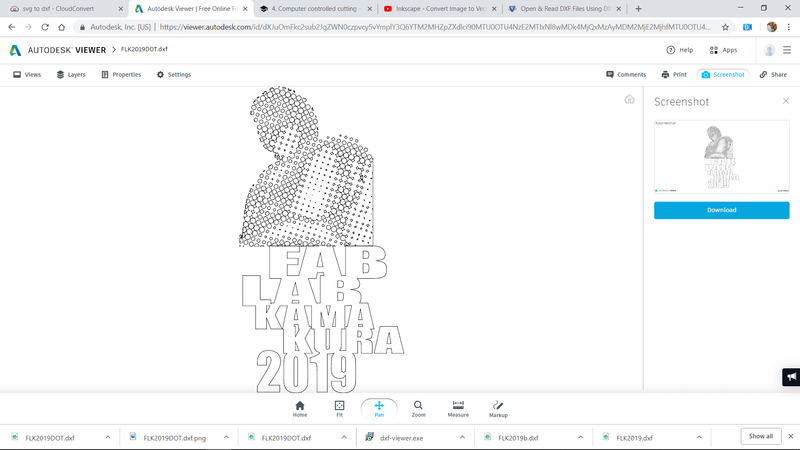
- To check the results, I viewed DXF for any issues with Autocad Viewer
 Autodesk DXF File viewer link
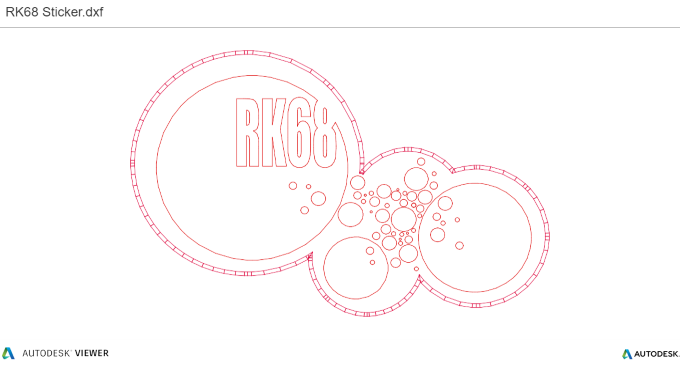
- The DXF file didn’t render the text the way I hoped. I needed to convert text to paths…
Back in Inkscape…
- Path > Object to Path (or Shift+Ctrl+c)
- Path > ‘Dynamic offset’ (or Ctrl+j)
…easier to convert text to path than I thought! Here’s the new DXF file…
That went reasonably well! Let’s make a second one…using a photo this time
- Turn image into B&W and boost the contrast…in Lightroom
- Import into photoshop to make background around figure transparent…using mask layer and xxx tool
- Simplify the image further using “Pixilate > Color Halftone”…played around with the dot size…settled at “100” Max Radius (Pixels)


- Import into Inkscape to combine with text and vectorize everything (converting image and text to paths)…to prepare for DXF file conversion
Note: Discovered that the more little dots to convert to path, the larger the resulting DXF file size…fewer is better


Done! Time to cut…
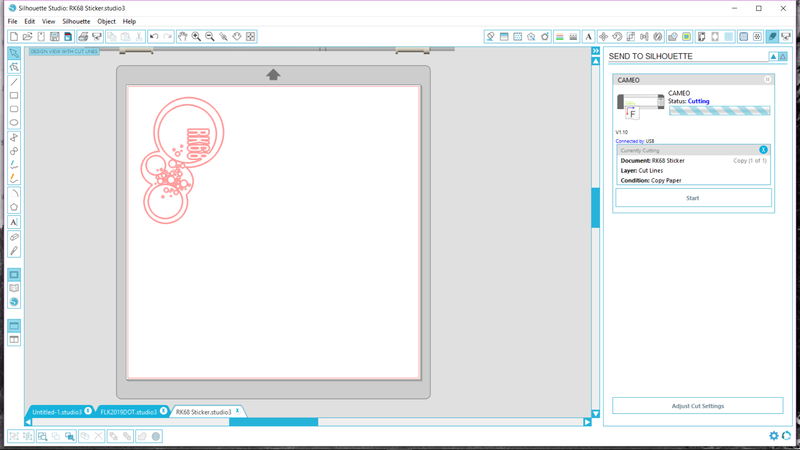
- Installed Sillouette Studio (installed the wrong version initially…for a more updated version of the machine we have in the lab…the Sillouette Cameo)

- Connected the cutter to my laptop via USB cable
- Really struggled to get the vinyl sheet to load into the printer properly…gotta make sure to have it captured under both rollers…but this was a real challenge to do (machine design flaw?)
Align left side of sheet to this line
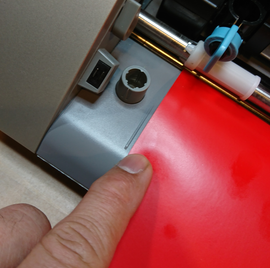
Make sure the vinyl sheet is under the white plastic left roller and the knife blade holder blue tab is in the lock position (angled)

Make sure the vinyl sheet is under the white plastic right roller too (not shown in this picture)…and the blue lock tab is down
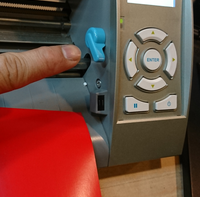
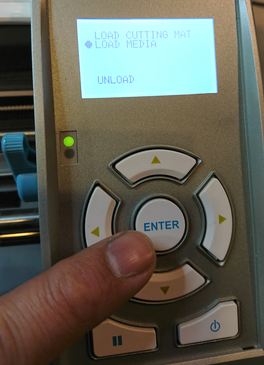
Push ‘Enter’ to load sheet (make sure it loads properly to avoid bad cuts)
-
Shrank the “FabLab Kamakura 2019” sticker to about 5” x 3” and printed…

-
Printed beautifully…even the small dots
- Getting rid of negative space…really tough, little dots peeled off and got mislocated…

Note: afterwards, Neil reminded everyone NOT to try to peel the sticker from the backing without FIRST putting it on the final surface…where it will have better adhesion
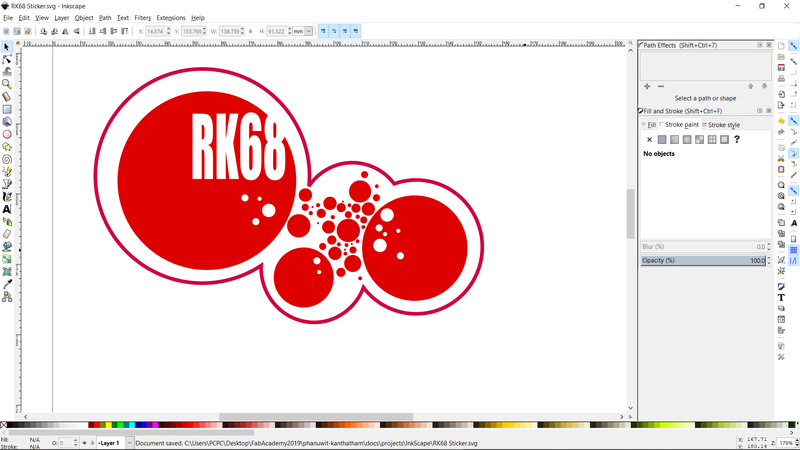
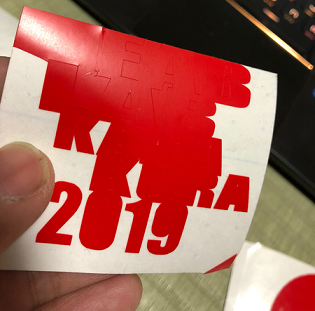
Didn’t want to waste time, moved on to the “RK68 Sticker”…
- Simple design, printed quickly
- Easy to remove negative space…small bits moved but could be reset into the right location
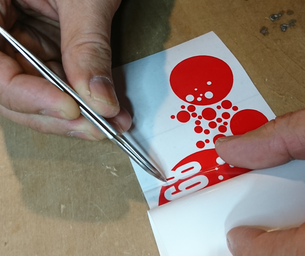
Note: Avoid small pieces in designs to eliminate unneccessary busywork
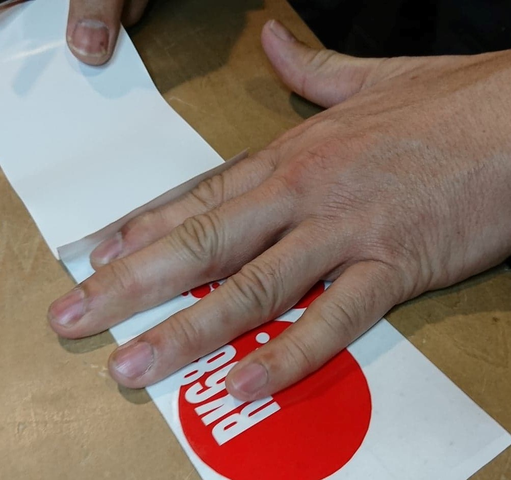
- Applied transparent transfer film…the trick is to peel and apply progressively and as flat as possible

Satisfied. Time to play with the laser cutter…
Laser cutter - Press-Fit Kit
Plan
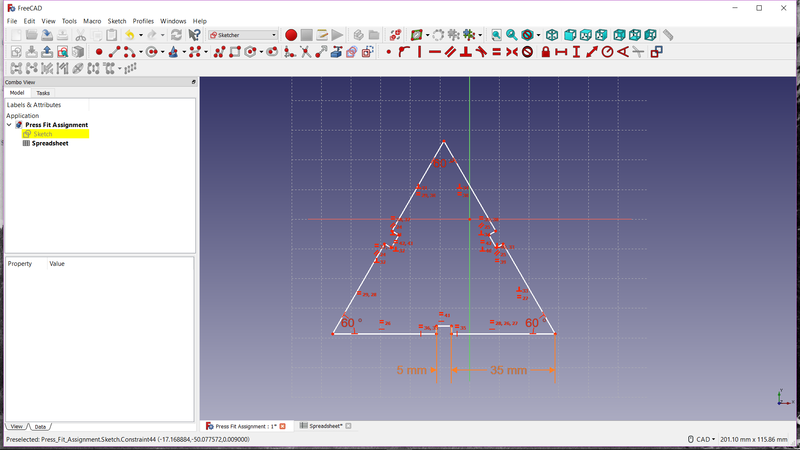
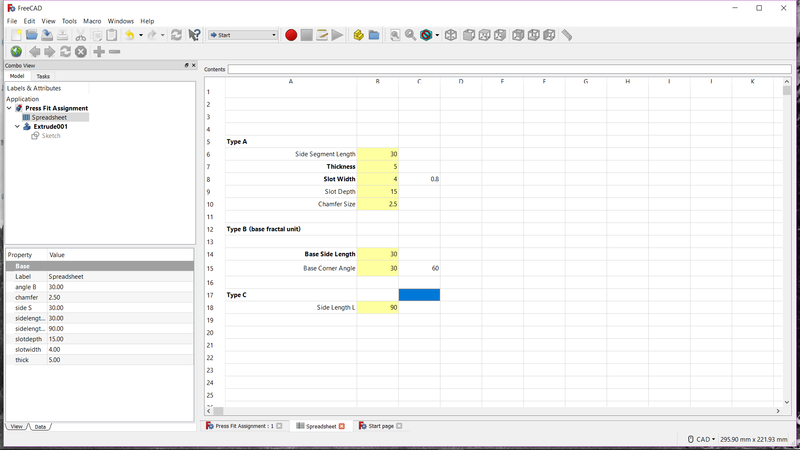
- Use FreeCAD to create parametric models of press-fit kit pieces
- Concept: Fractals
- Using the equilateral triangle as the base fractal form
- Press-fit construction components will be designed in 5 sizes, increasing as a multiple of the base component size to make progressively larger forms (i.e. 2x for the medium component and 3x for the large component, etc.)
- The number of each component piece to be produced will be the inverse of the size in multiples of 3…starting with 3 pieces of the largest component, 9 for the next, 27, 81…then 243 for the smallest
Execution
- Followed along with the FreeCAD demonstration video on the FabAcademy page…reintroduced myself to the CAD software
- The software feels a bit more understandable and comfortable now that I had spend some time on it last week
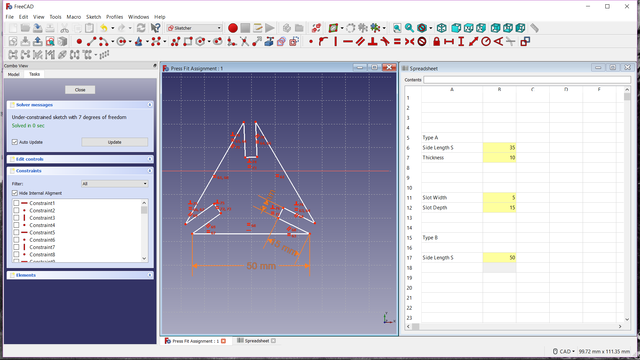
- Watched another video about how to use spreadsheets with FreeCAD


 …not too hard to follow.
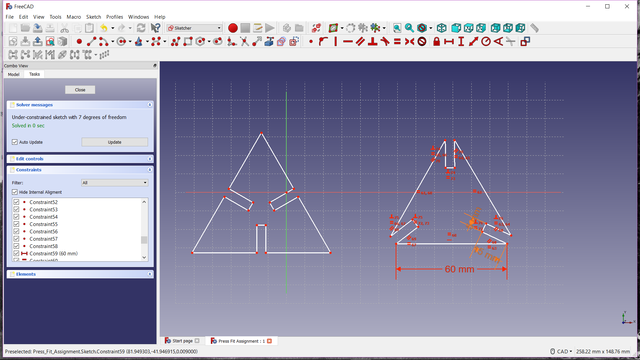
Now to try parametric modeling on Fractal triangles…
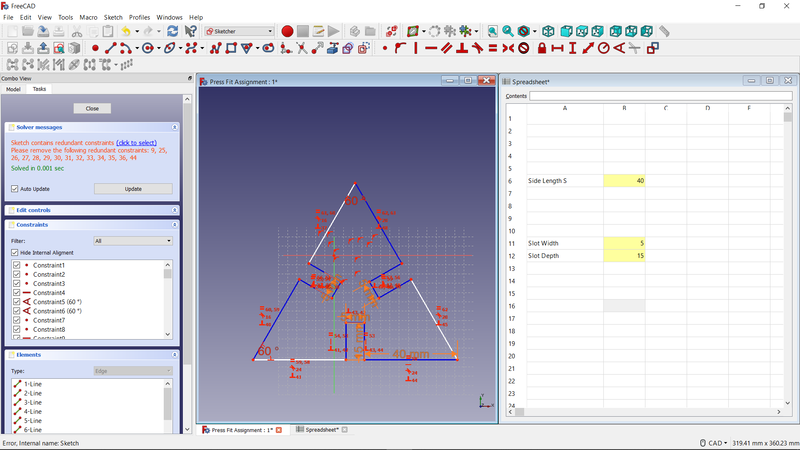
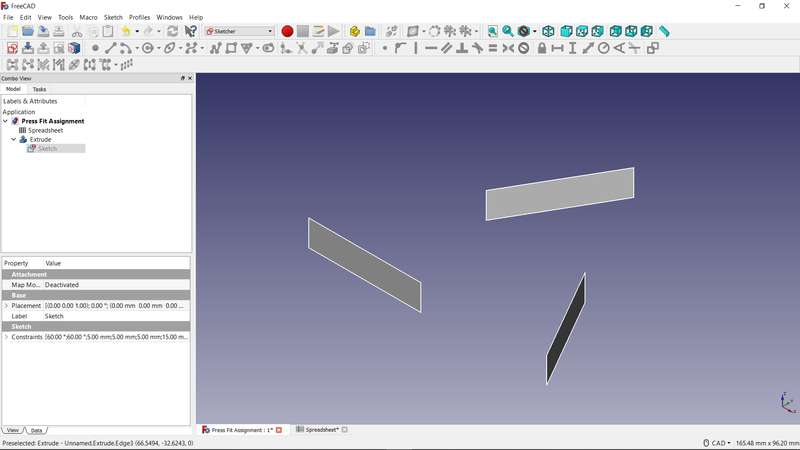
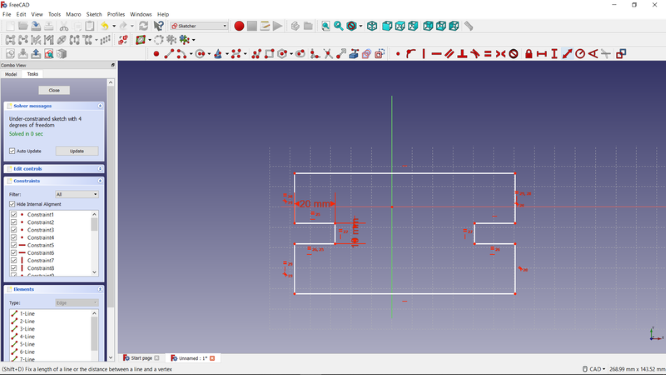
The attempt to create the form resulted in a weird 3D extrusion. Too many constraints? Use constraints sparingly…too many and you end up with modeling complications. Restart…
> Note: space bar toggles visibility in FreeCAD…discovered this after losing visibility without knowing why
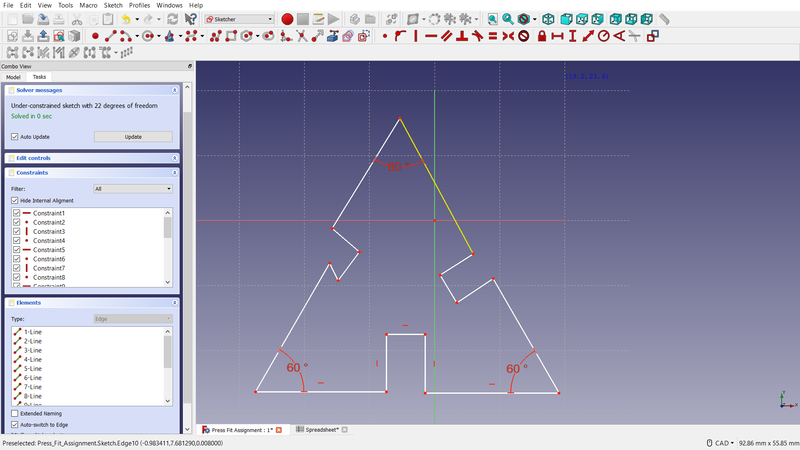

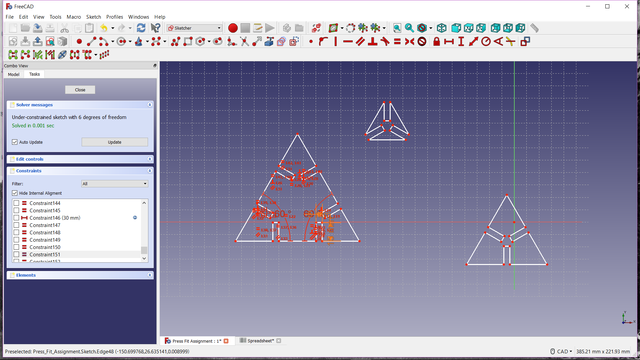
- Success…when the minimum of constraints used to get the parametric form desired
Note: Spreadsheet alias names are case sensitive!
- Have to double click to update dimensions in sketch view when it is active…auto-updates when it is closed and in model view
- The triangle has to be drawn as lines with slots in it…doesn’t work well when start out with a triangle shape and cutting out slots
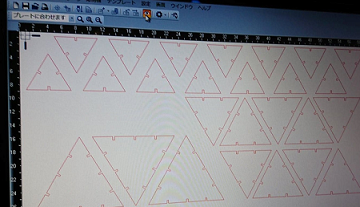
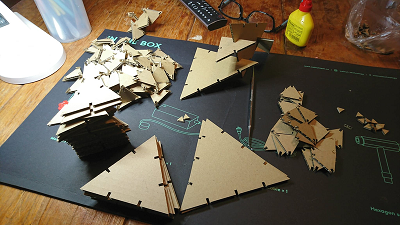
- Generated the forms for 5 distinct, progressively larger pieces…exported as DXF File
- In Corel Draw…created arrays of each component pieces (it was easier to do it here than in FreeCAD)
Time to laser cut! Using parameters learned during group assignments…the cut went very smoothly…

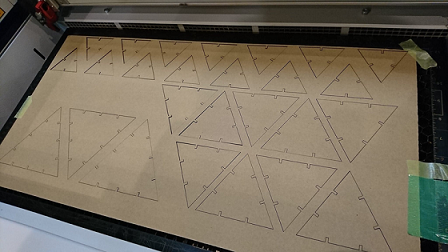

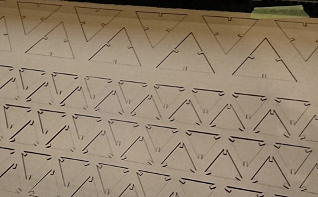

- Would want to cut this out with a stiffer material where the slot edges don’t deform so easily from repeated insertion and removal
Time to assemble the cut pieces… - Initially thought to assemble the pieces according to fractal logic…with the next biggest size attached to the piece one size bigger - This generated a dull sculpture and also some clashing of parts - …gave up on this idea and decided to just build a rule-free “Fractal Sculptures”…and generated interesting results


Note; FreeCAD crashes when there are too many objects…especially when they contain constraints…use constraints intelligently and sparingly
Files
Vinyl Cut RK68 DXF File Vinyl Cut Buddha DXF File Press-fit Kit DXF File Press-fit kit FreeCAD File