3D scanning and printing
Task to do
To make and scan 3D model
What I did...
Before this I made 3D designing and printing but scanning was new for me.
Printing
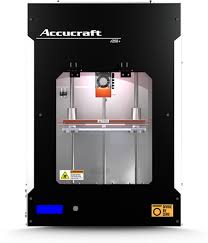
I used Accucraft i250+ printer.It has
Bed size- 250mm*250mm*200mm
Extruder - single extruder.
Print operation and controlling-With SD card with computer
Printing material- PLA,ABS,Nylon
Filament diameter- 1.75mm.
Bed heating - Up to 110 Degree Celsius.
In case of Accucraft 3D printer,important things we have to verify are
- bed level
- proper extrusion
- maintenance at least once in a month
- If we are using printer daily then due to wear and tear nozzle size get increased so we have
to make changes in KISSlicer
Softwares required-
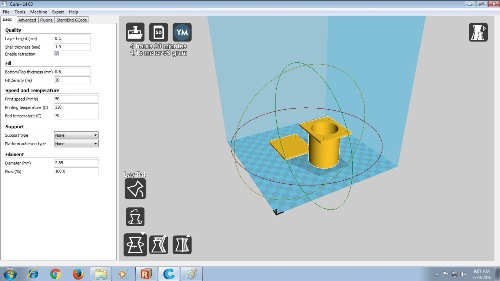
Cura-for Position the object on a bed,resizing and for changing its orientation
KISSlicer-For making Gcode.
RepetireHost-For machine interface and making gco file.gco file is required for give the print
through SD card
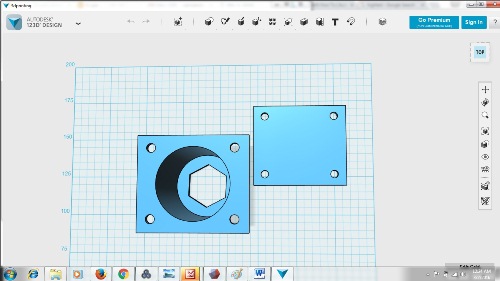
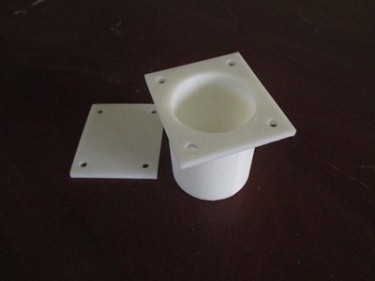
step1-For printing I made 3D design of motor shell which I am going to use in my project.
step2-Load object in cura to lay flat or fixing the position of object on printer bed.It is open software
and we can scale or rotate the object here.We can save Gcode here but for accucraft i250 it is better
to use more software to get good print.
step3-Now slice object in kslicer.In this software we can adjust quality and speed of printing.We can
also change support type.If we gave more speed then we get poor quality print.This software generates
Gcode file.
step4-Open repitire and load gcode file into it.we can give print from that software as due to repitire
we can connect computer with 3D printer.If we dont want to use computer then we have to save file
in binary form and send it in SD card.file will save in .GCO file format.Then I put bed temperature
as 60DC and extruder temperature as 225DC
NOTE
1.If material is not sticking to bed then the reason may be bed level,
we have to check and adjust the level the bed by putting single folded paper below the nozzle.
We have to adjust the bed by revolving the screw below bed up to the limit such a that paper should
make friction with nozzle.
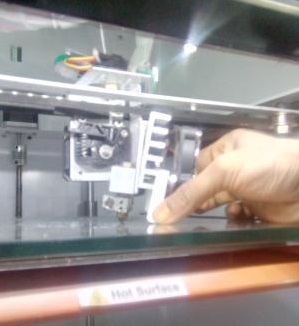
2.Some time when nozzle stop extrusion that time we have to open nozzle assembly
by opening the front screws of the nozzle as shown in side picture.
We have to remove 2 screws and have to clean the upper assembly of nozzle
as many times material stick between 2 rollers.
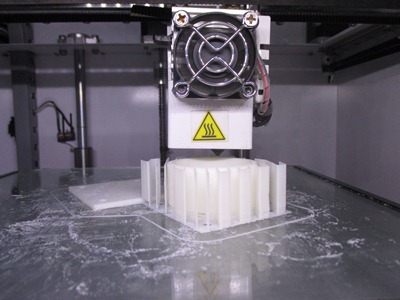
This is final print I got after removing the support.
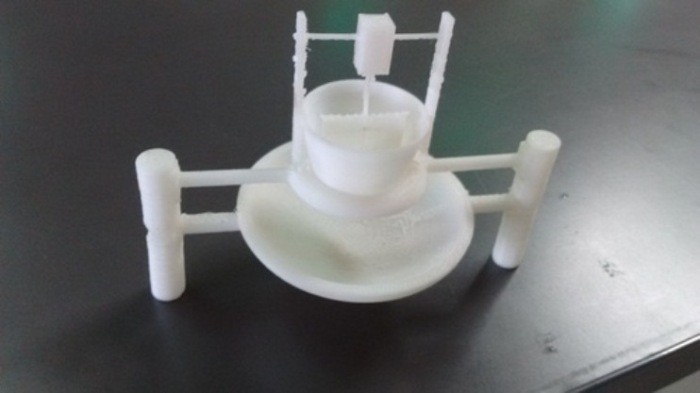
I have printed my project model also.I have designed it in 3D designing assignment.This object is critical to make
by subtactive method as It has many joints and below parabolic plate is able to rotate through holes in side colums,
as I printed it using 3D printer.But If we go for making it by milling method then we will not get its rotational function.
Somehow we will create its shape by molding but we will unable to put rotational function of parabolic dics.
Scanning
I refer fab academy tutorial page to know different 3D scanning methods.I decided to use 123D catch
for scanning as it is useful to make 3D scan from multiple photos of object in different angle.While
referring the tutorial for 123D catch I come to know that mesh mixer is required for editing.I downloaded
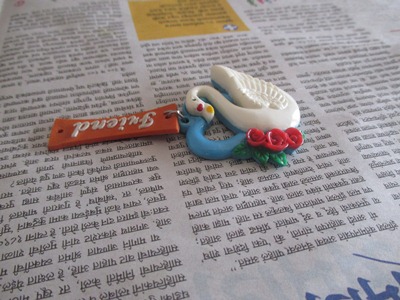
In tutorials I observed that tutor had selected object which is having some hight. So I decided to scan
keychain which is having less hight.I wanted to experiment by using small hight object.
step 1- I put paper on table and put keychain on that.I started taking photos in different angles.
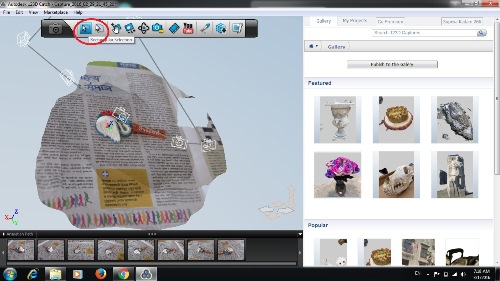
step2-Open the 123D Catch application, and click the button for "Create a New Photo Scene". You'll
get a dialog prompting you to select image files. Navigate to the folder where you put your photos,
and select them all. (You can use the Ctrl-A shortcut to select all, or click the first file, and then
Shift-click the last file to get them all).
step3-If everything went well, 123D Catch will show you a 3D presentation of your object that you can
navigate around. Click on the orbit icon on the tool bar, and you can look at your model from all sides.
we can delete extra part by selecting and pressing delete button.
You can erase these by selecting them with the lasso or square tools. The selection will turn red. You
can delete it by pressing delete. Go ahead and clean up your capture by deleting anything that doesn't belong.
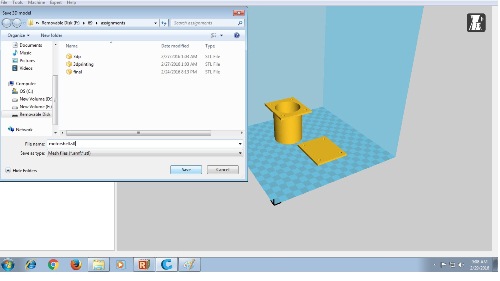
step4-Save file in .obj file format. Open that .obj file in mesh mixer by importing it. You will notice that
there is a hole in the bottom! If there are holes in your object, they will be outlined in blue. Click the
Inspector button on the toolbar, and you will now see "bubbles" attached to each hole. Click on each
bubble and Inspector will attempt to automatically repair your object by filling in all gaps.
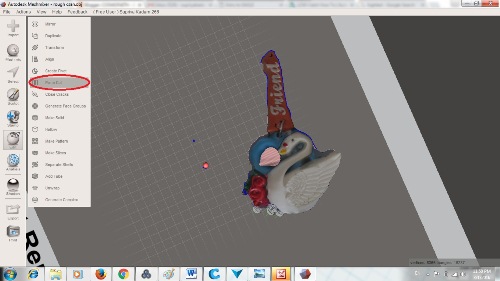
step5-Use plane cut option for cleaning the plane below the object
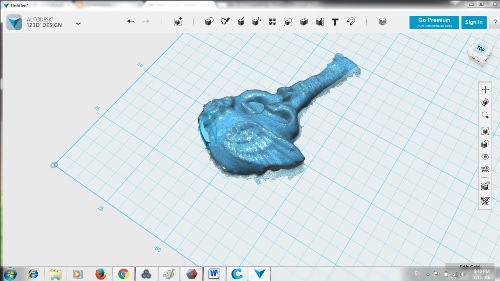
step6-I export the objec to 123 d design to edit it more.but it is not good to edit such a design in 123D
design as design we have is of free type and in 123D design it is not easy to make free sketches(sketch
with more curves) .
I saved file in .STL file format for 3D printing.First I load it in cura to decide where to put object
on print bed for printing ,in cura I saved file in .stl format again.Then I sliced it in kslicer and
saved it in Gcode format.Lastly I load Gcode in Repitire and I cot error.
I got this error as I did not fill the base of object and some part was not deleted clearly.Now I am
going to make it correct.I come to know that our photos should be sharp for capturing more details
and for that
- The object should not be moved at all during capture, and lighting should remain consistent. In
effect, once the object is in place, you should move around it
- The target object should take up most of the frame: either get close to the object or zoom in
In this assignment I learned 3D scanning with photos as well as with '3D sense'3D scanner device.
Use different softwares to make 3D file from collecting 2D photos in different angles.It was fun for me
to create 3D madel of anything by just clicking photos in different angle.Learned and used 3D printer.
and learned its troble shooting.It was very good experience.I liked this 3d printer as it printed design
given by me as it is.