
Embedded Programming
To fulfill the assignment I decided to use Arduino IDE to programm in Arduino and pure C. Also I used Arduino as a programmer to upload the codes to my board, how to do this is mentioned here.
Arduino IDE
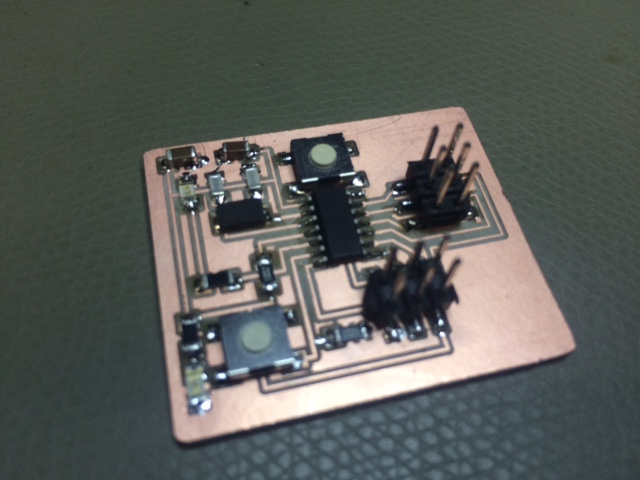
My Idea for the sketch is very simple I want to use the button I added to the board as an input and link it to the LED connected as an output. Whenever the button is pressed the LED toggles.
First step was to check the pinout of the microcontroller from the datasheet .
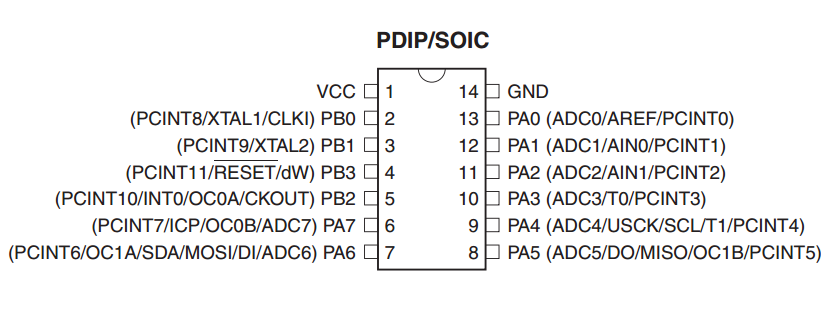
-The LED is connected to PB2 and the Button is connected to PA7
Doing some experiments I found out that those pins correspond to Arduino pins 8 and 7. I discovered this by setting the output to one pin and measuring it using the multimeter, I kept doing this until I figured out which is which.
Programming In Arduino:
-First I created a new sketch.
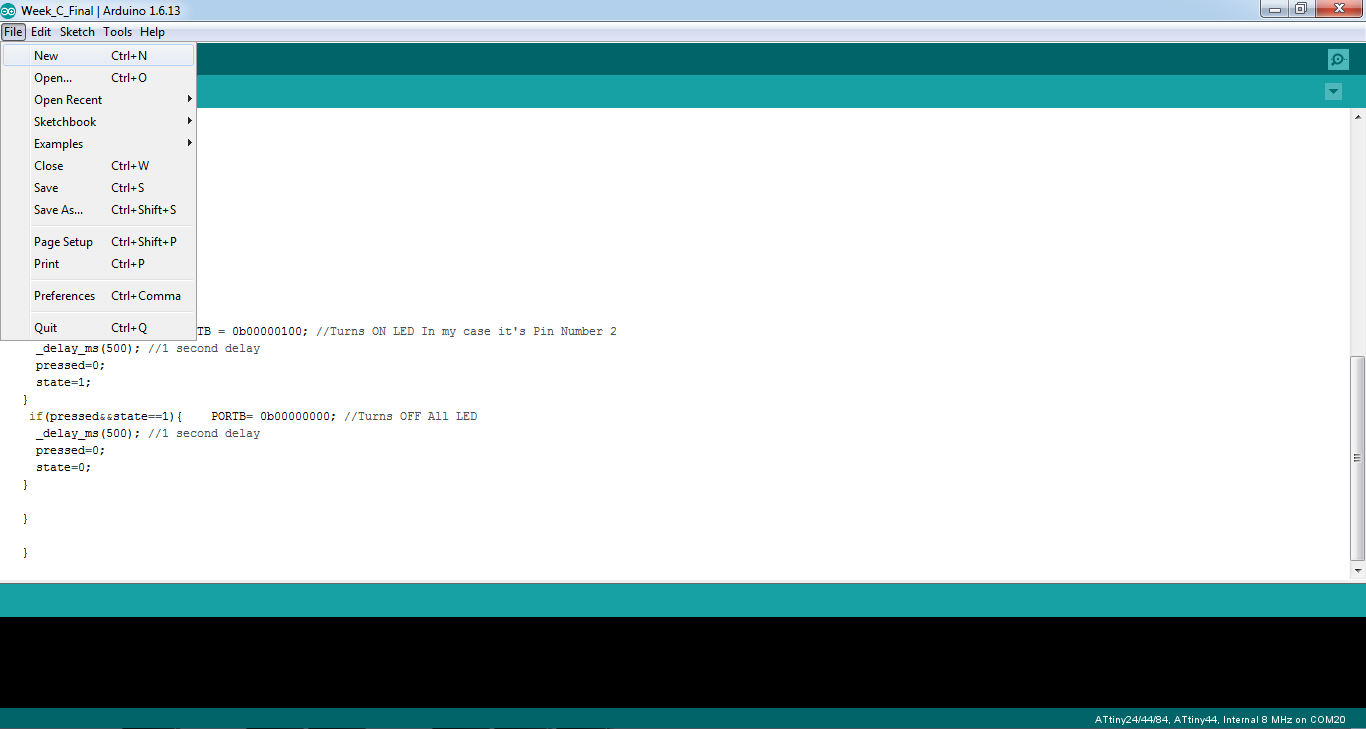
I started by defining the variables, then setting the input and output and finally the logical part of the code. Here is the code:
boolean pressed,state=false;
// the setup function runs once when you press reset or power the board
void setup() {
  // initialize digital pin 8 as an output and pin 7 as input .
  pinMode(8, OUTPUT);
   pinMode(7, INPUT);
}
boolean Button_pressed(){
  if(digitalRead(7)==HIGH){
  delay(5);
   if(digitalRead(7)==HIGH){
    pressed = true ;
    return true;
  }}
 return false;
  }
// the loop function runs over and over again forever
void loop() {
pressed= Button_pressed();
if (pressed==true&&state==false){
  digitalWrite(8, HIGH);   // turn the LED on (HIGH is the voltage level)
  delay(500);// wait for a second
  state=true;
  pressed=false;
  }
 if (pressed==true&&state==true){
  digitalWrite(8, LOW);   // turn the LED on (HIGH is the voltage level)
  delay(500);// wait for a second
  state=false;
  pressed=false;
  } }
I added a software serial for debugging the code
#include <SoftwareSerial.h>
SoftwareSerial serial(1,2);
boolean pressed,state=false;
void setup() {
  // initialize digital pin 8 as an output and pin 7 as input .
  pinMode(8, OUTPUT);
   pinMode(7, INPUT);
serial.begin(9600);
}
boolean Button_pressed(){
  if(digitalRead(7)==HIGH){
  delay(5);
   if(digitalRead(7)==HIGH){
    pressed = true ;
    return true;
  }}
 return false;
  }
void loop() {
pressed= Button_pressed();
if (pressed==true&&state==false){
  digitalWrite(8, HIGH);   // turn the LED on (HIGH is the voltage level)
  delay(500);// wait for half a second
  state=true;
  pressed=false;
 serial.print("ON");         // print on
    serial.print("\t");         // print space
  }
 if (pressed==true&&state==true){
  digitalWrite(8, LOW);   // turn the LED off  (LOW is the voltage level)
  delay(500);// wait for half a second
  state=false;
  pressed=false;
 serial.print("OFF");         // print OFF
    serial.print("\t");         // print space
  }
}
I used an FTDI cable to connect the software serial pins to the computer and I opened the serial monitor and set it to the correct baud rate after selecting the correct serial port.

Programming In C:
I translated my code to C so it does exactly the same function.
#ifndef F_CPU
#define F_CPU 20000000UL // 20 MHz clock speed
#endif
#include <avr/io.h>
#include <util/delay.h>
int Button_Pressed();
int pressed;
int state ;

void init() {
 DDRB = 0b11111111; //Makes PORTB as Output
 DDRA = 0b00000000; //Makes PORTA as Input
 PORTB= 0b00000000; //Turns OFF All Outputs
 state=0;
}
int Button_Pressed(){
  /* the button is pressed*/
  if (bit_is_set(PINA, PA7)){

    //wait a certain time for button debounce
    _delay_ms(5); //5 milli second delay

     if (bit_is_set(PINA, PA7)){
      return 1;
  }}
  return 0;
}
int main(void)
{
    init();

  while(1) //infinite loop
  {
pressed=Button_Pressed();
  if(pressed&&state==0){PORTB = 0b00000100; //Turns ON LED In my case it's Pin Number 2
    _delay_ms(500); //0.5 second delay
    pressed=0;
    state=1;
  }
   if(pressed&&state==1){    PORTB= 0b00000000; //Turns OFF All LED
    _delay_ms(500); //0.5 second delay
    pressed=0;
    state=0;
  } }
  }
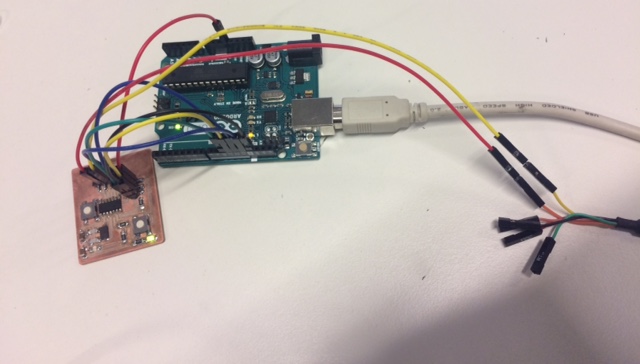
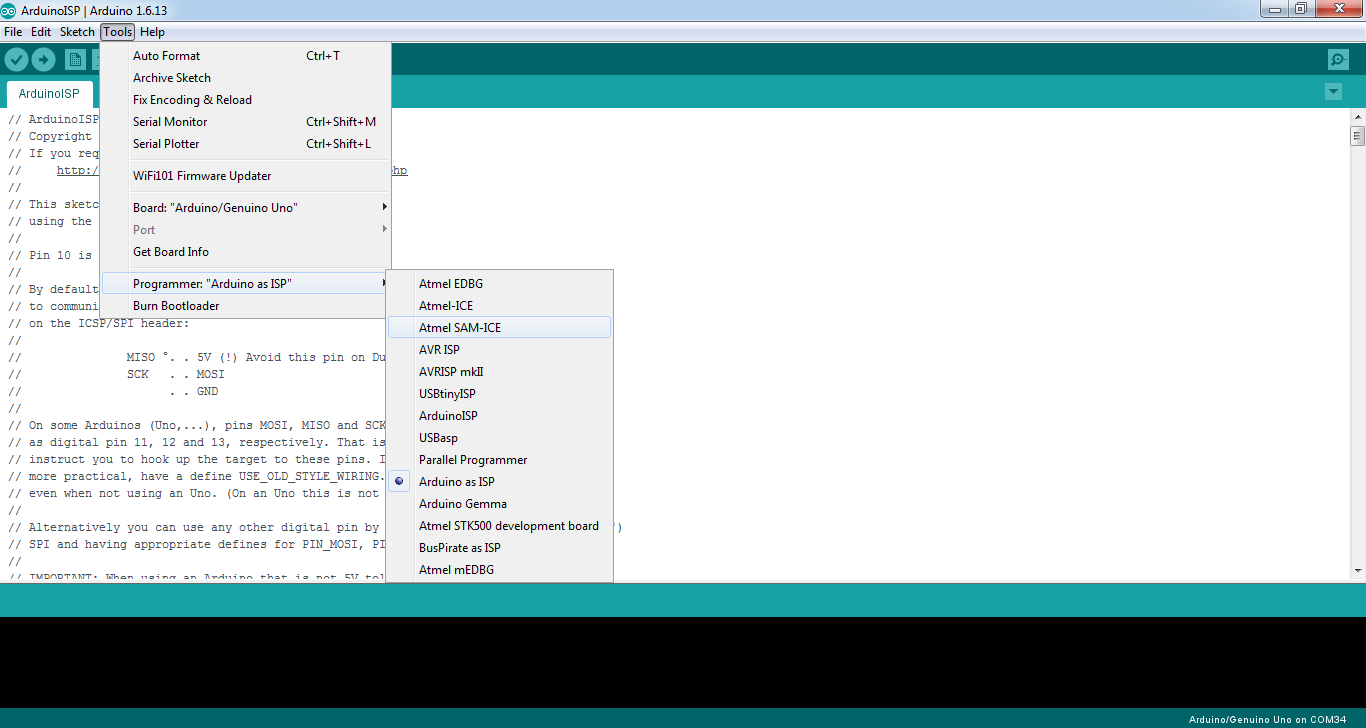
I uploaded the C code exactly the same way I did for the Arduino code I used Arduino IDE and Arduino Uno as programmer. First I uploaded the Arduino ISP sketch to the Arduino Uno and then I connected my board to the Arduino, selected the right programmer and port and finally uploaded my C sketch using programmer.

I also used FabISP to upload the C code as a test and for this I had to use a Mac computer. I started by editing the make file
I set the microcontroller to attiny44
The frequency of the crystal to 20 Mhz
I edited the avrdude line as shown in the screen shot
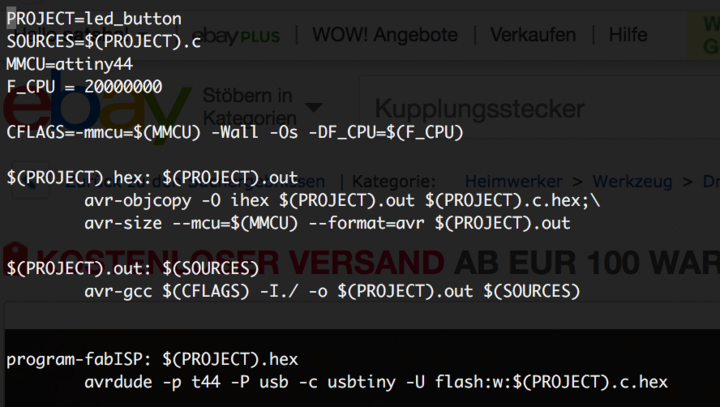
This is how the make file looked like
PROJECT=led_button
SOURCES=$(PROJECT).c
MMCU=attiny44
F_CPU = 20000000

CFLAGS=-mmcu=$(MMCU) -Wall -Os -DF_CPU=$(F_CPU)

$(PROJECT).hex: $(PROJECT).out
    avr-objcopy -O ihex $(PROJECT).out $(PROJECT).c.hex;\
    avr-size --mcu=$(MMCU) --format=avr $(PROJECT).out

$(PROJECT).out: $(SOURCES)
    avr-gcc $(CFLAGS) -I./ -o $(PROJECT).out $(SOURCES)

program-fabISP: $(PROJECT).hex
    avrdude -p t44 -P usb -c usbtiny -U flash:w:$(PROJECT).c.hex
I connected the FabISP to my board
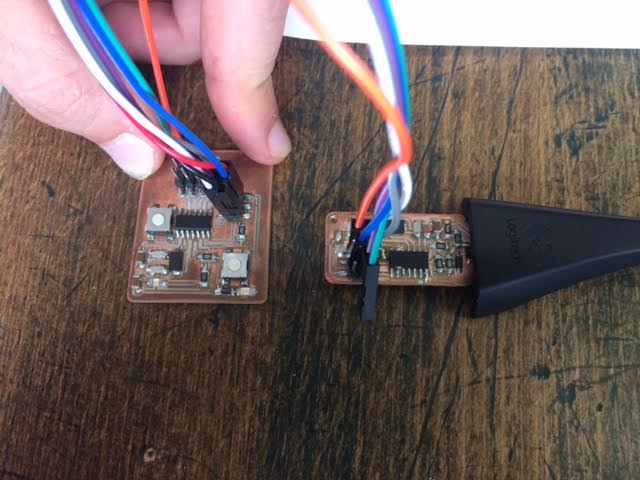
Finally this is how I uploaded my sketch using the FabISP
make program-fabISP
avr-objcopy -O ihex led_button.out led_button.c.hex;\
    avr-size --mcu=attiny44 --format=avr led_button.out
AVR Memory Usage
----------------
Device: attiny44

Program:     262 bytes (6.4% Full)
(.text + .data + .bootloader)

Data:          4 bytes (1.6% Full)
(.data + .bss + .noinit)


avrdude -p t44 -P usb -c usbtiny -U flash:w:led_button.c.hex

avrdude: initialization failed, rc=-1
        Double check connections and try again, or use -F to override
        this check.


avrdude done.  Thank you.

make: *** [program-fabISP] Error 1
admins-MacBook-Pro:upload DI$ make program-fabISP
avr-objcopy -O ihex led_button.out led_button.c.hex;\
    avr-size --mcu=attiny44 --format=avr led_button.out
AVR Memory Usage
----------------
Device: attiny44

Program:     262 bytes (6.4% Full)
(.text + .data + .bootloader)

Data:          4 bytes (1.6% Full)
(.data + .bss + .noinit)


avrdude -p t44 -P usb -c usbtiny -U flash:w:led_button.c.hex

avrdude: AVR device initialized and ready to accept instructions

Reading | ################################################## | 100% 0.00s

avrdude: Device signature = 0x1e9207 (probably t44)
avrdude: NOTE: "flash" memory has been specified, an erase cycle will be performed
        To disable this feature, specify the -D option.
avrdude: erasing chip
avrdude: reading input file "led_button.c.hex"
avrdude: input file led_button.c.hex auto detected as Intel Hex
avrdude: writing flash (262 bytes):

Writing | ################################################## | 100% 0.31s

avrdude: 262 bytes of flash written
avrdude: verifying flash memory against led_button.c.hex:
avrdude: load data flash data from input file led_button.c.hex:
avrdude: input file led_button.c.hex auto detected as Intel Hex
avrdude: input file led_button.c.hex contains 262 bytes
avrdude: reading on-chip flash data:

Reading | ################################################## | 100% 0.36s

avrdude: verifying ...
avrdude: 262 bytes of flash verified

avrdude: safemode: Fuses OK (E:FF, H:DF, L:E2)

avrdude done.  Thank you.
Final product
Downloads
-Arduino sketch-C sketch