Week 14:Composites
Assignment:
- Read the material safety data sheet (MSDS) and technical data sheet (TDS) for the resins that you're using Design and make a 3D mould (~ft2 /30x30cm), and produce a fibre composite part in it
This week I decided to make an umbrella cap
Composites
When two or materials with different physical or chemical properties which are categorized to be "matrix" or "reinforcement "are combained together,in such a way that
they remain seperate and distinct and will lead to the formation of composites.
The most of the plastics available are not composites,but when addition strength is needed they can be reinforced with some reinforcing fibers to make to more stronger.
The composites also known as fiber-reinforced polymer (FRP) composites is a combination of a Polymer matrix resin such as polyester, isopolyester, vinyl ester, epoxy,
phenolic etc with Fiber reinforcement such as glass, carbon, aramid or other reinforcing material in such a way that here is a sufficient
aspect ratio (length to thickness) which provides perceptible reinforcing function in one or more directions.In addition it may also contain fillers,
additives and core materials that modify and enhance the final product.
The identities of the constituent elements are retained ,which provides the composite with added advantages such as

Designing of 3D mold
This time also I opted for Rhino,obviously I became more confortable with rhino.My plan is to design a mold for making a cap which is having more outer surface area compared to the caps already available.I am planning in such a way that it is an umberlla cum cap,so that it can be used y me in future.

The screenshot above show the making of my 3D mold for cap in rhino.

The screenshot provides the detailed view of my mold.
stacking process
I have used a depth of 30mm ,the plywood we are having in lab is of 18 mm thickness,so I thought of stacking two plywoods .

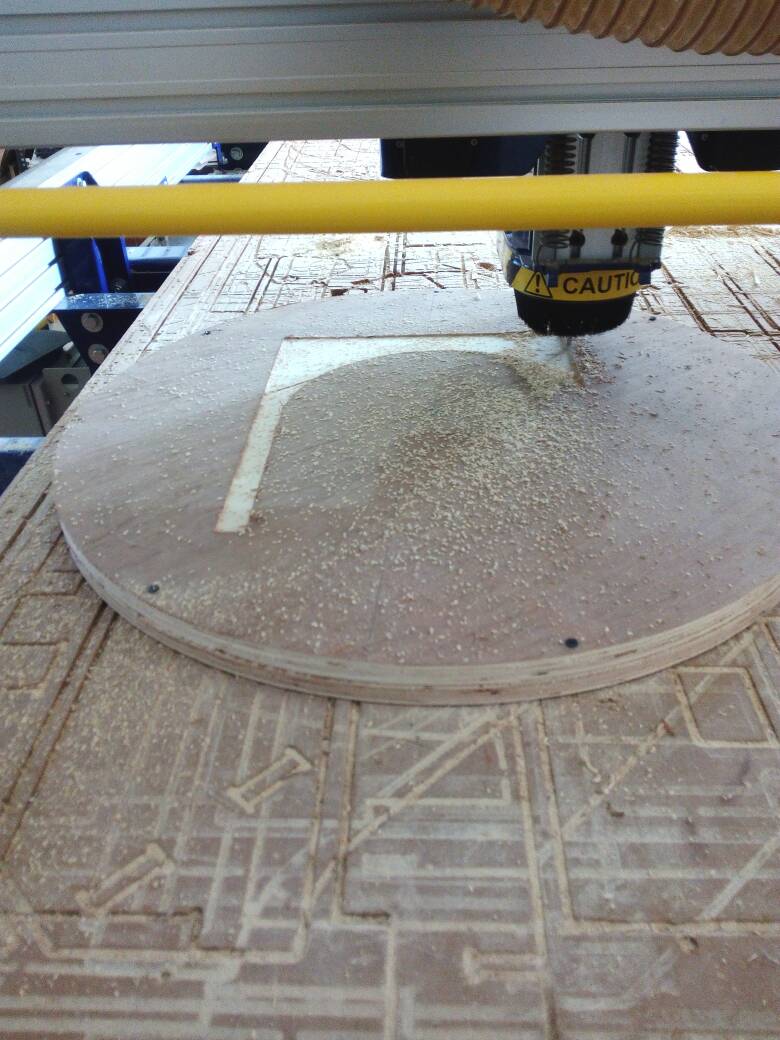
Cutting of a circular region of diameter 700mm in shopbot is going on.I need two such peices for stacking sothat the thickness becomes 36mm

I stacked the two peices after applying fevicol in between.I removed the barclamp after one day,It was perfectly fitted.
Making of the mould
Settings in Partwork3d software
The STL file of the cap is opened in Partworks3D software. First of all the stl file is opened in the partwork3d.

the dimensions of my cap mould is visible ,in addition to that orientation of the model can be changed .

Setting the material thickness and fit to material .

In the roughing toolpath end mill for roughing is selected ( 6mm flat end mill) .

The extimated time for roughing is arround 2hr 17 min.

In the finishing toolpath I selected 6mm ballnose endmill .

The extimated time for finishing is arround 25 min.

Cutout toolpath is the final profile path.6mm end mill is being selected

The extimated time for cutting is arround 9 min.

Here we will be getting the idea how the shopbot will be finising or cutting or roughing ,ie from where it will start and how it will be moving .when we click on each tool path preview .

atlast save the individual shopbot files in .sbp format in order to work in shopbot.It includes all the three toolpath
Making of my mould in Shopbot
|
|
|
|---|
The machine cutting procees is being intiated after setting the machine .The shopbot intial setting can be obtained from week 7 in this documentation. The milling process was smooth even though I have used the stack.

|
|
|---|
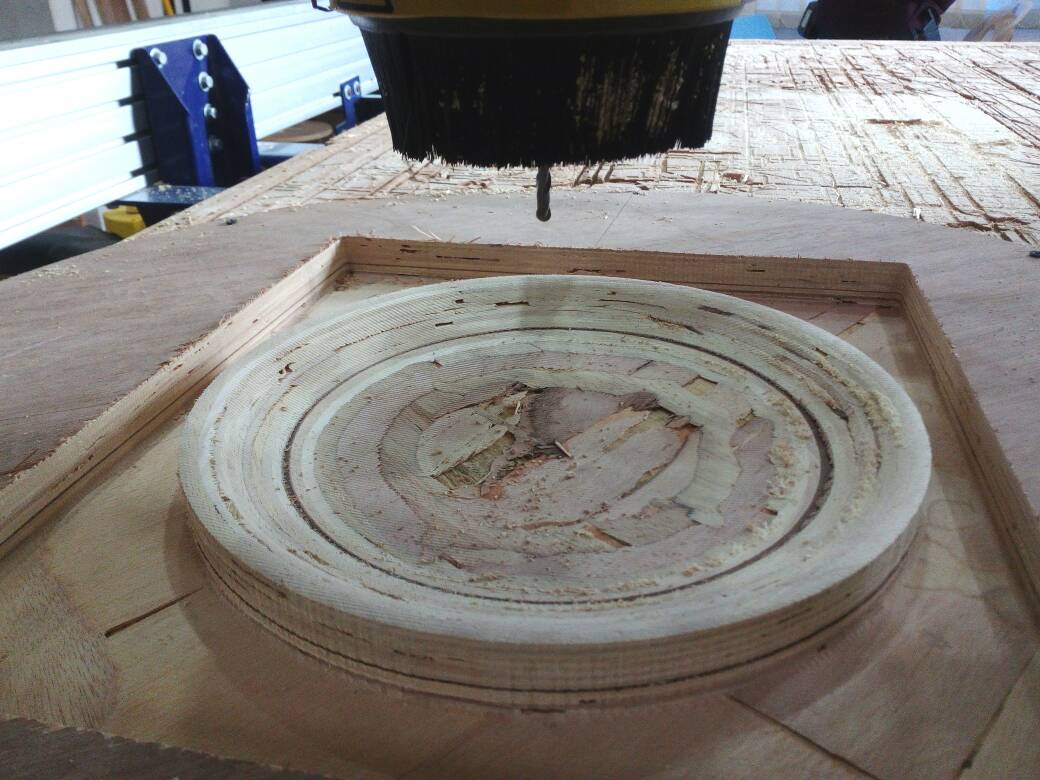
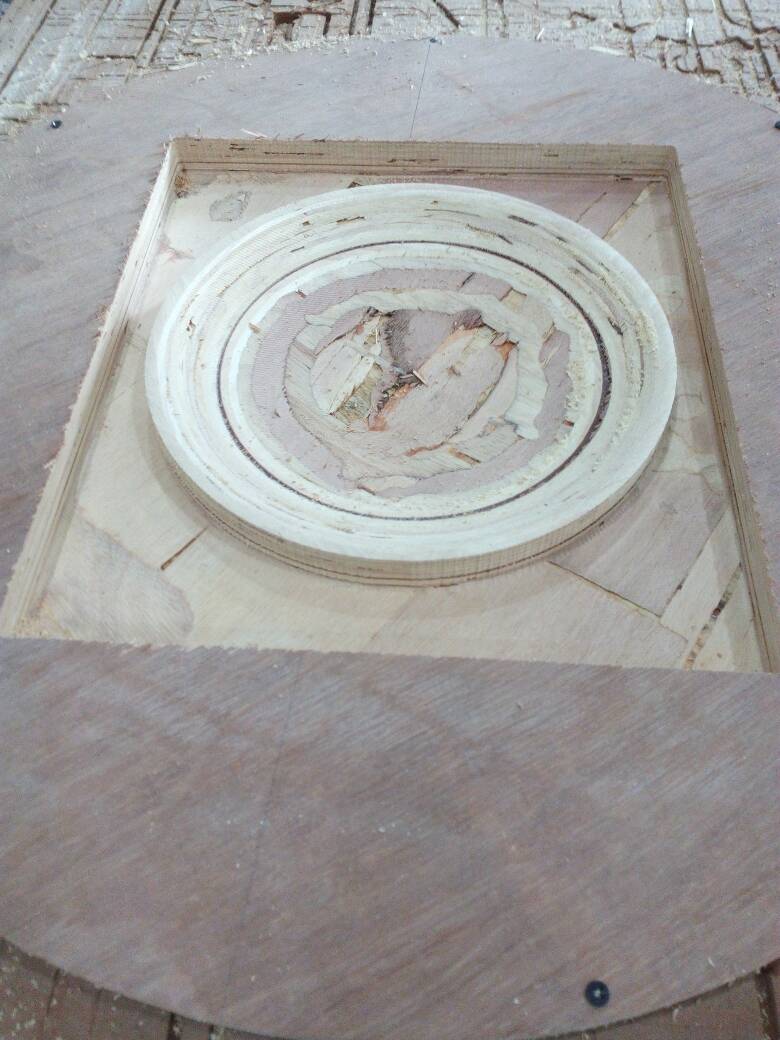
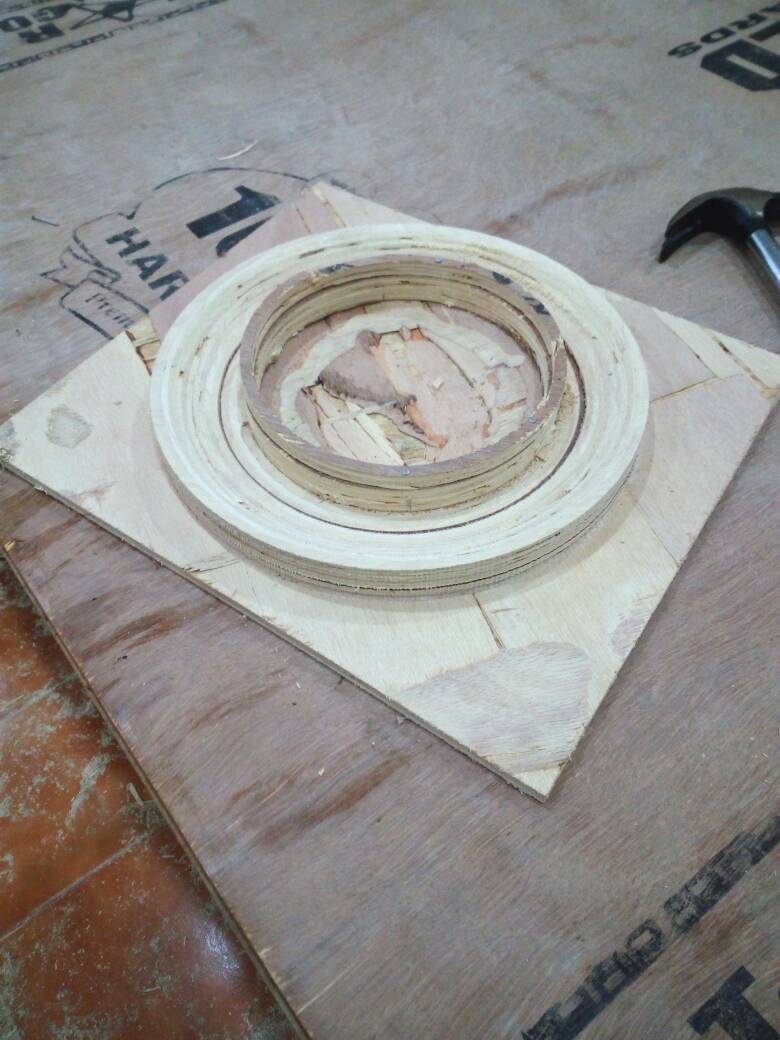
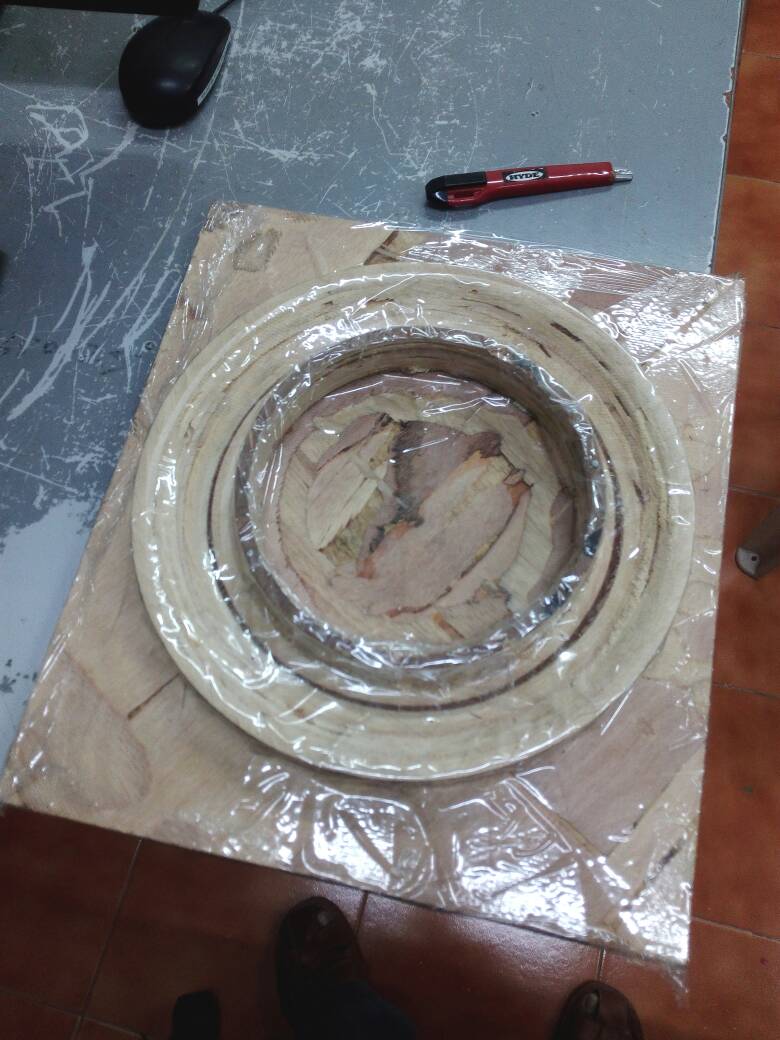
Finally my mould is ready.The ring structure in the mould was seperately made in shopbot .This was actually a mistake I done in my fabrication.I understood the mistake only at the end ie when my product was ready.

|
|
|---|
The mould has to be covered using adhessive tape or polytheen sheets in order to avoid the resin from sticking on it.Since the mould is wooden material, sticking of the resin may damage the mould.I covered my mould with the transparent sheet available in the lab.
|
|
|---|
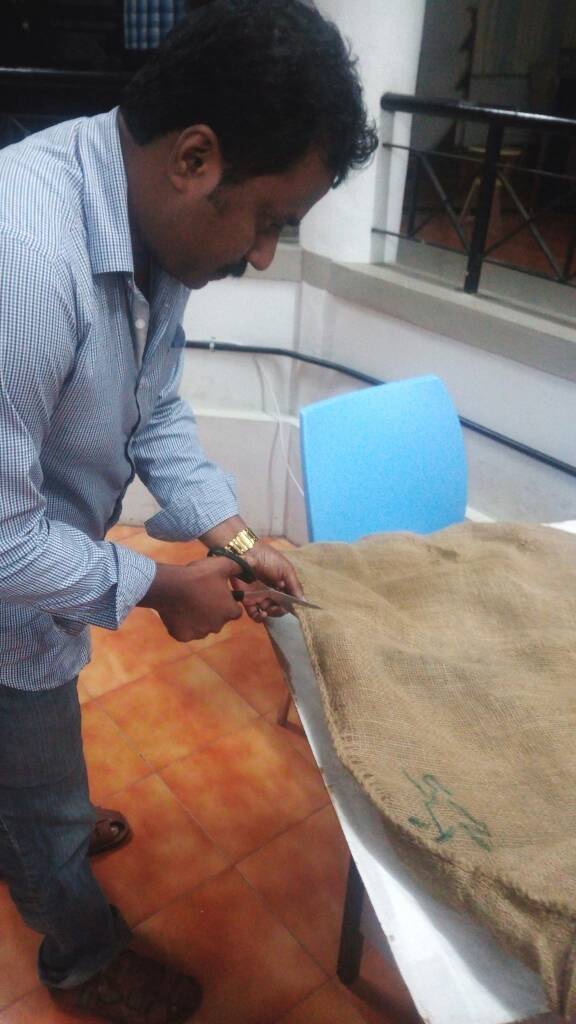
I used burlaps purchased from market as Fiber reinforcement ,it was cut into square shapes .A Vaccum bag is necessary which is used to cover the reinforced resin placed on the mould.It should be made in such a way that no air gaps should be left behind.
|
|
|---|
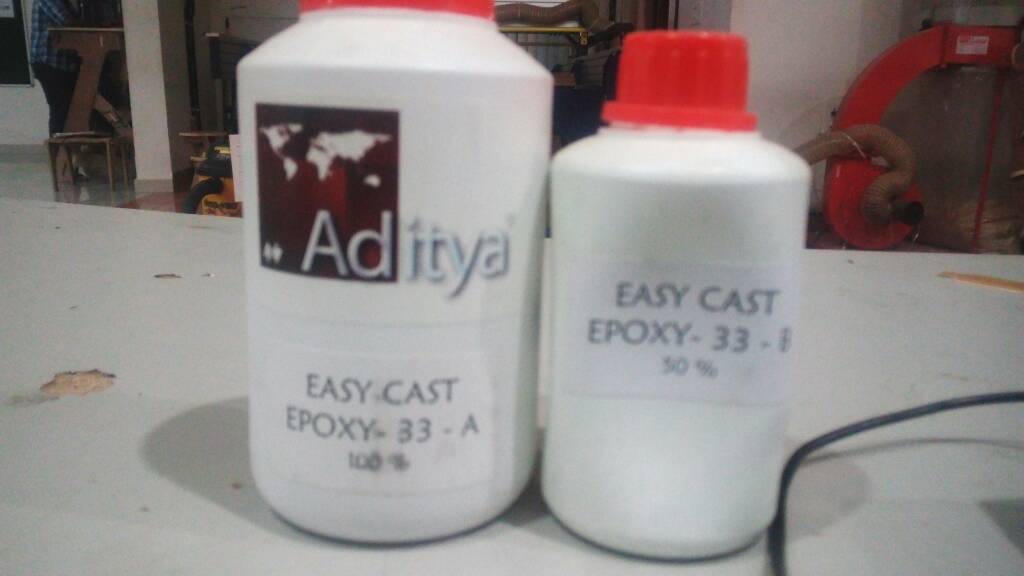
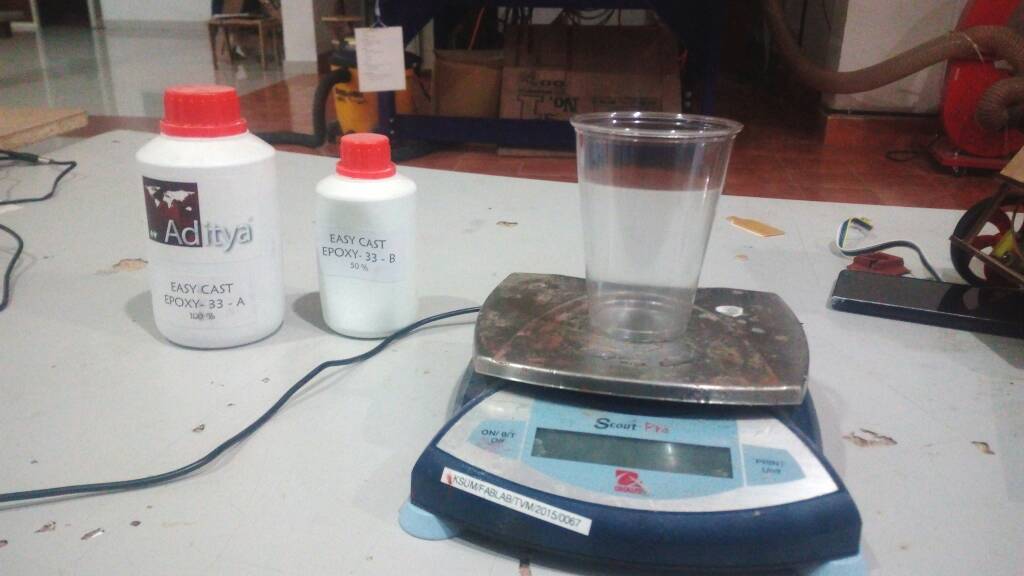
Easy cast epoxy 33 resin available in the lab is used for making the composite.The resin is actually a combination of two parts A and B,each of them are somewhat transparent. The resin was locally purchased and I have gone through the specifications fro internet . some of the characteristics of the resin is given below.
- Specially created Epoxy Resin to make transparent Statues, Murties etc
- Very less viscosity like water.
- Can Cure in 30 minutes if heated at 65 degree centigrade and poured
- Will cure at room temp in 24 hours.
- Non - Yellowing
- Shore hardness: ~ 80 shore
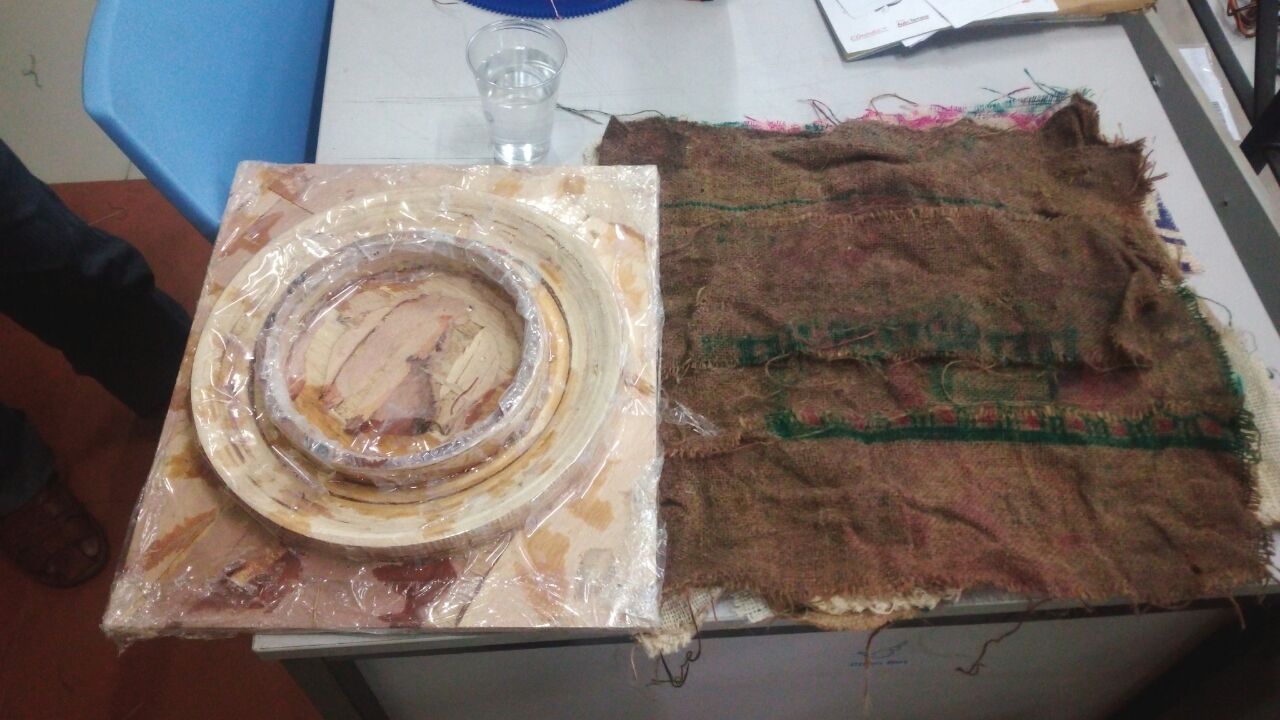
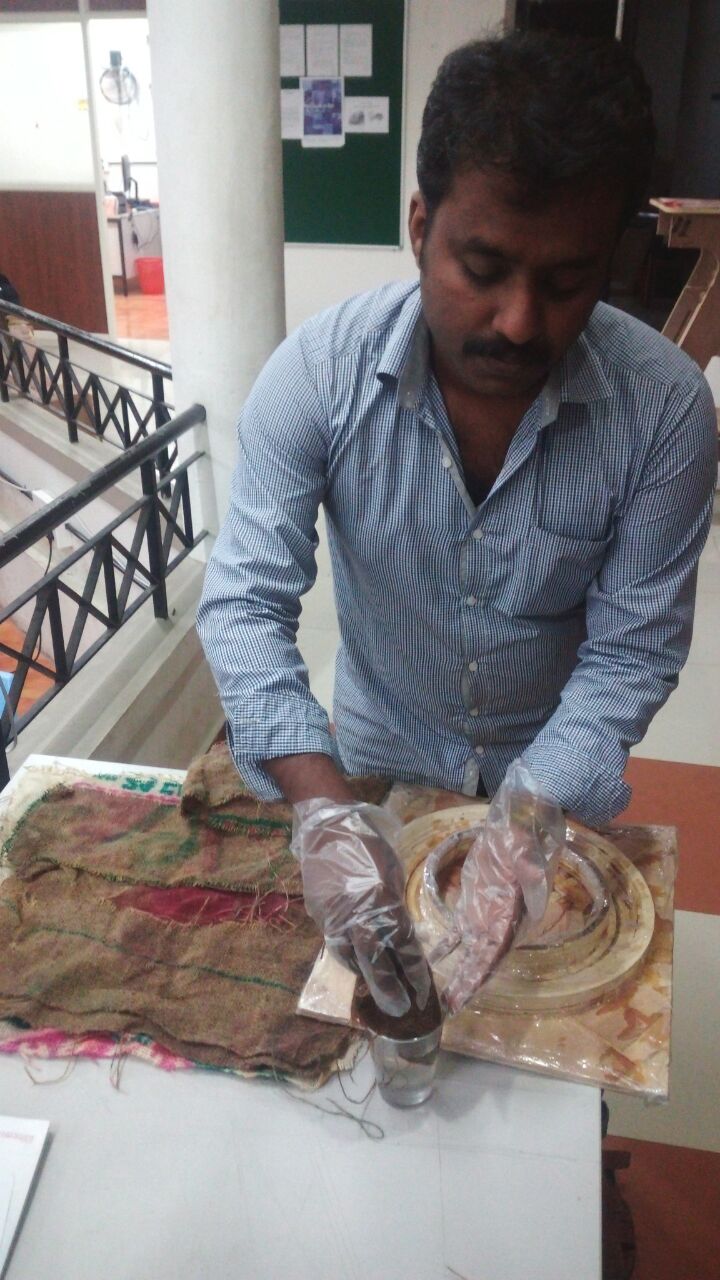
I am now ready to stack the composite ,I plan to have 3 layers of burlap which I have already shaped and kept.
|

|
|---|
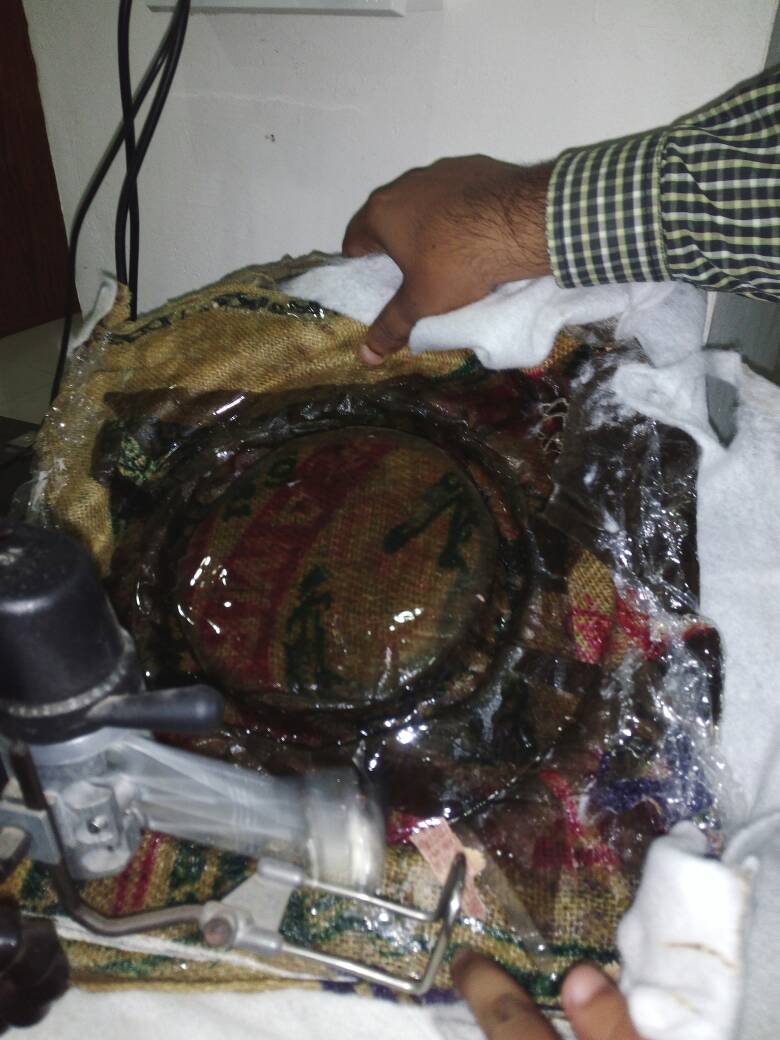
We have to mix the part A and part B in 2:1 ratio.I have taken almost 300 grams of part A and 150 grams of part B for my work.We have to use a plastic glass for taking the resin and after that stirr throughly with wooden strirres available in lab. Next I have dipped the burlap into the mixed matrix and placed over the mould one by one .Remaining matrix is poured over the mould. After completing the procedure the entire mould was covered with breather fabric .Then the whole material is placed inside the vaccum bag.
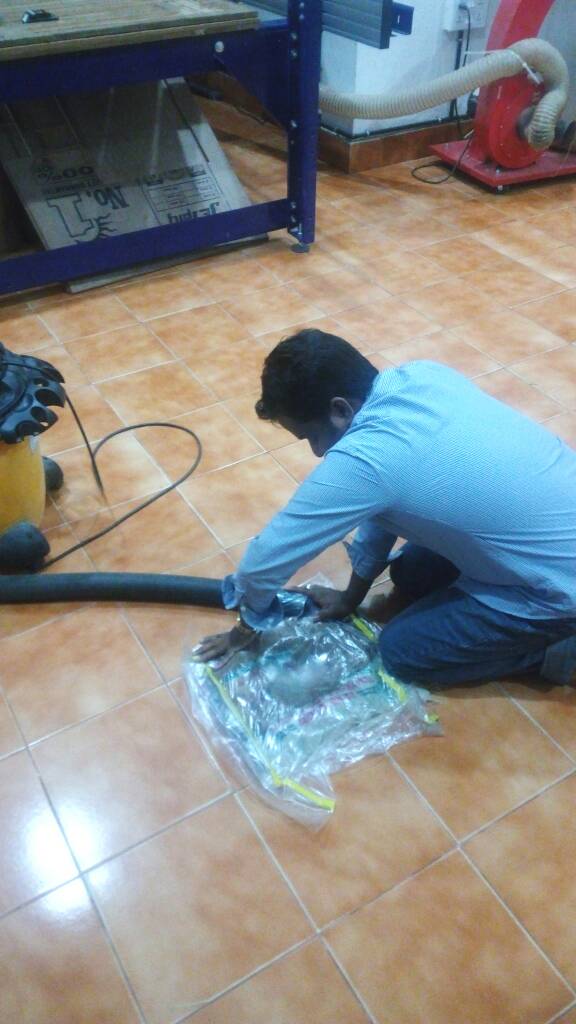
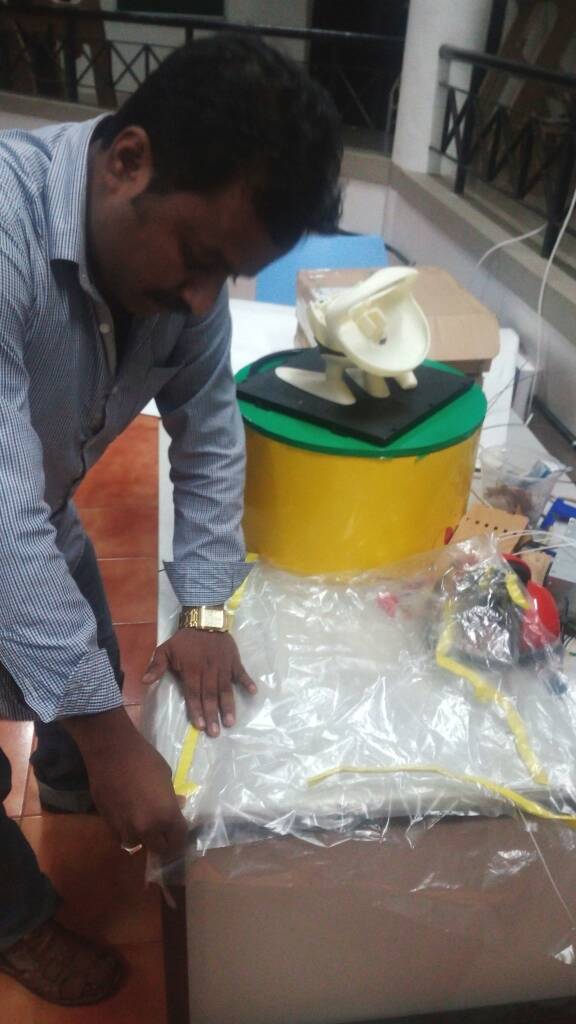
In order to maintain proper shape the whole part has to be kept in the vaccum bag which is prepared previously and after that a vaccum is created inside using Shopvac 6.5HP vaccum cleaner available in our lab.
.
|
|
|---|
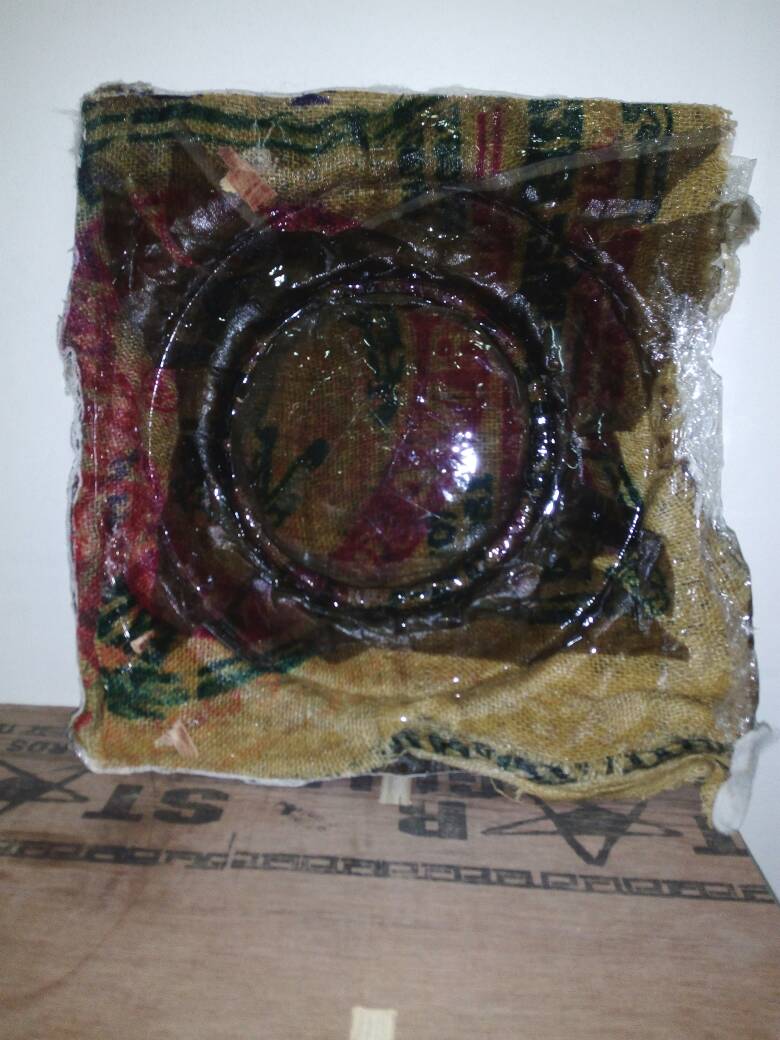
After 24 hours of waiting ,finally I got the cap ready,but it looks different.From the above figure it is evident that the cap is having some extra material extended outward.I and syed cutted this extra part using scroll saw available in the lab.As the process of cutting goes on my cap becomes looking better.

At last after a hard work of more than 3 days I got my cap ready,although its look like cape , My design is having mistakes .Placing of ring part is a mistake,because it causes my cap to have a projection such that it is good for keeping this on the head but there is a dip made for this projection in the other side.