Expectations and model design
I've been having great expectations for this week since the beginning of Fab Academy 2017, because I had lots of
T-shirts I didn't wear anymore which I would have liked to give a second life to but also mostly for its being a lot challenging.
Another week where manual and digital works are equally balanced...that fires me so much! Process to be follow was rather clear to me even before
Neil's lesson, owing to the fact that I followed and cooperated with last year's students of Fab Academy at SantaChiara Fab Lab, but I reserved all the passages a
deep focus anyway, cause as for Computer-controlled machining I had
to work with Shopbot and independently from the different scope I used it for I had to pay lot of attention (here some
advice for behaviours).
A quick summary of this week path:
- 1-check you have all the materials needed:
- Overall
- Plastic gloves
- Plastic glass
- putty knives (some for mixing some for psreading resin)
- Polistirene to be milled (check thickness so as to slice the model for milling files if needed)
- Sand paper to finish surfaces (optional)
- Wax or something else as detaching material
- Linen or cotton or fabric/fiber to be stratified with resin
- Resin
- Breather
- Release fabric
- Perforated film
- Vaccum bag and pump (or, as well bags to be filled with water and a box to put your resined model into)
- Patience
- Focus
- 2-design a 3D model;
- 3-export it as STL file and prepare milling files (I did that with Cut3D)
- 4-sleep and eat well
- 5-mill the model
- 6-glue model parts together (if needed), sandpaper rough parts and put stucco on holes (if needed)
- 7-spread wax on surface - do the same on a little polistirene piece to be used for test
- 8-cut linen of fabric stripes according to your model shape - consider many layers and also test ones
- 9-prepare resin (pay attention to parts ratio for mixing) and test it on a little stripe
- 10-put another layer of resin and fabric onto testing polistirene
- 11-take the resined model and put on in the following materials in this order:
- release fabric
- perforated film
- breather
- 12-put all inside the vacuum bag faraway from vacuum port
- 13-add a little square of breather under vacuum port
- 14-turn vacuum pump on and stretch crinkles that forms while air is being sucking out
- 15-once all air has been taken out, let resin dry for time required
- 16-open the vacuum bag, take out the model and all layers above resin
- 17-composite material should detach easily from polistirene now
- 18-if everything worked, repeat passages 9-17 for your project model
....You see?! Loads of steps to follow!
The reason why I typed patience and focus among materials is because each passage contains source of mistakes that you would bear along all the process
and that would endanger final result.
As you can imagine you need lot of time to do this weekly assignment (consider that the wax we have in our lab requires
two hours to dry and you have to put at least 10 levels of it!) so a quick design and organized milling turns will be great friends of yours in this.
Back to 460 BC: Peloponnese War
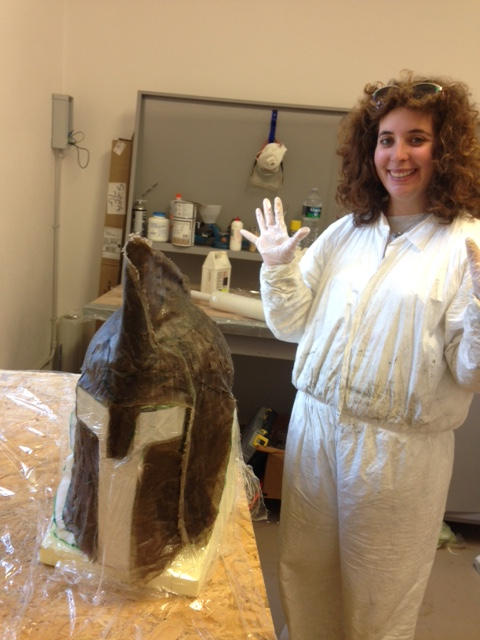
For this week assignment I really would have liked to do something quite big and realistic and owing to my being fond of armours, I decided to replicate
an helmet. There's no relevant reason why opted for Spartan-Corinthian ones instead of General Maximus Decimus Meridius's or Achille's one
except for the fact that I had to avoid overhangs and deisgn the easiest shape to be covered with fabric and to avoid crickles as much as possible. So in the end my
helmet looked much similar to those Peloponnesian soldiers in 460-450 BC.
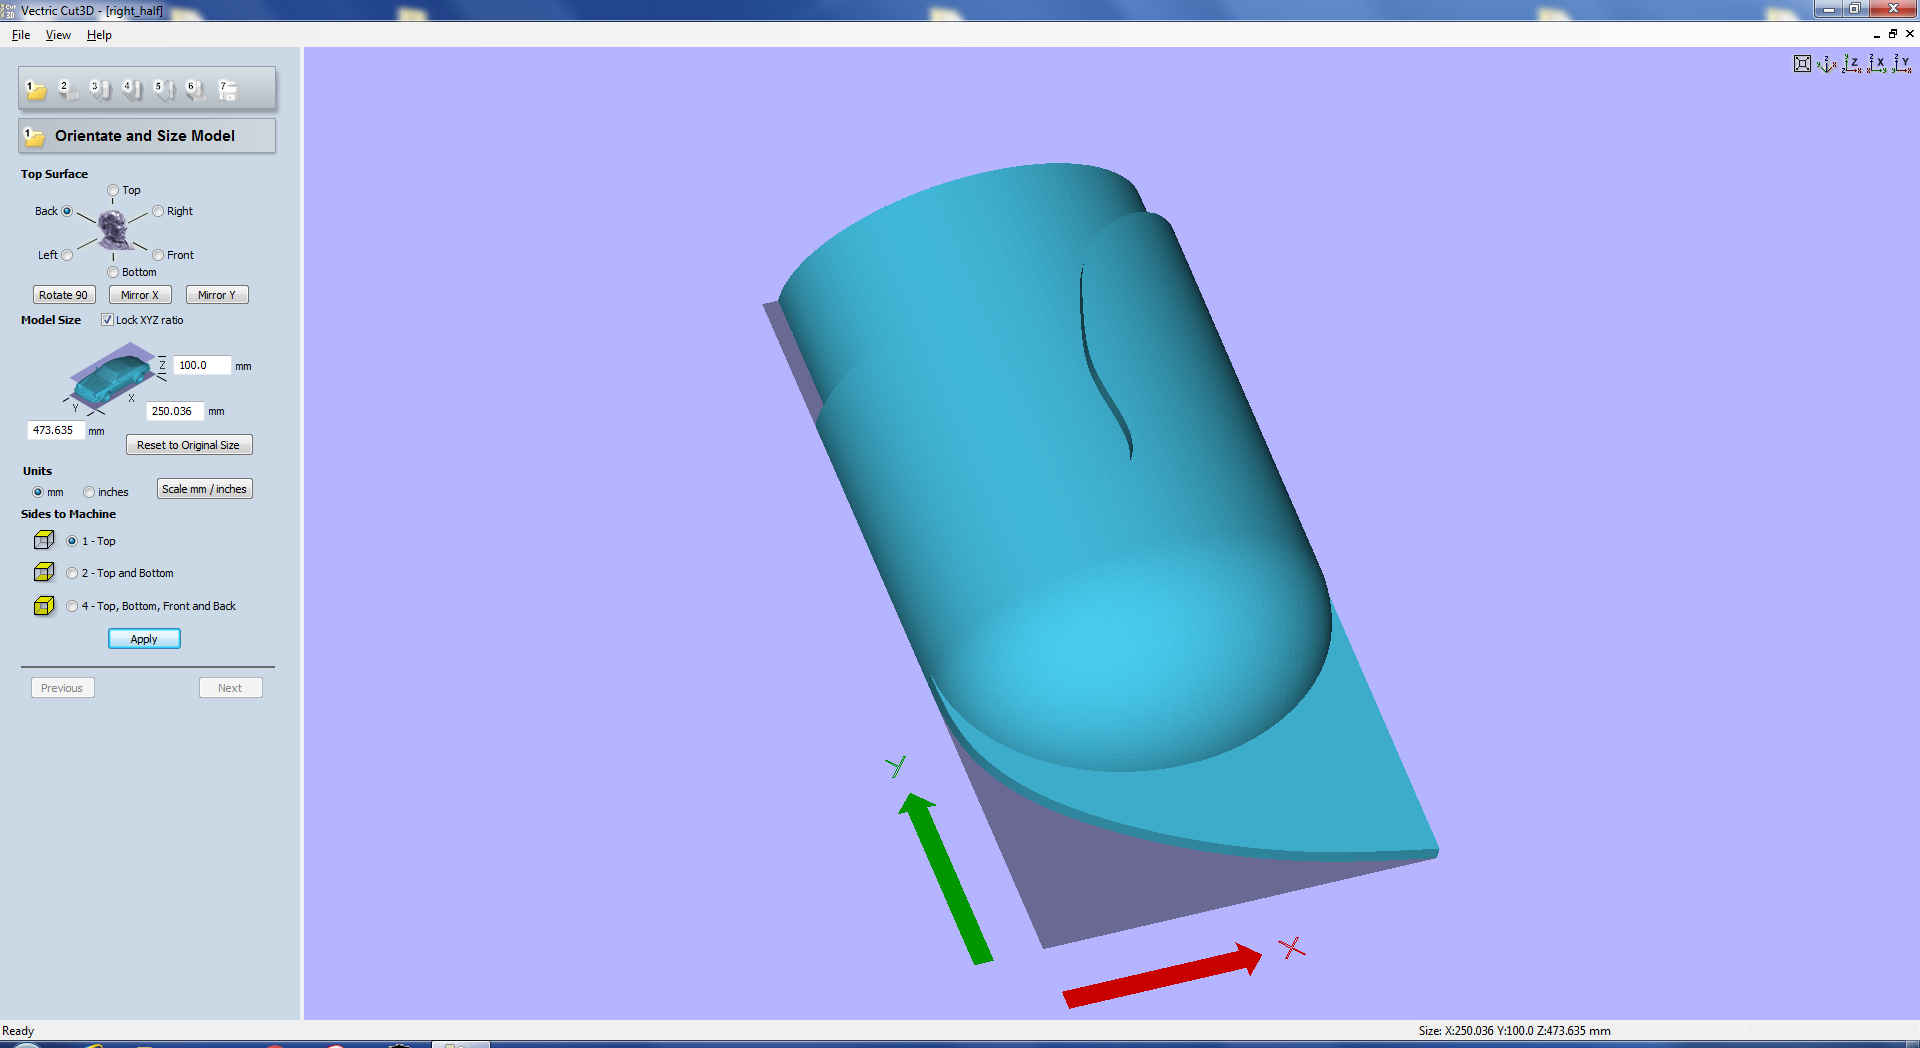
Since I hadn't Solidworks on my computer and I wanted to have the model sterted and finished under my .... before going to bed on wednesday night, I chose
to give another chance of surprising me to Onshape...And I must say it let me quite satisfied :)
First I designed quickly a sad helmet (you'll soon see why) just to become confident with Onshape tools:
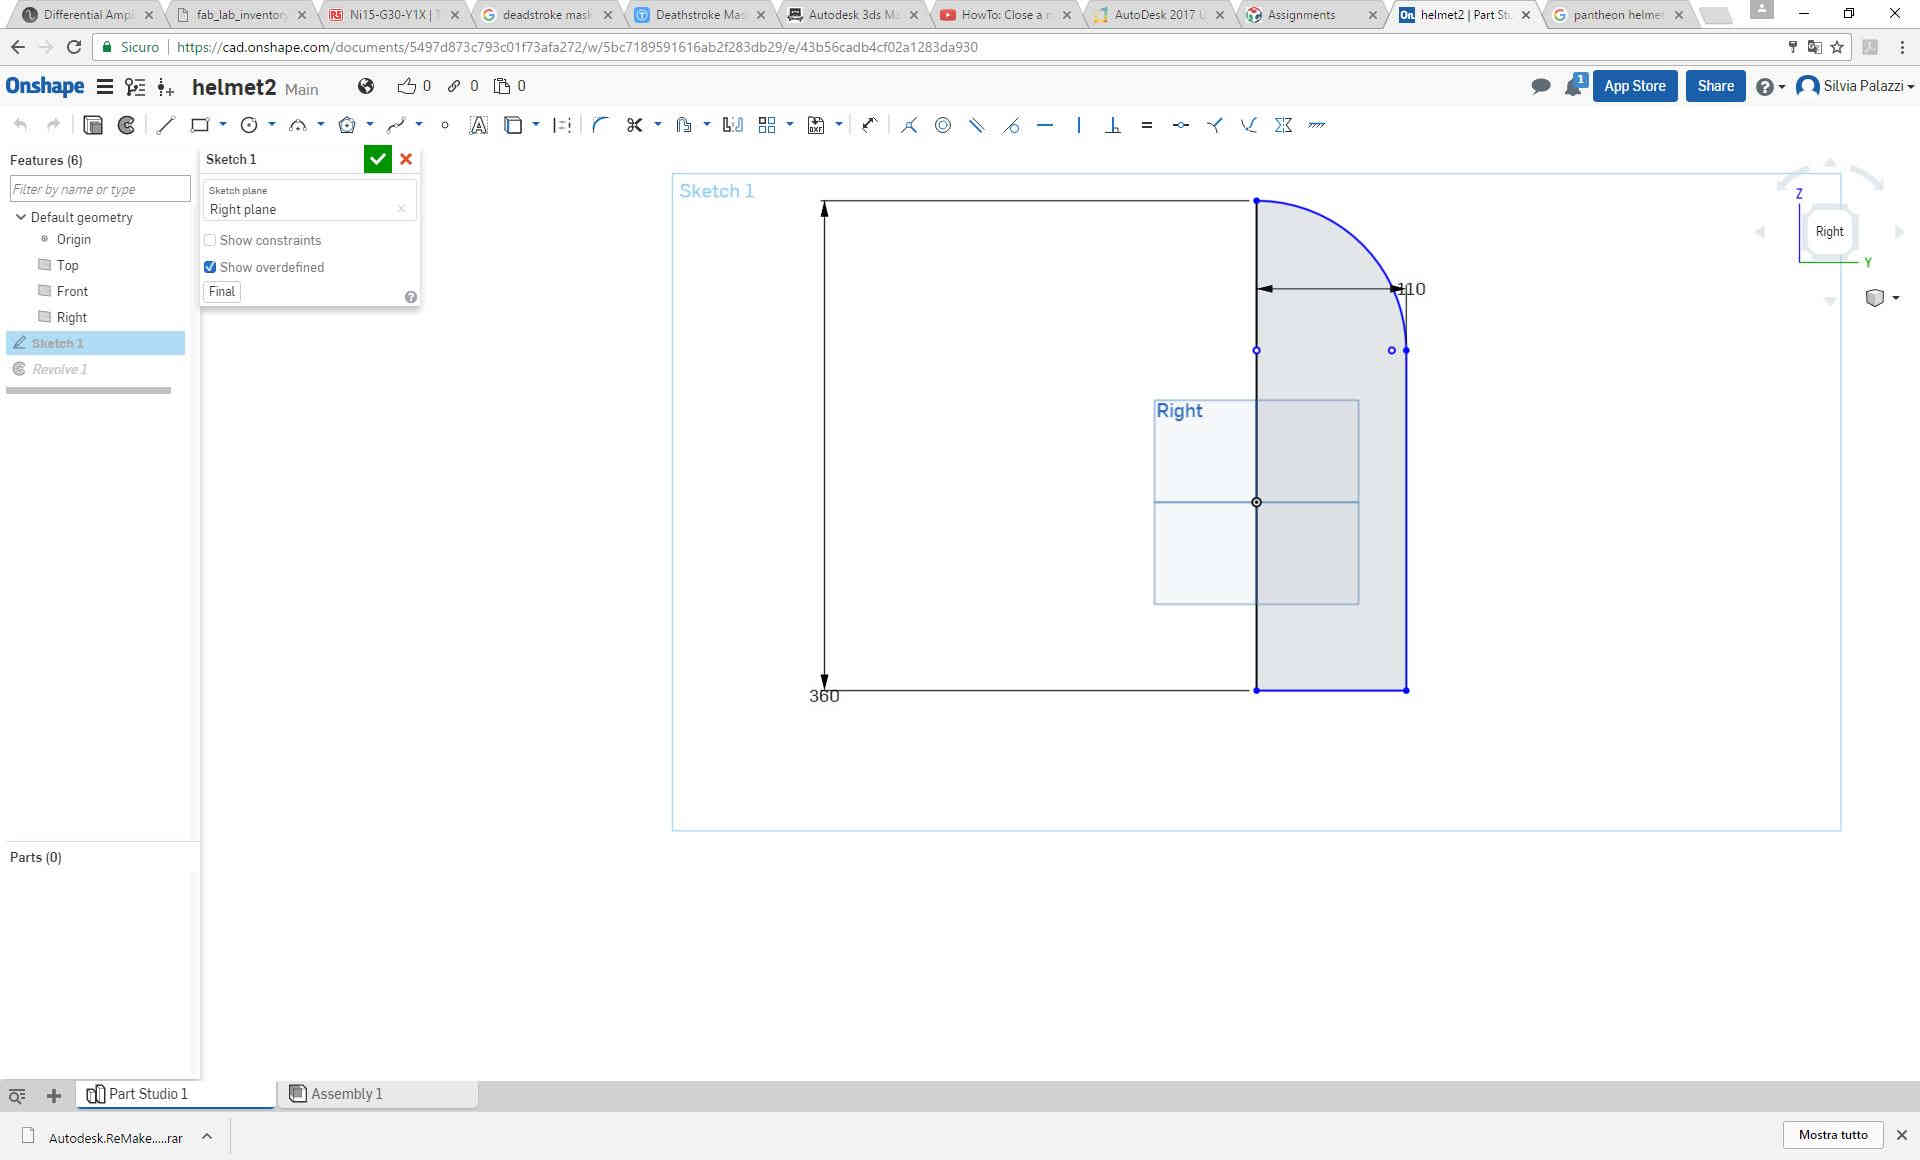
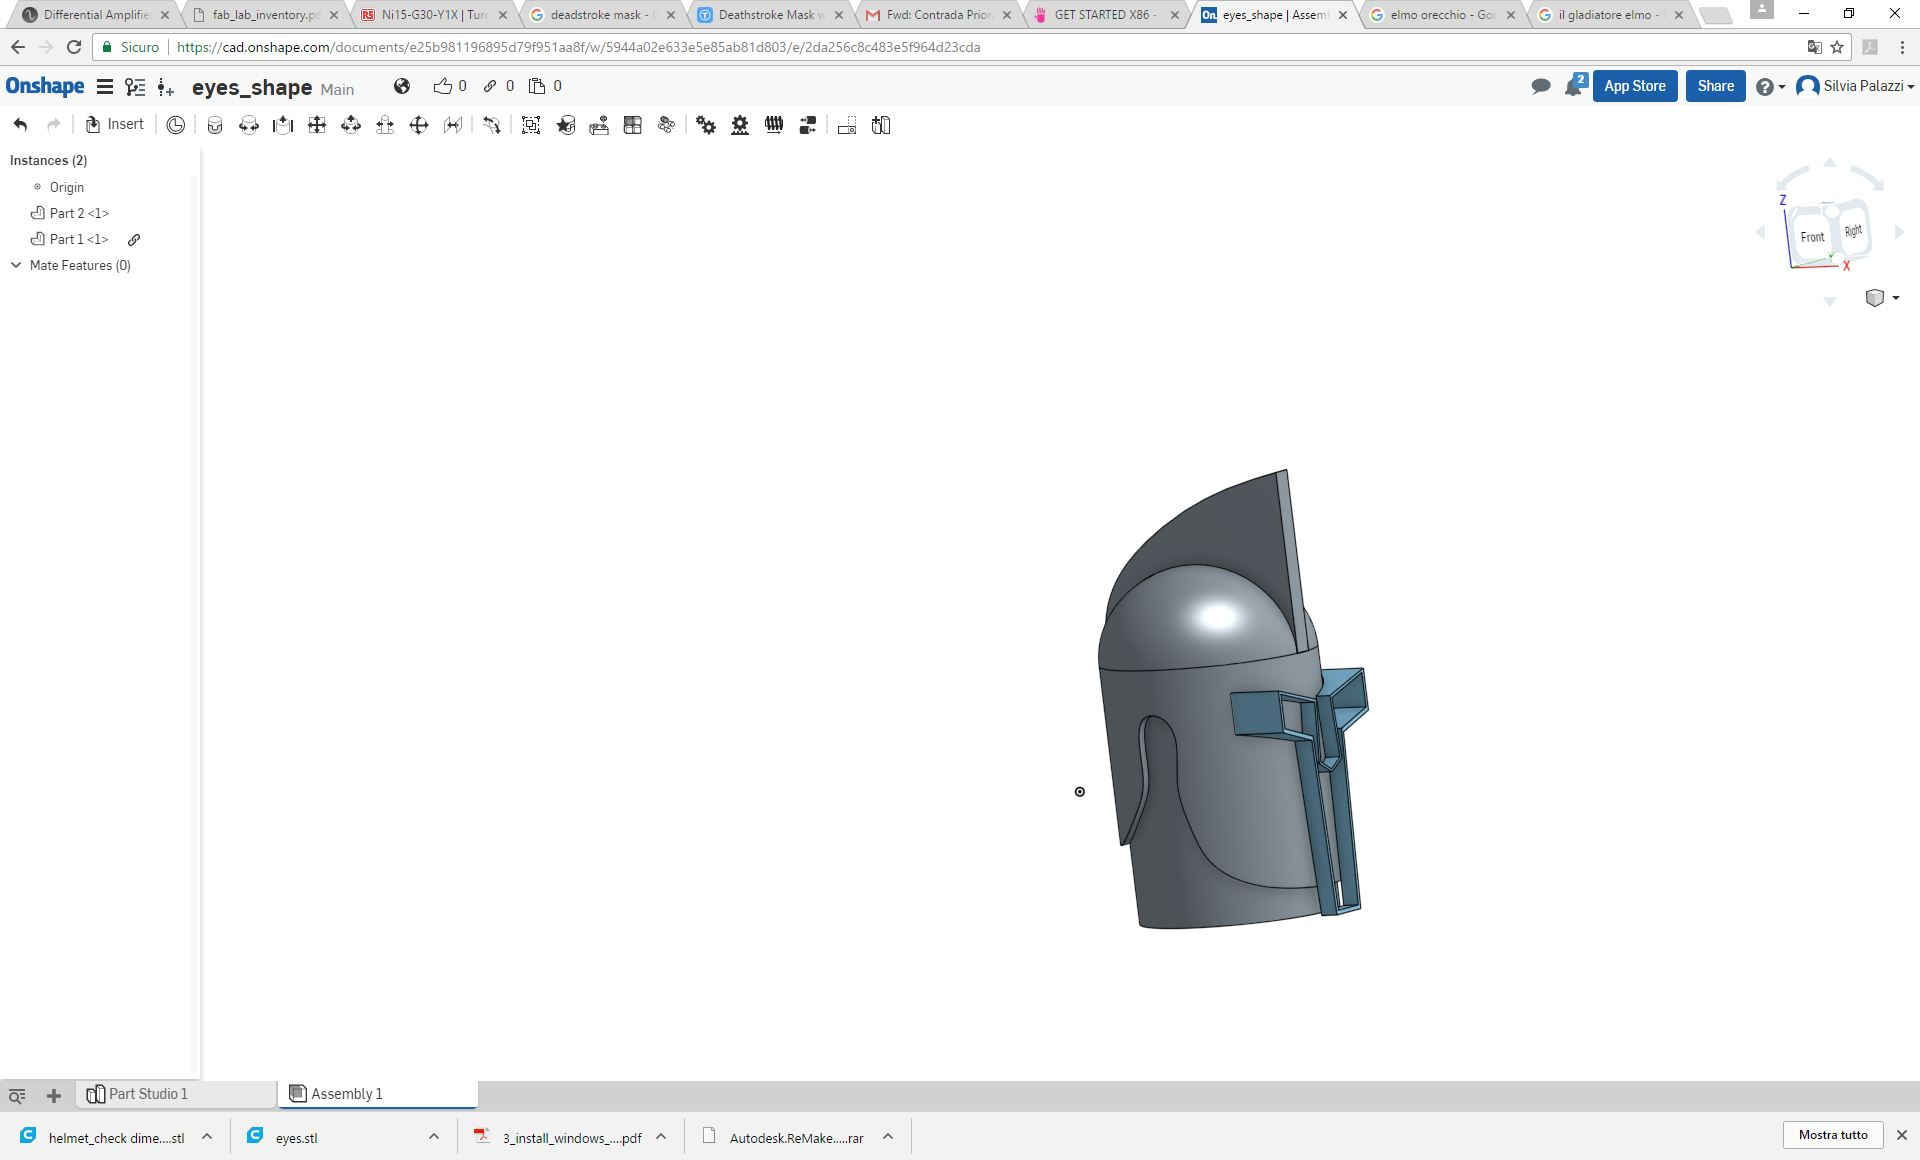
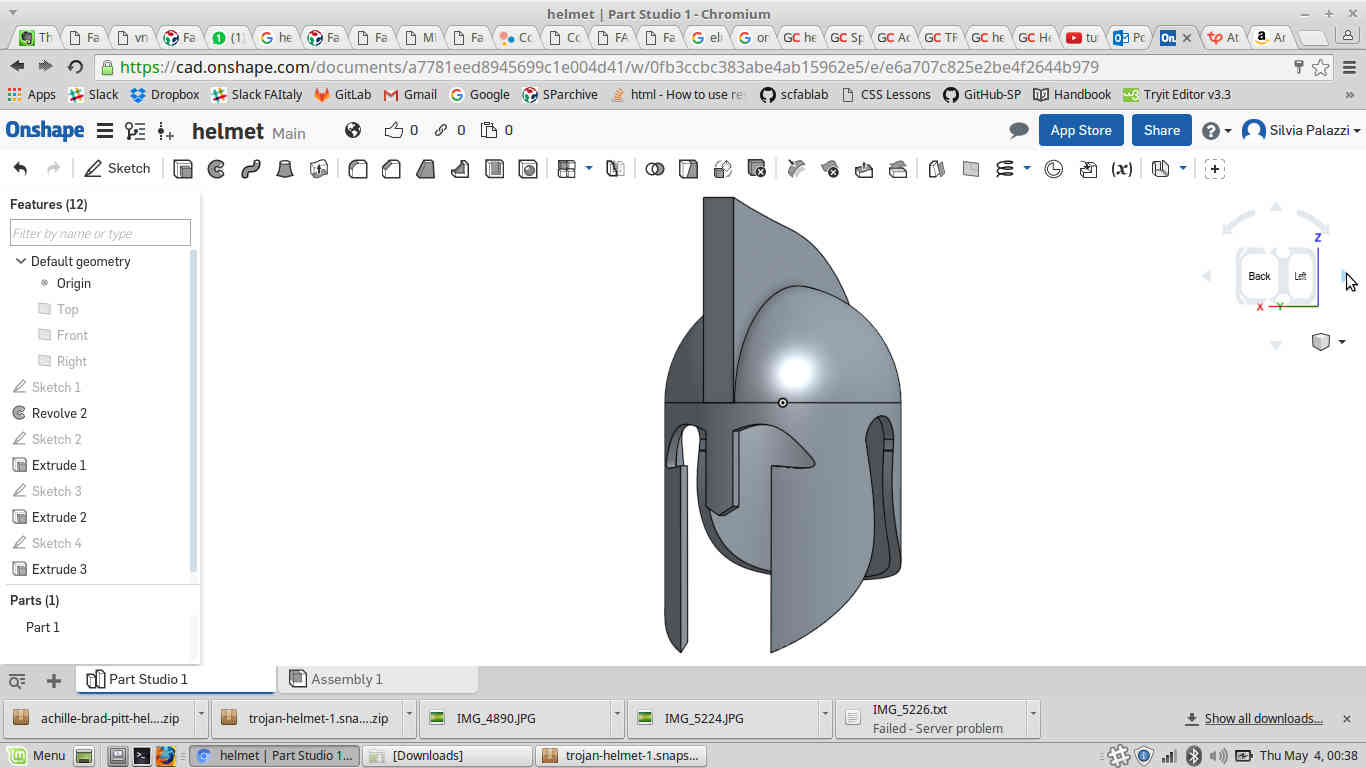 You see those sad eyes?? Actually they represented my incoscious thinking about the fact I didn't quote any dimension properly :)
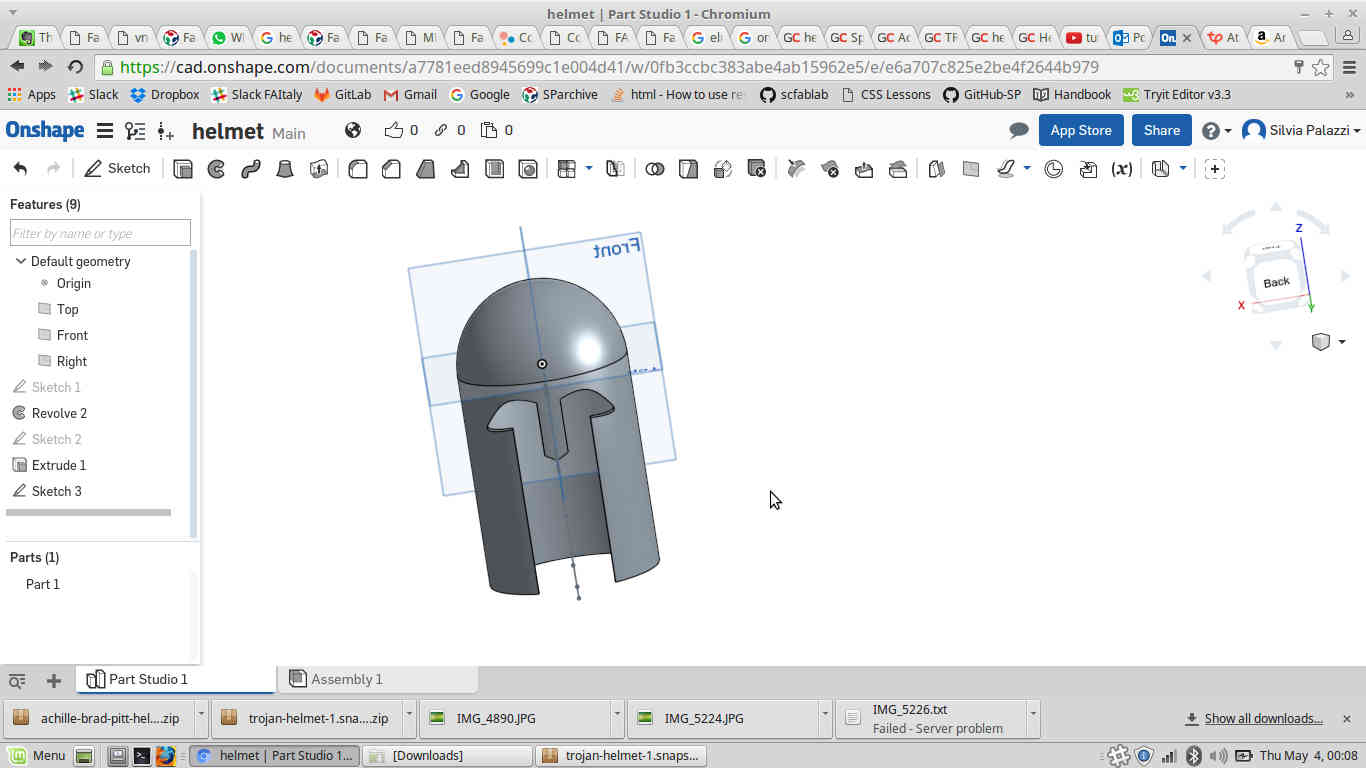
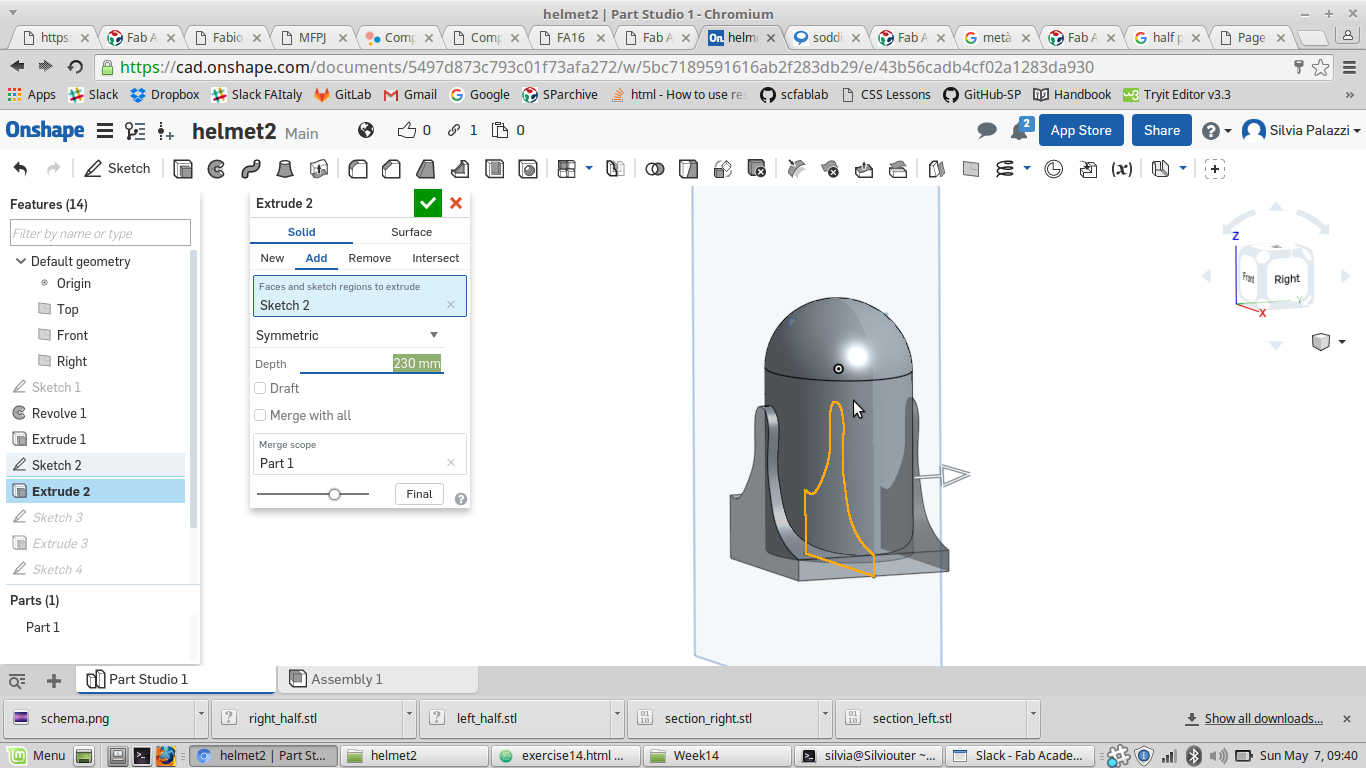
On that model, I thought about how should I change 3D shapes in order to be milled. First of all I needed the model filled inside:
 Then also I realised that I couldn't obtain all engraved parts at the same time, when slicing the model, because according to the direction of slicing, ear engravings
or eyes engraving would result as overhangs.
Then also I realised that I couldn't obtain all engraved parts at the same time, when slicing the model, because according to the direction of slicing, ear engravings
or eyes engraving would result as overhangs.
I therefore decided to delete eyes and nose shape which I would lately cut by hand.
 ...I could go to bed pleased :)
The day after I focused on my helmet dimensions: I found many tutorials about right way of measuring
your head dimensions and according to changes I had to do do my model.
Here I found this image:
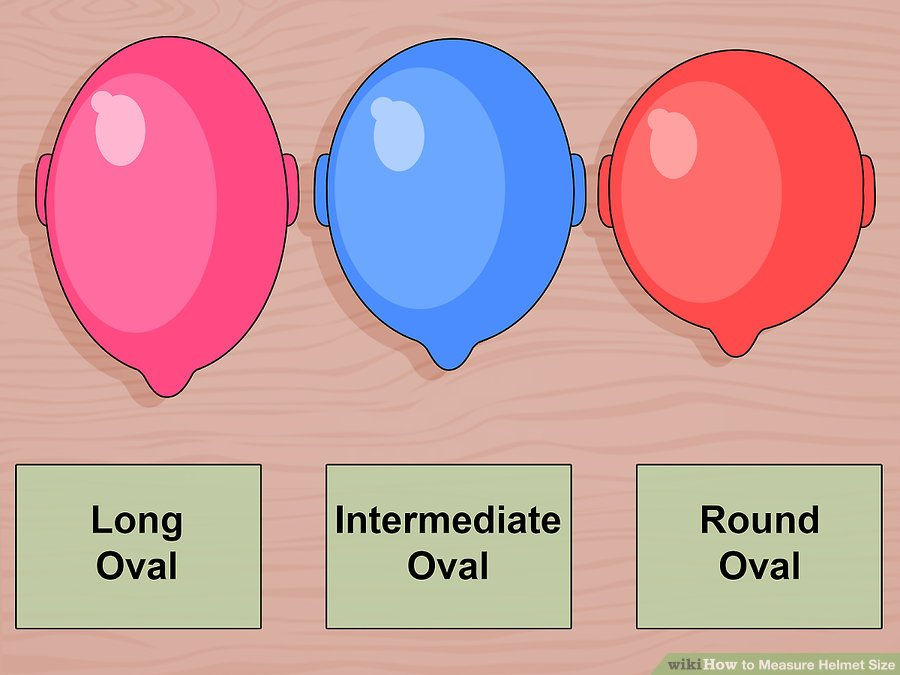 And it made me ask which of those shapes my head was like to:
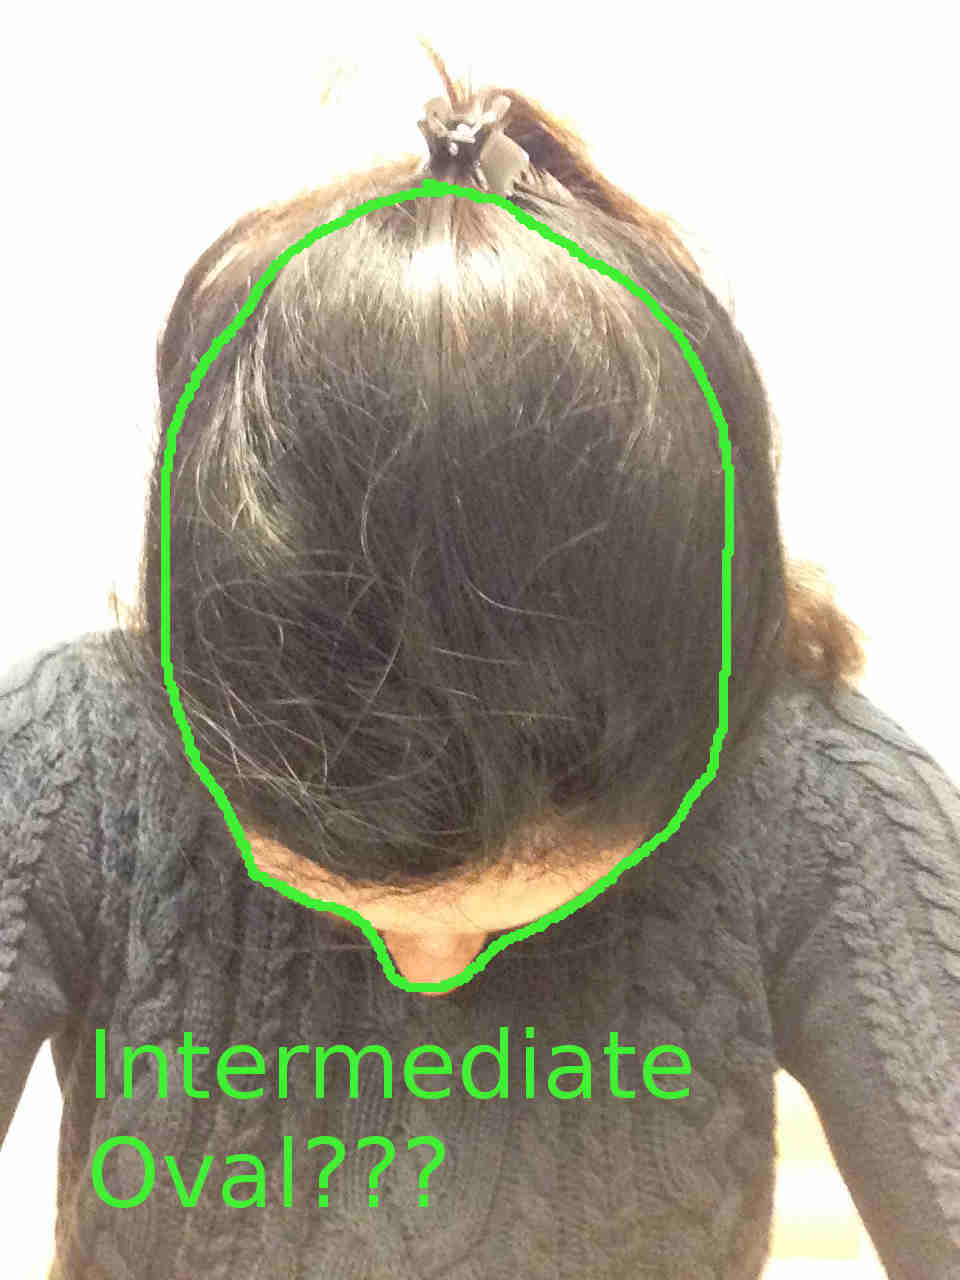
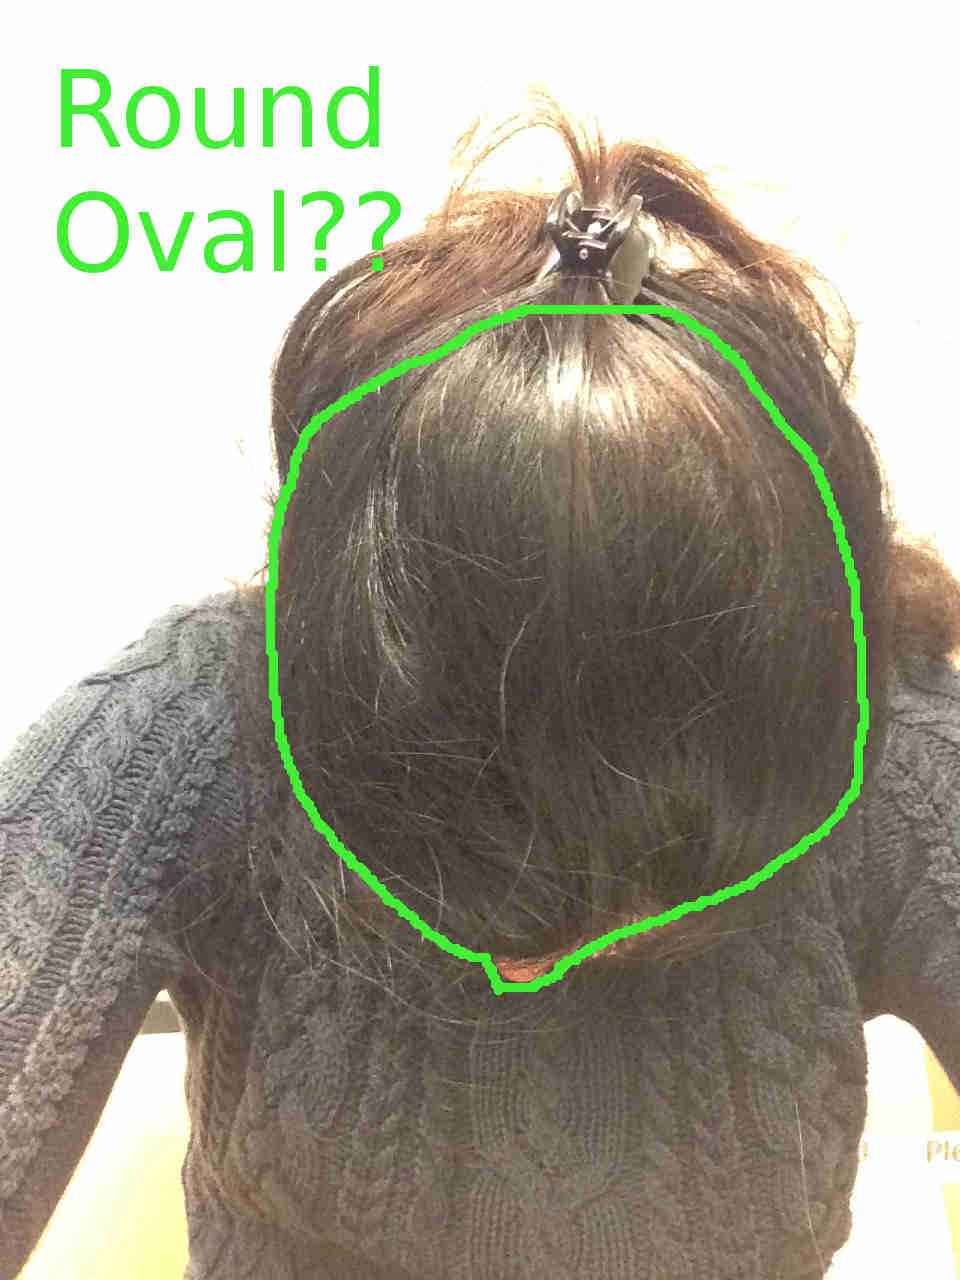 Feeling weird, I just referred to some standard dimensions I found on the net and adapted proportionally to my head dimensions.
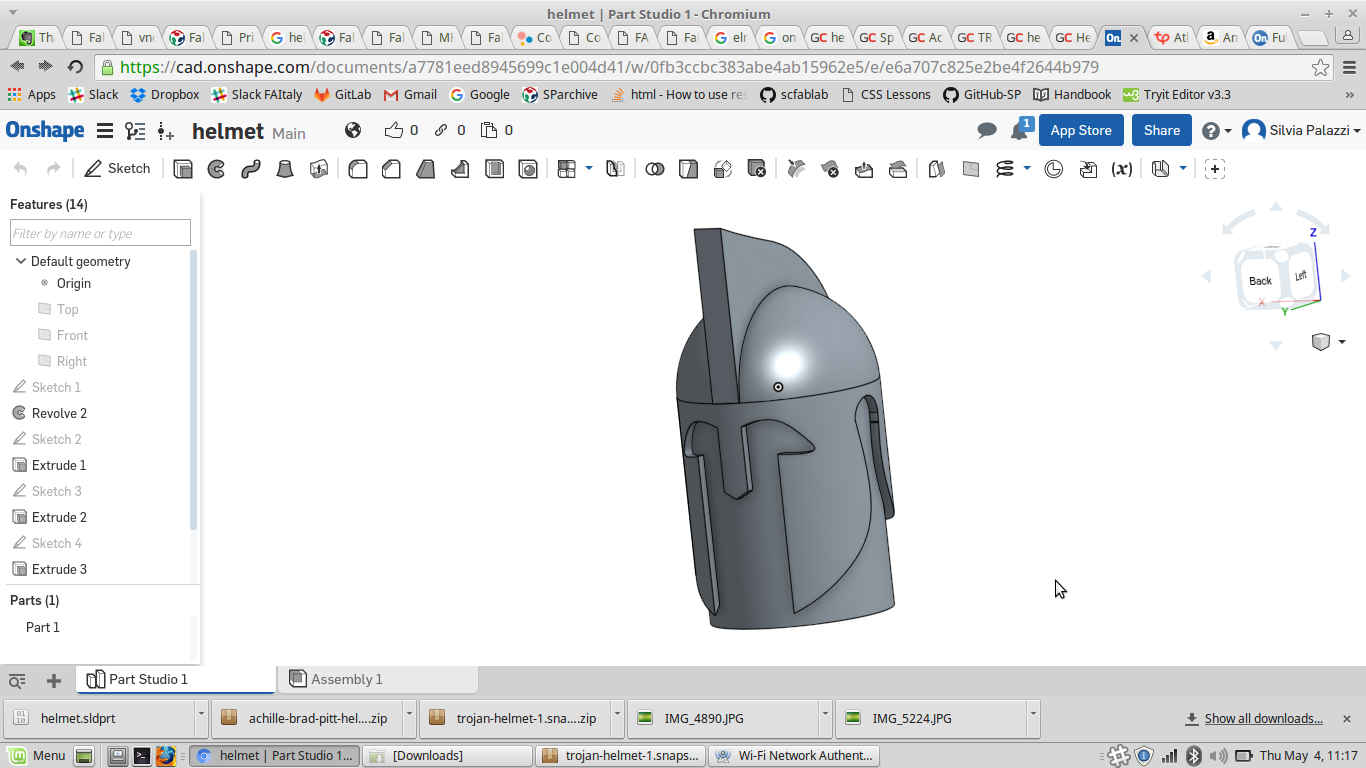
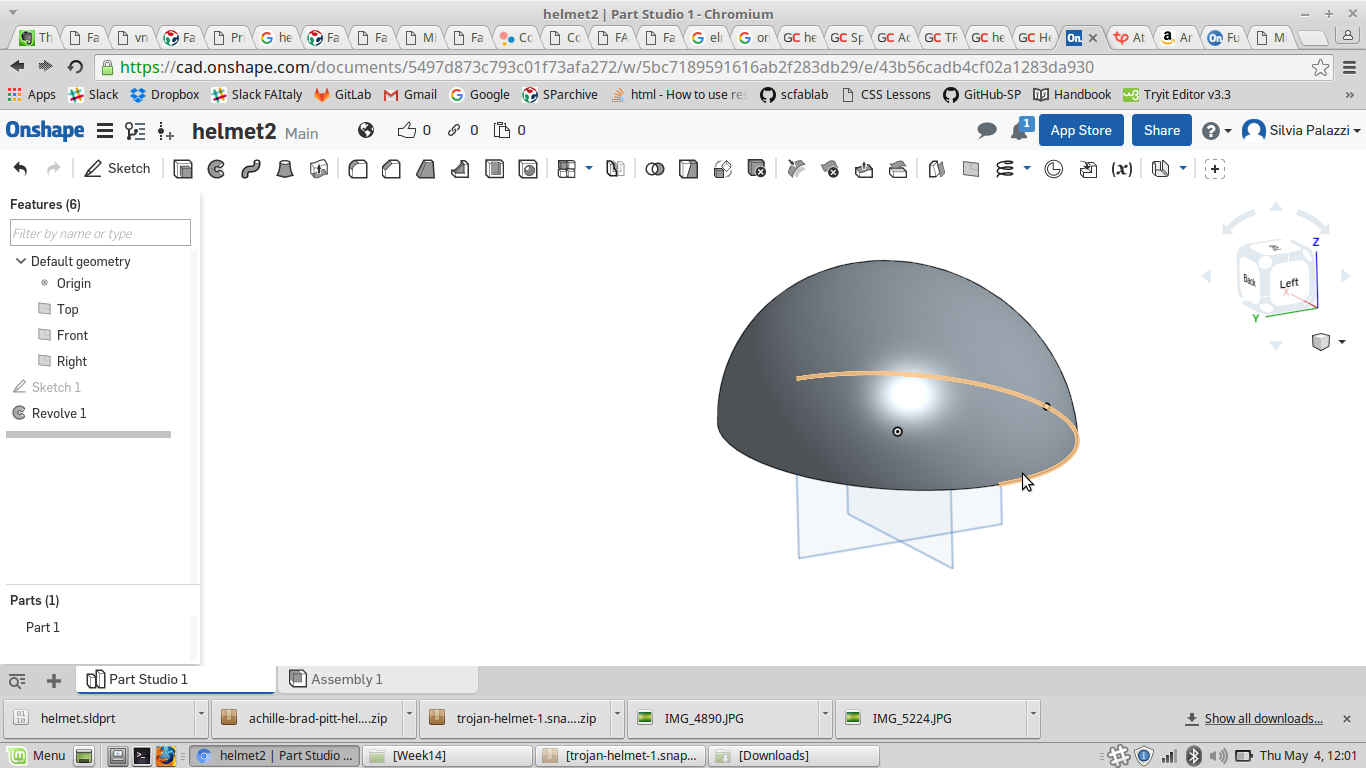
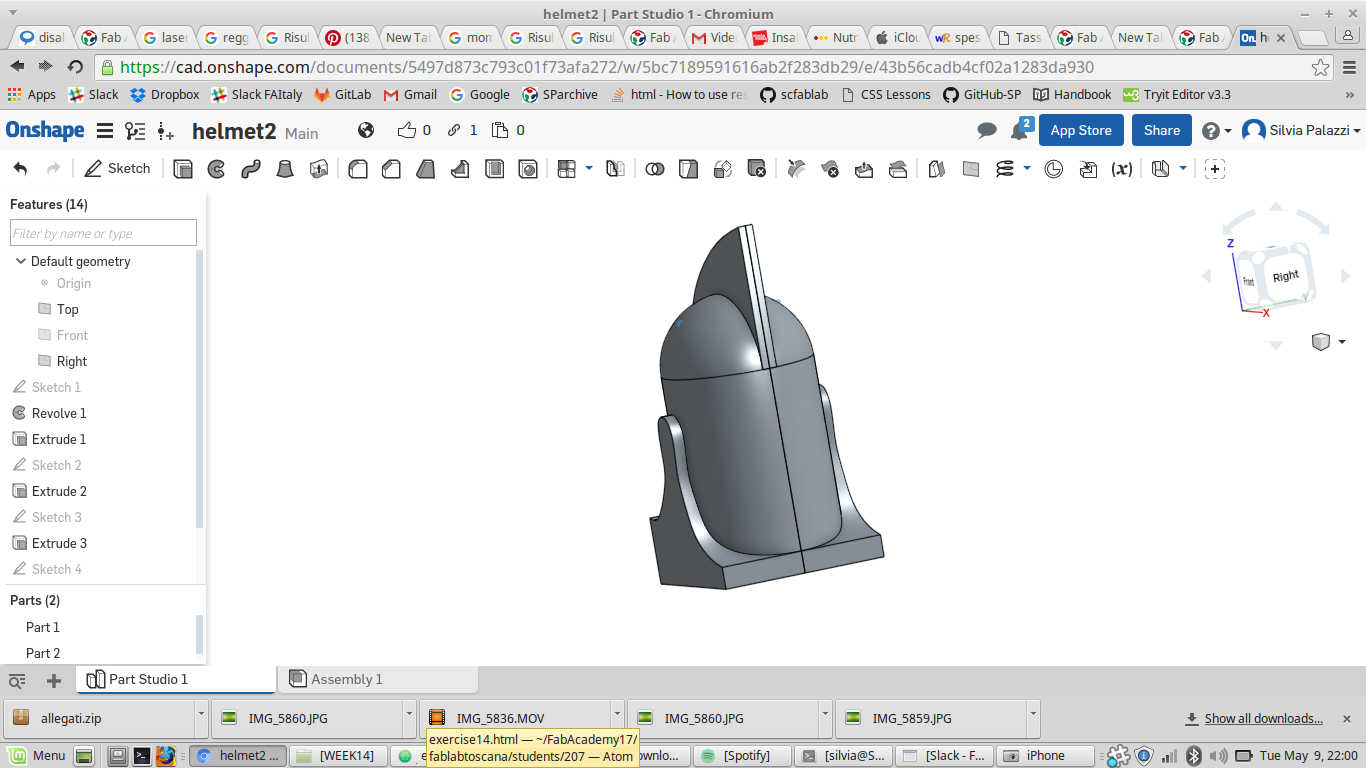
I so decided to make a new helmet, starting the upper part:
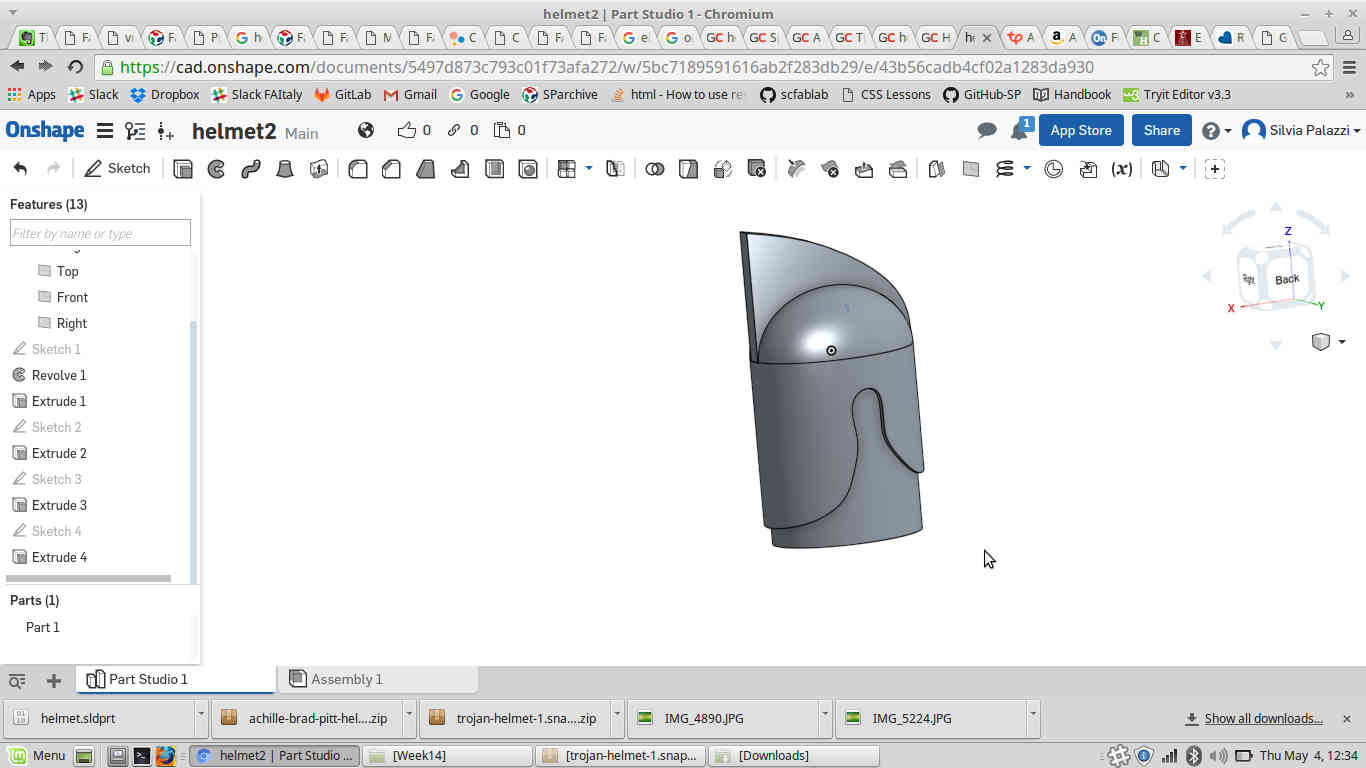
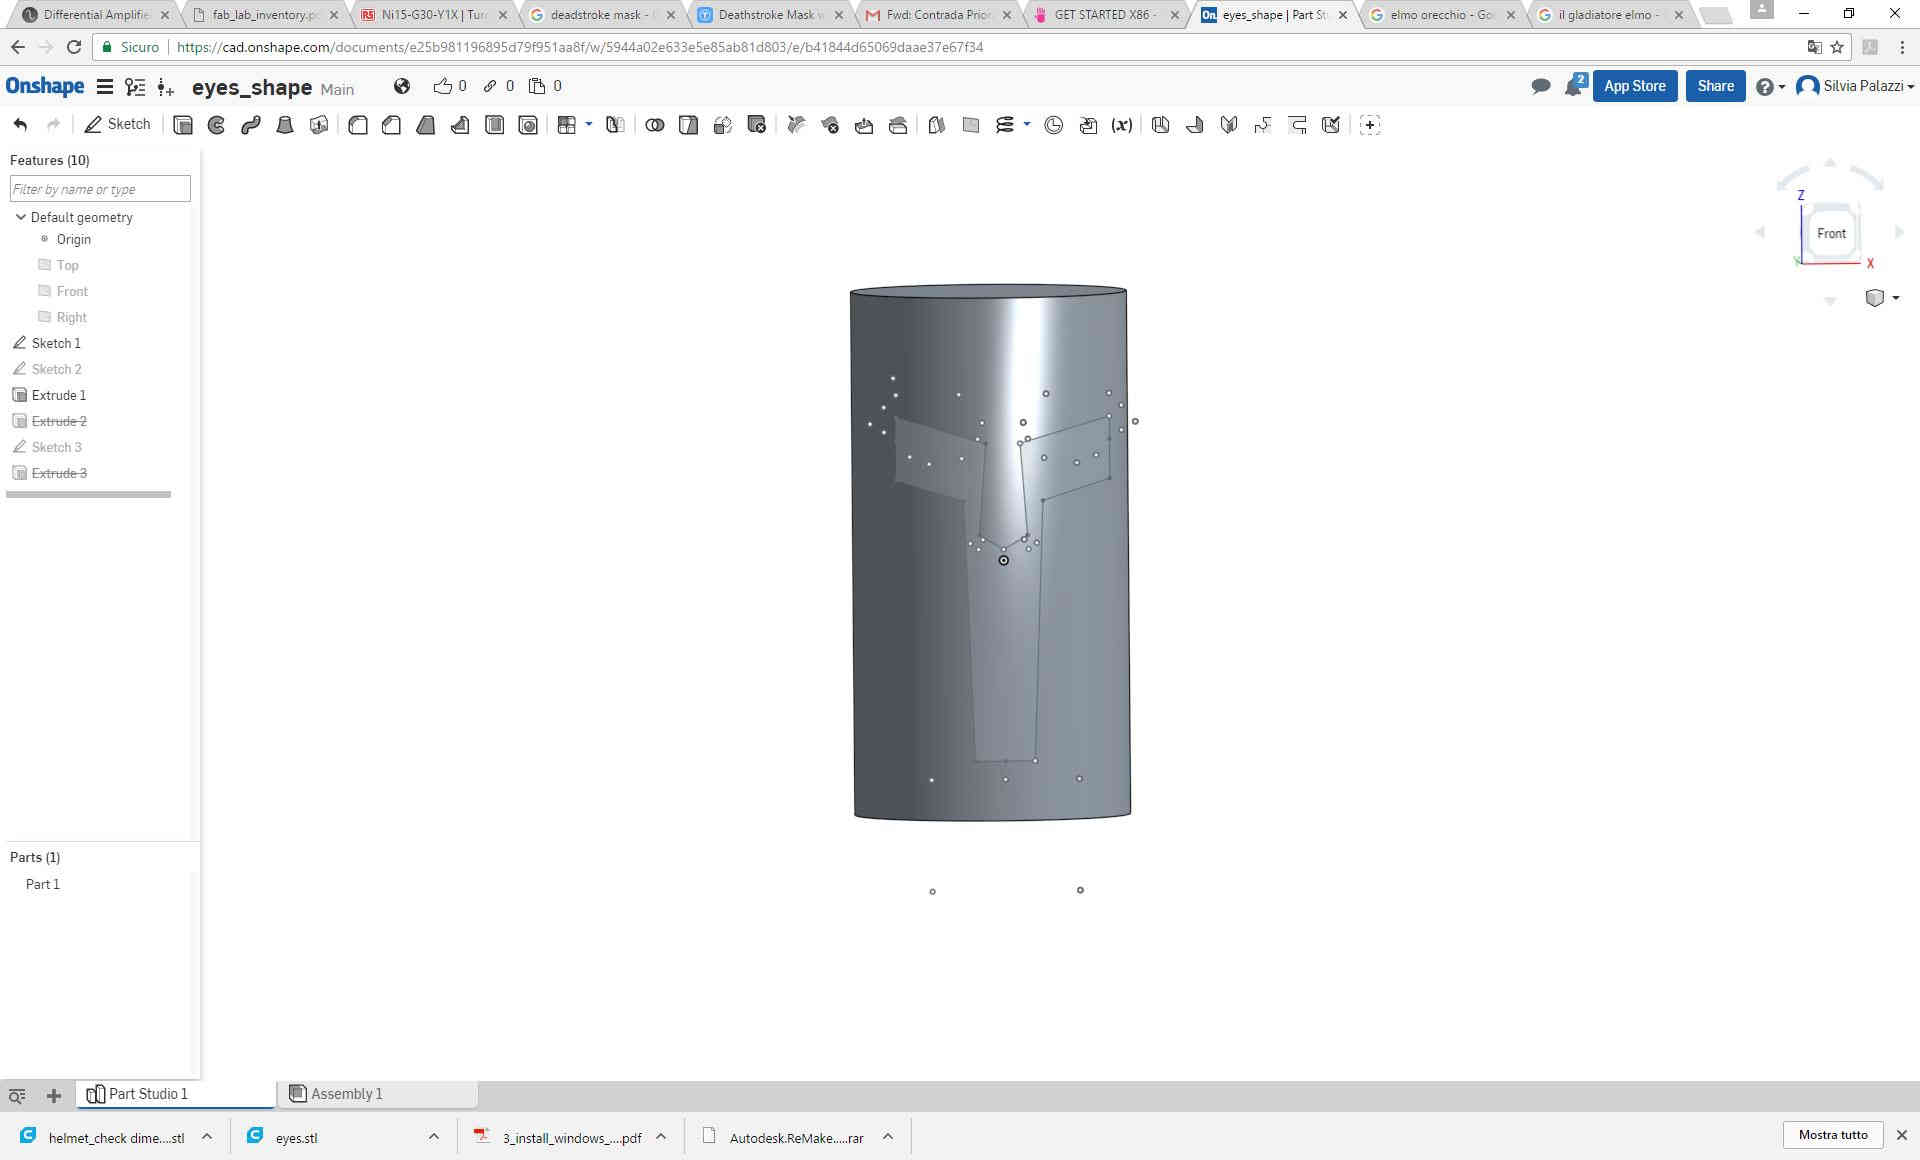
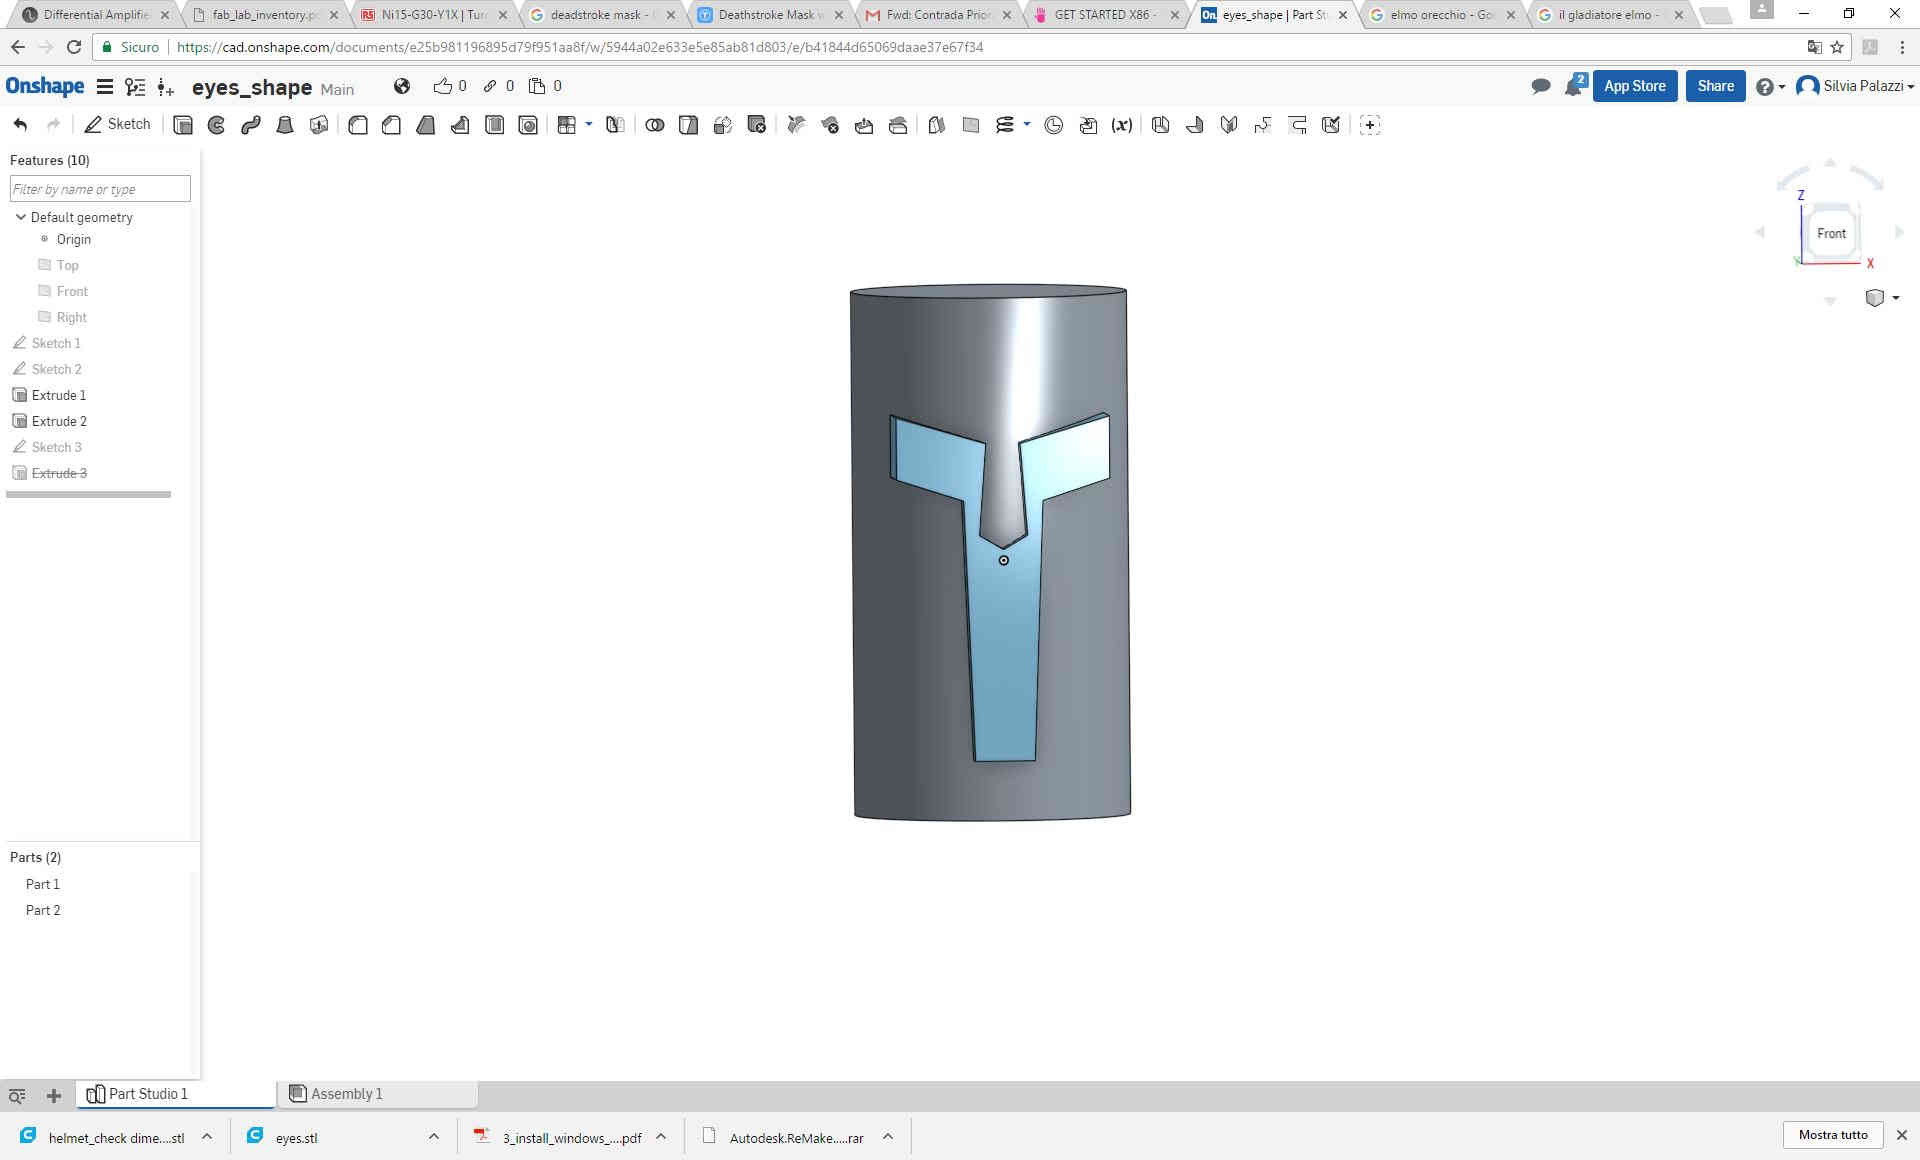
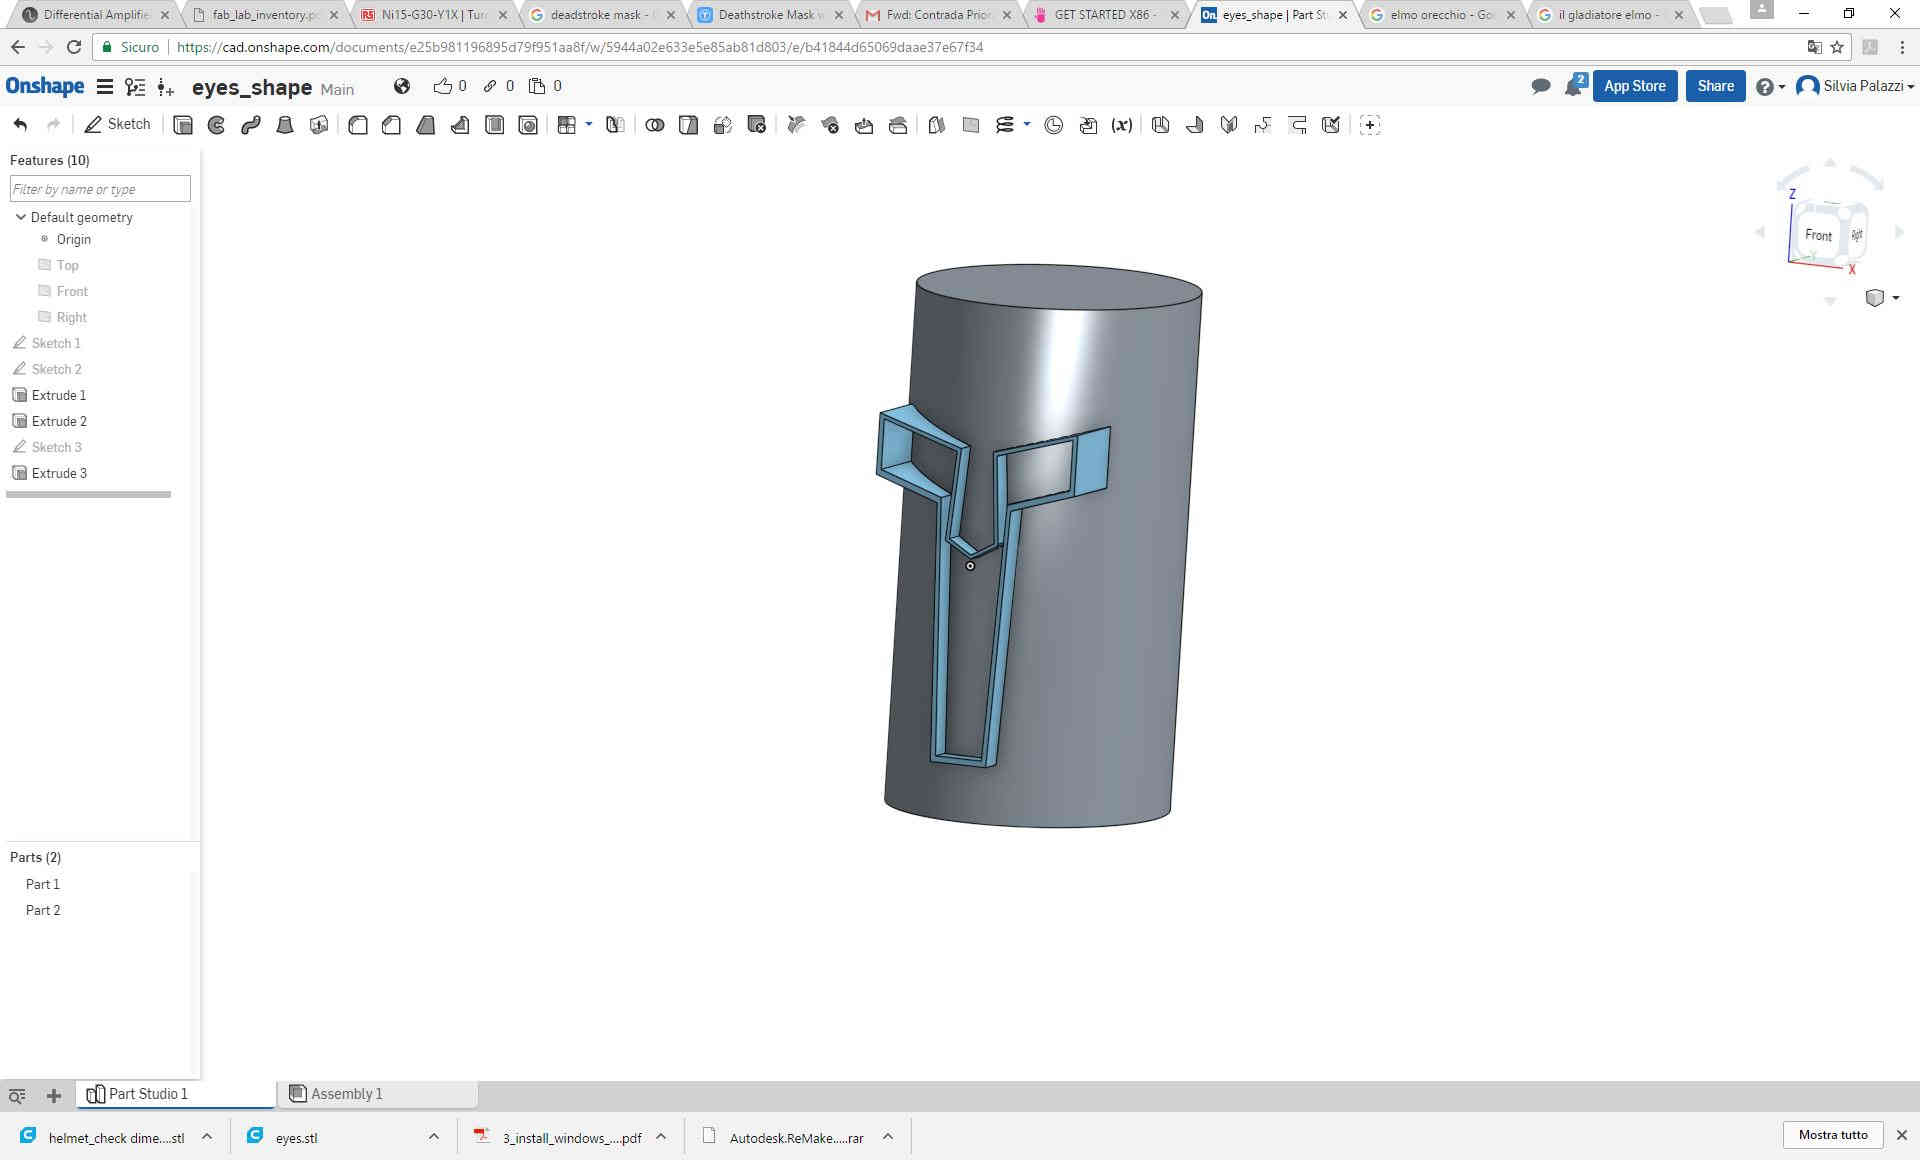
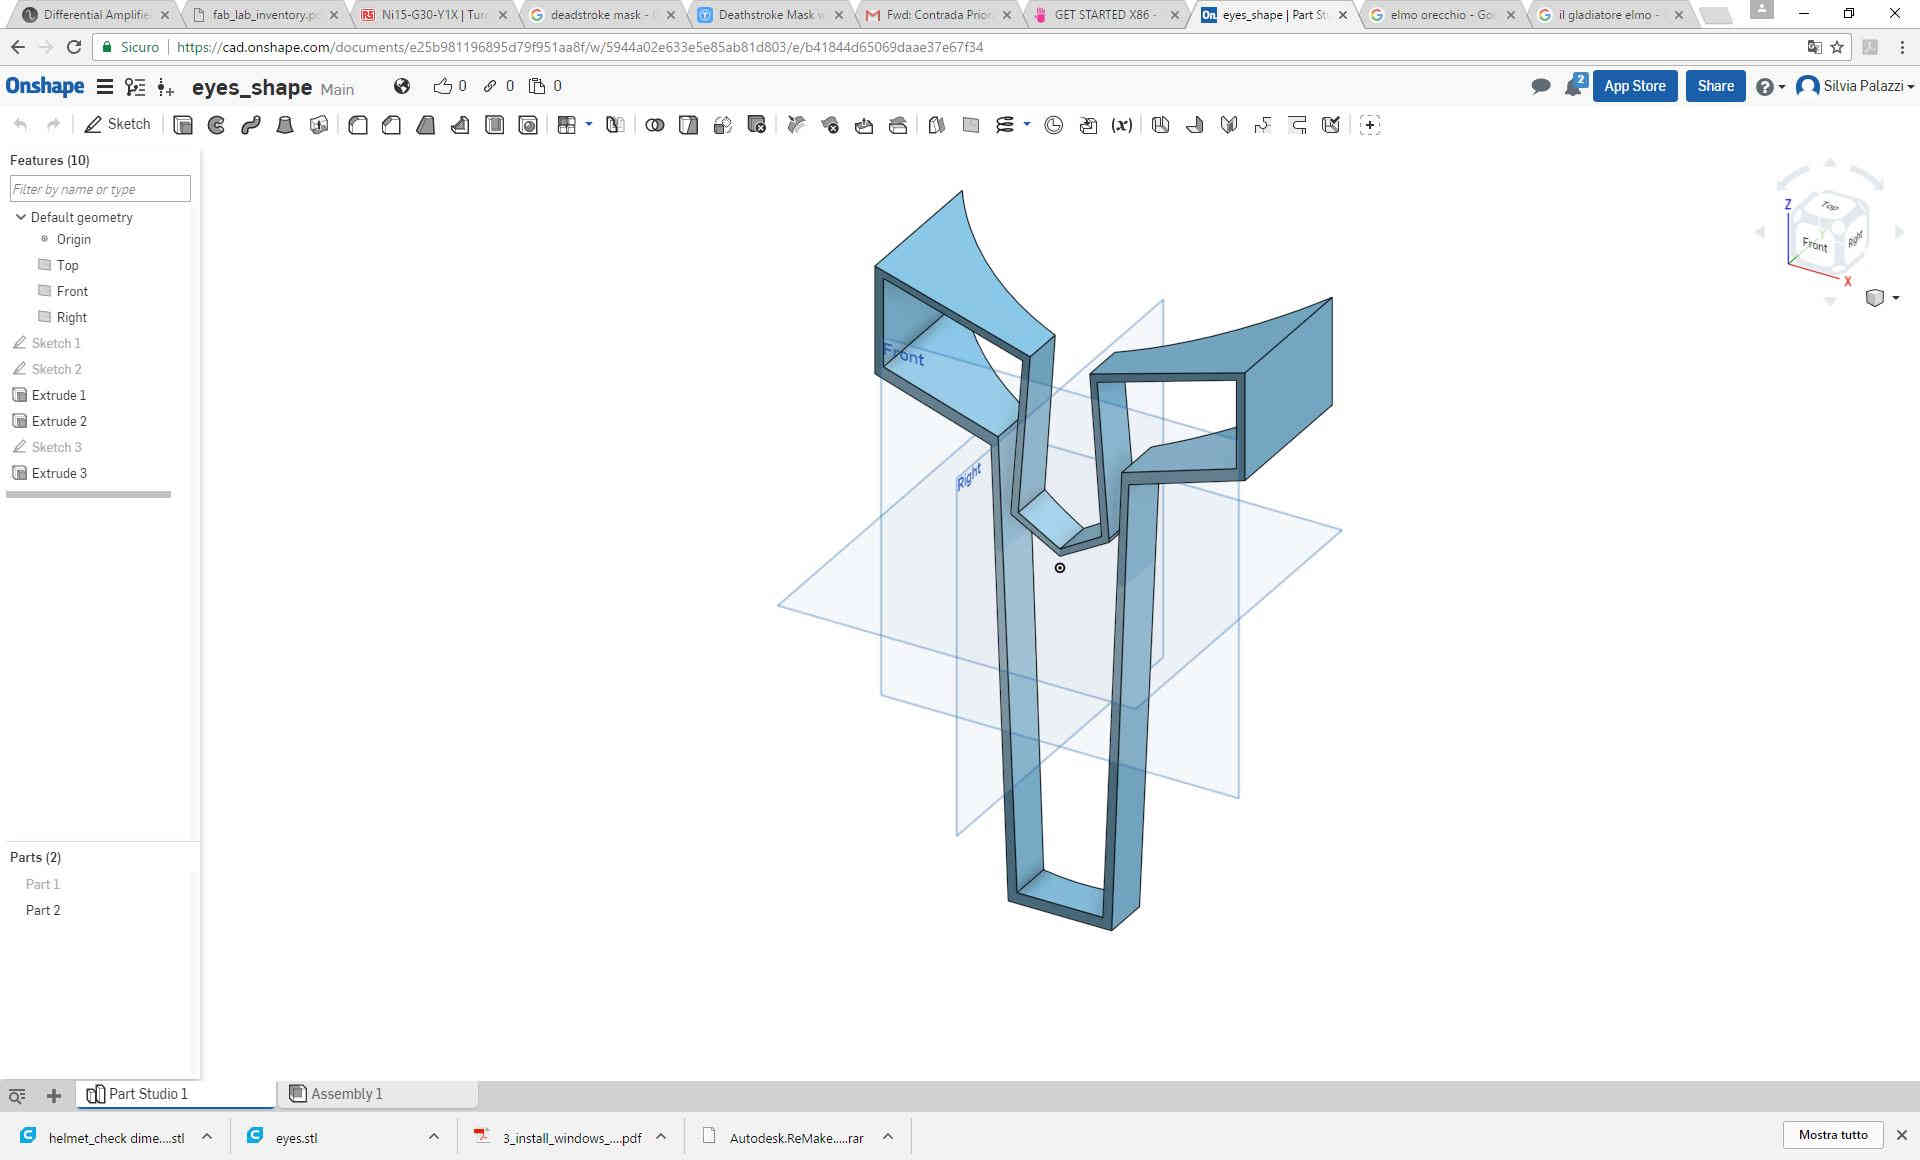
 I also made a new model for the mask I would lately use to take away polistirene from eyes position:
 With Assembly tool I checked dimensions worked for new helmet I made:
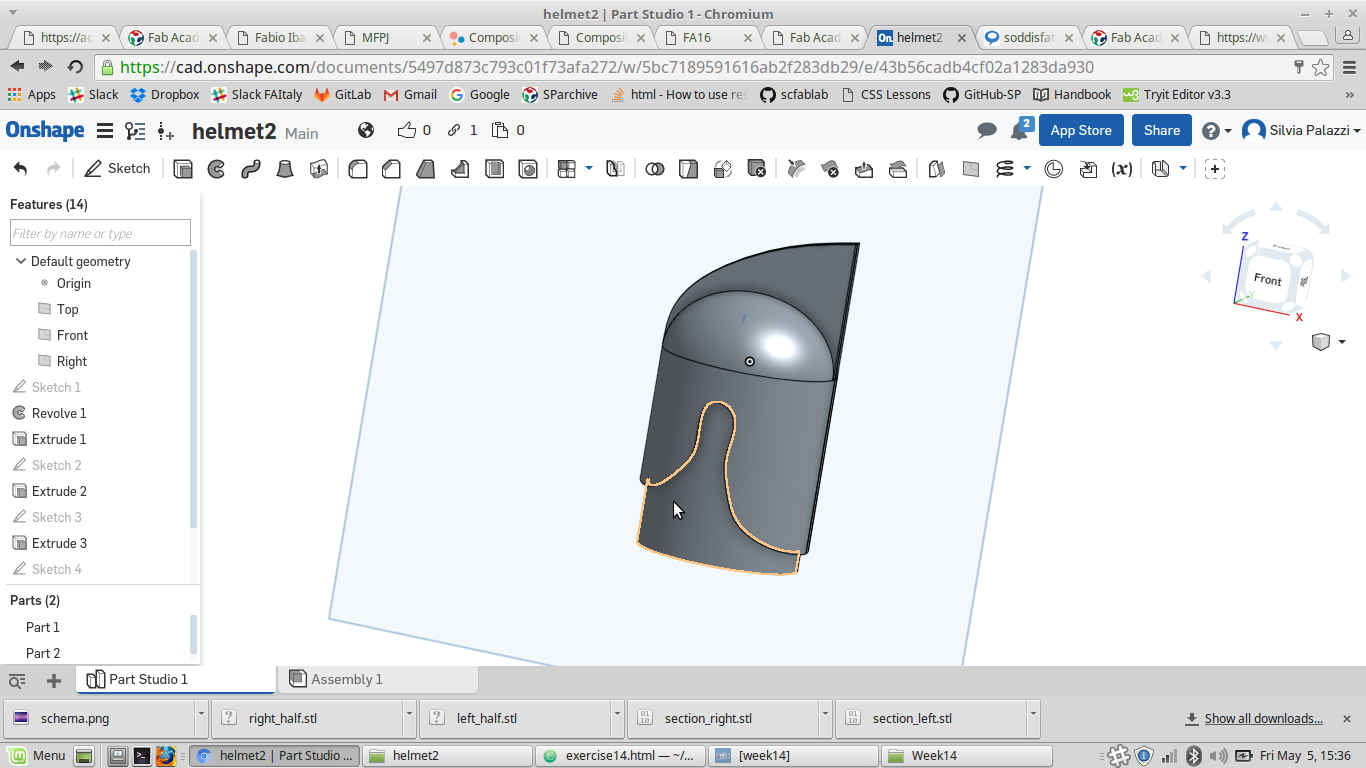
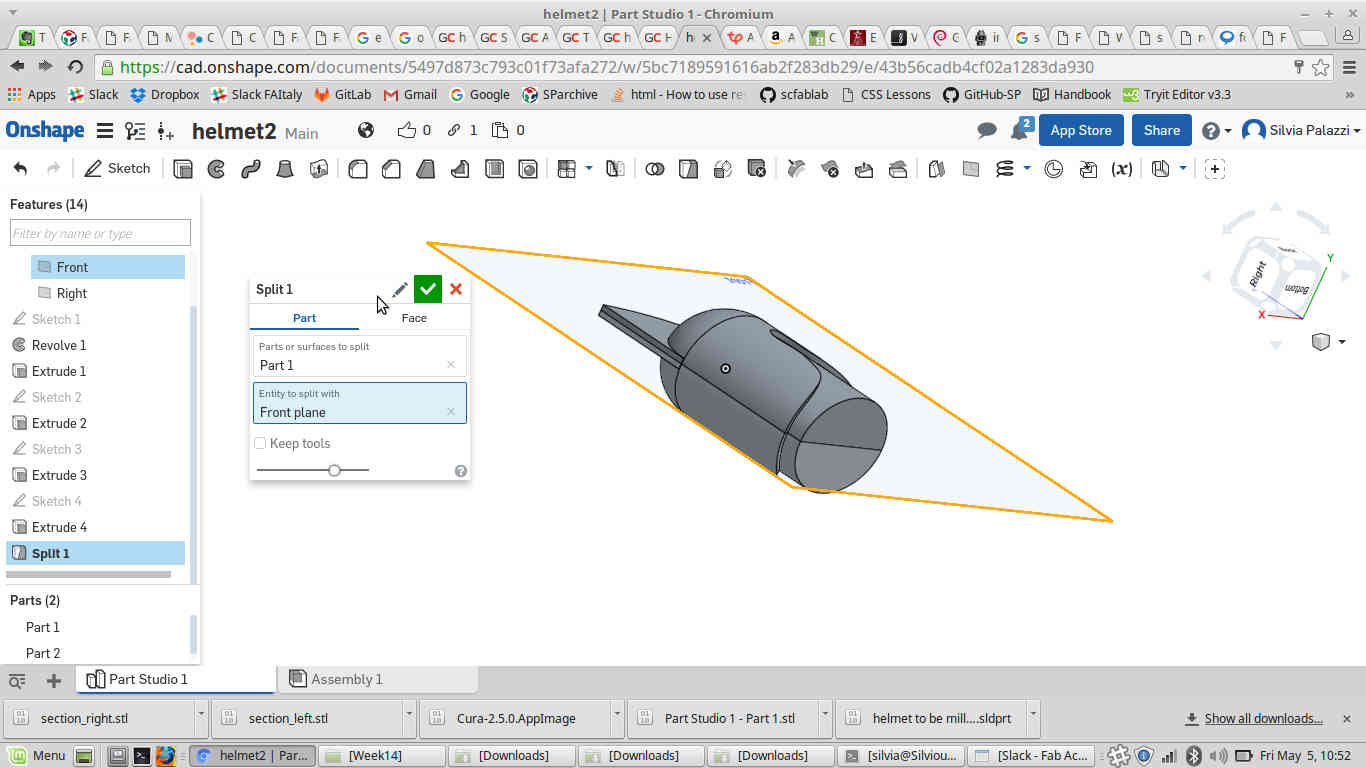
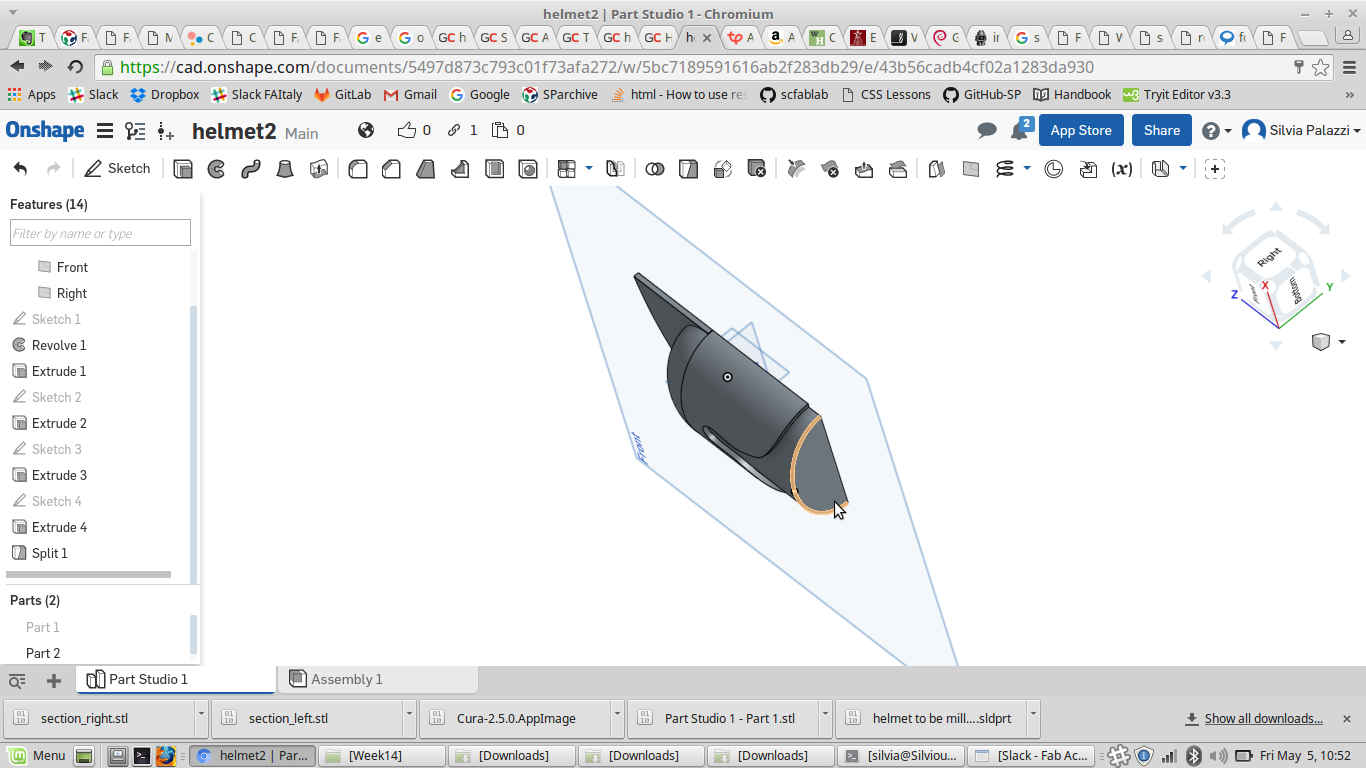
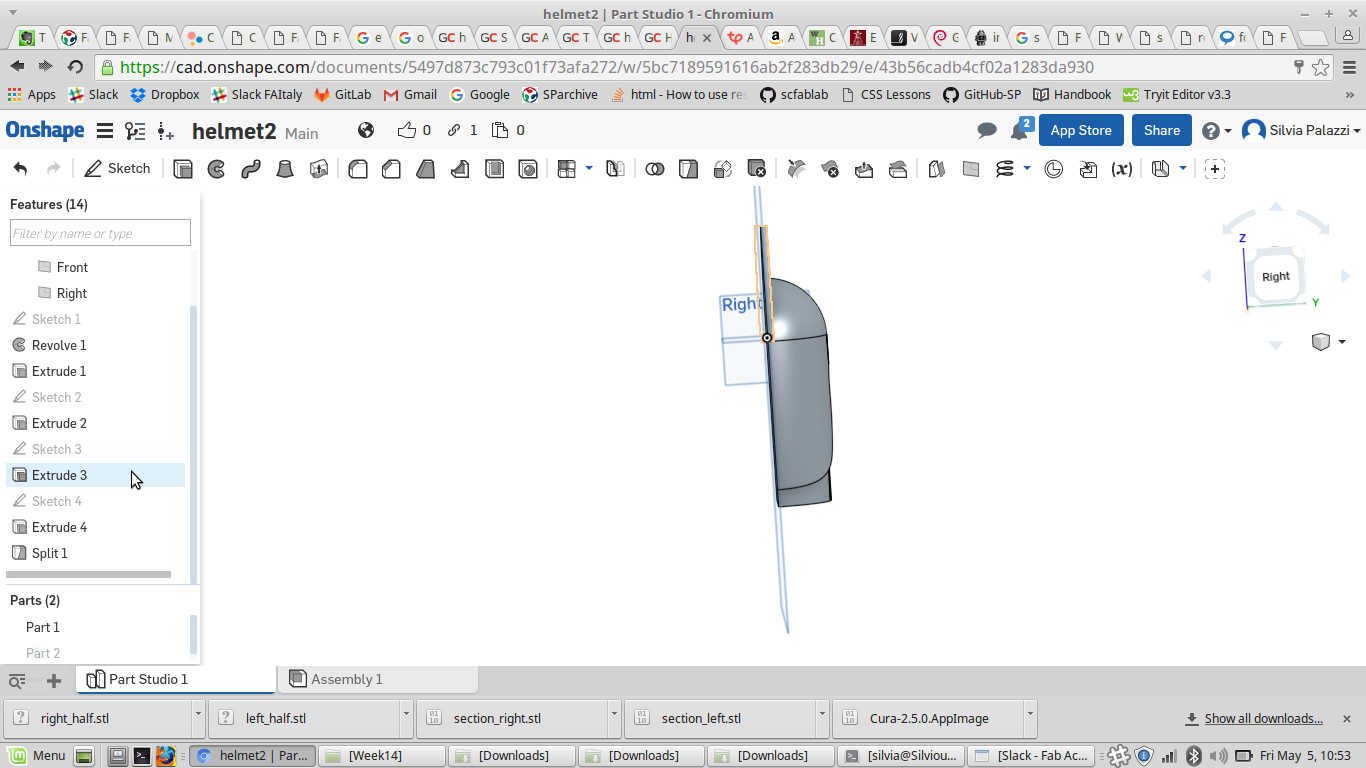
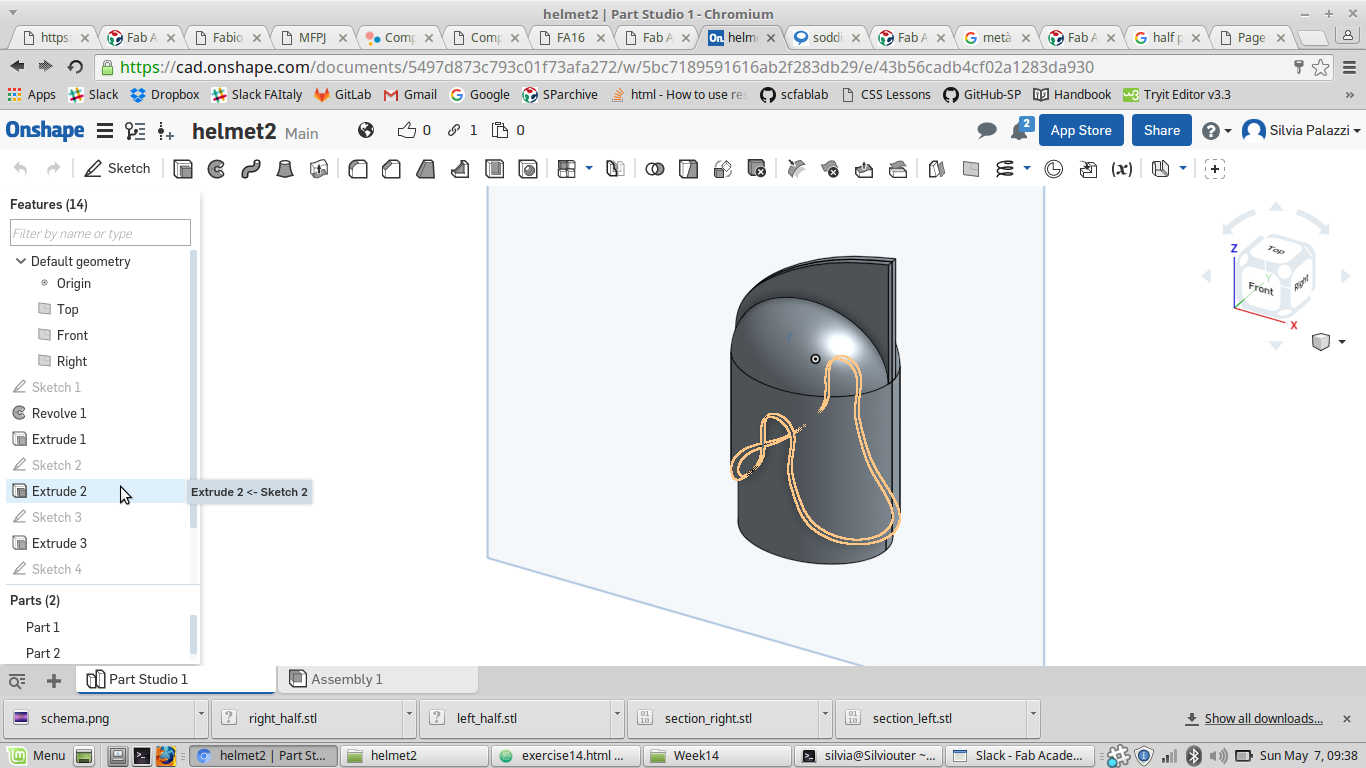
 I then took no-eyes helmet and divided it in two halves using Split tool:
 And I then separately exported each part as STL file:
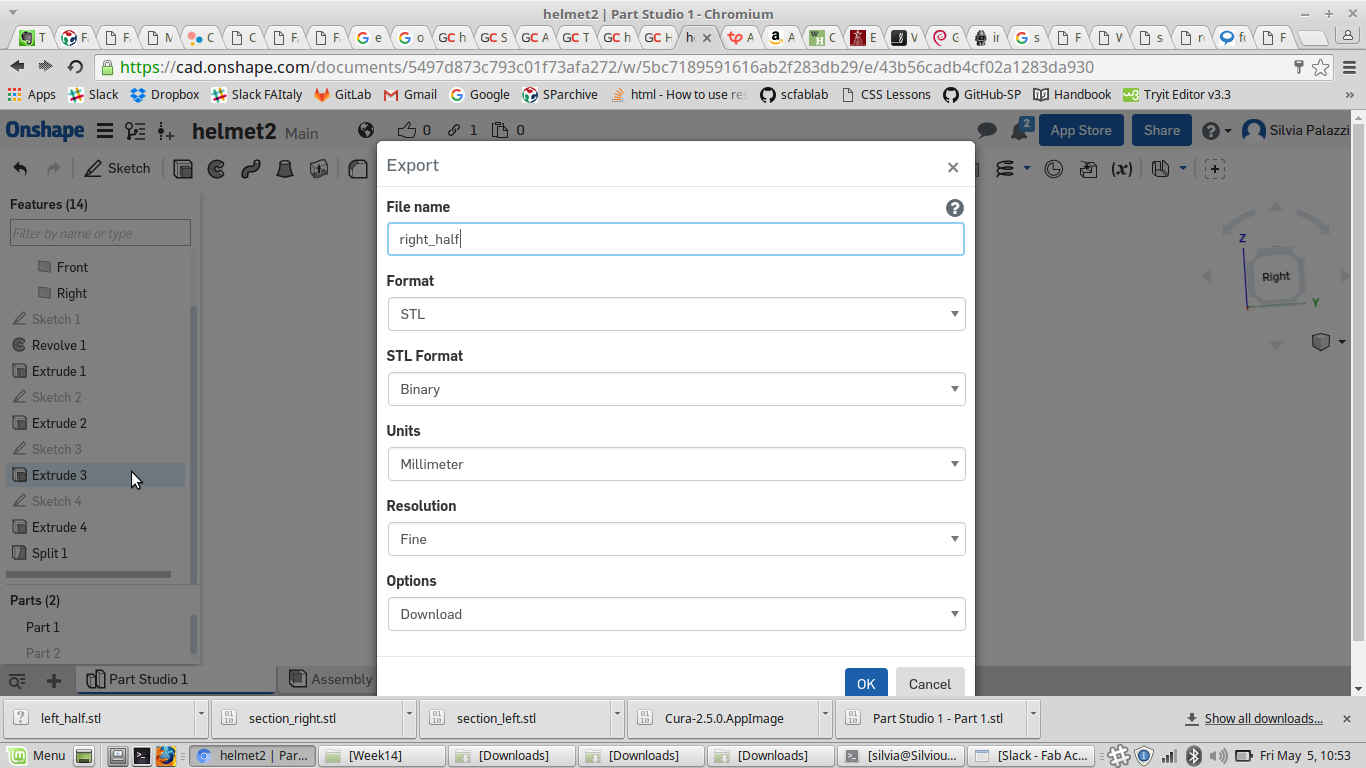 (I did the same for left_half).
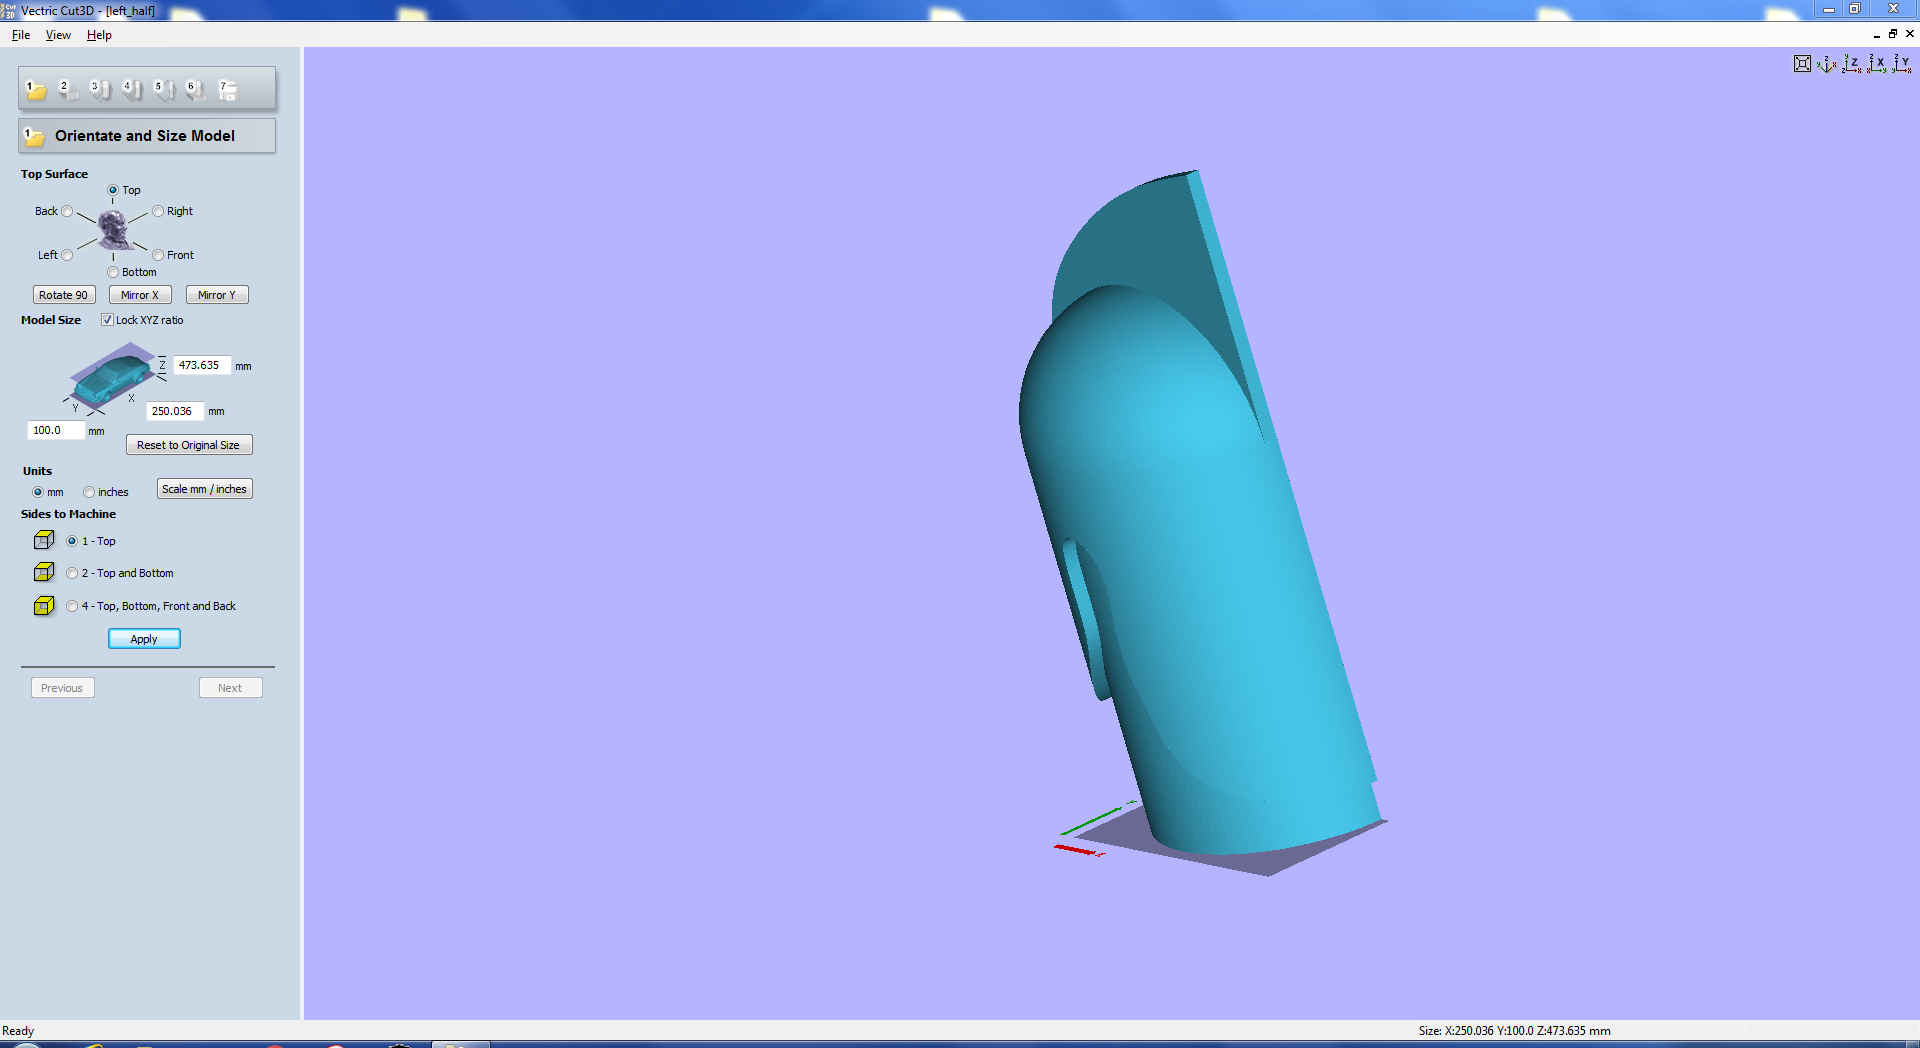
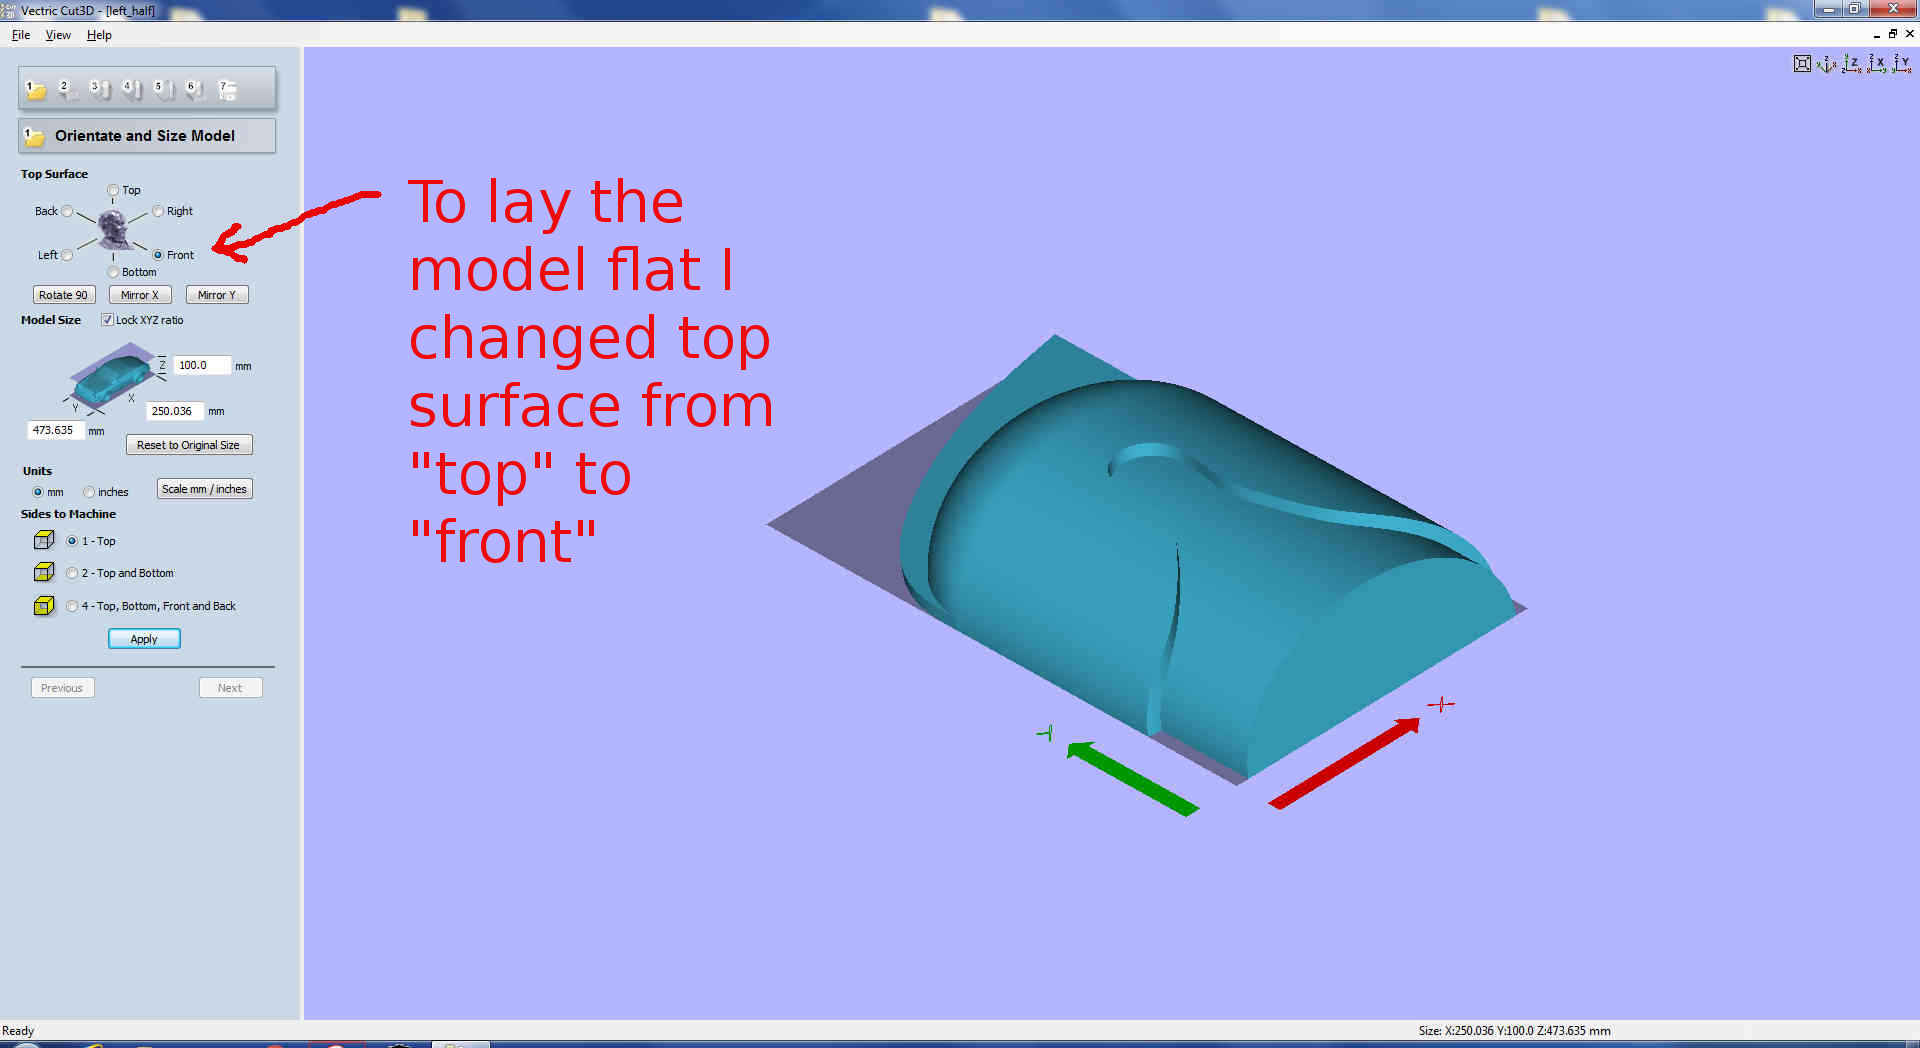
Preparing milling files with Cut3D...How many parameters!!!!
I already used Cut3D for Molding and Casting week, so I was
quite confident with all parameters I had to set. The only thing now was that polistirene panels I had were 4omm high therefore I needed to slice my model.
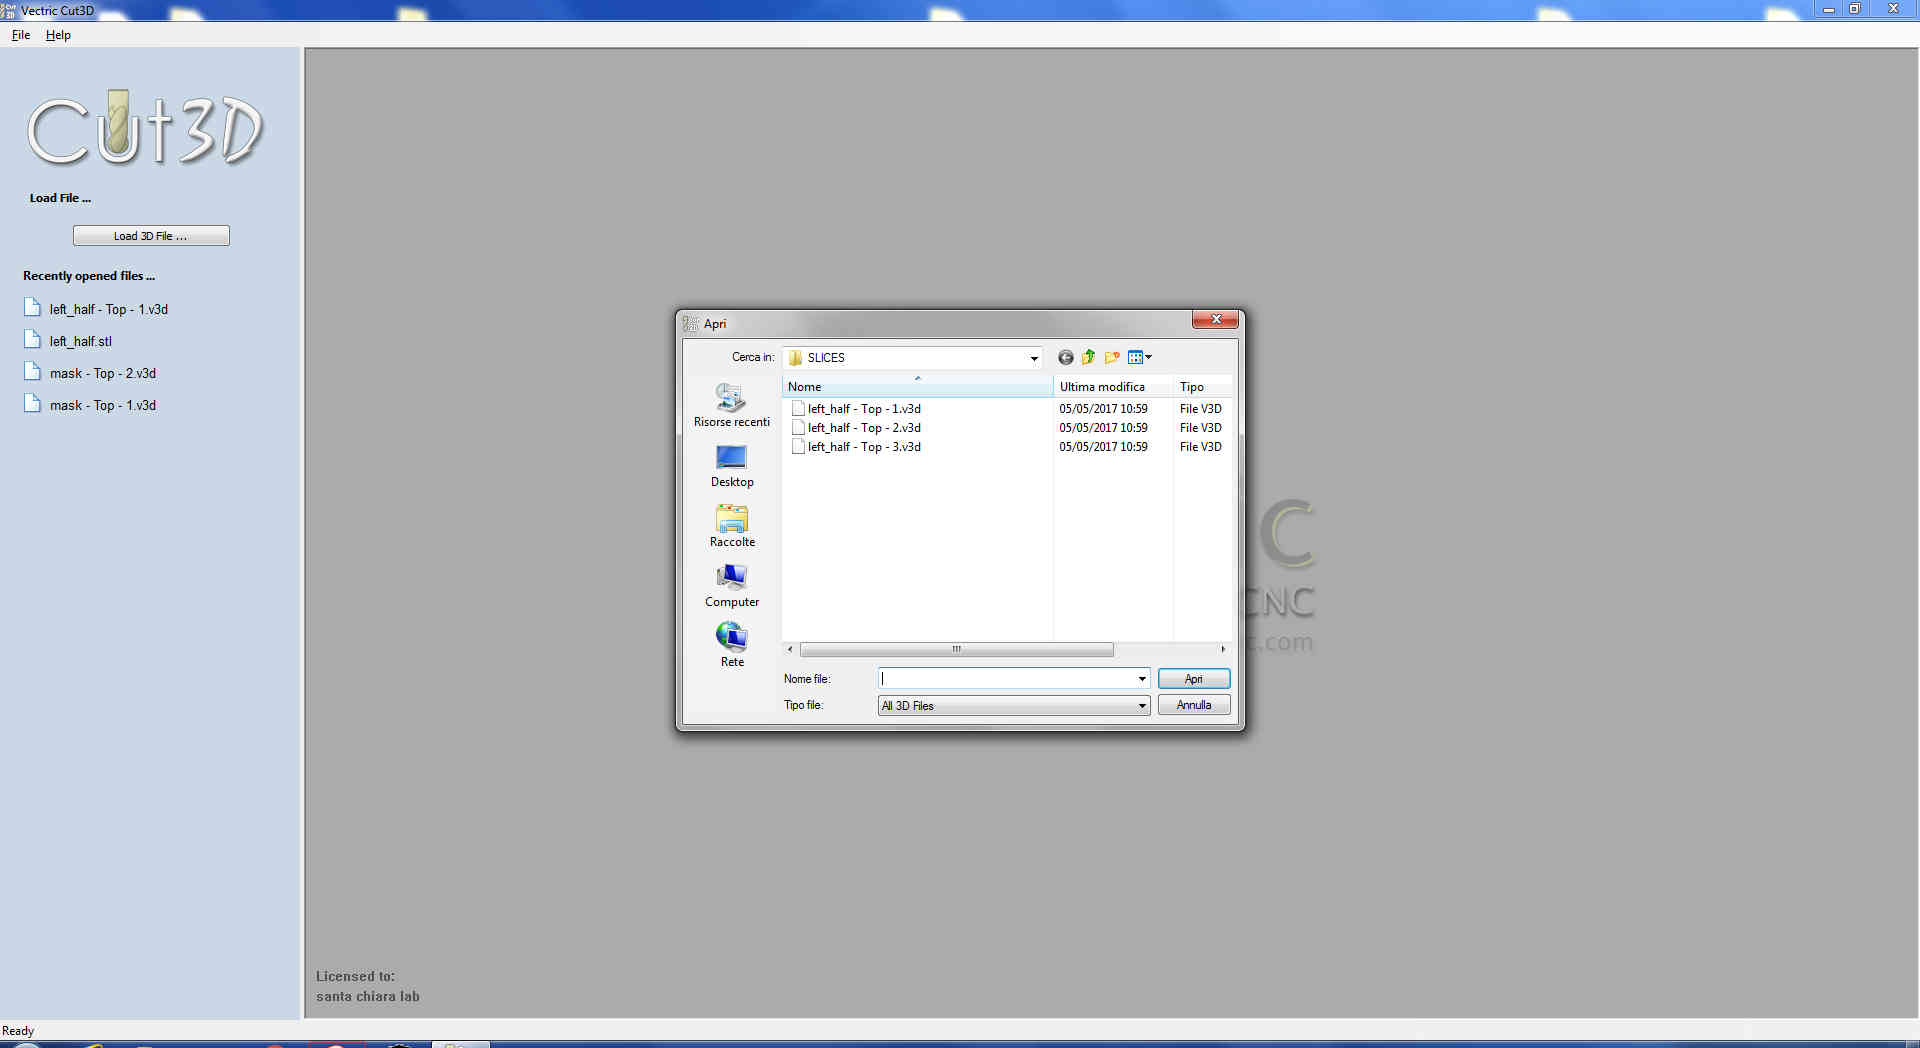
I opened Cut3D and pressed Load 3D file, then I chose my STL file:
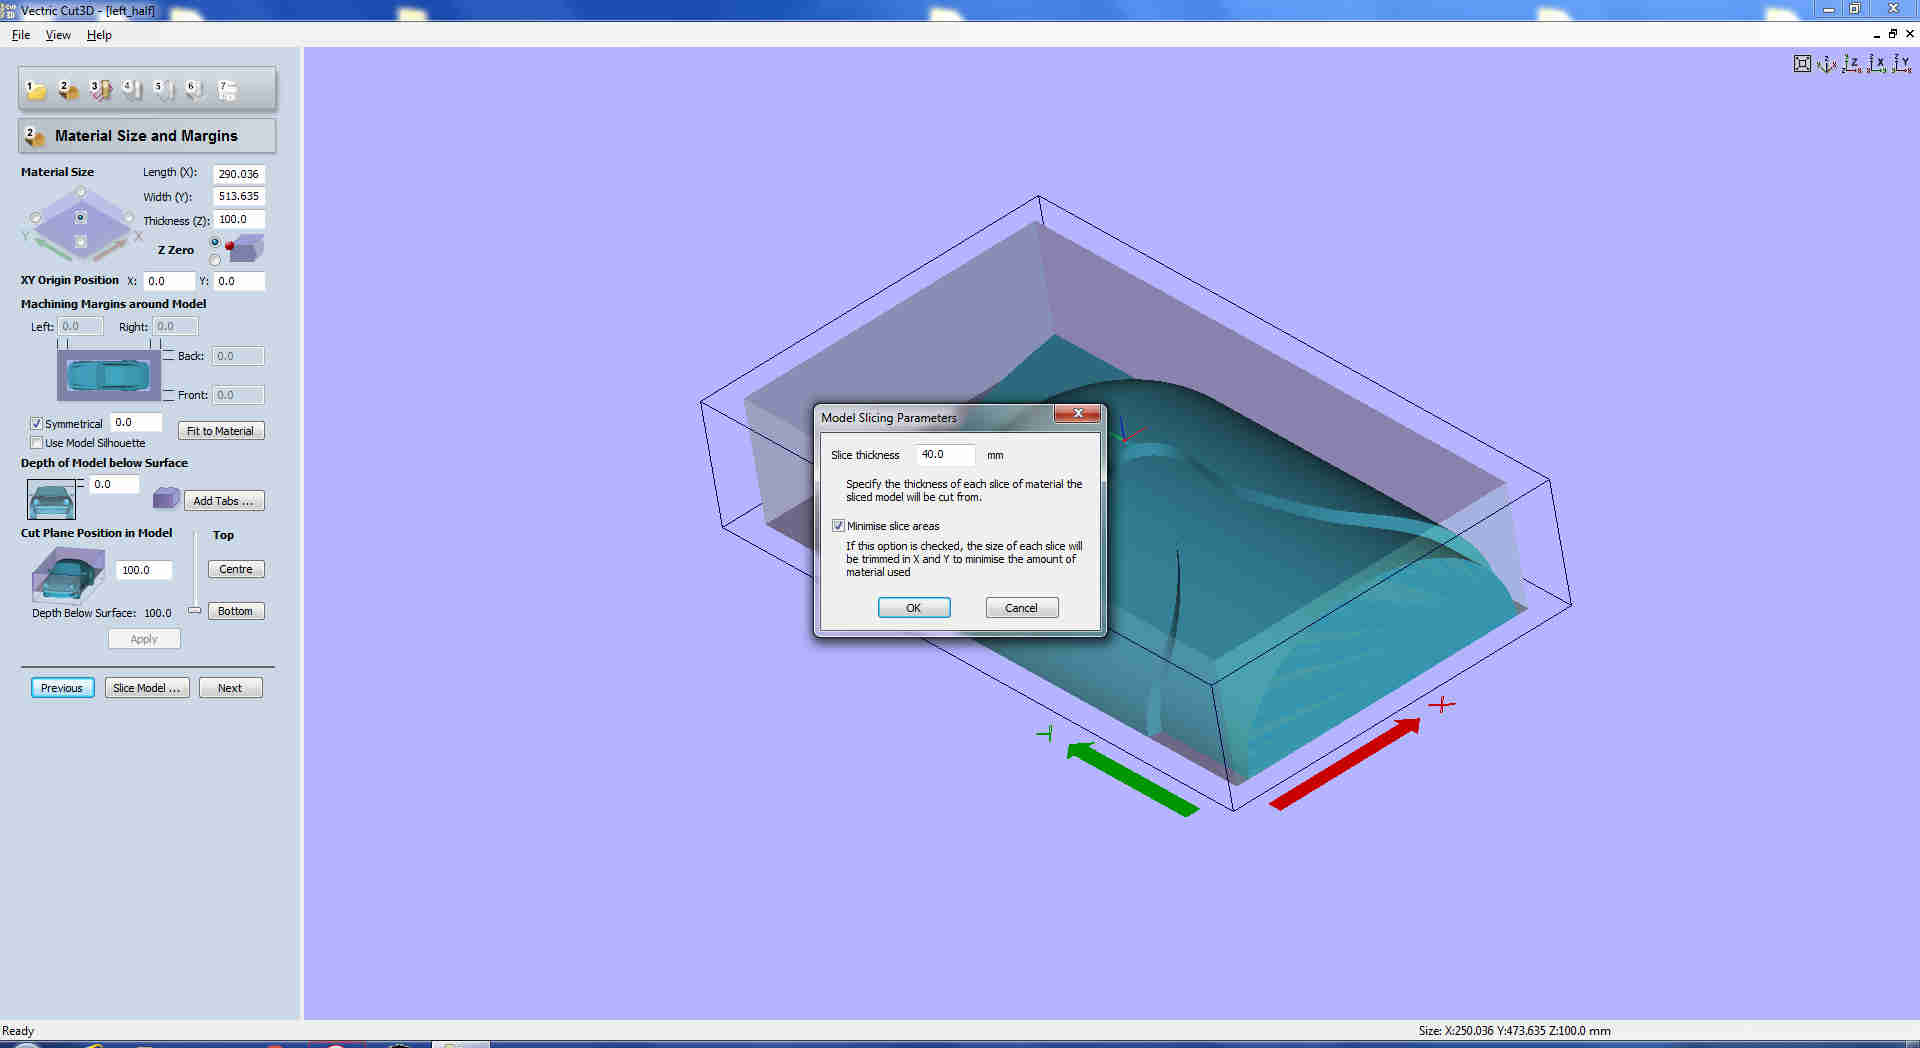
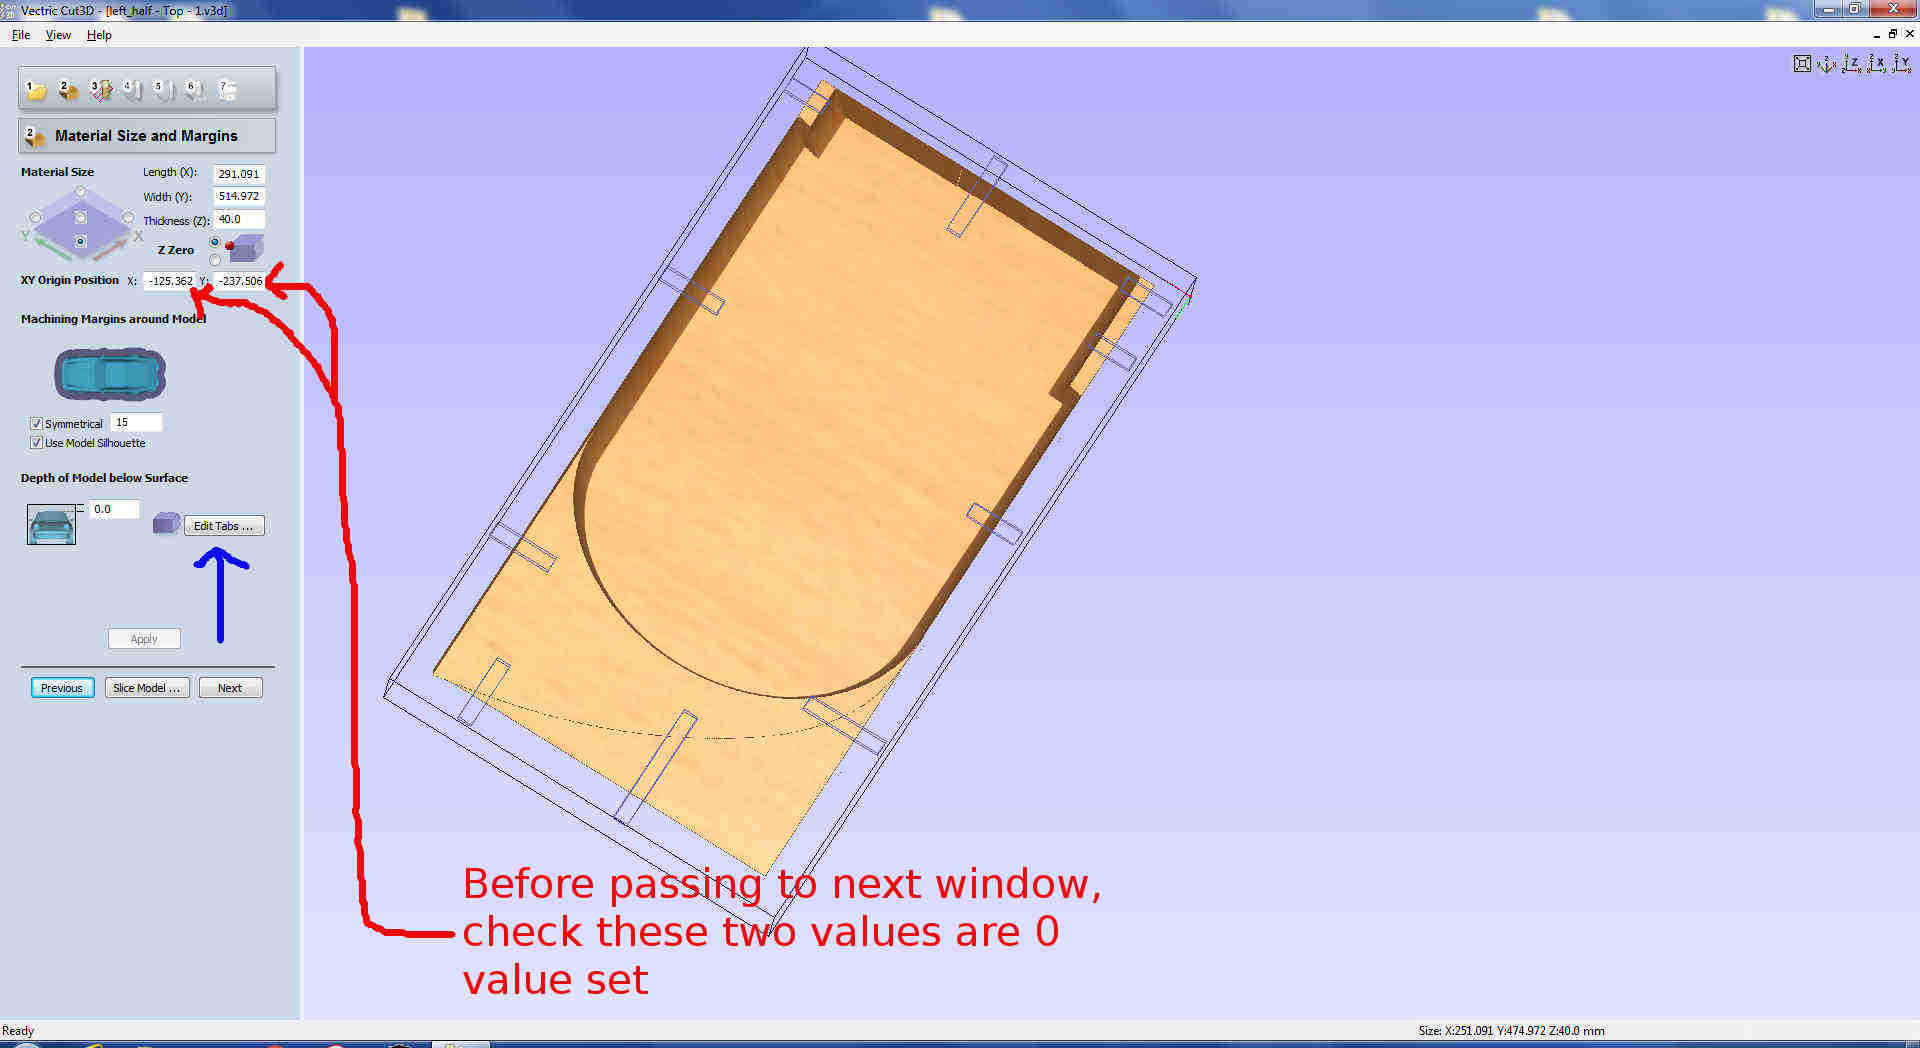
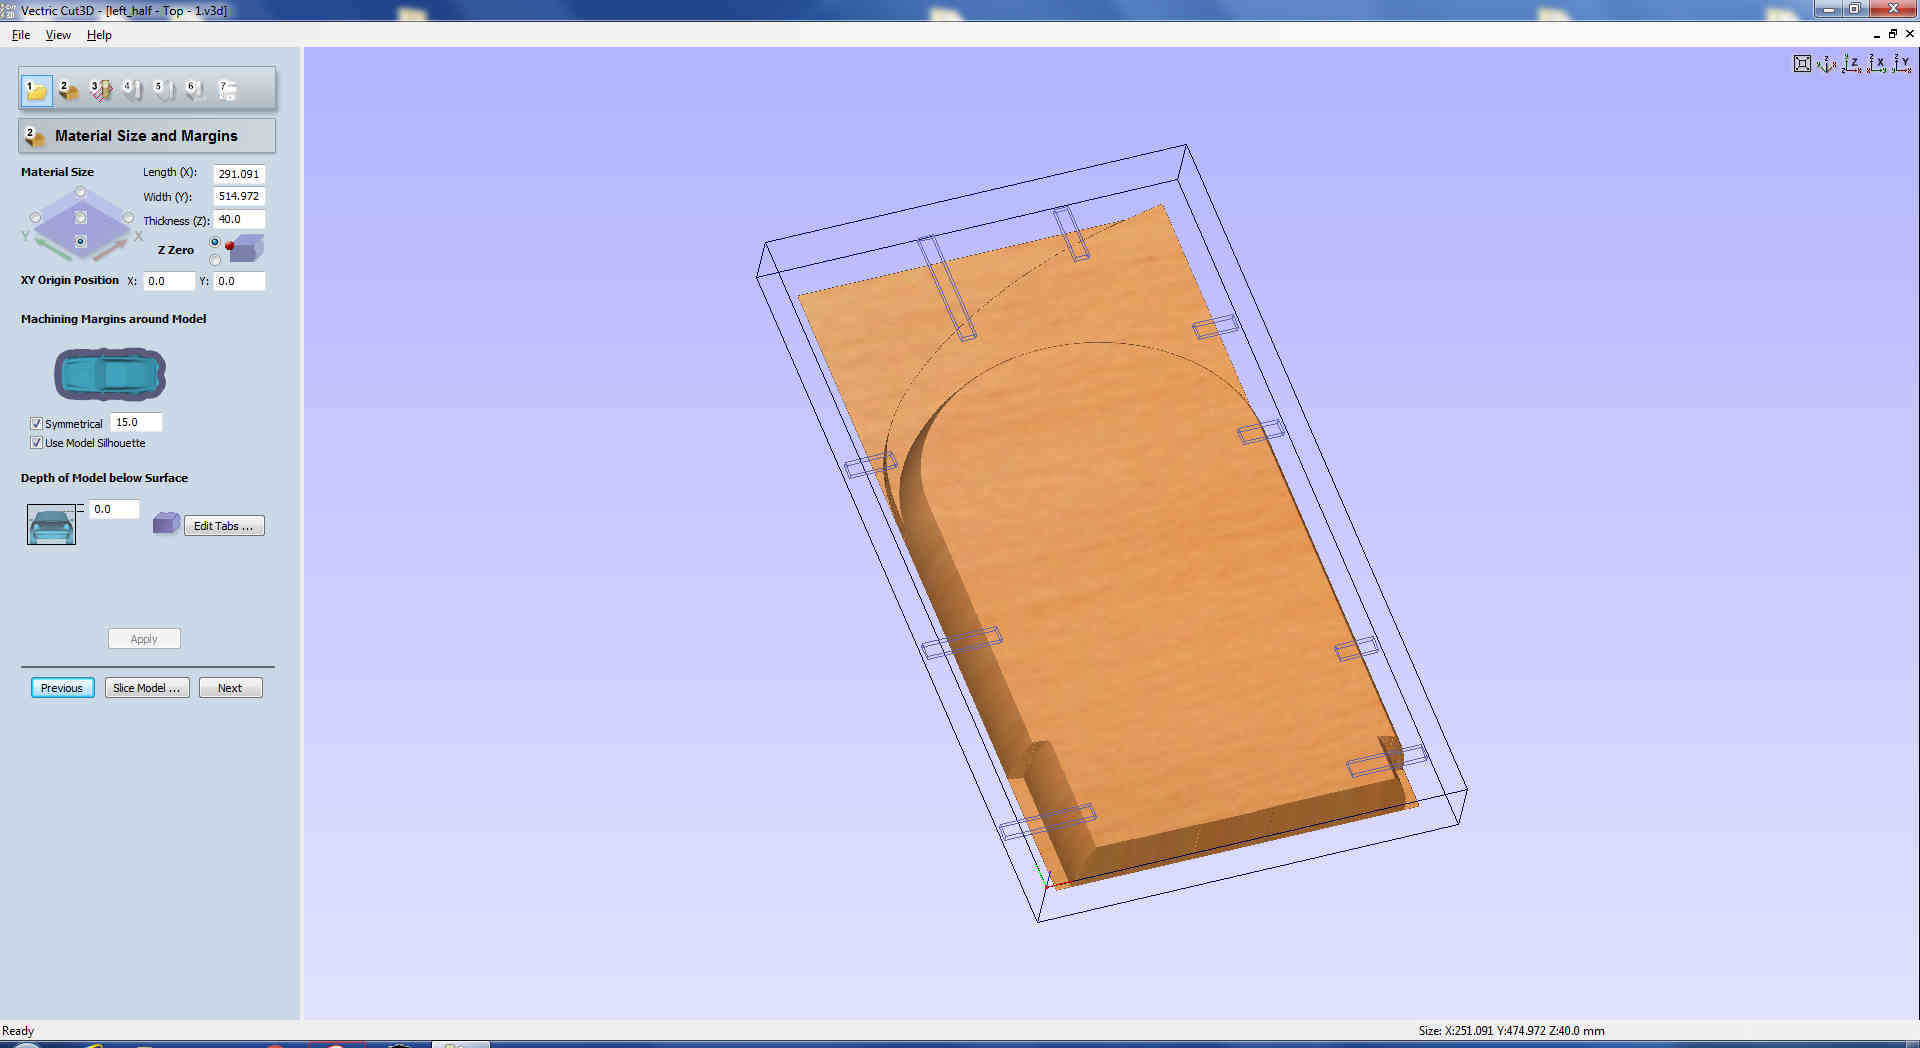
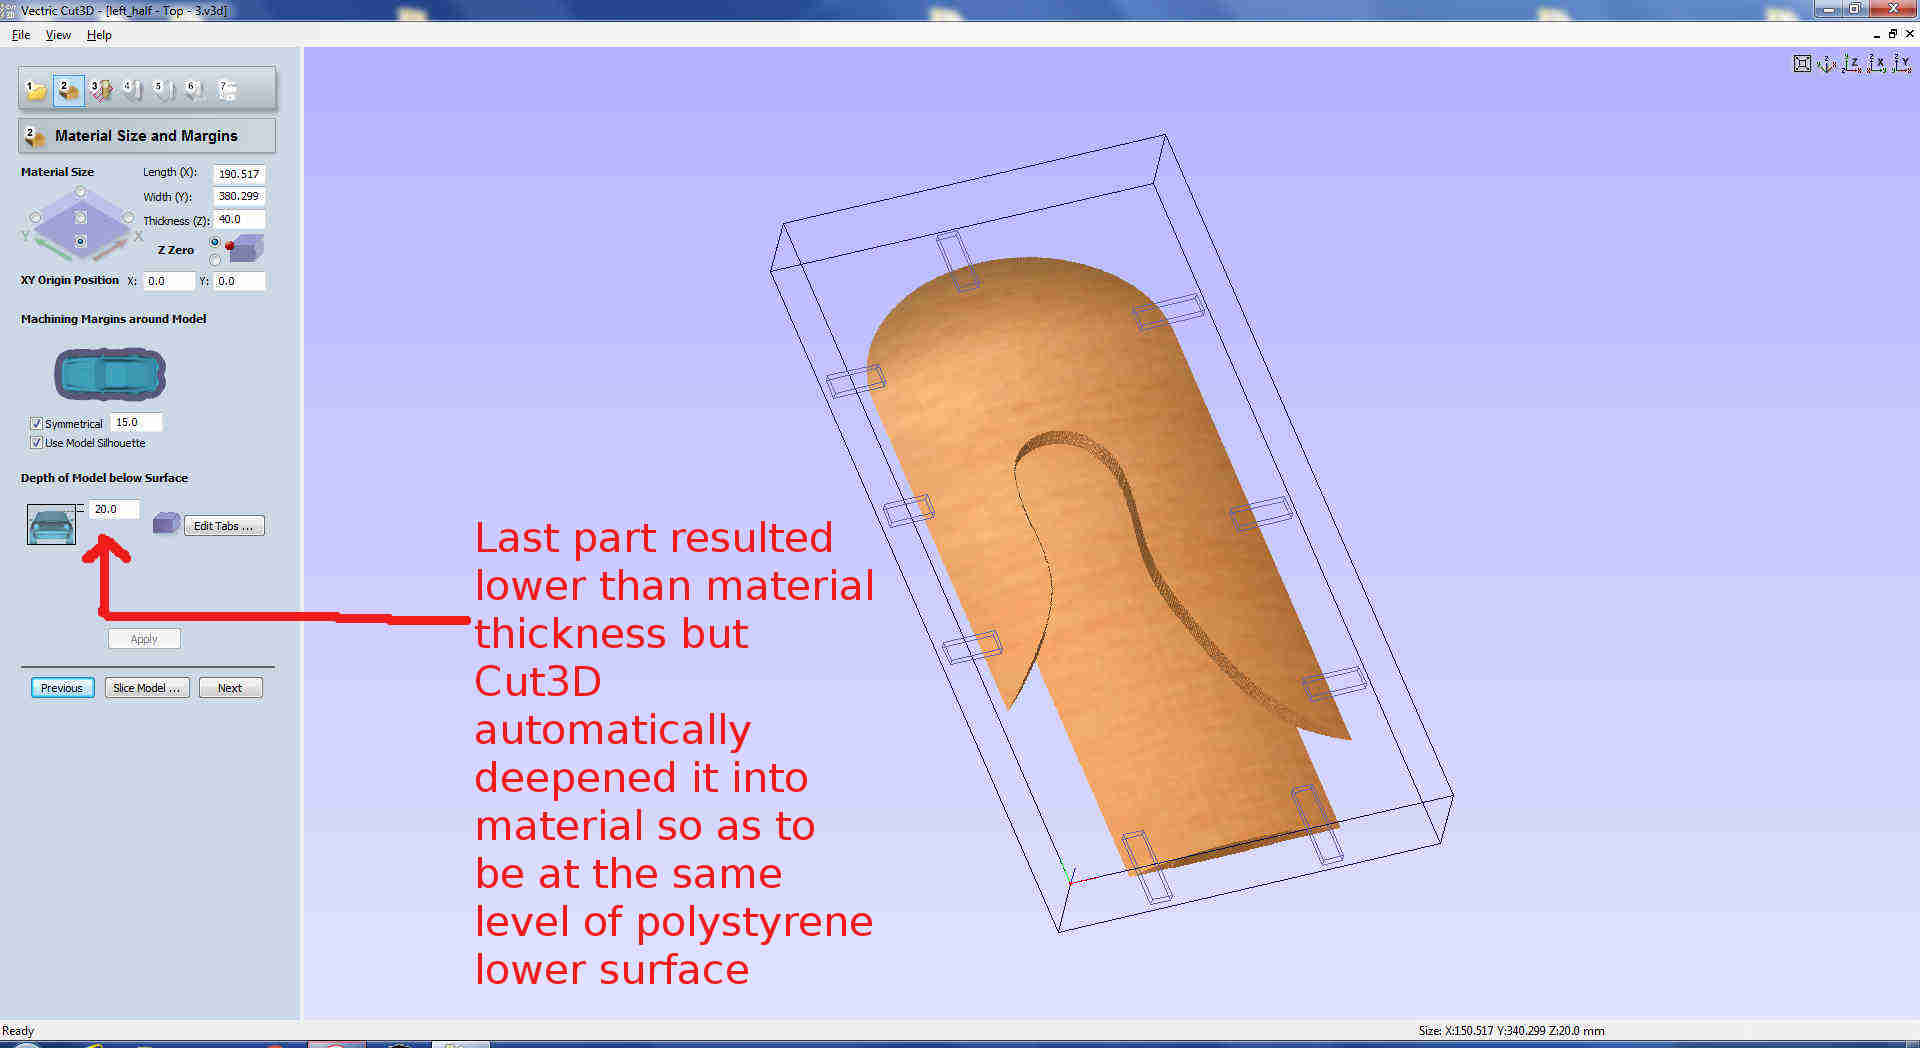
 clicking on Next, I pressed on Slice model.. into Material Size and Margins window and I set my material height:
 Then three different file were automatically saved:
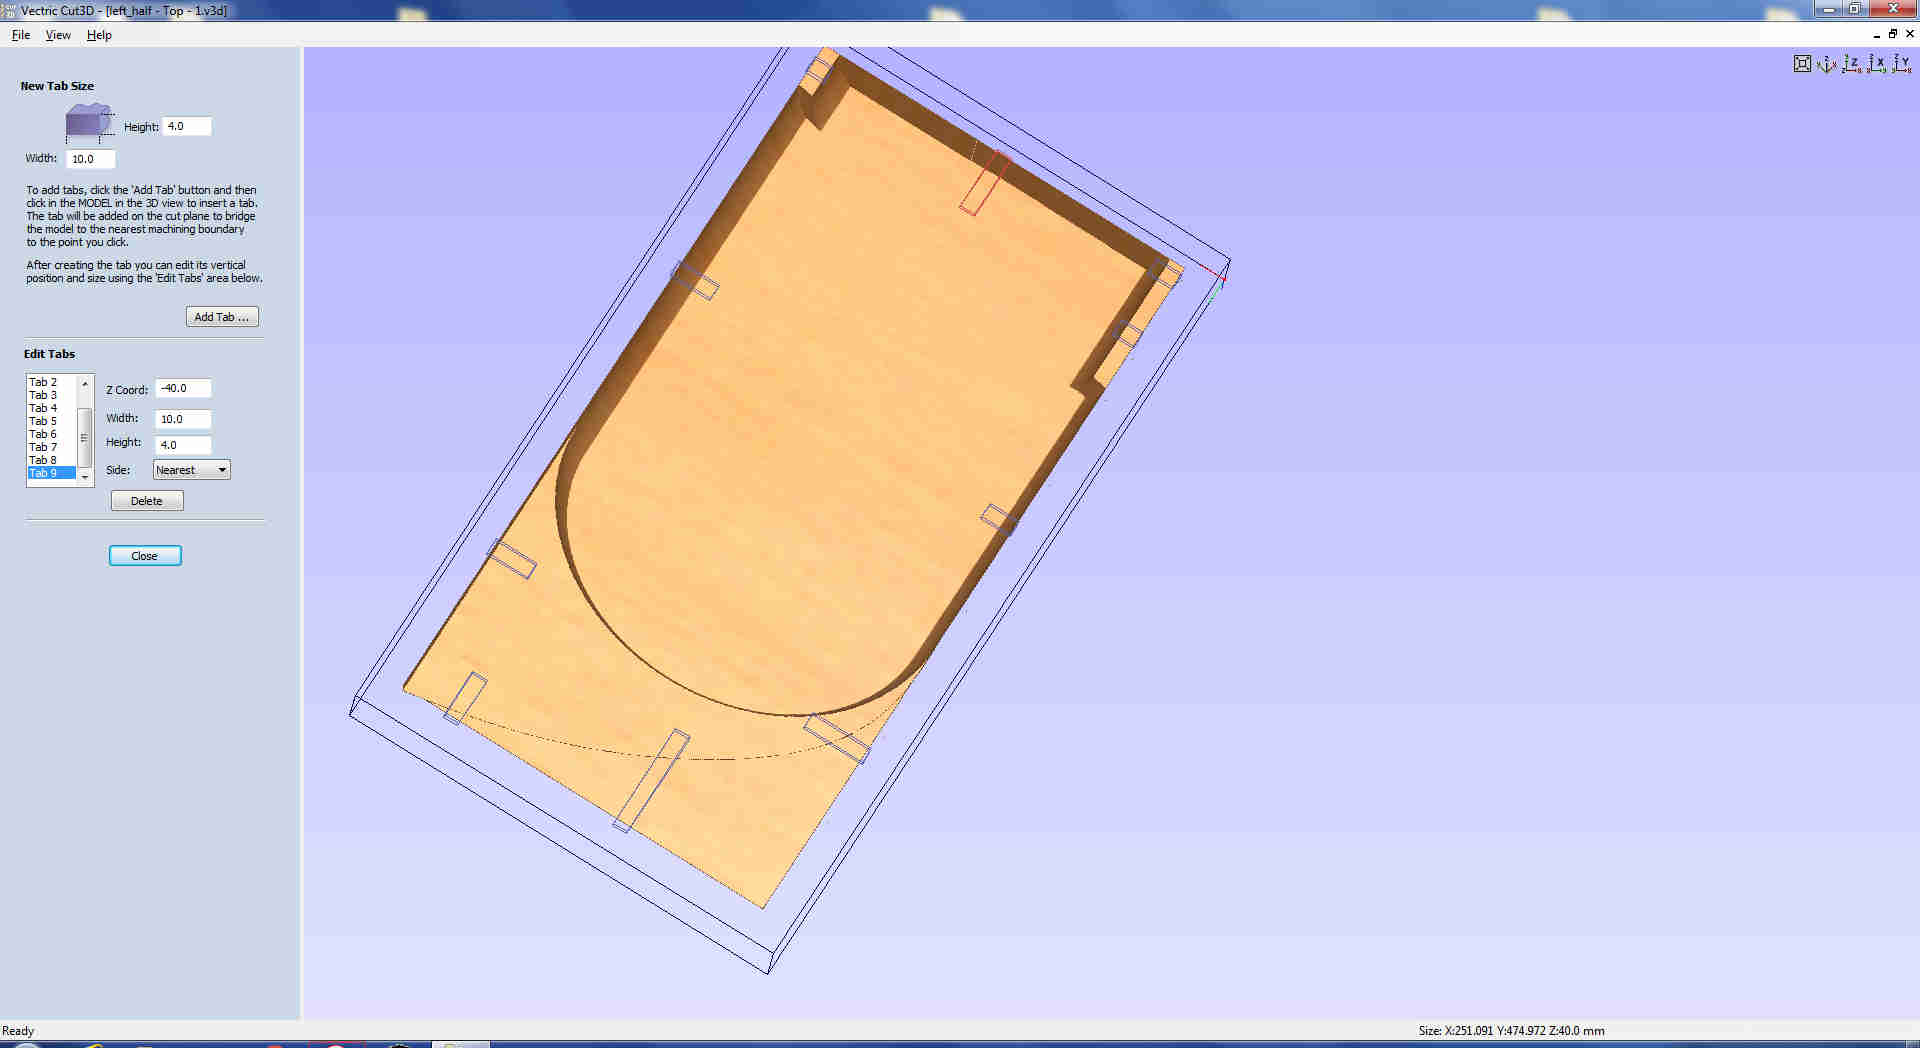
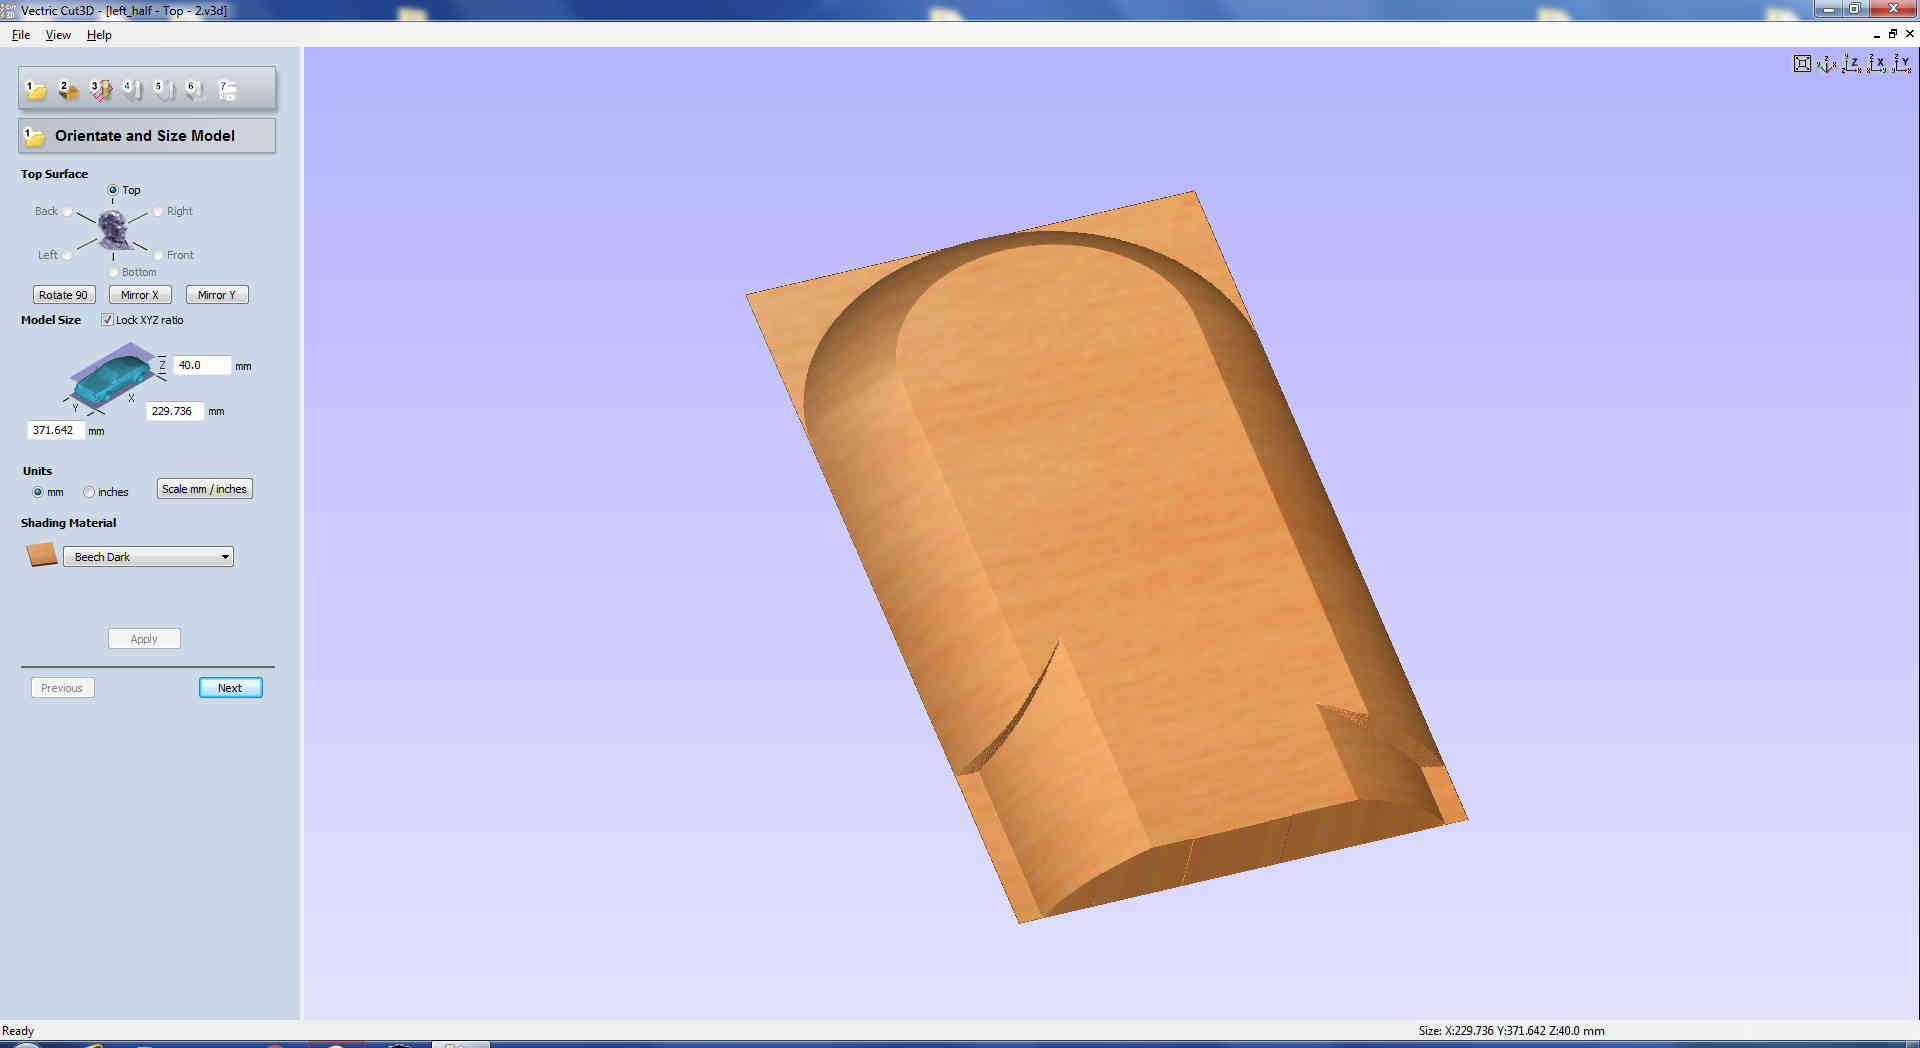
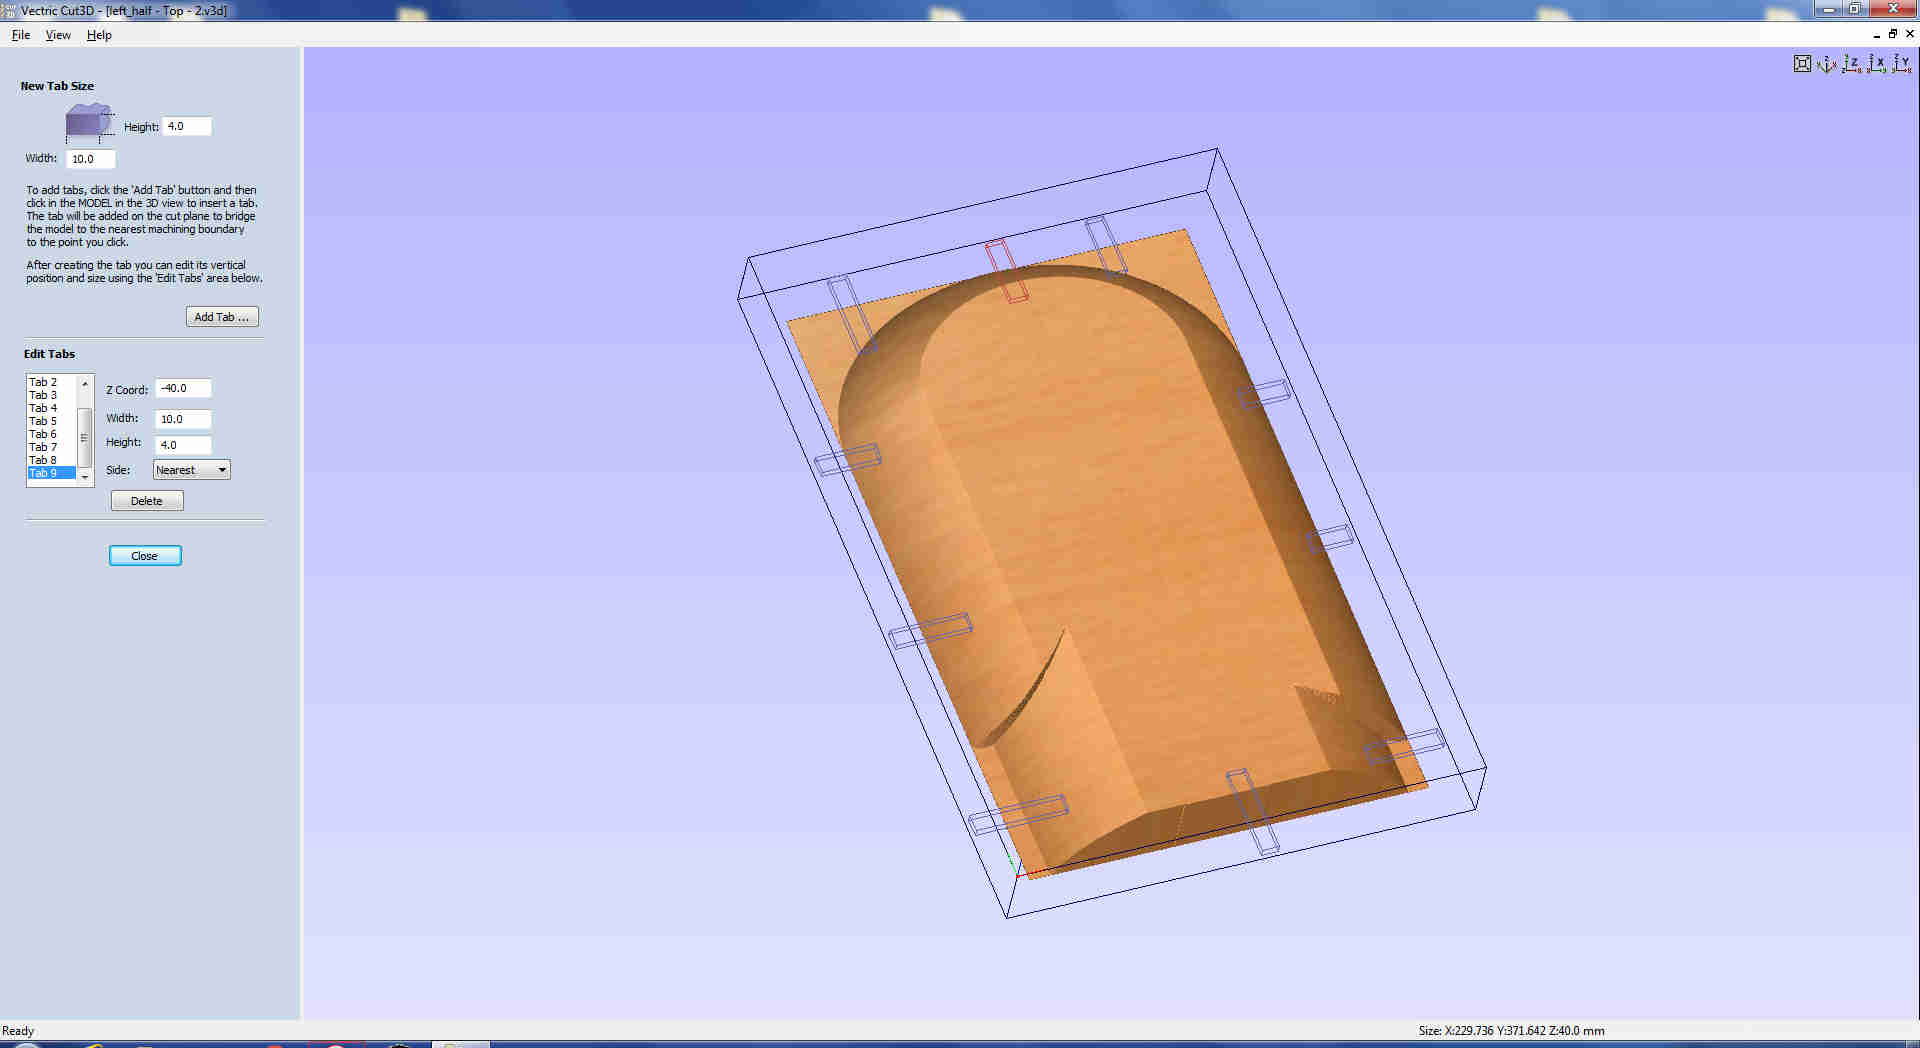
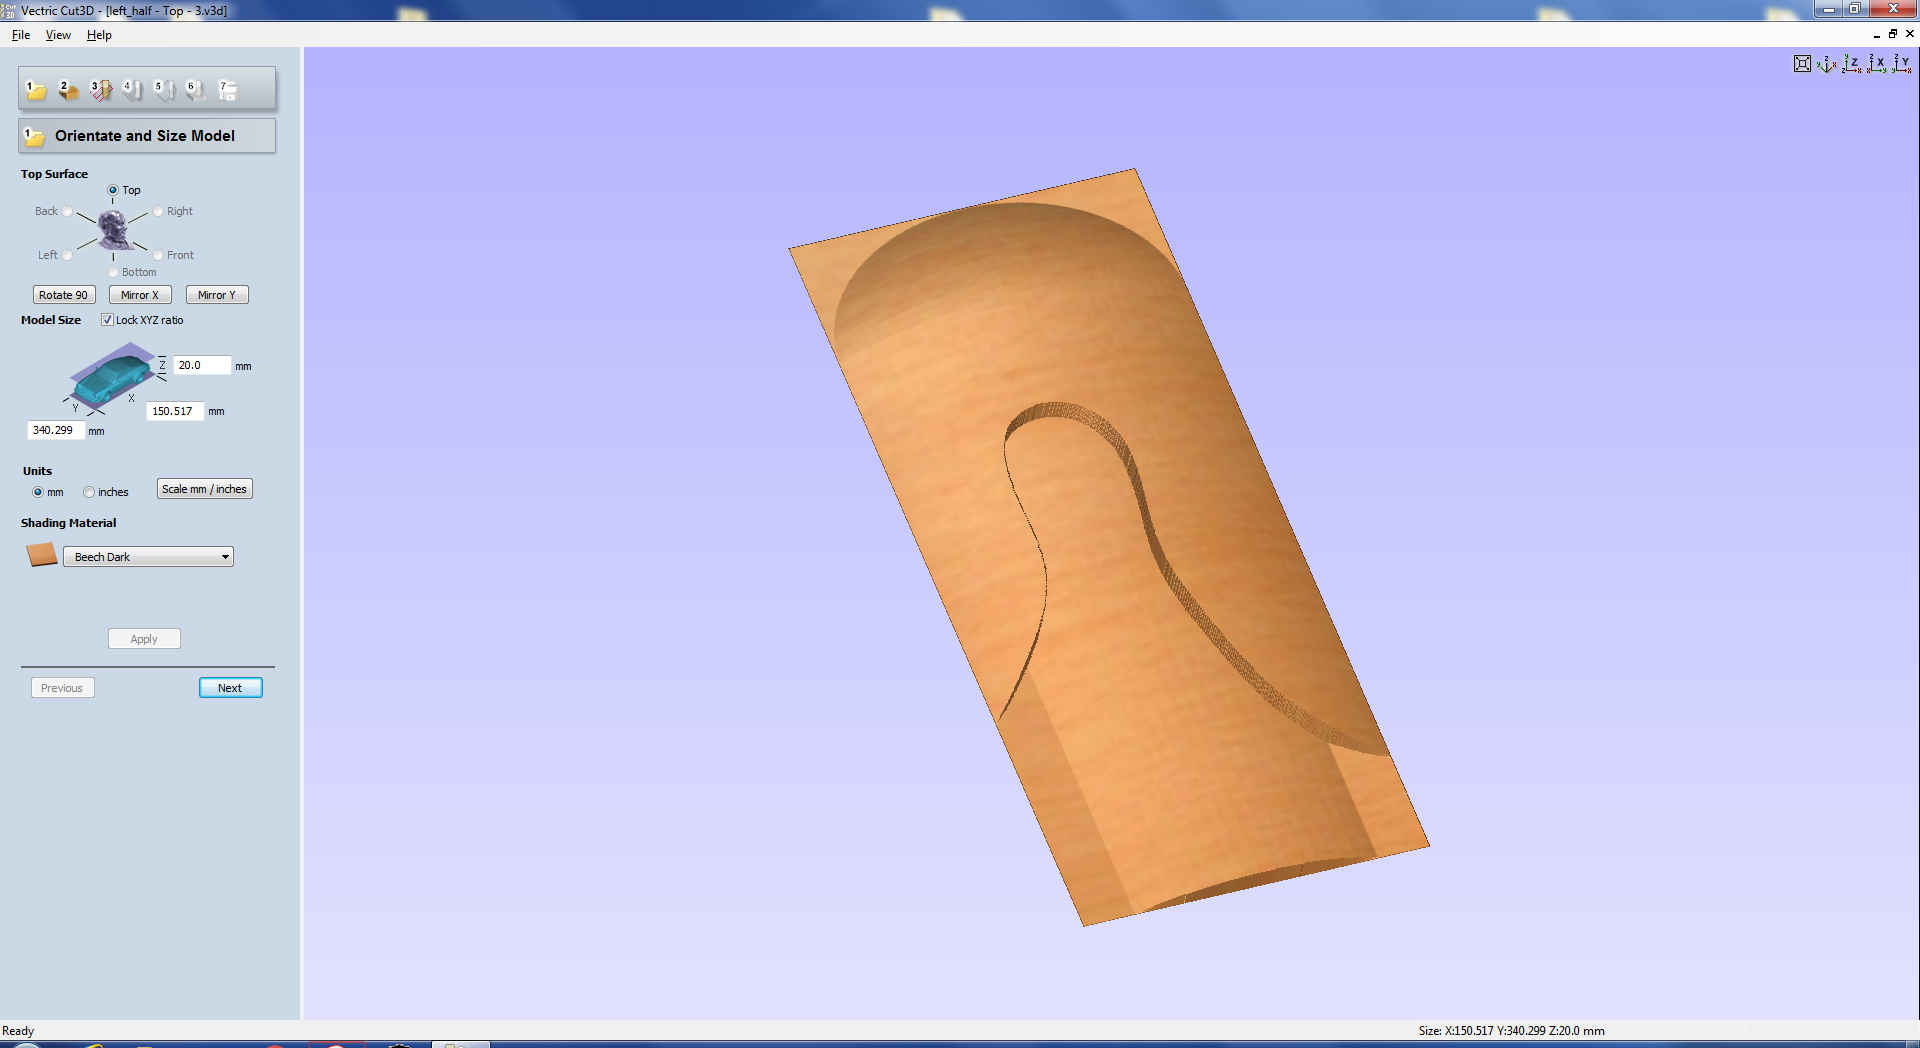
 I then closed current half model and opened first of three generated file. In Material Size and Margins window I set origin position and I added tabs
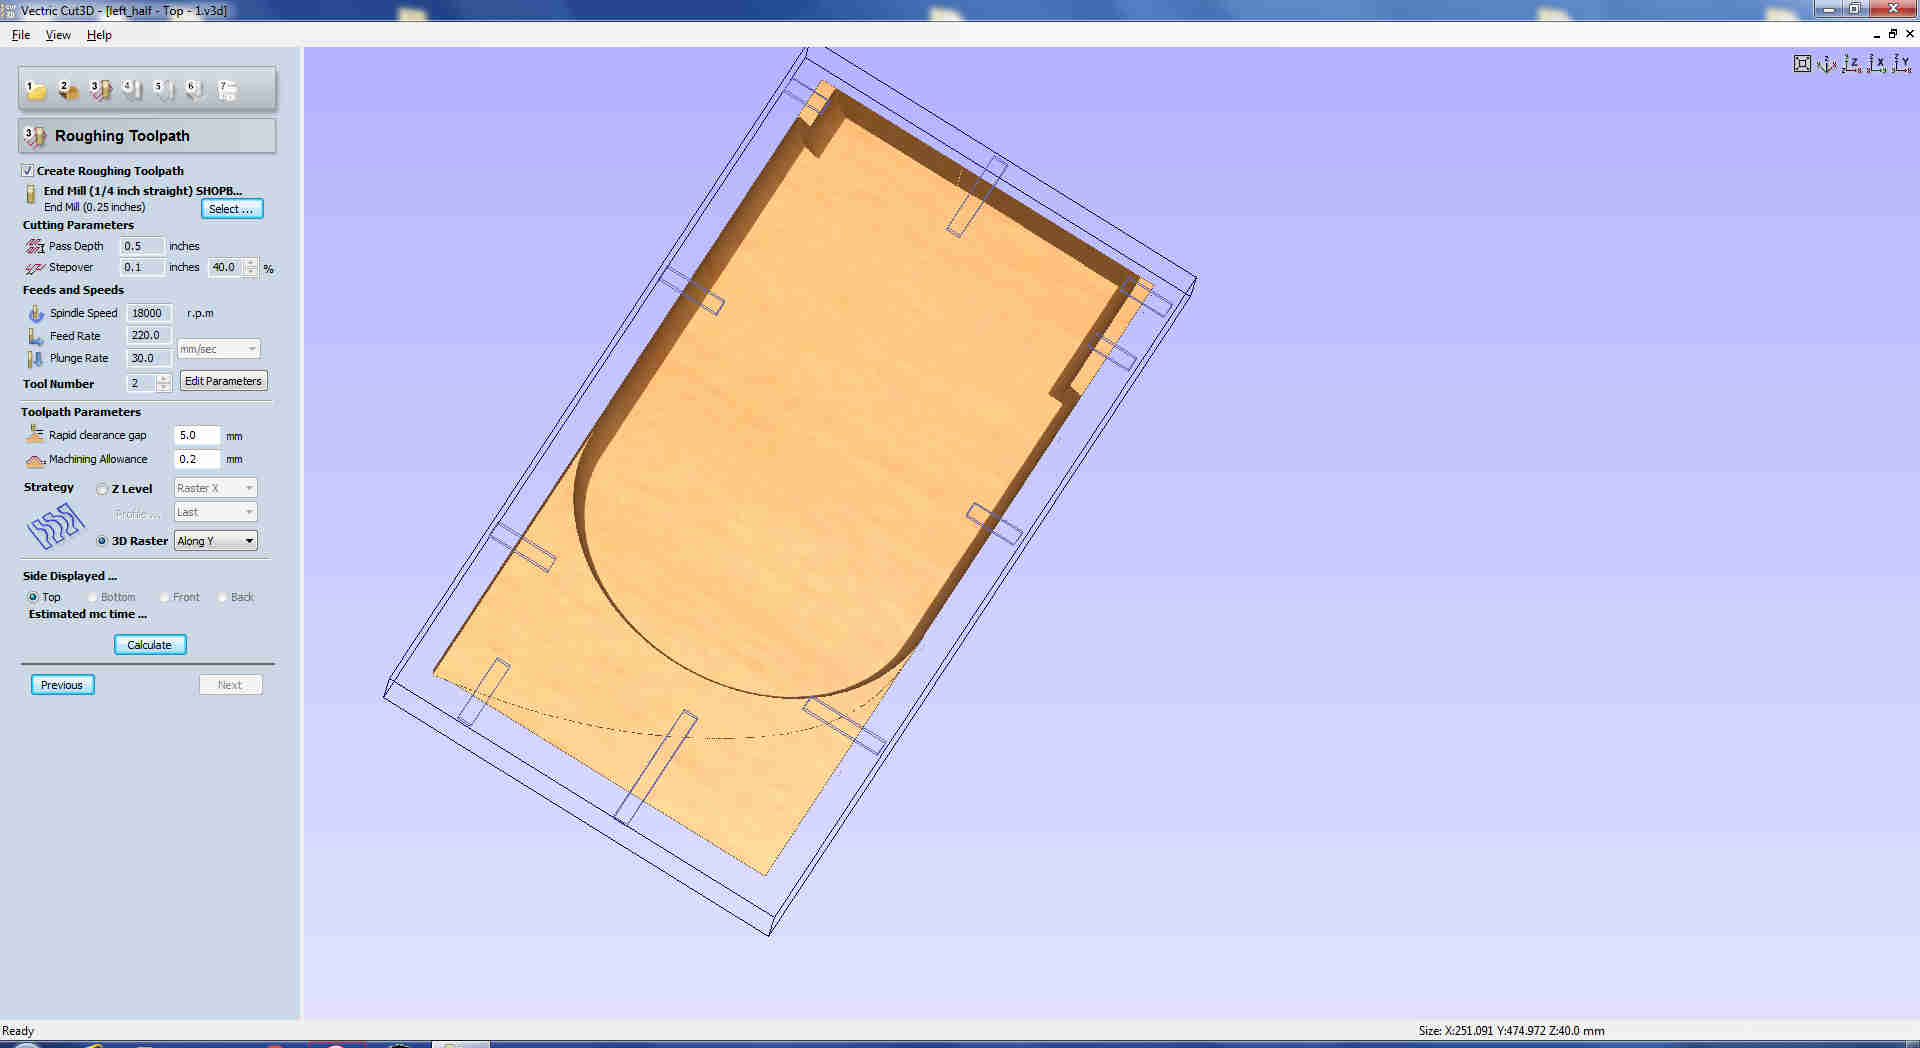
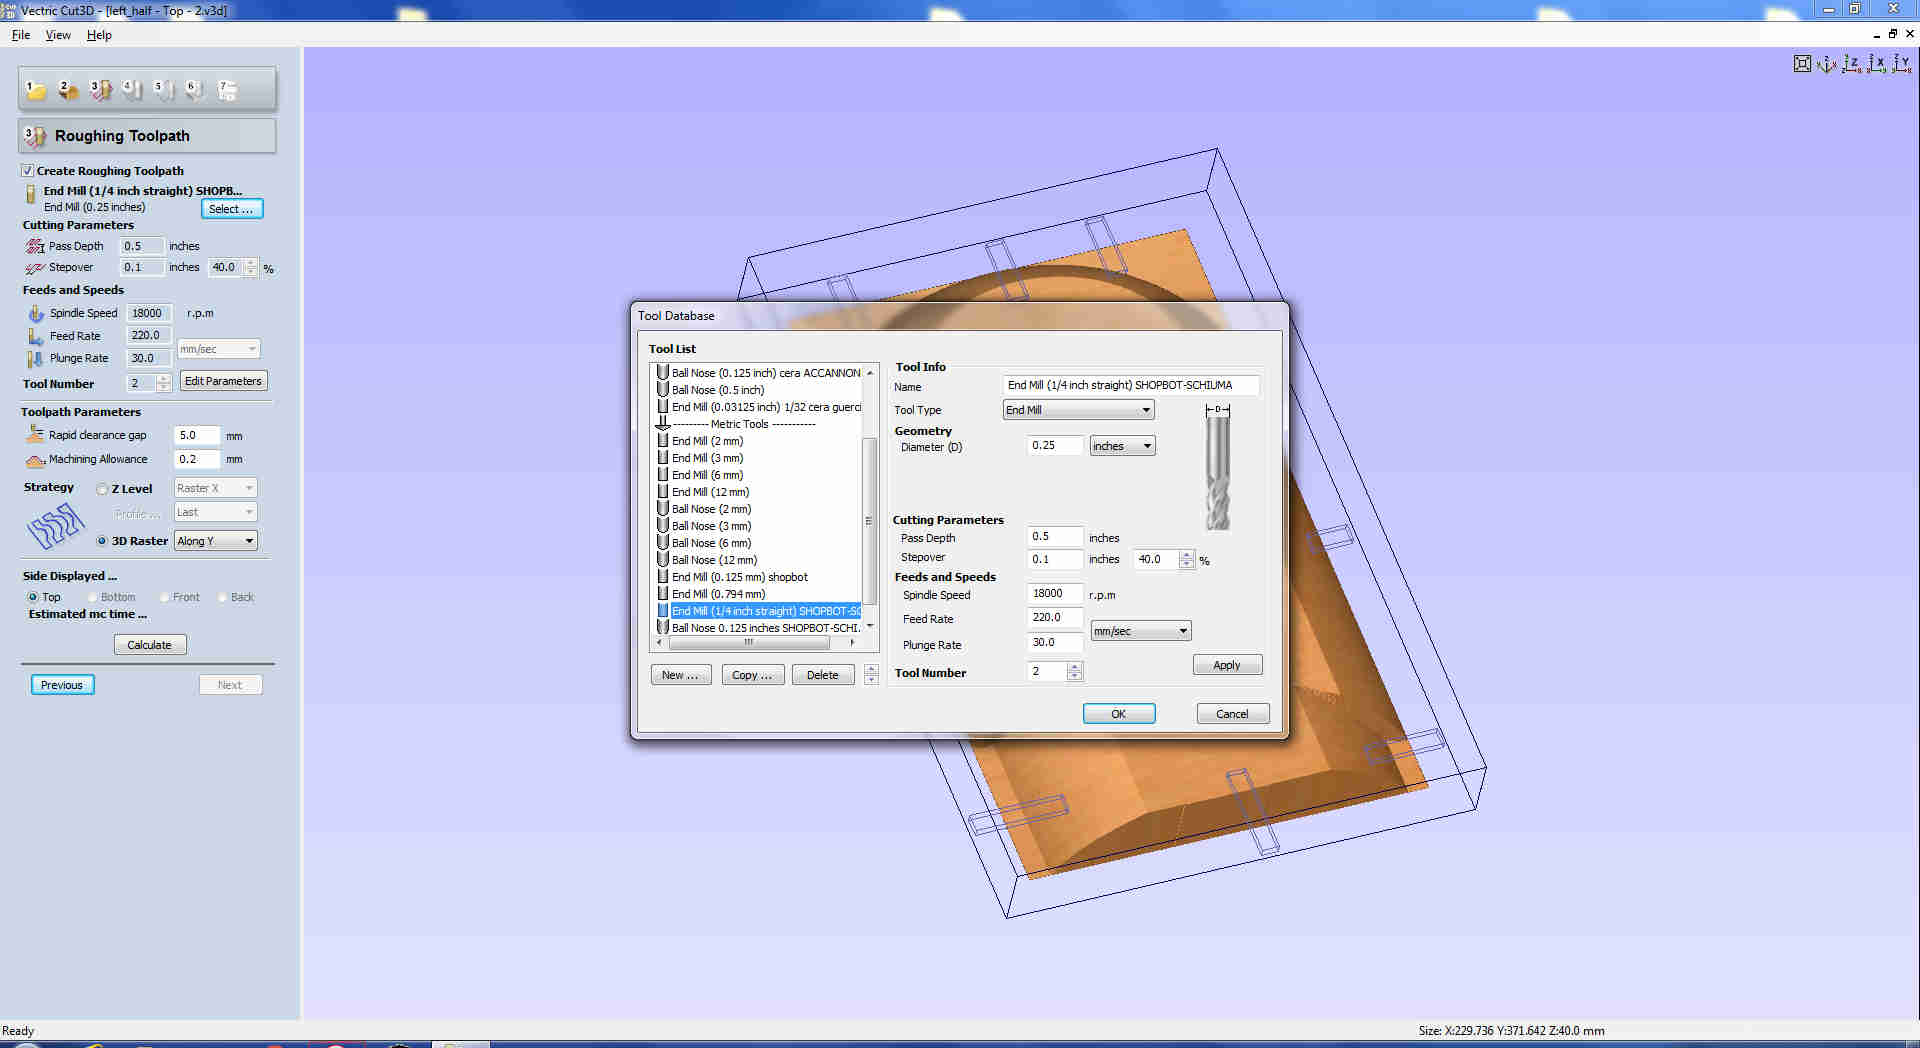
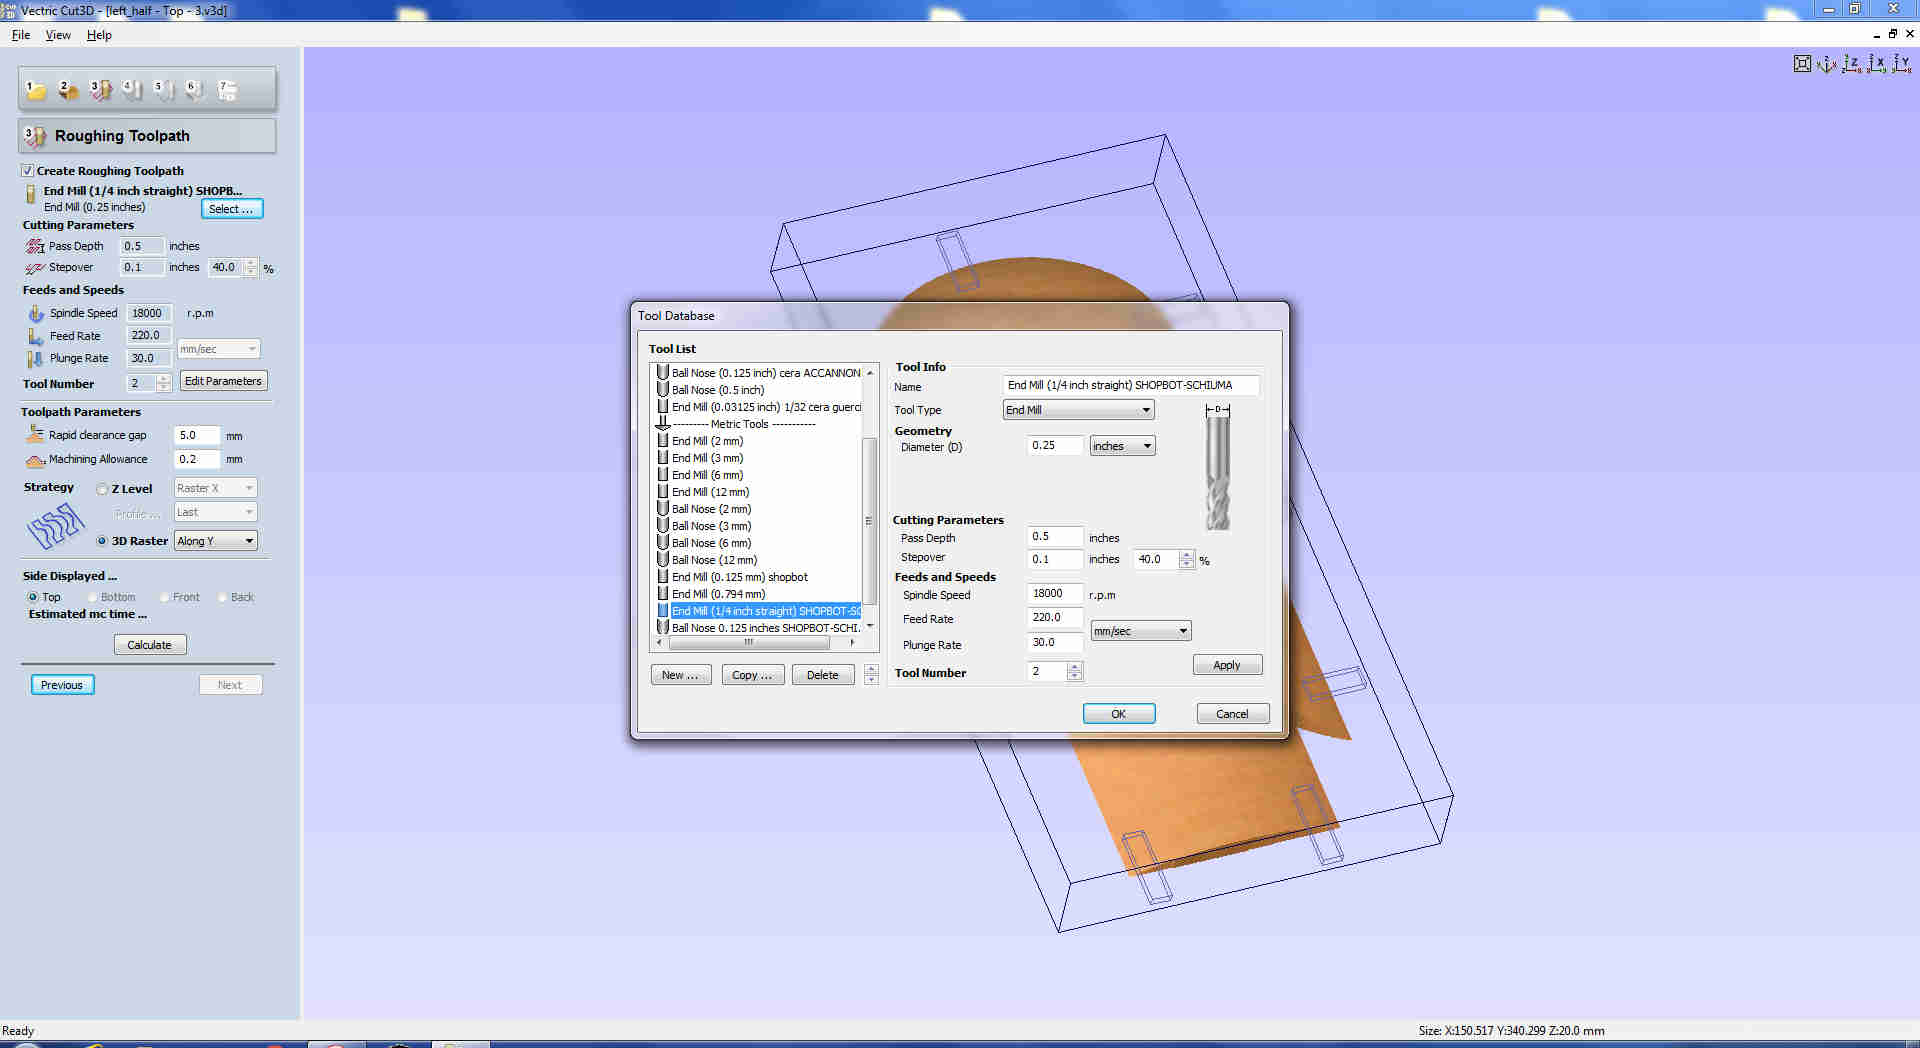
 In Roughing Toolpath I set endmill parameters and cutting Strategy (which I now set as 3D but I will change it later on)
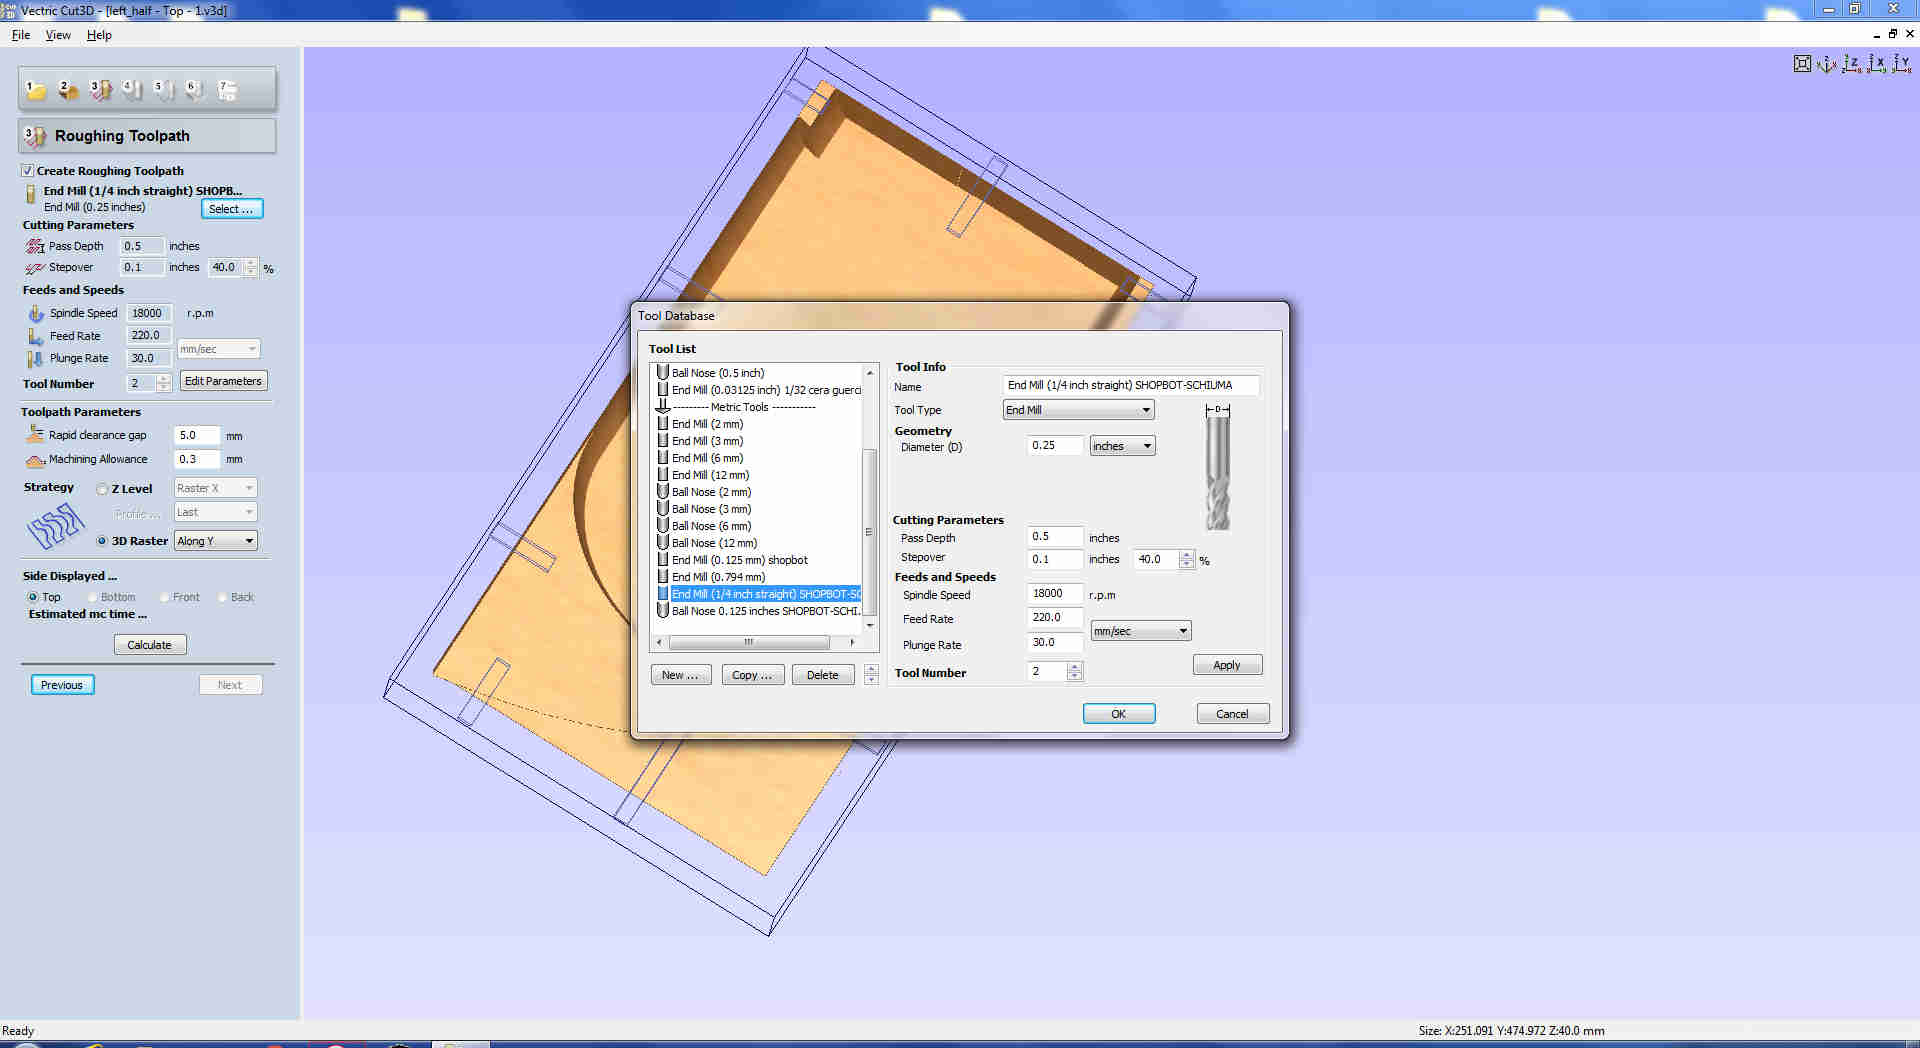
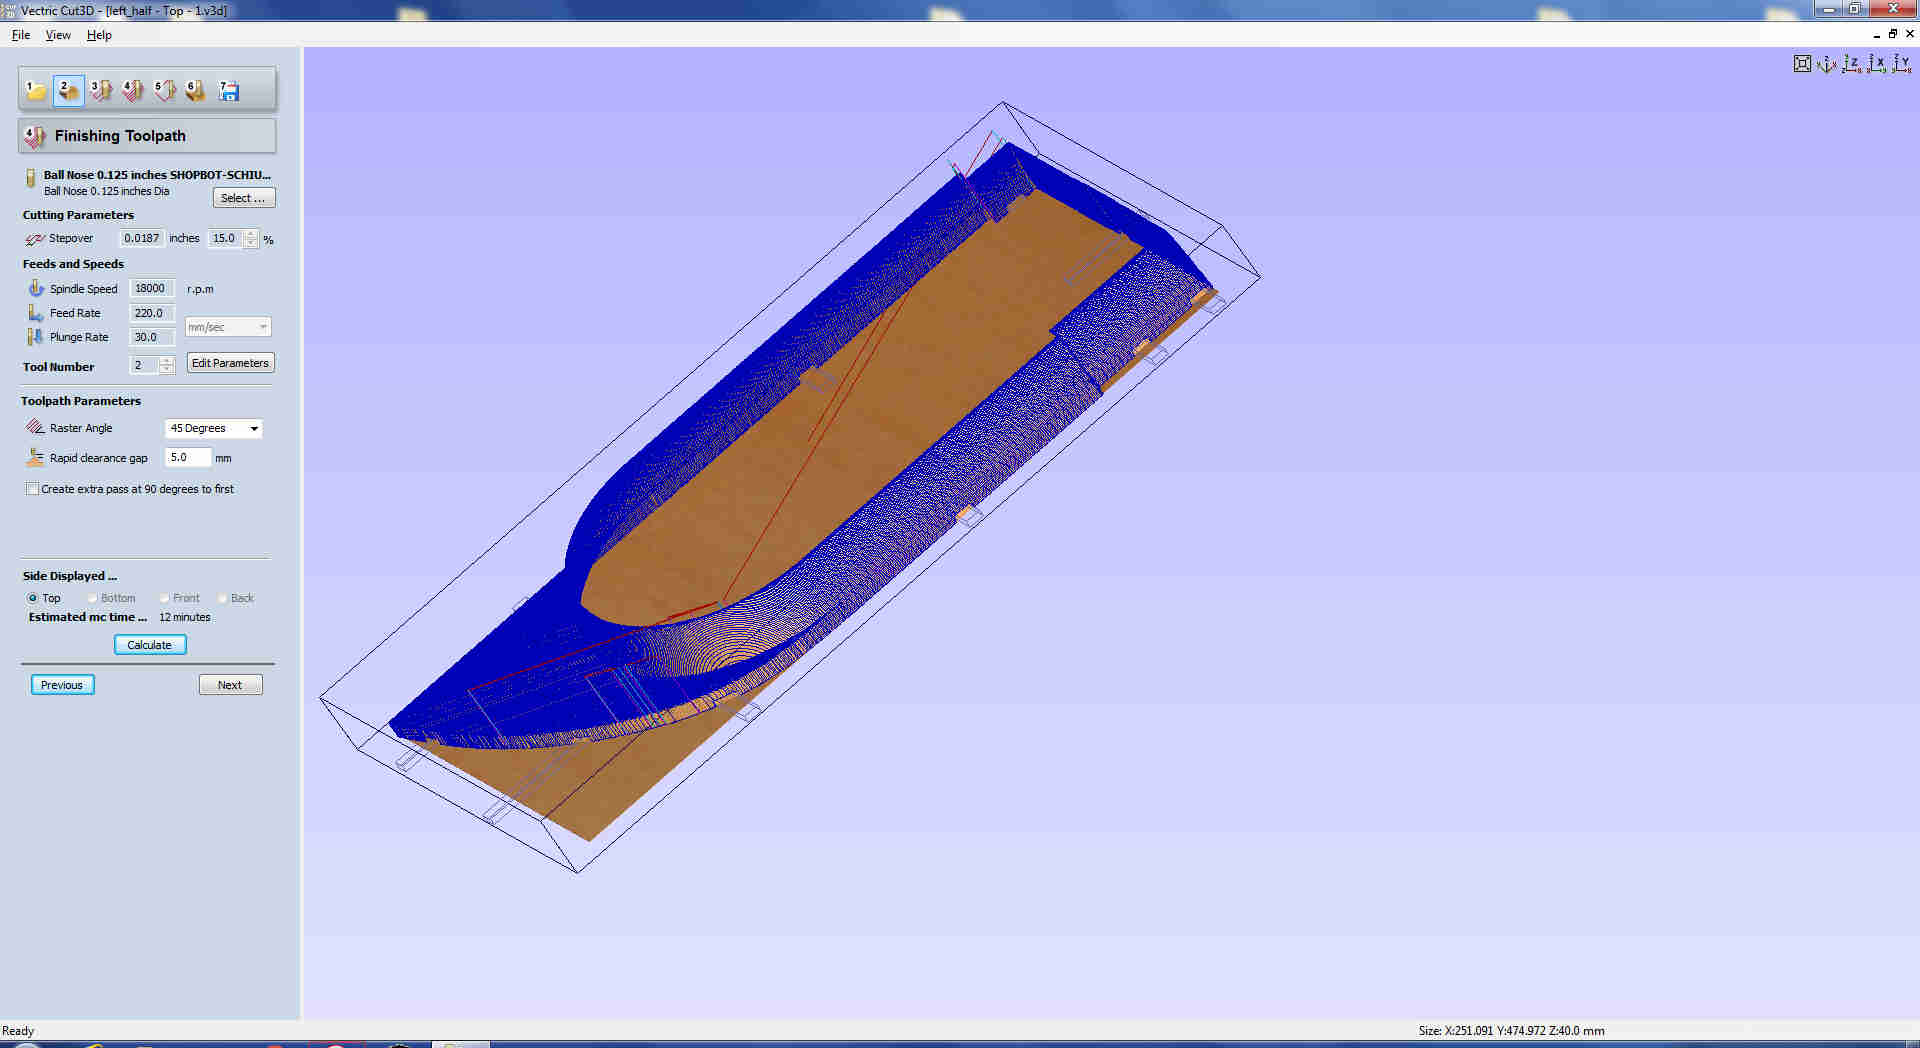
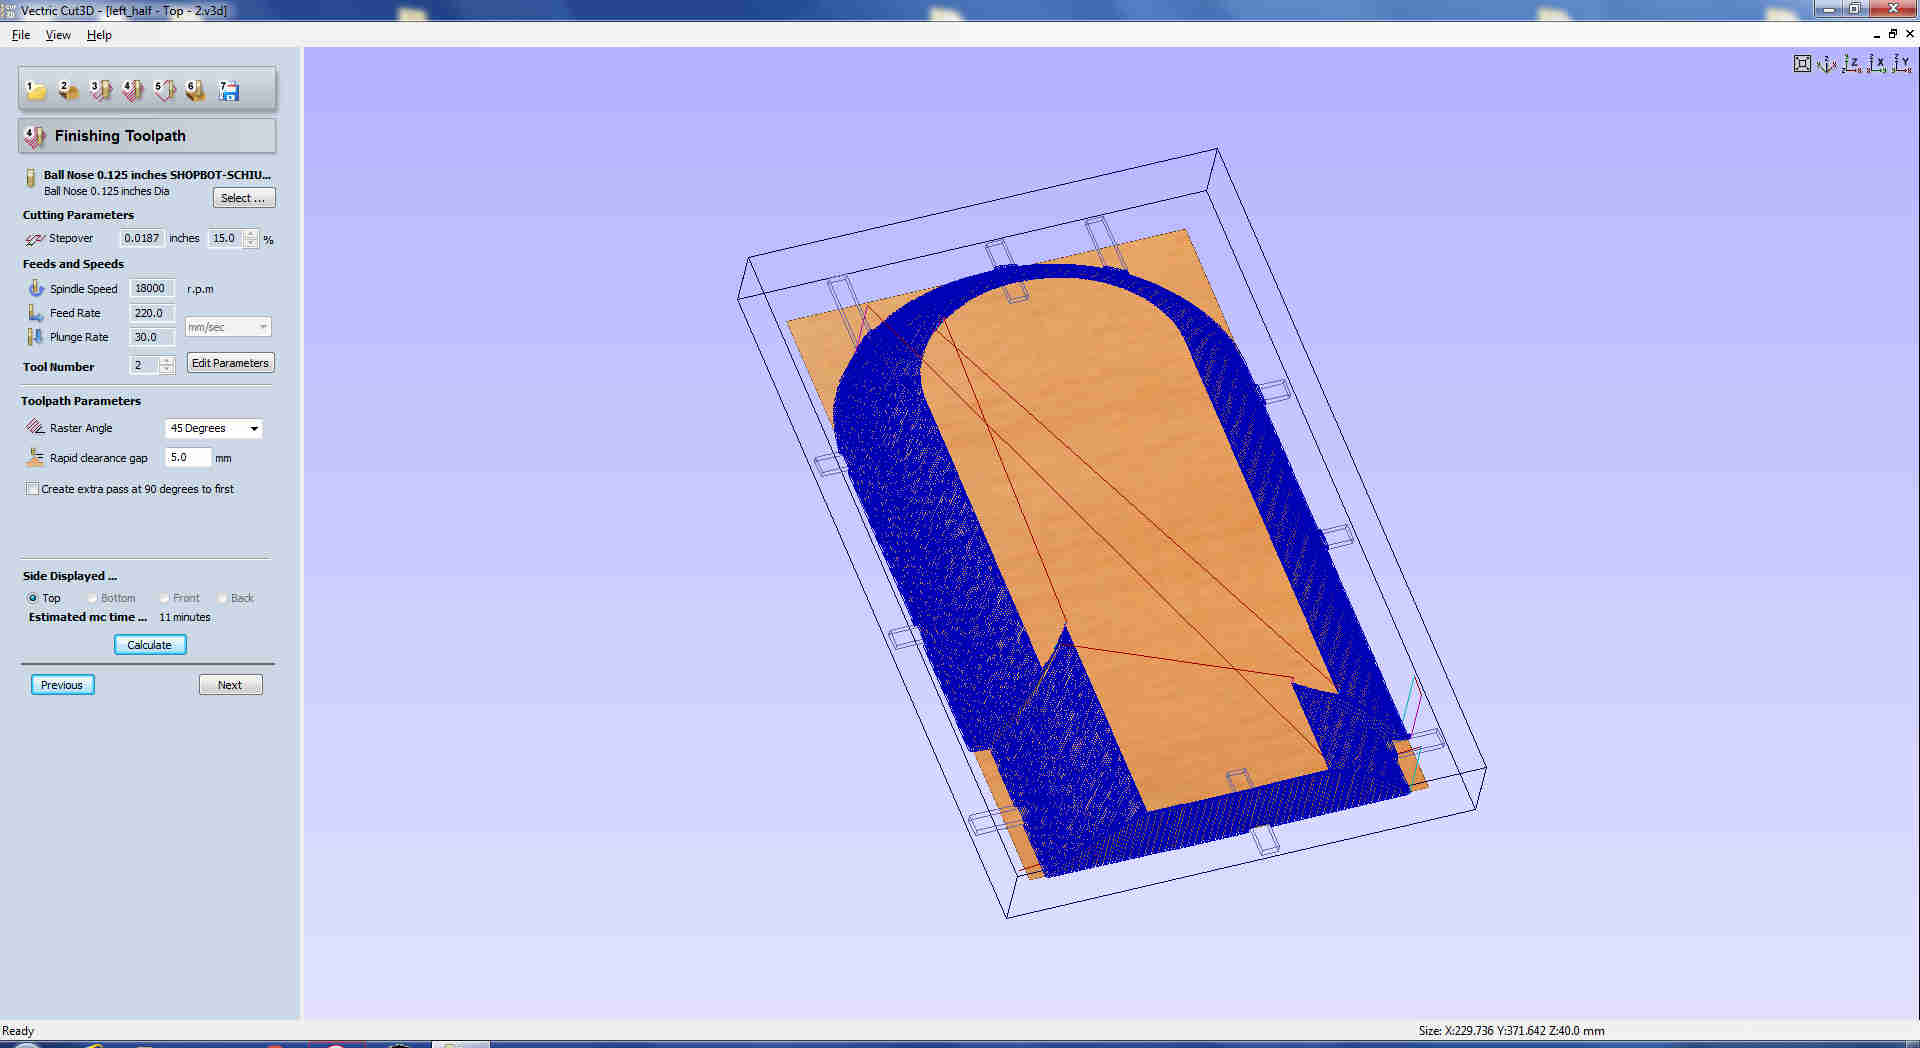
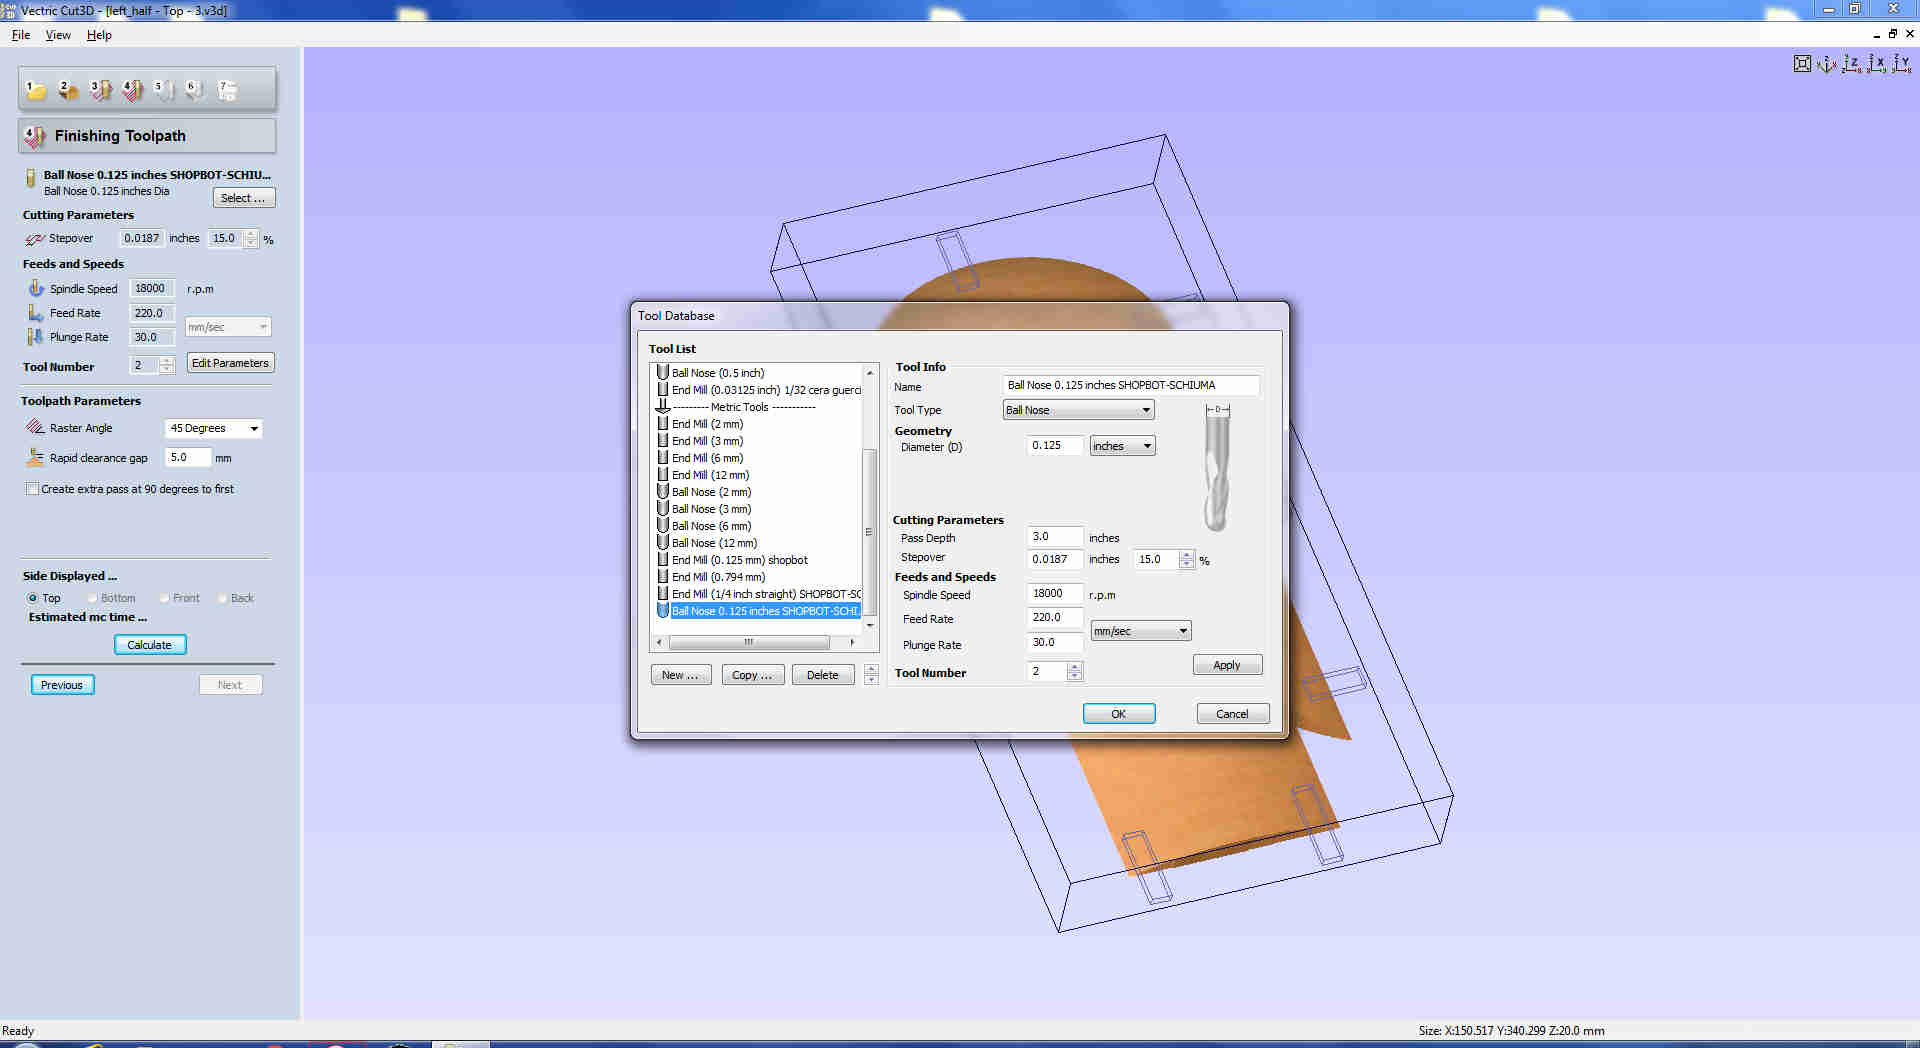
 I then set Finishing Toolpath endmill properties

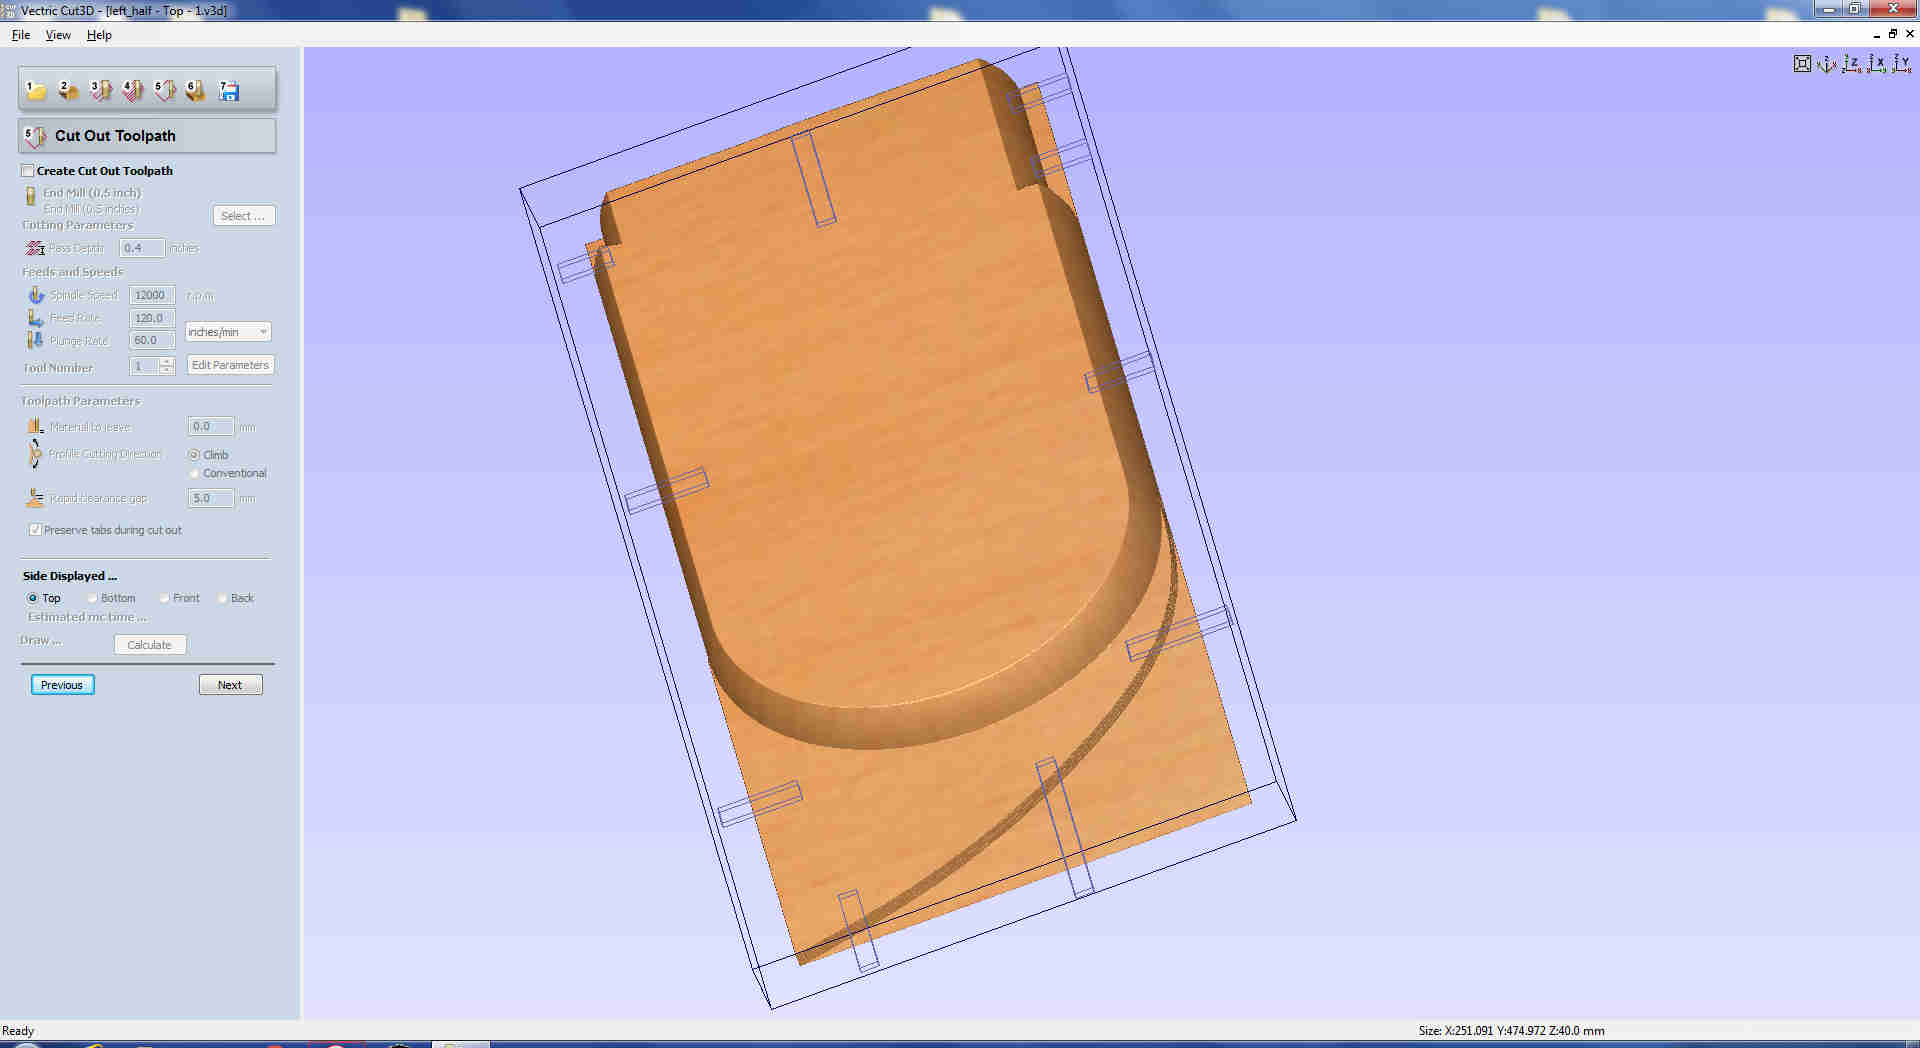
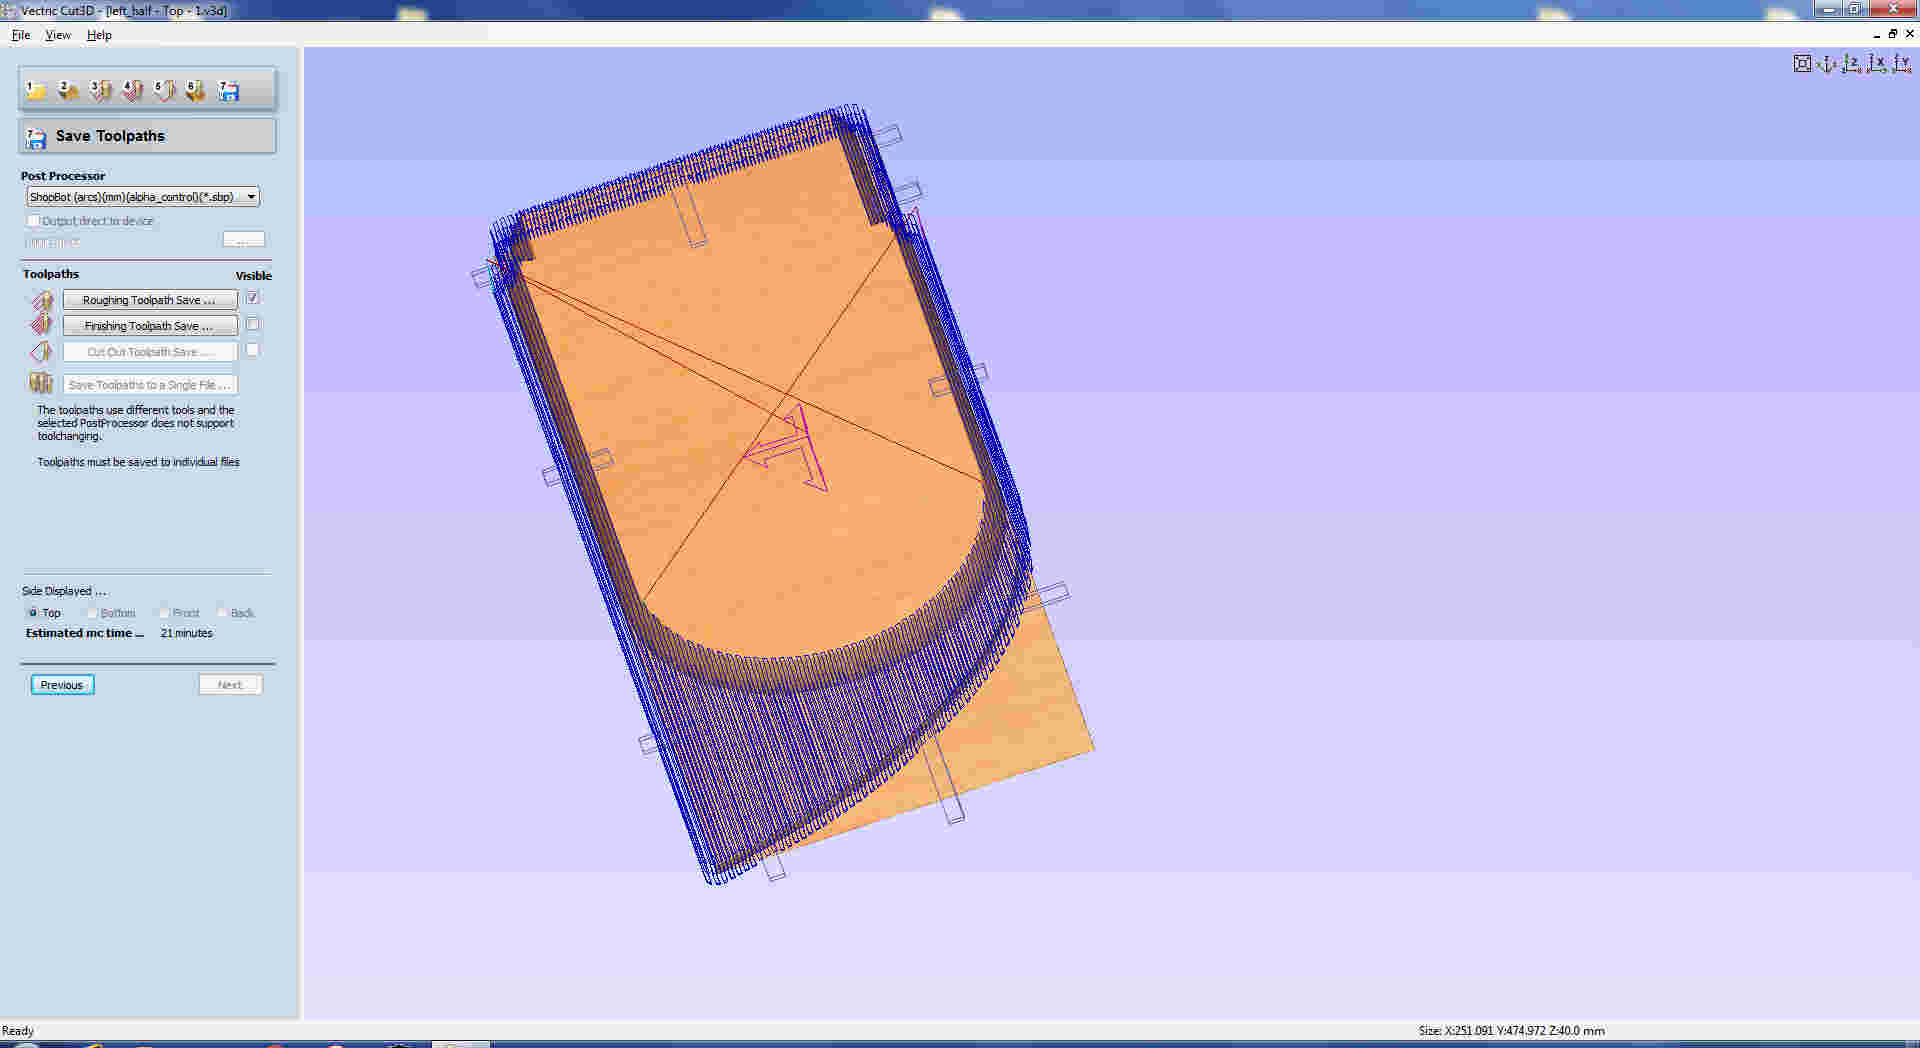
 I needn't Cut Out Toolpath since current part was as high as the material and I added tabs to prevent it from detaching while milling
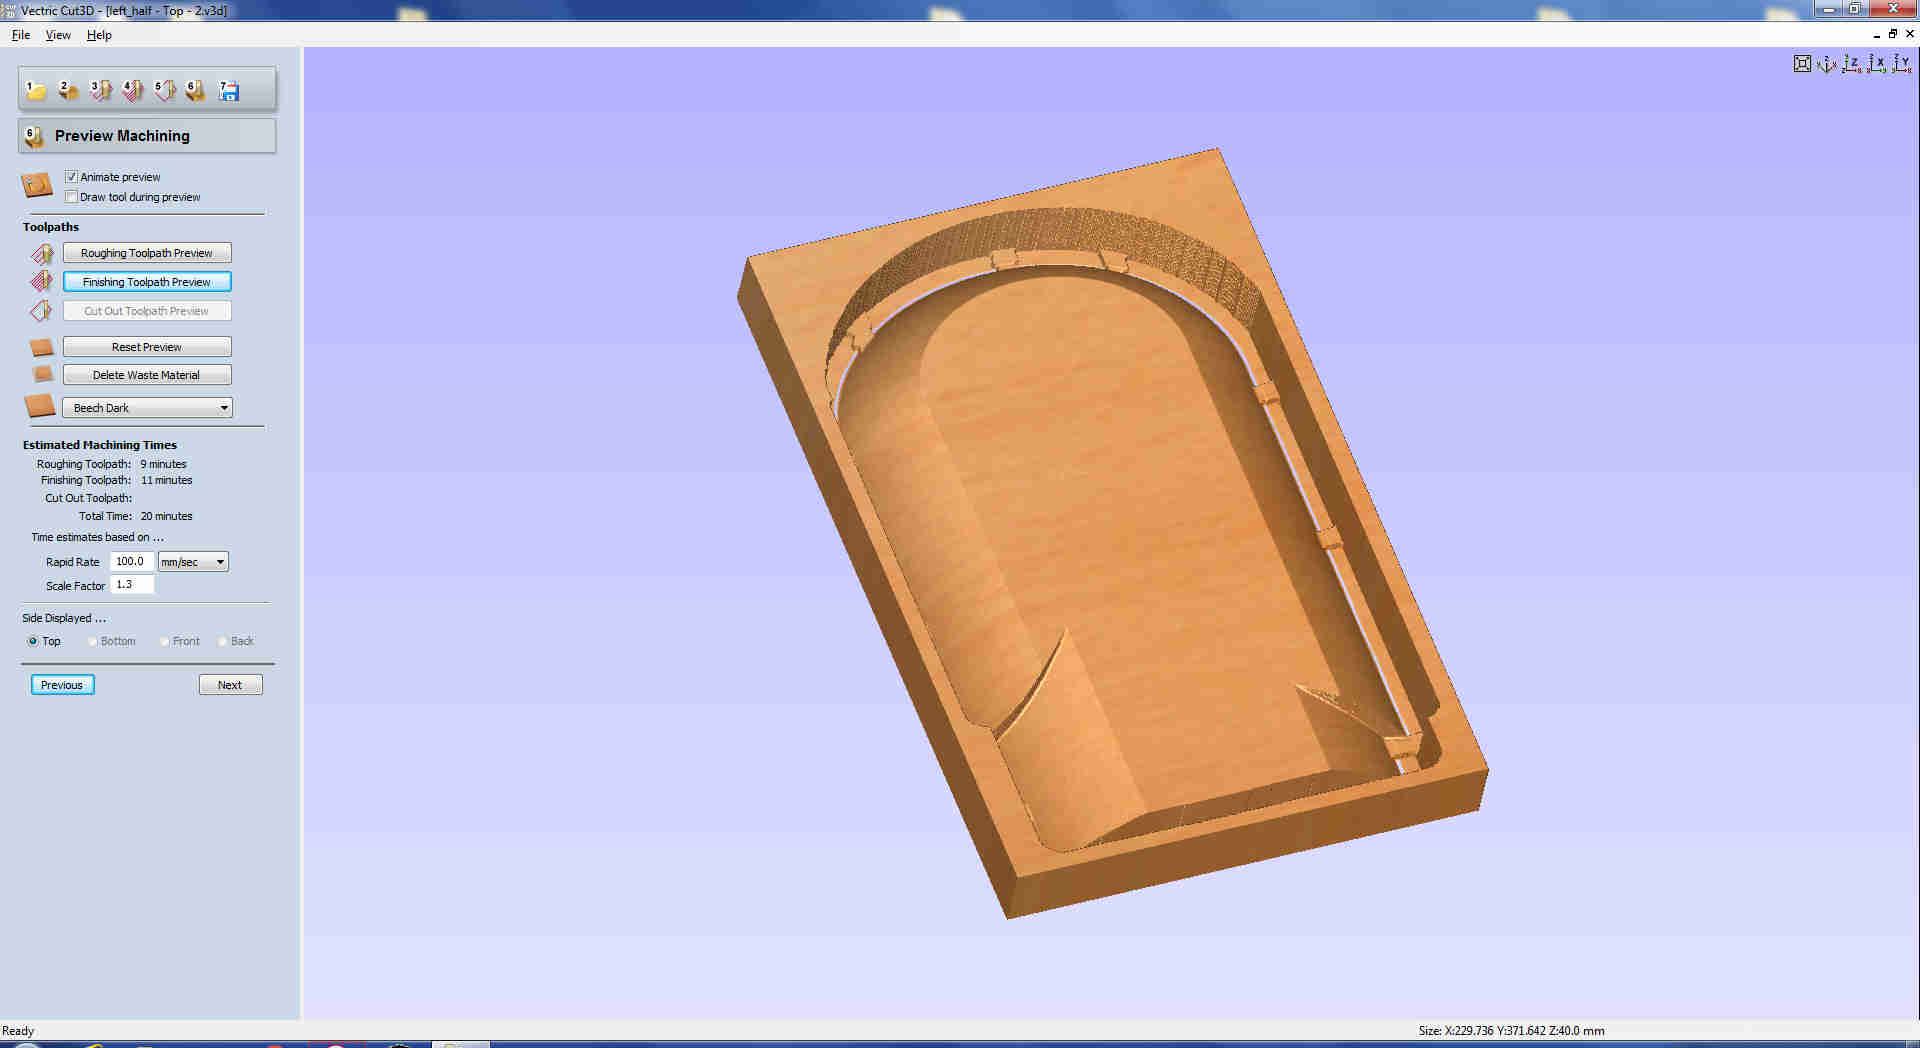
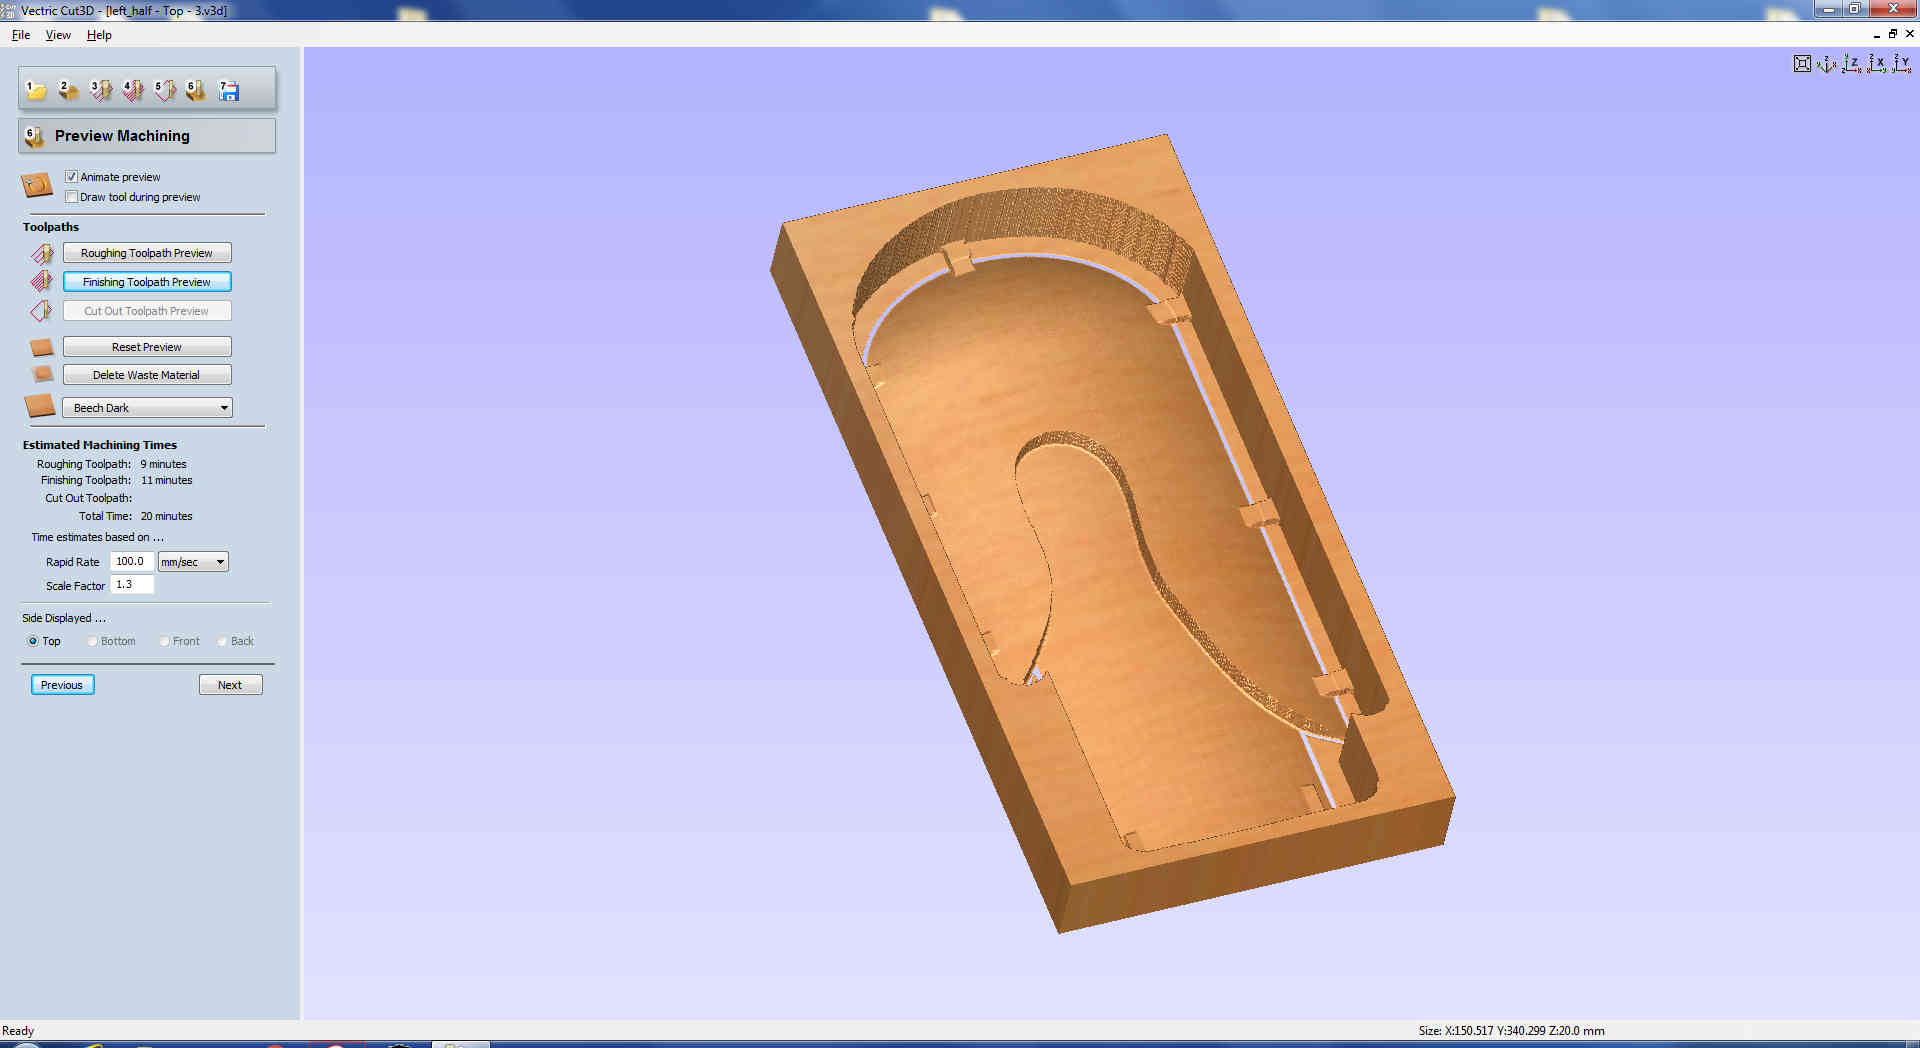
 I previewed toolpahs to check them:
I so then separatedly saved milling files:
I previewed toolpahs to check them:
I so then separatedly saved milling files:
 I repeated these steps for all parts:

 I then sliced also the other half of my model and repeated all steps above:
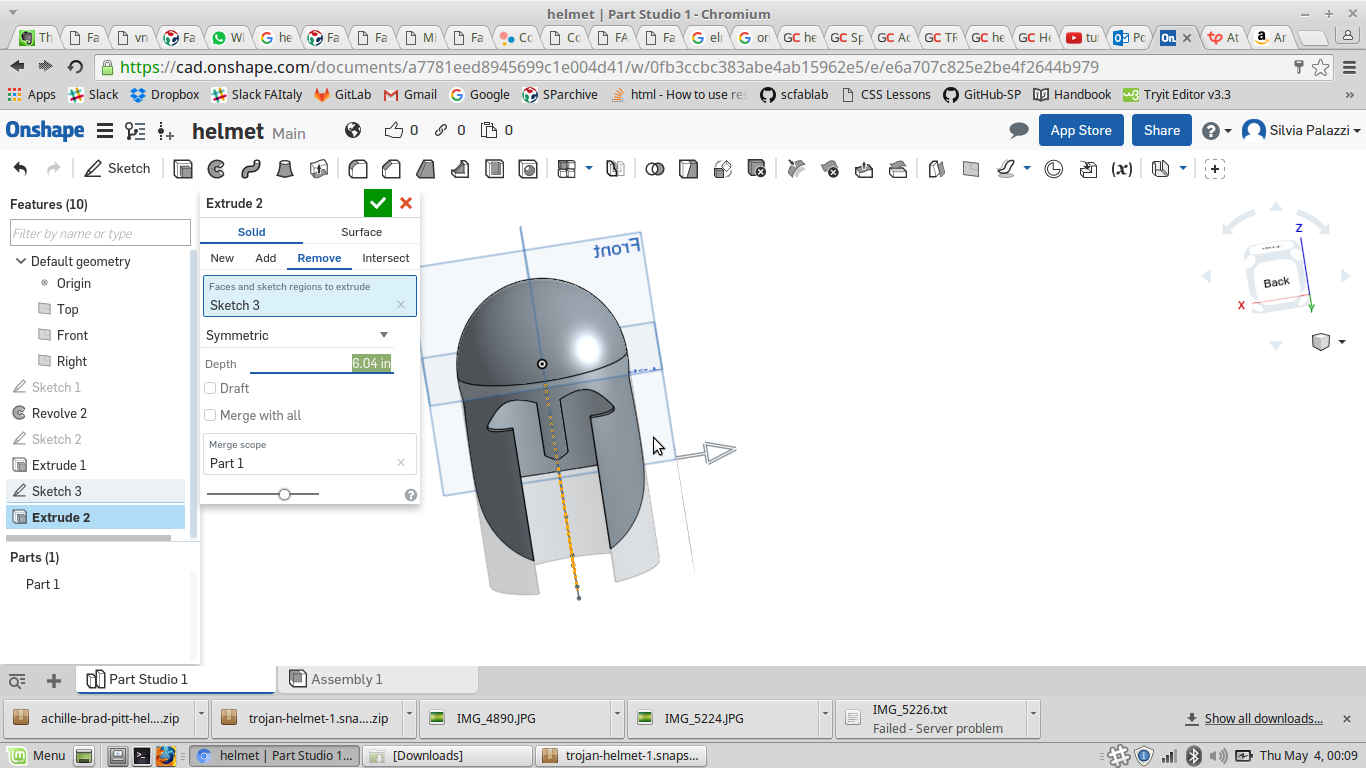
 As soon as I did all these, my istructor suggested me to extrude and not engrave ears cut of my helmet, because it would have helped me
in removing composite material once dried.... when you say matter of time :)
As soon as I did all these, my istructor suggested me to extrude and not engrave ears cut of my helmet, because it would have helped me
in removing composite material once dried.... when you say matter of time :)
I so had to change my model and make milling files again:
 Everything was set the same way except for milling Strategy (that I now set as Z raster) endmill parameters. I used those that my mates alrady tested with their models:
Roughing toolpath-1/4 inch endmill straight
| Parameter | Value |
|---|---|
| Pass depth | 15 mm |
| Stepover | |
| Feed Rate | 100 inch/min |
| Plunge Rate | 100 inch/min |
Finishing toolpath-1/8 inch endmill ball
| Parameter | Value |
|---|---|
| Stepover | |
| Feed Rate | 200 inch/min |
| Plunge Rate | 100 inch/min |
Milling
Test
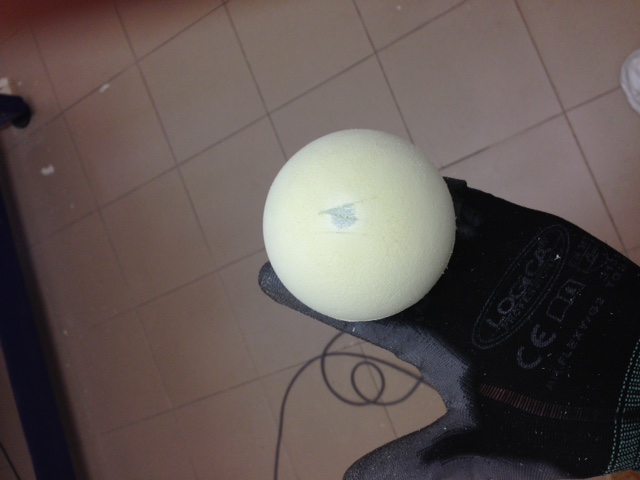
I had to cut 6 pieces then and it would have taken me quite long (average time of roughing toolpath: 12 mins/piece; average time of finishing toolpath:30 mins - consider endmill change for each piece- total time: 5h more or less).
I therefore preferred to test a little model first, to double check parameters I chose were right.
I turned ShopBot on (red lever) and also the spindle (key rotated to ON).I
then started Spindle Warmup Routine (under Cuts menu) and waited till the spindle was oiled well.
I then set the origin, moving the spindle with Keypad panel commands and then I went through Zero--> zero [*] axis (where * indicates x,y and z).
I then launched
With first endmill setting Plunge rate was quite low and milling resulted very slowly:
half_ball_rough from Silvia Palazzi on Vimeo.
half_ball_finish from Silvia Palazzi on Vimeo.
Since endmill found really low resistance from polystyrene, I reasoned 100 inch/min one could work fine. I also tought I could use
Z raster milling strategy to make roughing quicker.
 I was so ready to launch my 6 files (I left my agenda page blank for sunday afternoon and monday morning).
QUICK NOTE before showing results:
Remember to change endmill from straight to ball one once roughing toolpath is finished; this to me resulted to be:
- 1- Put straight endmill
- 2- Move to origin (Move-->Move to origin [X and Y] Z Safe Height if already set, otherwise move to the position desired and go through Zero-->zero [*] axis with * being x and y)
- 3- Set Z zero with plate and alligator clip (Cuts-->Zero Z Axis w/ Zero Plate)
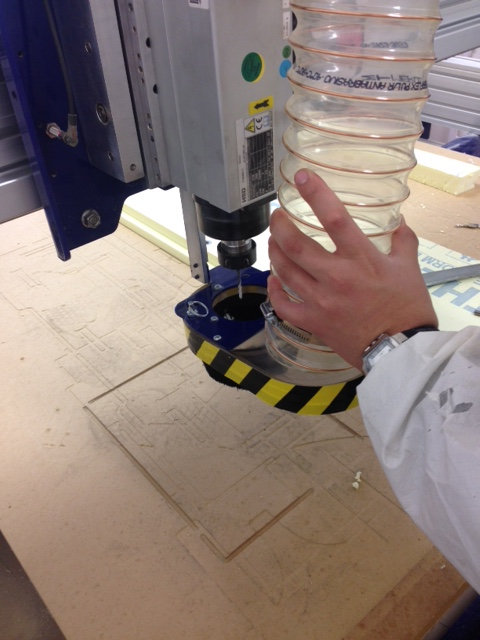
- 4- Turn vacuum pump on (that's the step I always forget and this makes me rush to the button as soon as the work starts)
- 5- Launch Roughing Toolpath (File-->PART FILE LOAD)
- 6- Wait
- 7- Turn vacuum pump off
- 8- Move endmill head out of the panel (endmill fall may damage panel surface and your model part), close to the edge you have access to
- 9- Turn Spindle off and take the two keys needed for endmill change
- 10- Take straight endmill away and put ball one inside
- 11- Move to origin (Move-->Move to origin [X and Y] Z Safe Height))
- 12- Set Z zero with plate and alligator clip (Cuts-->Zero Z Axis w/ Zero Plate)
- 13- Turn vacuum pump on
- 14- Launch Finishing Toolpath (File-->PART FILE LOAD)
- 15- Wait
- 16- Move endmill head far from cut piece and take the part out
- 17- Move the endmill to new origin position desired
- 18-Go through Zero-->zero [*] axis with * being x and y
- Repeat steps 3-18 according to pieces you need to cut
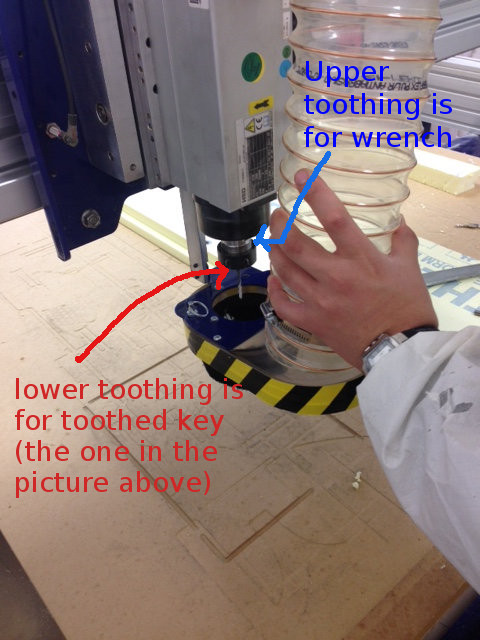
Changing endmill path
To change endmill, each Shopbot is provided of two keys, one of which is usually wired to spindle turning on/off lock:
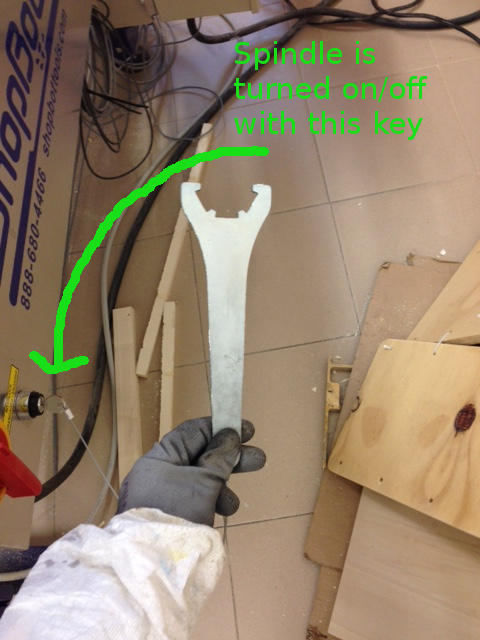 (This is a smart trick to prevent you from changing endmill while spindle is turned on)
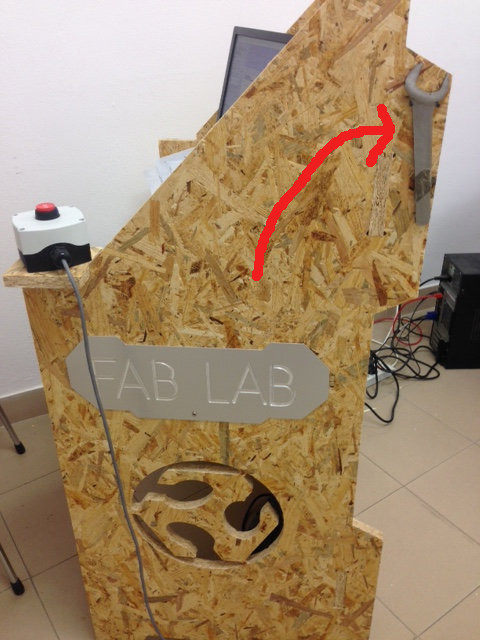
The other is a wrench:
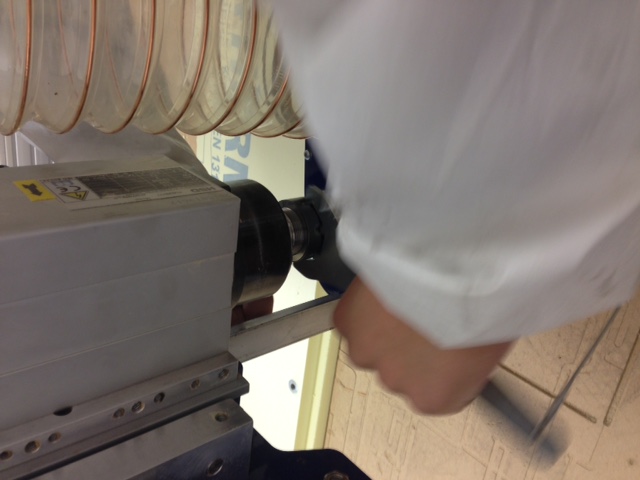
 First you must unscrew a black knob to push down vacuum pump head:

 Two keys must be used together:
 to unscrew, tool handles must drift apart, to screw they must move toward each other.
 NB: check endmill sharp edges are entirely out of endmill collector before screwing.
Put vacuum pump head back to position and screw the black knob.
[Thanks to Nicola that helped me in this]
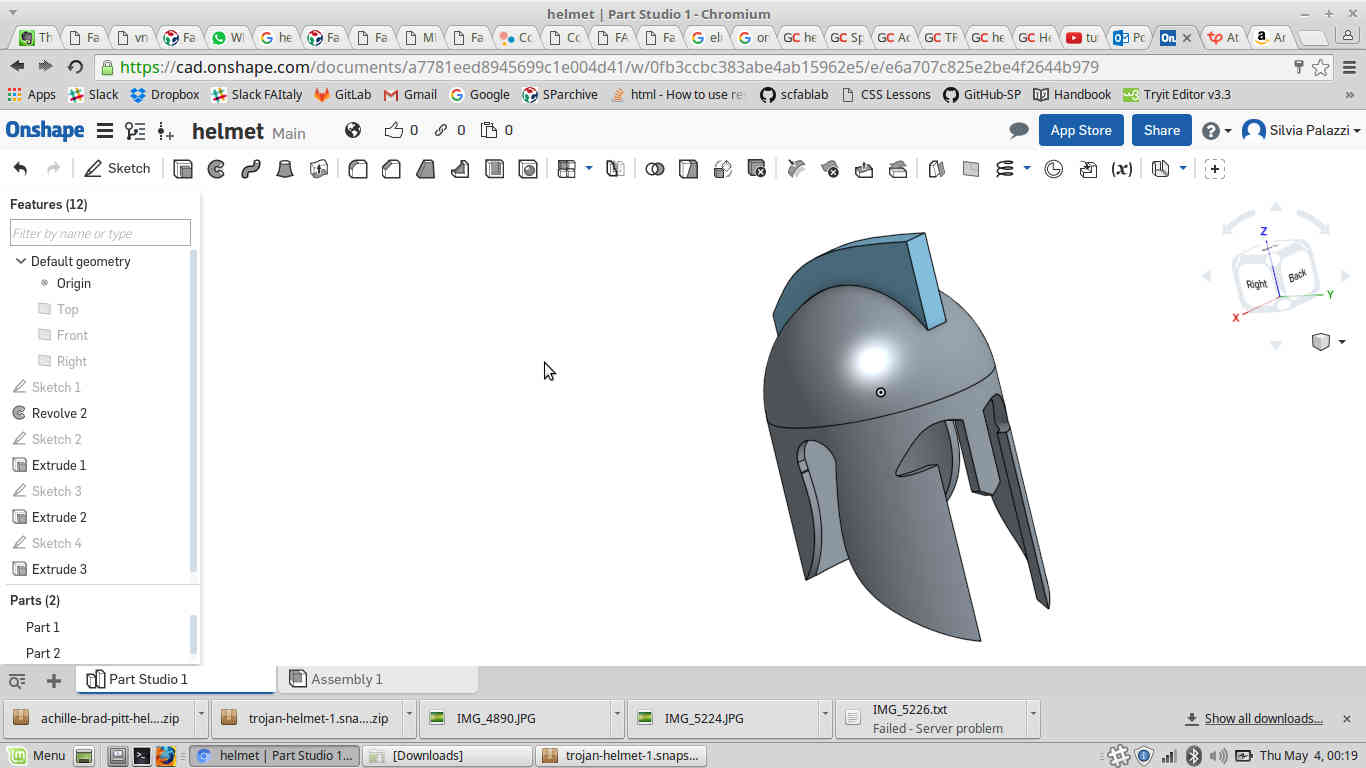
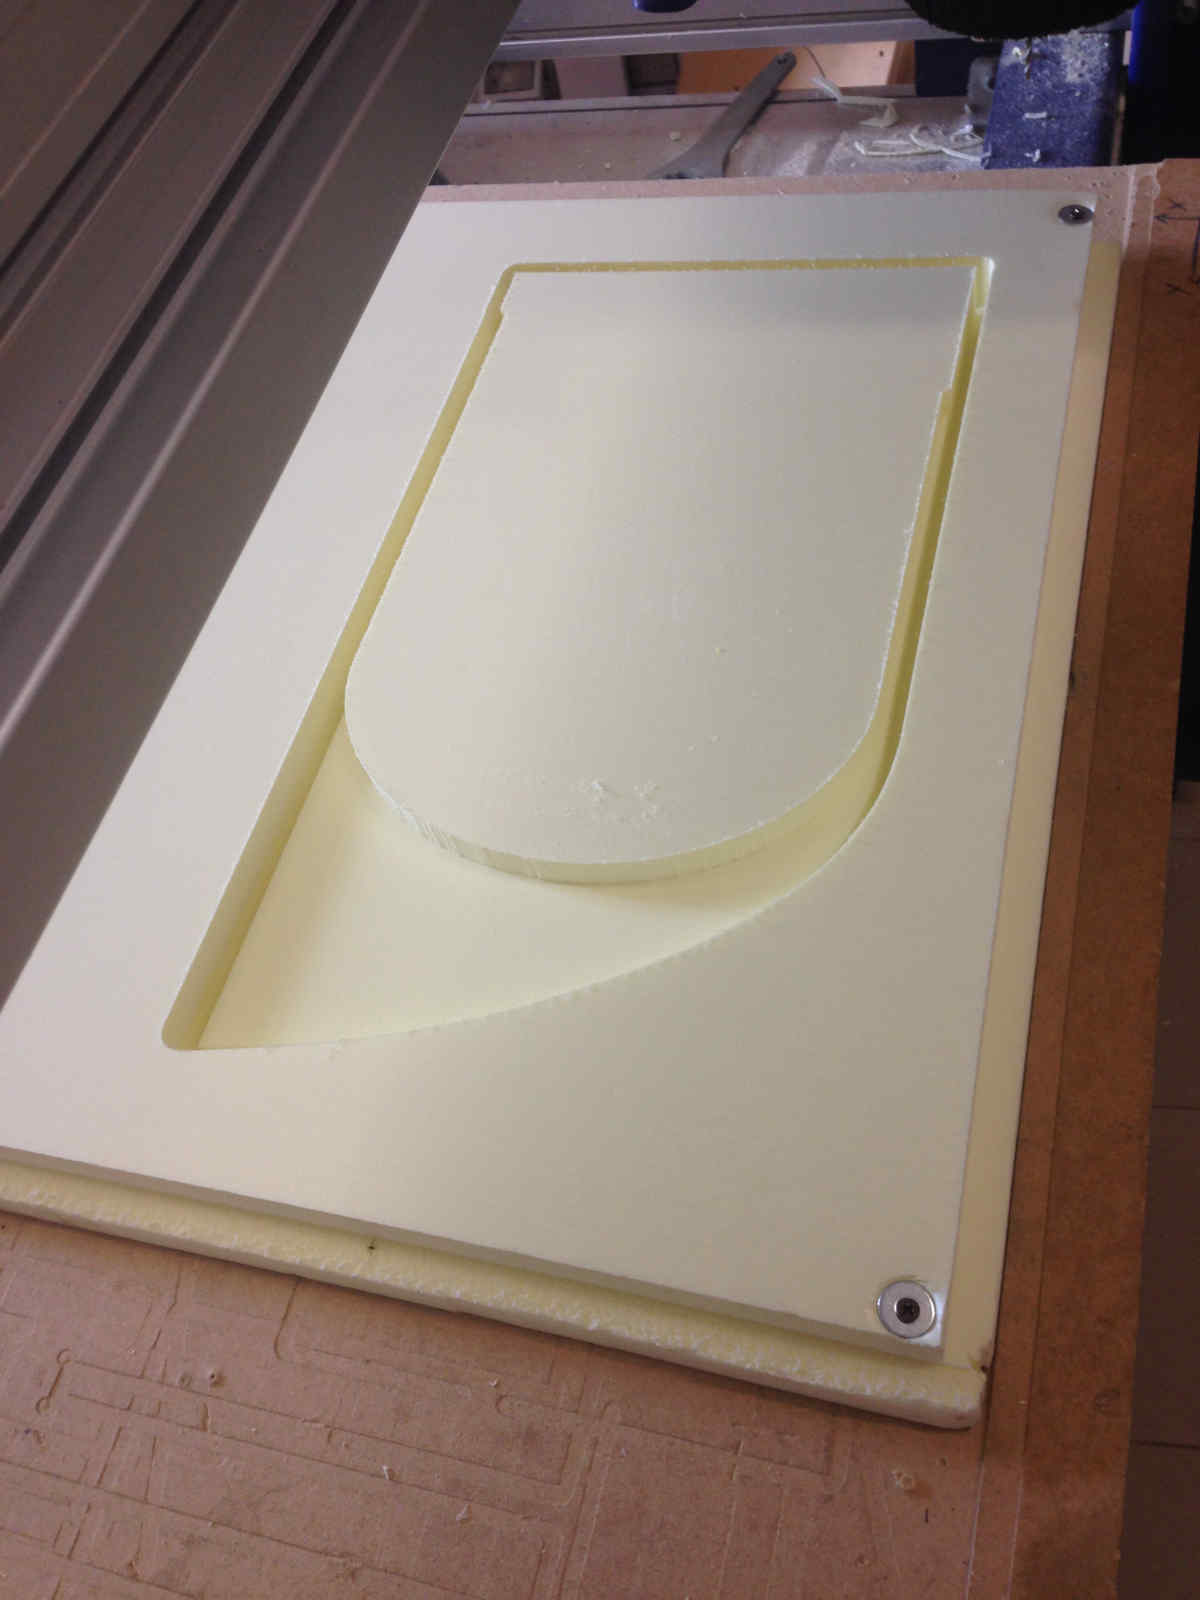
Helmet milling
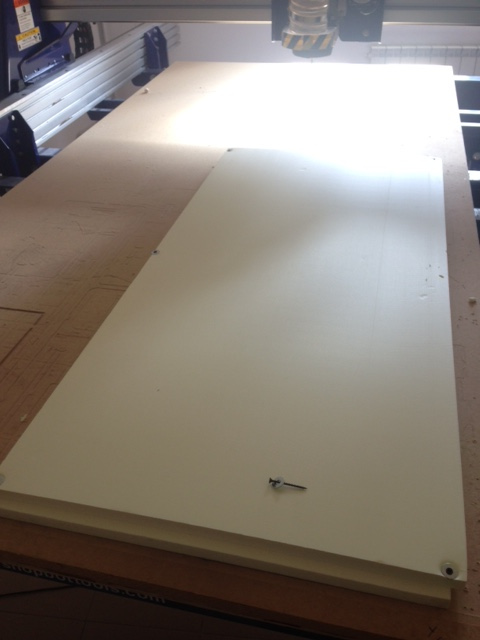
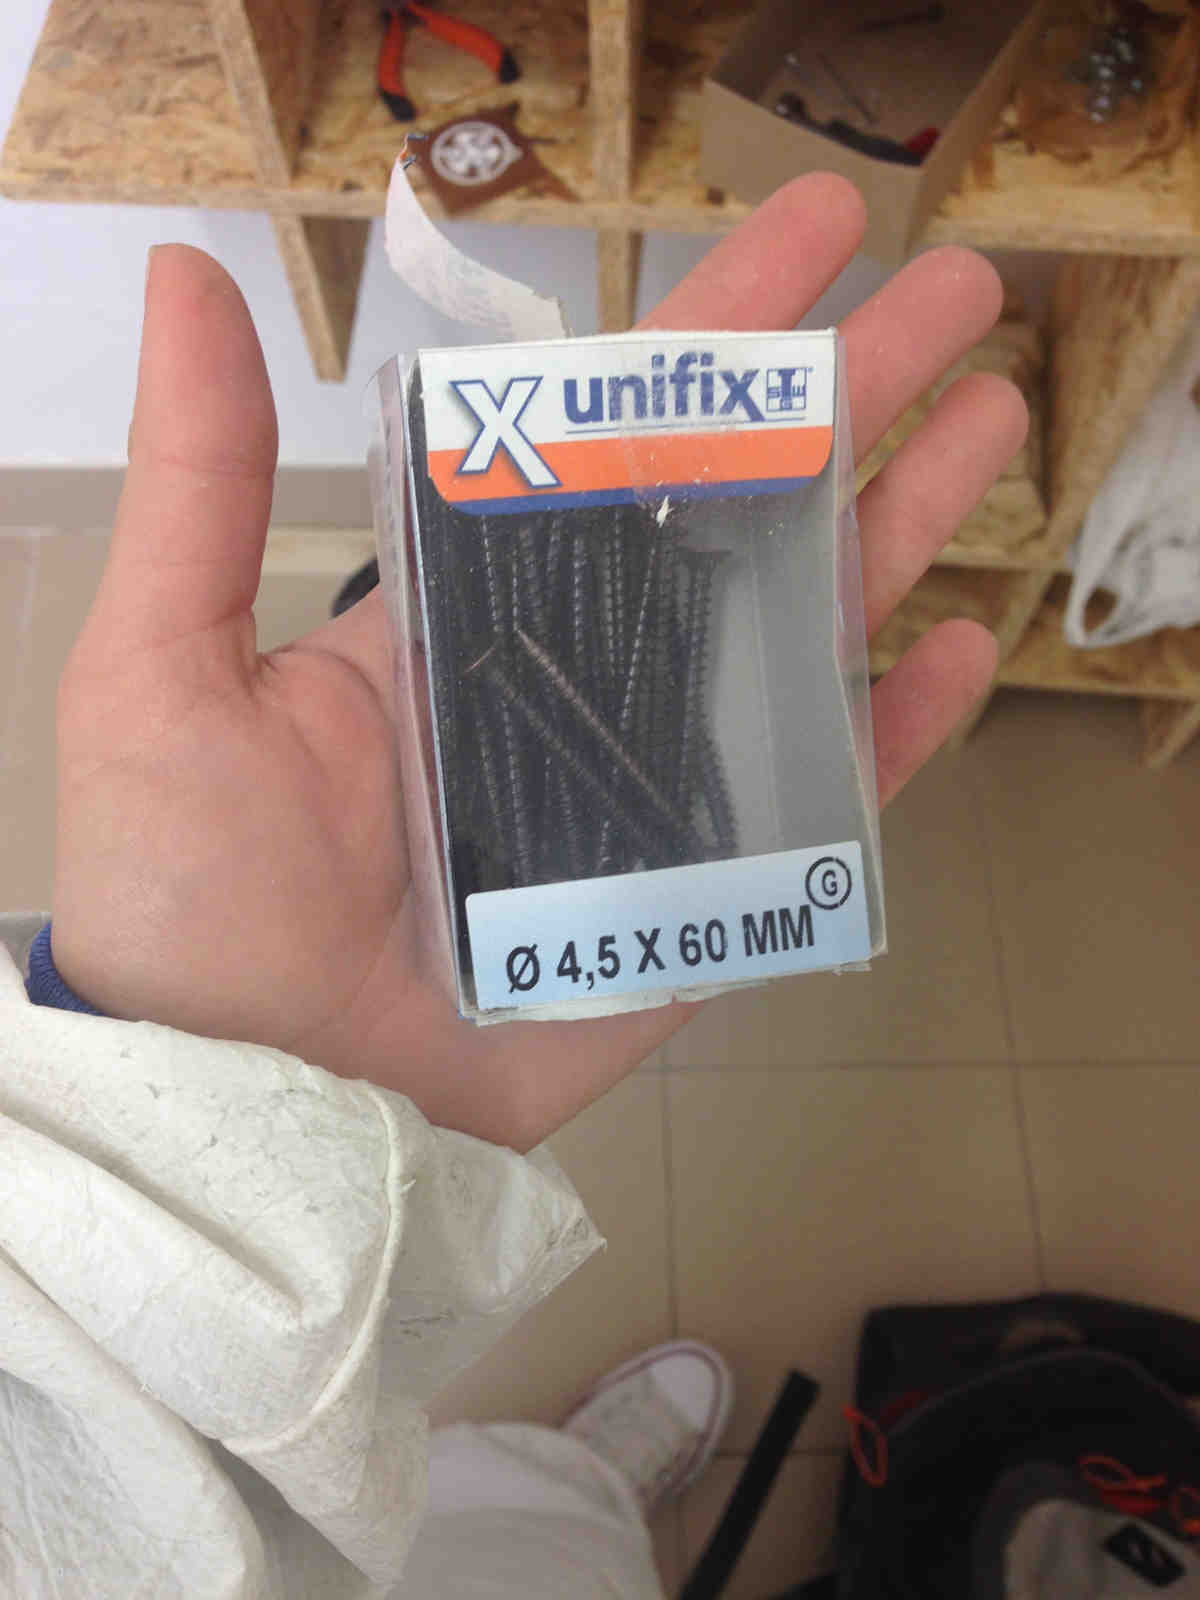
I so wore my overall and set polystyrene panel for my helmet 6 pieces, I then blocked it to MDF sacrificial layer
with long screws (remember my panel was 40mm high):
 I then followed steps in the NOTE above to cut parts.
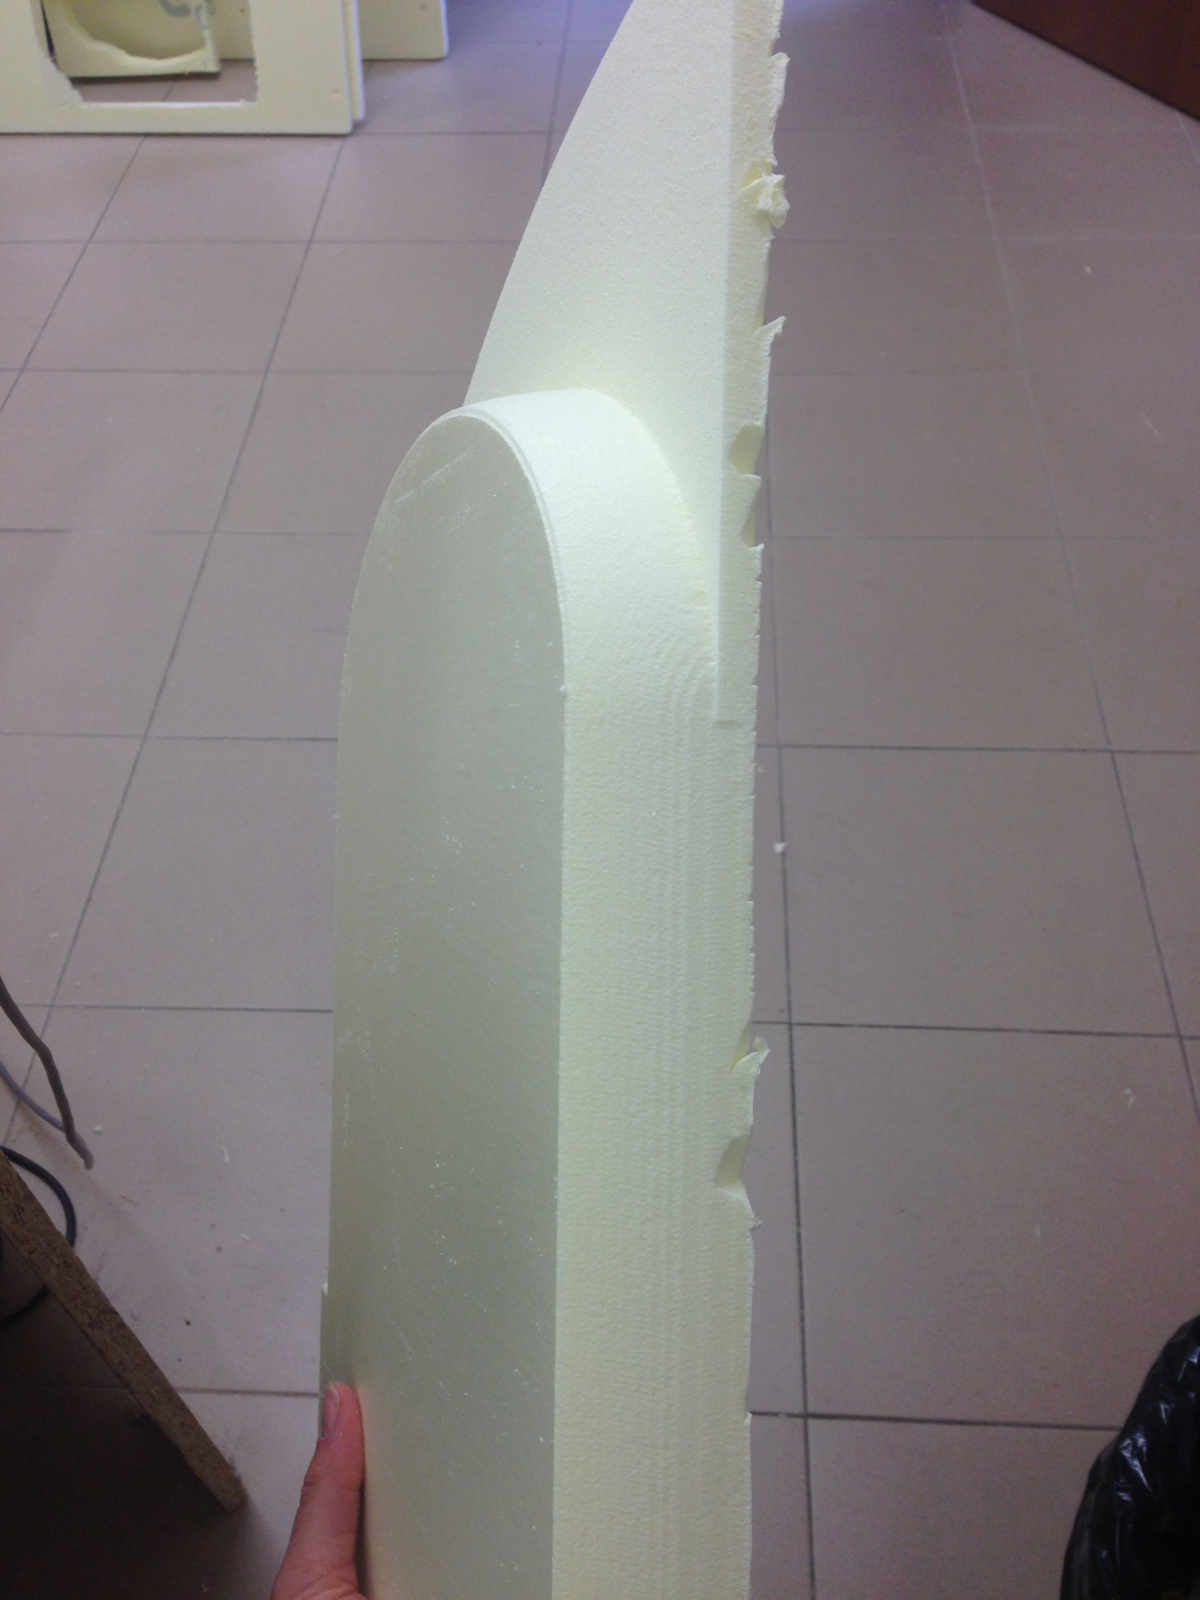
First part:
 Since the polystyrene hadn't been cut till the lower surface (there was a millimiter left), I had difficulties in
taking the part out:
Since the polystyrene hadn't been cut till the lower surface (there was a millimiter left), I had difficulties in
taking the part out:
 Anyway, while second part finishing toolpath was running I used the finest-grain-sandpaper I had in my lab to finish edges better:
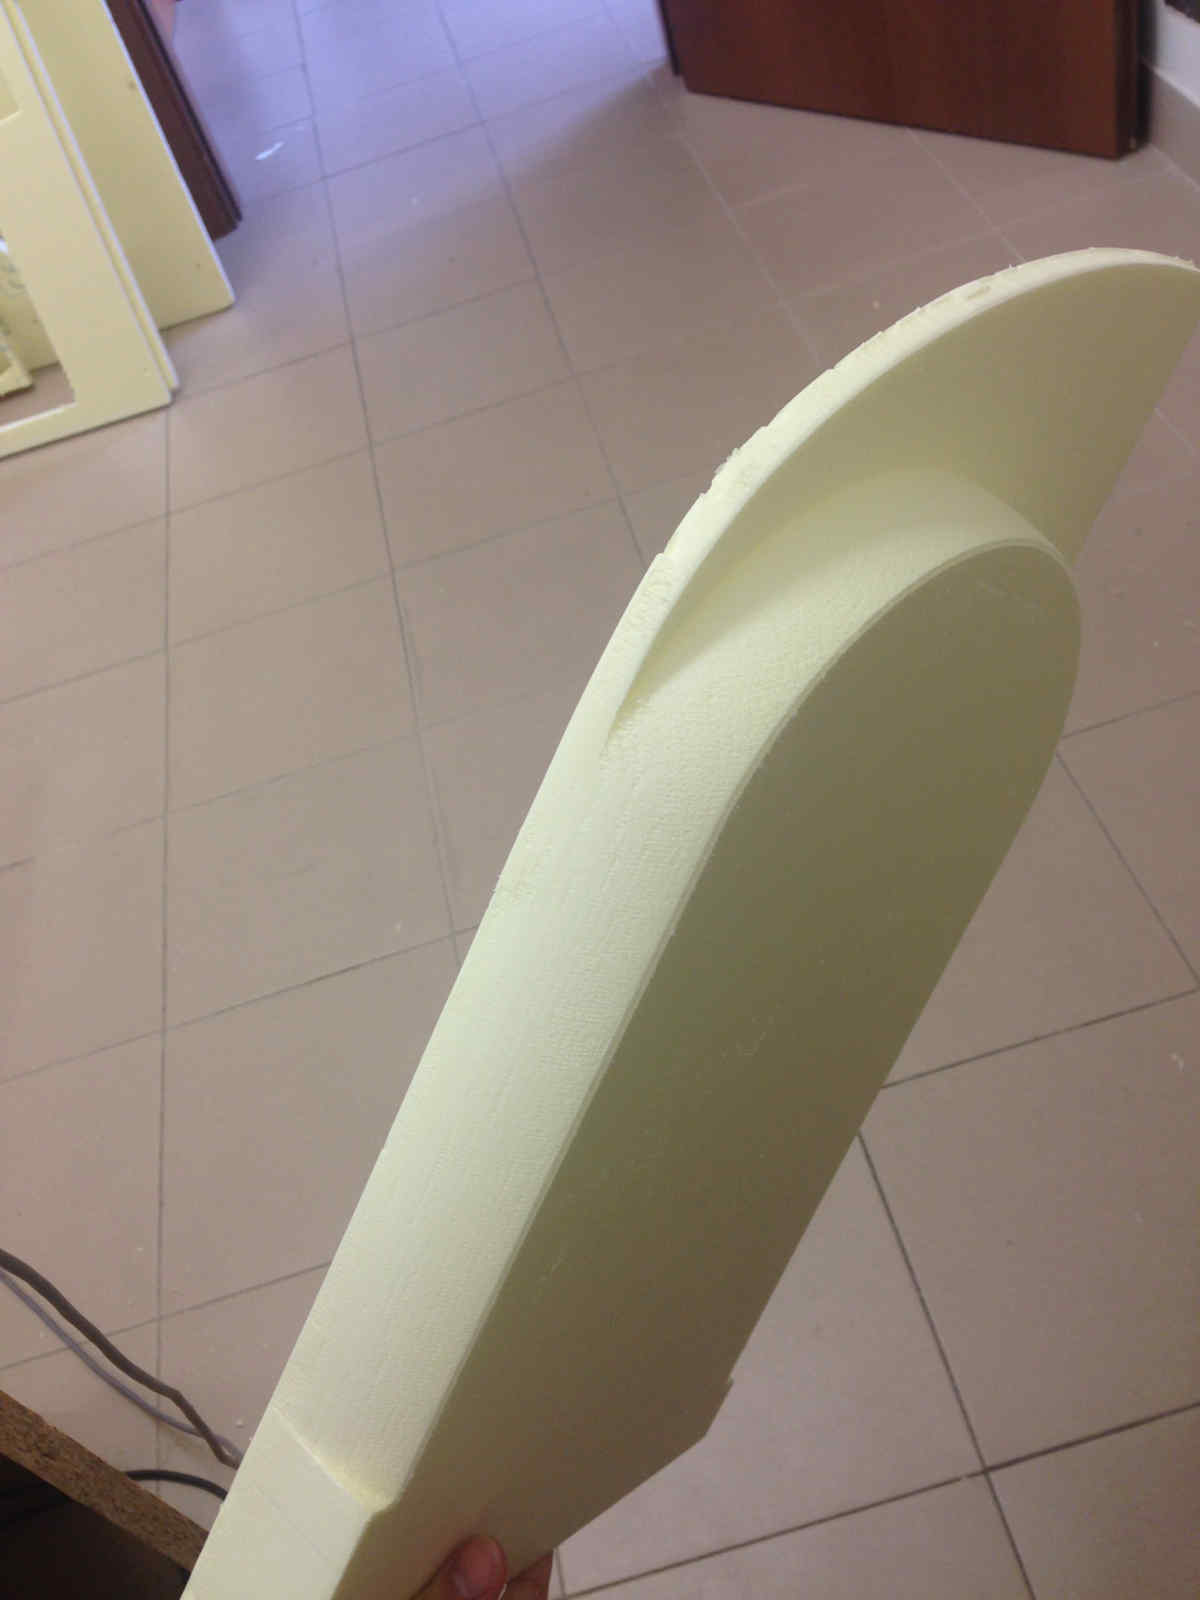 In the end I had to fix each part edges but this helped me in passing time during such a long work.
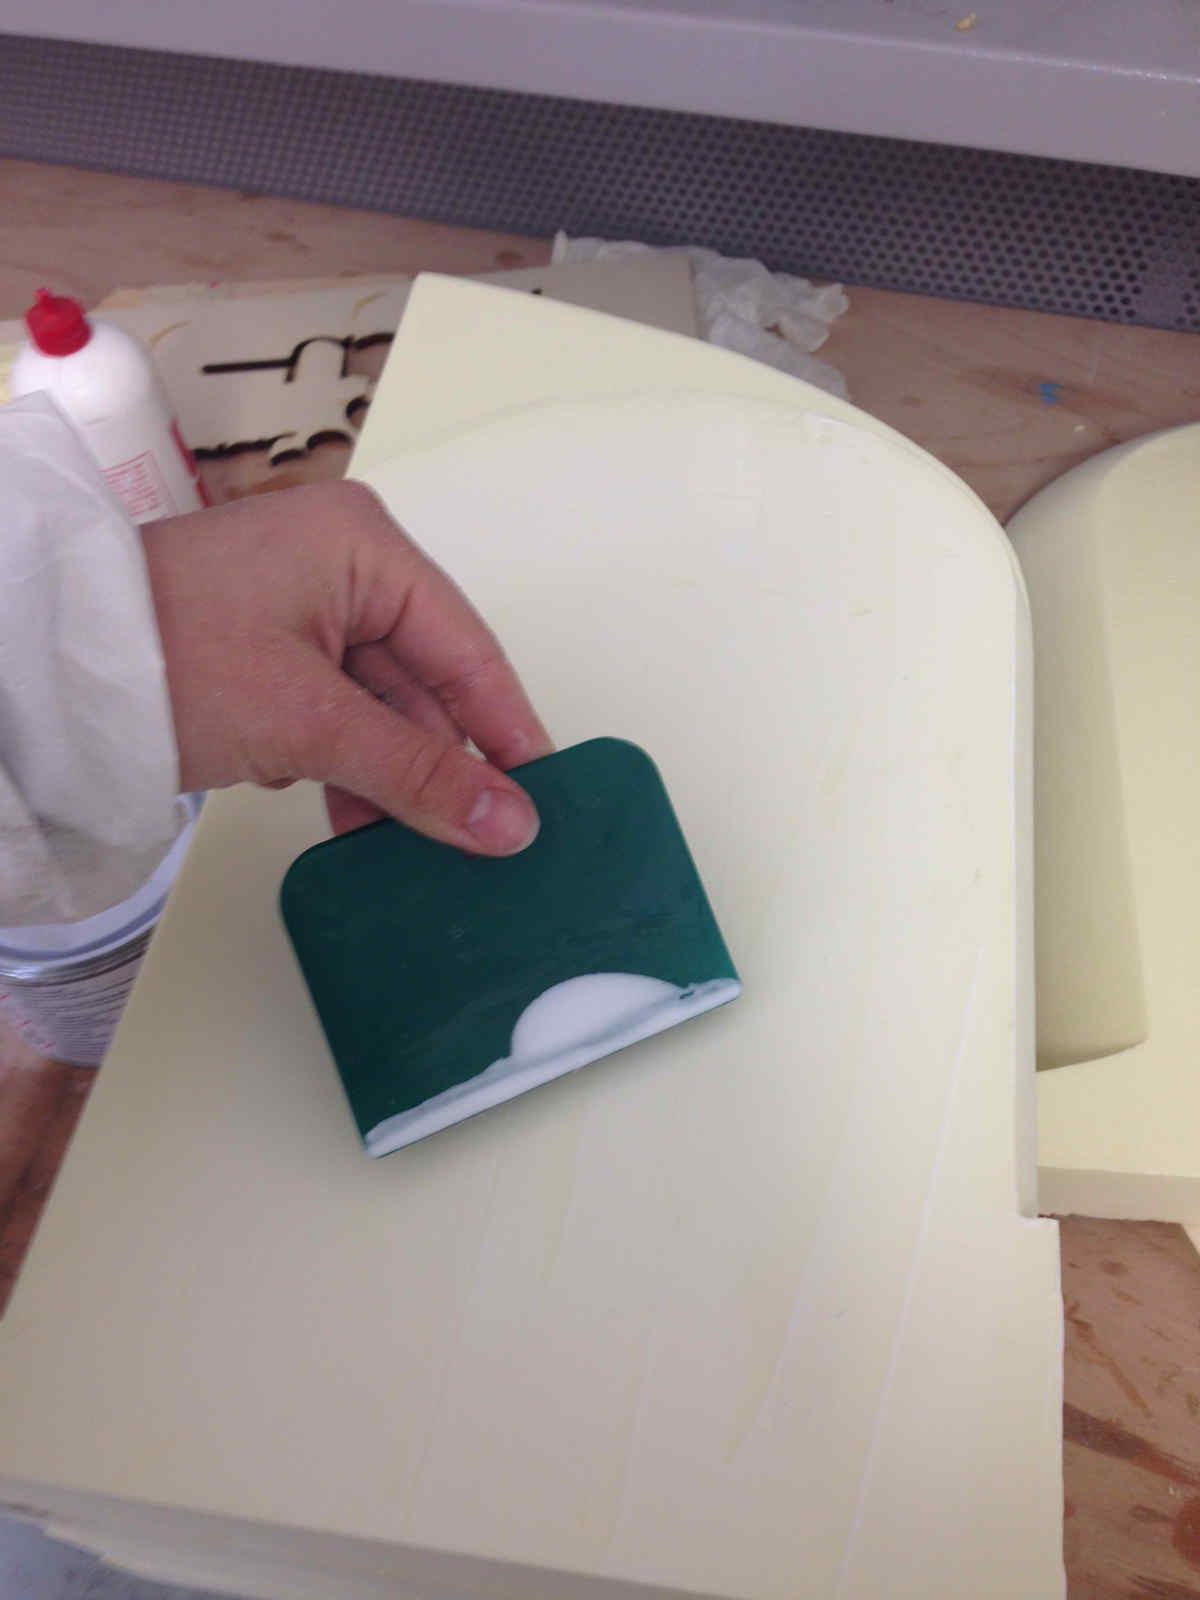
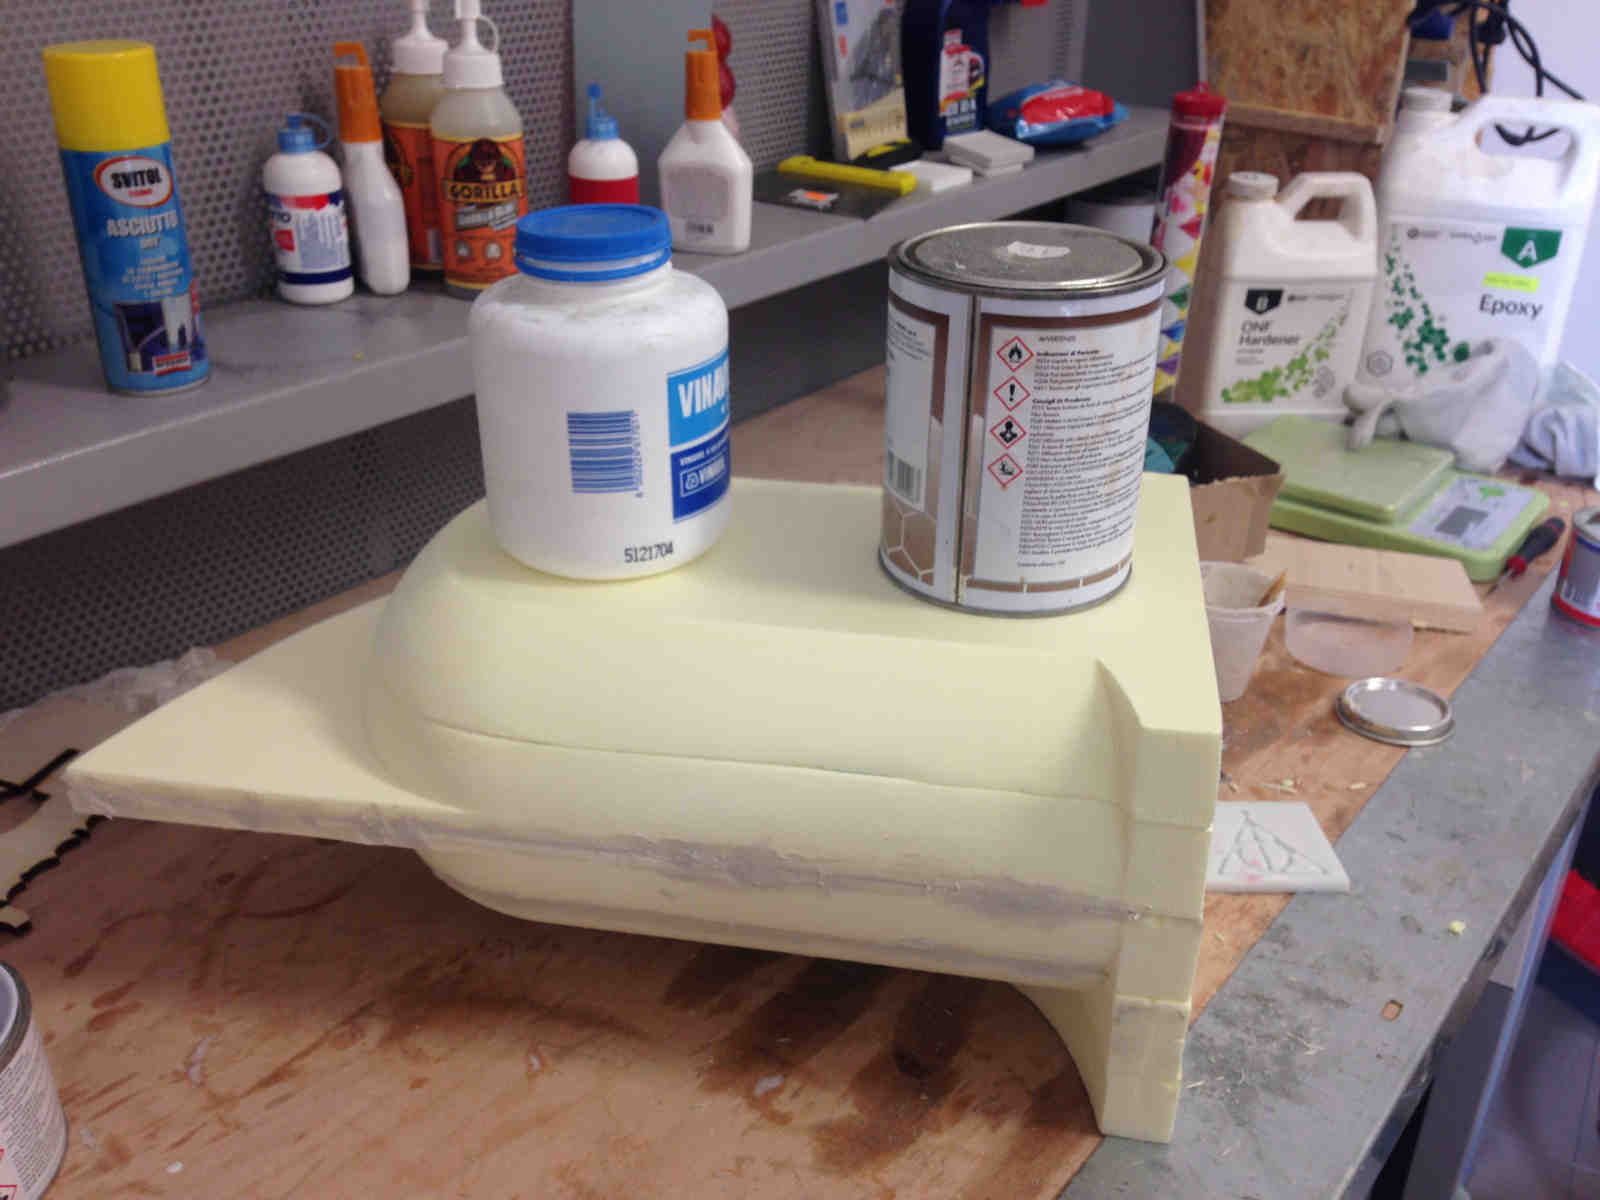
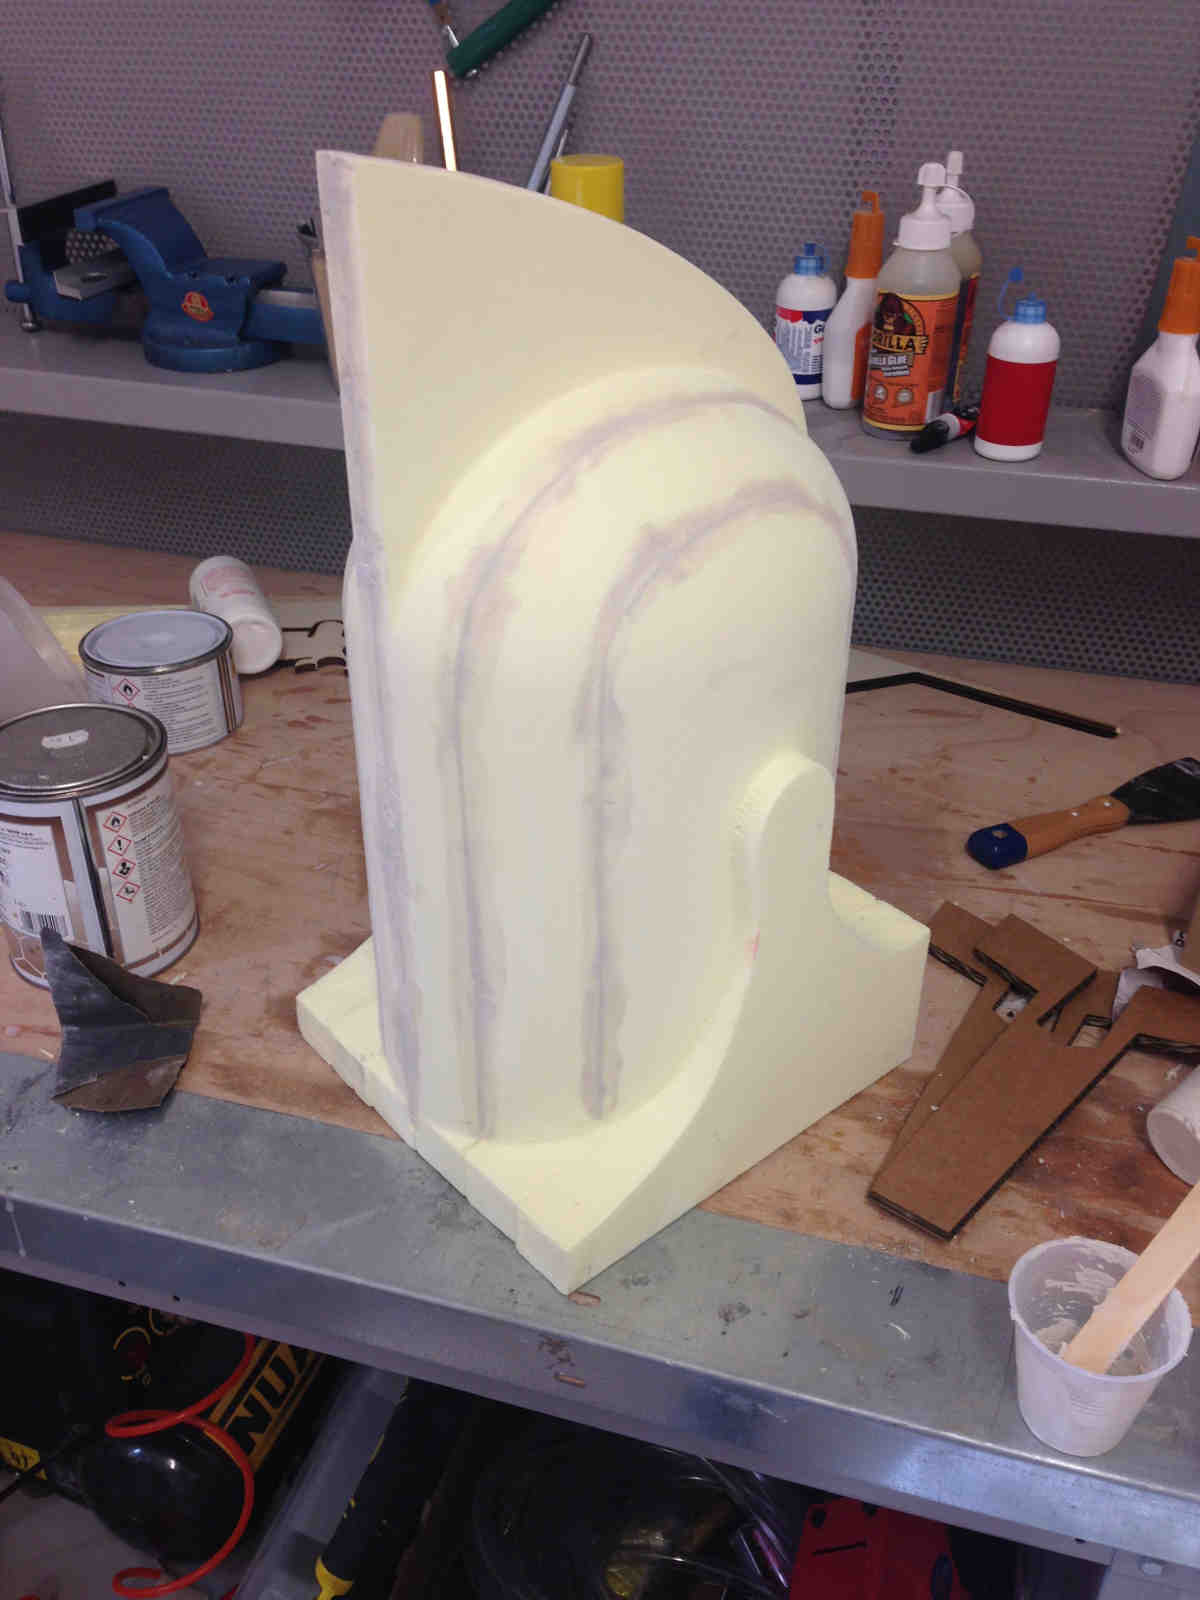
I then glued parts together and used stucco to fill the gaps I ended with in the edges of facing surfaces:

 ...Do you remember about the mask issue? Well, I reasoned it well cause 8 hours printing (even with the lowest quality) seemed too much for me and
mostly a waste of material. How did I end up with it?? Well, in my Fab Lab, when I had to stay there to work at night, I recently heard sounds of
extremely sad weeping. I wondered for days about where they could came from. I asked the others if they ever heard them, I walked all the rooms to check if there
was someone until I realized it was.....Our lasercutter! She felt so alone and excluded, many weeks ago we all used to dance in front of her showing attention
to her...and now no one cared much of her, she was just the quick solution to 3D printing often and she felt so sad :/
...Do you remember about the mask issue? Well, I reasoned it well cause 8 hours printing (even with the lowest quality) seemed too much for me and
mostly a waste of material. How did I end up with it?? Well, in my Fab Lab, when I had to stay there to work at night, I recently heard sounds of
extremely sad weeping. I wondered for days about where they could came from. I asked the others if they ever heard them, I walked all the rooms to check if there
was someone until I realized it was.....Our lasercutter! She felt so alone and excluded, many weeks ago we all used to dance in front of her showing attention
to her...and now no one cared much of her, she was just the quick solution to 3D printing often and she felt so sad :/
I therefore told her she could help me very much so as to give her back some self-esteem :)
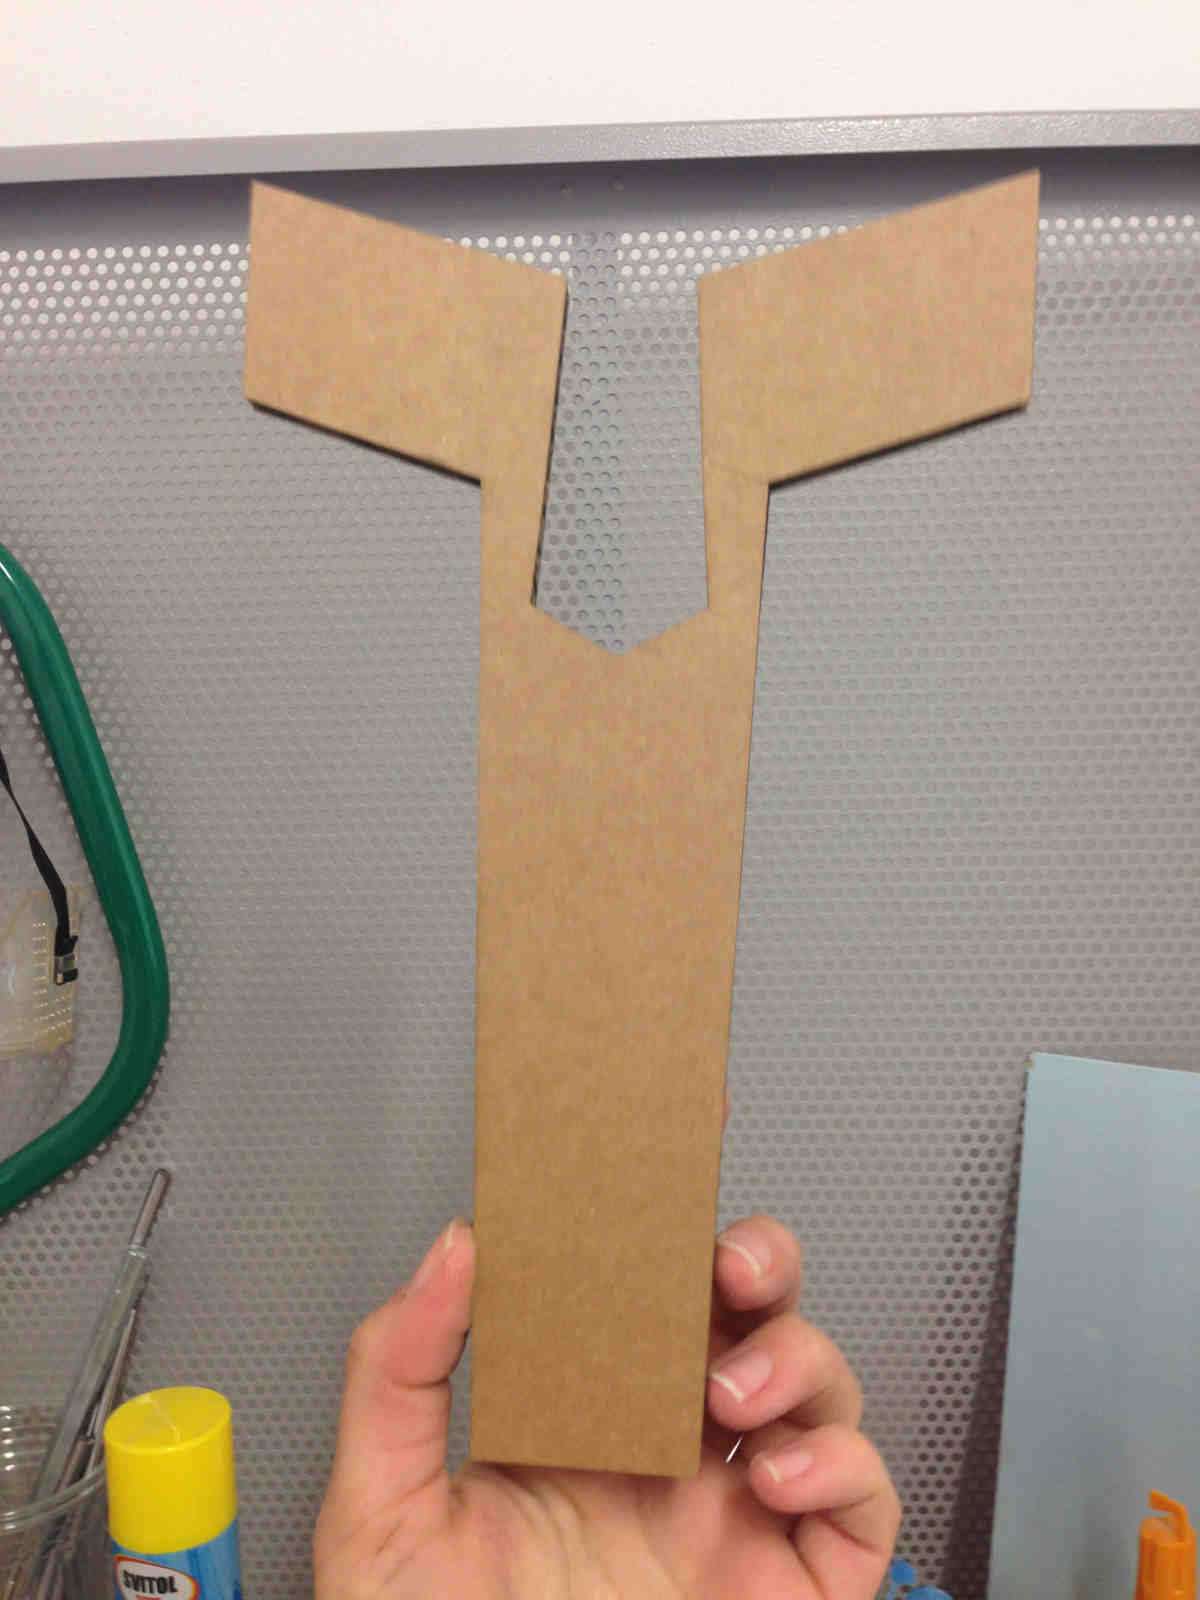
I so lasercutted my frontal part of the helmet: I pressed on the sketch with right button and chose Exports as DXF/DWG
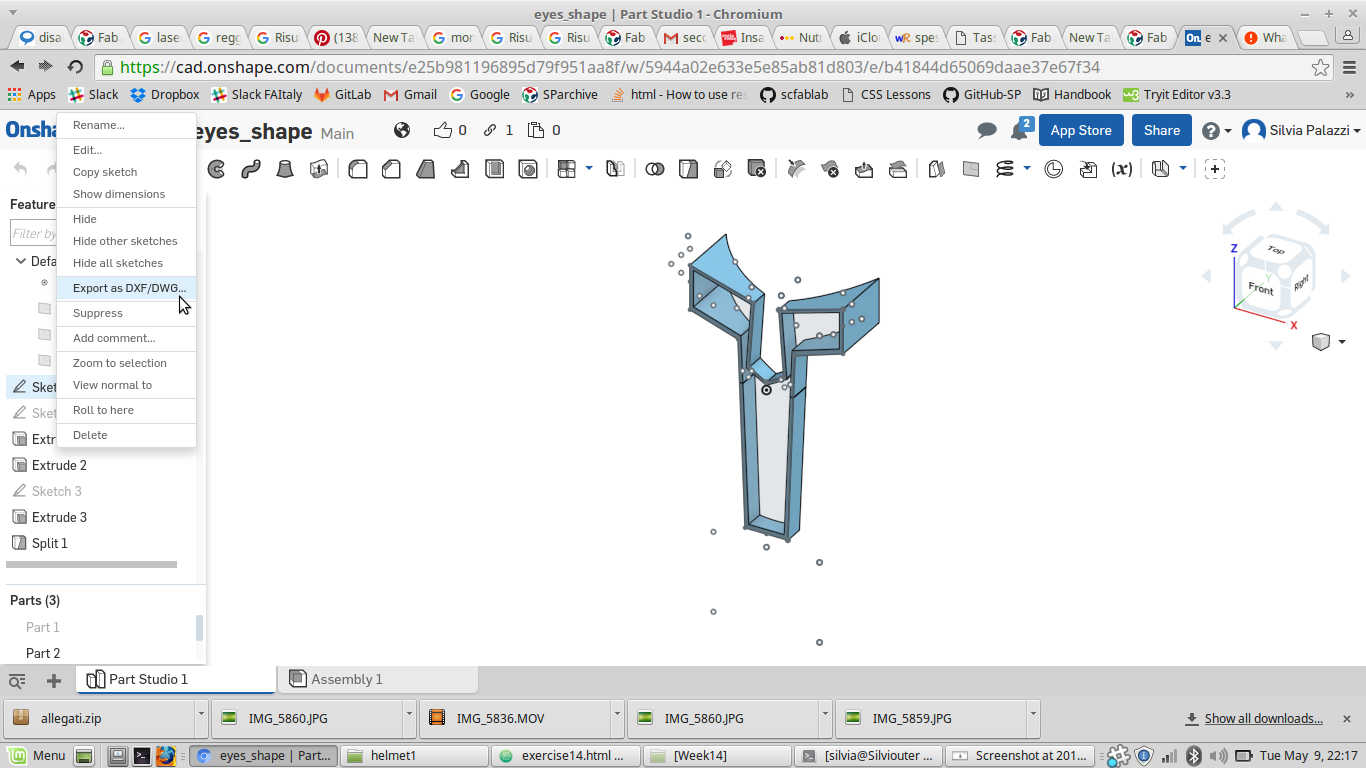 Then I opened it on Illustrator and sent it to the lasercutter
(see how here).
Then I opened it on Illustrator and sent it to the lasercutter
(see how here).
 Why didn't I mill eyes part like ears one? Following my great expextations, I thought I could reuse the polystyrene model to make other helmets with
different facial shapes, but I agree with you that milling it as well was easier a lot.
Why didn't I mill eyes part like ears one? Following my great expextations, I thought I could reuse the polystyrene model to make other helmets with
different facial shapes, but I agree with you that milling it as well was easier a lot.
Since this point, I was helped by Chiara who I have
to thank a lot for patience and smart advice
(which I heartily followed owing to her nice job).
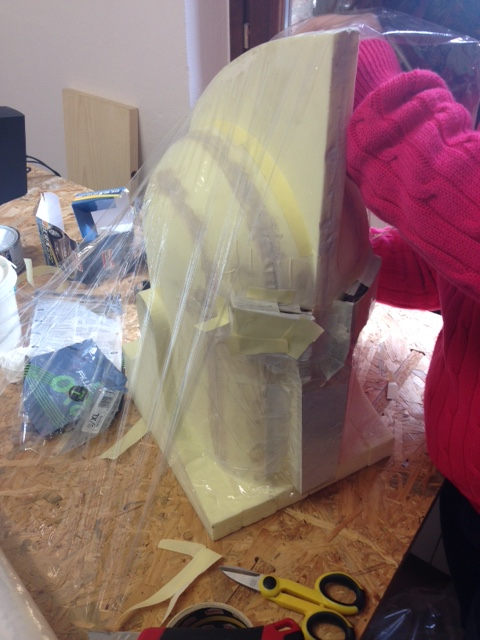
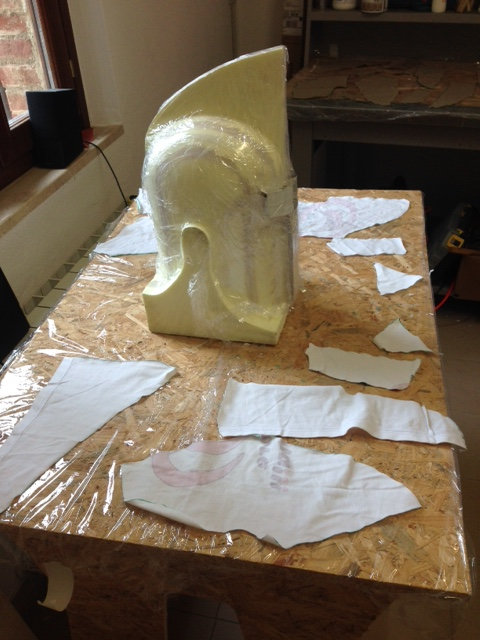
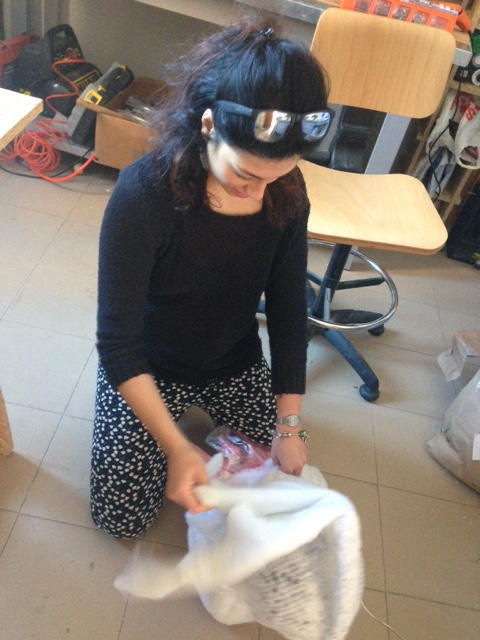
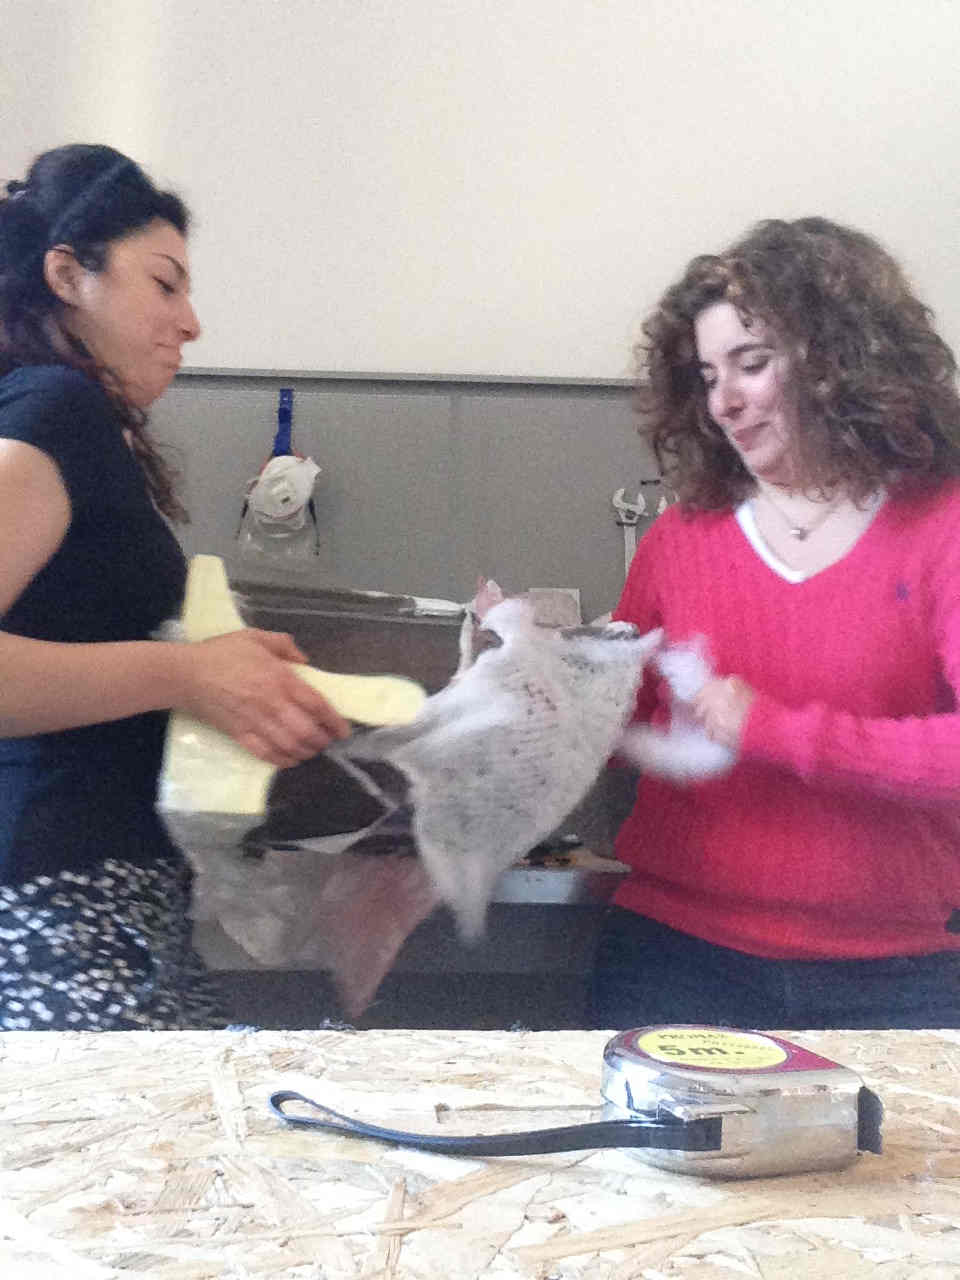
We covered the model with cling film (using wax or other release materials to be spread and let dry many times would have taken me too much time - it was monday afternoon)
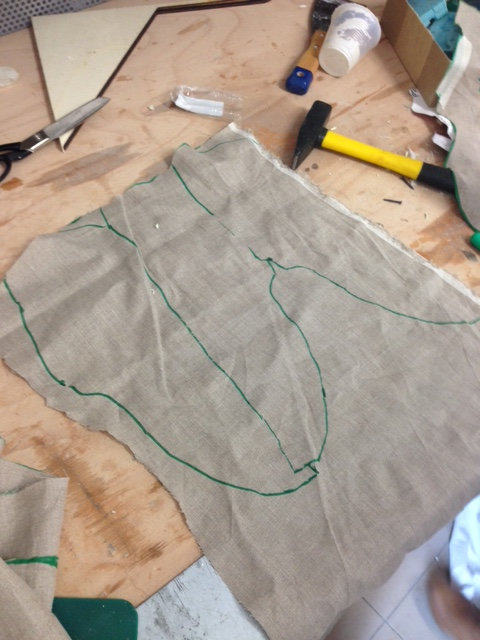
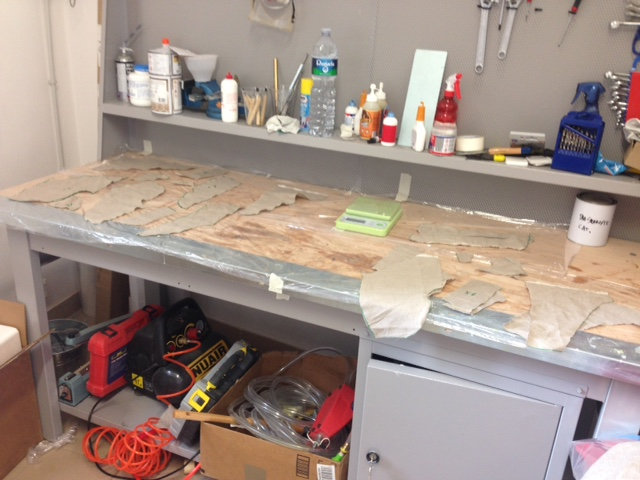
 Then we started cutting little pieces of linen and my brother's t-shirt so as to make three layers to be put together with epoxy resin:
 And then we set them on film-covered tables:
 Then I took:
- Epoxy resin (part A and B)
- Scale
- Plastic Glass
- Wooden stick
- Putty knife
- Plastic gloves
NB: you need to have all pieces cut and prepared cause resin must be spread within 15 mins; I also cut extra stripes to
close ad fix eventual gaps.
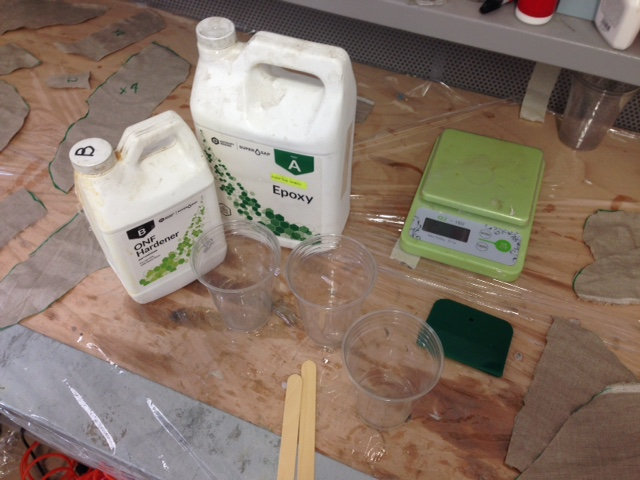 I then mixed part A and part B (ratio 2:1 in weight) and stir well for two minutes
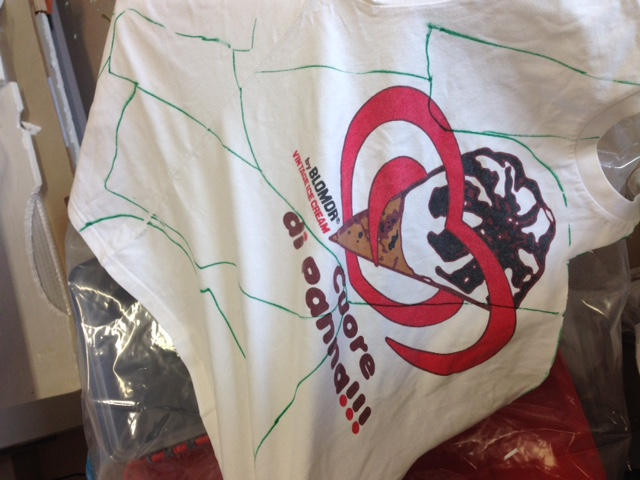
 I started with cotton layer because I would have liked to have Algida's Cornetto inside my helmet but this didn't show to be a nice idea cause
cotton is thicker than linen and worse adapts to shapes.
I started with cotton layer because I would have liked to have Algida's Cornetto inside my helmet but this didn't show to be a nice idea cause
cotton is thicker than linen and worse adapts to shapes.
Once I put all pieces my helmet looked like that:
 I then followed this scheme to put materials in right order before vacuuing:
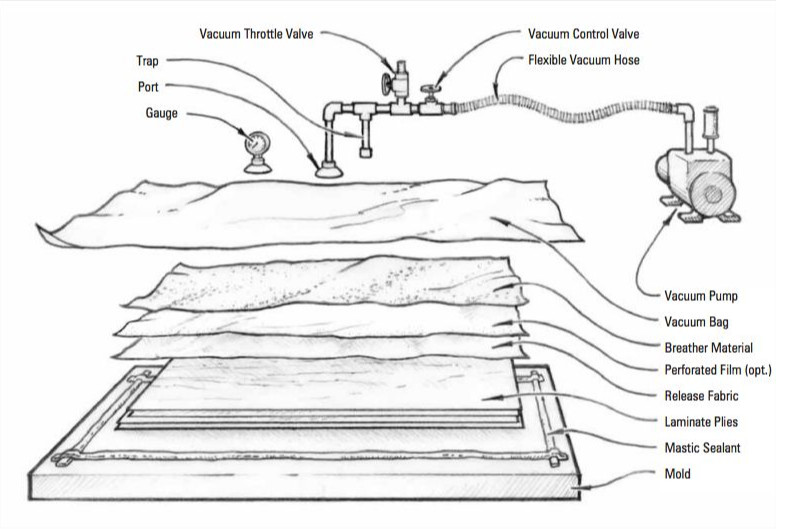 NB: before pouring epoxy release fabric, perforated film and breather
pieces were cut, vacuum pump and bag were prepared.
NB: before pouring epoxy release fabric, perforated film and breather
pieces were cut, vacuum pump and bag were prepared.
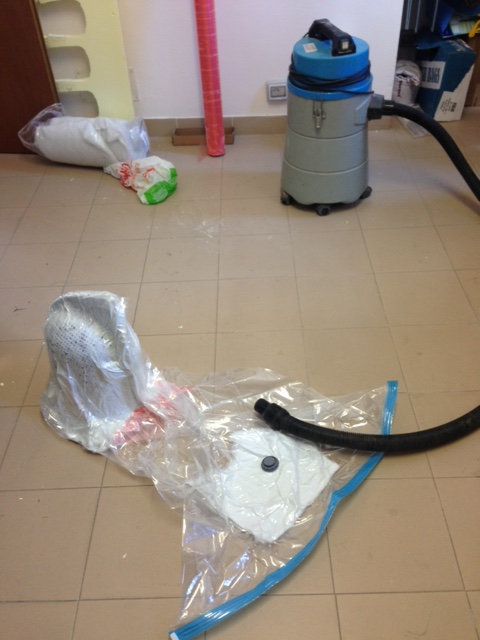
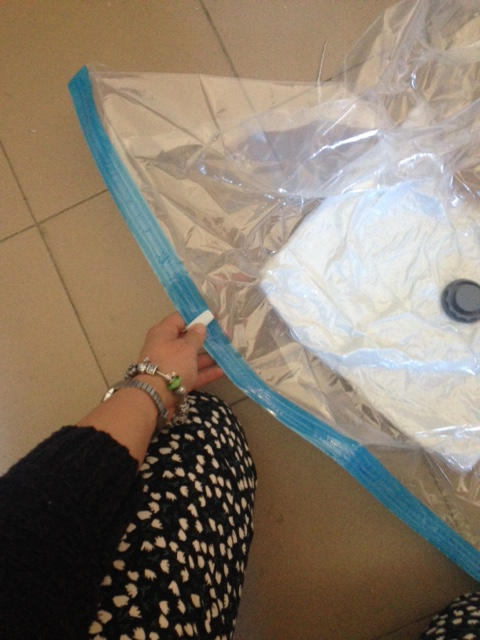
I so put release fabric, perforated film and breather on my model and insert everything into vacuuing bag and turned vacuum pump on.
After some time it looked like this:
 I left t dry overnight and took it out the morning after.
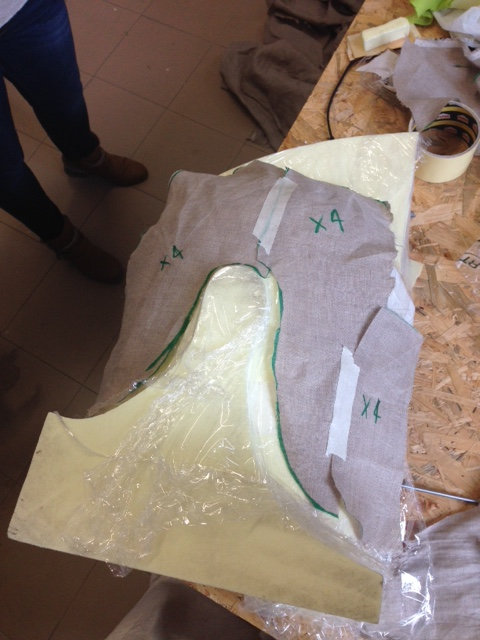
 Breather, release fabric and perforated film were easily unstickable:
 But then it came the hardest part: detaching composite model from polystyrene
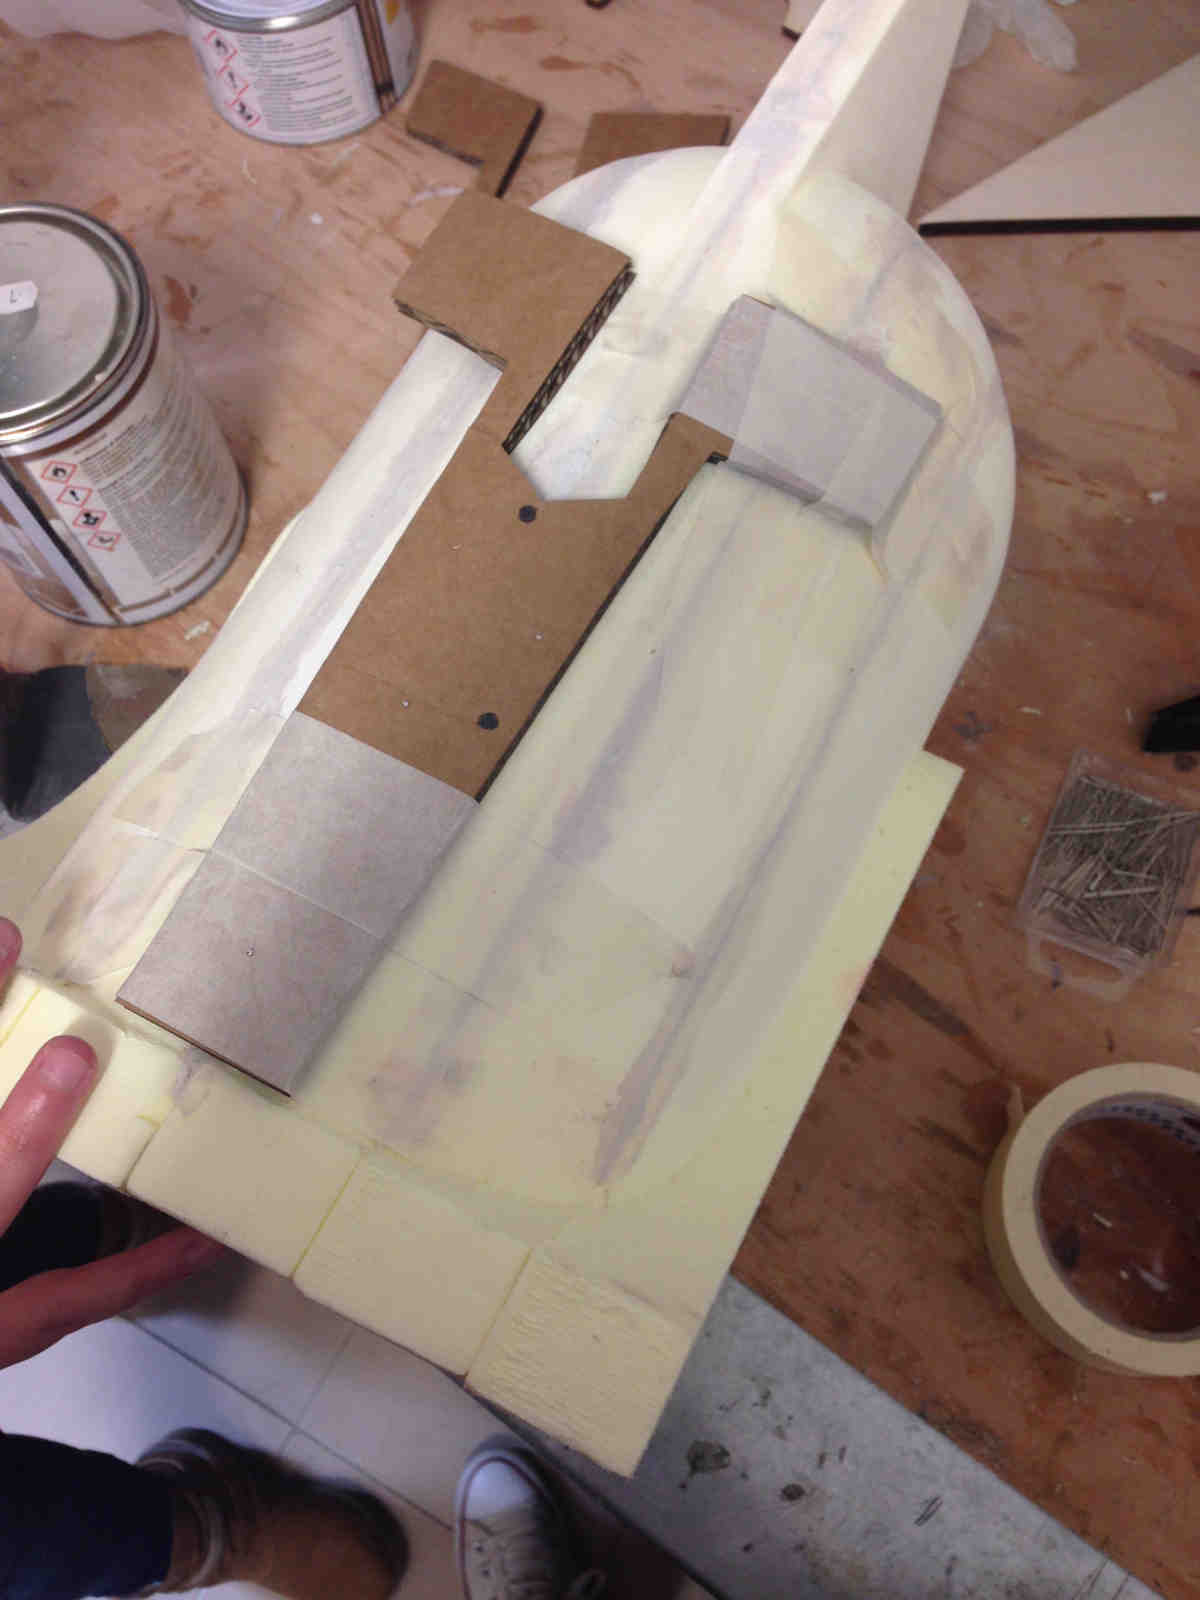
 First I took frontal cardboard part away:
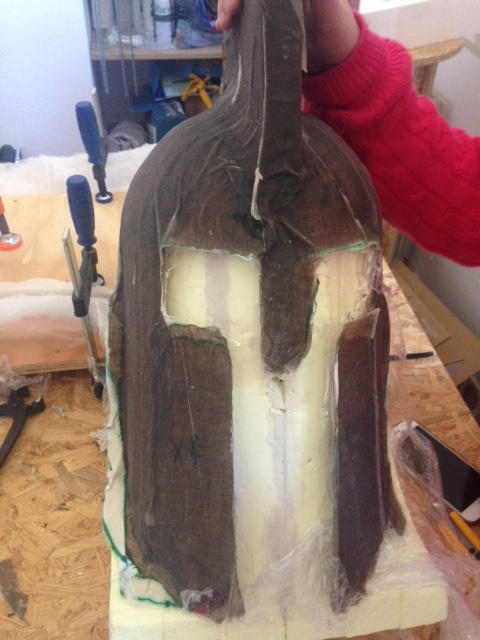 But then I started having huge problems in removing the model, risking to damage it. Therefore I decided
(ERROR) to break polystyrene so as to get my helmet incorrupt.
But then I started having huge problems in removing the model, risking to damage it. Therefore I decided
(ERROR) to break polystyrene so as to get my helmet incorrupt.
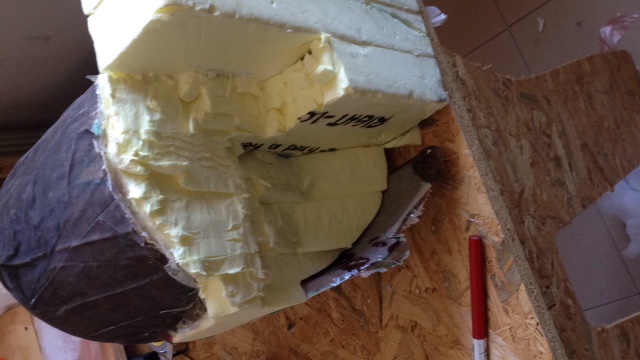 I realized it was harder than I expected and, since my rage was pushing me to destroy everything, I simply decided to give myself time
to think about a solution.
I realized it was harder than I expected and, since my rage was pushing me to destroy everything, I simply decided to give myself time
to think about a solution.
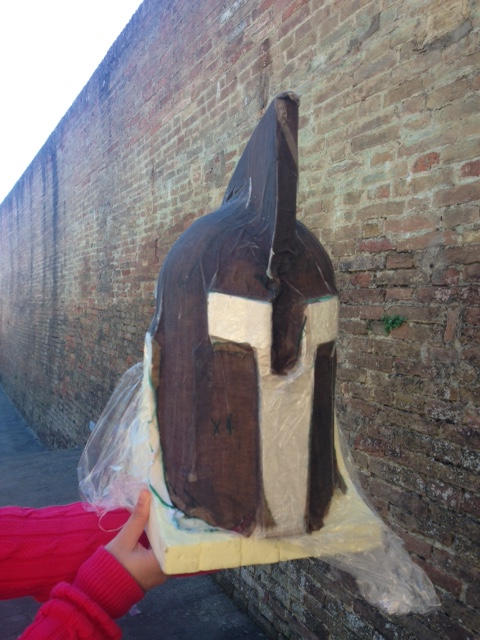
Conclusions
This week assignment took very long time to be done and I in the end realised I could have done some things differently, easily and more precisely:
1-I could have milled frontal part as well so as to avoid cardboard shapeto be glued to the mold
2-I could have used Vinavil (or wax if I had more time) instead of film as release agent
3-I could have used Pepakura software to design fabric parts to be then lasercutted and put on mold with resin
4-I could have avoided cotton fabric, which resulted too thick and adapted badly to shapes
5-I could have at least covered each part well with film because some parts of the helmet looked like they were stuck to polystyrene
6-I could have chosen to destroy composite layers so as to reuse polystyrene model for another attempt
Result is that I have to redo everything in a very miserable mood.
Download