Consciousness
Why this title? Well, actually being conscious of risks and procedures is something you must face with each week in Fab Academy, but Molding & Casting
module, to me, has a bigger WARNING on safety measure to consider. Silvia, remember you used ShopBot...Can it be more dangerous? Yeah, I know but even if
everything I've done since January could have been riskful if done with spuriousnness, the fact is that ShopBot looks like a big scary monster to be approached with LOT of
caution to, playing with rubber and silicone may easily remeber you those times when you used to play with pongo besmearing your hands with colourful and smooth materials.
Now, given that molding & casting can be a beautiful flashback to childhood, you now are quite an adult, dude, so you should already be into that sense of
preservation and survival that passing time is inculcating in your daily life.
In few words, apart from specific food and skin friendly rubbers and plastic,
what's inside those pot in front of you is toxic and may hurt your skin and eyes a lot.
This speech is not intended to be a mummy-like recommendation, thus wants to suggest you to be smarter than me in taking off your plastic gloves when
you still have to clean working table and tools ( that, as well, have to be conserved narrowly).
I haven't thought it so useful before
Using molds to replicate models has always be the most stavble way in terms of time and accuracy. What about 3D printing? Nice competitor but it can't outclass
a method dating from Bronze Age: with 3D printers you have to face with really longer working-time and unpredictable errors due to vibrations of printer support, humidity, filament
misfire and many other problems.
I haven't never seen molding so relevant for little production till now, but if I only think about making Easter chocolate eggs ( I've eaten so much chocolate these days that my thoughts couldn't
help coming strictly to that field ), imagine how easier can it be to have a bivalve mold to use every year instead of that obsolete one I have, that only allows me to make
half an egg per time and then heat their edges up to be put together.
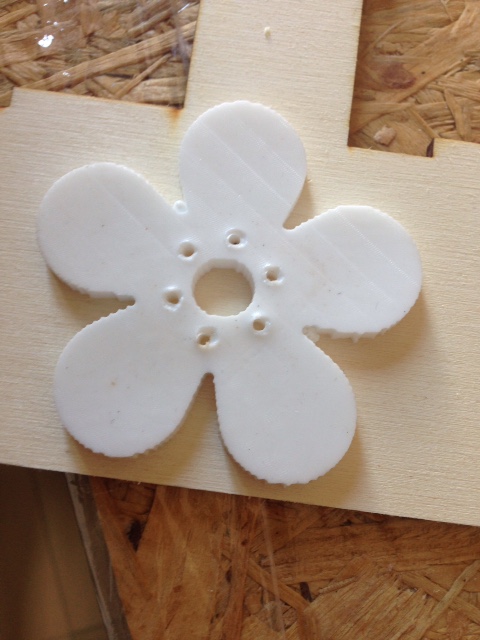
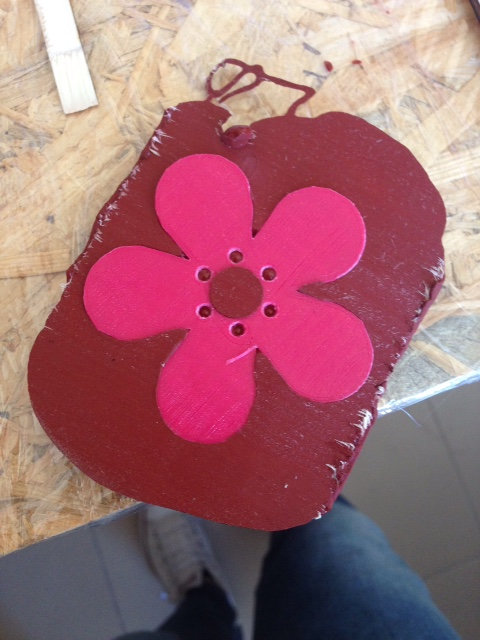
Anyway, no late chocolate eggs for Easter 2017 this week, because everyone of us was provided of just a 75x180x35 mm wax block. I therefore decided,
to create a new piece
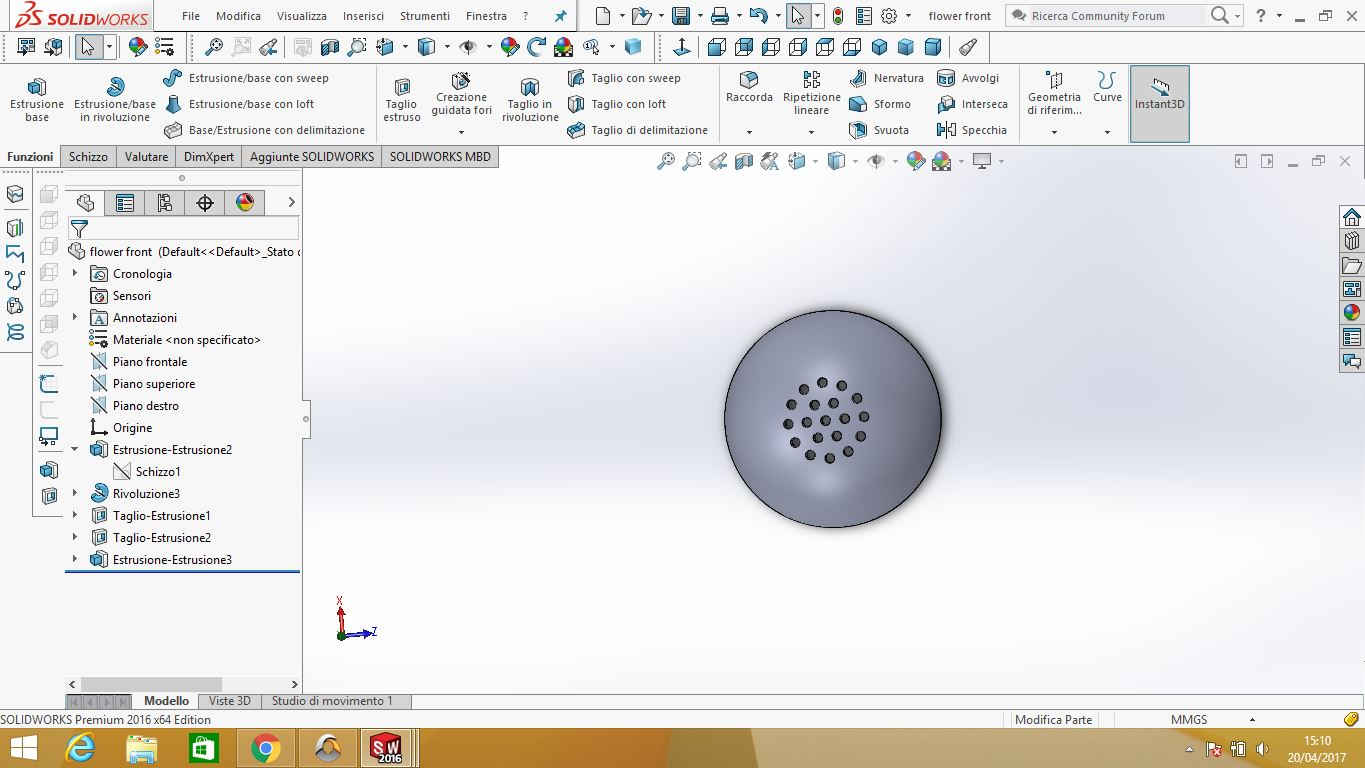
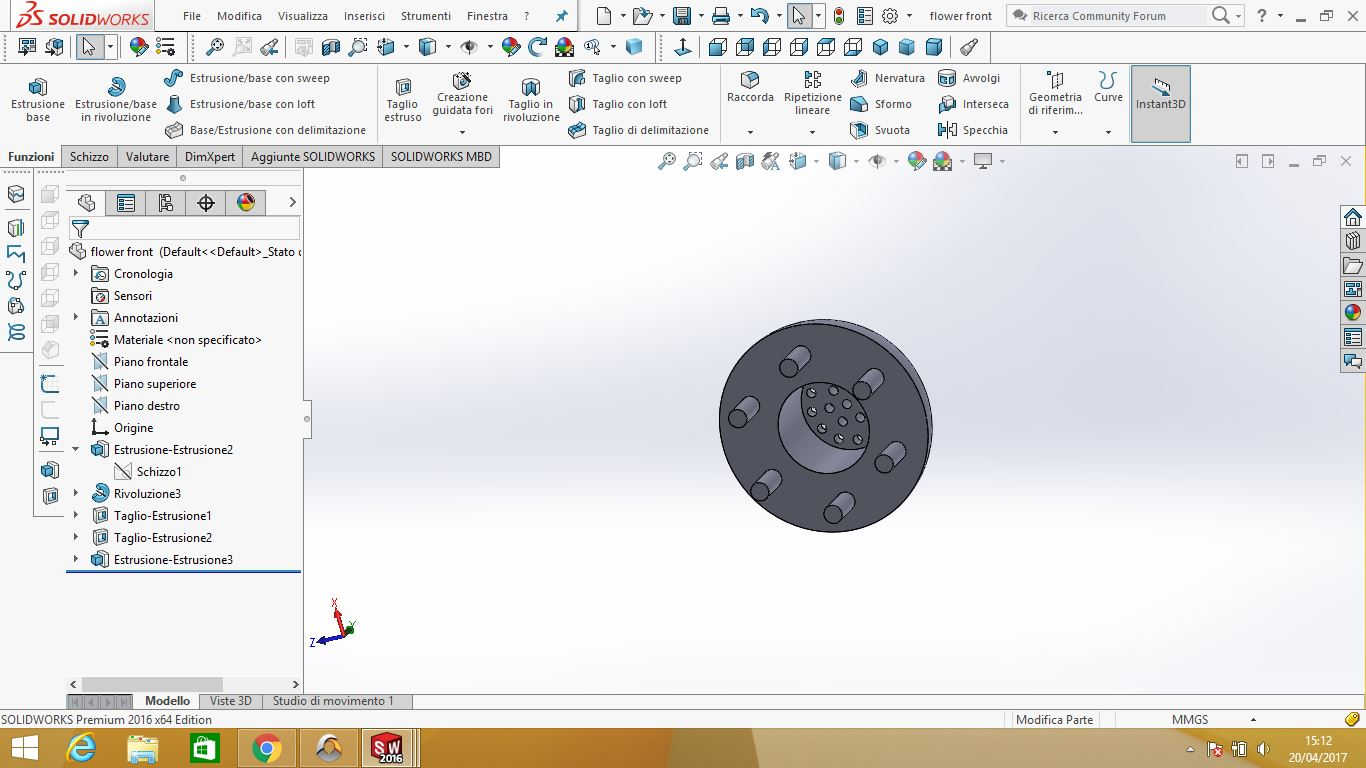
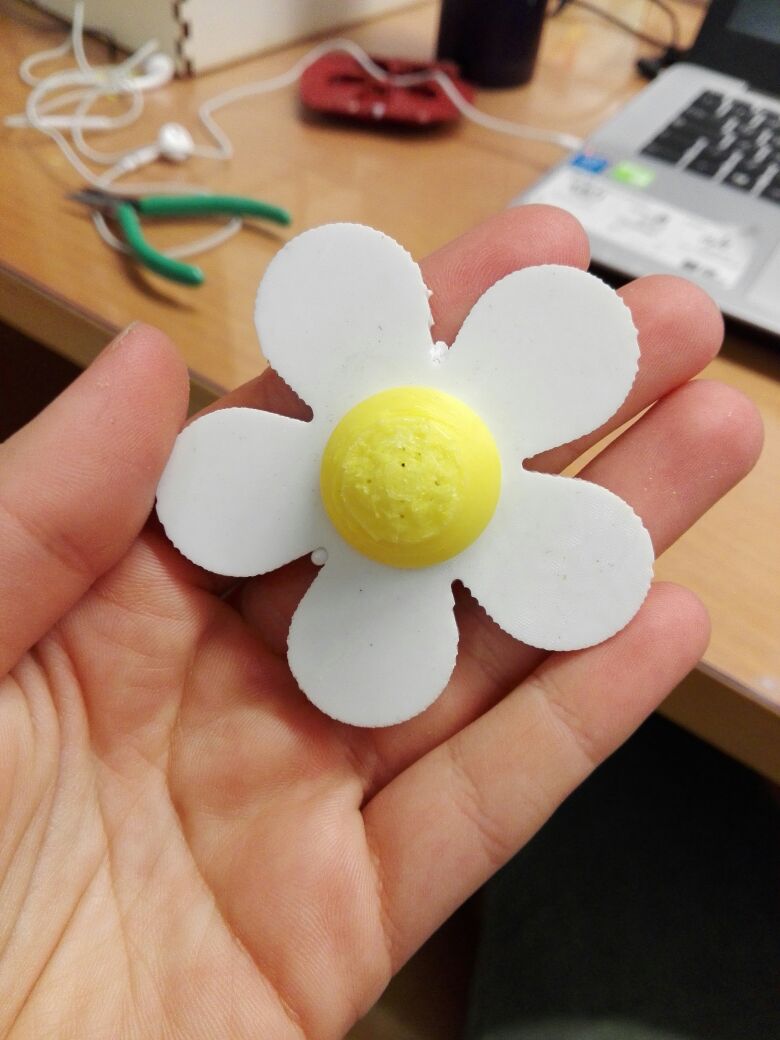
for my final project: since I had to put a microphone somewhere, I thought I may do a nice capsule to cover microphones and I chose flower shape.
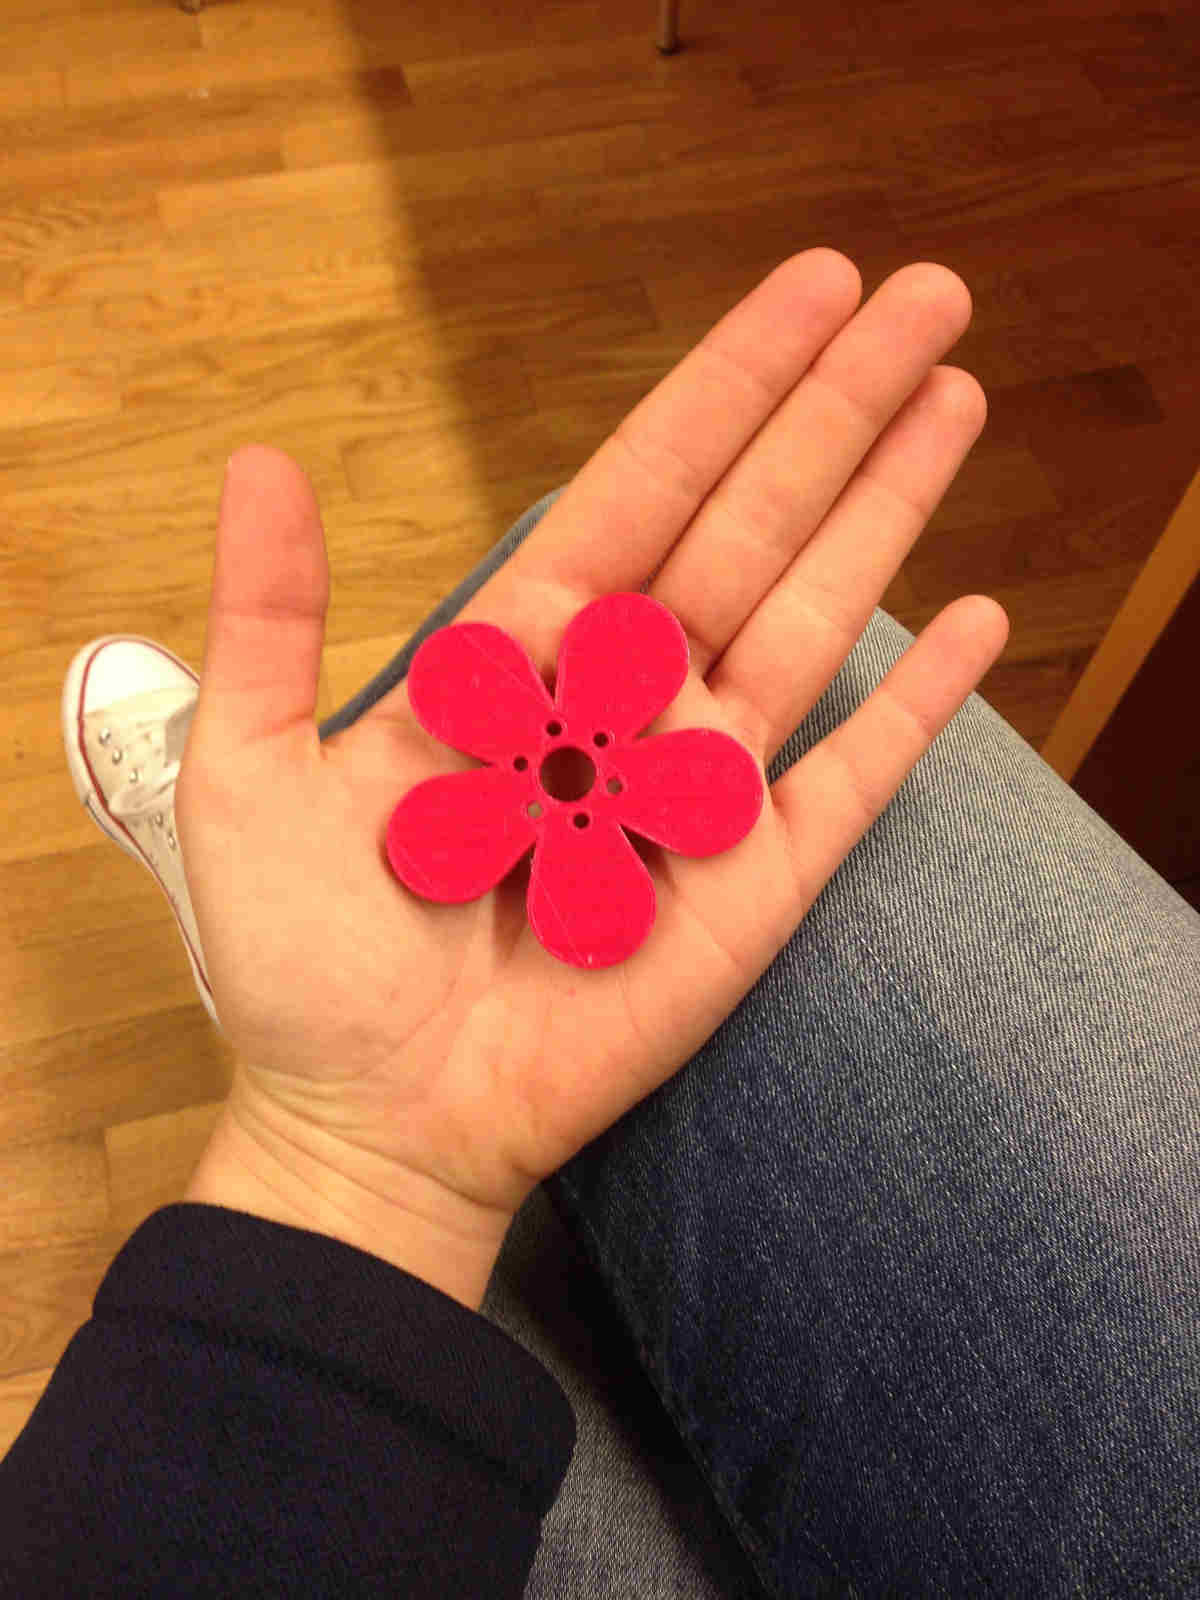
I pondered a while about if I could do it in just a piece but owing to the fact that overhangs can't be done with milling, but since I needed an inside hole
for the microphone, I had to split the model into two parts to be joined together:
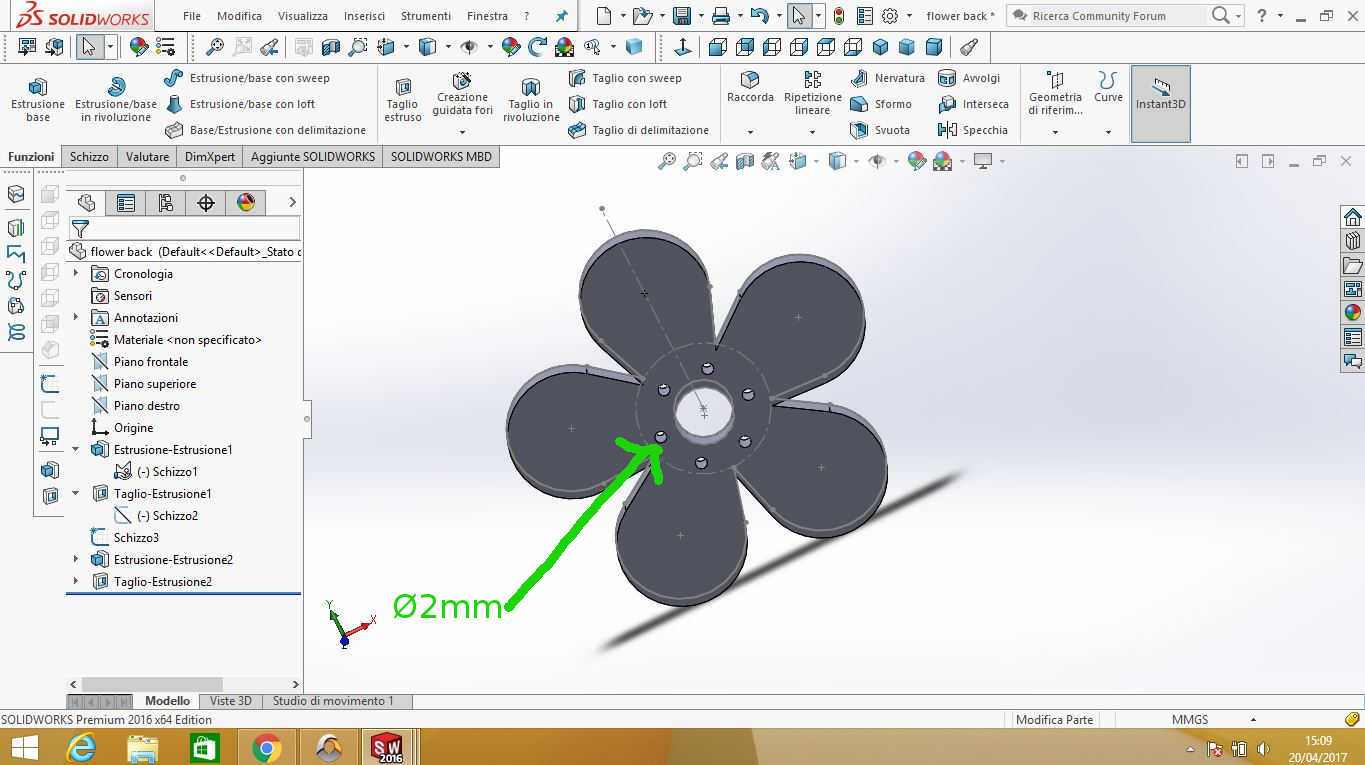
 I at first thought I could mill the flat part, so as to get started easily, and then the round shaped one, also because for petals I would have only needed
a single side mold, while for the pistil bivalve mold would be required.
I at first thought I could mill the flat part, so as to get started easily, and then the round shaped one, also because for petals I would have only needed
a single side mold, while for the pistil bivalve mold would be required.
From STL to mold
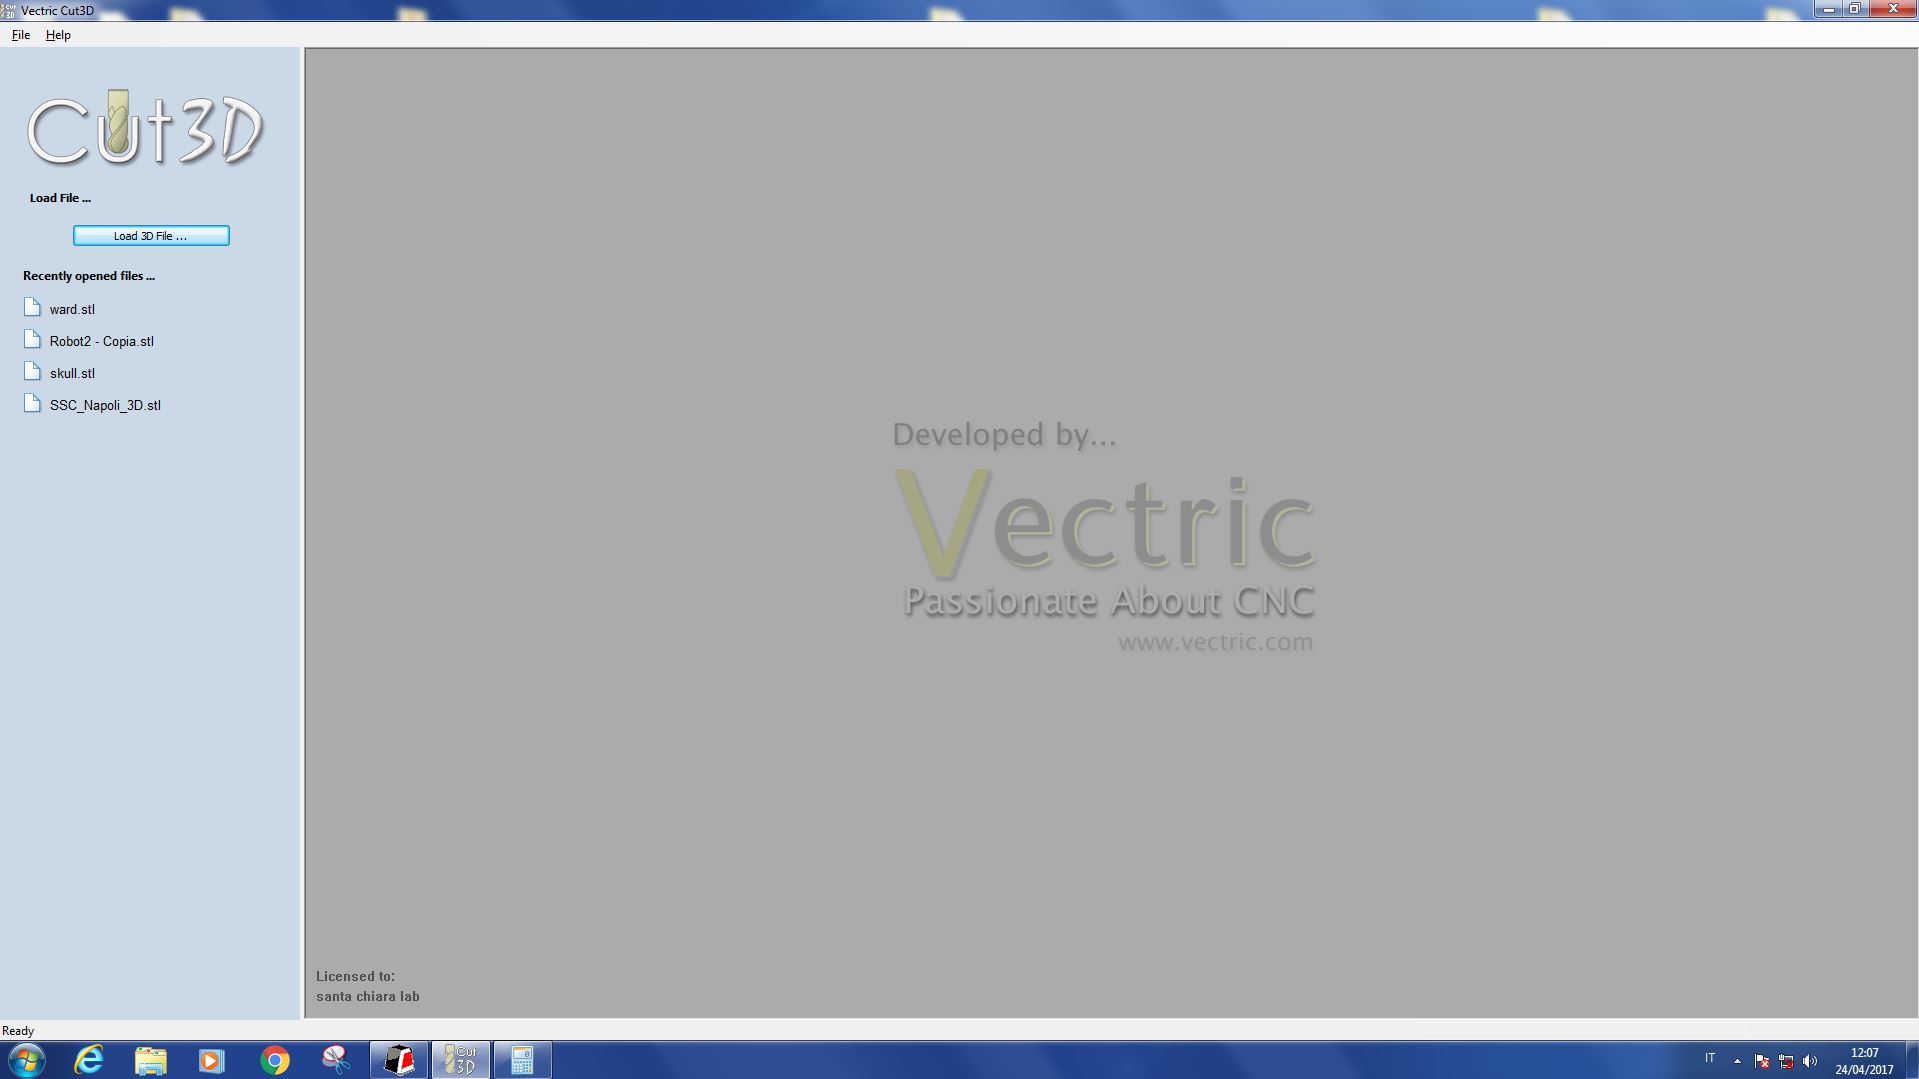
I saved my parts as STL files on Solidworks and then I moved up to Cut3d.
This software is fed with STL files and allows you to choseCasting proper setting for milling process.
As I loaded my STL file...
 I then had to set MATERIAL AND MARGINS properties:
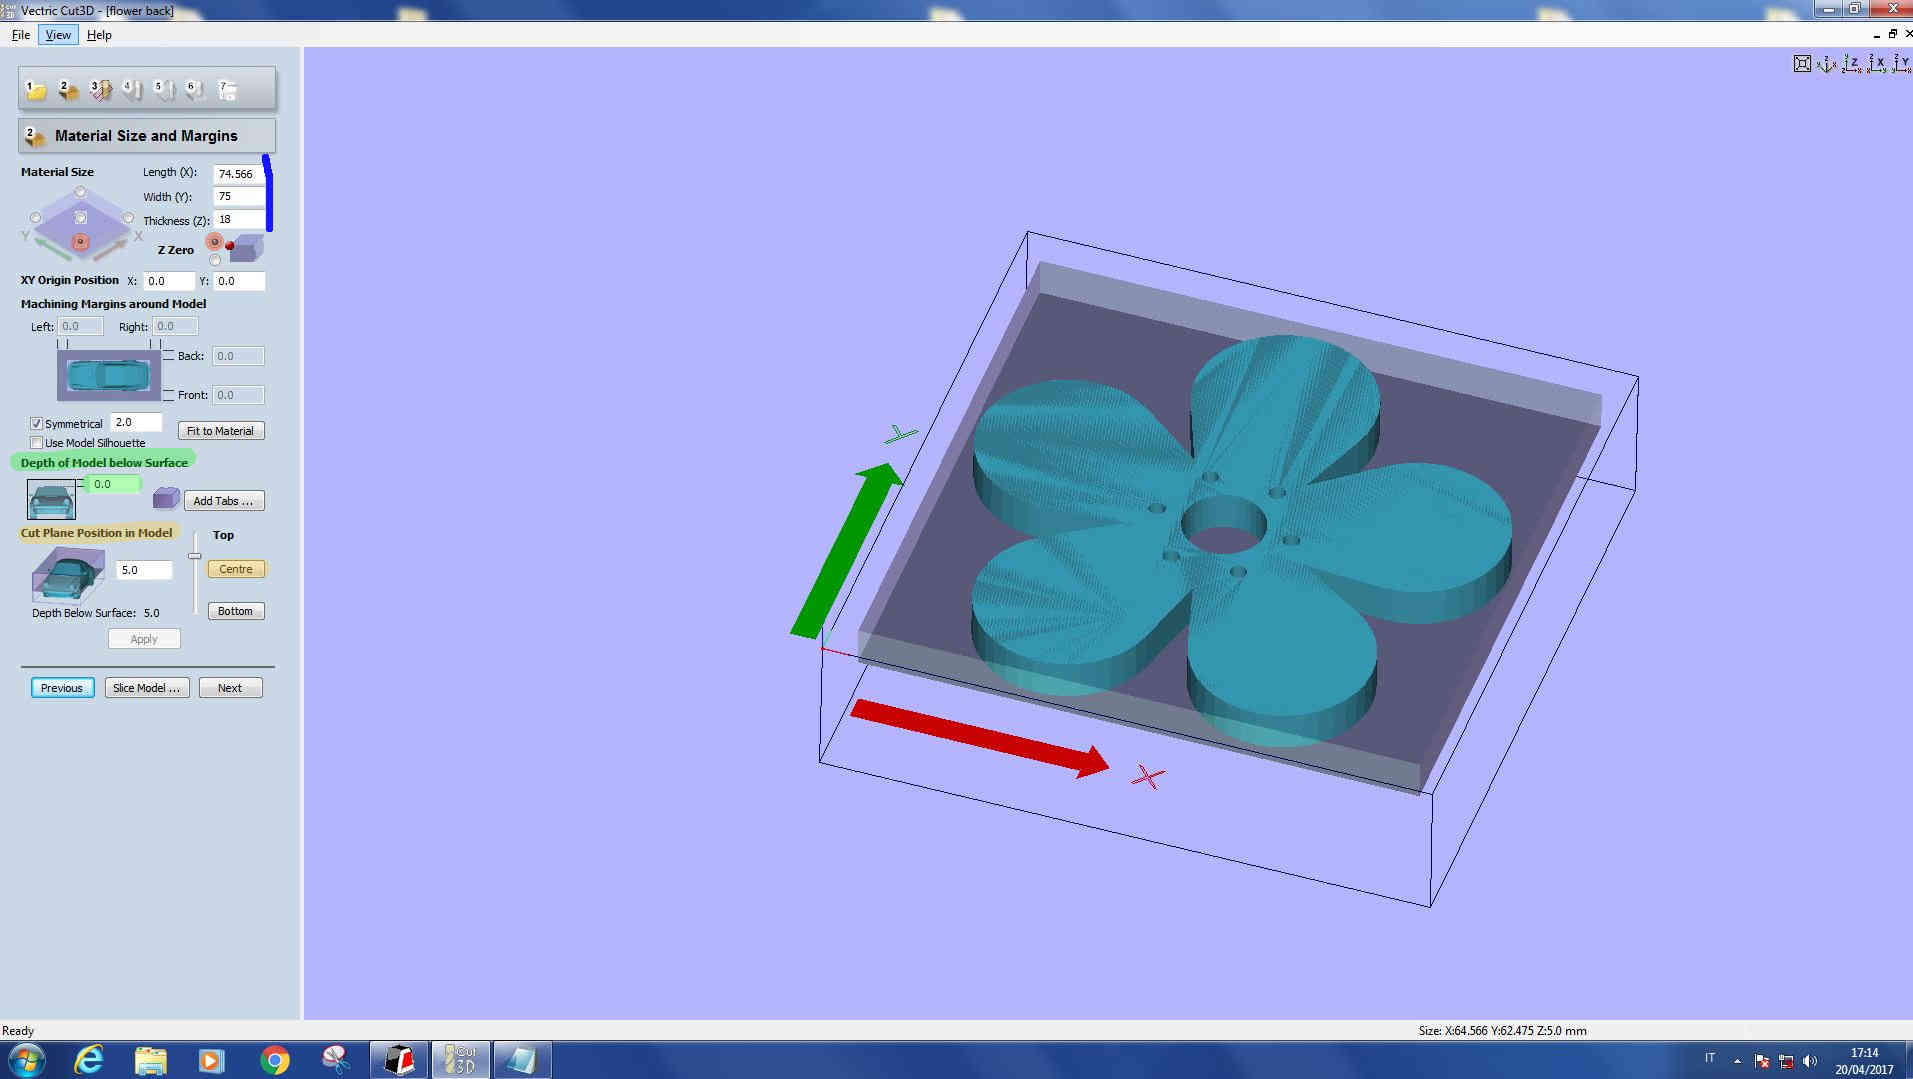 These buttons represents starting position of the endmill relatively to origin;
Here you have to set your wax block dimensions: thickness MUST be the real one but
lenght and width can be adapted to model dimensions (*);
This is an important parameter because lets you decide how much space endmill
will leave from block sruface to model upper surface. In other words it represents your mold external thickness (I'll show you my mistake later);
Moving this plane up and down you can change milled depth of your material,
that means that if you want to mill half of design height, you must click on Centre.
Pressing on Next, ROUGHING TOOLPATH windows opensprocess.
As I loaded my STL file...
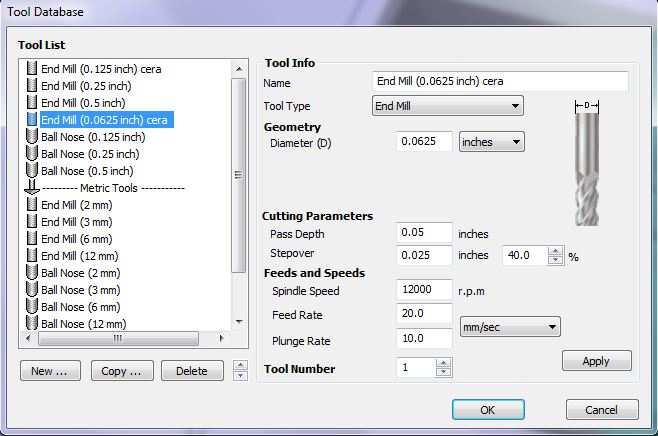
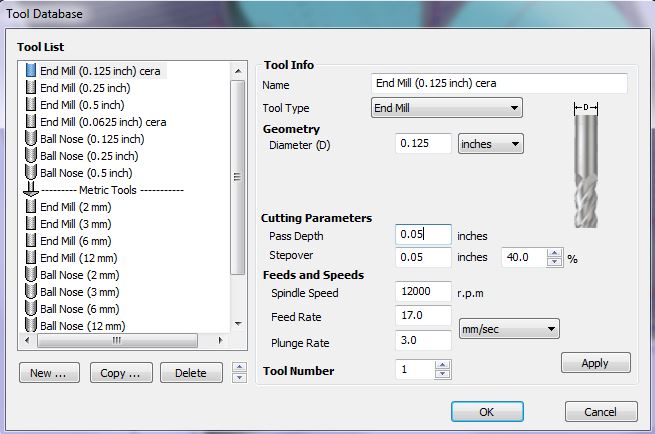
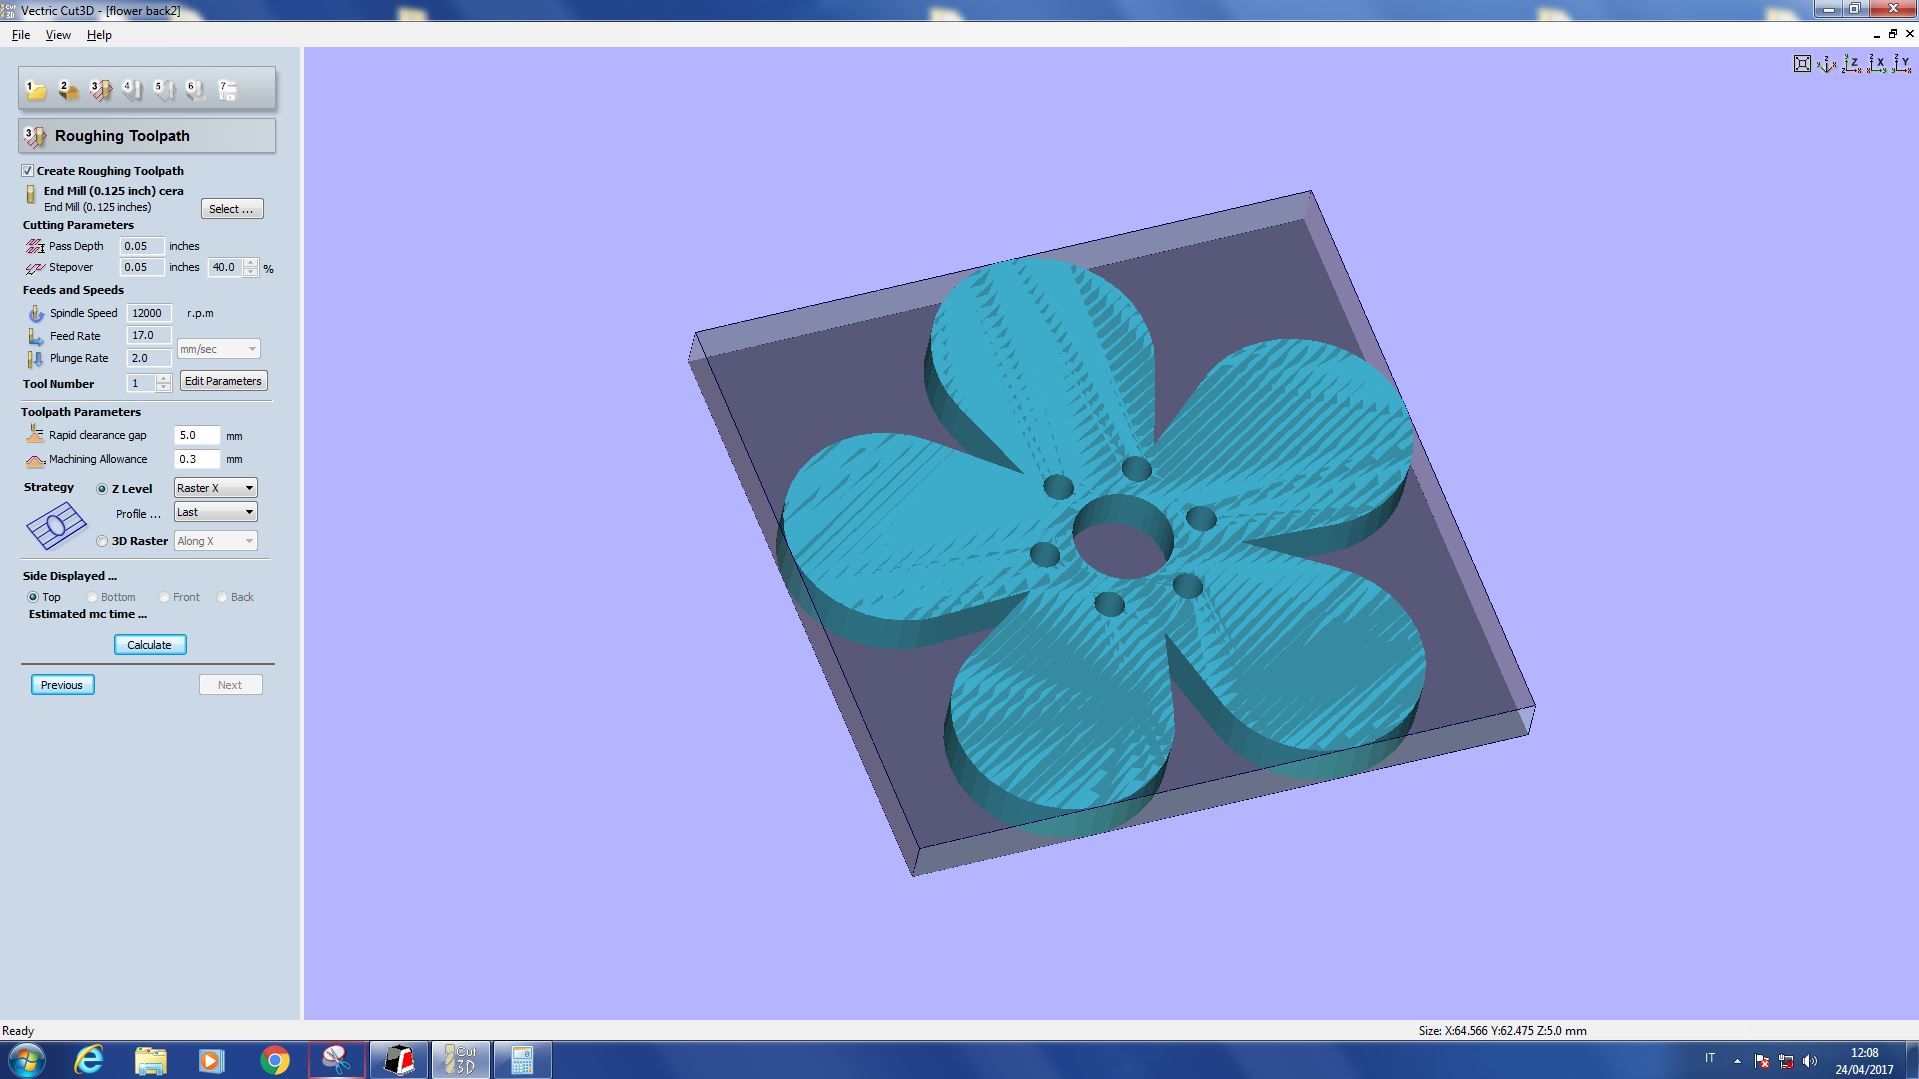 To edit endmill properties click on Select.. button, here's how, following my instructor's advice, I set mine (I would have used 1/8 inch endmill for roughing toolpath):
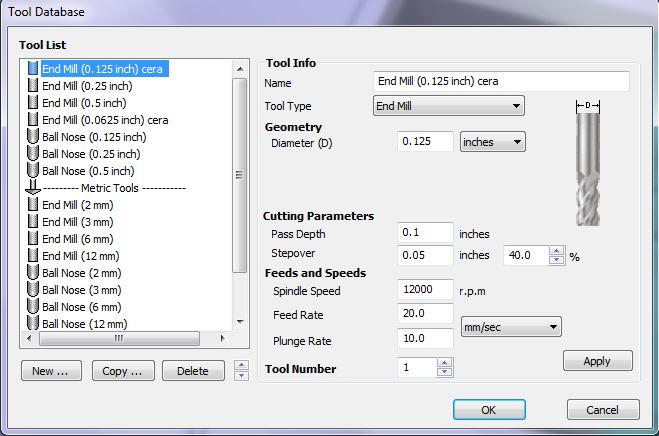 NB: these parameters will be changed after, don't copy them carelessly.
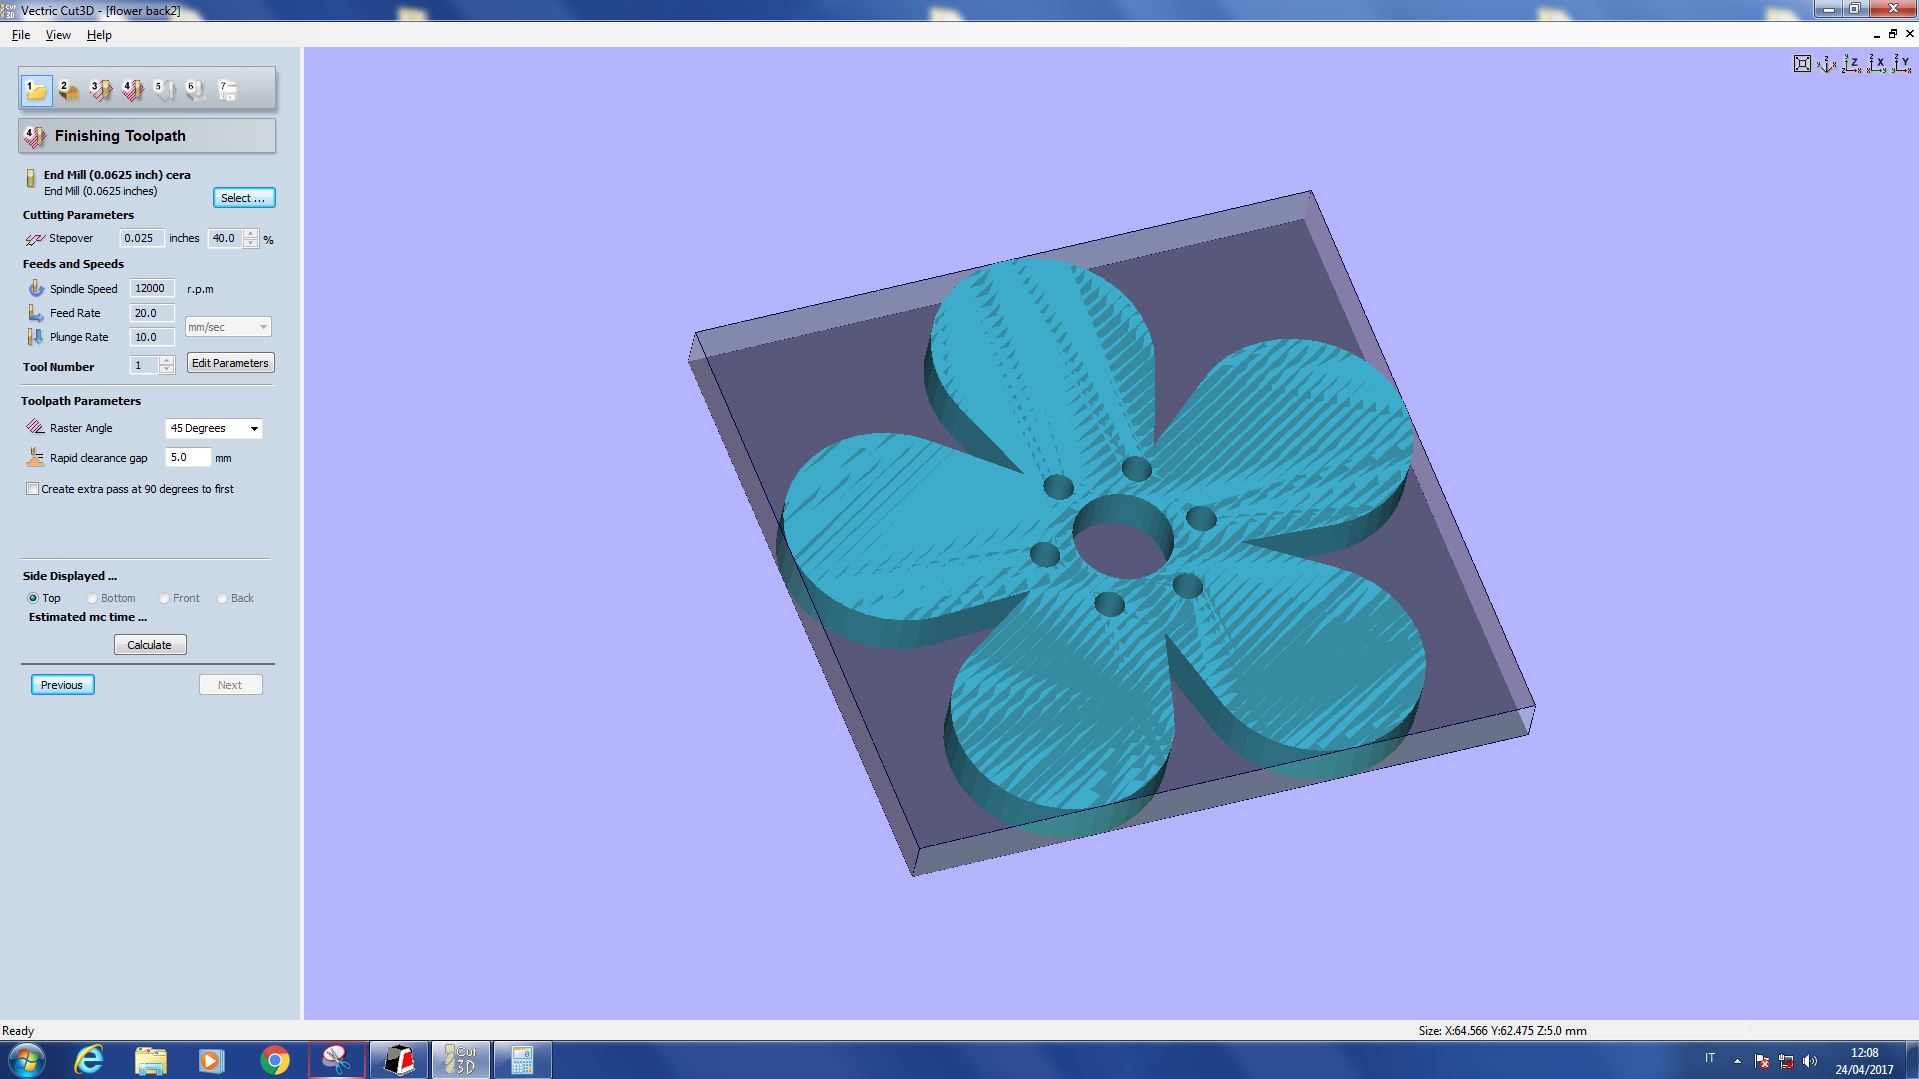
I did the same also for FINISHING TOOLPATH, setting 45 degrees direction for endmill:
 NB: these parameters will be changed after, don't copy them carelessly.
Pressing on Next button, CUT OUT TOOLPATH windows opens but, since I needn't to cut out a wax flower, I skipped it and
pressed on Next button again.
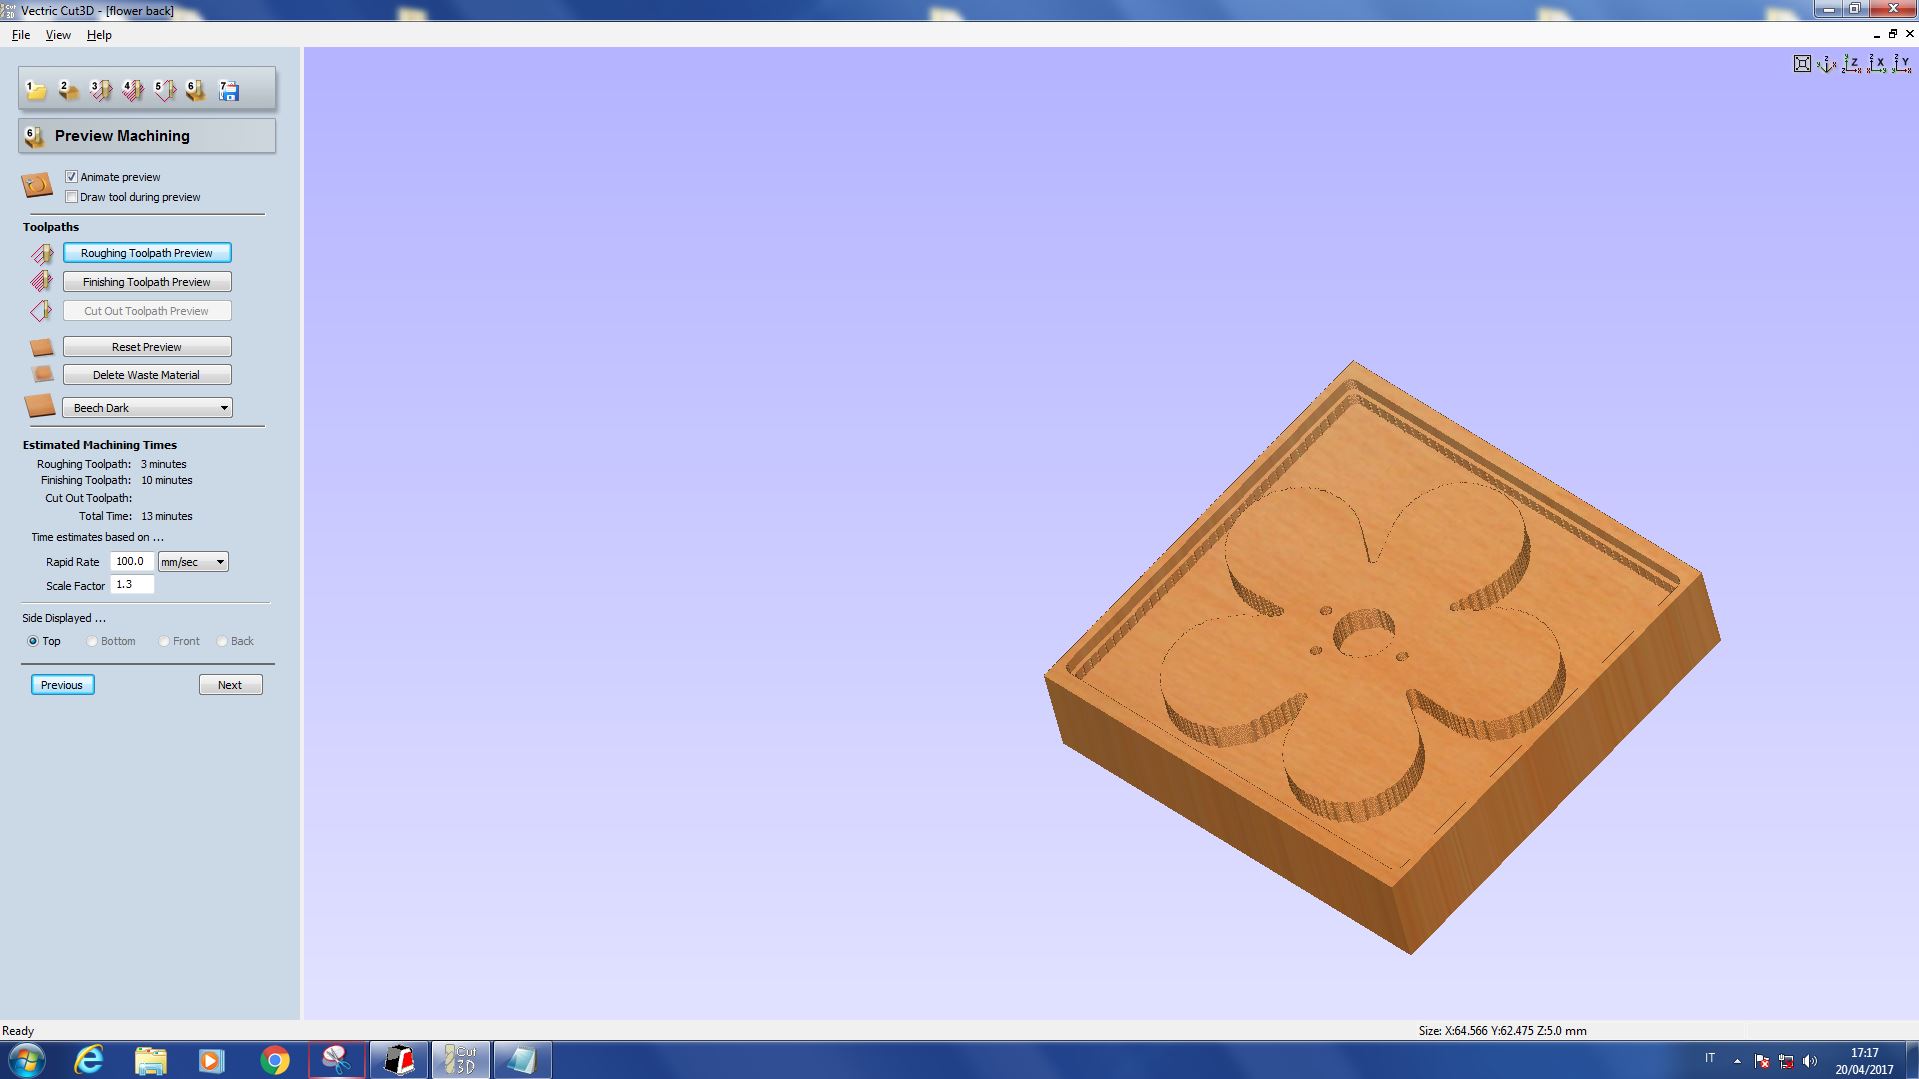
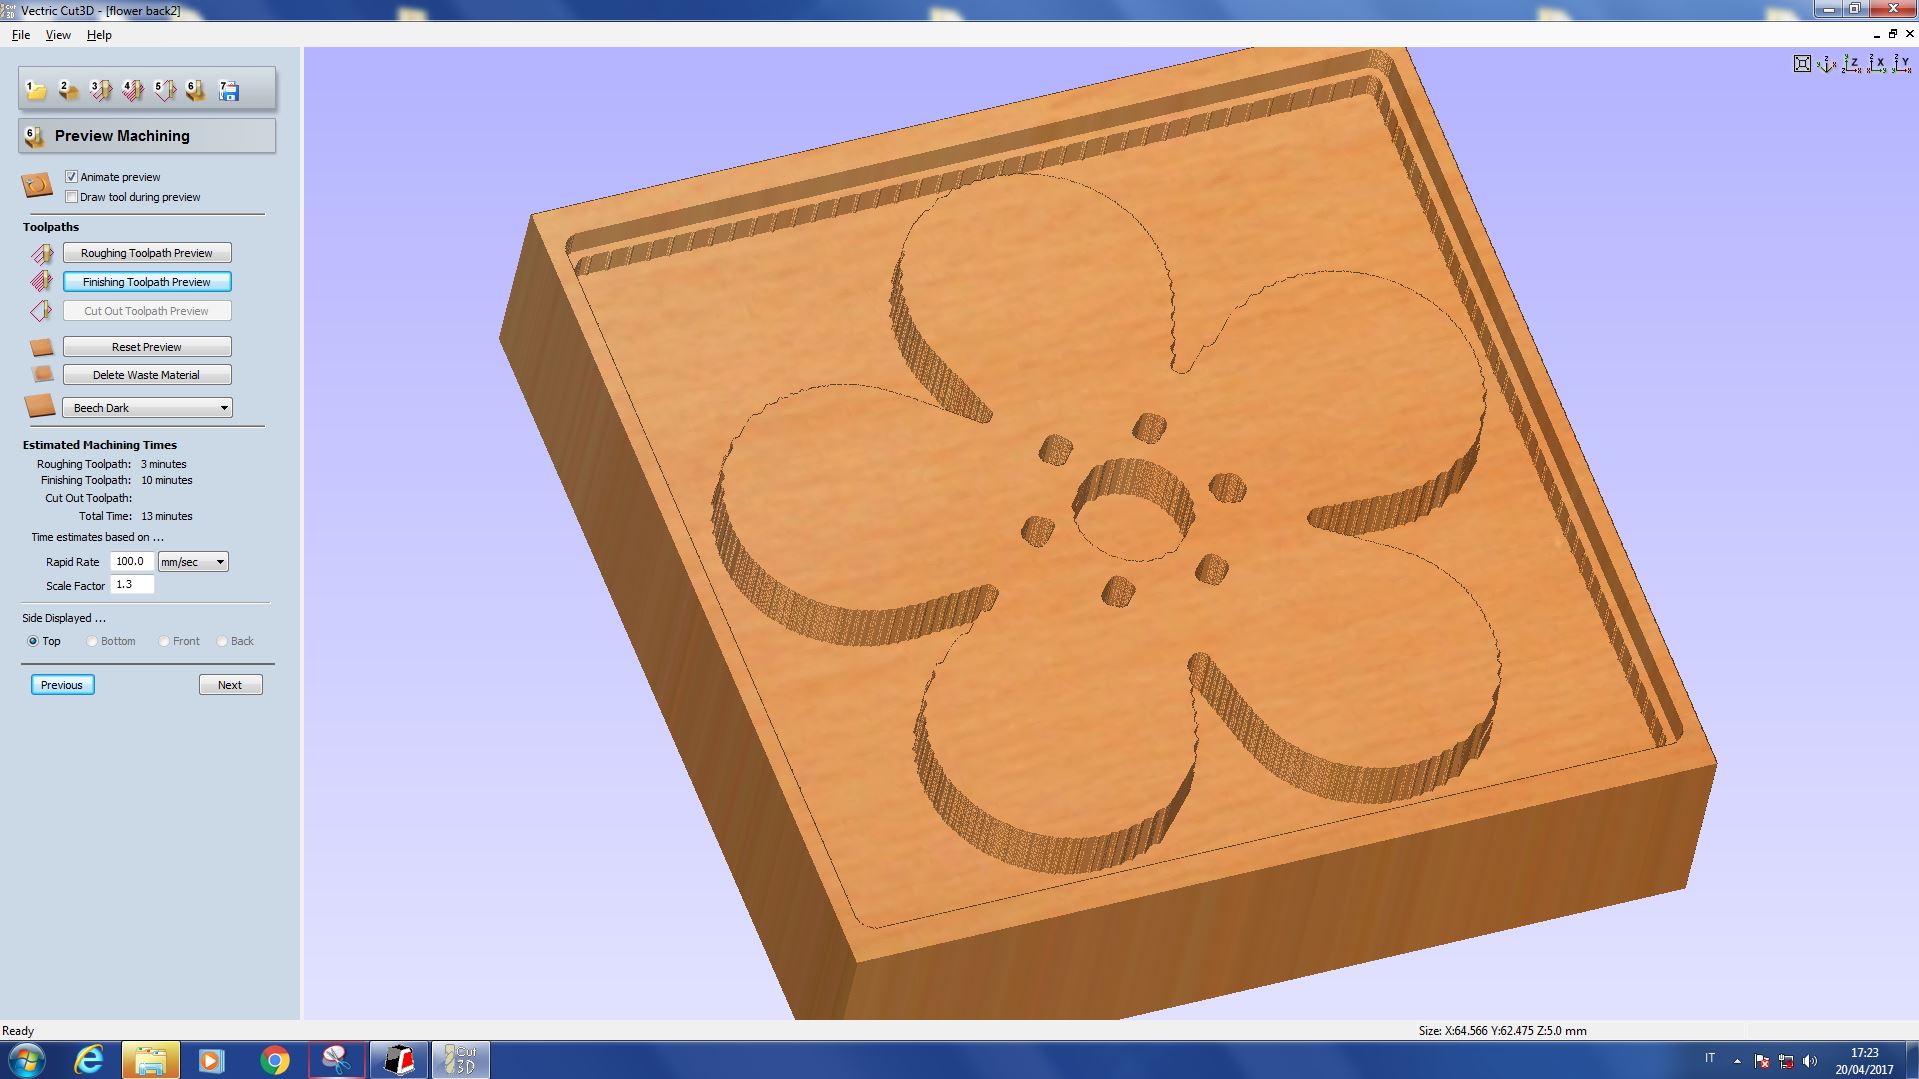
As soon as I previewed machining I saw some holed hadn't been calculated:
 NB: these parameters will be changed after, don't copy them carelessly.
Pressing on Next button, CUT OUT TOOLPATH windows opens but, since I needn't to cut out a wax flower, I skipped it and
pressed on Next button again.
As soon as I previewed machining I saw some holed hadn't been calculated:
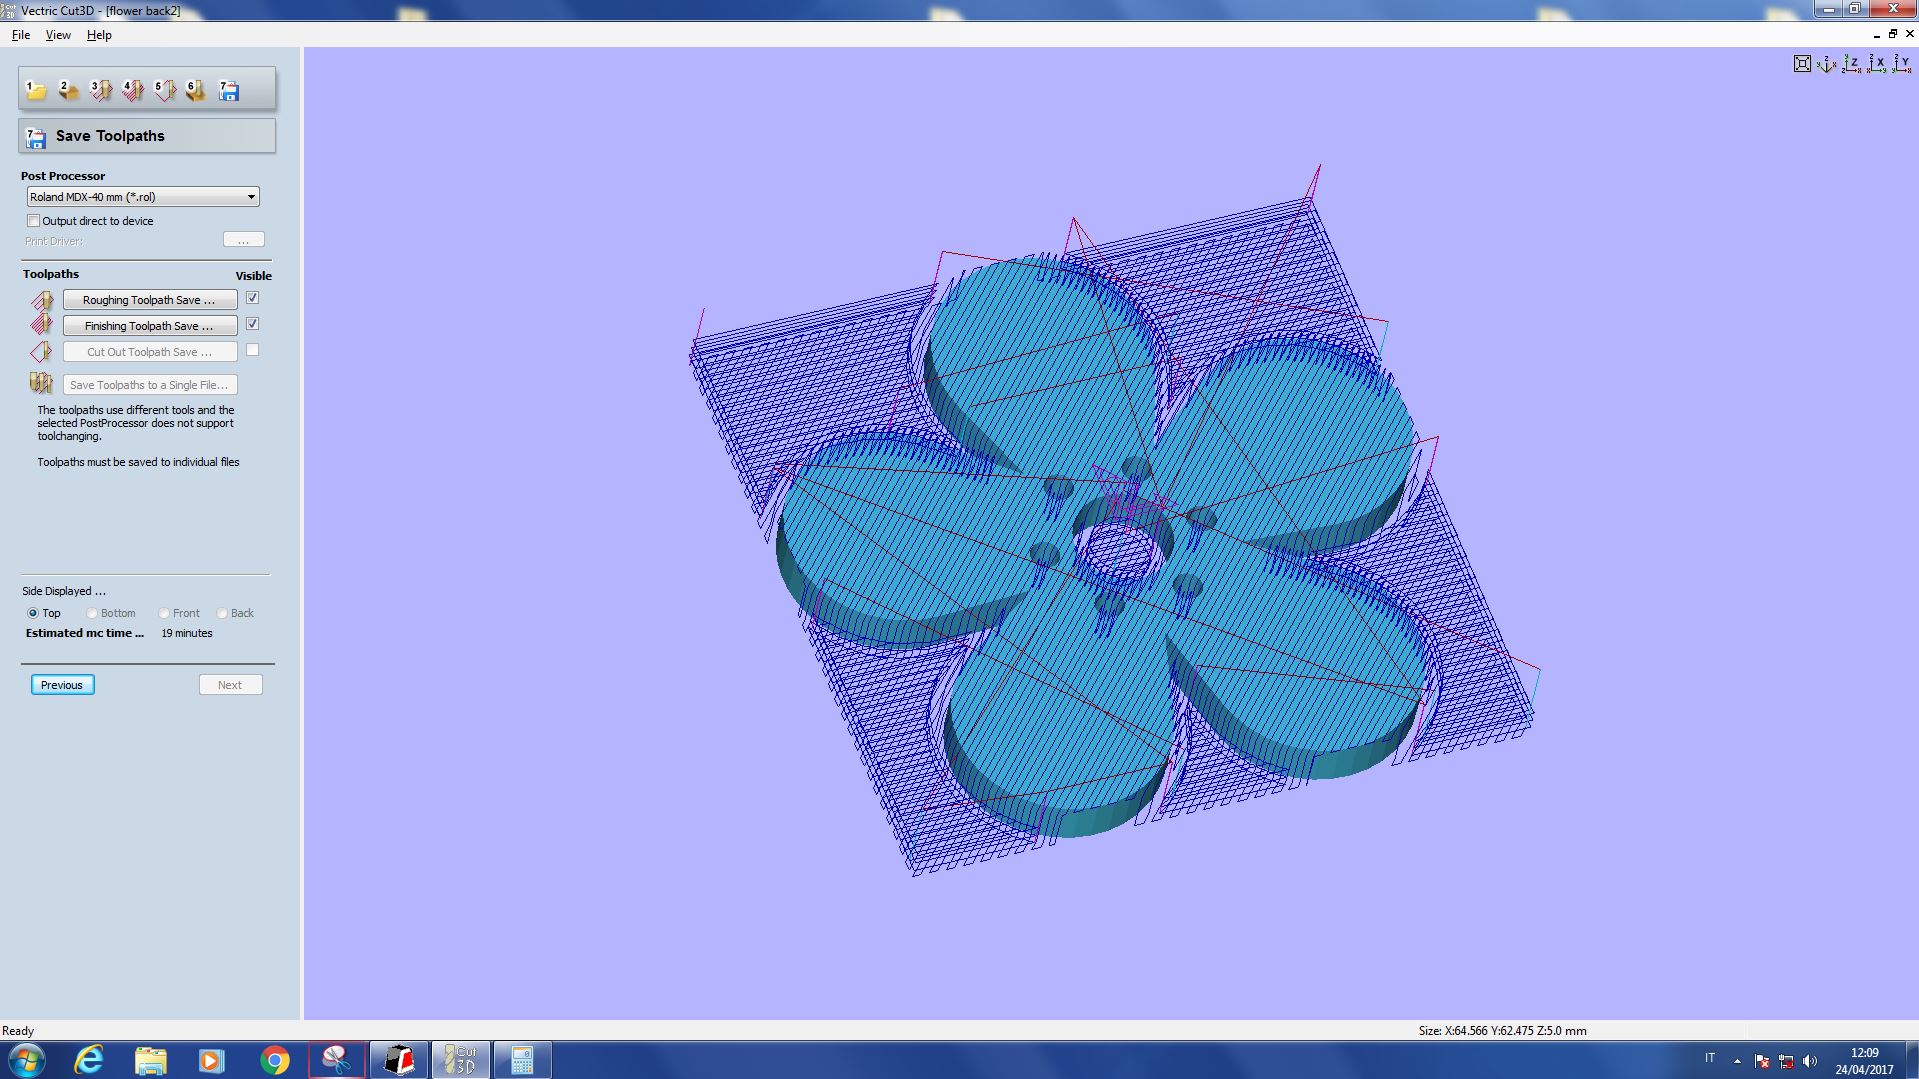
I then separately (tick just one file per time) saved .rol files:
Wax milling
I payed attention to stick thw block well to MDF layer with double-sided tape, mounted 1/8 inch endmill and then opened V-Panel.
Once I set origin x, y and z, I launched Roughing toolpath file pressing Cut button and going through Add->file path.
!!! IMPORTANT !!!
As soon as the endmill started removing wax, I saw it was running too fast and I therefore, slowed down speed from VPanel (down to 50%)
and also I changed pass depth on Cut3D for future milling (from 0.1 to 0.05 inch).
As always I couldn't help making at least one stupid mistake and I therefore forgot to change the endmill (from 1/8 of inch endmill to 1/16 one) and so I received back
a rough finishing:
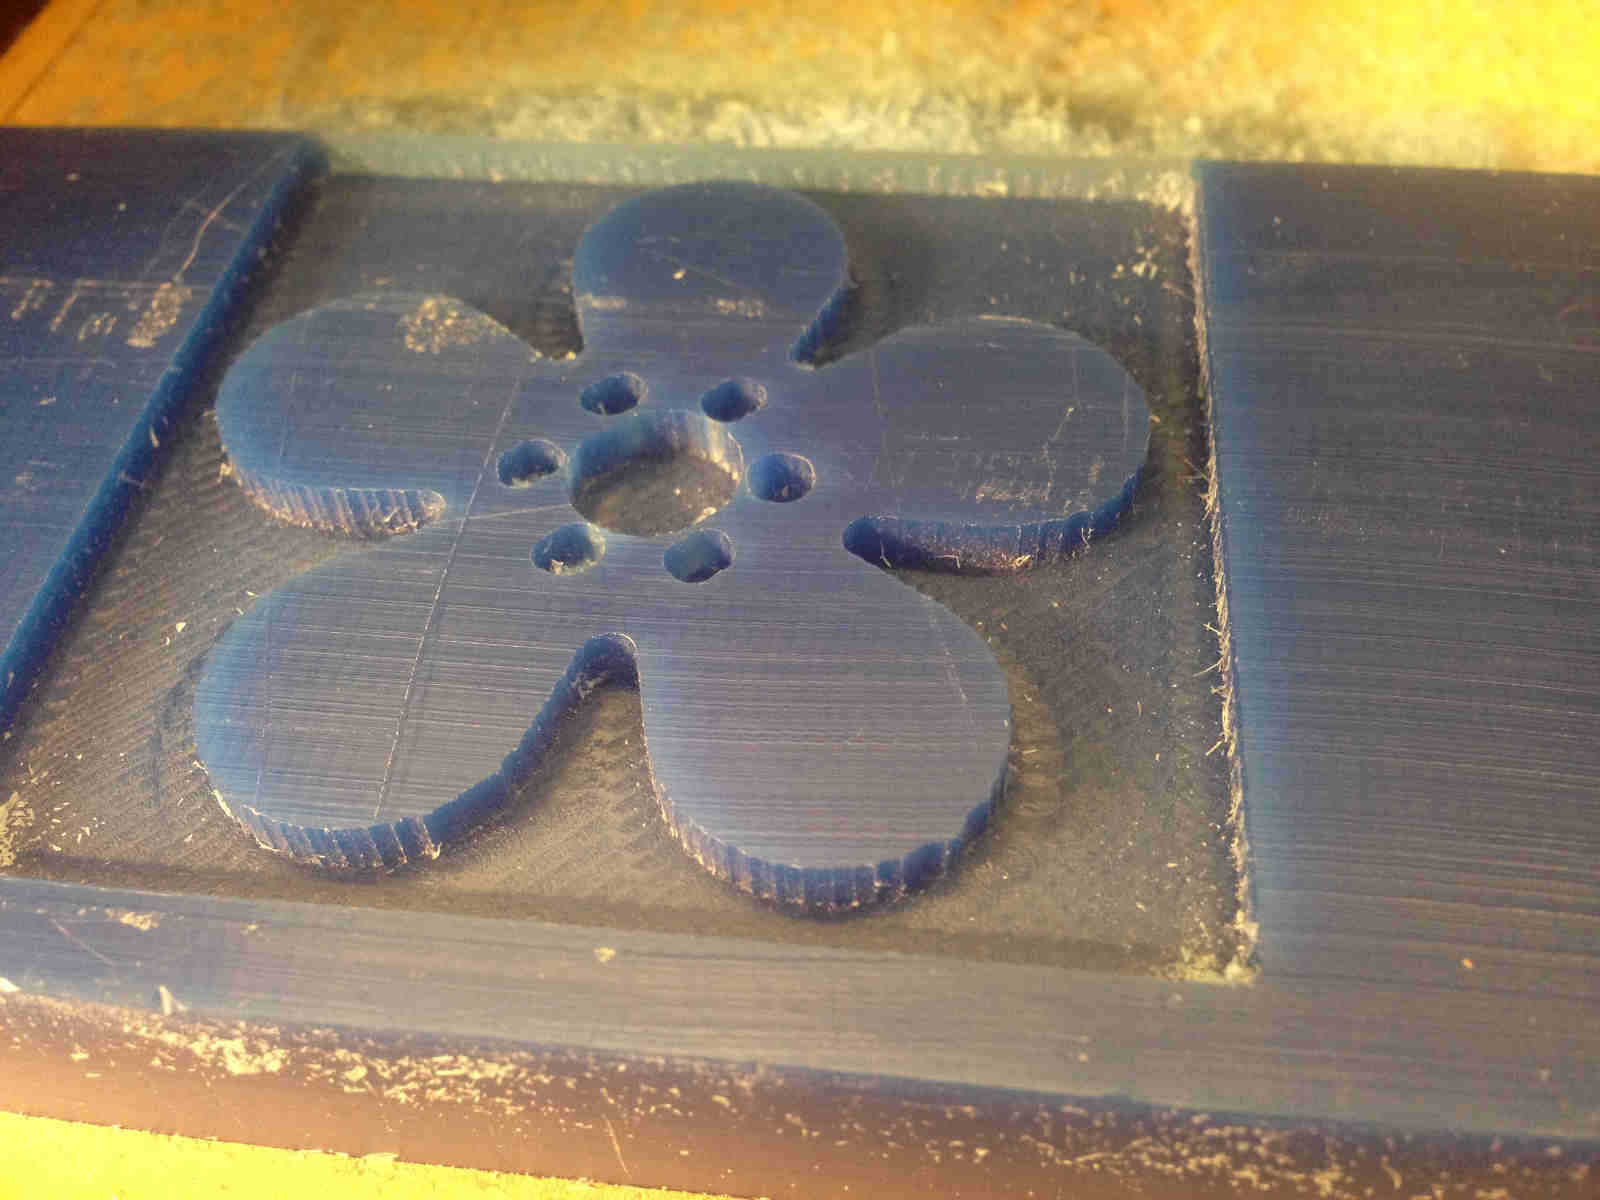 Also, as you can see, I set origin position too far from block edge and upper wall resulted too thin.
I therefore re-tried to mill the other side of wax block, remembering to change endmill:
ROUGHING TOOLPATH result:
NB: these parameters will be changed after, don't copy them carelessly.
Pressing on Next button, CUT OUT TOOLPATH
.jpg) FINISHING TOOLPATH result:
FINISHING TOOLPATH result:
.jpg) To remove reect wax from wax I used a particular tool you can't find in Fab Labs inventory (but that you can steal from your dentist):
To remove reect wax from wax I used a particular tool you can't find in Fab Labs inventory (but that you can steal from your dentist):
.jpg) As you can see, upper surface of the flower was at the same level of the original surface around: I forgot to sink the model into the block.
As you can see, upper surface of the flower was at the same level of the original surface around: I forgot to sink the model into the block.
Has it happen to you too?? Don't panic, an archaic solution would take the problem apart but this parameter can be set in MATERIAL SIZE AND MARGINS window
under Depth of model below surface.
Like Magic Sand and DiDo for adults
I had to fix my negative mold so as to have it thick enough to pour silicone inside and have a nice mold base.
I so made a little wooden structure that I glued to wax surface:
.jpg)
Now that I had the negative of my future mold, the nicest part begun.
Preparation of tools
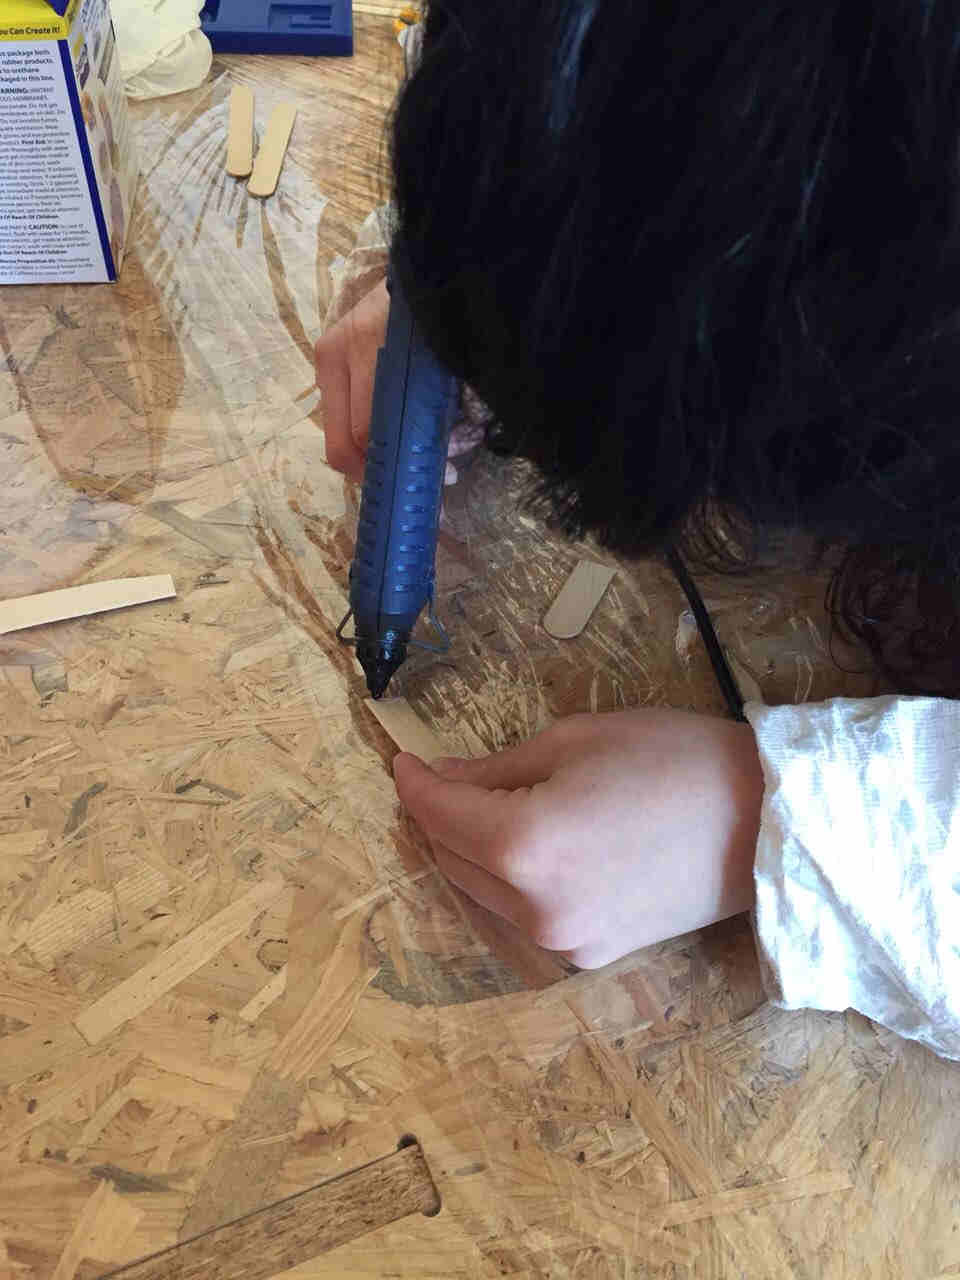
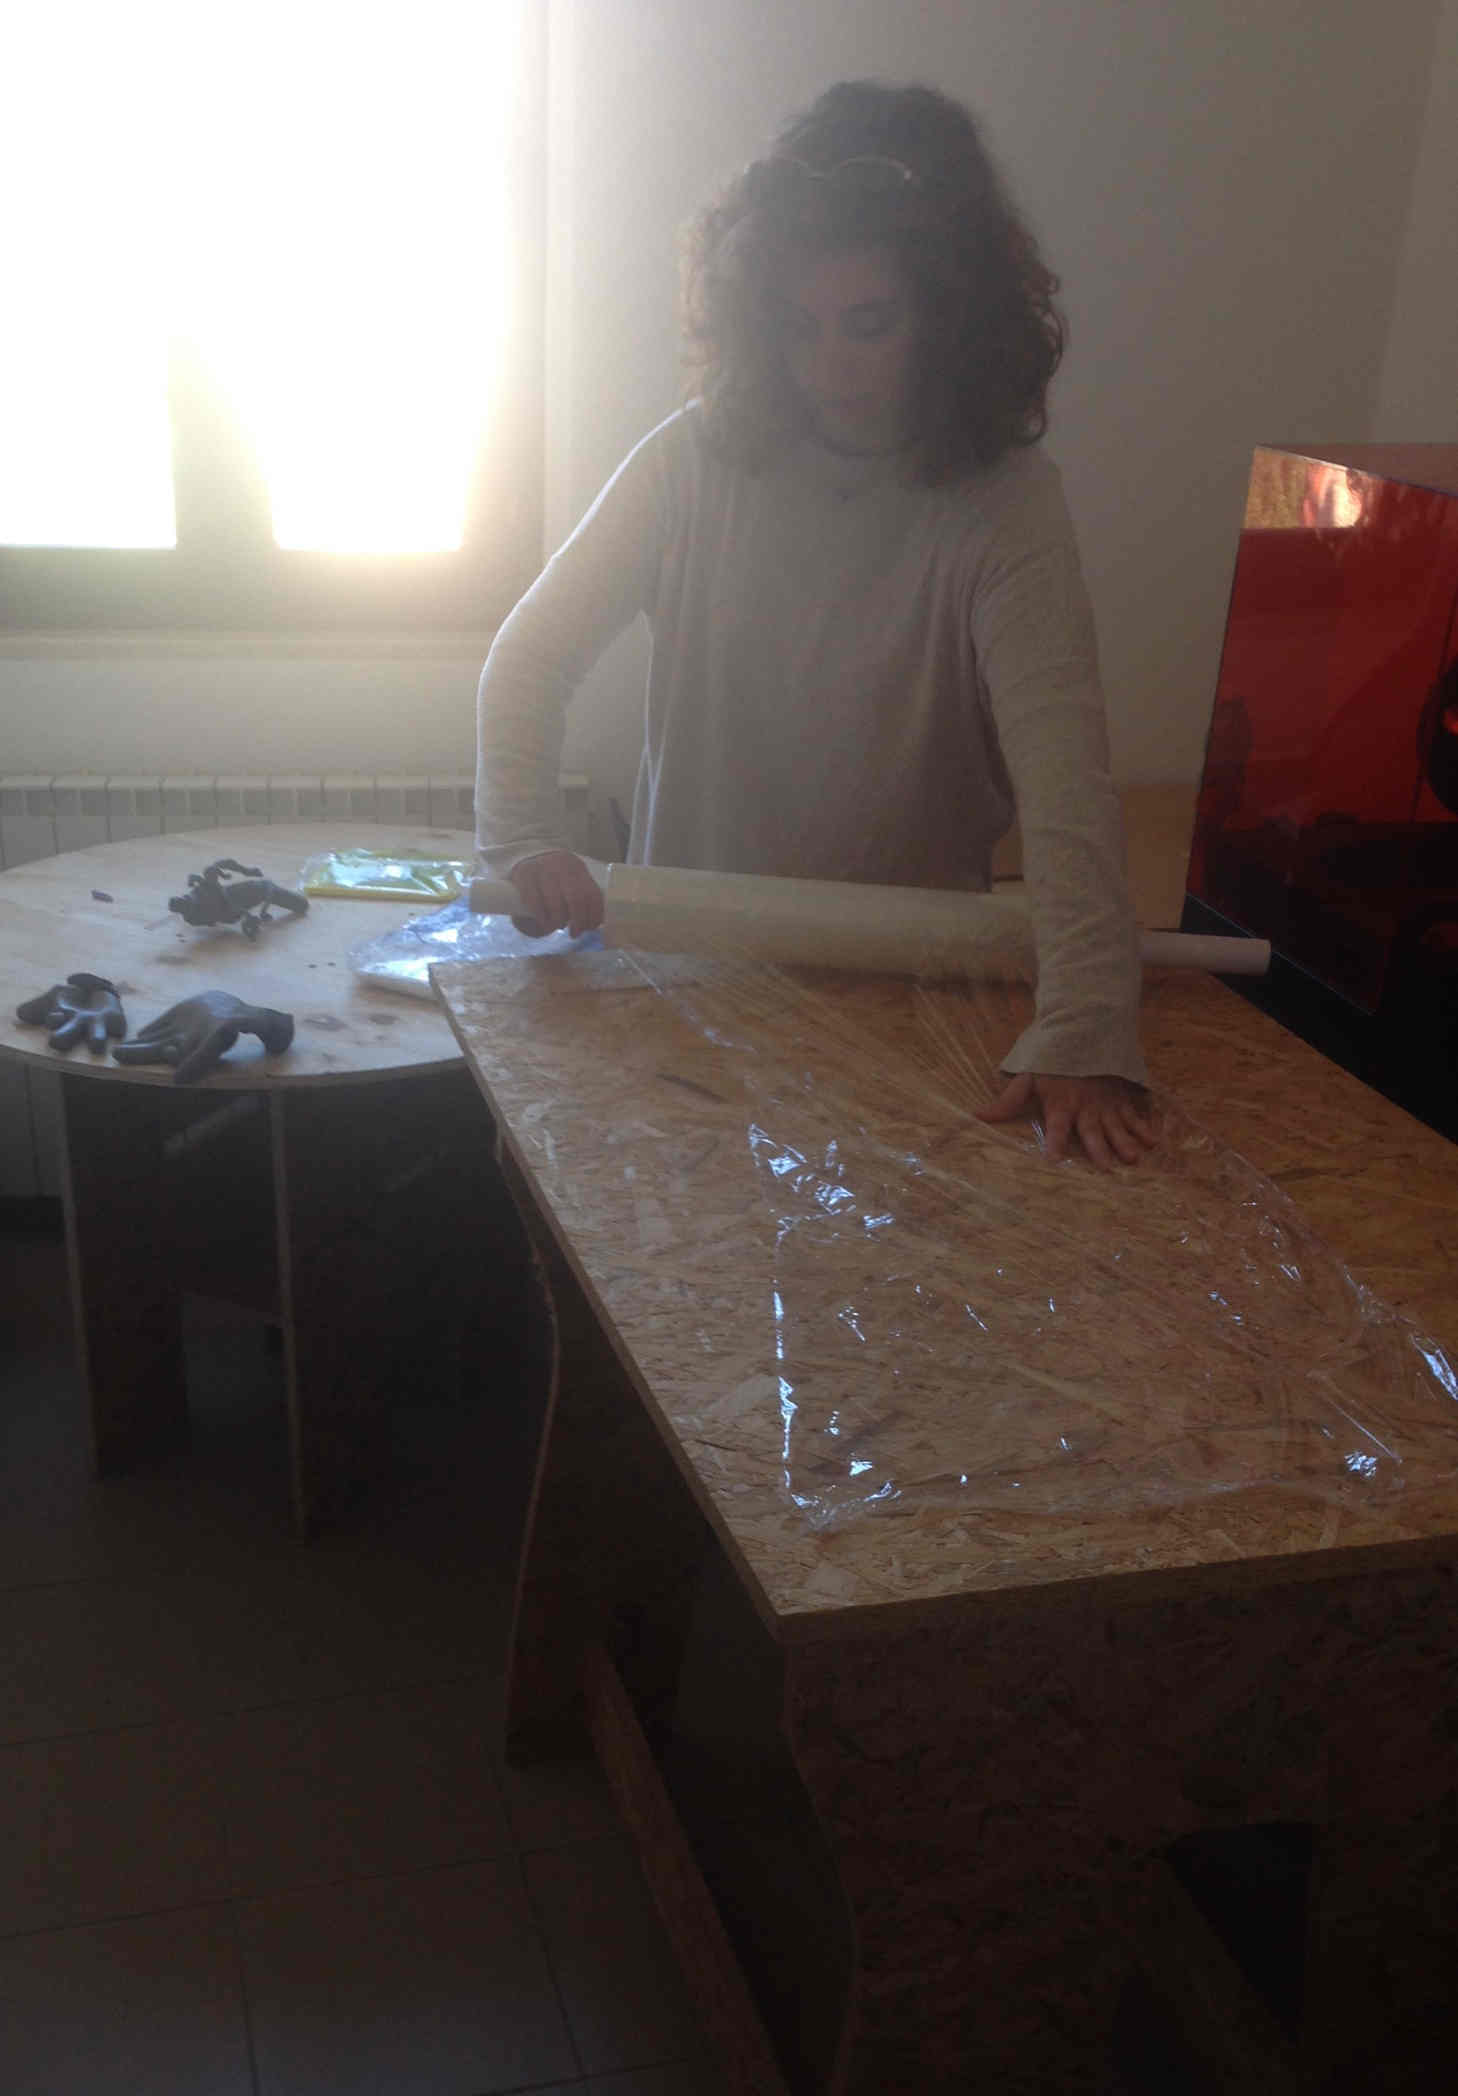
First important thing to do is to prepare working space with enough protection. So Chiara and I covered
Simone's table:
 Then:
Then:
- wear a overall;
- wear plastic gloves;
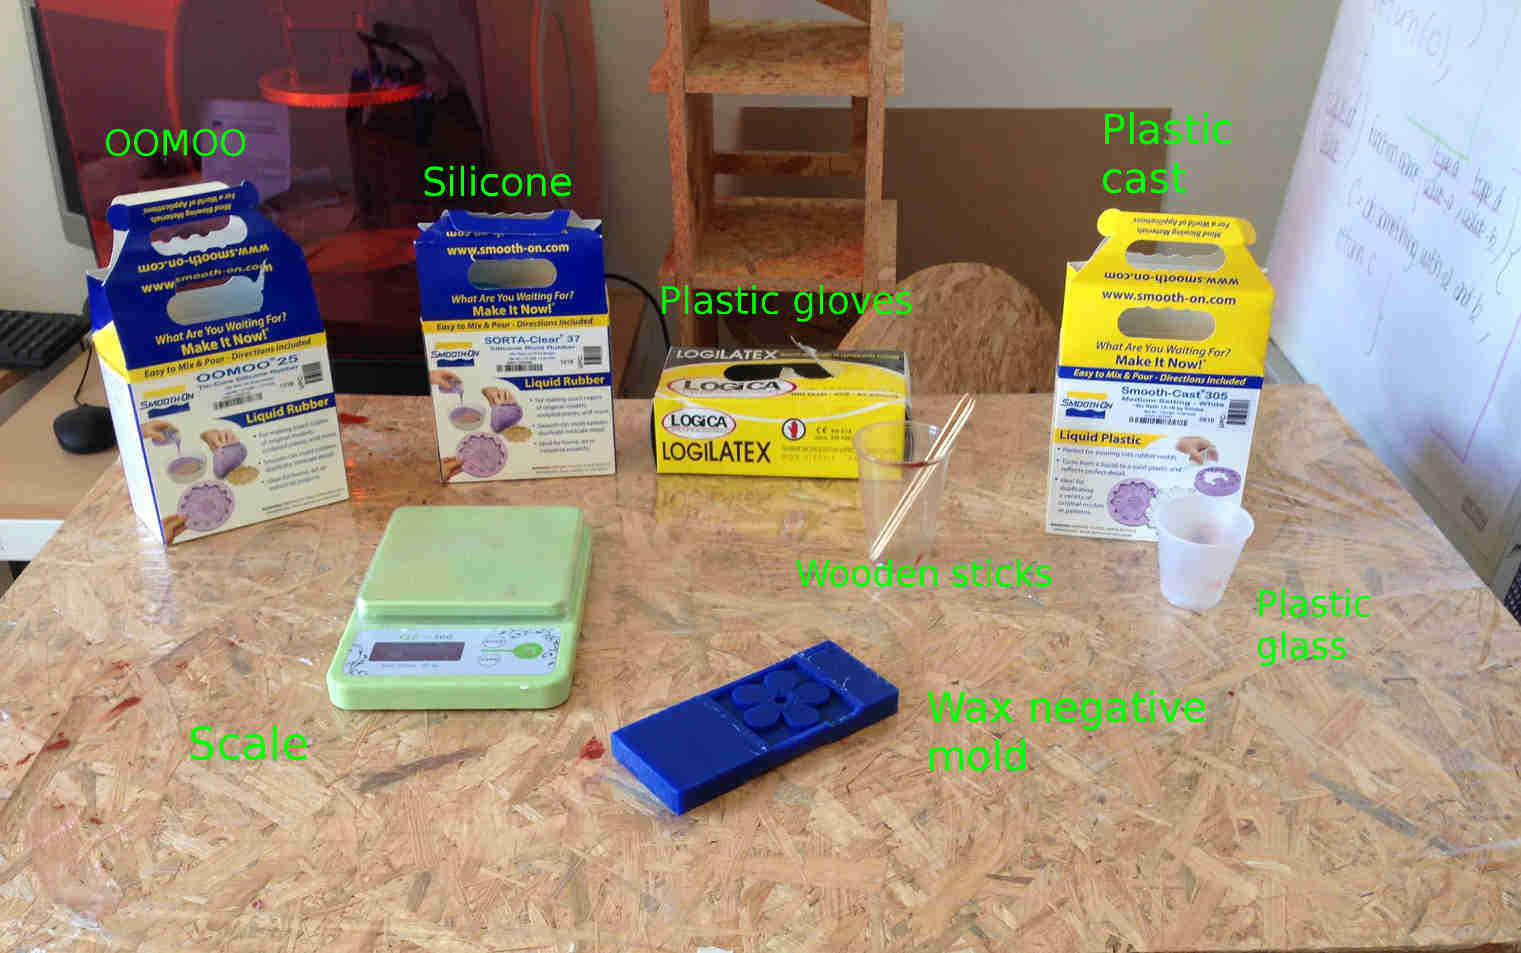
- prepare
- plastic glasses
- wooden sticks
- OOMOO and/or Silicone rubber
- Scale
- Plastic to be cast
- make sure you have a clock
 Unfortunately, our lab was provided with very little quantities of materials and we couldn't use last year's OOMOO
cause it dried:
Unfortunately, our lab was provided with very little quantities of materials and we couldn't use last year's OOMOO
cause it dried:
.jpg) I therefore moved to Silicon rubber:
I therefore moved to Silicon rubber:
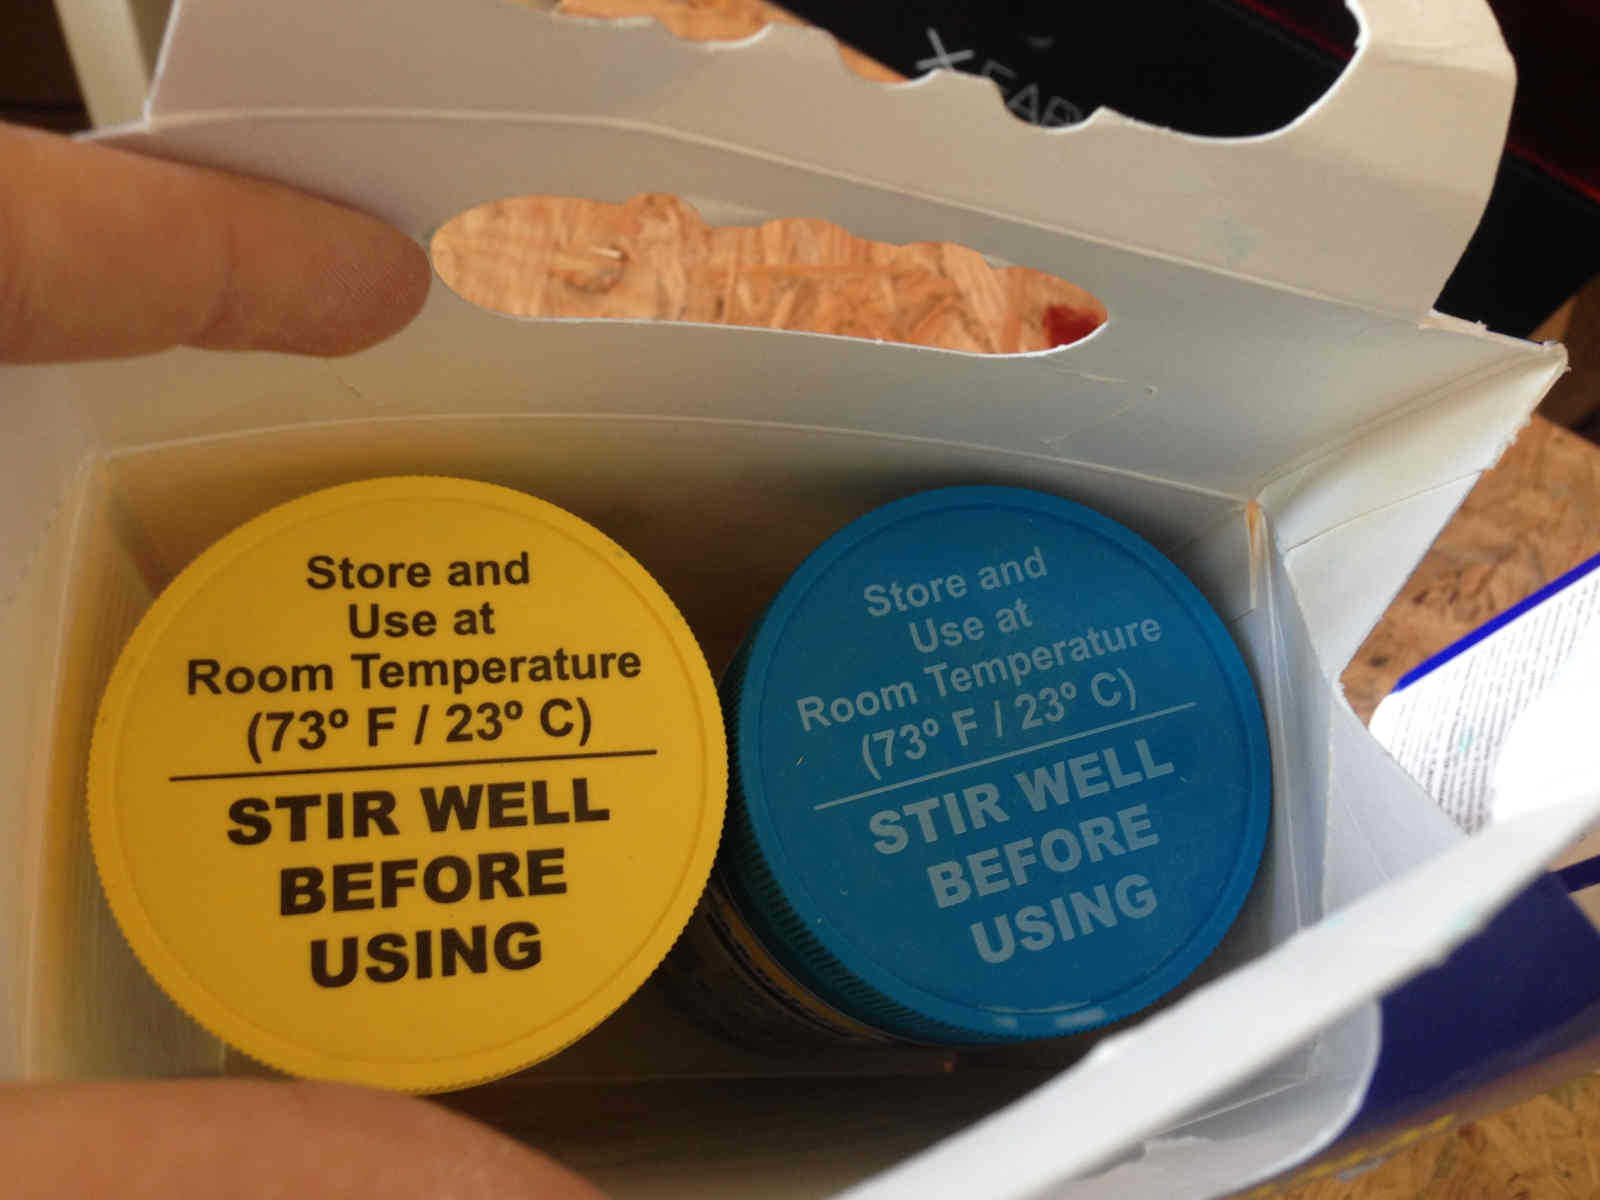 Silicon condition after a year looked quite good but actually I had no idea of quantity I needed. I decided to start with little amount of both liquids
(Part A and PART B that have to be added in 1A:1B ratio), I could have then quickly added some more if needed.
Silicon condition after a year looked quite good but actually I had no idea of quantity I needed. I decided to start with little amount of both liquids
(Part A and PART B that have to be added in 1A:1B ratio), I could have then quickly added some more if needed.
Why quickly? Well, in casting process you somehow feel an inner metronome that goes along with you in every step you make. In fact, you have to face
with the fact that rubbers and plastics react among a precise amount of time before the end of which you have to put them in the mold and then wait another more or less
precise period to let them harden.
Pot life: util amount of time to pour mixture into the mold;
Curing time: time the mixture needs to solidify. It may be underrated, so I advise you to wait longer than indicated.
Recommendation for mixing parts together:
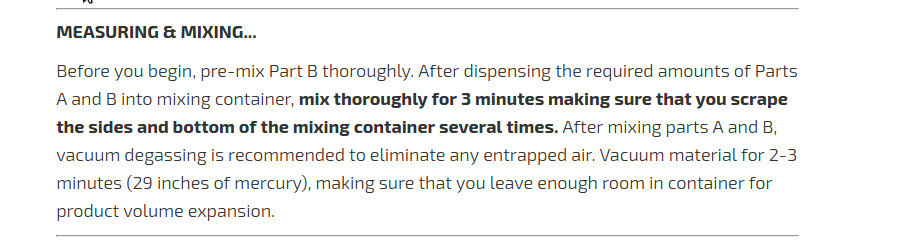 Mixing may cause load of bubbles and that could be quite a problem if, for example, you have holes in your design (like me) and, generally, they may cause flaws in mold
surface and, cosequently, in your finished model surface.
Mixing may cause load of bubbles and that could be quite a problem if, for example, you have holes in your design (like me) and, generally, they may cause flaws in mold
surface and, cosequently, in your finished model surface.
My mixture contained a huge number of bubbles and foolishly I decided to make something similar to a vacuum pump during pot life: we recently "loaned" a vacuum cleaner
from the housekeeping staff of the lab and I heard my instructor talking about its being not too powerful to make a vacuum pump out of it.
I ran to the lasercutter (silicone potlife was 15 minutes), I grabbed a circle-shaped MDF piece I found around and I cut a circle (dimensioned as the tube of the vaccum
cleaner) out of it, having no idea of how a vacuum pump for this scope could look like ( and it was quite far away from my idea). I slotted the MDF piece and the tube
together and I started hoovering up. As soon as I saw that the silicon was close to be drawn off, I turned the vacuum cleaner off. I understood I may have been too
imaginative and much less reflective about what I was doing.
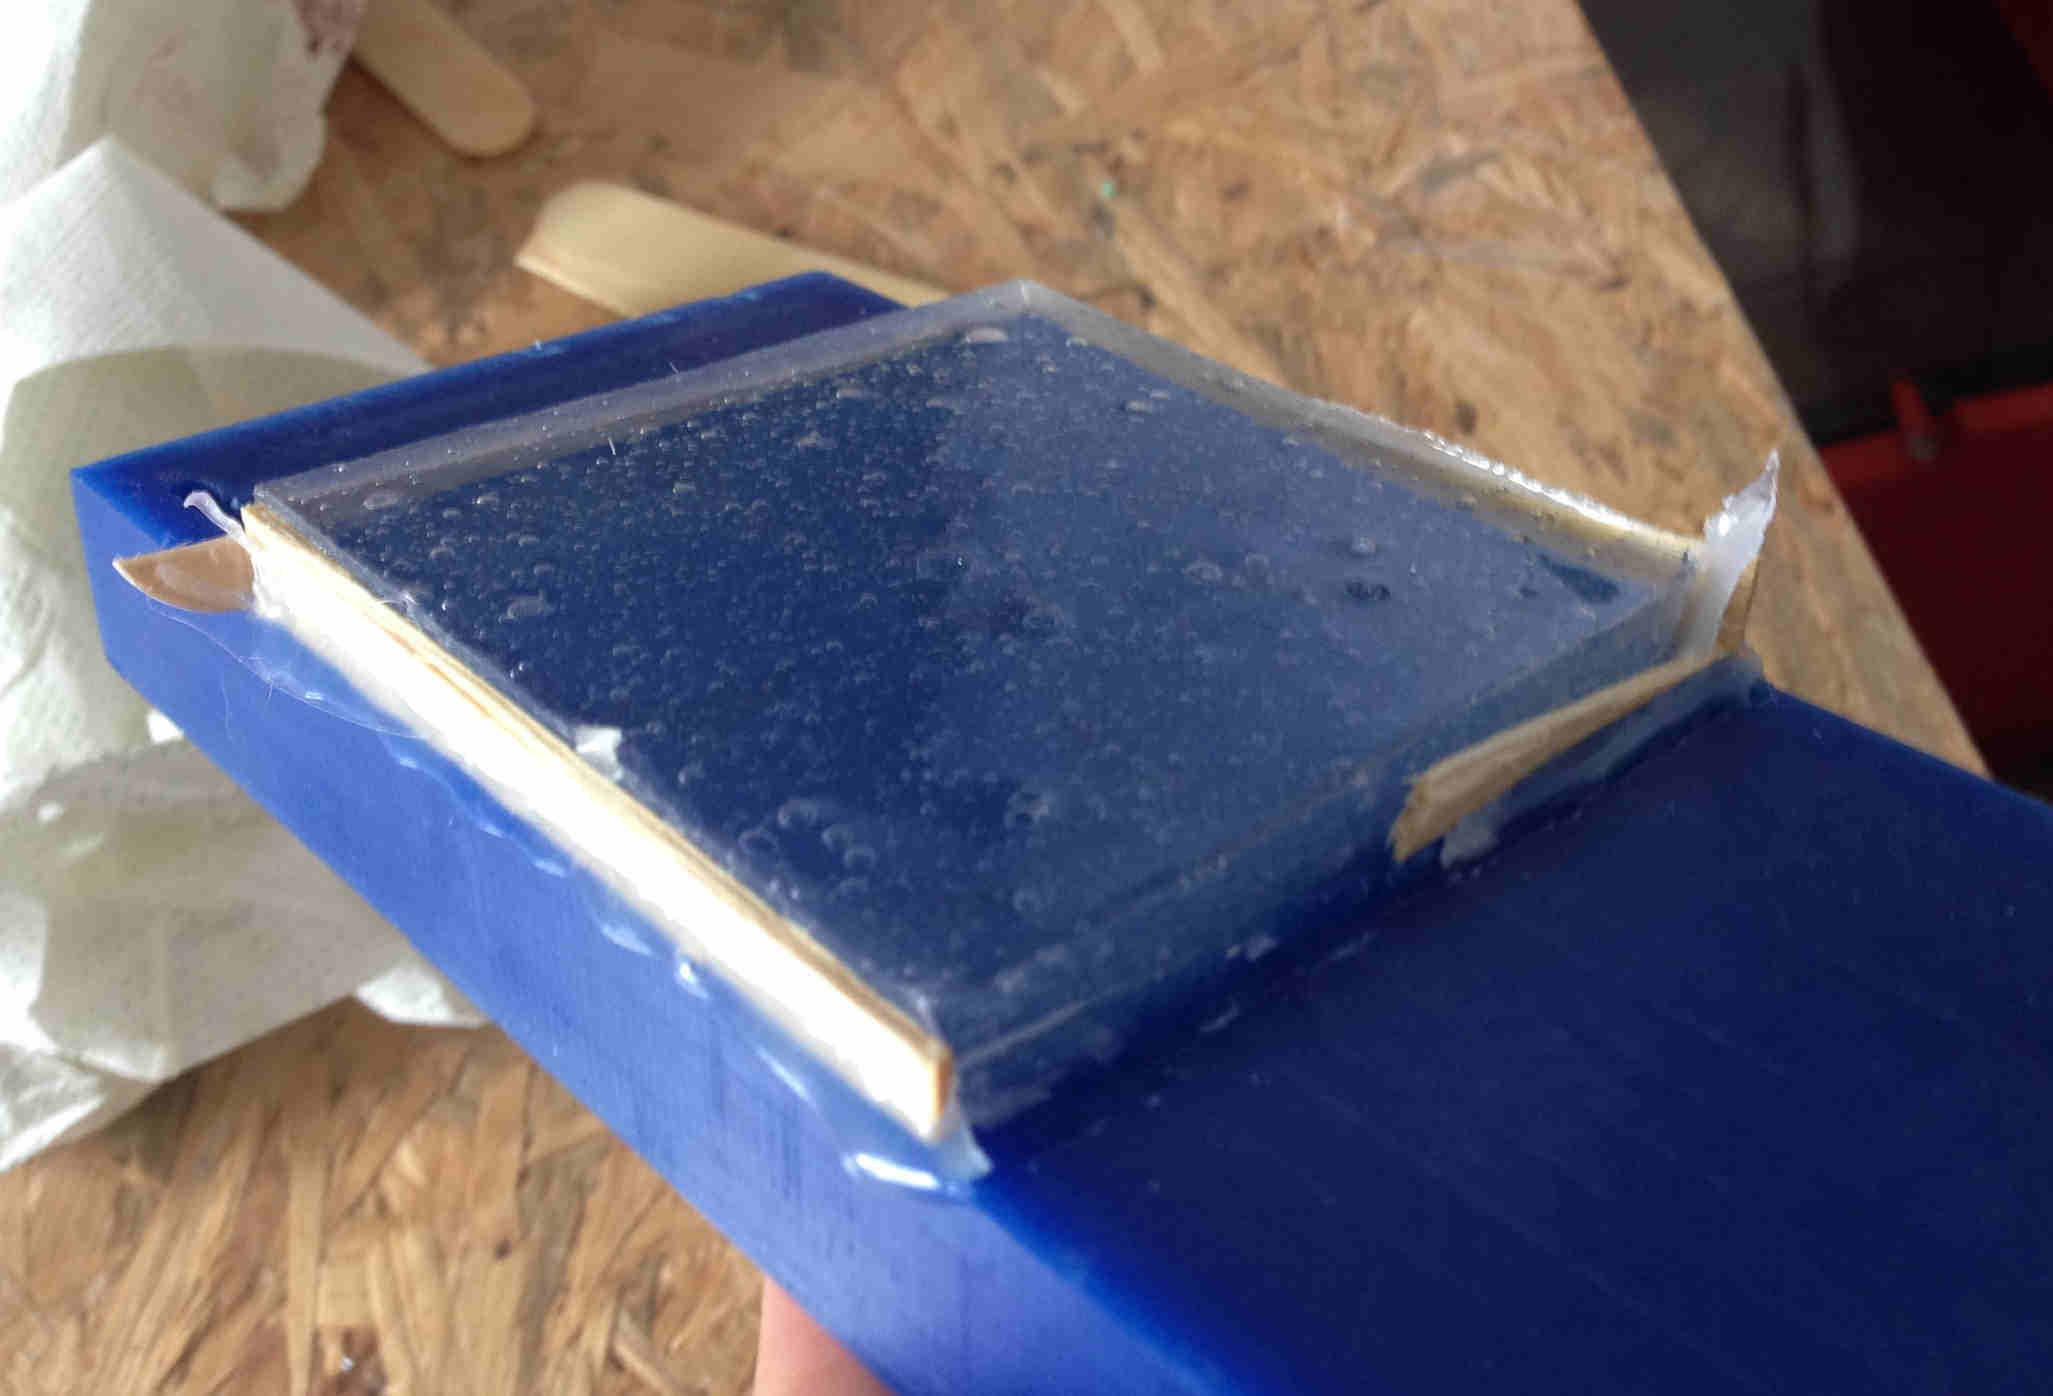
.jpg) Bubbles just had an offspring which ad children itself but I wanted to try to pour anyway and I did it:
Bubbles just had an offspring which ad children itself but I wanted to try to pour anyway and I did it:

I left it solidify overnight and the day after I came back to grup the mold up.
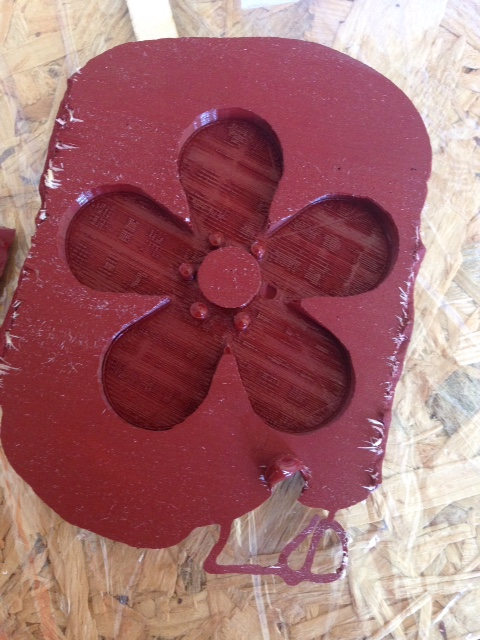
 As I expected, bubbles causem me problems and I had no cylinder where I intended to have holes. But I found a quick solution for that ;)
.jpg)
.jpg) I then took the liquid plastic:
I then took the liquid plastic:
.jpg) and again mixed Part A and Part B in 1A:1B ratio (check your own material instructions for ratios):
and again mixed Part A and Part B in 1A:1B ratio (check your own material instructions for ratios):
.jpg) Then I poured new micture into the mold:
Then I poured new micture into the mold:
.jpg) And waited...(more than specified 75min :/ )
And waited...(more than specified 75min :/ )
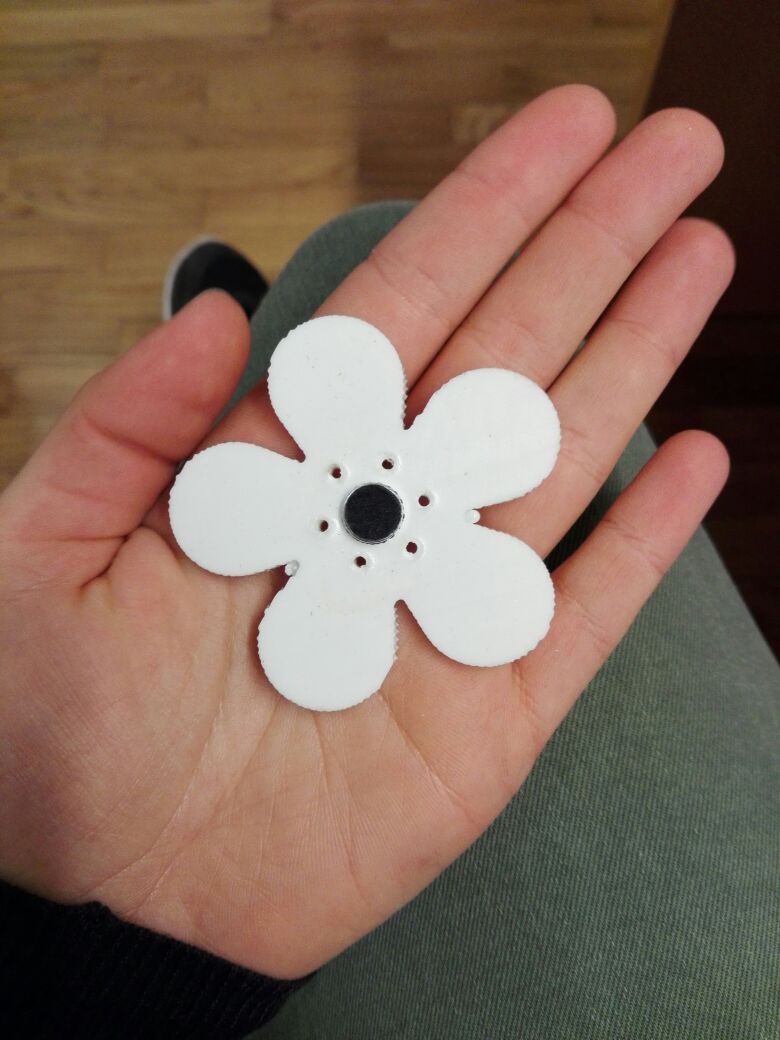
.jpg) When I removed nails:
When I removed nails:
.jpg)
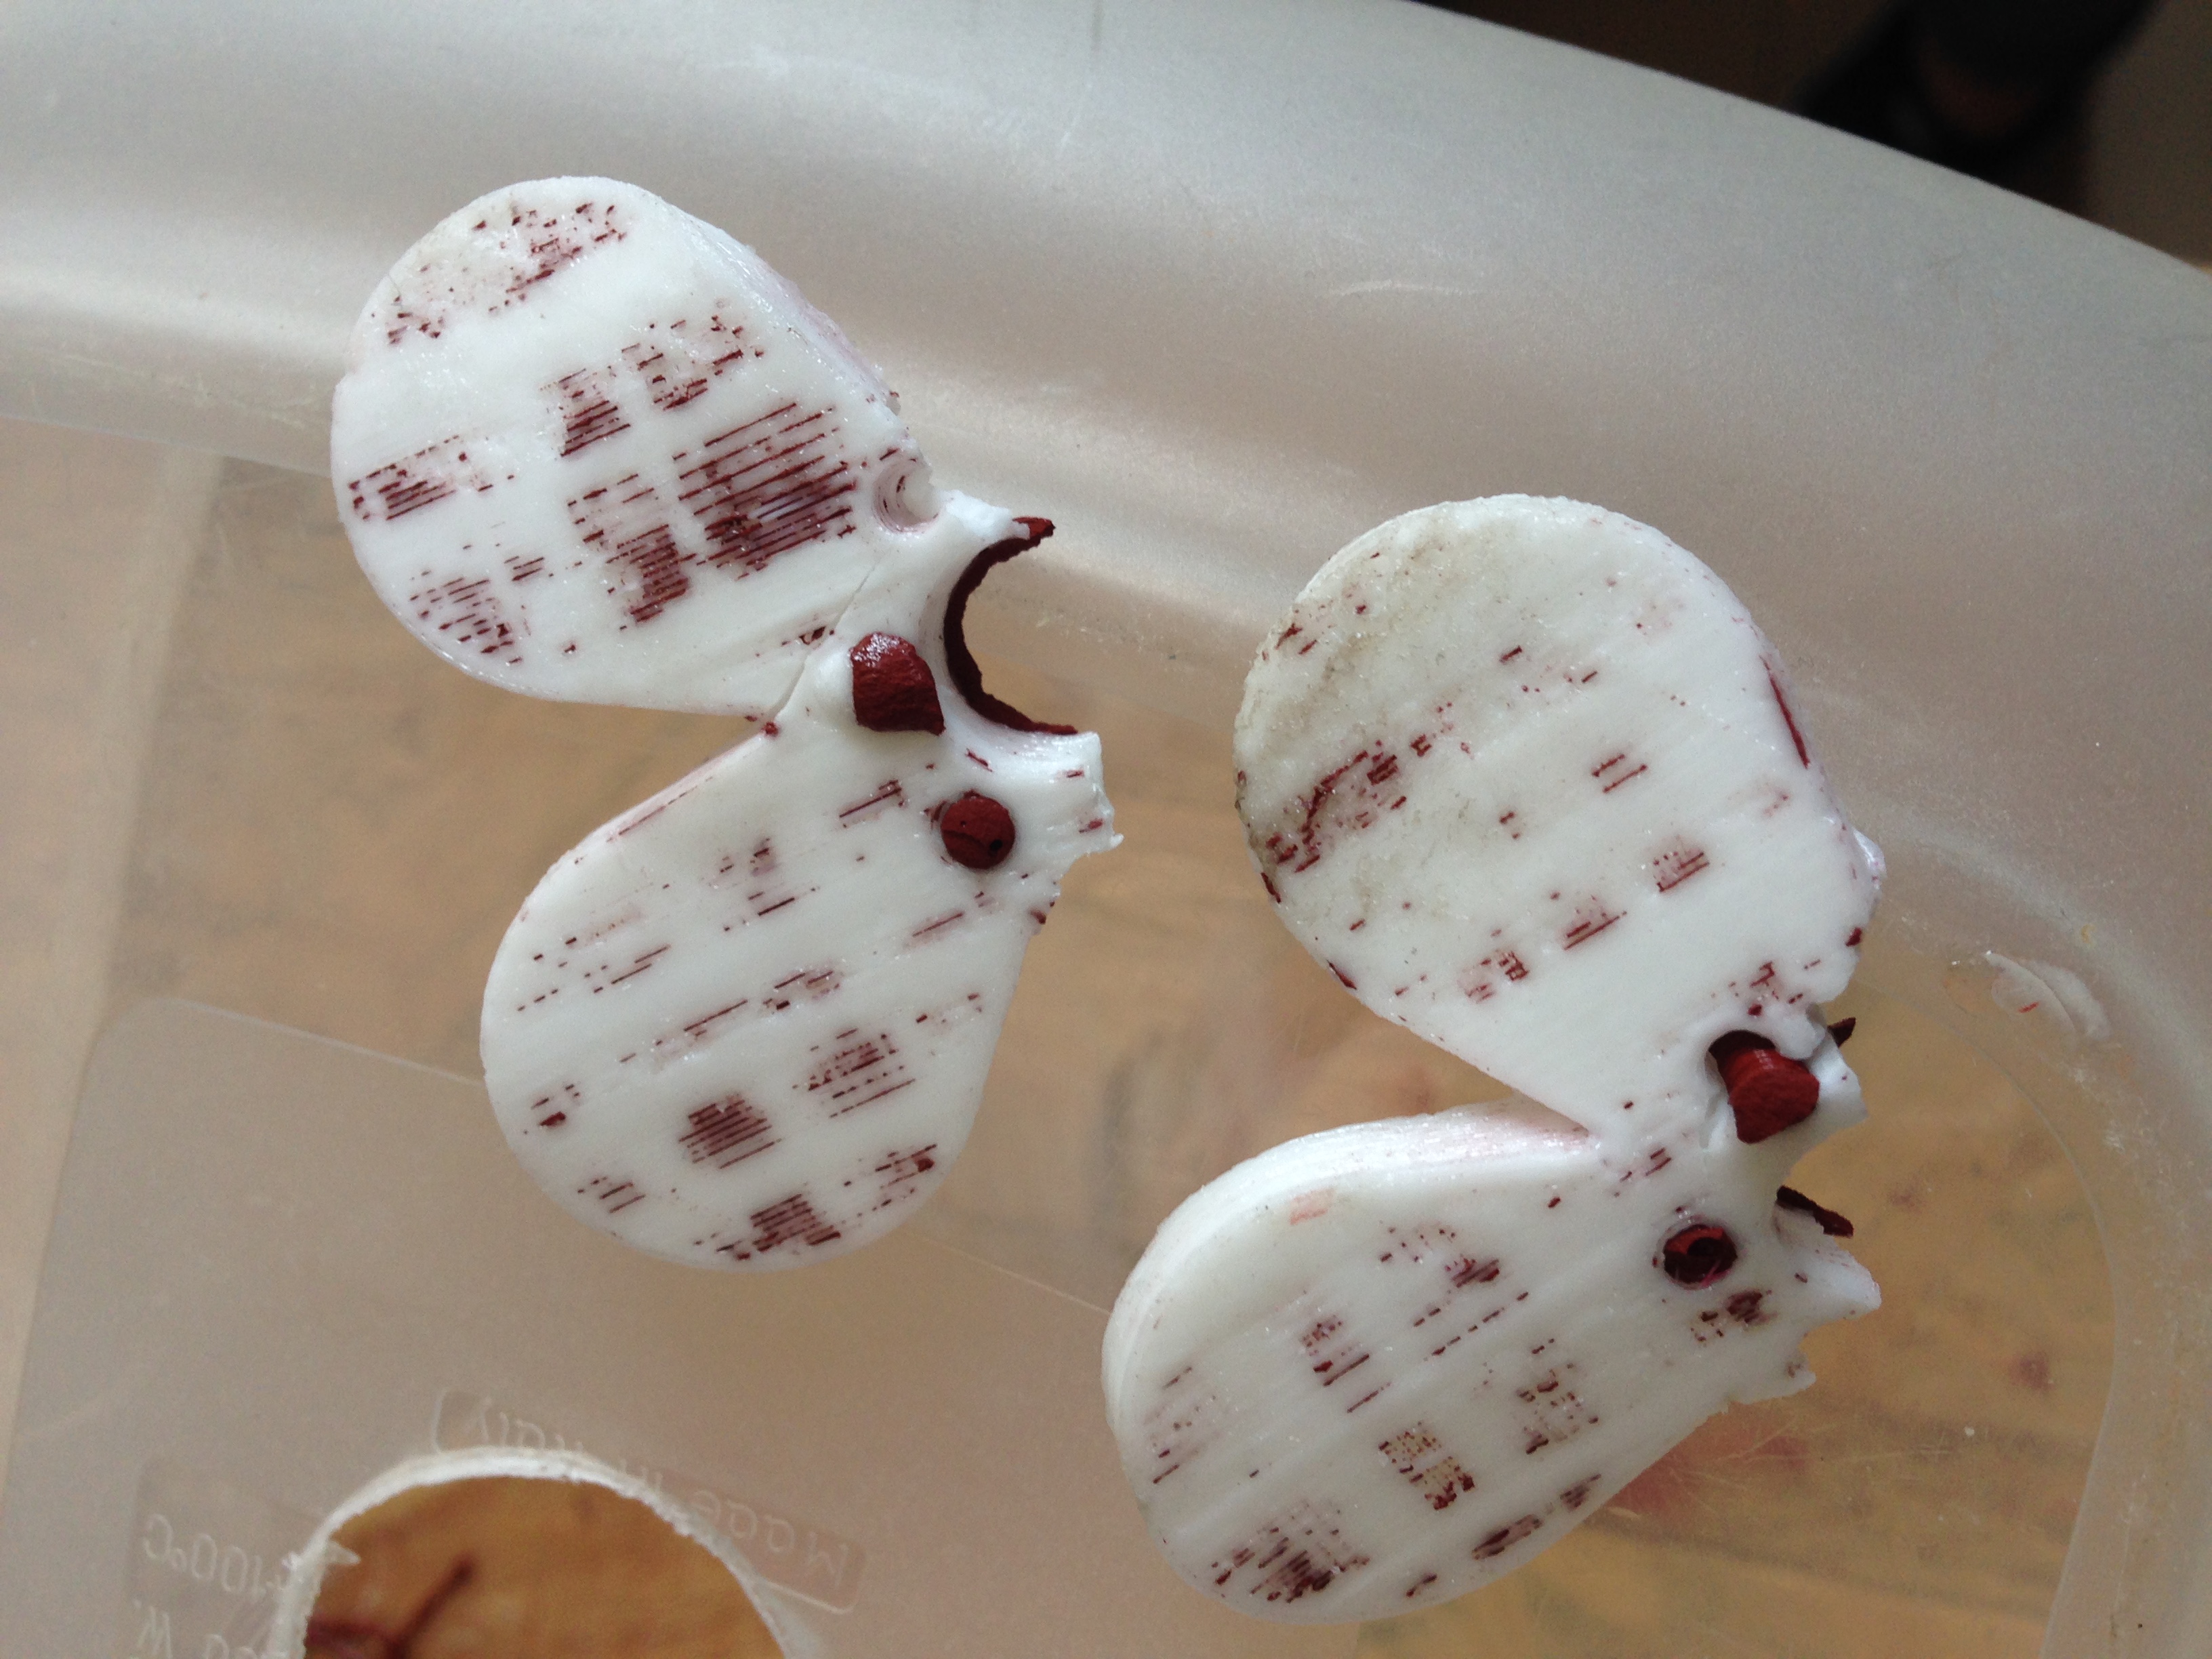
 The flower perfectly suited microphone dimensions:
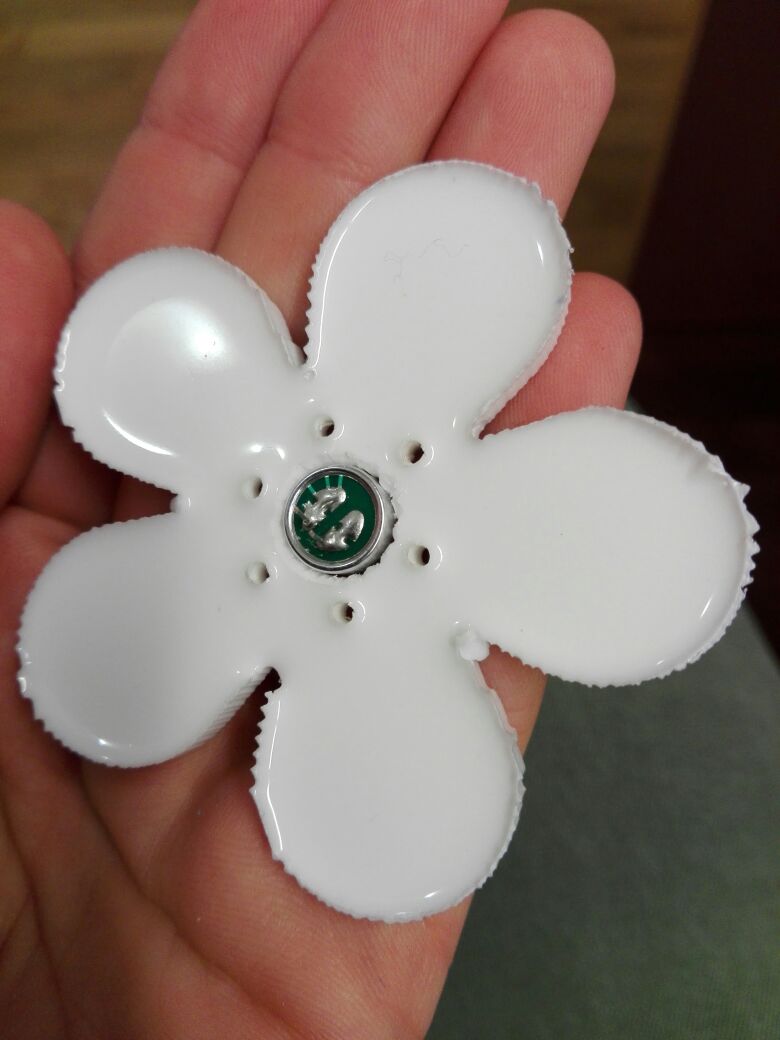 I then 3D printed microphone cap to put everything together:
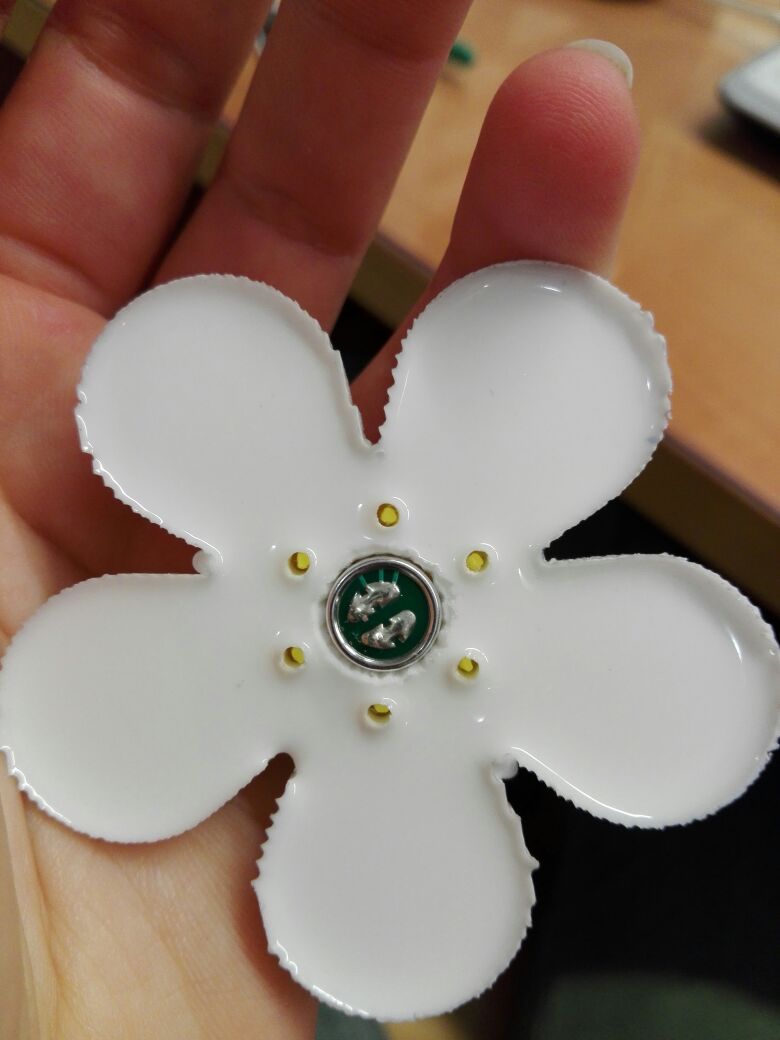
 Evem if I have to fix 3D printing settings I'm quite satisfied of the result :)
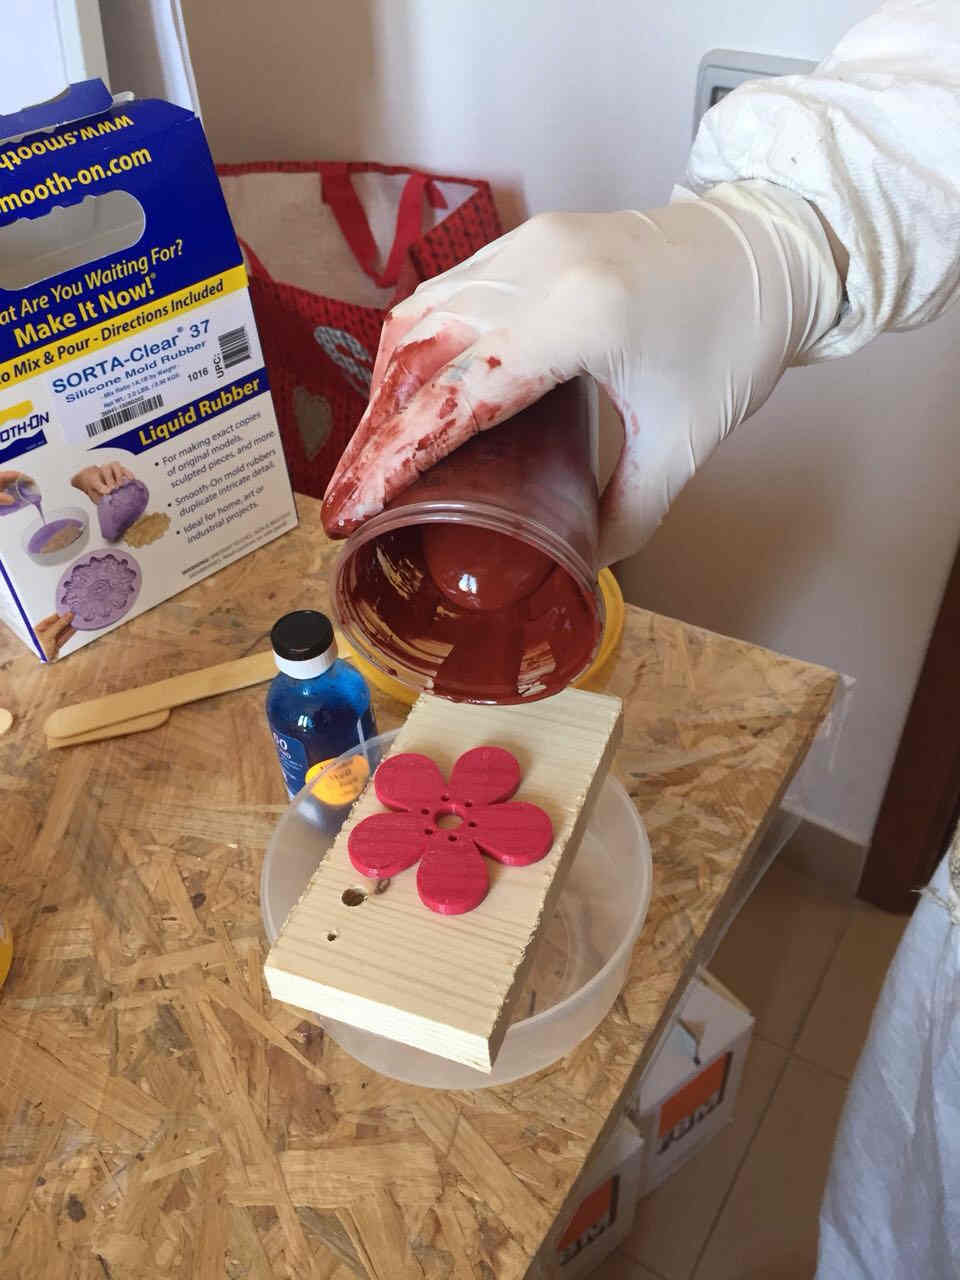
Mold Max
To make more tests, I also wanted to test Mold Max, which is a sticky blood-coloured paste used for
3D model casting method close to lost-wax casting. Still, there are two liquid to be mixed together: Part A (bigger can) and Part B (little blue bottle) that
have to be blended in 100A:3B ratio.
In my case, 3D model was very simple but Mold Max is very suitable with more complicated and detailed objects, since
it can catch little inlets very well (I'll show you later on ).
I 3D printed the same model I used to mill wax:
 I put the overall on and wore plastic gloves and put materials together in a plastic glass, so I stirred them.
I should have prepared a nice case for the model but I realize I didn't just when I was going to pour the blend onto the 3D printed part. I managed to escape
problems in a unbeseeming way:
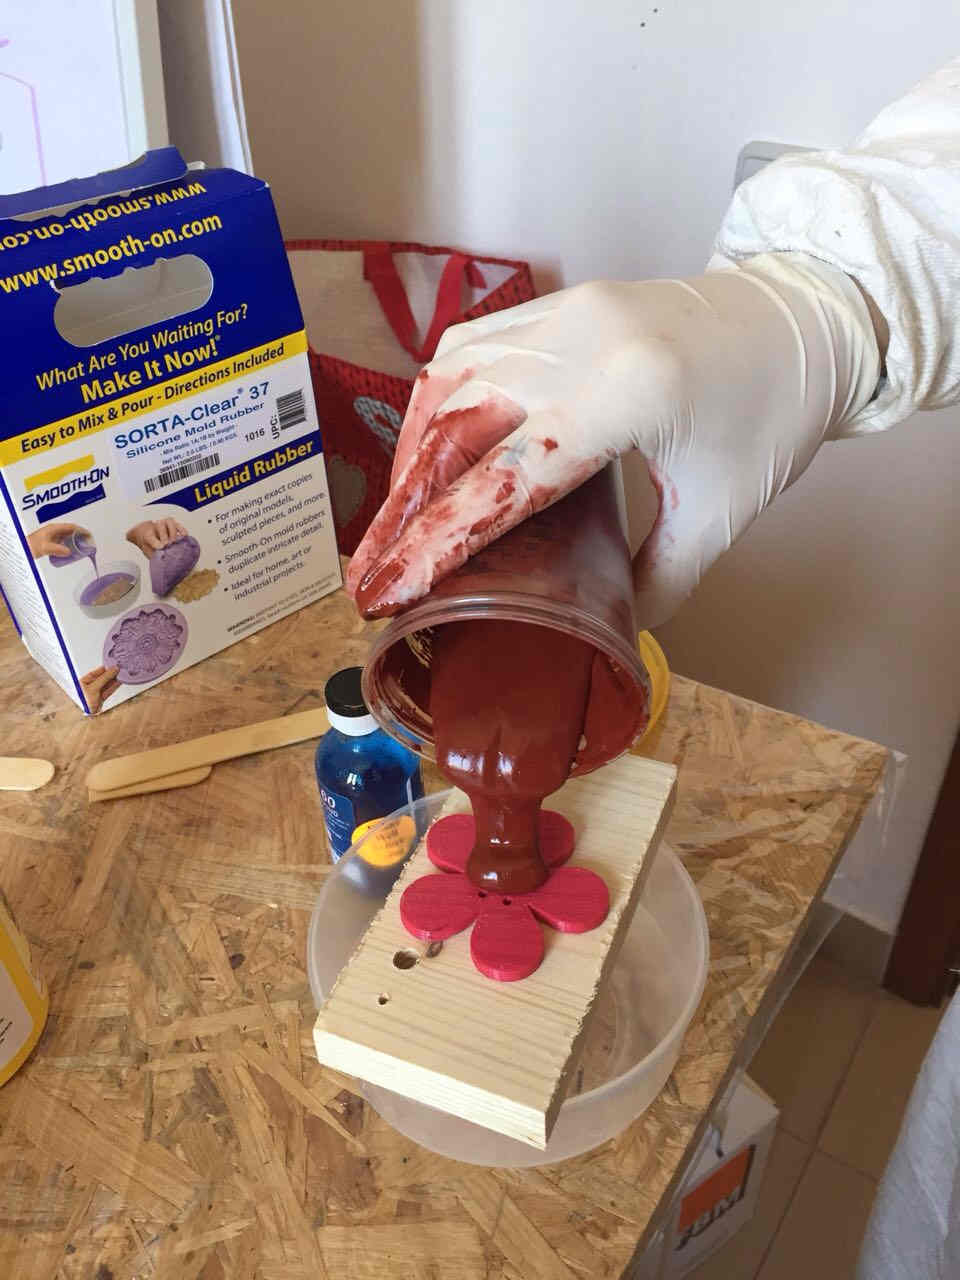
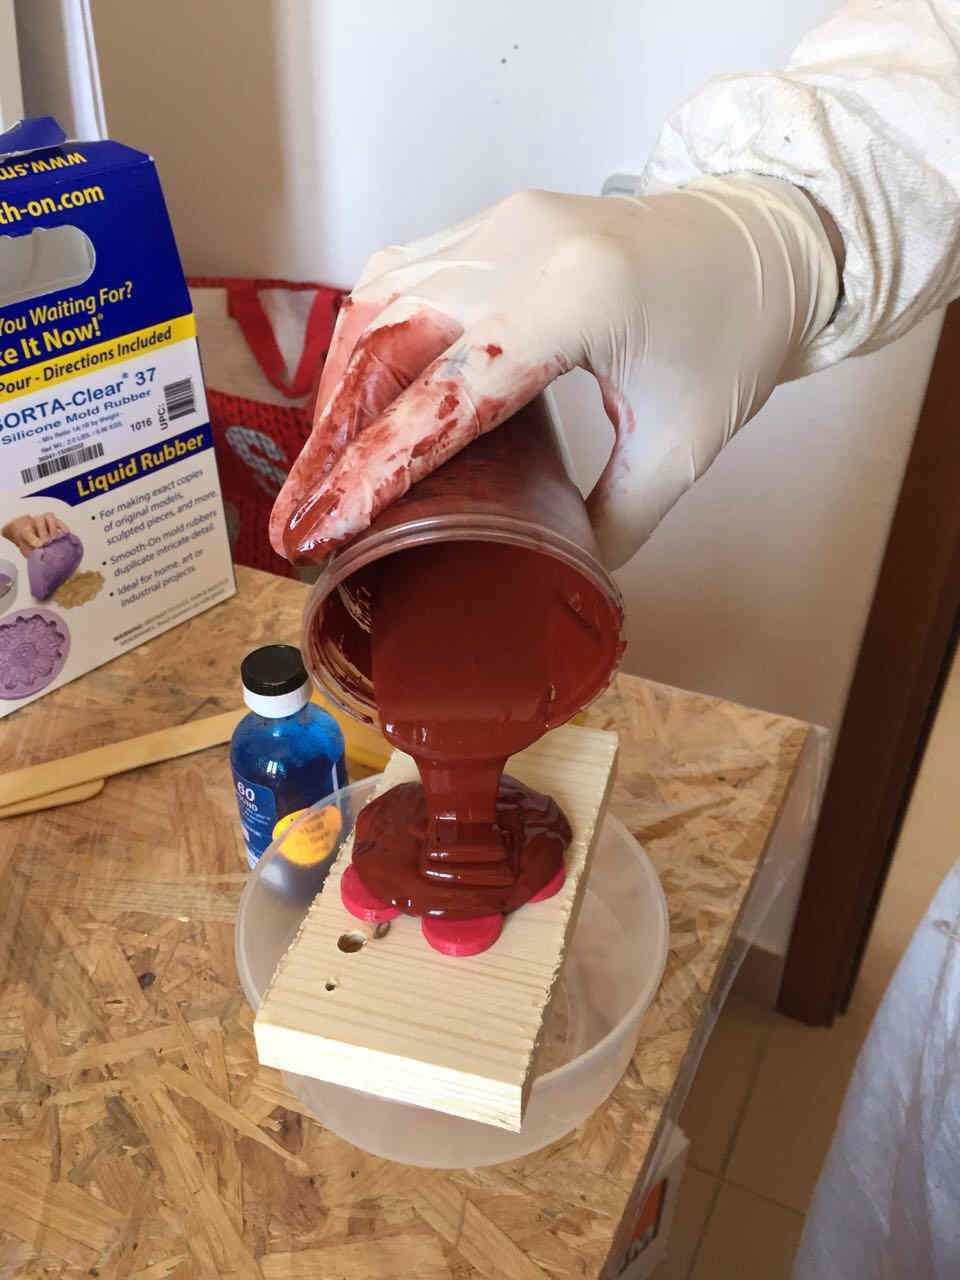
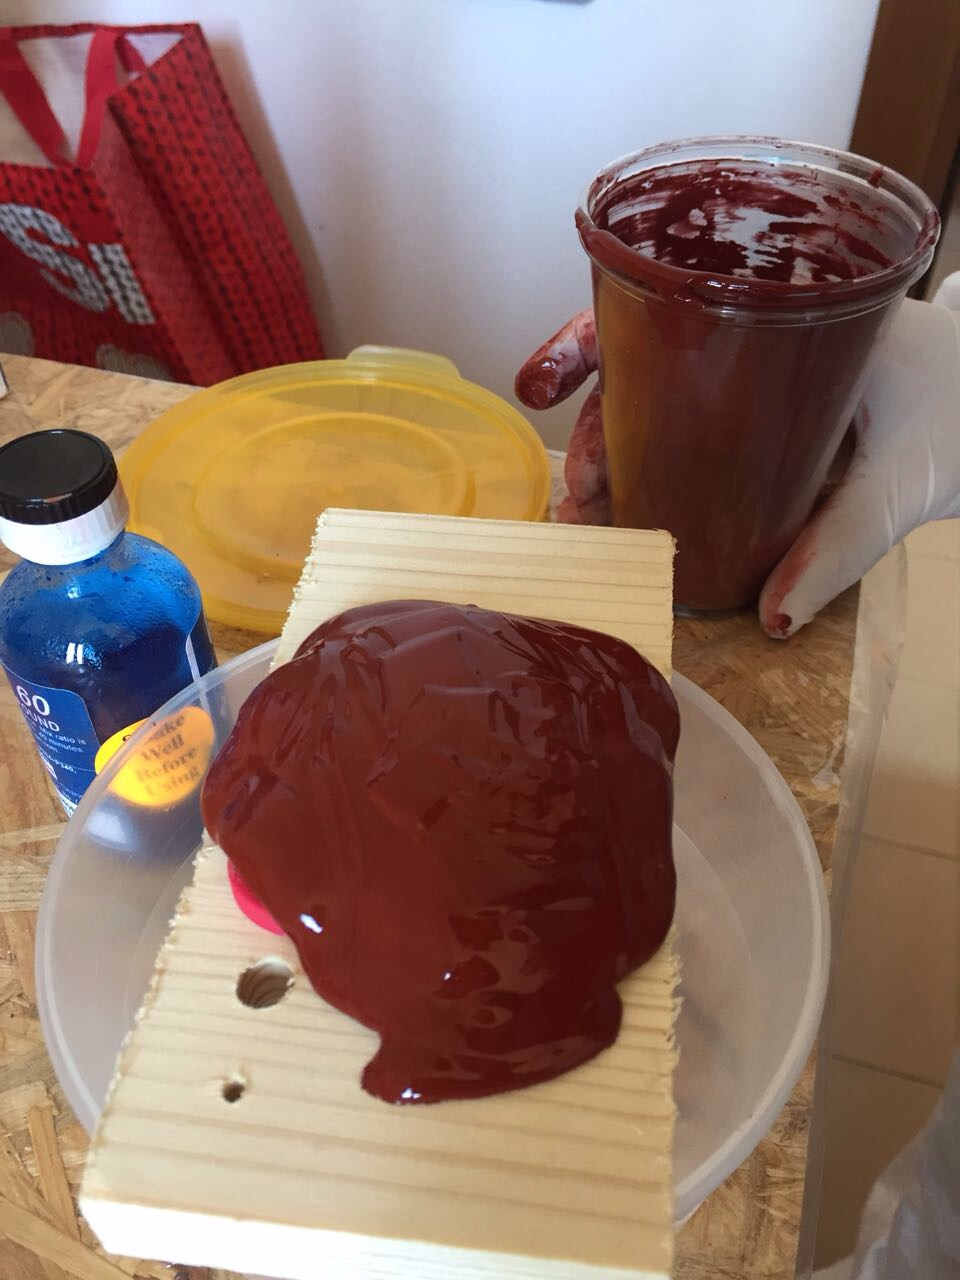 So viscous, isn't it? it didn't even drop into the plastic bowl.
Pot life is around 40 mins while Curing time is one day :/

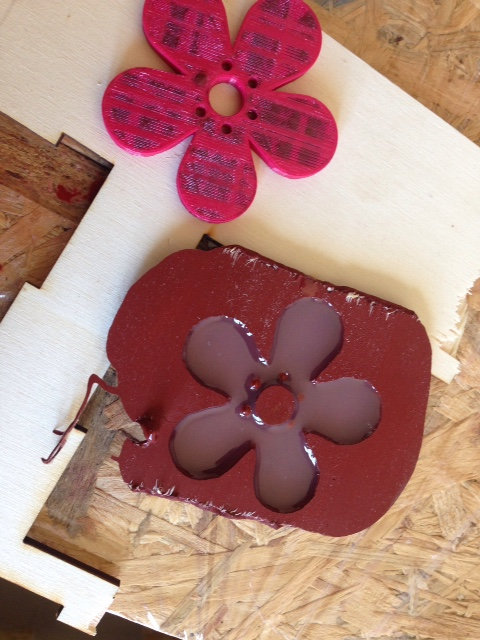
I so left it dry all weekend:
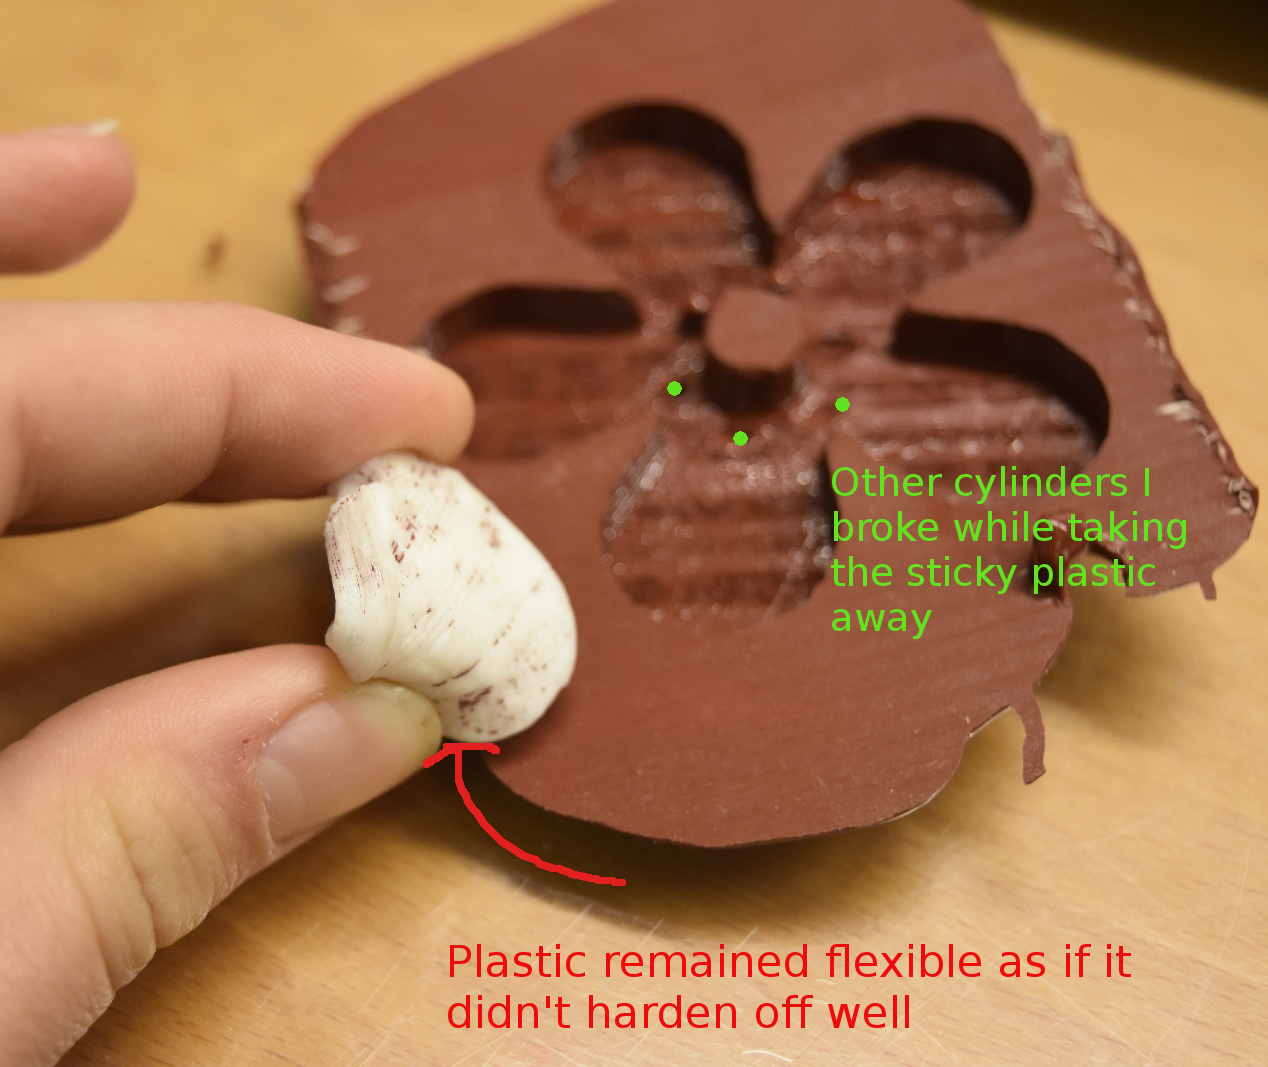
 Unfortunately, the paste managed to pass a bit under the model and that caused extremy widening. Consequently, I broke a cylinder while taking the model
out of the mold
Unfortunately, the paste managed to pass a bit under the model and that caused extremy widening. Consequently, I broke a cylinder while taking the model
out of the mold
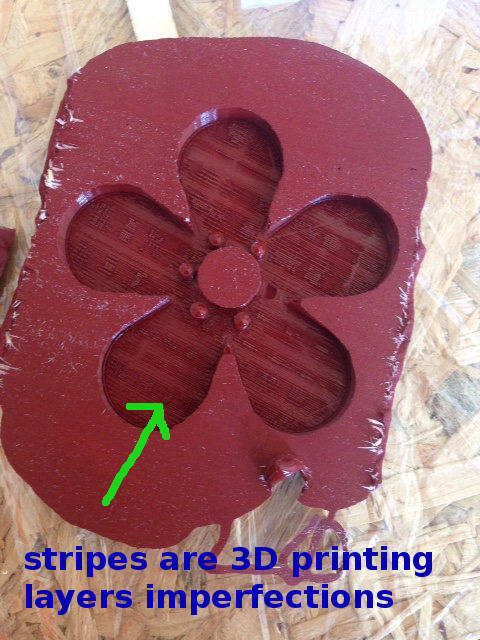
 As you can see, the paste catched layer lack of homogenity of the 3D printed part:
 Chiara made too much blend for her mold so I let her
pour liquid plastic into my mold (see above for materials and mixing ratio)
Chiara made too much blend for her mold so I let her
pour liquid plastic into my mold (see above for materials and mixing ratio)
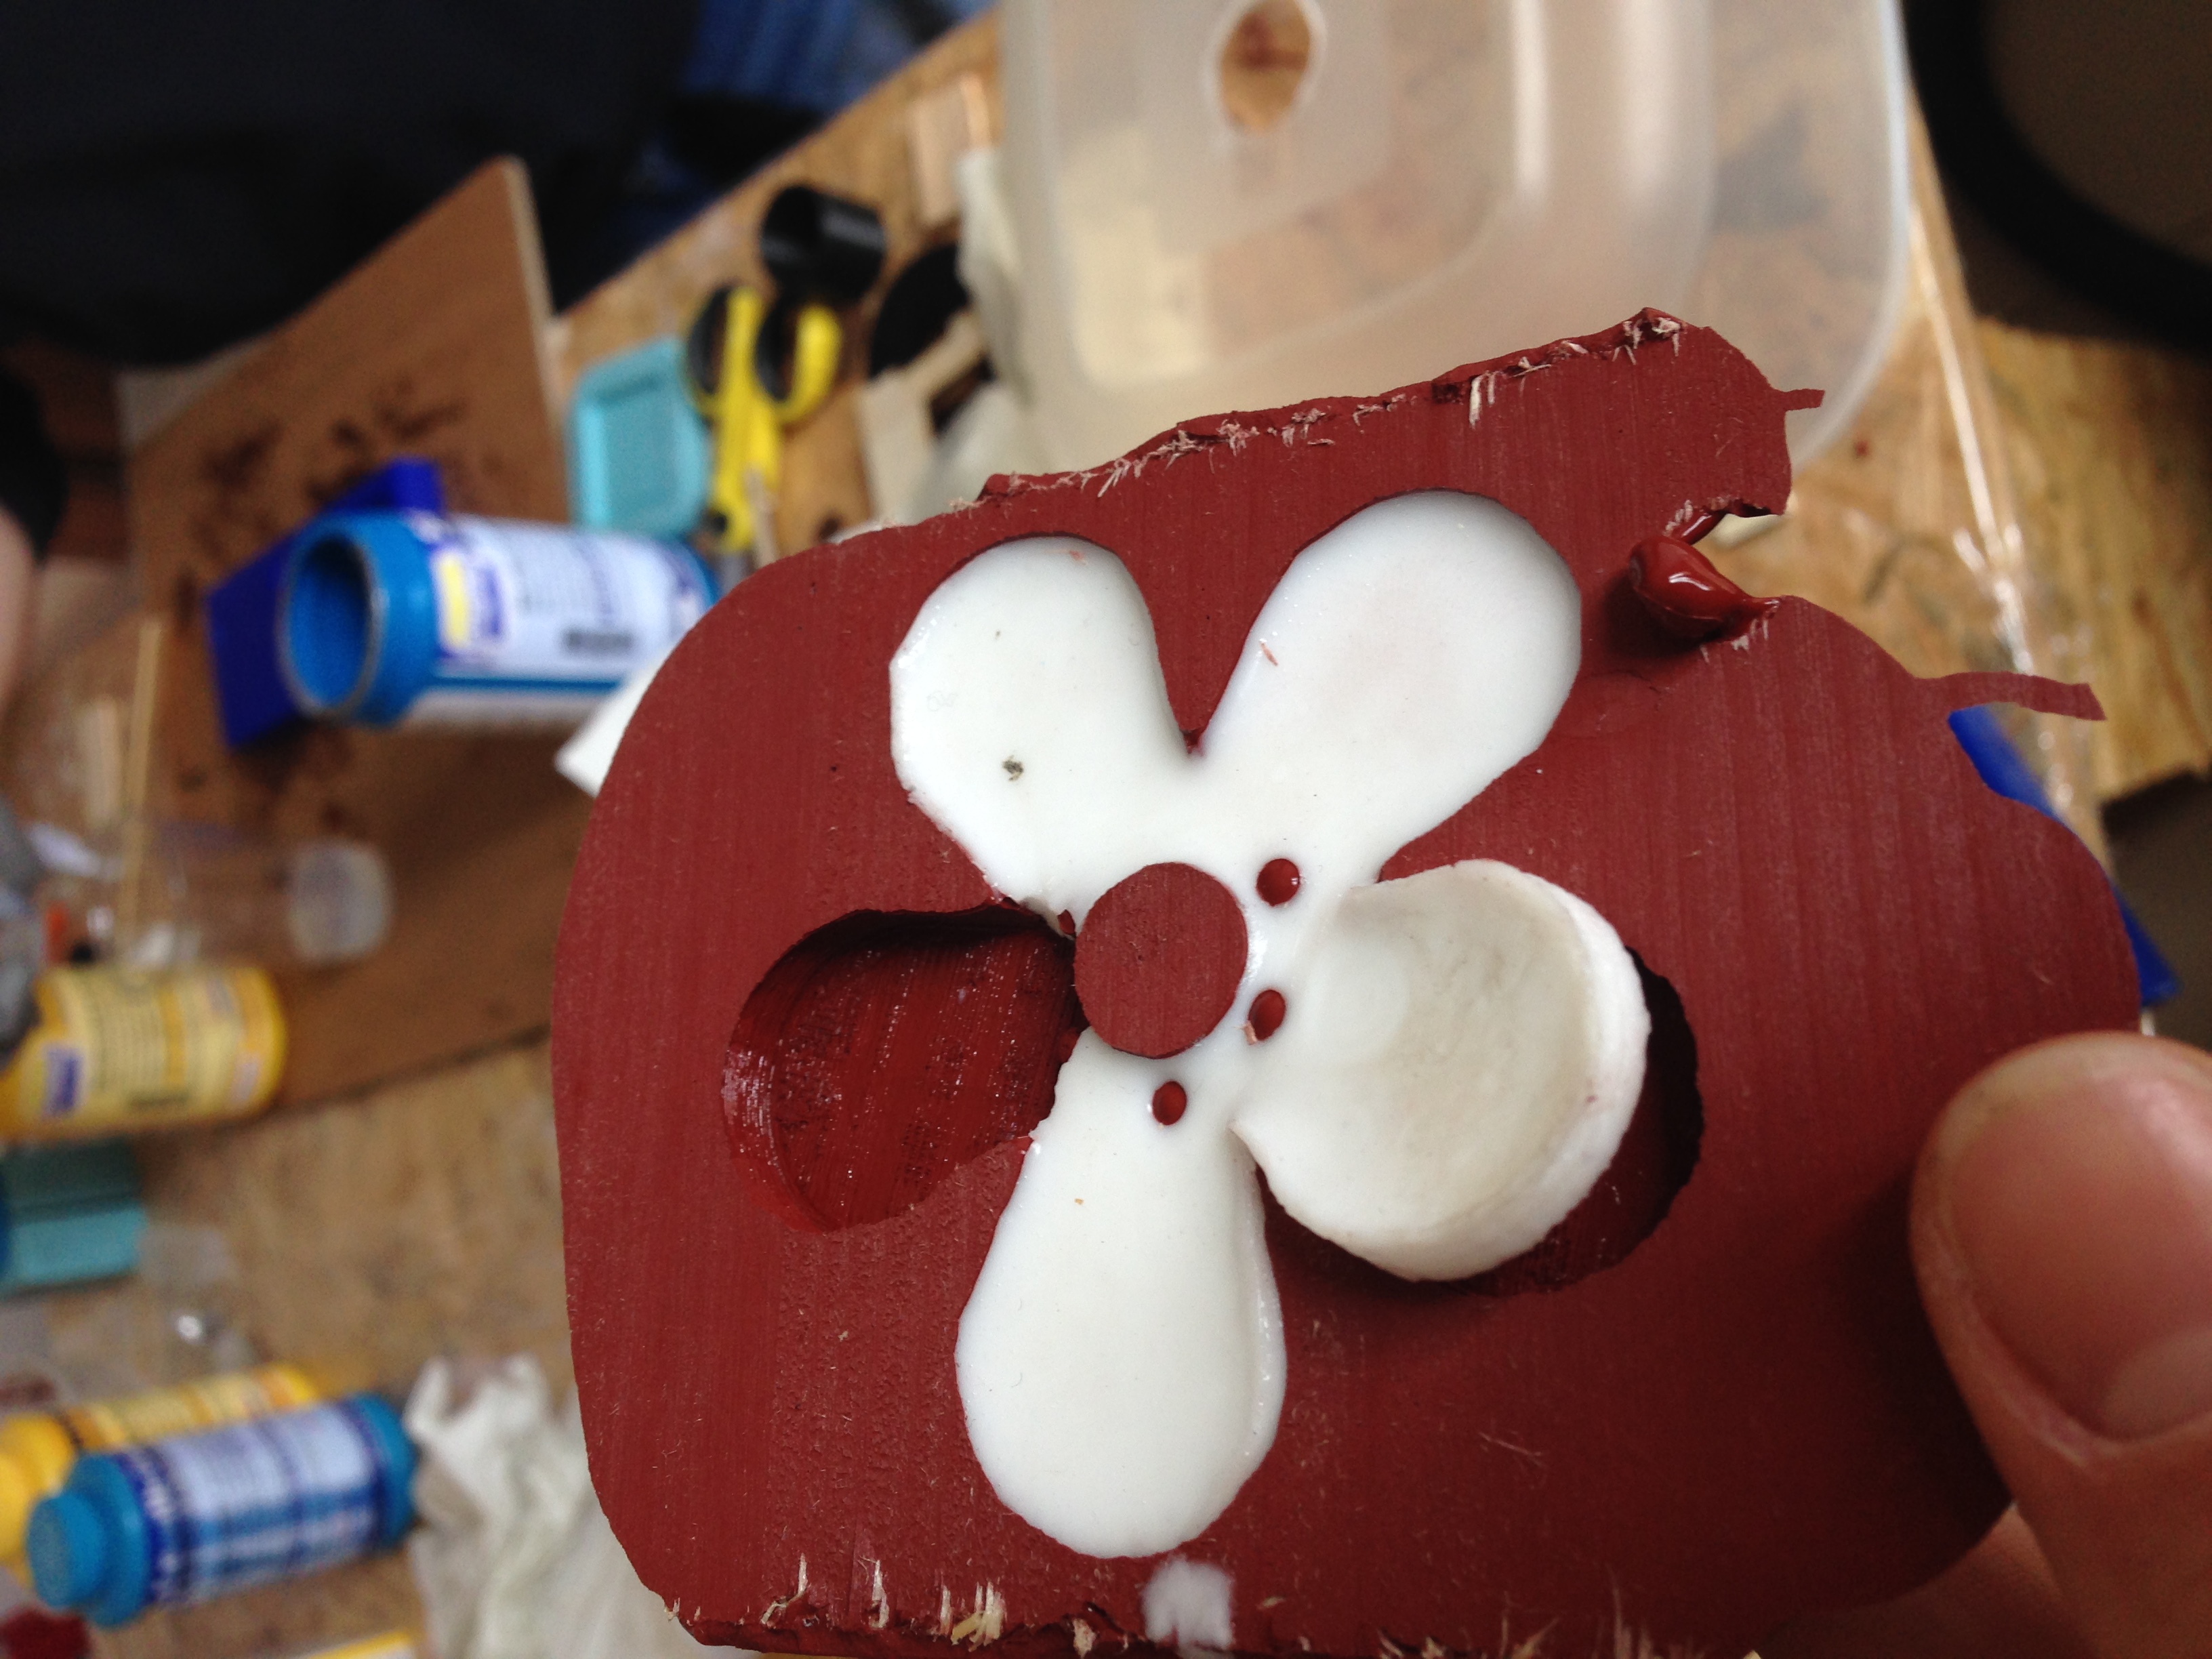
 I then waited curing time and then tried to take the mold away, but, using no release agent ( this was an ERROR, talcum powder
could have prevented my problems nicely), plastic resulted very sticky to the mold and I broke it while taking it out:
I then waited curing time and then tried to take the mold away, but, using no release agent ( this was an ERROR, talcum powder
could have prevented my problems nicely), plastic resulted very sticky to the mold and I broke it while taking it out:
Conclusion
This week was really nice to me, cause it put software and manual work at the same level. Although I would have experienced more, owing to turns we had to take for milling
wax with the Roland, I just made a simple mold, which wasn't bibalve neither it contained complicated shapes. I think this was a necessary starting point to me, because
I wanted to become friendly with process and security measures to follow first, then maybe I'll be able to exploit more complex mold designs and different materials.
By now, I feel I made progress in my final project development as far as it regards design parts and that excites me a lot: living a project development, from nothing
to final shape (if you really believe in the scope of what you are doing) is doubtlessly the most amazing facet of objects you see around you, the hidden history of even the most trivial
tool you can think about makes it something to be approached with respect and curiosity.
Download