______    _      ___                _                             _____  _____  __   ______
|  ___|  | |    / _ \              | |                           / __  \|  _  |/  | |___  /
| |_ __ _| |__ / /_\ \ ___ __ _  __| | ___ _ __ ___  _   _       `' / /'| |/' |`| |    / /
|  _/ _` | '_ \|  _  |/ __/ _` |/ _` |/ _ \ '_ ` _ \| | | |        / /  |  /| | | |   / /
| || (_| | |_) | | | | (_| (_| | (_| |  __/ | | | | | |_| |      ./ /___\ |_/ /_| |_./ /
\_| \__,_|_.__/\_| |_/\___\__,_|\__,_|\___|_| |_| |_|\__, |      \_____/ \___/ \___/\_/
                                                        |_|
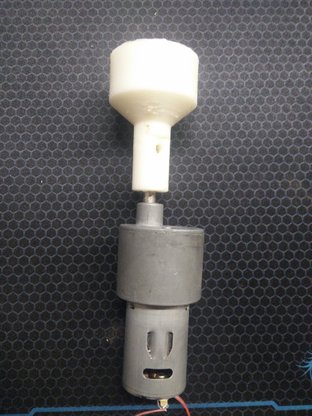
My final project consists of a spherical bin that has to be rotated 2-3 rotations at a leisurely pace at periodic intervals, I've acquired a 12v 10 rpm - geared DC motor for the above mentioned purpose.
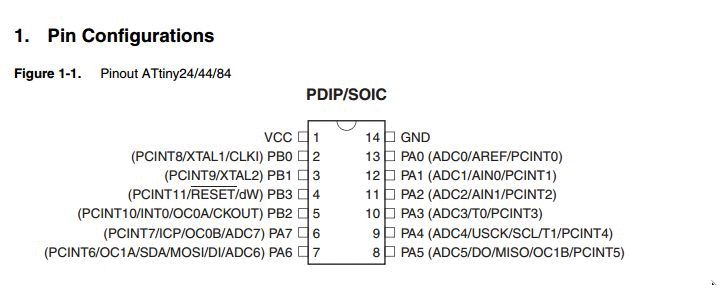
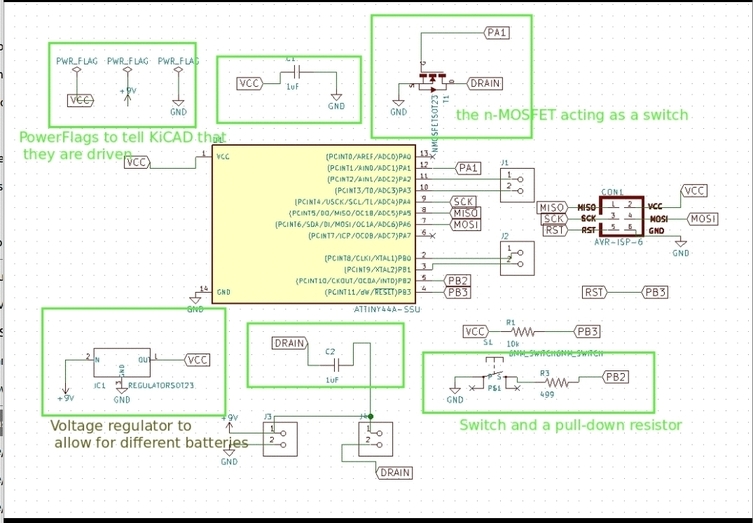
The pinout diagram from the datasheet is what I used to pick the digital pin I needed to drive the gate of the n-mosfet
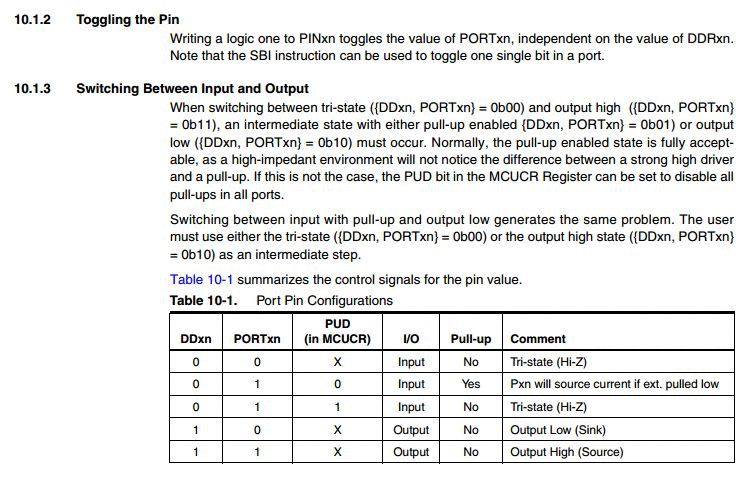
I selected PA1 - it is a general I/O port and the description is as follows

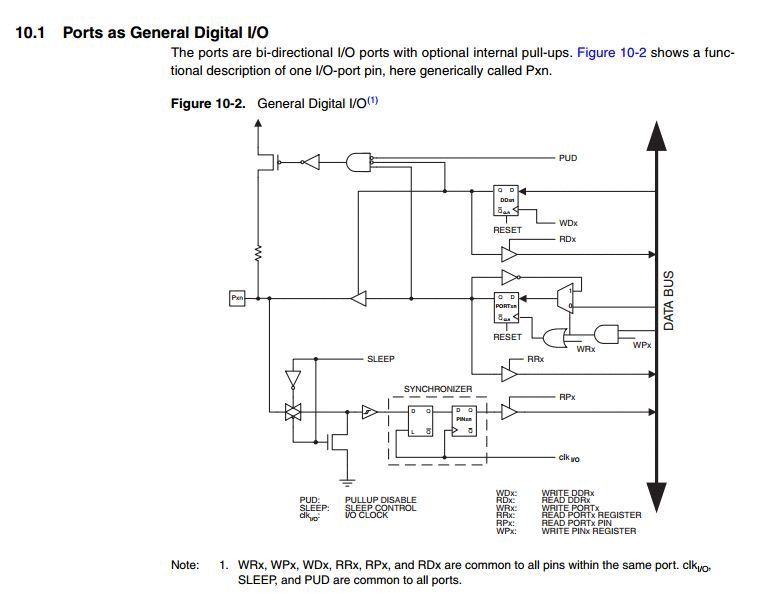
The block diagram for a I/O pin
I used arduino libraries to toggle the pins on/off as seen in the part-code below
void loop() {
  digitalWrite(8, HIGH);   // turn the MOSFET-GATE on (HIGH is the voltage level)
the command digitalWrite is doing the following
invoking the compiled version of FabModules
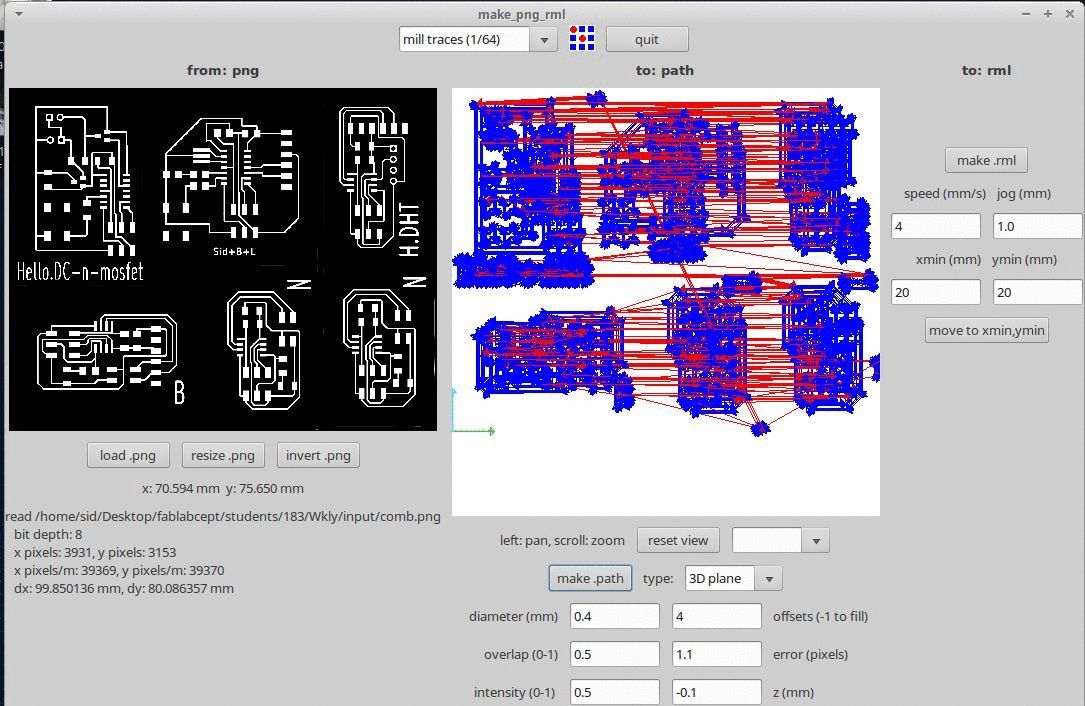
Selecting the 1/64 profile to mill traces
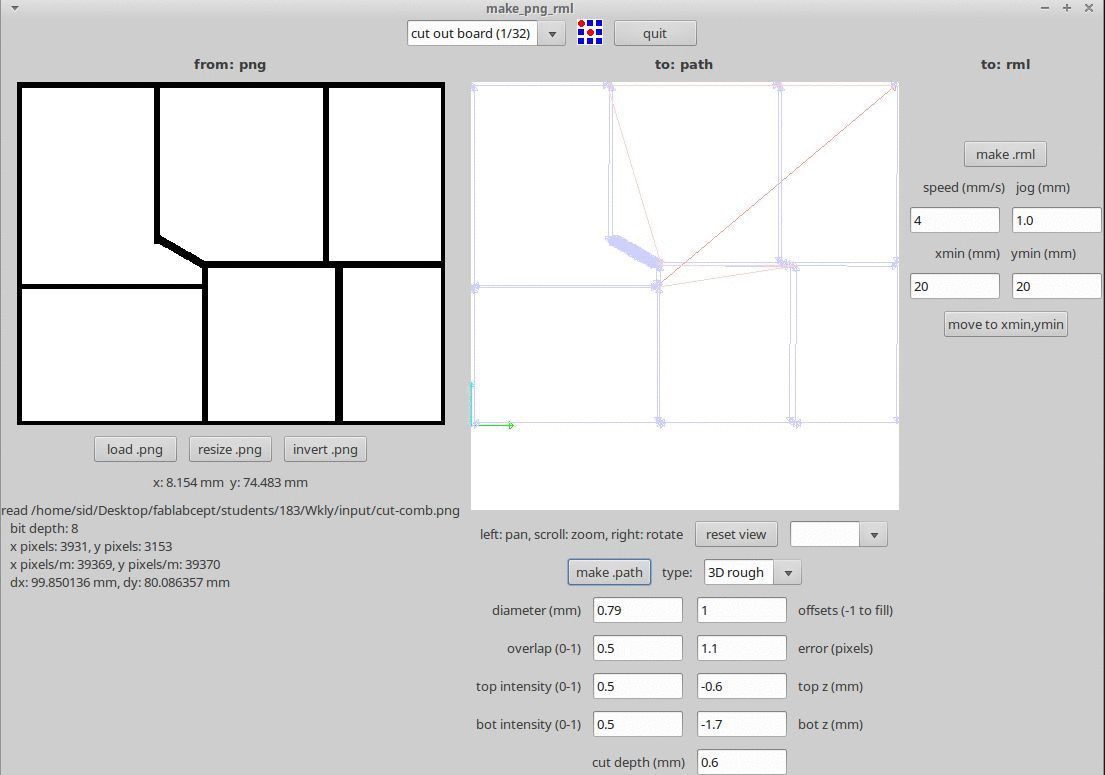
Selecting the 1/32 profile to cut edges
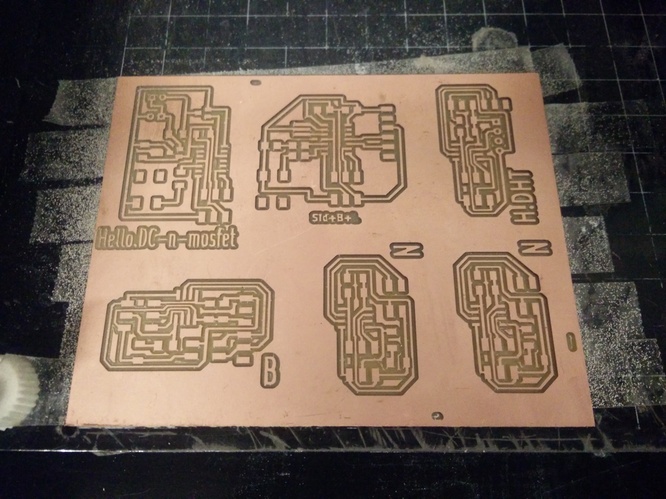
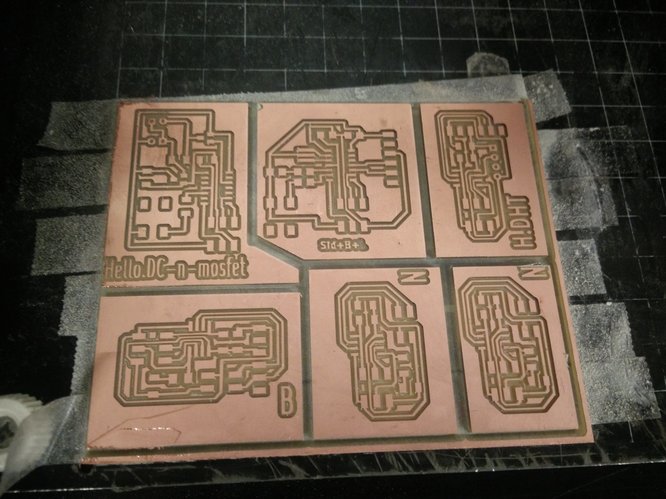
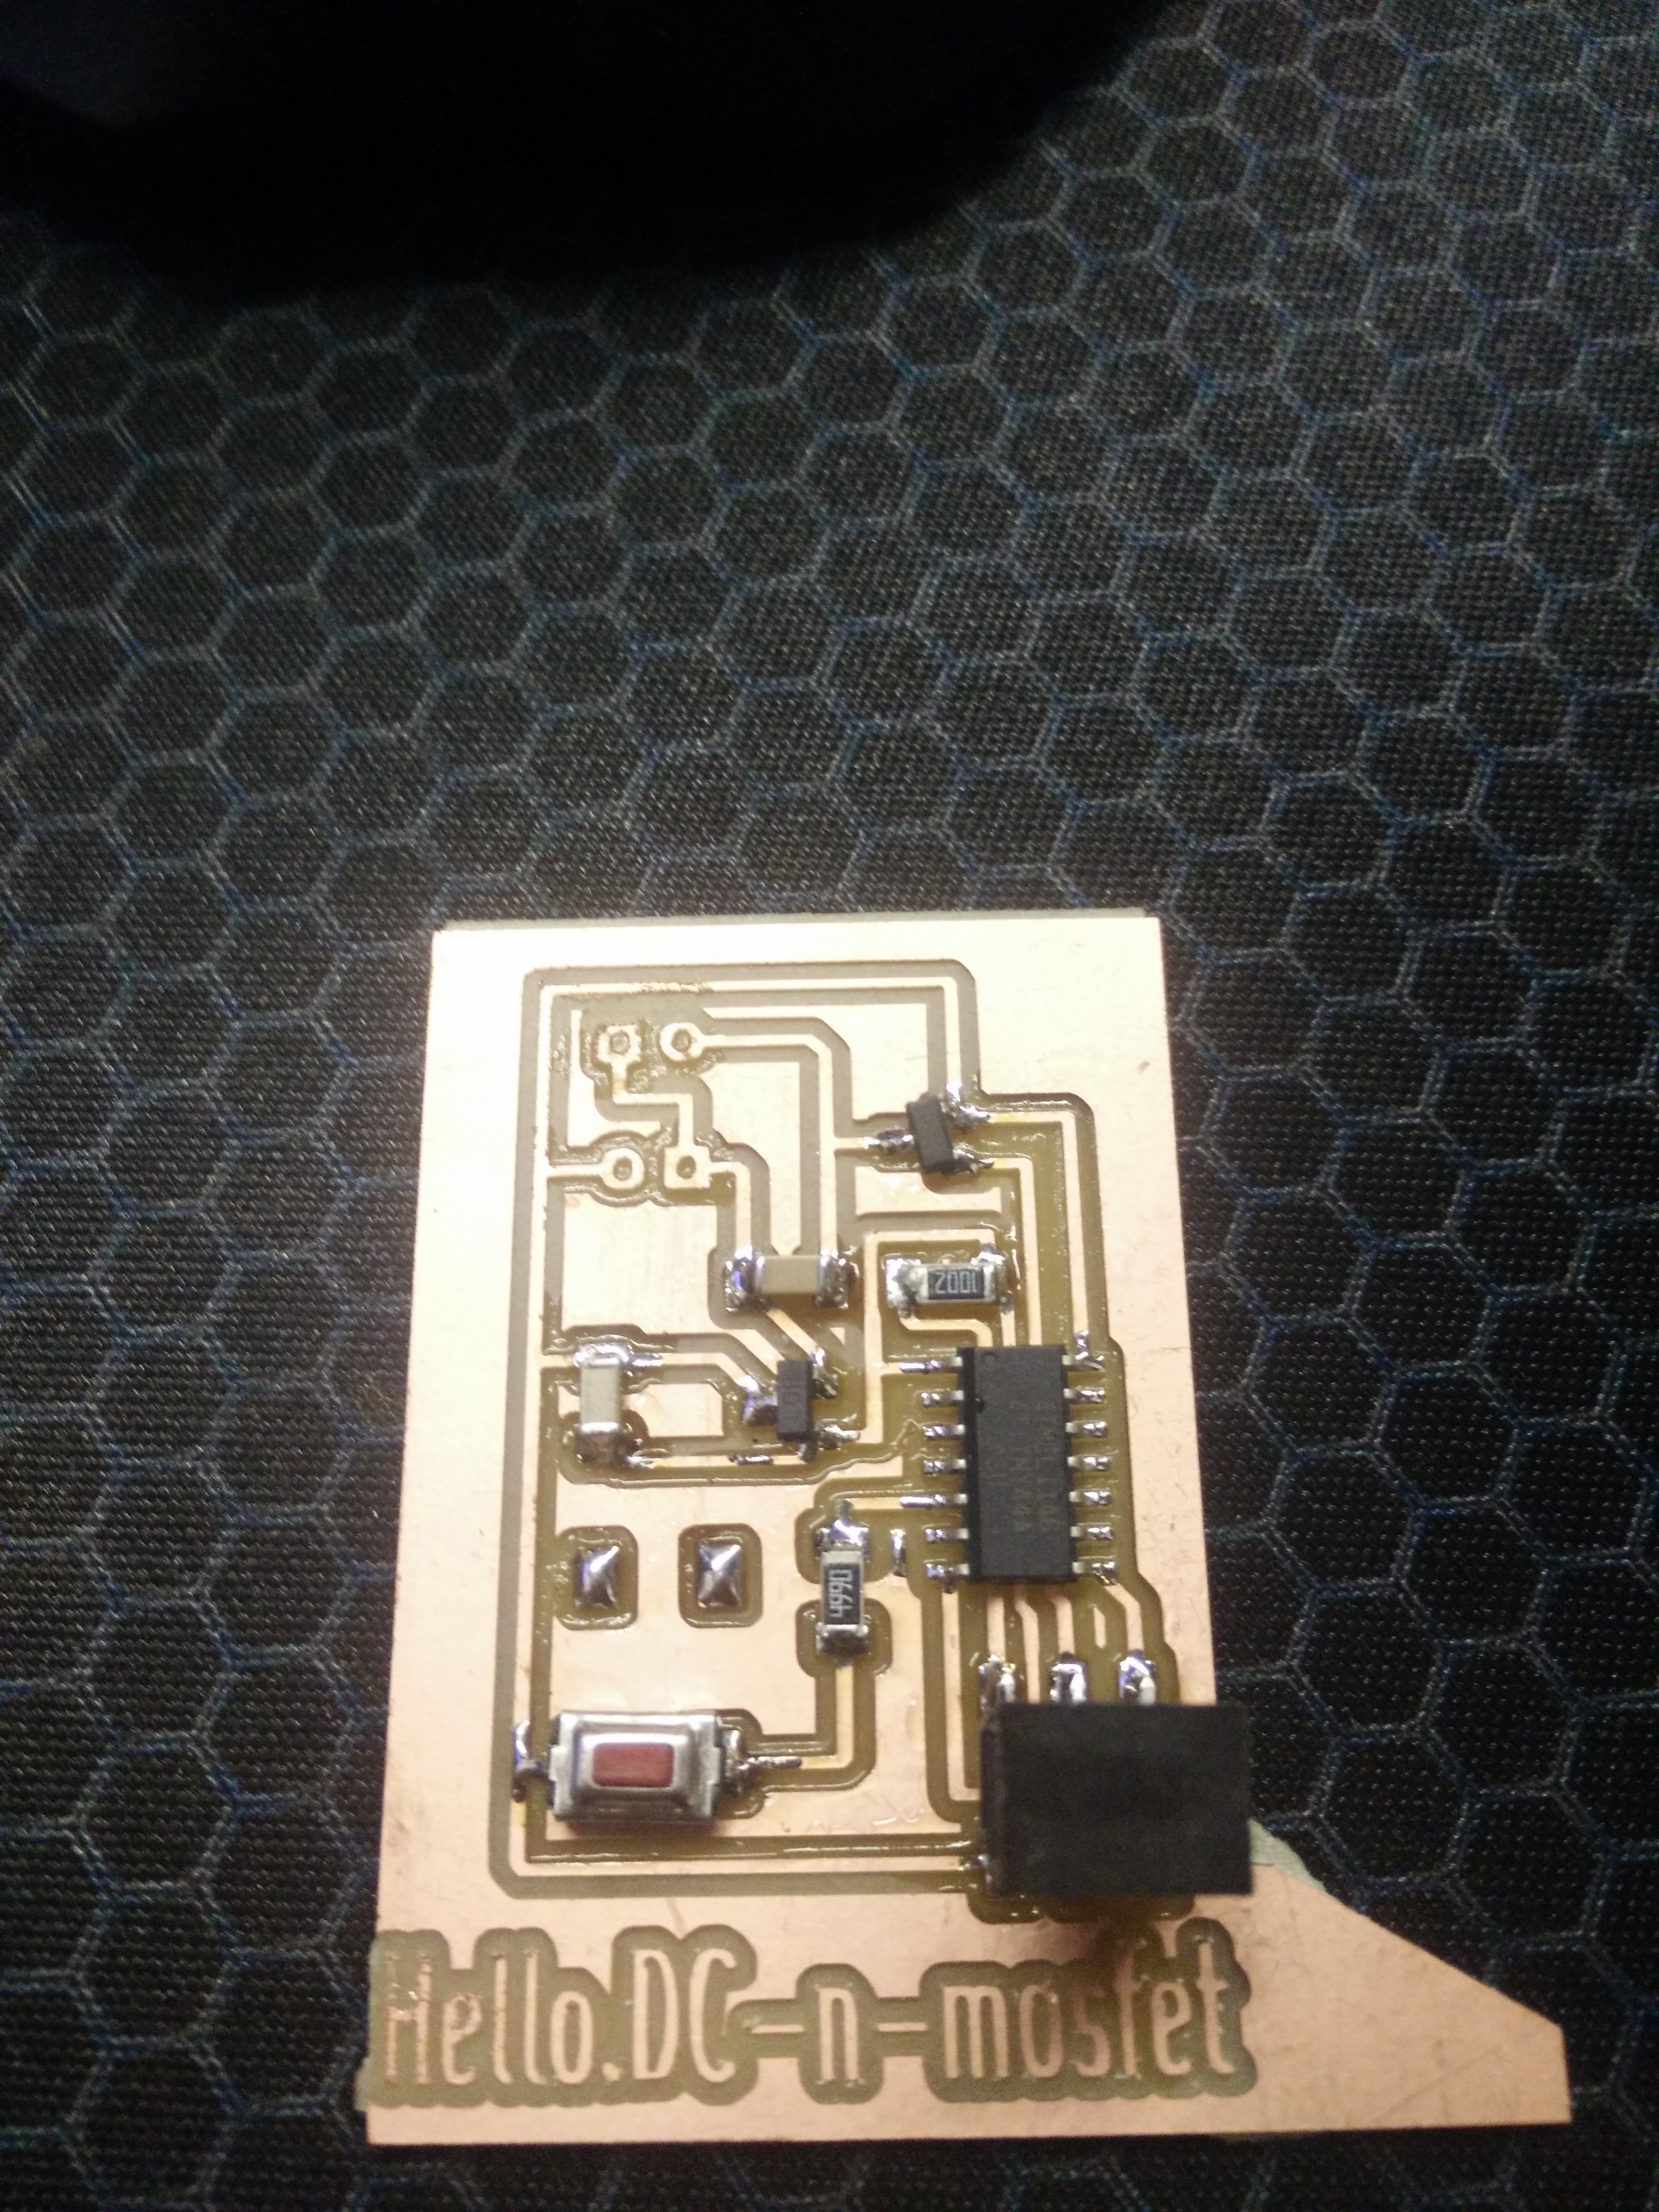
Milled boards :)
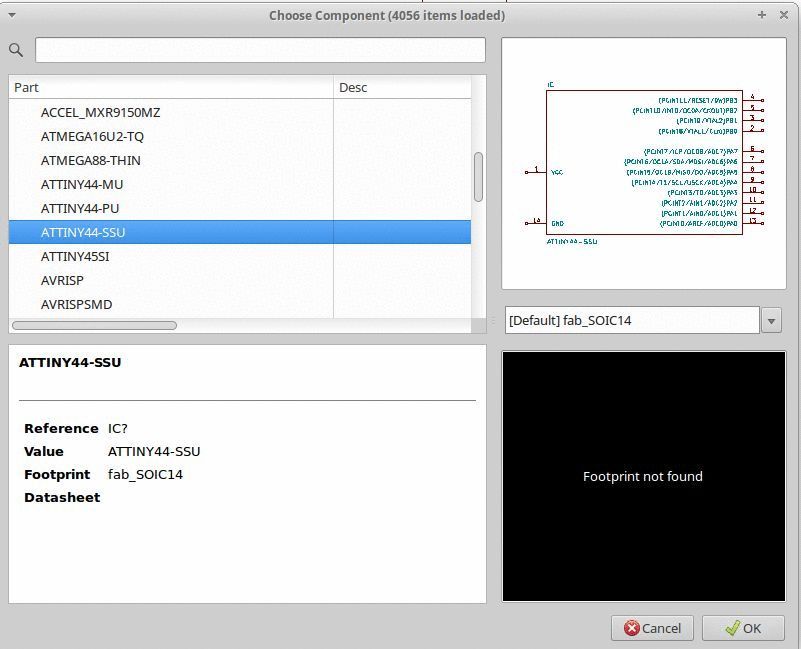
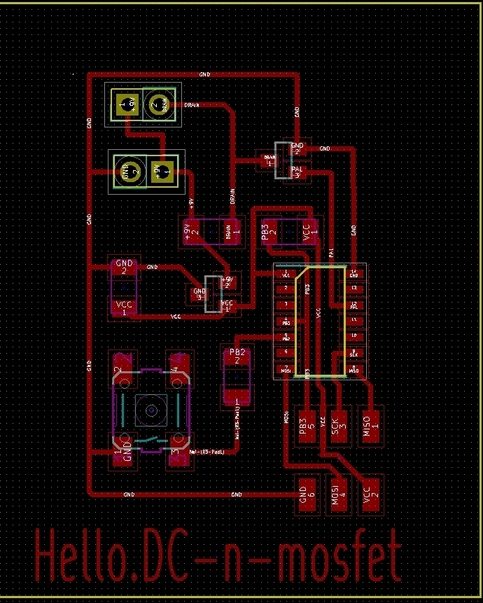
Adding components in the schematic is done through this dialog, 'a' is the keyboard shortcut to add components.
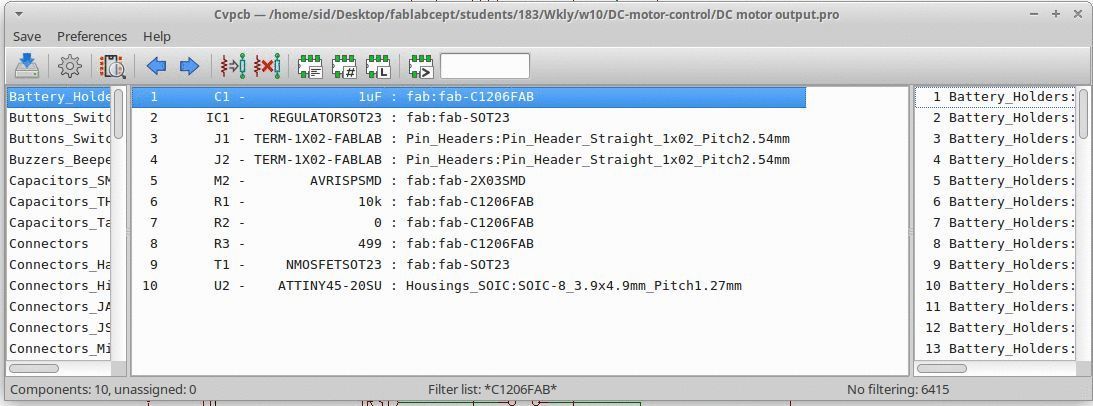
This is the CvPCB window where all the components you have added to your schematic will need to be assigned footprints here
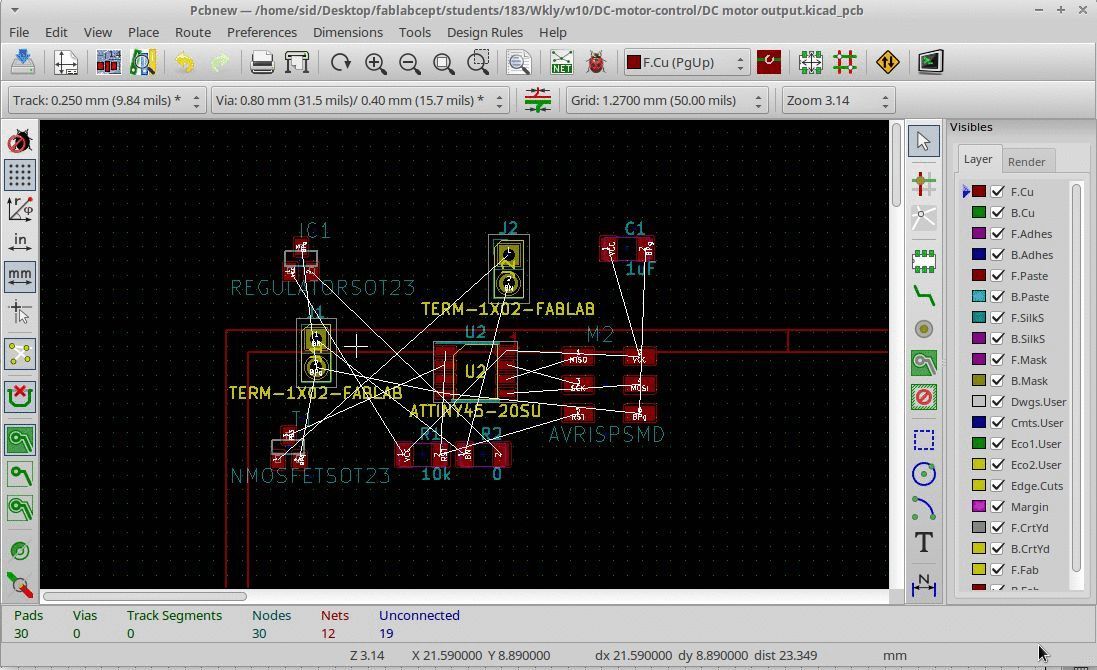
After assigning footprints, one has to generate the netlist and then read that netlist in PCBnew - which is the PCB layout software
View post on imgur.com
Used Arduino UNo as the programmer, reluctantly as my FabISP's micro-usb port is very finnicky and the lab's avrmsk2 wasn't responding
              void setup() {
  // initialize digital pin 13 as an output.
  pinMode(8, OUTPUT);
}

// the loop function runs over and over again forever
void loop() {
  digitalWrite(8, HIGH);   // turn the MOSFET-GATE on (HIGH is the voltage level)
  delay(10000);              // wait for 10 secondS
  digitalWrite(8, LOW);    // turn the MOSFET-GATE off by making the voltage LOW
  delay(300000);              // wait for 5 MINUTES