
The group assignment for the week 09 was:
- make a machine, including the end effector
- build the passive parts and operate it manually
- document the group project and your individual contribution
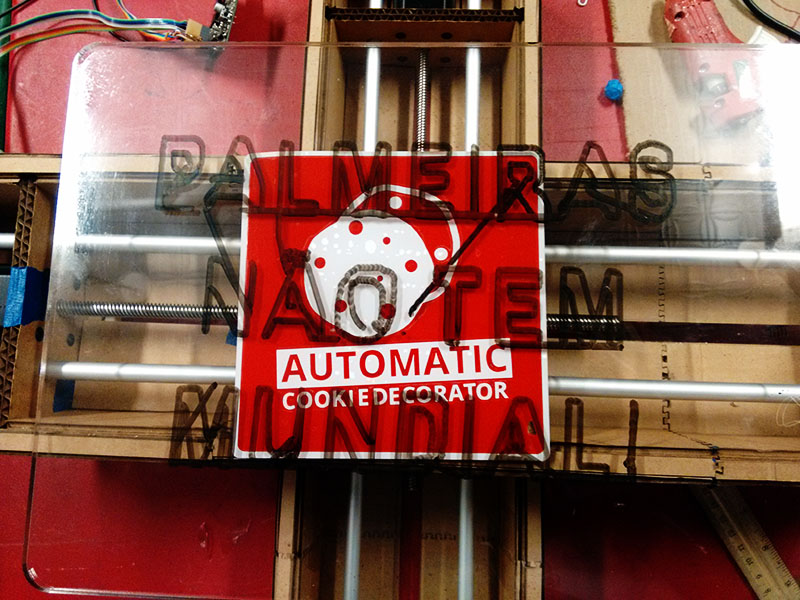
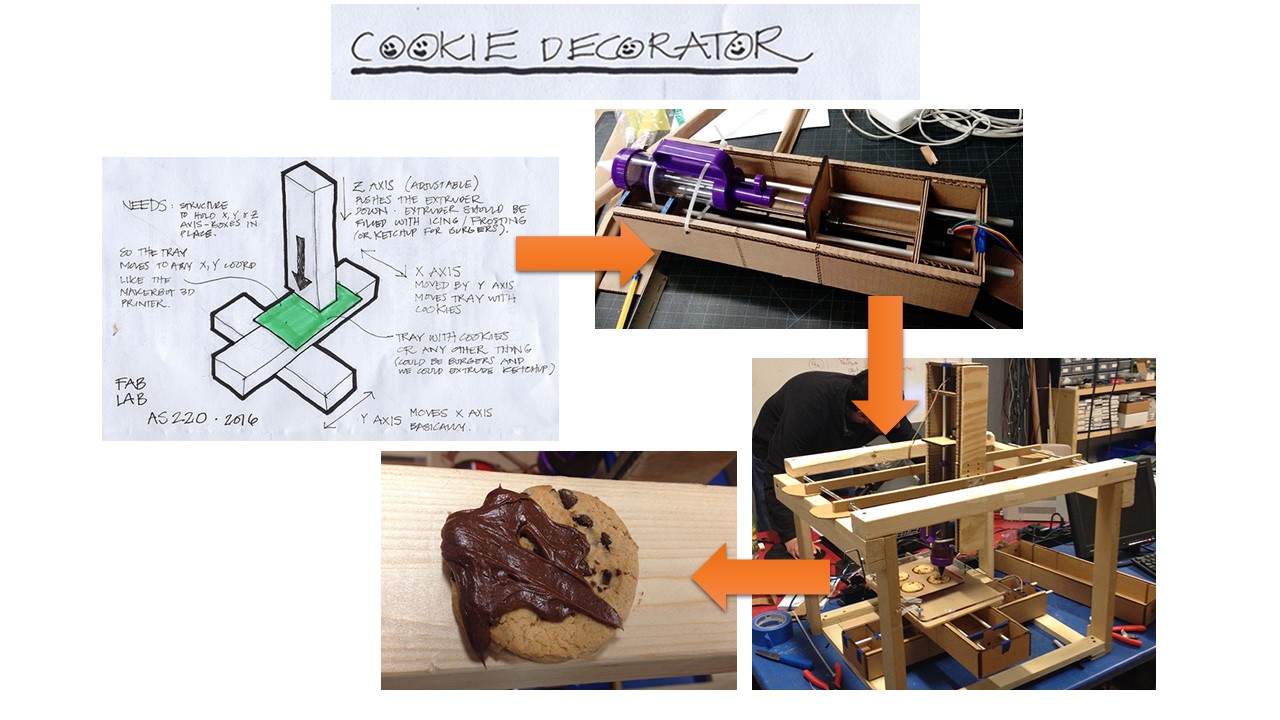
We decided to make a Cookie decorator machine. Basically it will extrude frosting or icing to decorate cookies, cup cakes or even cakes.
You can check other spots of documentation of this project on these links: Nicolas Kist and Ryan Dean
So we first started by making each of the axis, from the original drawings from Nadya Peek.
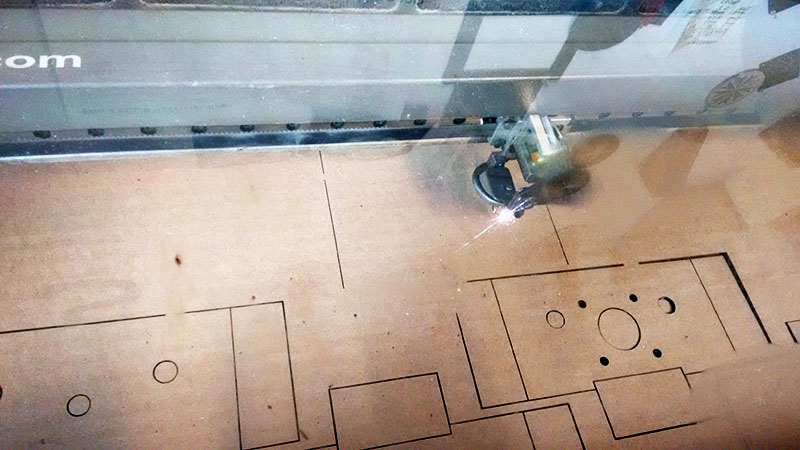
We first started by cutting the cardboards at the Laser cutting machine. The laser cutter at our lab is only 12 x 24 inches, so to make one single module we need to cut three pieces of cardboard and asseble them together.
To better fix them together we used some transparent tape on the joints.
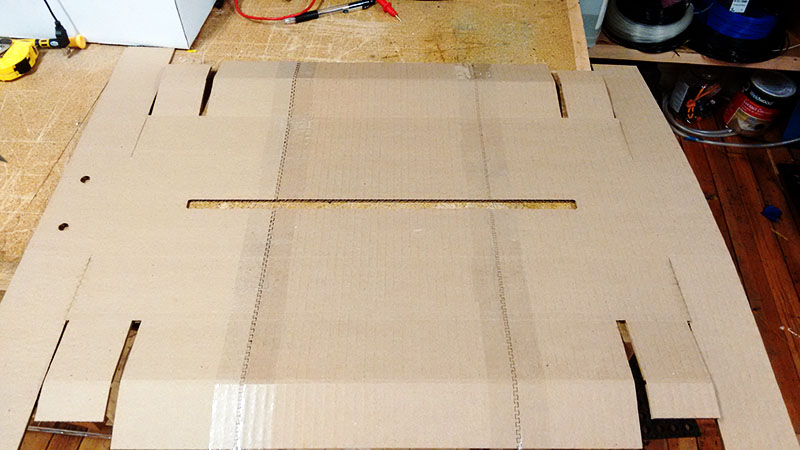
After cut the cardboard we assembled it. Note that to assemble we needed to fix the motor in the middle of the assemble process. We had to make all again because at first we glued everything without put the motor in it.
After assemble it all we started to work on the programming part. Python was brand new for me, but it realized it is not that difficult. Of course as I got the programs already from Nadya's git, i had to try understand what each part means. Some important functions I found was:
portName = 'name-of-your-port' - You need to know in which port on your computer the Fabnet is conected. In Windows you can find it at Device Manager
elements.leadscrew.forward(#) - Sets how much the motor rotate for each command. use 8 to ride 1 mm when you send a command that changes in 1 from the previous command.
stage.xNode.setVelocityRequest(10) - Sets the speed of the axis. Be careful because after 15 the motors start to go to fast and makes some bad noises.
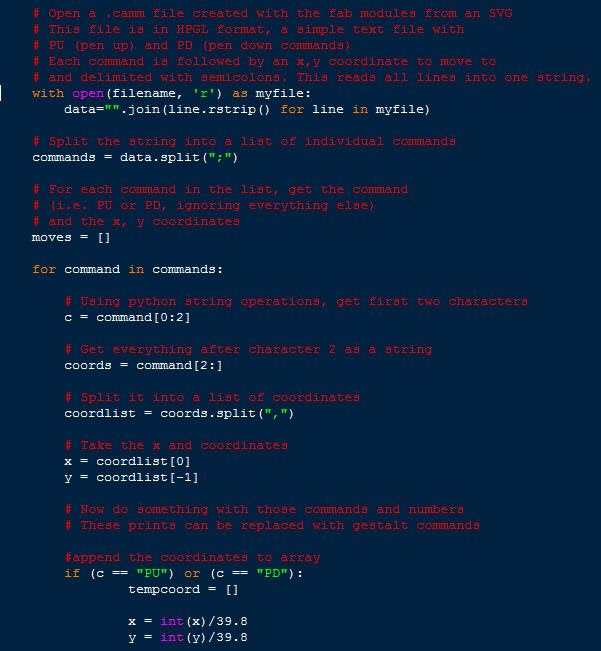
As Shawn Wallace sent on e-mail regarding using the Fab Modules to the MTM, I was trying to figure out how to transform the Fab Modules coodinates to out machine. I made some tests using 10mm square svg file, using the Fab Modules, got their coodinates at the file .camm.
To travel 10mm at the Vynil cutter, I realized that the commands .camm range in around 398. For our machine, to travel 10 mm our commmands range in 10. So all we have to do is to divide the coordinates from the Fab Modules per 39.8, and we will get a good coordinates for our machine.
I did it at the programming and it worked pretty well. Here is how this part of the code looks like:
And then they worked prety well:
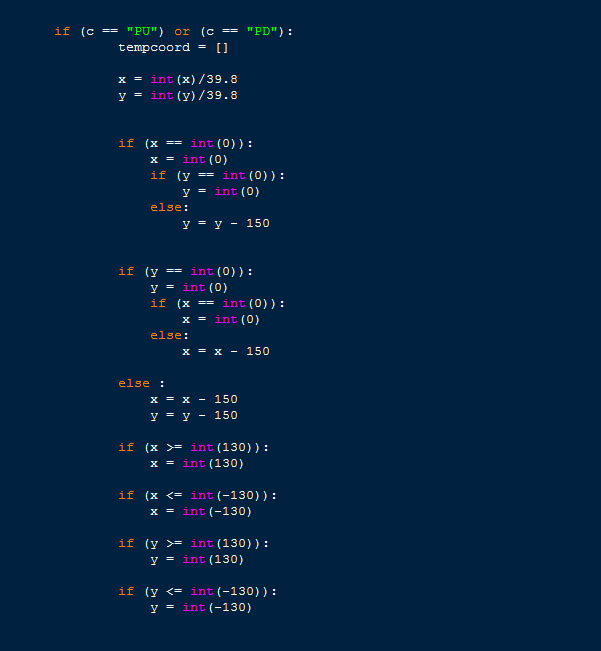
Then I tried to work in some limits for the printer, to prevent the carriage of coming out of the fuse. To do this I made some more programming after divide the coordinates by 39.8. So here how it looks likes:
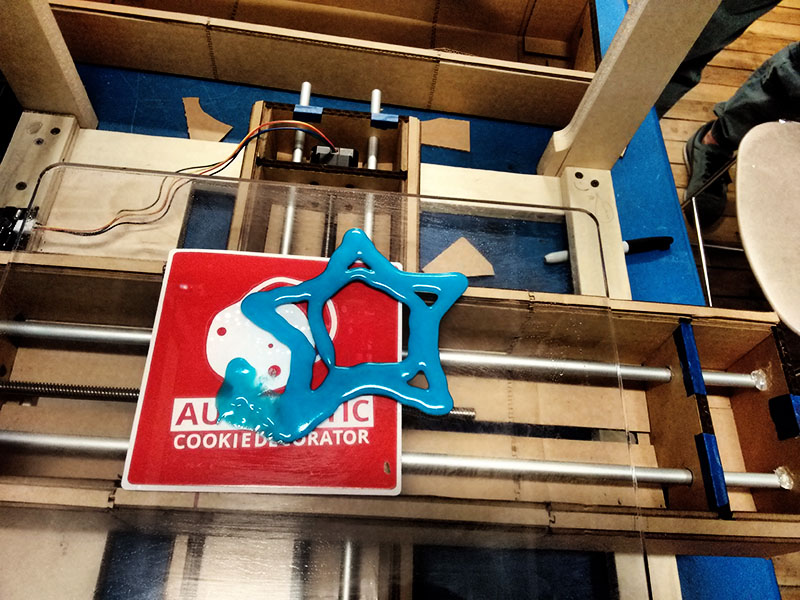
Yeah, so I tested the movements with different patterns of draws. At first before use the icing extruder I used a pen just to write it down on the place. It also worked well.
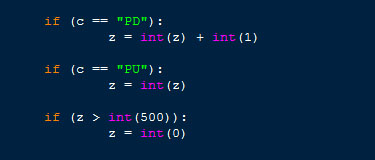
So next step was to figure out the extruder. I also made some tests changing the extruder speed but I found the solution at elements.leadscrew.forward(#), using 18 instead of 8. To make it push the frosting out of the syringe I made this code to recognize when its PU (Pen Up) or PD (Pen Down) from the Vynil Cutter code. So if it is PU the axis does not move, if its PD then add 1 to the coordinate and move it. This way we got a quite good movement for our extruder. Here is the code:
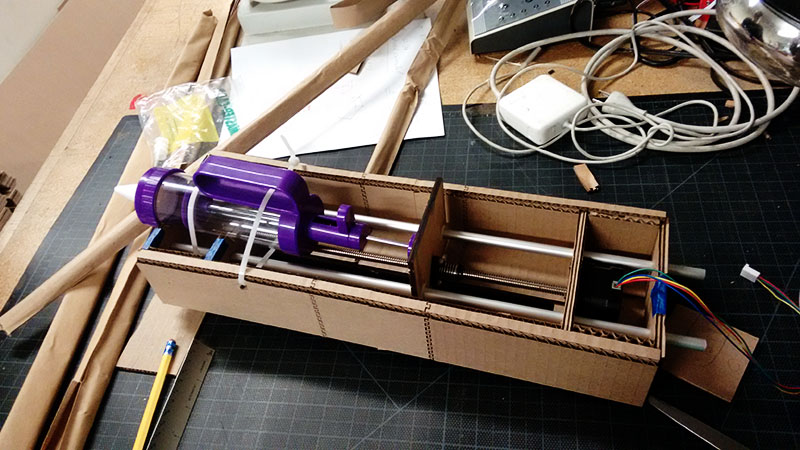
Then we bought our frosting syringe to assemble it at the extruder axis. We made a little pywood board just to push the syringe. Nicolas assembled it and we first tested using icing, but we was without cookies, so we just tested on the acrilic plate made by Drew. It worked pretty well, but our icing was too liquid that sometimes it comes out from the syringe without push it.
I tought that the icing was coming out because the hole at the nozzle it was to big (5mm diameter). So a made another one and 3D printed it. We didn't test with icing because we ran out of it. But the next day we tested using frosting. We found that frosting it is harder to push out from the syringe and almost impossible using the new 3D printed nozzle. So we went back to the original one.
So basically the process of making it was:
All the main files we used for this assignment are available here:
Python file: camm-to-cookie-icing.py
New 3D printed Nozzle: new_nozze.stl
.camm sample file: pentagononstar.camm