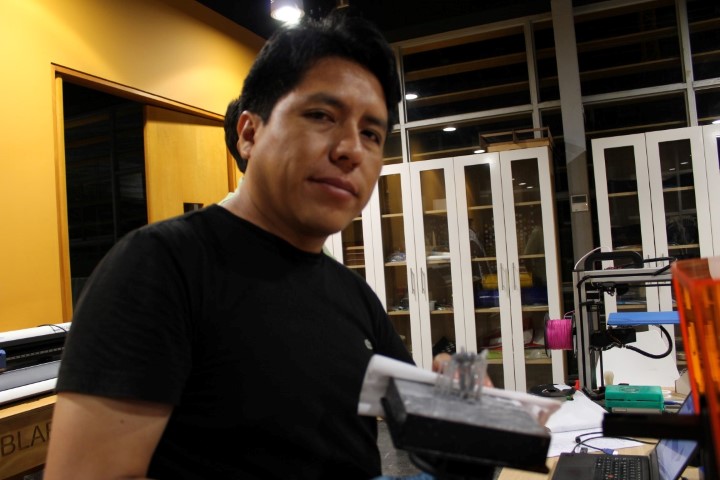
3D scanning and printing
Have you:
- Described what you learned by testing the 3D printers
- Shown how you designed/made your object and explained why it could not be made subtractively
- Scanned an object
- Outlined problems and how you fixed them
- Included your design files and ‘hero shot’ photos of the scan and the final object
Described what you learned by testing the 3D printers
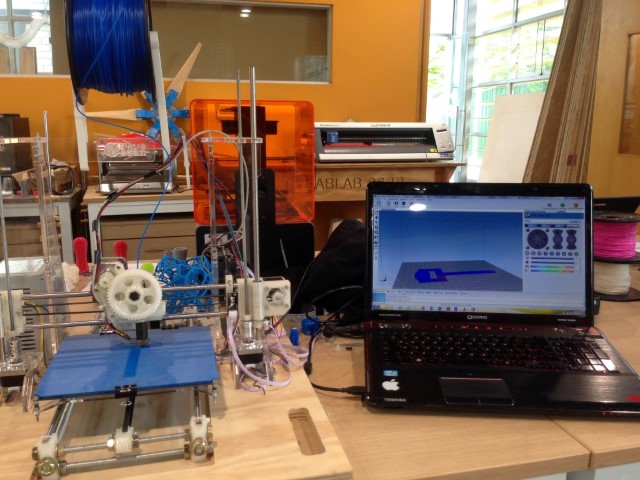
I could test these printers:
- Felix 2.0
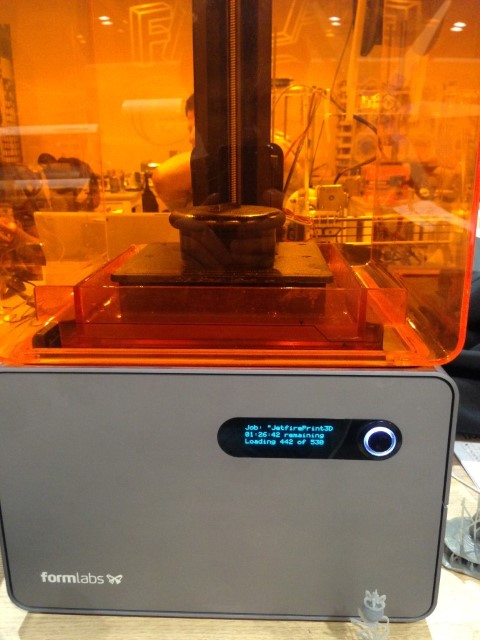
- Formlabs Form 1+
Felix 2.0
Main specifications:
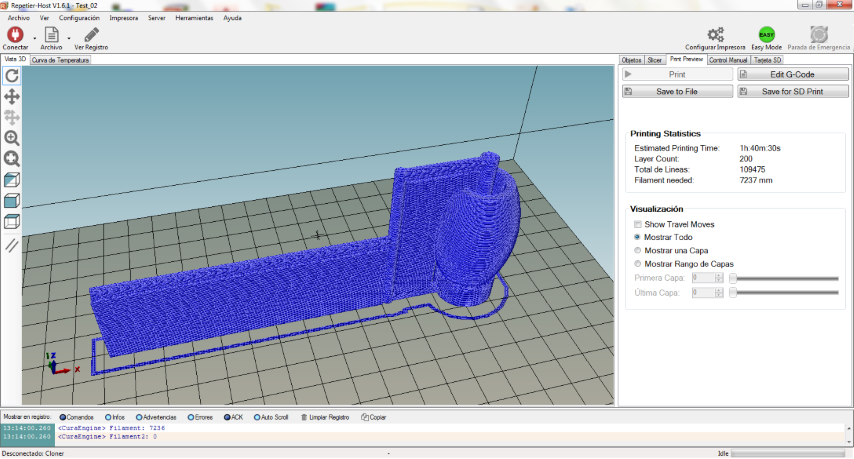
Technology: FDM
Print volume / build size (X,Y,Z): (255x 205x235)mm 12.28 LITRES
Resolution (Z-AXIS): 0.05 - 0.35 mm
Accuracy: 0.05 mm
Print Speed: 150 mm/sec
Nozzle diameter: 0.35 mm
Filament Diameter: 1.75 mm
Filament Material: PLA
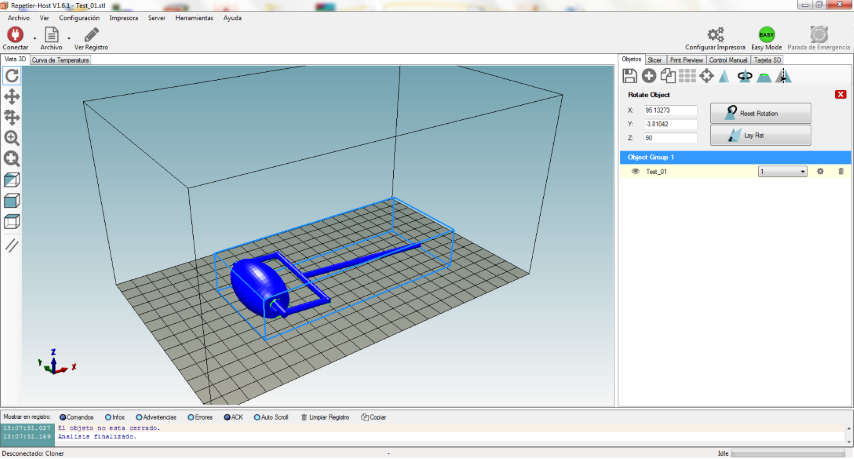
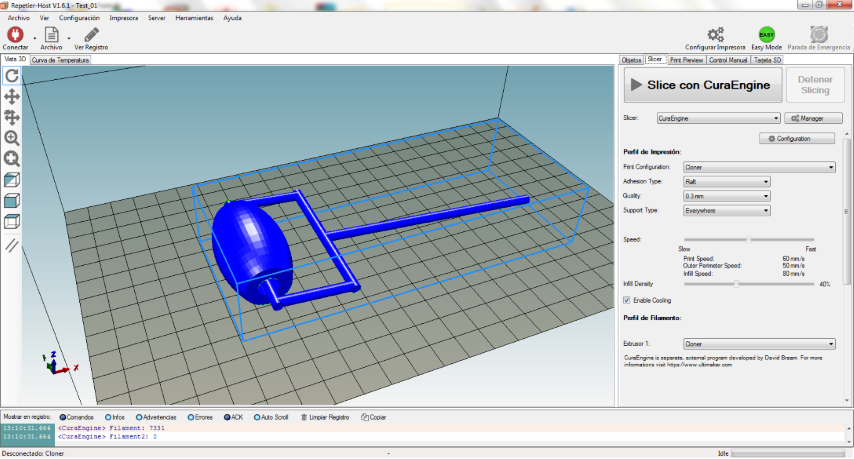
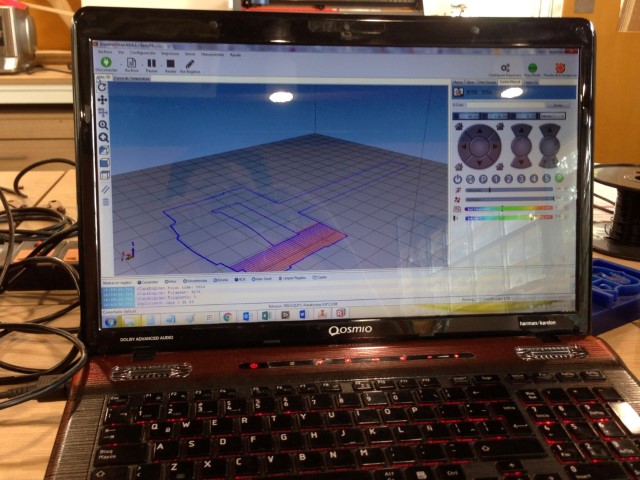
Slicing Software: Repetier Host
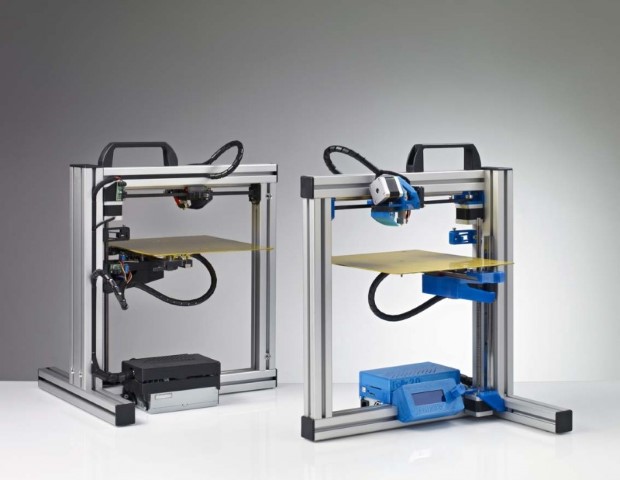
Form 1+
Main specifications:
Technology: Stereolithography (SLA)
Peel Mechanism: Hinged Peel Process
Resin: Fill System Manual
Print volume / build size (X,Y,Z): 125 × 125 × 165 mm
Layer Thickness (Axis Resolution): 25, 50, 100, 200 microns
Laser Spot Size (FWHM): 155 microns
Material: Grey Resin SDS
Software: Preform

Conclusions:
Quality of final product, Form 1+ has a better resolution but is more slower than Felix. If the build platform of Form 1+ is dirty the final product will fail, can print out incomplete or lost; in the case of Felix Printer must monitor the printing of the first layer and care for the feeder strand can not get stuck. The supports are always a problem even in Form 1+ is less noticeable in the final product.
Shown how you designed/made your object and explained why it could not be made subtractively
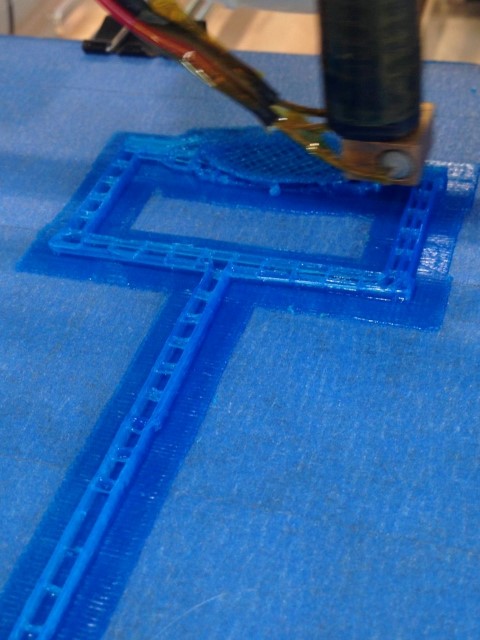
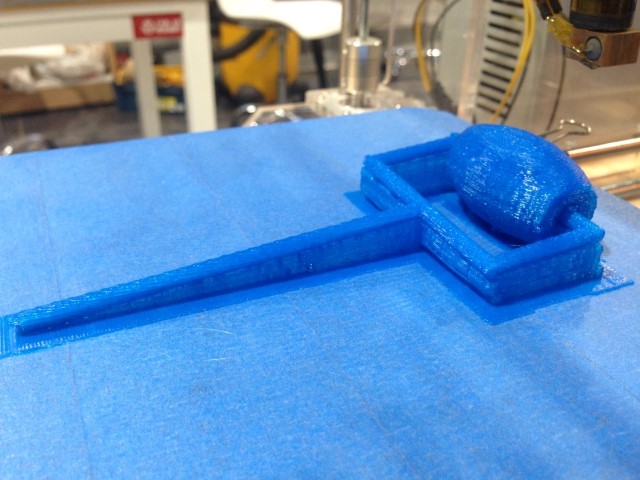
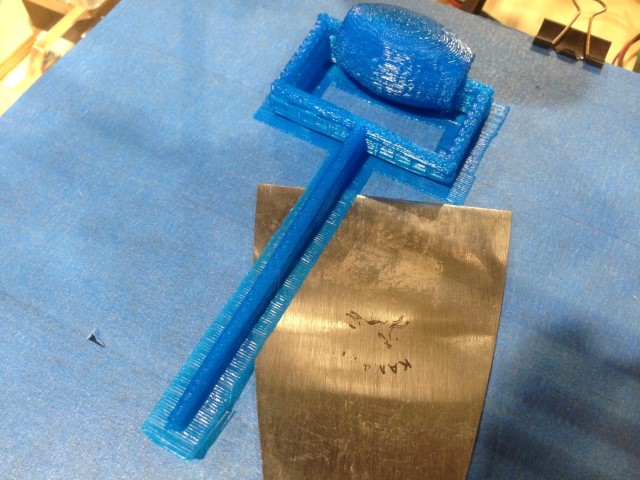
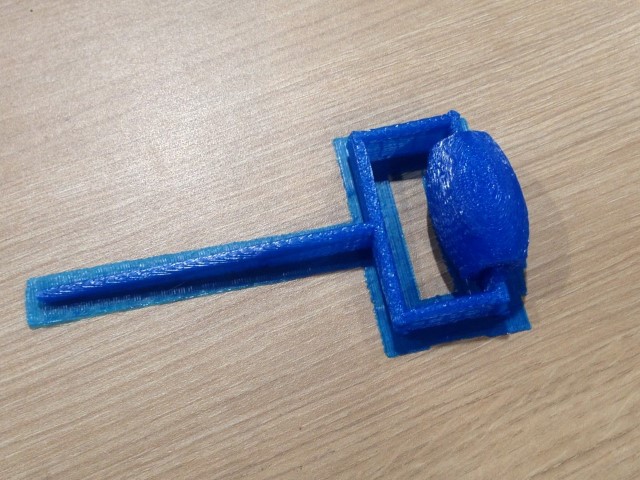
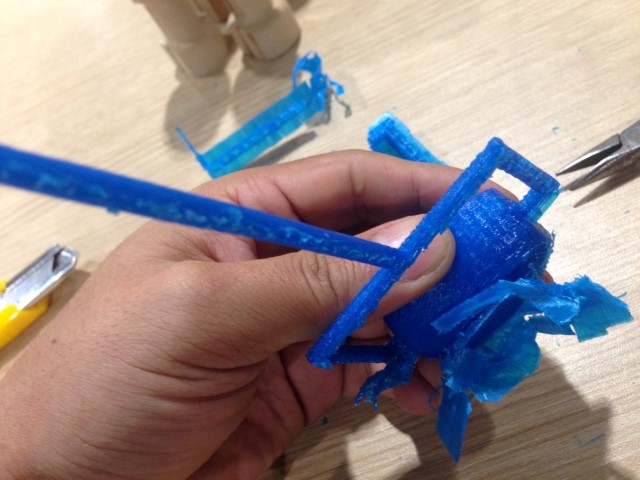
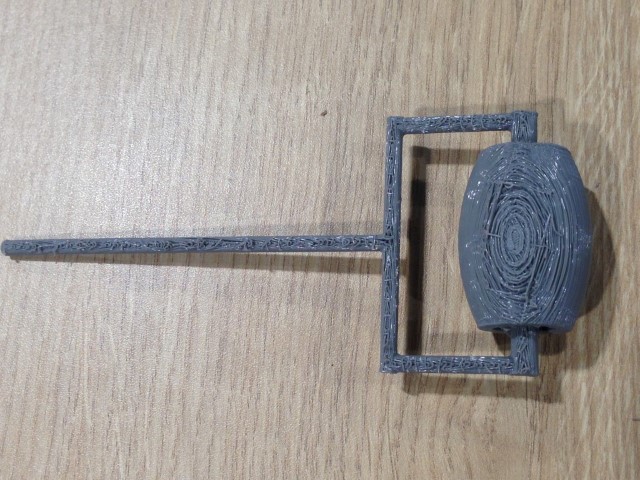
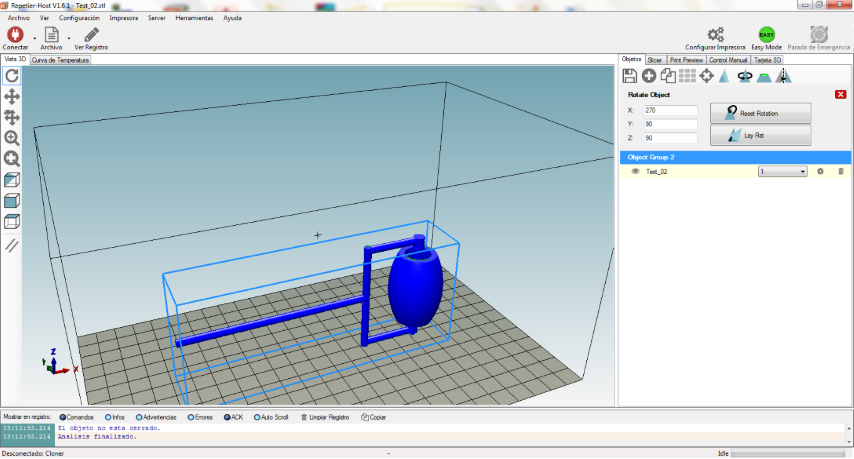
I made a design using Inventor. My design is a cylinder with an internal bar and a handle,
I chose this design because it is not possible to do using a CNC (subtractive method) machine.
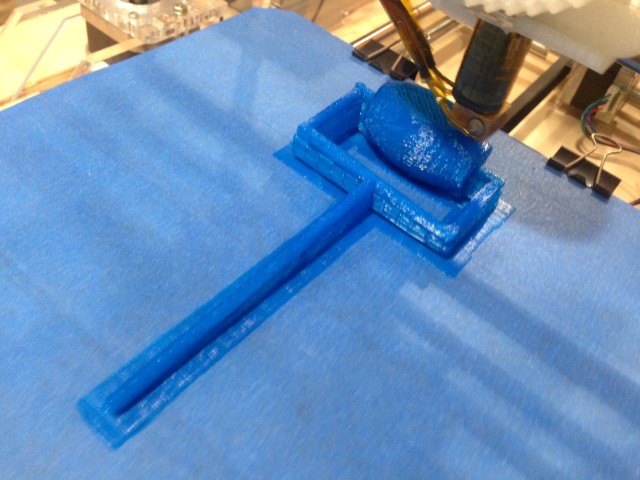
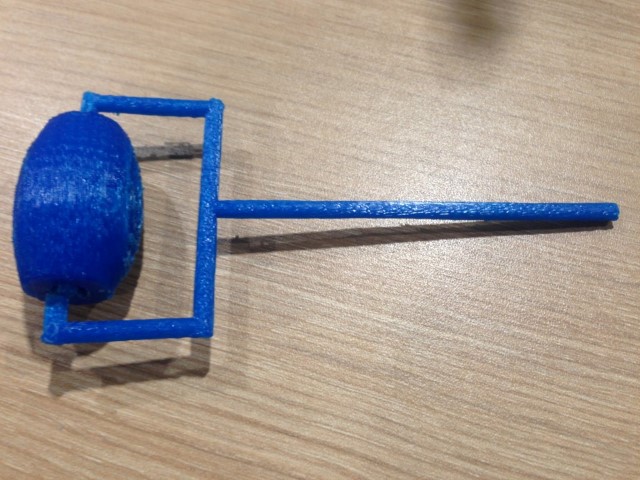
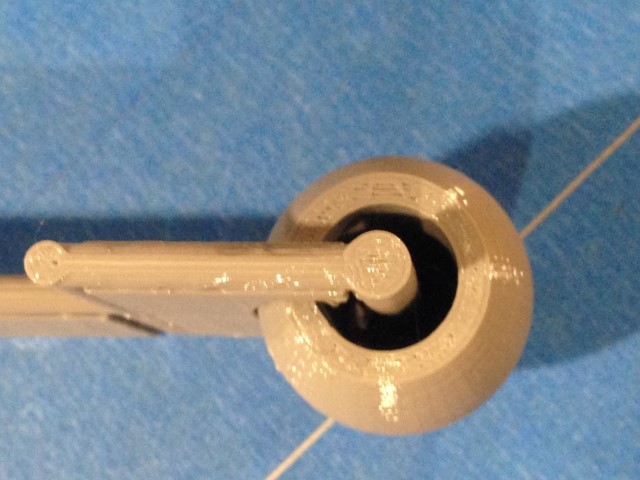
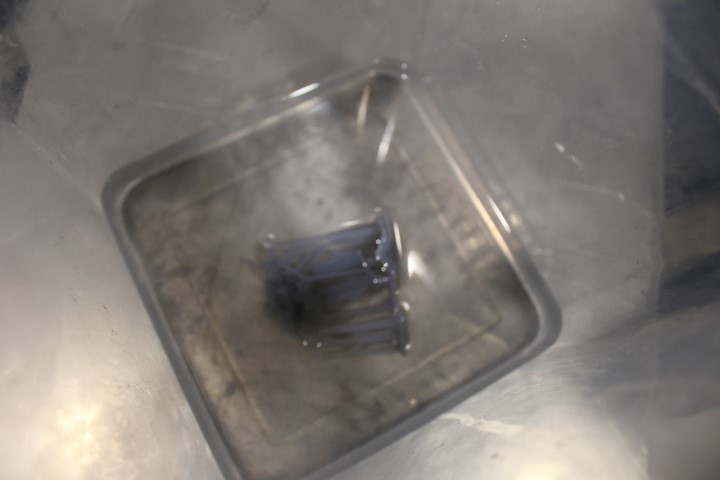
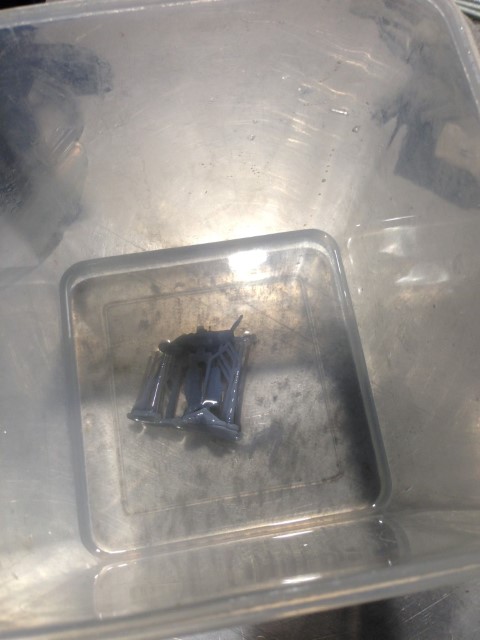
The final piece is movable, like a roller.
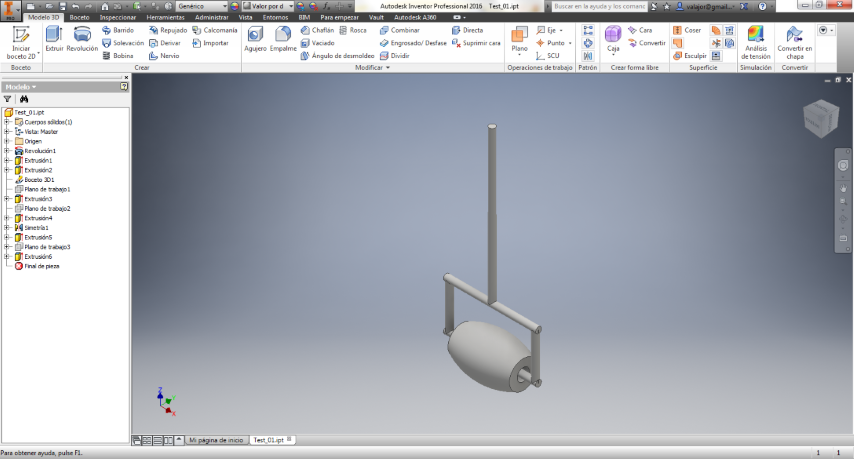
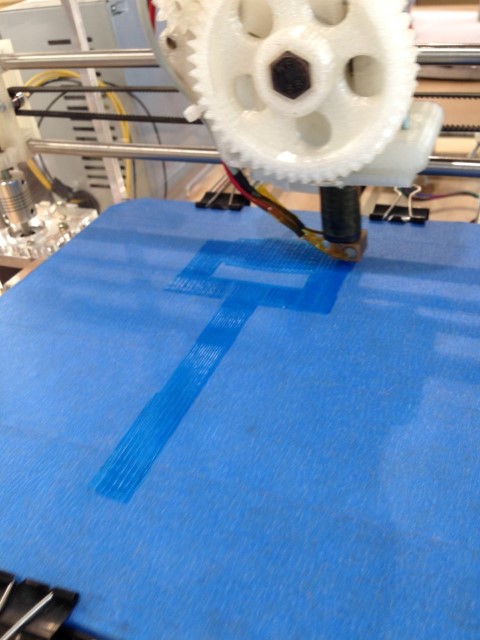
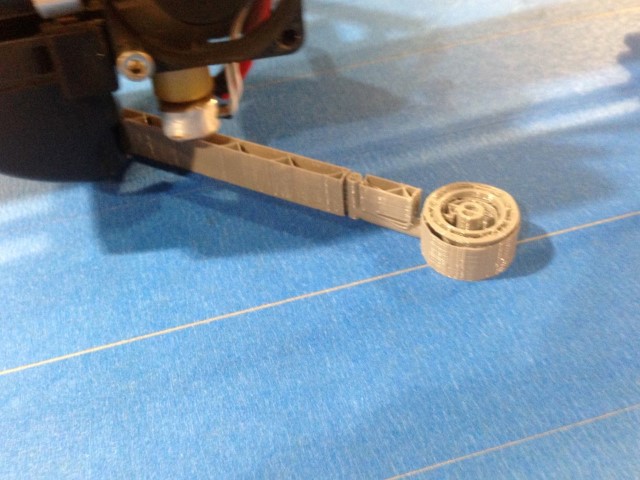
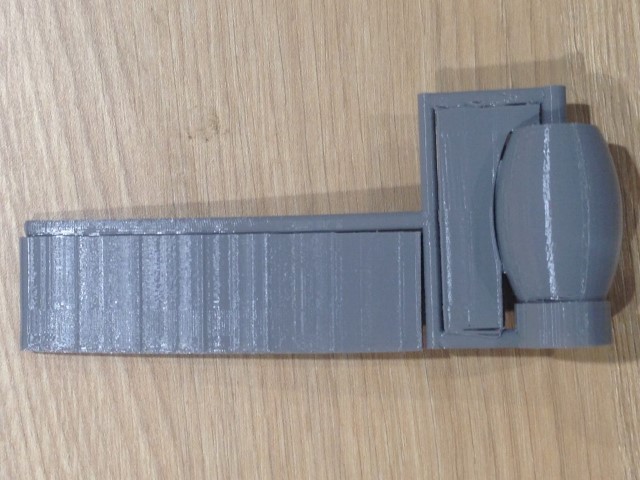
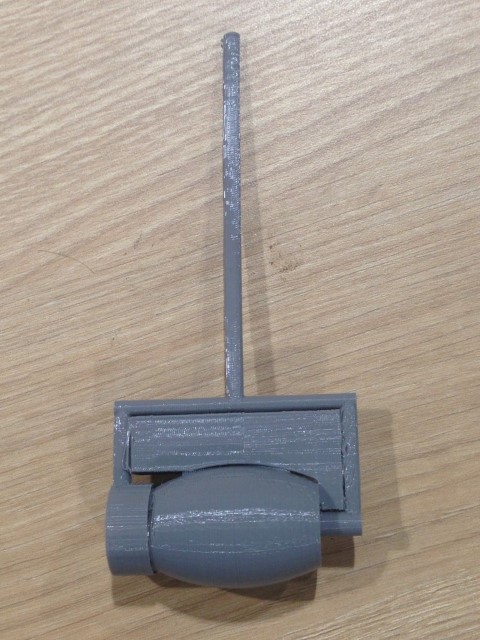
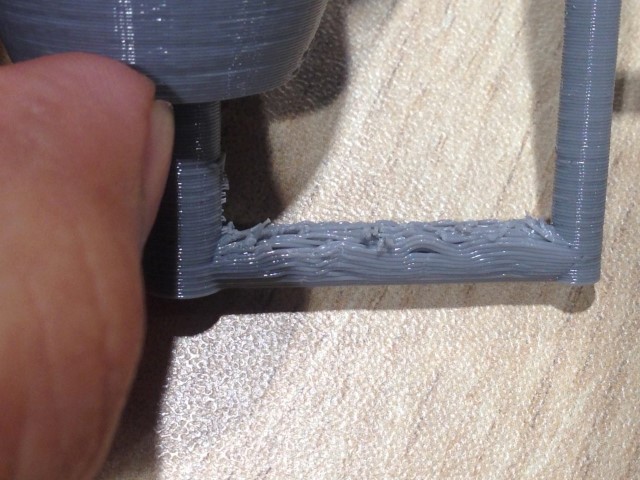
The first version has a diameter of 7 mm, was printed with the cylinder horizontally and the
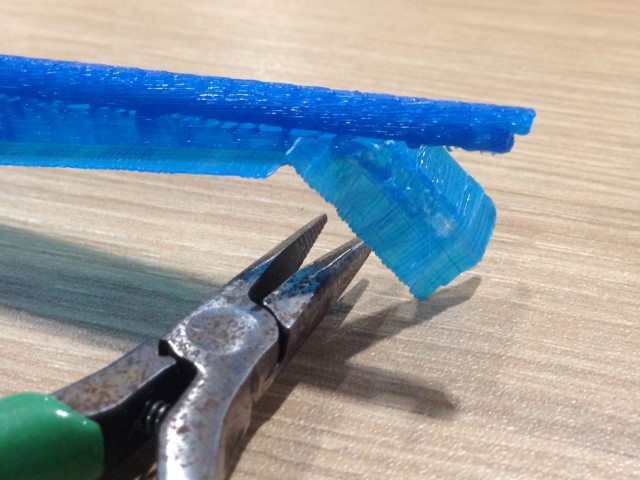
handle on the bed, was added supports everywhere.
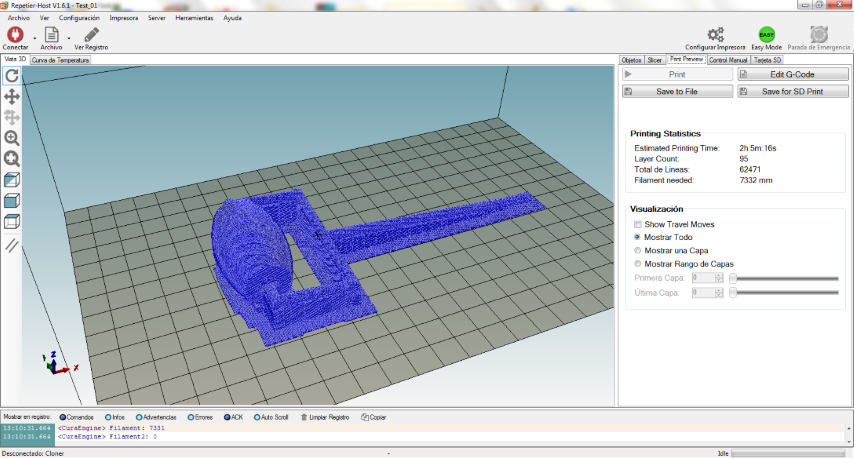
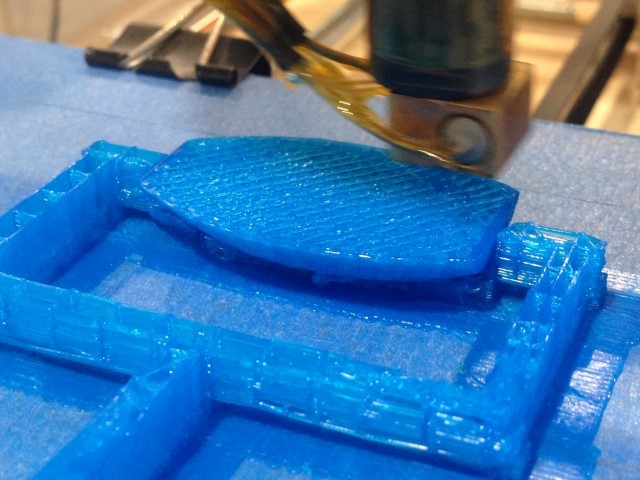
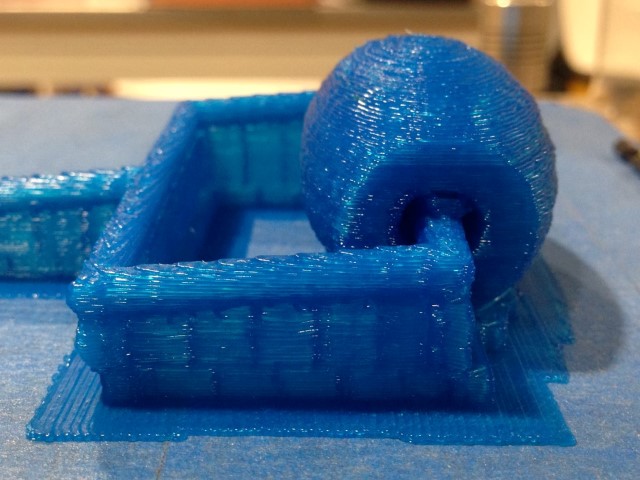
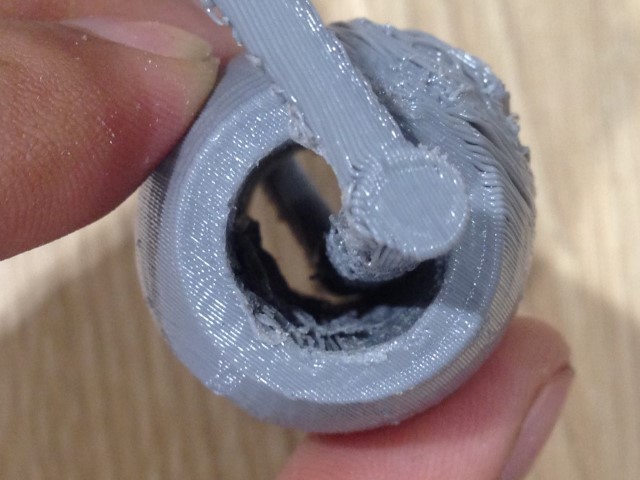
I could not remove the supports within the cylinder so narrow of the inner diameter.
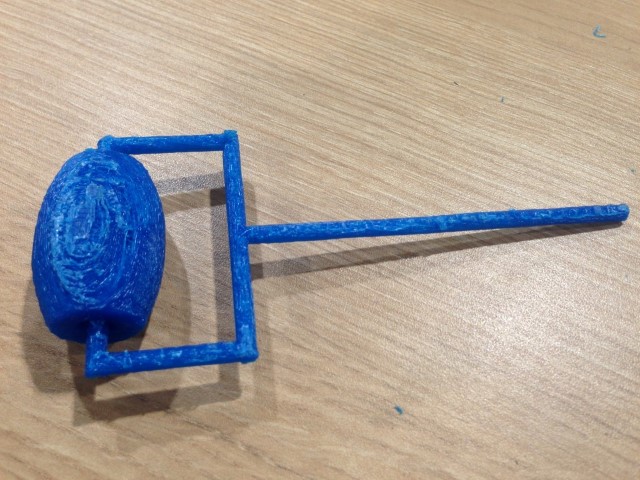
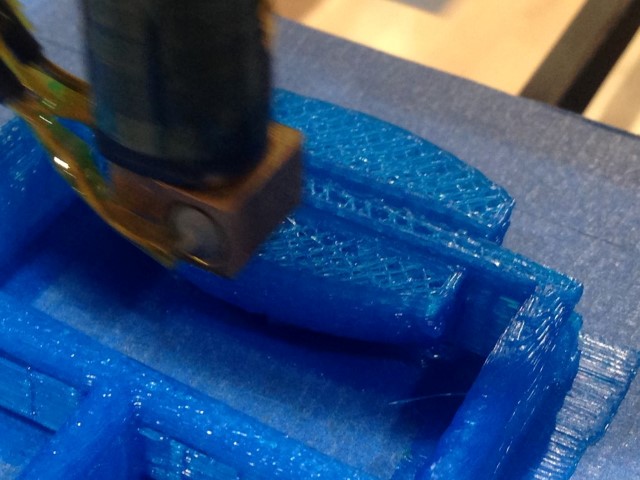
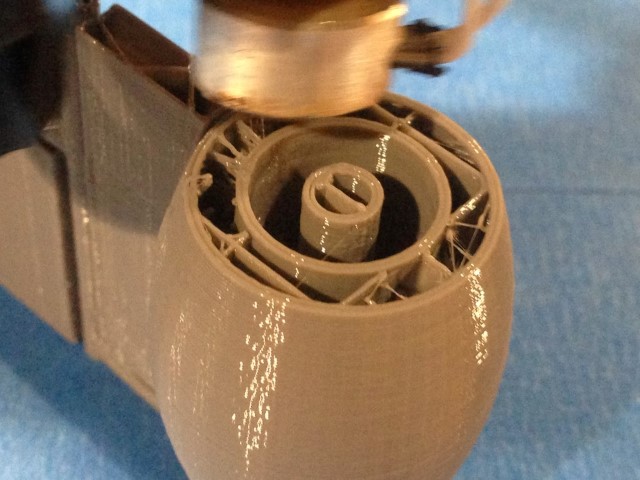
In the second and third version I duplicated the inner diameter (14 mm) to facilitate
the task of removing the supports.
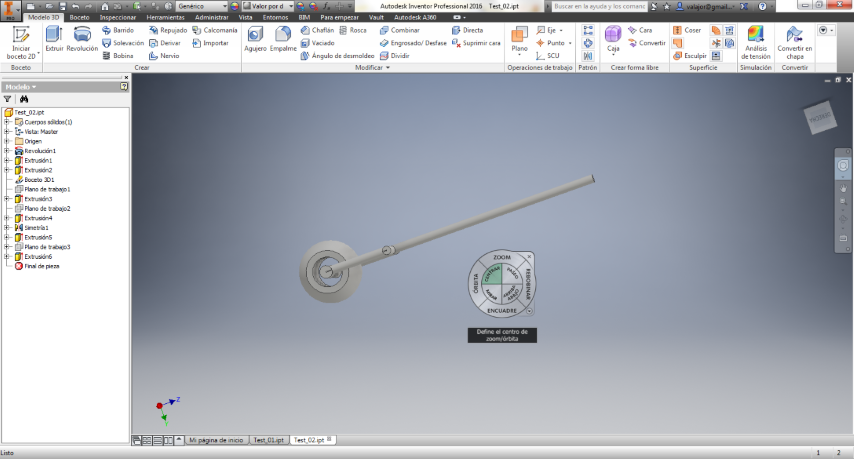
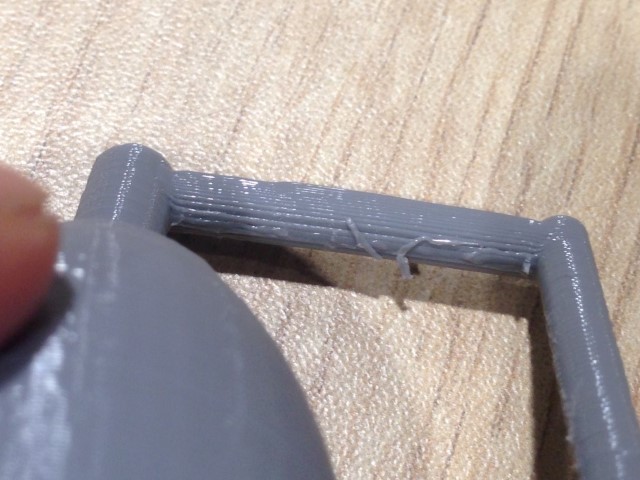
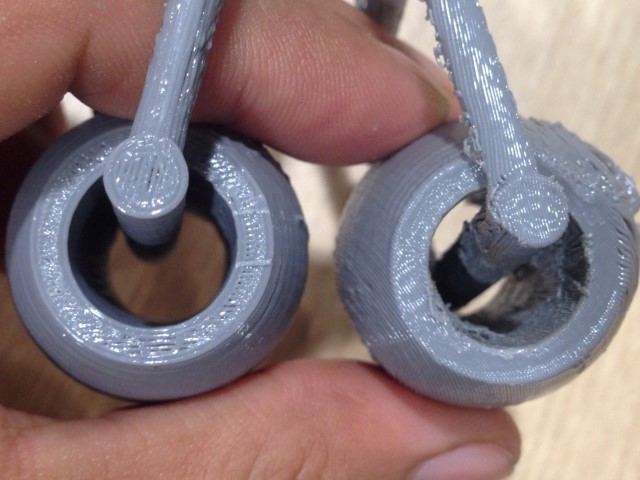
The second version was printed in the same way as the first. They were able to remove
the supports, the finish is not the best but it works.

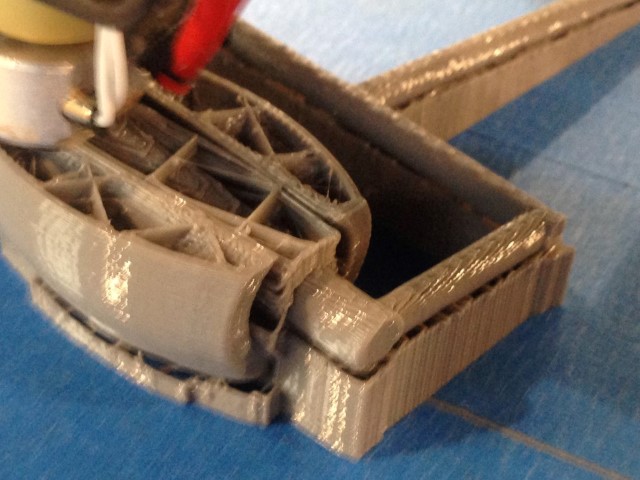
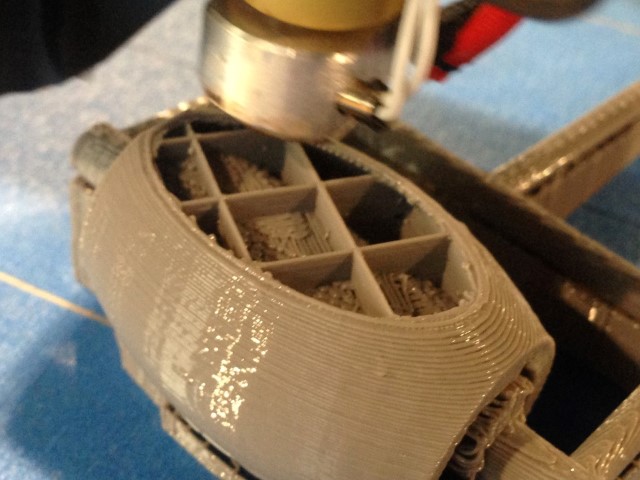
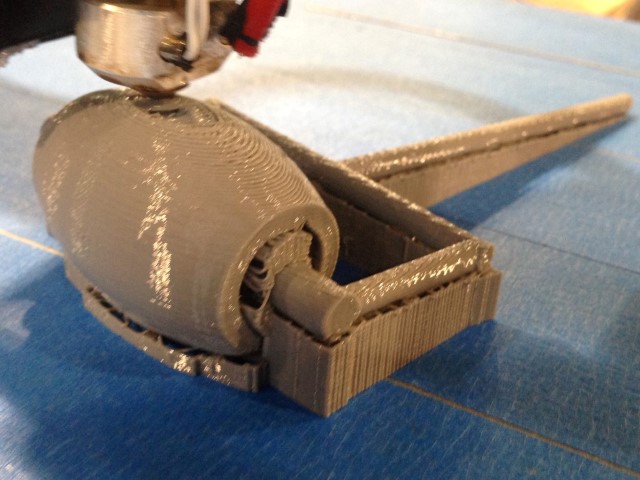
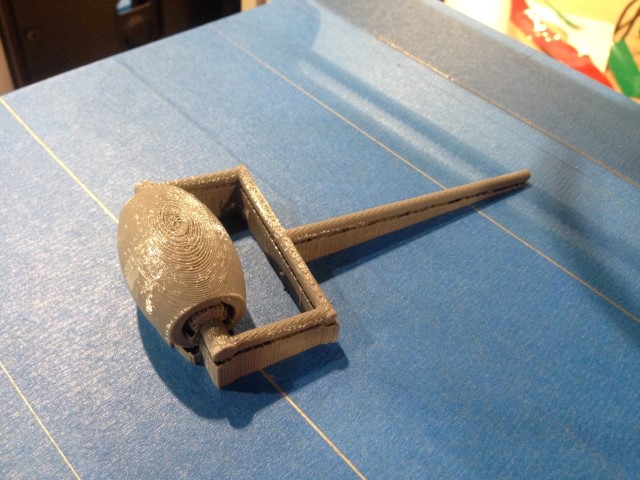
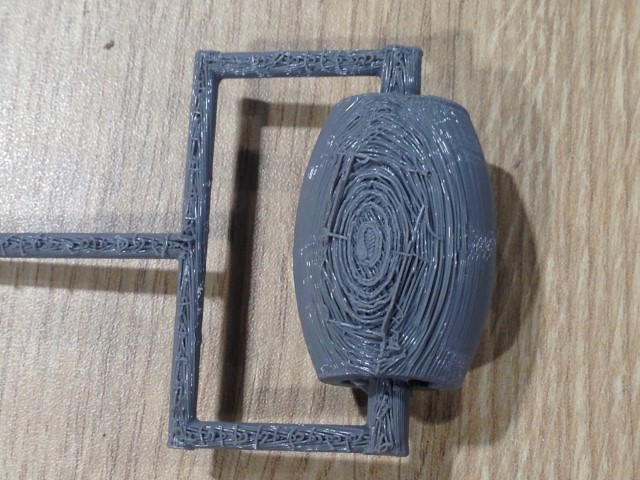
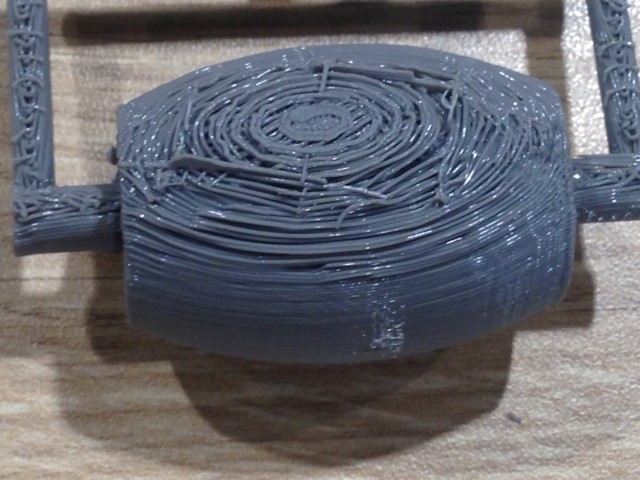
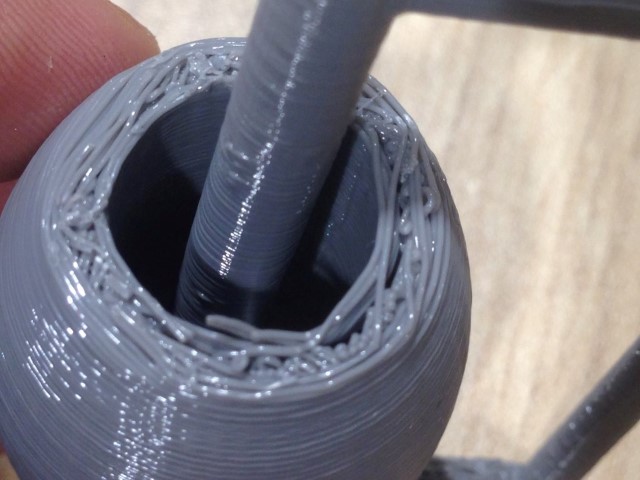
The third version was printed with the cylinder vertically and supports everywhere.
The result was satisfactory to not include supports within the cylinder.


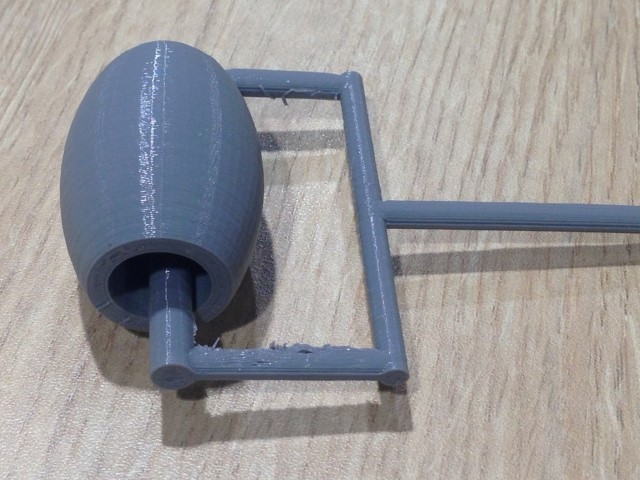

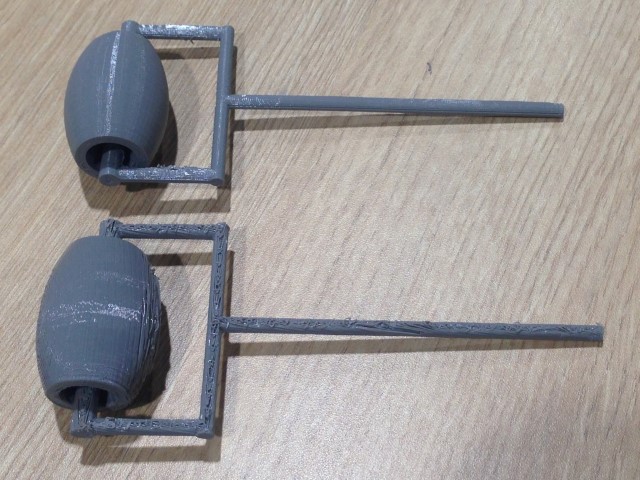
A comparison of the second and third version.
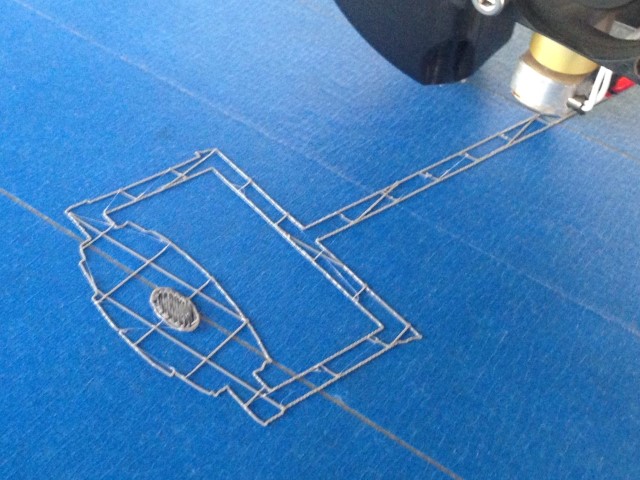
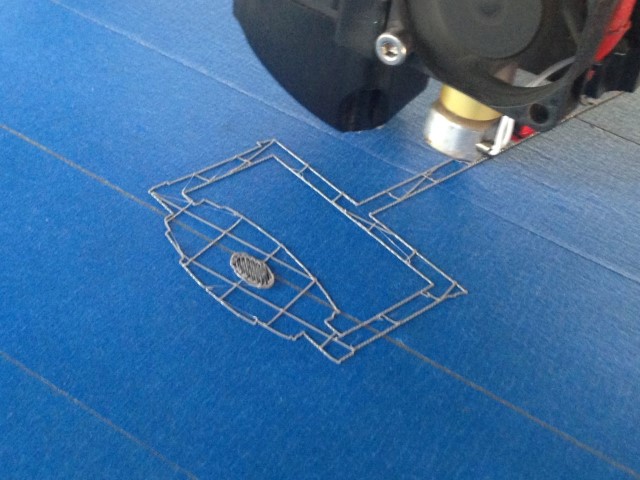
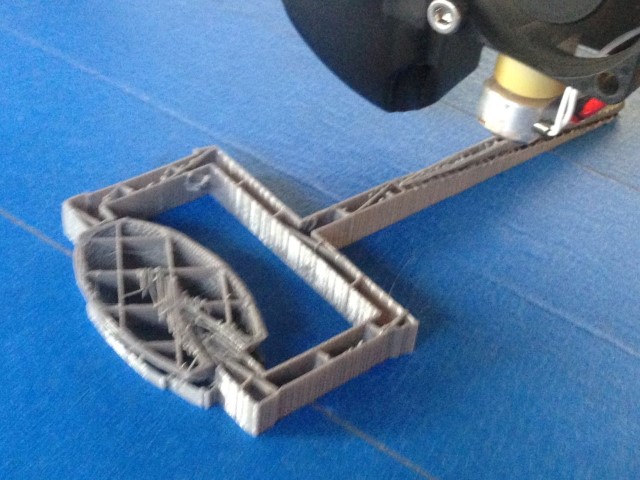
Scanned an object
Scan an object is not as easy as it seems, must have some considerations:
- The object should not be bright or transparent.
- There should be good lighting in the room.
- If using 132D Catch, you must take at least 40 photos of the object and take some photos from below and from above to avoid holes in the final design.
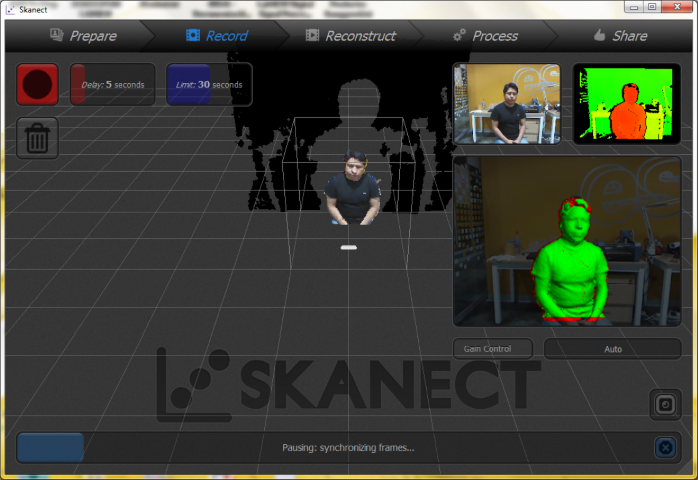
- If you use Skanet to scan the body does not rotate very fast, try to place the Kinect sensor to a greater height than the body, approximately 50cms and a minimum of 1.5m distacia
You can download from 123D Catch, It is compatible with Android, iOS and Windows.
You have to start a new capture
Take at least 40 pictures and some from below and from above.
When finished, the application will upload all the photos to its server and will process them. This can take several minutes or hours. On completion, it will show 3D capture and asks if you want to share or keep it private.
Then you can see it and send it by email to download to your PC and edit, fix bugs, and finally printed.
Now, you can download your design
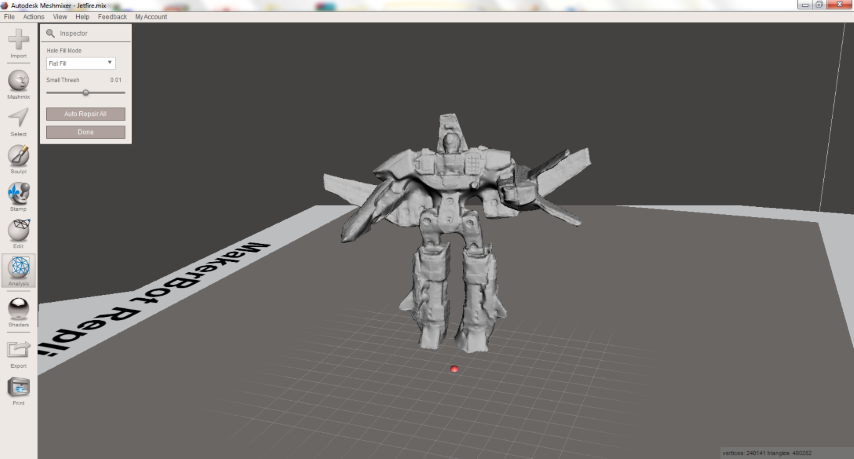
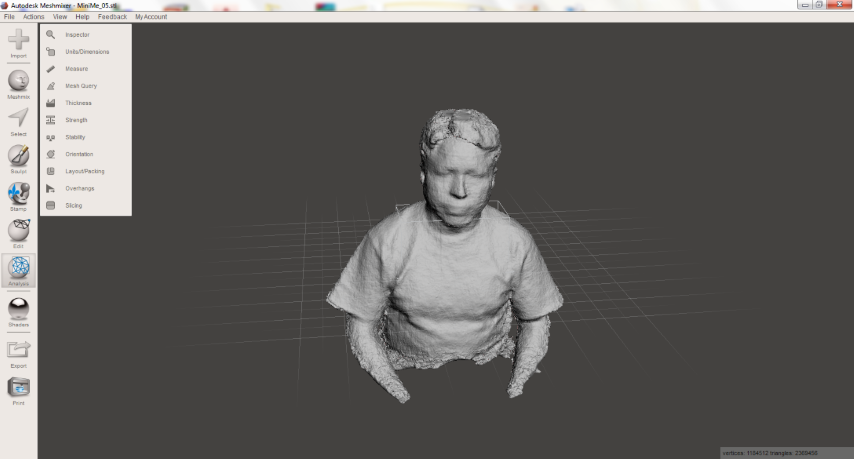
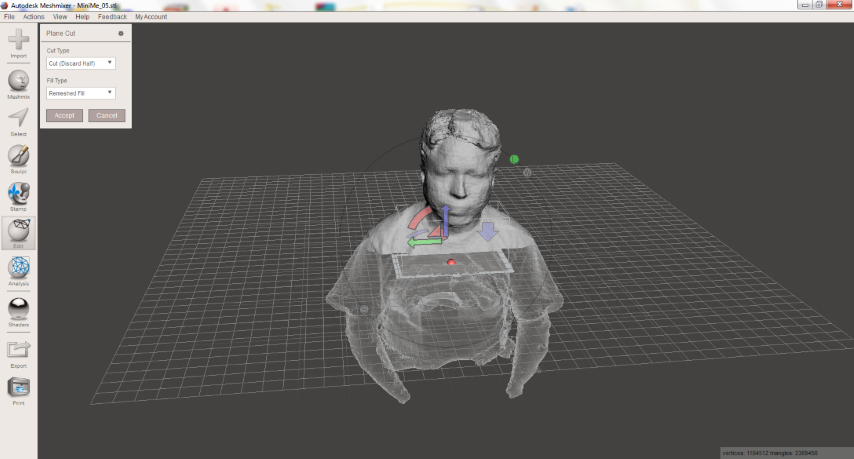
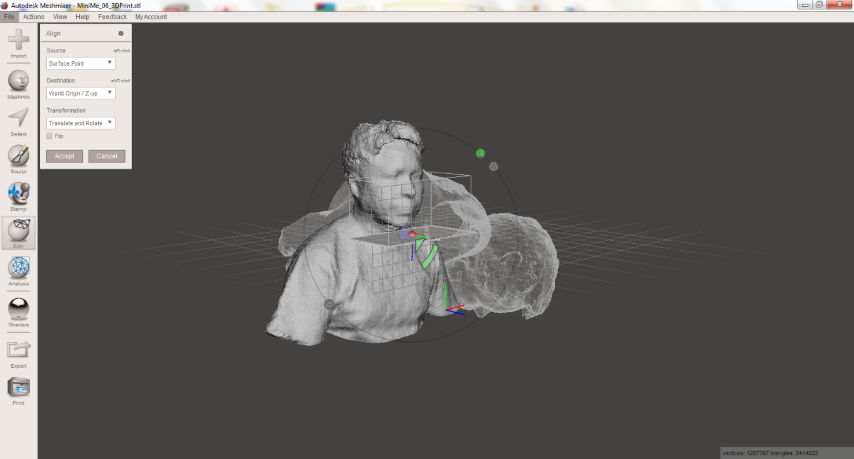
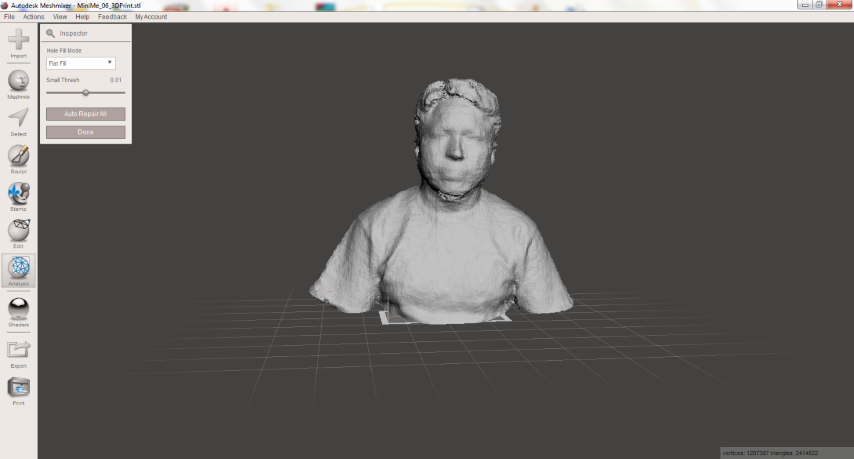
You can use Meshmixer to fix holes and cut
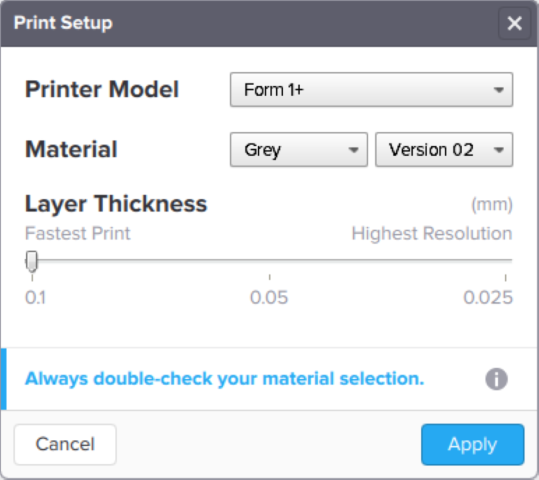
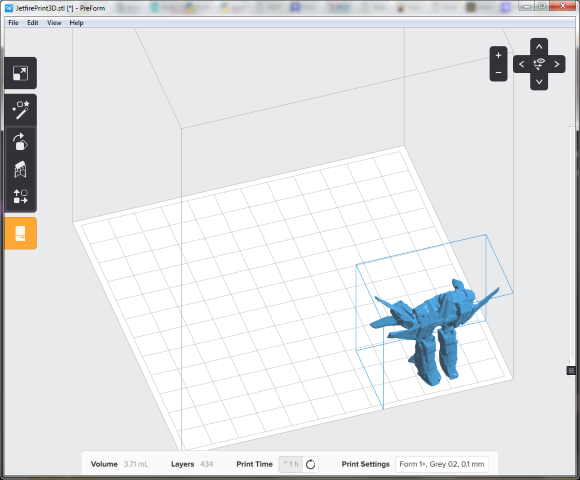
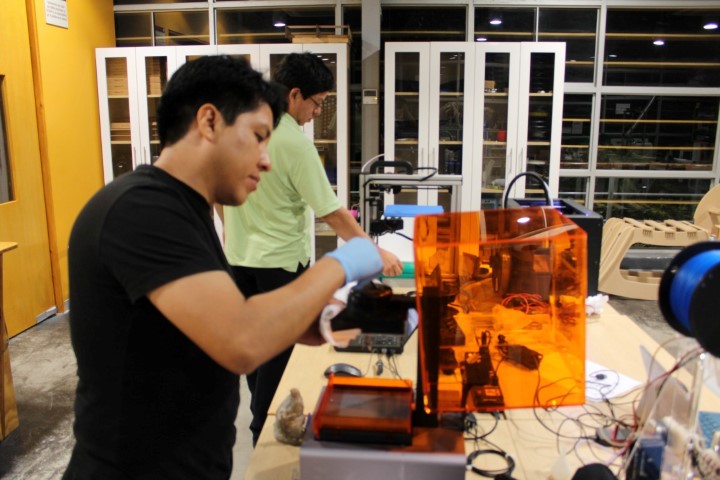
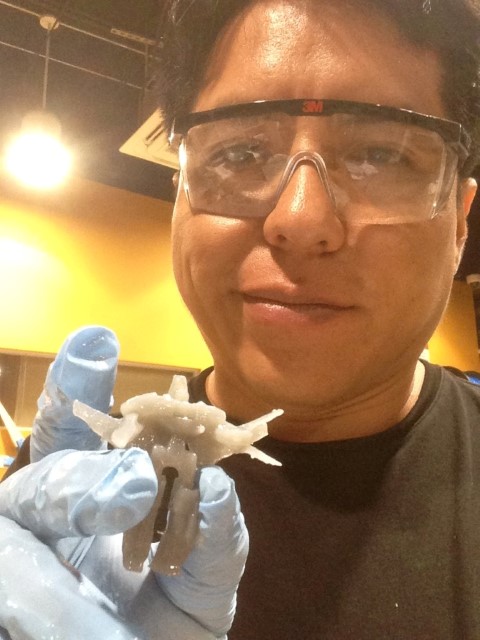
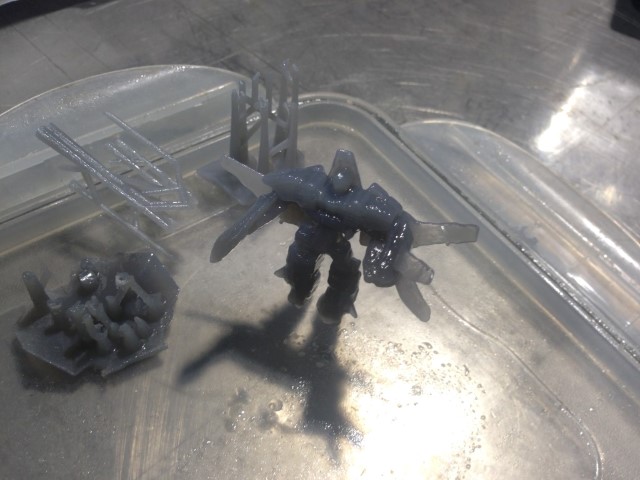
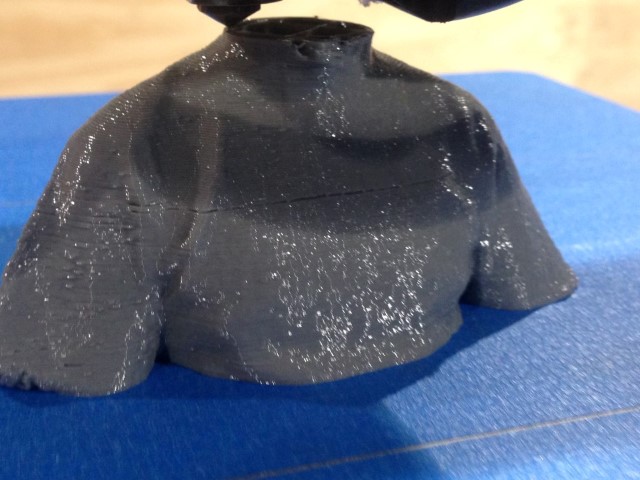
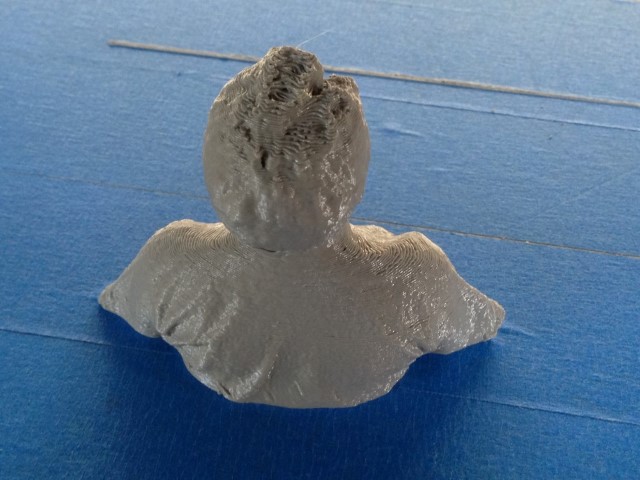
I printed it using the Formlabs Form 1+
Firstable, you need to select: Printer Model, Material and Layer Thickness.
Open a new file (.form, .stl or .obj)
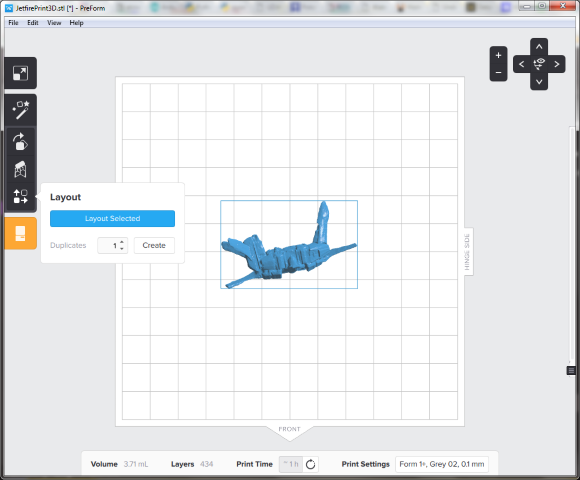
Place your object in the Layout menu.
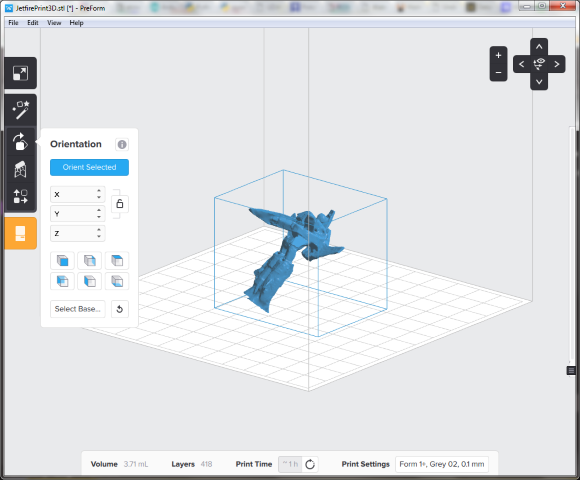
You need to give it an orientation manually or selecting the options of Orientation menu.
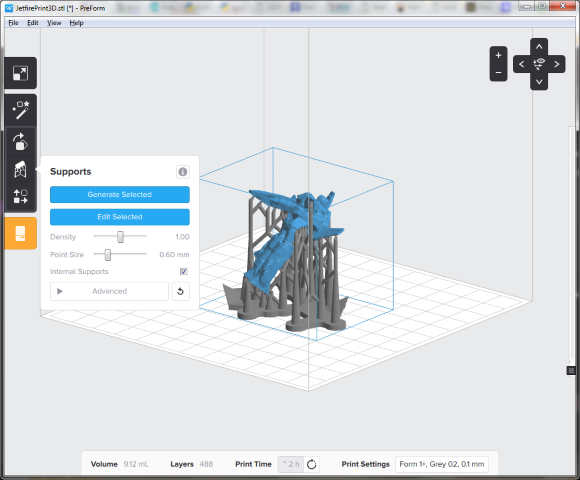
Generate supports from Supports menu and Start a print.


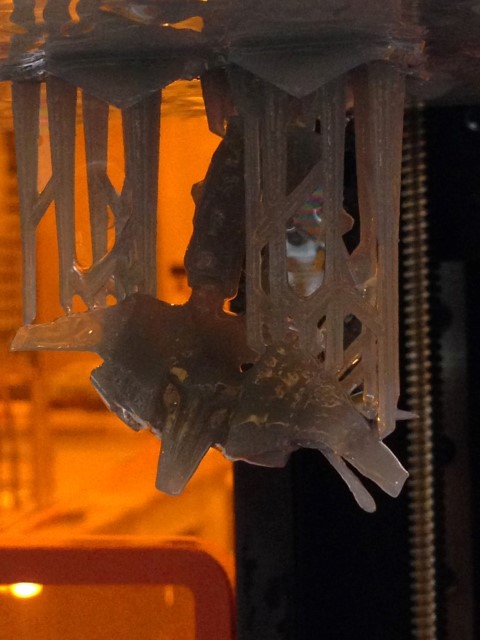
When finish you need to extract the object of the build platform.
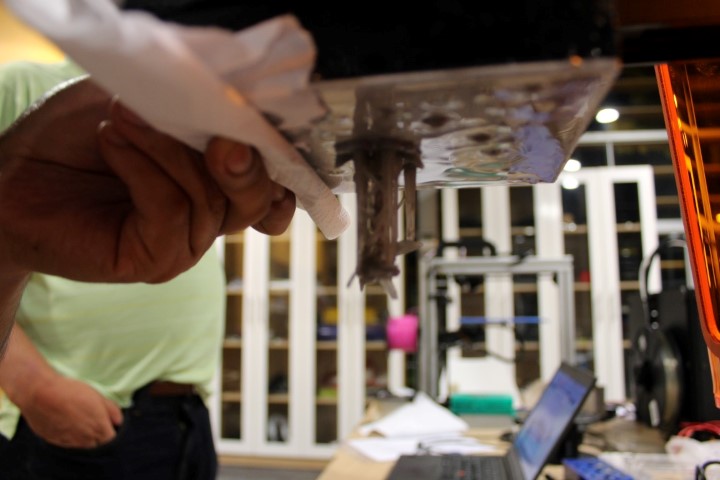
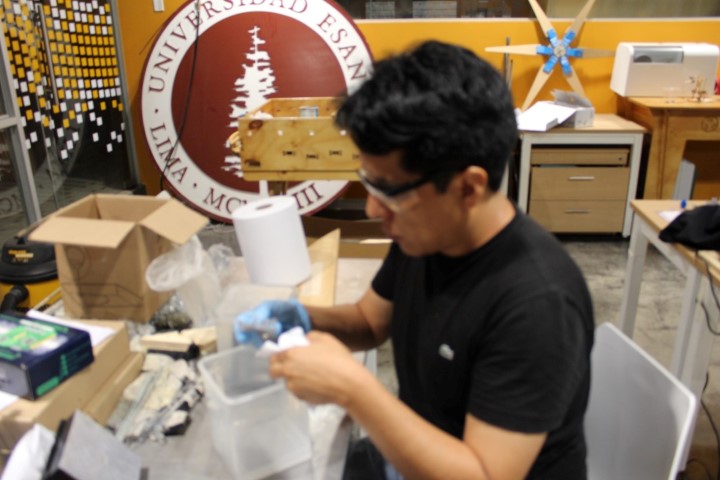
It is recommended to place the object in isopropyl alcohol.
Then cut the supports.
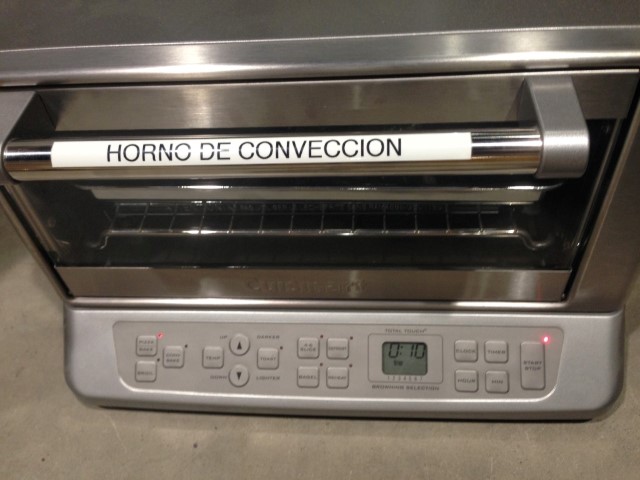
Allow to dry the object or use an oven at 150 ° F for a few minutes.
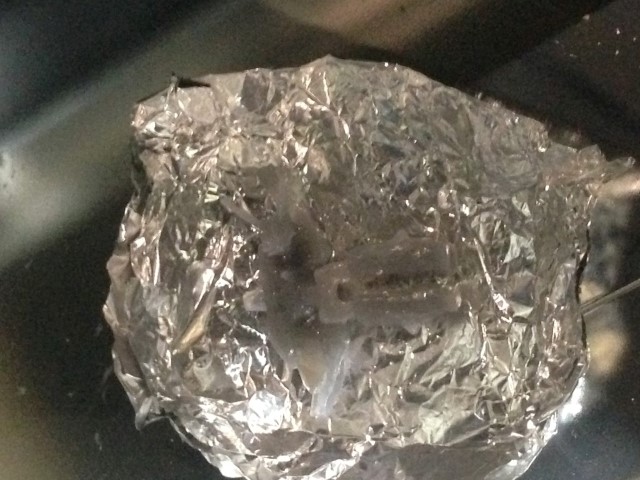
Done!
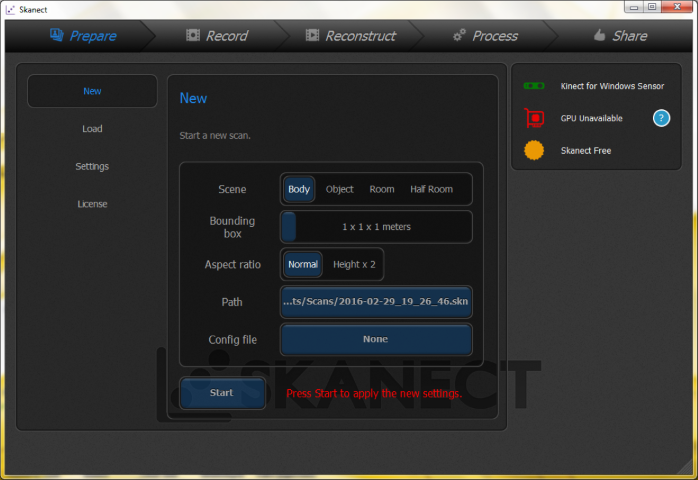
So, you can scan yourself using Skanet and Kinect sensor.
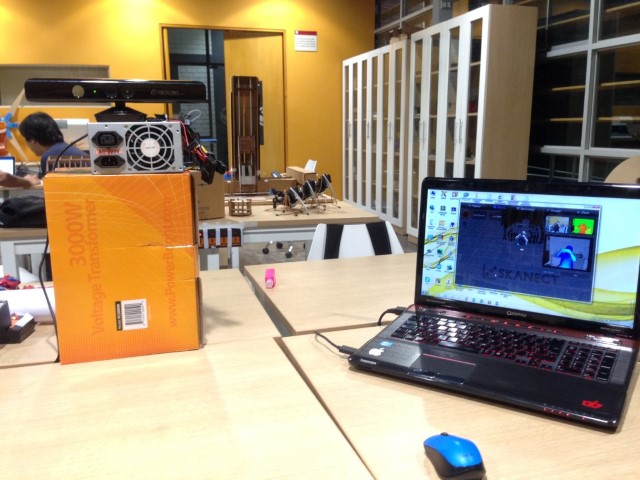
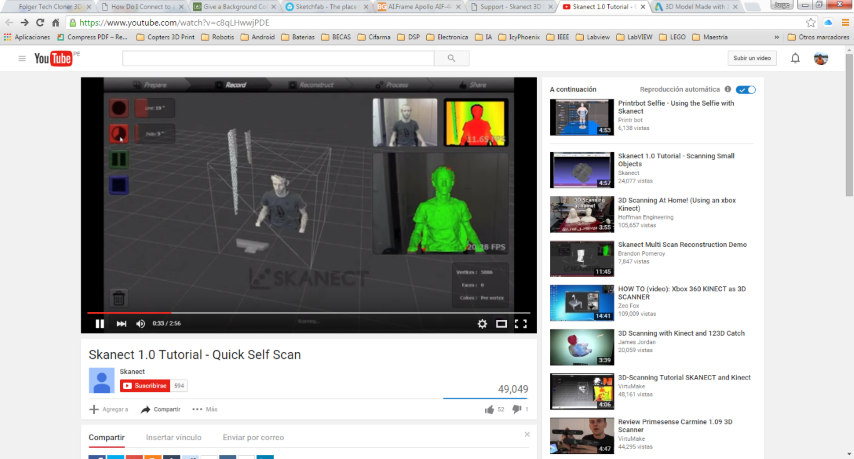
I watched this tutorial "Skanect 1.0 Tutorial - Quick Self Scan"
Start a new scan
Configure Delay and Limit time. "Delay" is the waiting time to start scanning. "Limit" is the duration of the scan. Slowly rotates on its own axis, I recommend using a swivel chair.
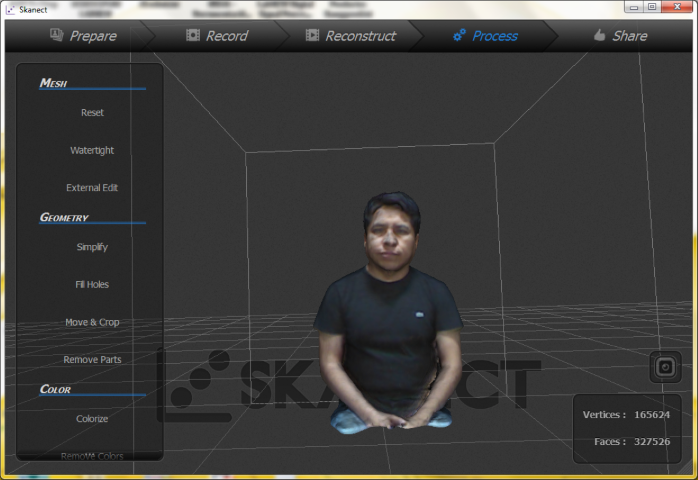
Compute a watertight colored mesh.
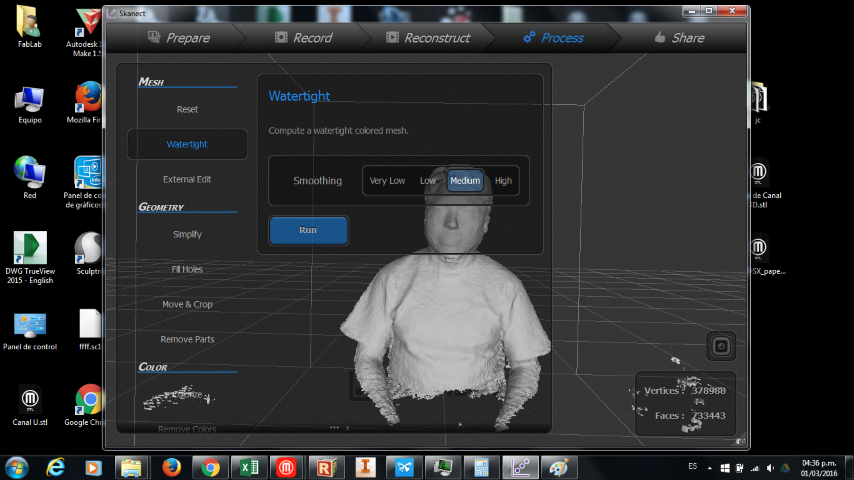
You can export the 3D model in stl format and in different resolutions (higher or lower number of polygons).
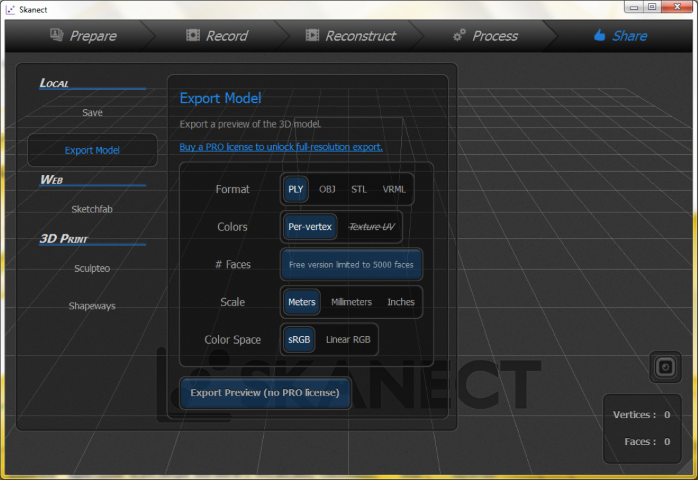
and edit it using Meshmixer.
and print it.
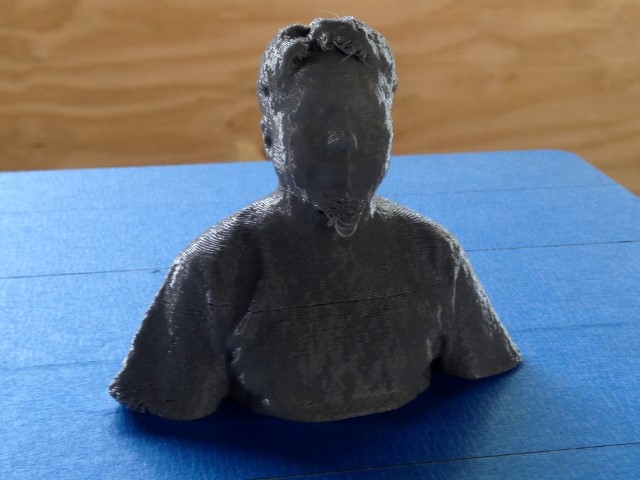

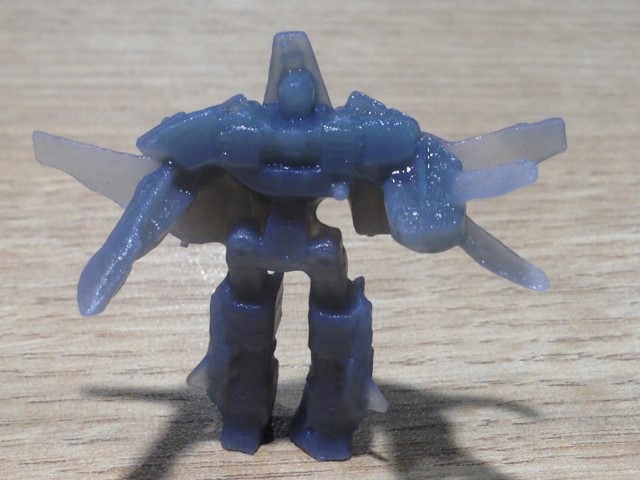
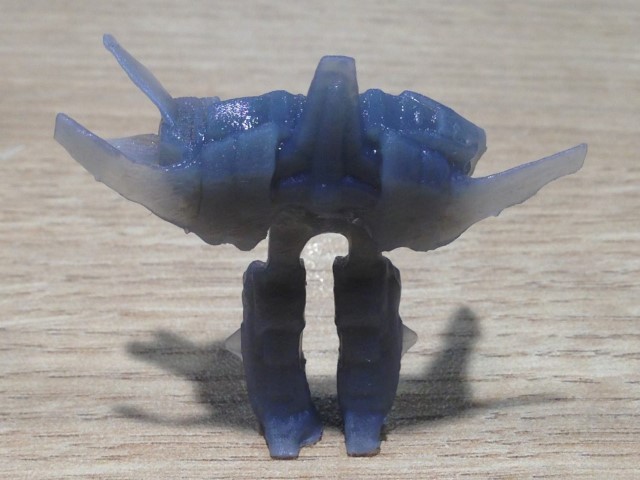
Included your design files and ‘hero shot’ photos of the scan and the final object
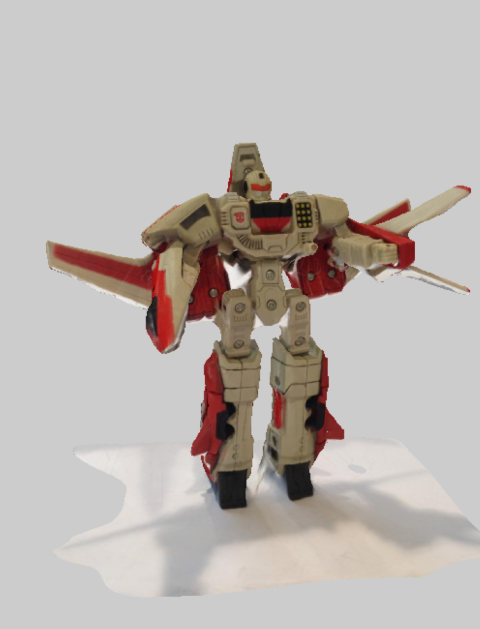
From Sketchfab: 3D Scan - Object - Jetfire
From Sketchfab: 3D Scan - Me
STL File: 3D Scan - Me
From Sketchfab: 3D Print - Object - Test
STL File: 3D Print - Object - Test