<-- Week 3
WEEK 4
[ELECTRONICS PRODUCTION]
Week 5 -->
WEEK'S GOALS:
IDEAS THIS WEEK:
Am thinking of making the ISP in such a way that it has a unique shape and I am able to print something in 3d which cant be made subtractively but in a very subtle way(nothing fancy)ACHIEVEMENTS THIS WEEK:
Electronic Production:1. Electronic Components
- 1. Got familiarised with diodes, Leds, Capacitors, Resistors, ICs, Zeners etc. by our instructor
3. Roland's PCB Milling techniques
4. Populating of board
5. Soldering
6. Programming
TASKS AT HAND:
NO PENDING TASKS<-- Week 4
Day 22
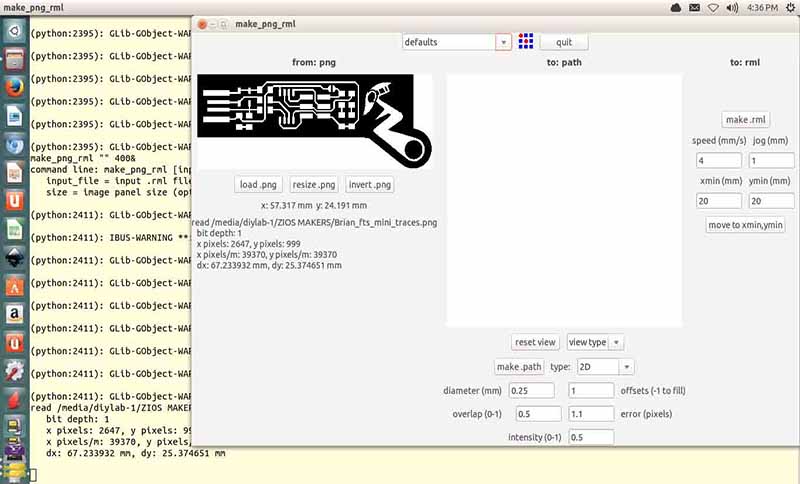
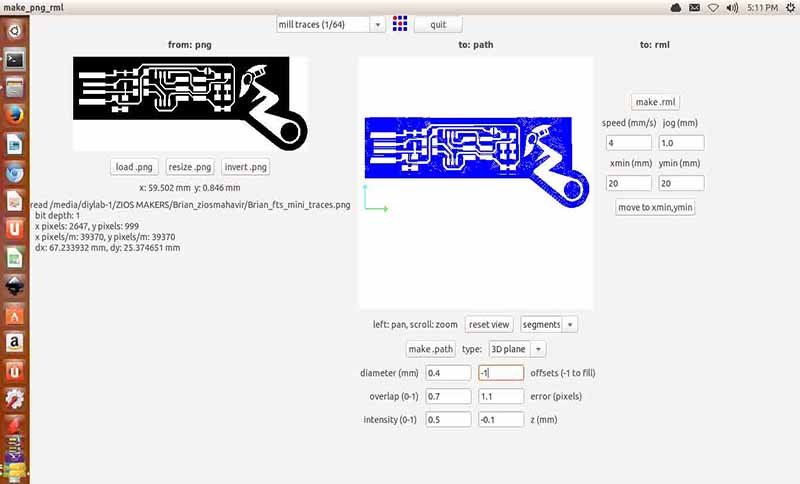
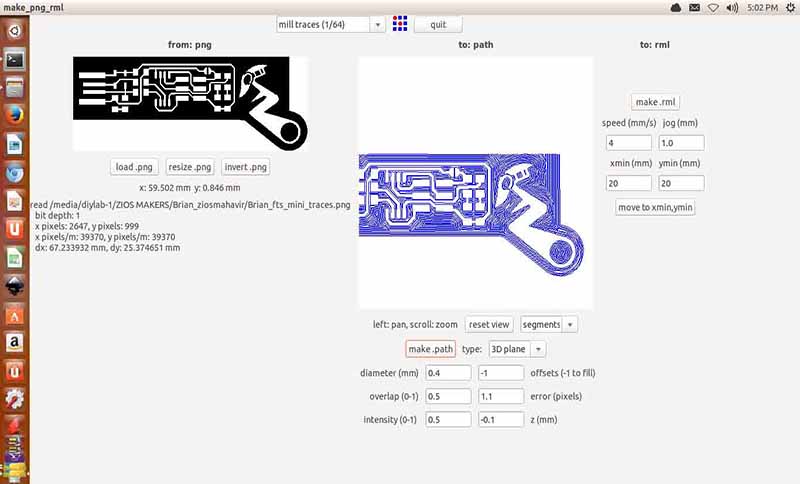
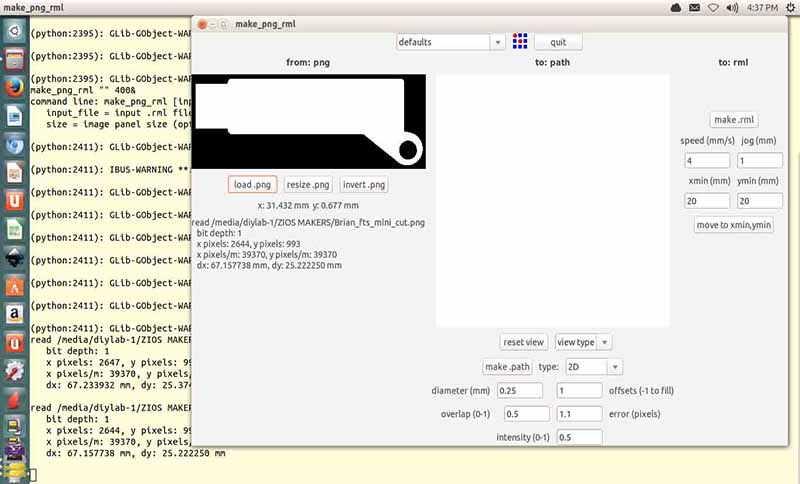
[ Preparing Files ]
Day 23 -->
This week is about Fabricating – Understanding Components – Programming the ISP Programmer.
Designing:
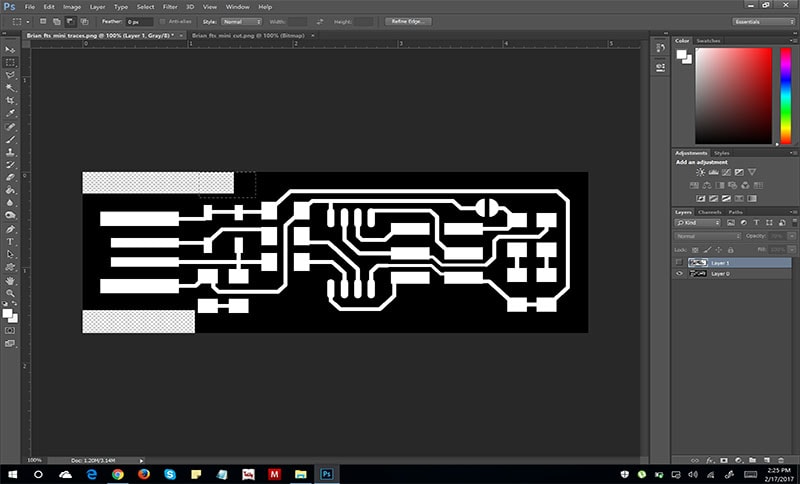
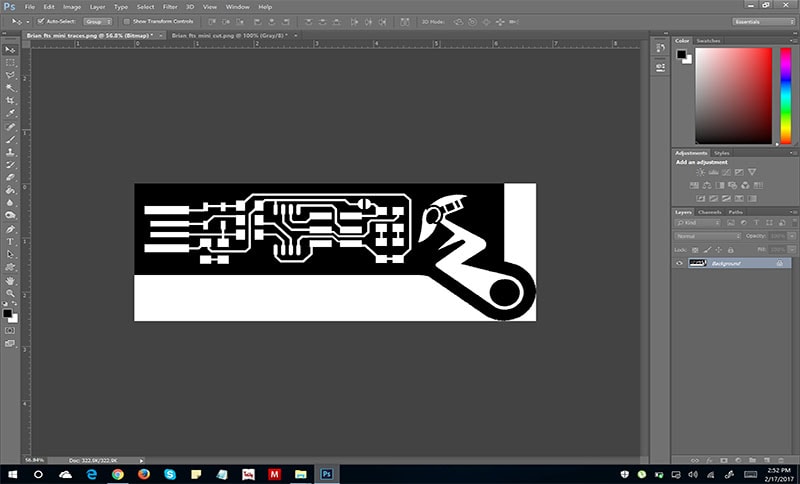
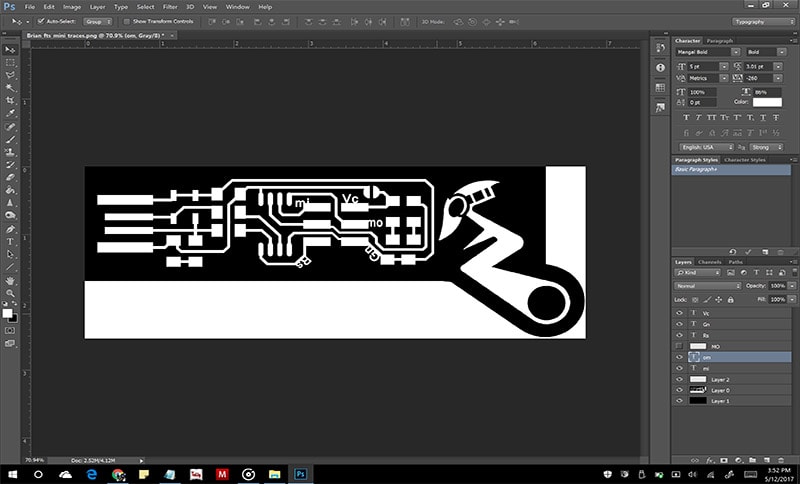
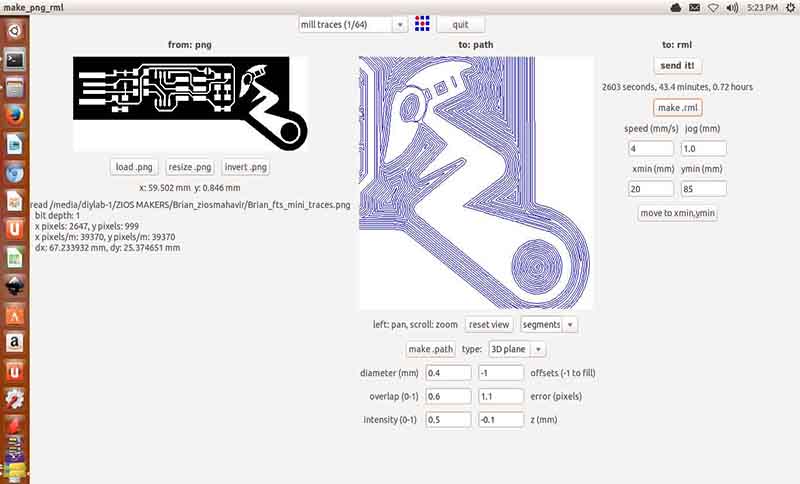
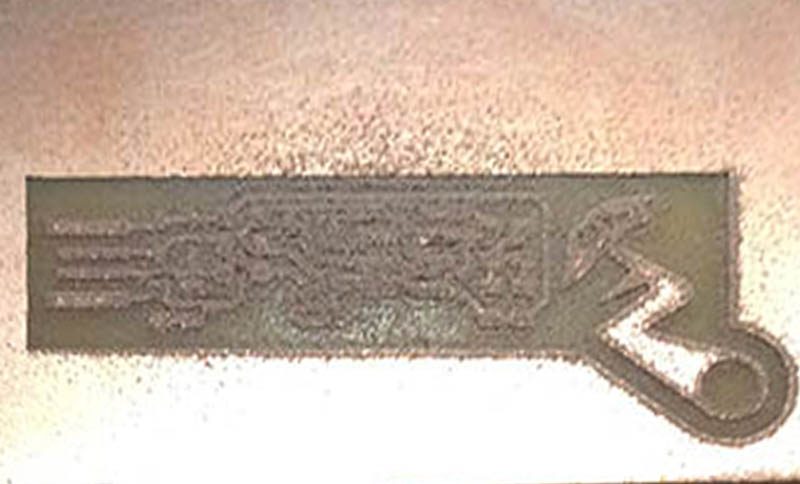
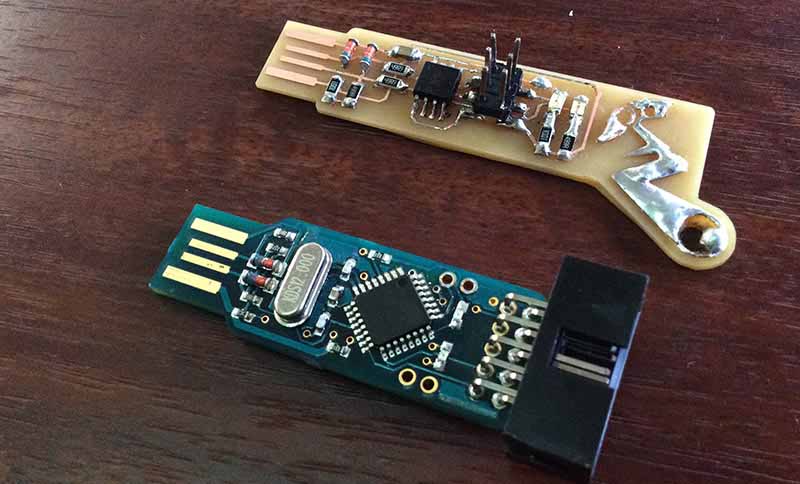
I have selected Brians board for this week,Started by adding some design to Brian’s board on Photoshop on traces as well as Cut file, which you can download from the end of this page.
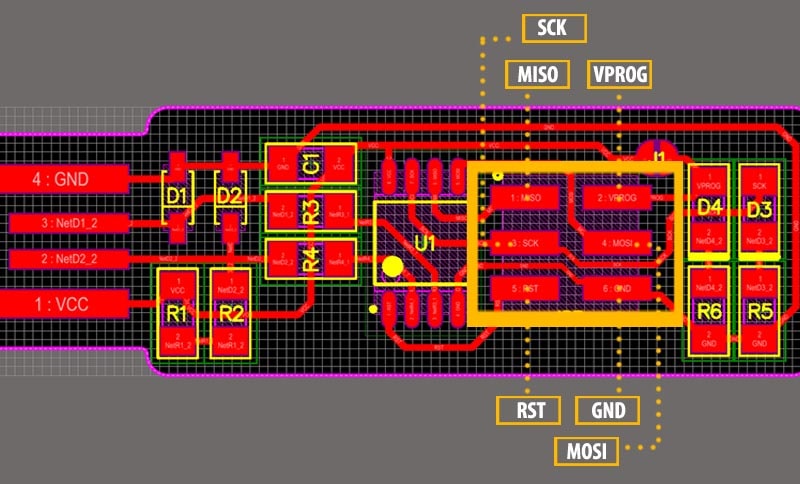
This week was typically spent making two ISPs for myself-one basic, and one modified. Editing an already ready made trace file by Brian as an ISP. I basically added texts to the 6 prog pins to make it easier to remember while arranging for jumper wires. In addition , it was spent modifying the cut file. I dint get much guidance on it so it typically went about thorugh my own discoveries on ways to edit it and make it artstic.

<-- Day 22
Day 23
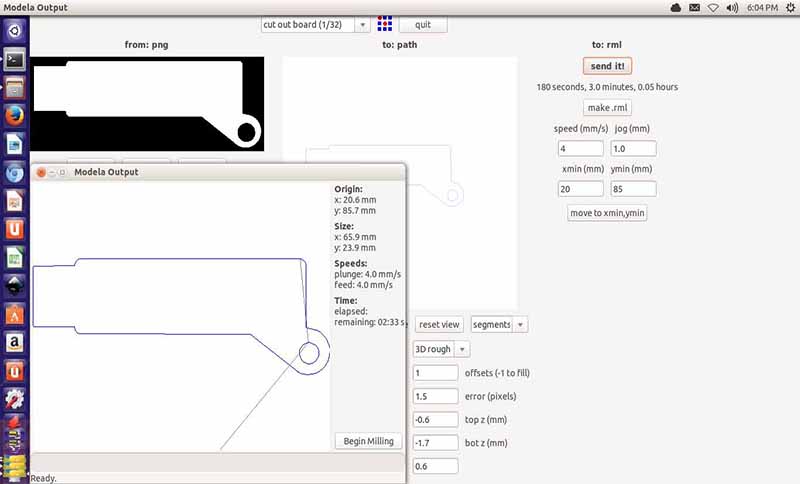
[ Setting up Modela ]
Day 24 -->
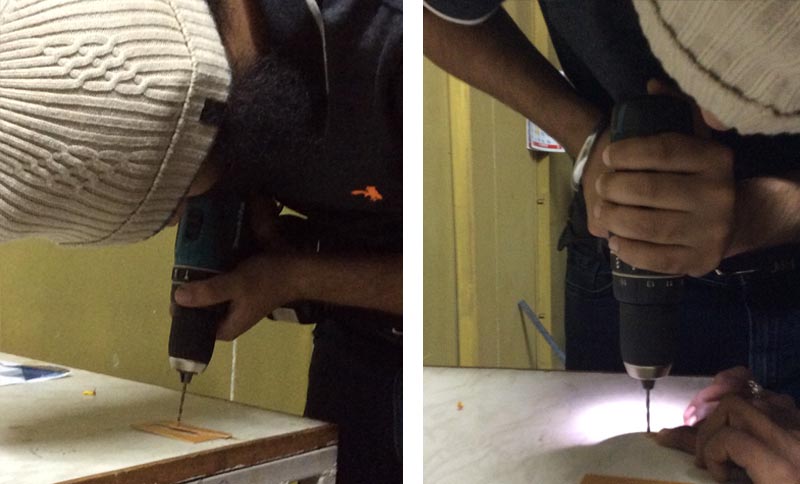
1. Learnt how to mill using roland modela
2. Tried milling by myself in the presence of our instructor Suhaas and Suyog.
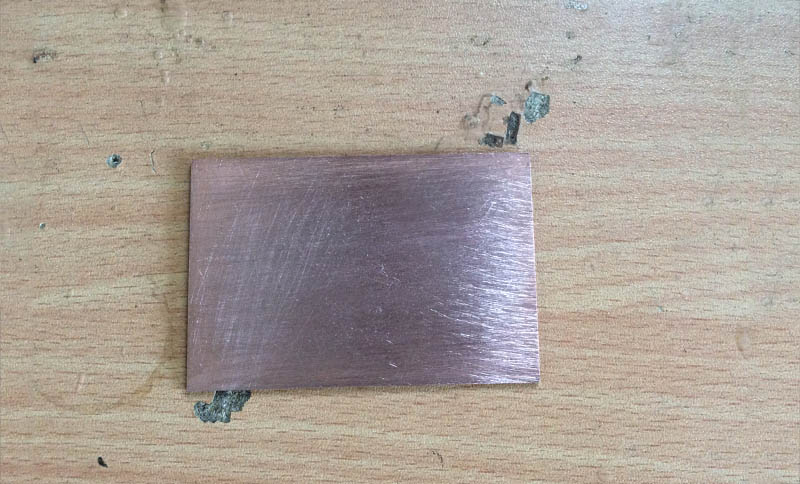
Milling:
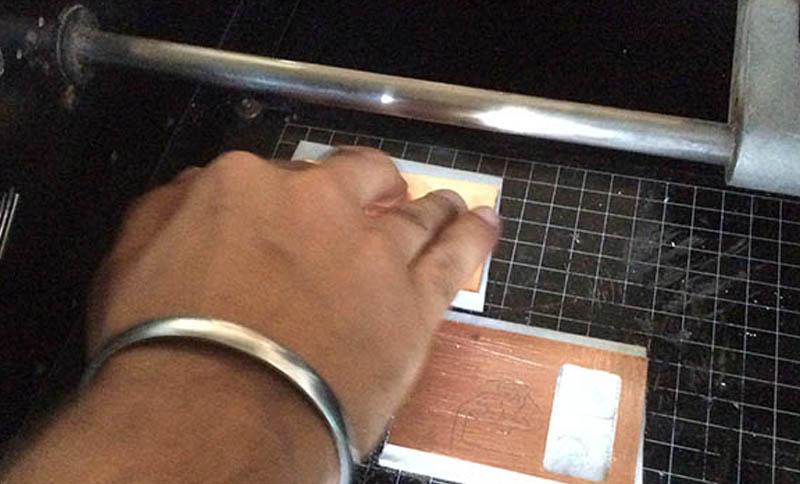
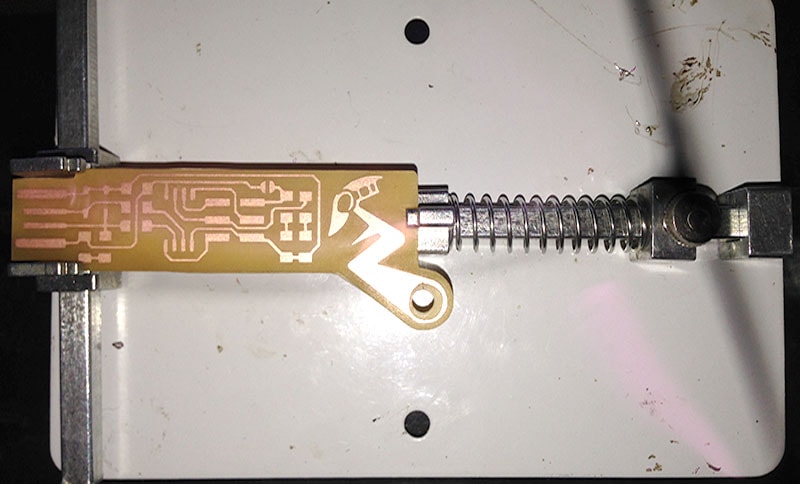
Took one sided copper PCB plate and pasted it with the help of double sided tape on the Modella with reference to the x and y axis grid made on its bed. These are the tools used for the same.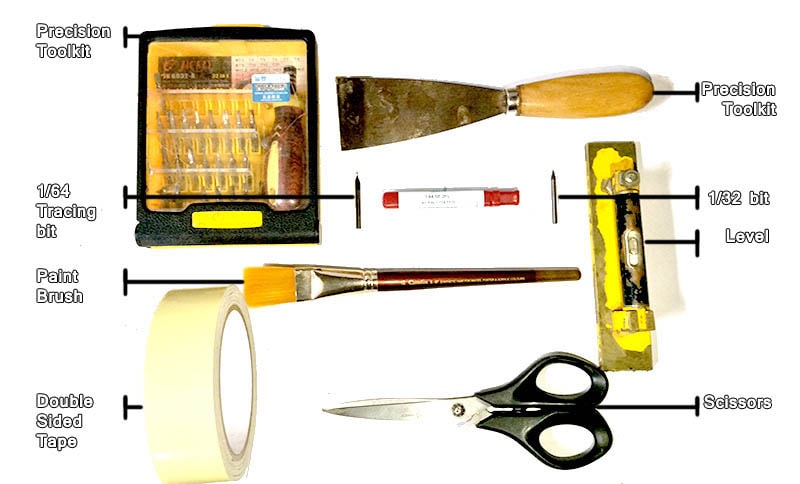


<-- Day 23
Day 24
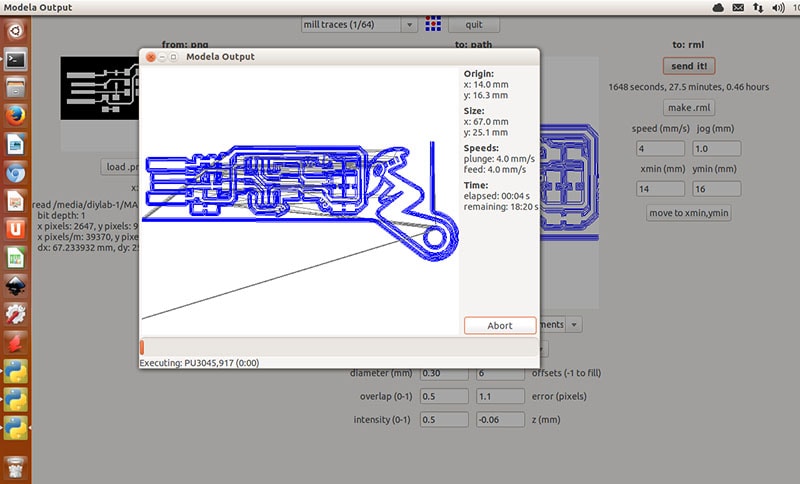
[ Fun moments with Modela]
Day 25 -->
Today is Saturday :
1. Had fun with the modela's broken cover with tape on its sensor
2. No blower to blow the dust off. Blowing with my mouth making sure not to inhale it back
3. Perfect milling of my board after few trials and understanding.
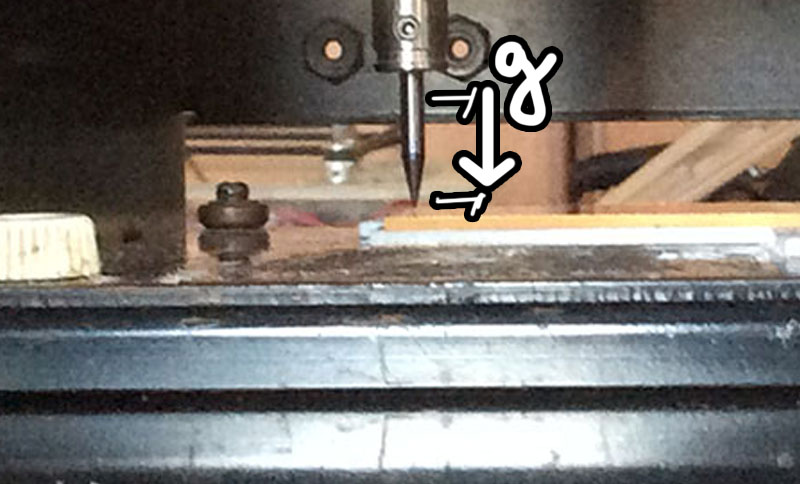
Having some fun with Modella, not actually blowing air, message here is to not blow away copper, its harmful can go in your eyes or you can breathe it, so always take a brush and slowly slide it away after stopping the machine.
 Today, its Vigyan Ashram's holiday as its their Village yatra (journey) where all the people belonging to that village meet each other coming from different places, pray as community and invite others to their home for lunch and dinner. So I was invited to one of our instructors place which had a very beautiful and heritage architecture, ate very tradional Vegetarian food. On this occasion they also have faire as community.

<-- Day 24
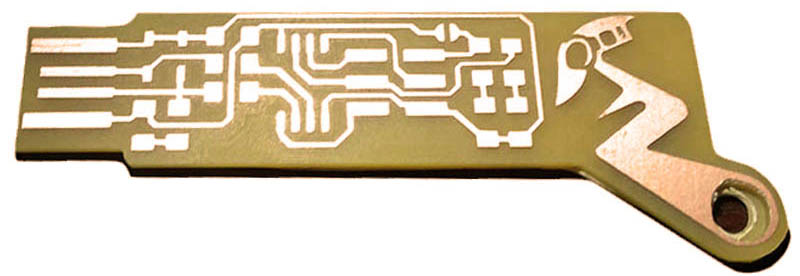
Day 25
[ Stuffing the Board ]
Day 26 -->
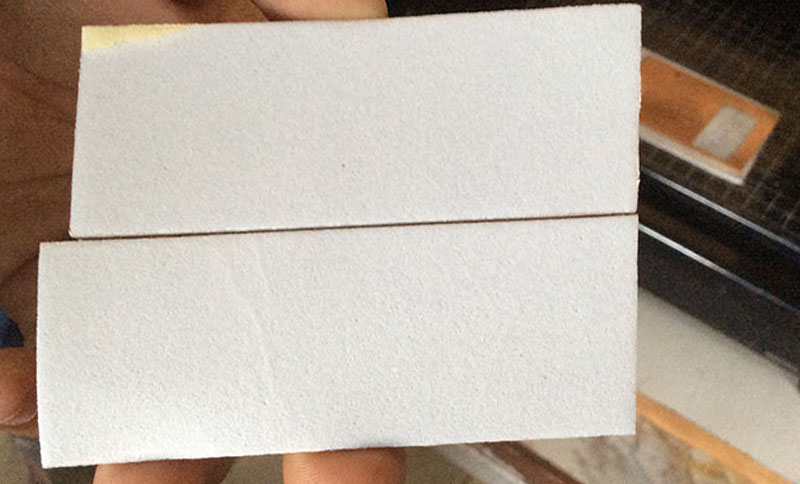
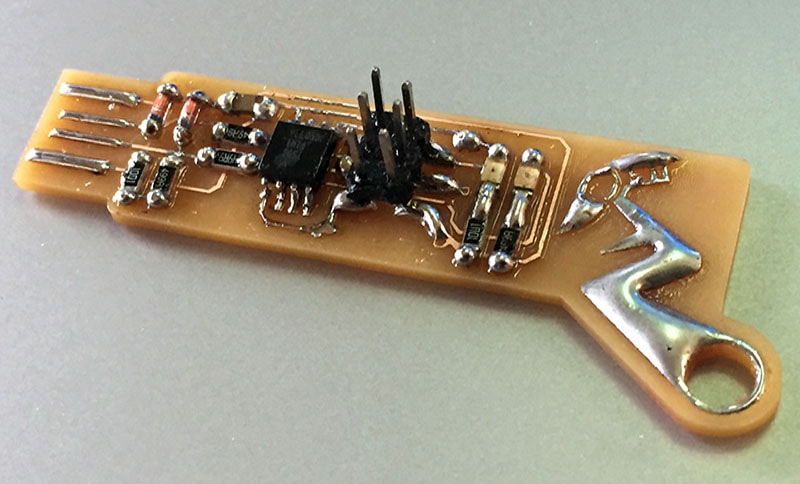
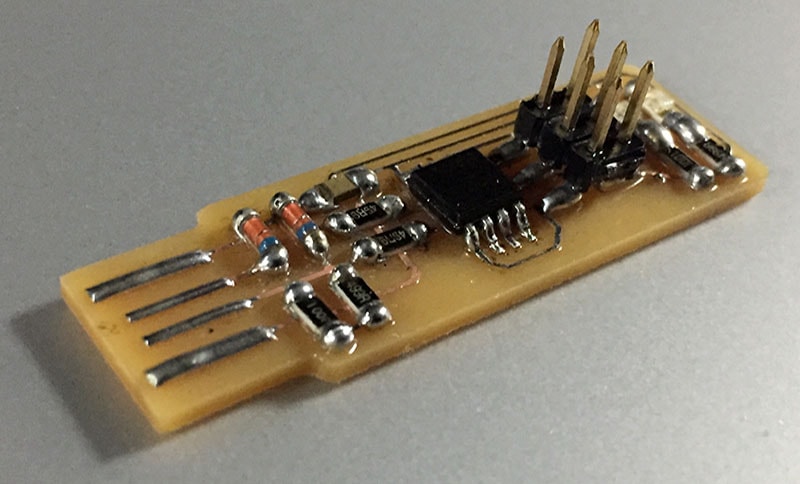
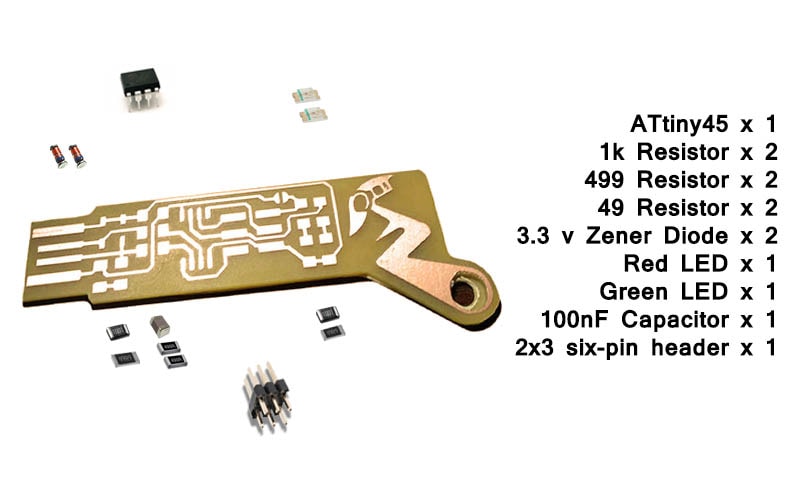 These are the components I have used on my board, it was great to explore all the different types of SMd’s while searching for these. Read datasheet of the IC too, just to know what is running my board.
So I surely liked soldering, I will be trying different methods of soldering and come up with the best way by the end of the fab academy, but for now this one is the proved one:
1. Basically , you put soldering coil a bit on the PCB where you want to solder,
2. Flatten it up with the help of soldering gun, then use flux a bit and put your component and use a very little soldering coil to join the component because connection will fall in place because of the flat layer you did before.
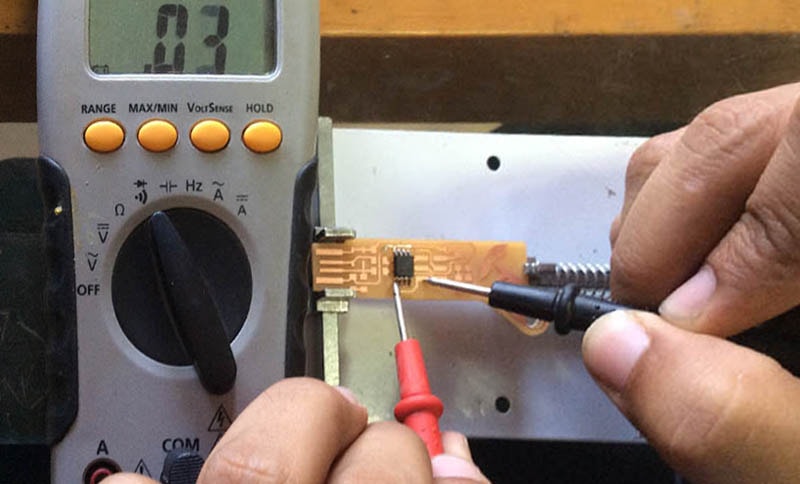
Also, keep checking your connections with Multimeter because when you check in the end, its too late , its possible but then save those efforts for something better.
- 1.Gathered all components
2. learnt how to stuff it and solder
3. Learnt importance of Flux and how to add and remove solder
4. Loved arranging the components while soldering

<-- Day 25
Day 26
[Programming time]
Day 27 -->
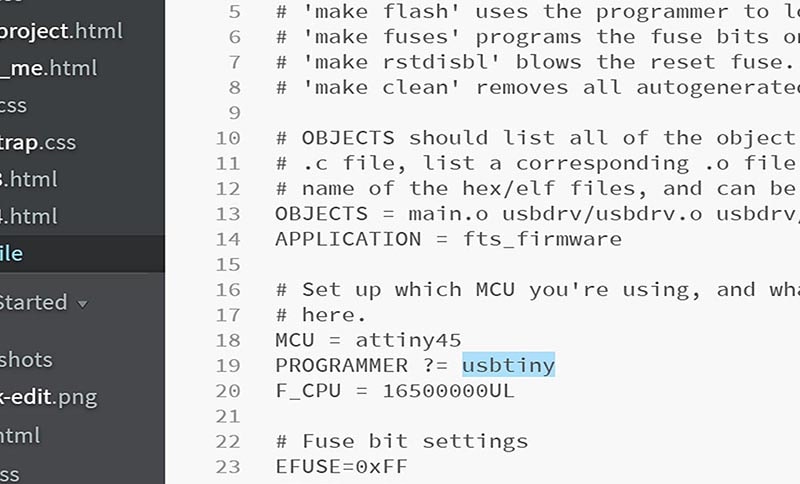
- Made it a point to try programming with windows as its mentioned in Brian's tutorial
- Got lots of errors every step but figured it out slowly.
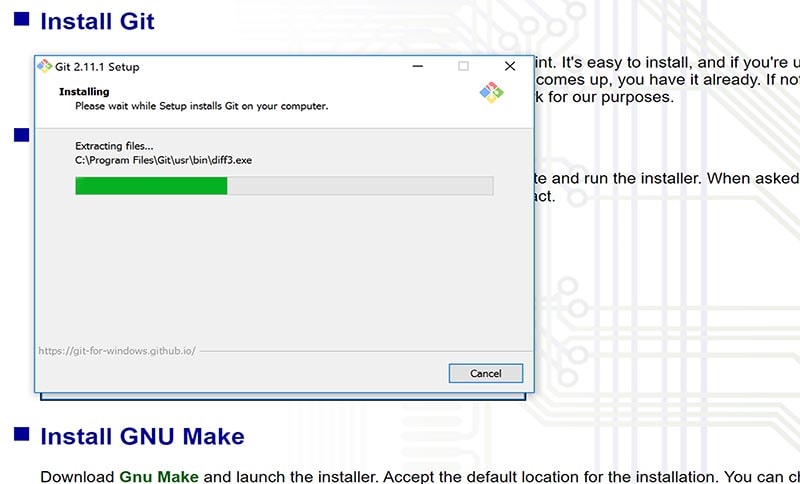
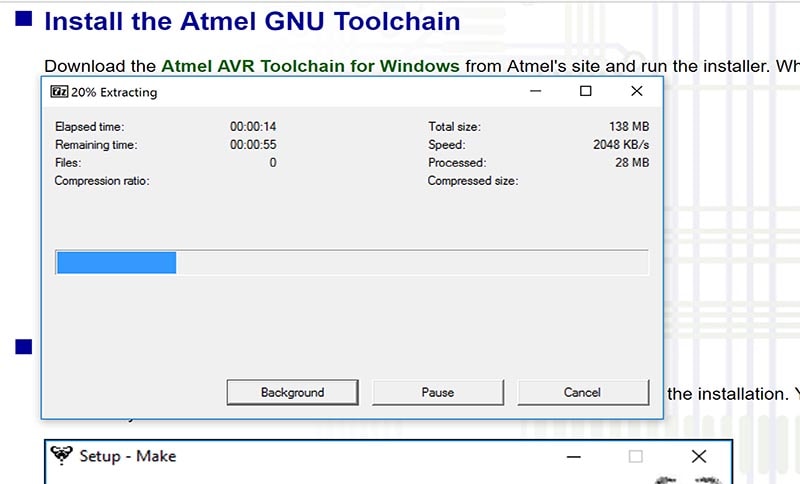
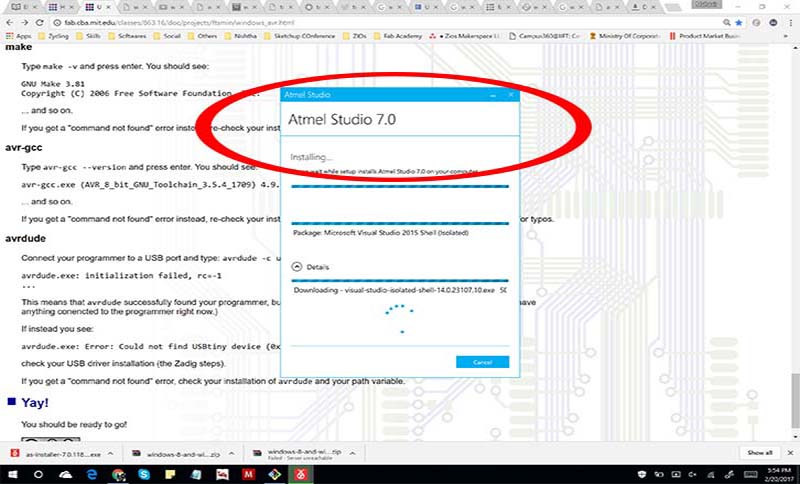
- Installed softwares mentioned in Brian's tutorial
<-- Day 26
Day 27
[Giving Windows a try]
Day 28 -->
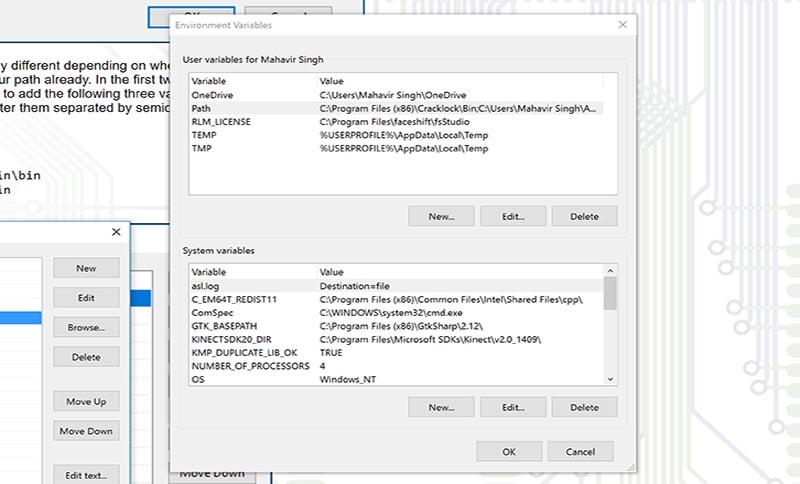
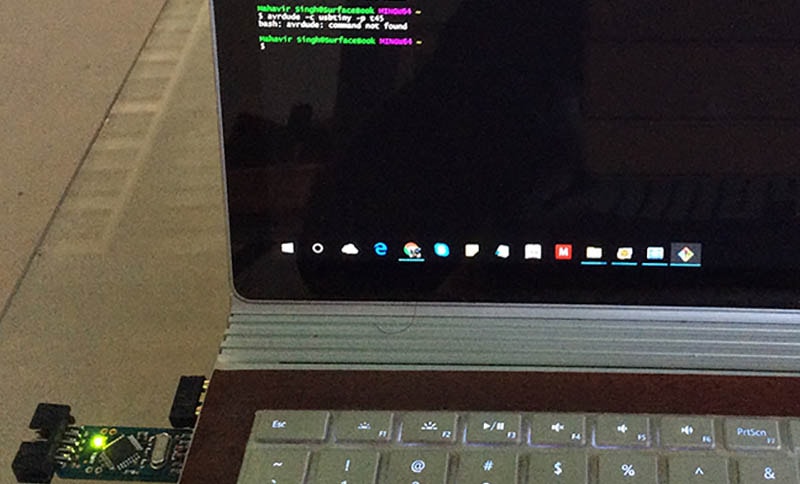
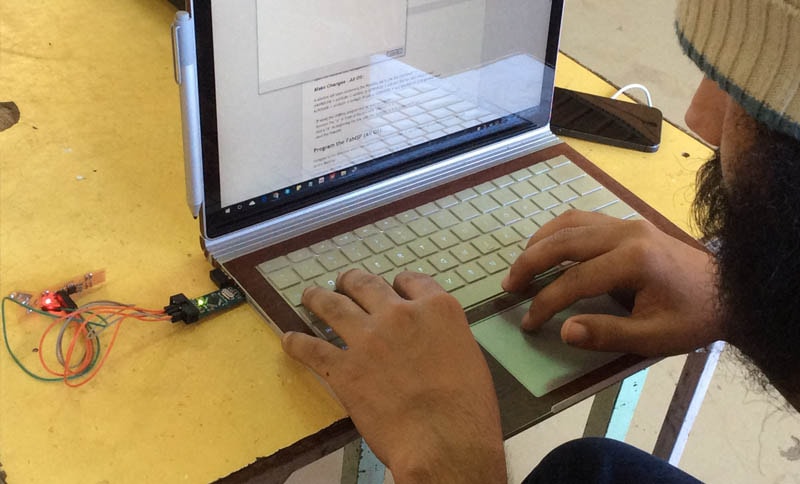
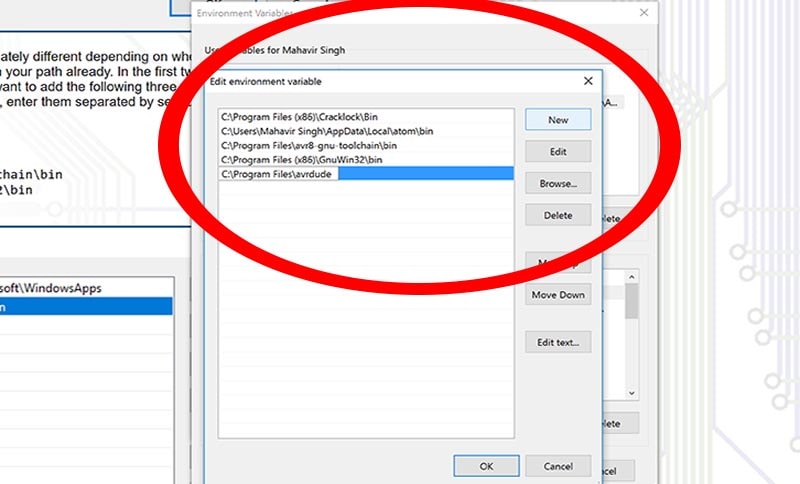
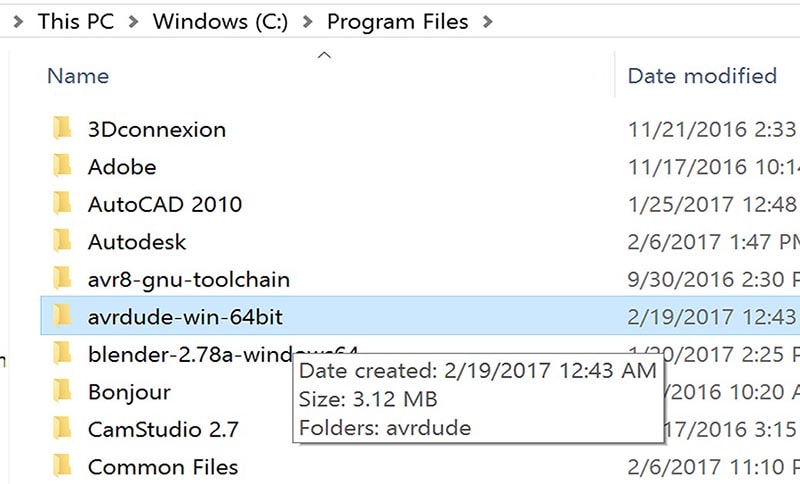
I am using Windows Laptop Surface book with windows 10, so want to try things on windows and check why and what cant be done on this. So yes, I downloaded the following softwares with following steps:
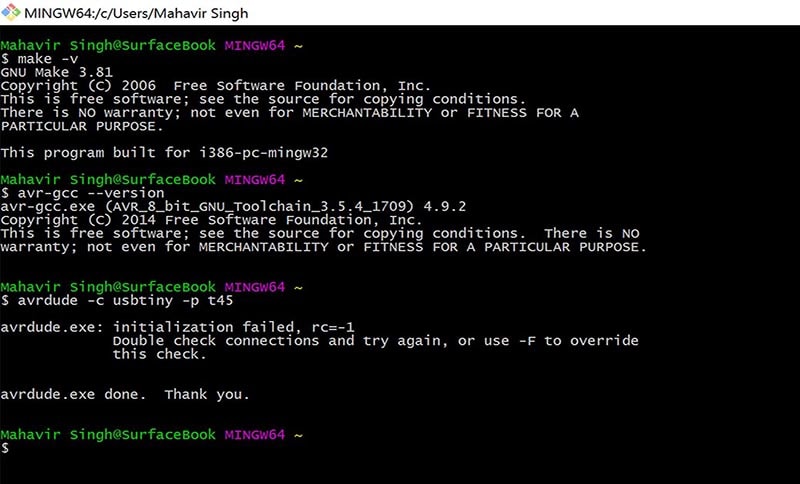
I am using Bash as my command line in windows:
Connecting My board with FabIsp of Suyogji to program my board.
Both boards were of Brian so it was easy to connect:
1. Download firmware
2. Open bash on windows/ terminal if you are in Ubuntu
3. Go to the folder through command line where your firmware is present
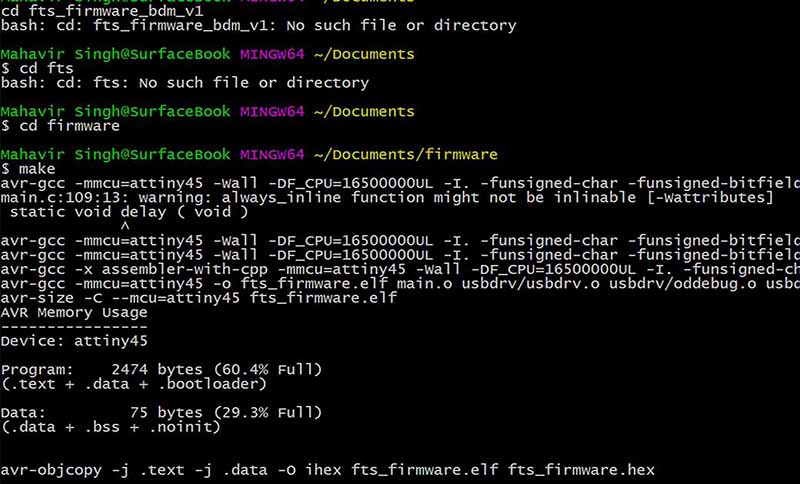
Cd Desktop
4. Cd fts_ (press tab to choose folder name. you can also type “ls” to list the files in the folder)
5. Make
<-- Day 27
Day 28
[ From UBUNTU to WINDOWS]
Week 5 -->
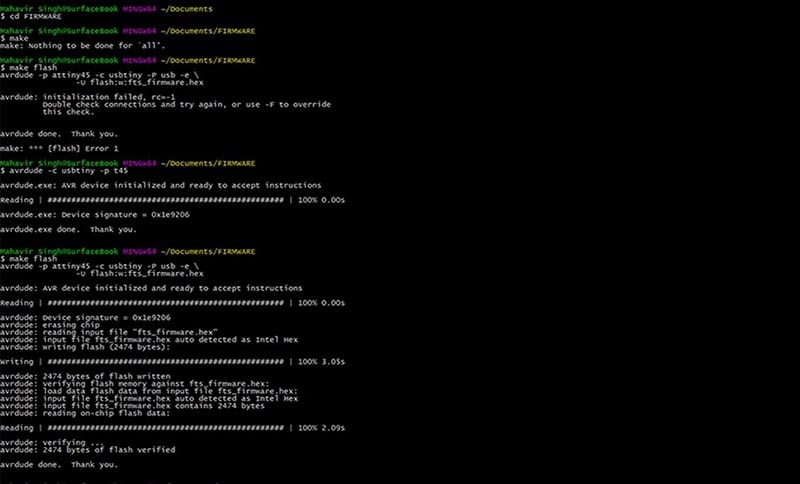
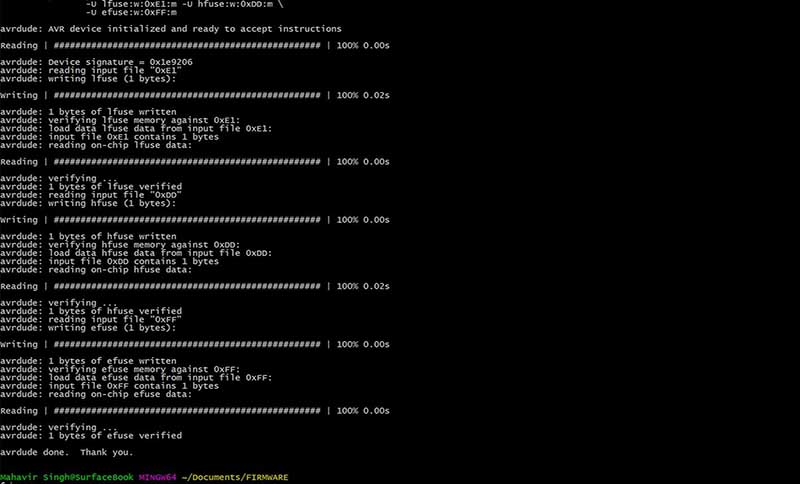
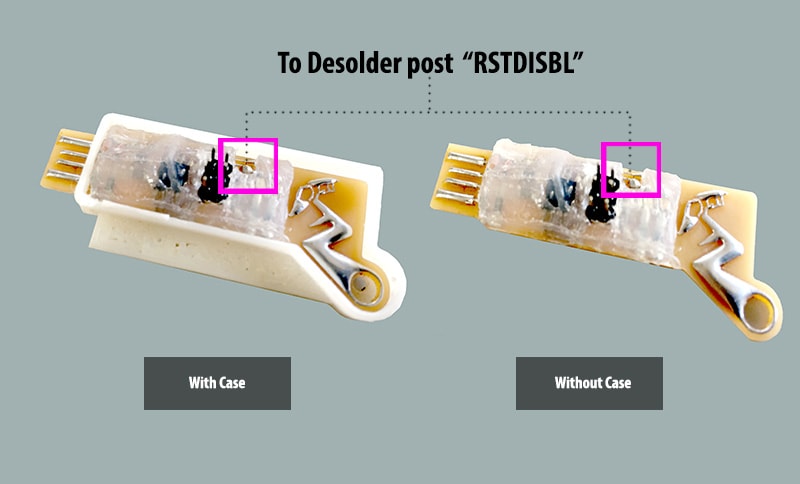
ISP burning another ISP (Video)
I milled a spare ISP on which i dint disable its reset. I'll use this board as a fab instructor to have kids test out their isp before RSTdisbl.
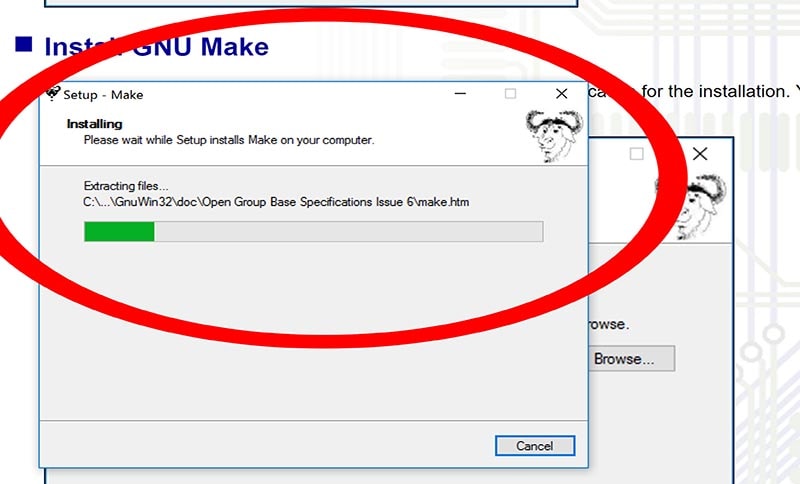
Moving on to programming on windows, to use GIT i followed and installed the following in the same order.


SET UP
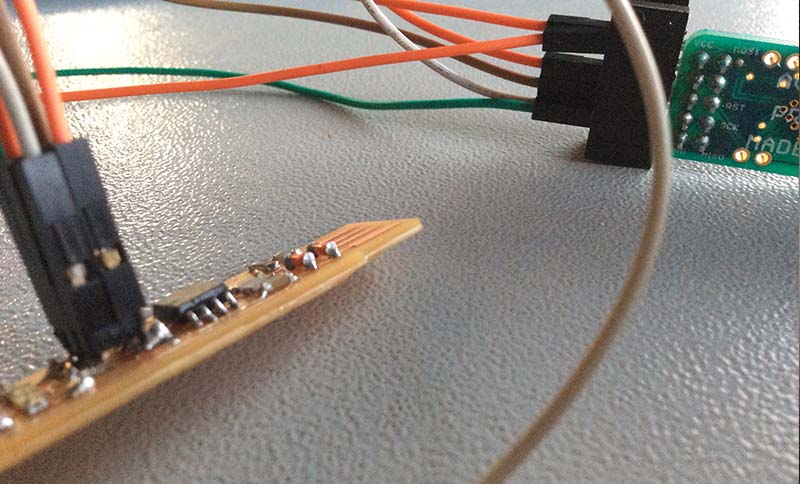
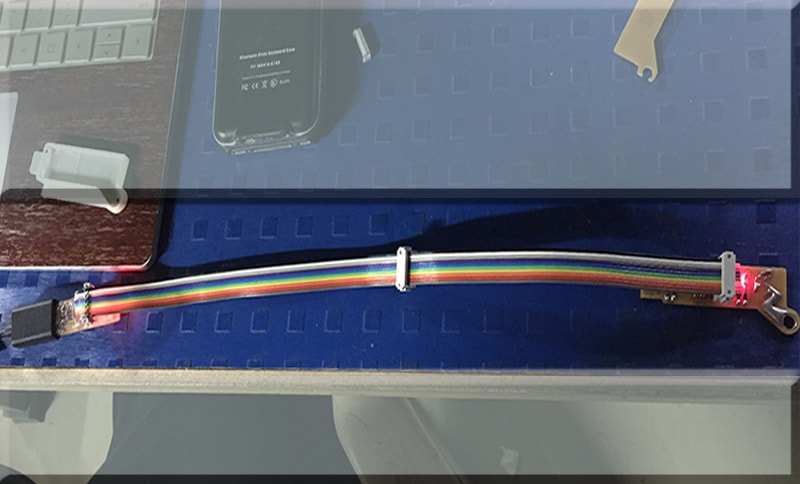
Its very important according to neil to set up your isp well beofre programming. I used a USB cable to plug in the isp to avoid pluggin it in directly to the laptop. This is to avoid damage to my usb and its easier to just flex the usb wire than to move the isp and its connected boards lal across the laptop. Another important thing in this image is showing the use of ribbon wires instead of jumper wires. Its easier and a neater process this way.
The next part is then to install the necessary driver in windows to be able to detect this(unlike Ubuntu which detects without this step)
I used Zadig to set up an interface to install drivers and libusb as the deviice filter.
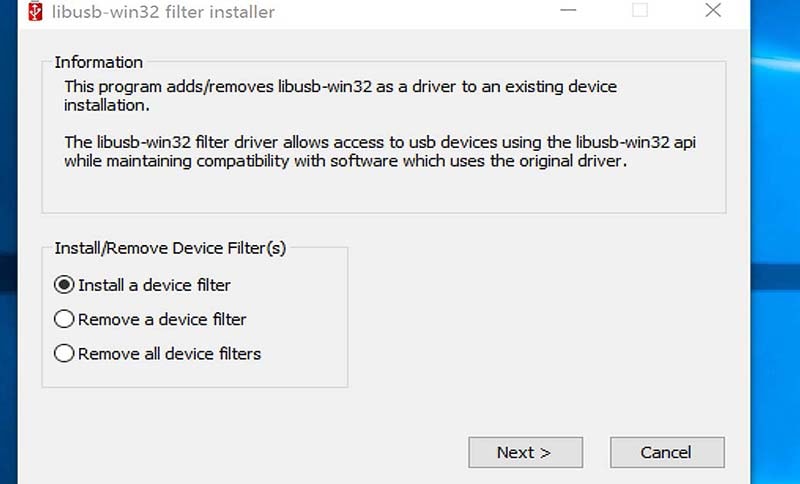
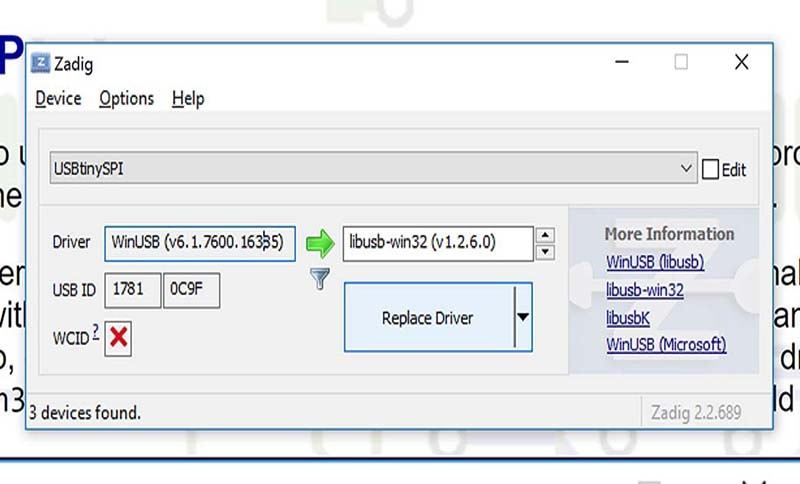
This stage requires us to select USBTinySPI and replace inusb with libusb installed earlier.
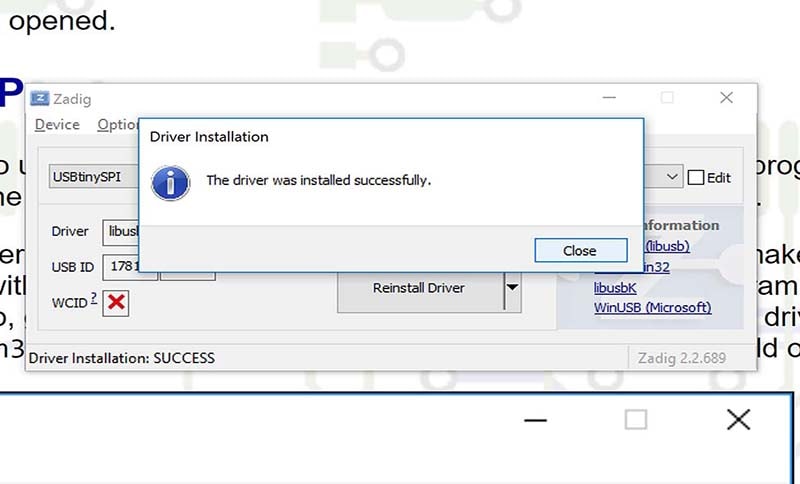
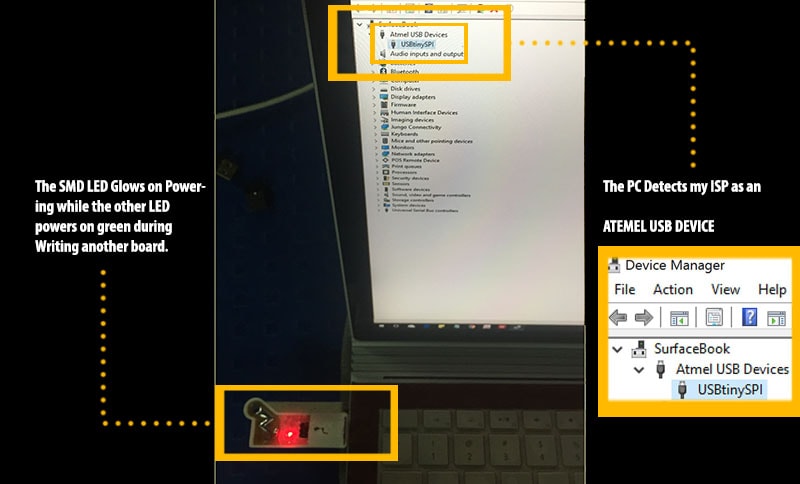
ISP FINALLY RECOGNISED
I liked this week as it forced me to not sit on laptop whole day designing and working but also do hands on work . I discussed with Yogesh ji my final project and how i plan to improvise it with time and use Shopbot before the given week so that i am able to figure out ideas to improve my final project. Nishtha made few designs which can be used for folding in group assignment as reference for all of us for our projects, so using 2 from that and designing 3-4 of mine i laser cut all of them and analysed which one go well easily for my Maker turban.

Project Files for Week 4
TRY 1


