Mechanical design
Weeks 9
Concept
Before we begin to talk about our specific project, we think it's important to say that we received the MTM kit last Thursday (April 13th) which put us in a situation where it was hard to get the project ready on time for this week. This said, the concept was already clear in our heads and even if we had the main files to build the axes, it was hard to figure the way it would move or space it'd take. We did as much as we could but we'd still need a bit of time to complete it and documents it completly.
Even with all that said, We still didn't speak about the concept! So, what we want to do for this assignment, and that we'll continue later on this week, is a automatized zen garden. It's sure that the concept is not the most innovative in the way that it does already exist and also that we probably did not push the concept that far upfront. Still, for us, at least, it's a great introduction to machines building and the final result seemed really awsome to us. As a reminder, we are still novice and we've already traveled a long way to arrive at that point where we could make such a machine!
To be more specific, we're going to use a magnet, mounted on X and Y axes. We want it to read Gcode, so it can draw something in the sand using a metal ball placed on a sandbox above the axes. Pretty simple you'd say ... well to us it's sound pretty awsome!
It seemed obvious to us at this point that we were going to use the MTM kit to build our machine and that the mechanical part of it would be limited to a 2 axes movement in X and Y. I guess there would be many different possibilities regarding the choice of a mechanical processes for this kind of project but since we have acces to those kits, why not use them !
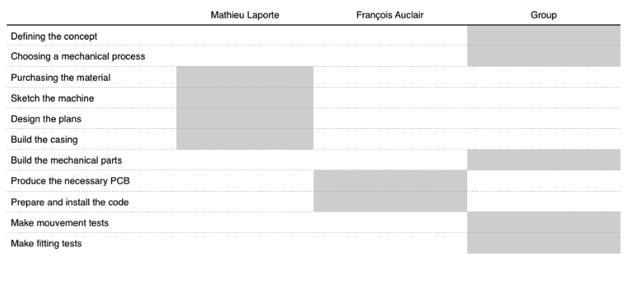
Planning
Also, as a group assignement for this phase of the project we were pretty much both involved all the time. Here how we separated the tasks :
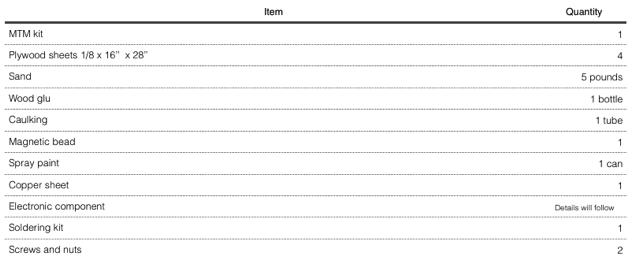
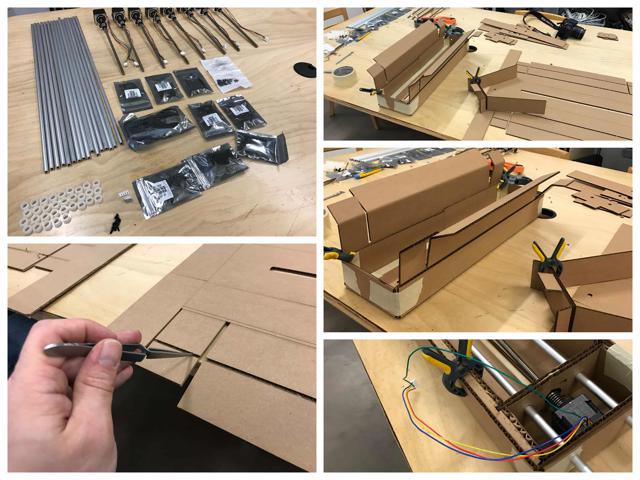
Matelrial list
Here what's going to be needed to build our zen garden :
Building the axes
As soon as we finally received the mtm kit we start building the machine. What a great design! Nadia and James really did a great documentation job and even tough some things was not up to date it was really easy to assemble the kit. One thing we really like about the kit is
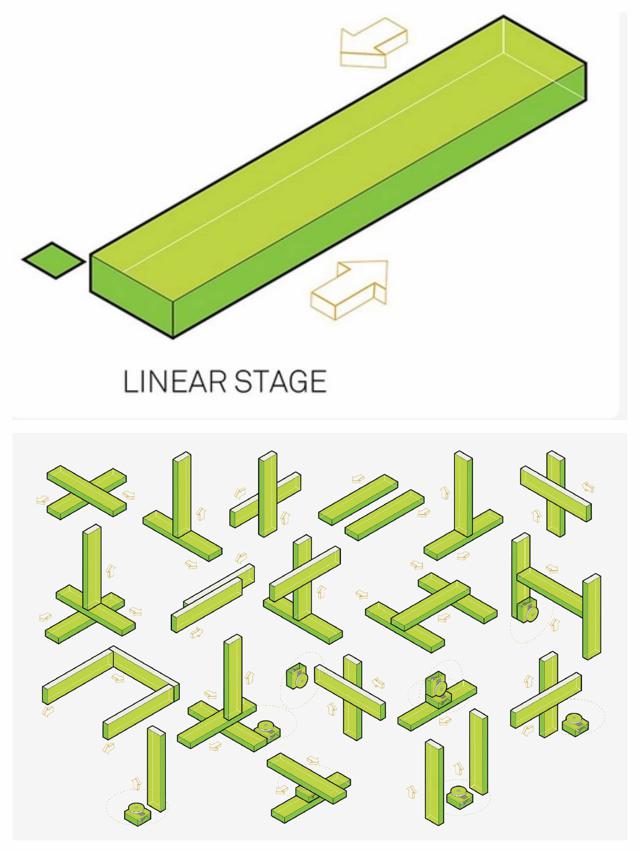
the way it use cardboard, a cheap and super cool material for rapid prototyping. With cardboard mistakes are less stressful. The kit is modular and can be use to make machines that use linear and rotary stages. Like said above, for our zen garden, we only needed a two axes machine that can move on it's y and x axis, since it's not a plotter, no use to have a z-axis.
First step was to laser cut the cardboard part. The files that we found inside the documentation was in a .dxf format and when we tried to open them via inkscape it appears all weird and not complete. First thing we try was to open them with another computer, but the issu persisted. So we then tried to open it via another software than Inkscape, we use CorelDraw, and it worked! Since I never use Corel, I save the file as an svg and reimport it in Inkscape, everything was working fine after that.
The draw was made in two colors: blue for whats needed to be cut and red for the things that was supposed to be fold. After a few test, here is the parameters we uses on our speedy 300 60 watt trotec lasercutter:
Cutting settings : Power : 60 Speed : 1.75 Frequency : 1000
Folding settings : Power : 40 Speed : 2.25 Frequency : 1000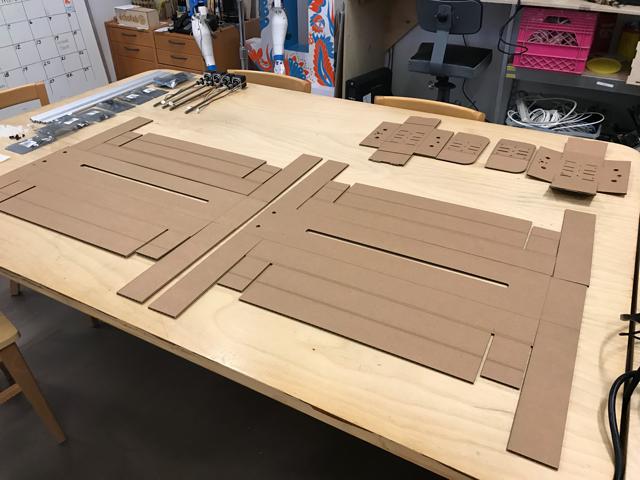
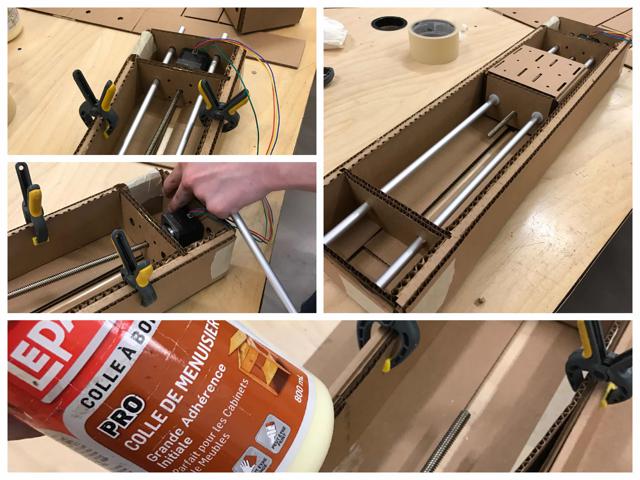
Once we had all the part we started to assemble the kit. We use glue and clamps to make sure everything stay in places, the design was super cool to assemble and we encounter no real issues during the process.
We simply follow the steps from the gif made my Nadia's team:

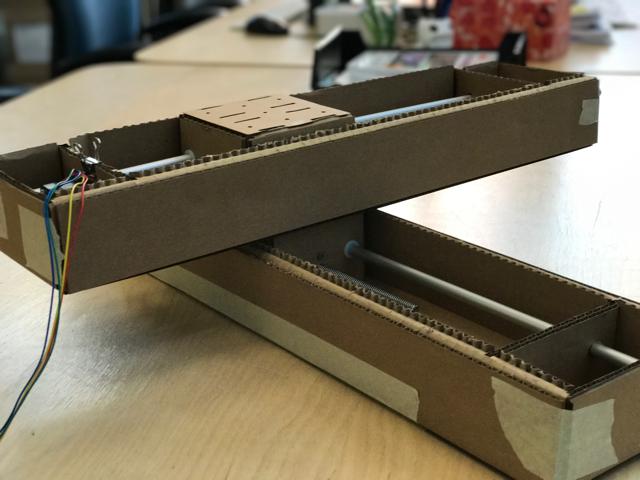
Soon enouph, the axis were made and everything seems good to go! Here are some snapshots of the process:
Rest of the taks on design week
This is pretty much it for me mechanical part of the MTM assignment. Our mechanical structure is definitely done and working manually, as Neil advised us to test. The tasks that remain and will be continued with the machine design week. First, I have to design the machine itself, meaning how to integrate the mechanical parts within a box with sand on top so it can draw on something. There are two challenges that I'll face for that. The axes together are bigger than our laser cutter. I'd have to come with an assembling solution to make it possible to make with the laser cutter. Also, it has to be fully closed, no cracks can remain because the sand would come down and block the mechanical parts. All the programming and electronics tasks will be done by ma colleague because his better at it.