Embedded Programing
Program your board to do something
In this assingment i realise how important microcontrollers can be! And how awesome they can performe under the right code.
Trying to understand the Attiny84's datasheet in deep was a quite a challenge because there they explain many things related to its construction and how it works on the hardware side, talking about their registers, memory addresses and etc
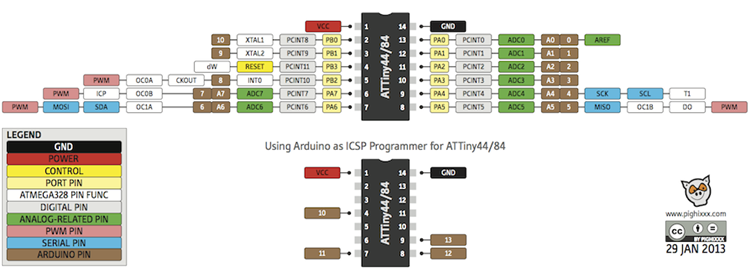
One of the most important things in the whole datasheet is the association of the pins to their coding representative numbers, which tells you if there are special "needs" for the chosen pin.
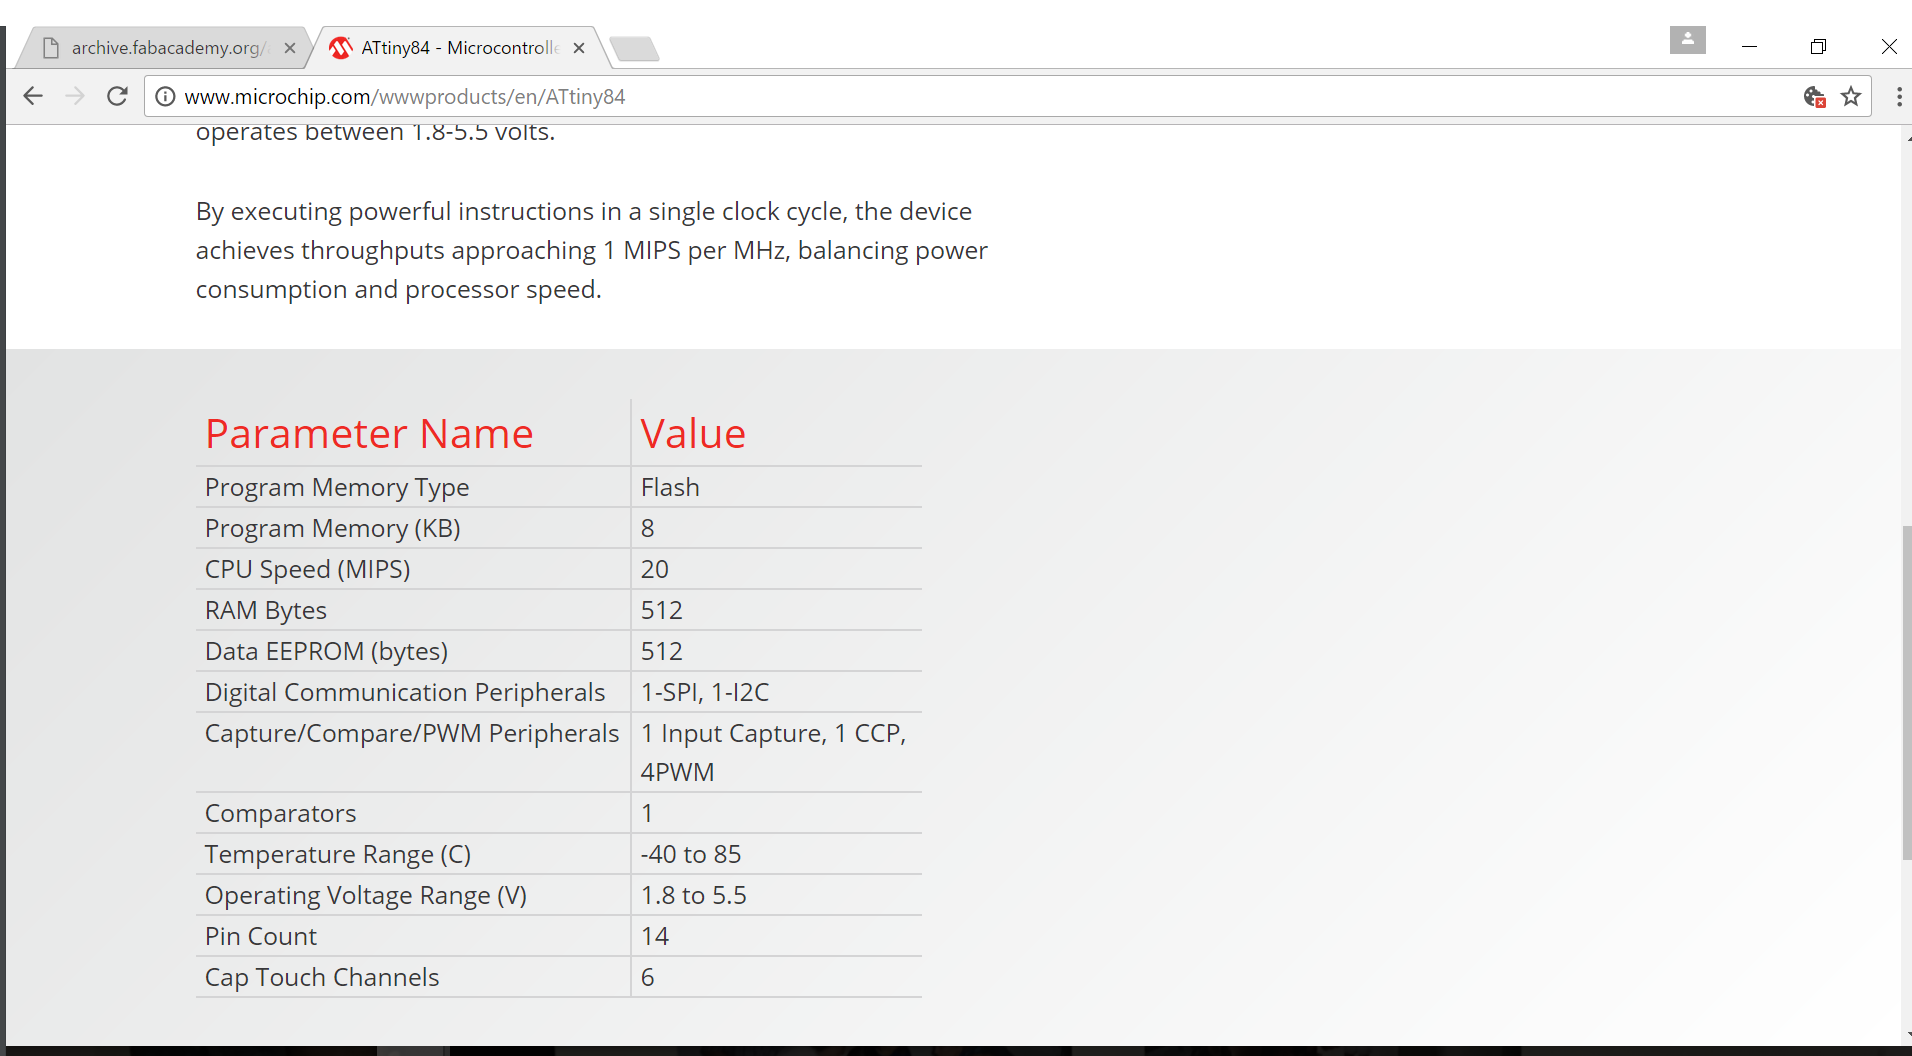
It's important to mention the voltage and temperatures that the attiny84 can operate
Setup the attiny libraries to you arduino IDE
I used the Fab ISP as programmer. To be able to use it, I had to install a new programmer and board manager to arduino IDE. I followed a tutorial that Siron showed us inhttp://highlowtech.org/?p=1695
To to this in arduino IDE you need:
- Go to file>preferences
- find for the option that says “aditional board manager”
- paste https://raw.githubusercontent.com/damellis/attiny/ide-1.6.x-boards-manager/package_damellis_attiny_index.json
- Click the OK button to save your updated preferences.
- Open the boards manager in the “Tools > Board” menu.
- Scroll to the bottom of the list; you should see an entry for “ATtiny”.
- Click on the ATtiny entry. An install button should appear. Click the install button.
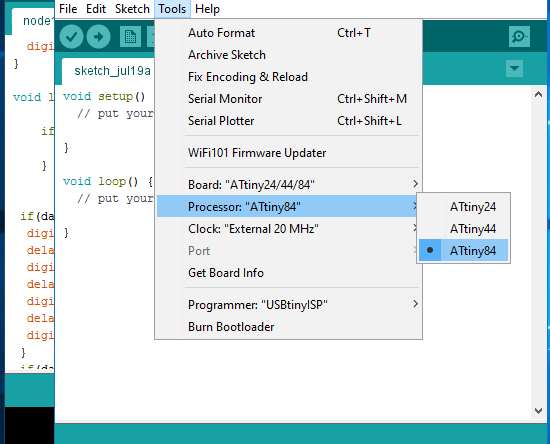
Modify the board tipe and cicrocontroller to ATTiny24/44/84 on the arduino IDE software
- Close the boards manager. You should now see an entry for ATtiny in the “Tools > Board” menu.
- After choose ATtiny, in board, you will be able to choose the processor (Attiny 24/44/84)
Choose the clock according to your board 8mhz, 20mhz etc..
Before program it, you need to verify you code, click in the “V” shapped button in th top left in Arduino IDE screen.
Connect you Fab ISP programmer in the USB, and the flat cable between the programmer and the board to be programmed. Make sure you did it in the right position
Then if everything go ok, click in Uplodad, a arrow shapped button.
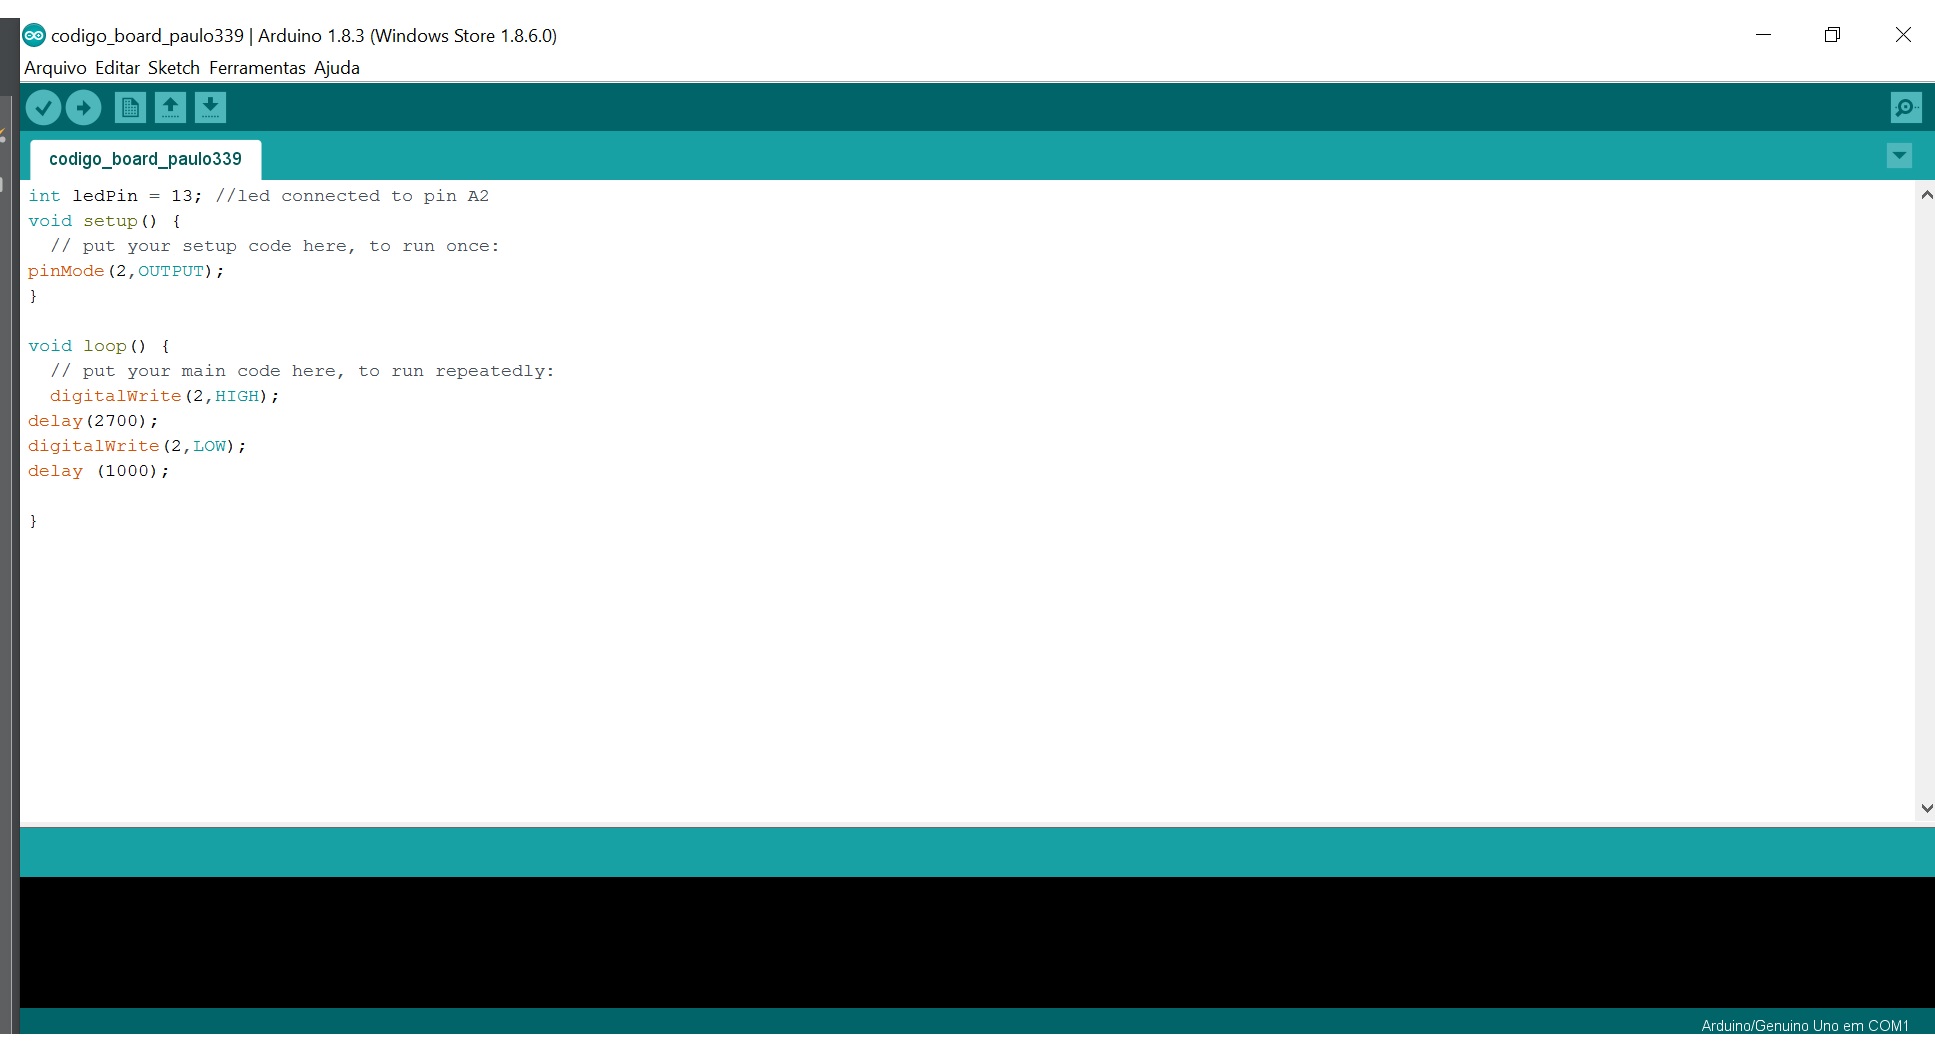
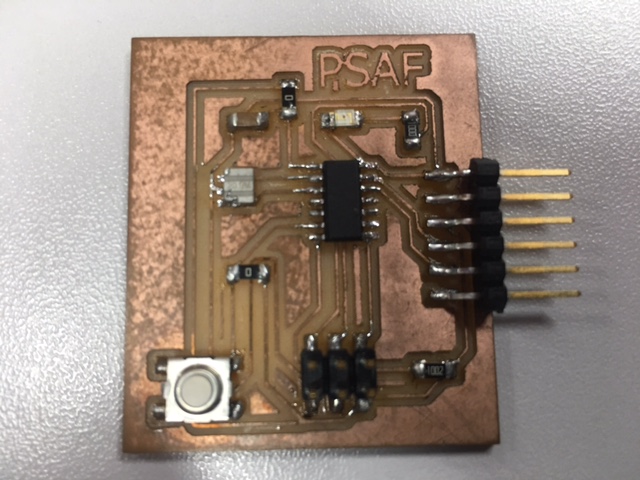
my code is pretty basic, it was a modification to the blink example on the arduino IDE Software, i had changed the pin ports to work with my board, I identfied wich pin were active on the original code and changed to work with the pins in my board
During this assingment I realised that i had forgot to add a resistor to my board, so the push button always burns.(already fixed)
After reading the Attiny 84 datasheet i realized that it can do a lot of things, but you need to pay attention to the voltage and to the amperage on you apllication.
 Code Avaliable Here
Eagle File Avaliable Here
Code Avaliable Here
Eagle File Avaliable Here