Week 4 - Electronics Production
Make the FabISP in-circuit programmer
Steps:
* Set up the Roland MDX-40A milling machine
* Creating PCB calibrating IModela
* Soldering components
* Coding
Set up and create PCB
I just fix electronics board since this week. I mean, it's first time I approaching electronics from zero.
I started to prepare
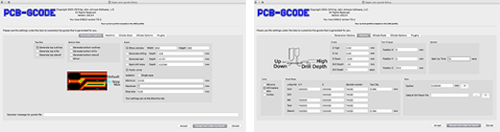
the PCB. First of all I installed Eagle 7.5.0 on my Mac,
then I downloaded and installed the plug-in "pcb-gcode-3"
that allow to generate the gcode from the board file.
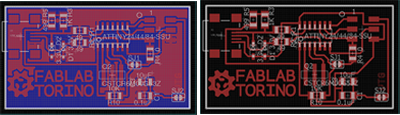
Federico Vanzati (our FabLab instructor) give me a template on Eagle to use. I change just the way of connecting the ground.
I typed the command: "ripup GND"-->"poly" and I created a rectangle-->"name" "GND"
Could be an hazard, because the routes are very close, but I hope on my manuality on soldering.
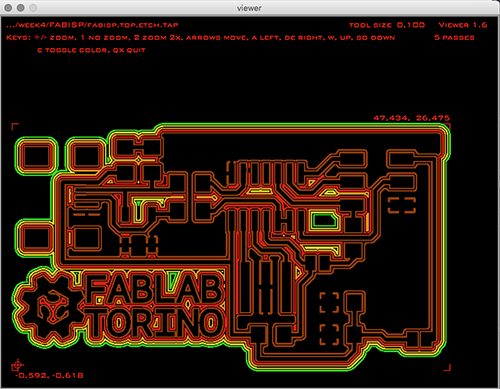
We choose the correct settings in order to make the most of the plug in installed on Eagle. The real first problem was the milling shape that we choose: a cone. If you get the wrong Z, you will take off more copper than the machine thinks.
For milling we try with a mechanical solution like this.
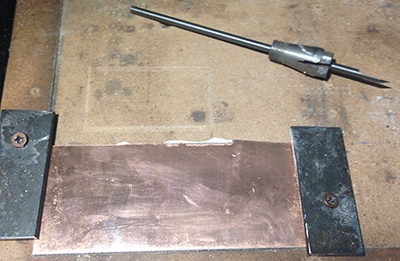
At the Fablab Torino, we have a super cool tool for calibrate the build plate. You just have to clamp one of the crocodile on the milling tool and the other on the copper surfacce: when the led turn on, you have the right Z positions.
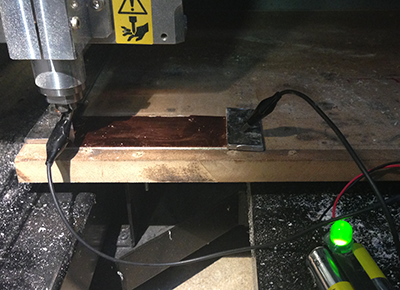
We worked in team to set up the milling machine: hight precision but very difficoult to lock the working plane complanar. We work on it till Monday. Stefano Paradiso fixed it, changing and livelling out the work plane. He also prepared it with some elements to secure the PCB base.

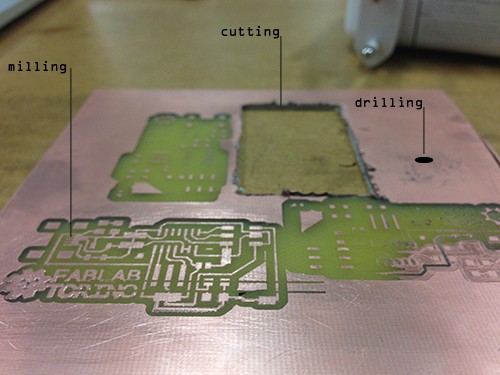
However, the milling process is divided at least in 3 parts: just milling, drilling and cutting (this is the right order: milling before, cutting at least). For a SMD board we just milling and cutting. Every process needs a different milling tool and every time you change that, you have to calibrate the Z again!
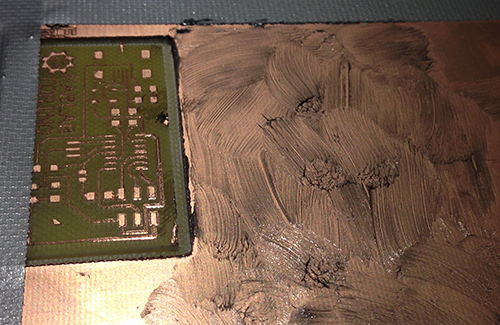
In order to reduce the friction, we always spread some grease on top. Less friction results in less vibration, so a better milled PCB.
I don't know why, but the structure of this of PCB, give us a lot of trouble: works well just the first time, than starts a loop of connecting and disconnecting from the computer. Fortunately one of us Gianfranco Caputo manage this assigment very well and give us his solution, that works well. We just change the usb port.
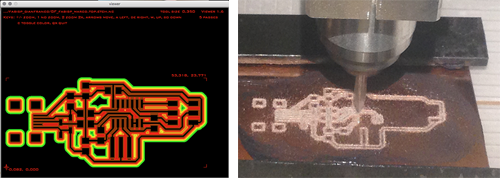
I was too excited to use the new eagle plugin and I realized that I had not enough time to use the fab modules for milling. All the arguments of this assigmant are new for me and I just follow our fablab workflow, anyway I'll use it soon because it's a very interesting tool!
Soldering
In this kind of work, I prefer to order well the workspace in order to have everything under control and keep the mind focused only on the goal
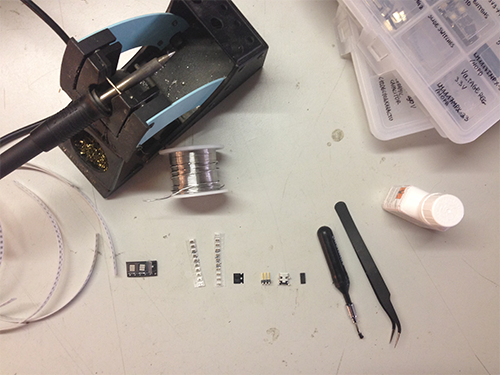
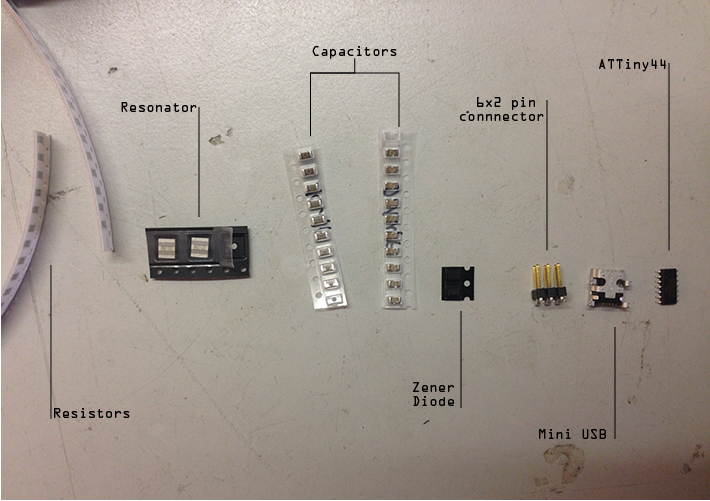
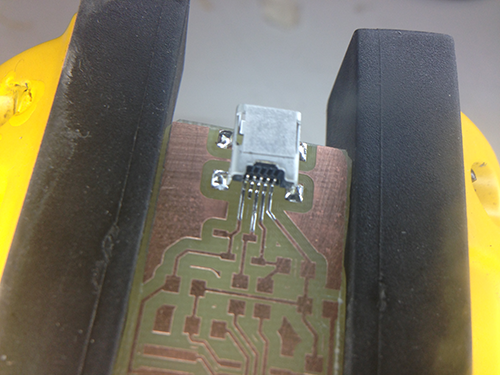
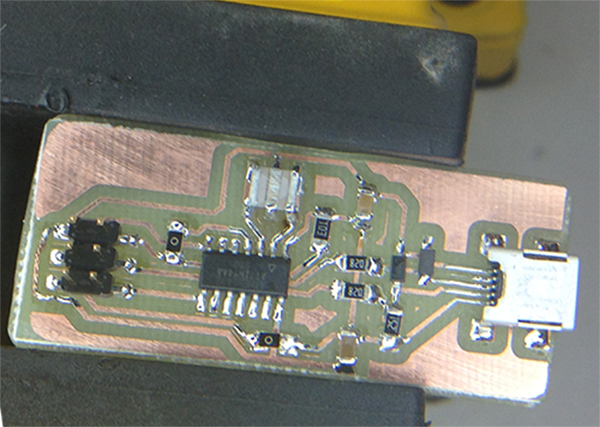
I sanded the PCB and I washed it with soap, in order to obtain a clear surface. I placed the PCB on the clamp and I started
directly with the USB port. Is in fact the more complex component to be soldered because of the size of the tracks. If you do well
that, everything else is downhill!
For this thiny track I use an amazing product called
flux liquid: you just have to drop it on the critical soldering zone and he directs the tin on tracks.
While I was soldering, I realized that I had taken away a track sanding the surface. I thought: keep calm and soldering! So I interweave some copper wire and make a little bridge.
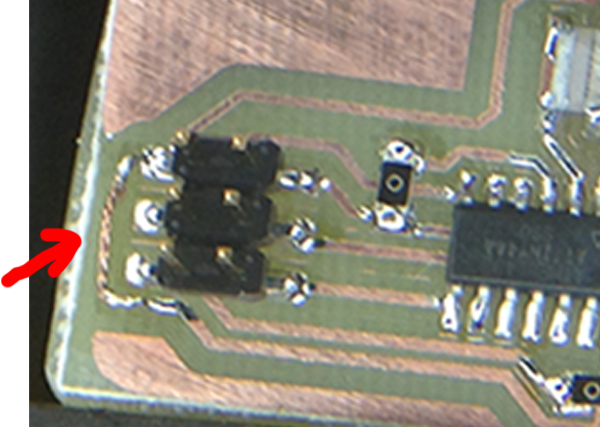
For soldering our mentors suggested us many tricks in those days: the main rule to get a good result is: warm up before the track and only after melting the solder wire, resting it in the soldering point and not on the top of the hot solder.
Coding
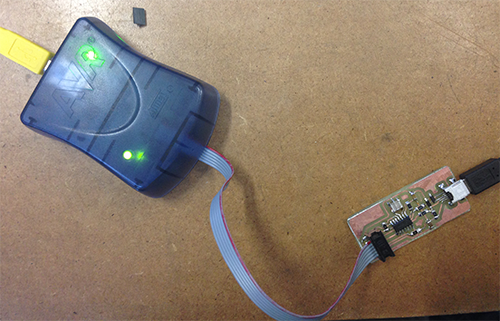
Basically, to upload the firmware on the FabISP I need another ISP programmer to bridge the FabISP with computer trough a 6pins
ribbon bus.
I started from the beginning, downloading CrossPack for AVR® Development.
Than I downloaded XCode from the Apple App store
in order to get make via x code.
I downloaded also the frimware
on my desktop, from the tutorial that the Academy leave us.
I opened terminal and I navigated to the desktop to unzip it and I
moved it into the firmware directory on my desktop. So I plugged my FabISP to the computer and to another programmer that was at the FabLab.
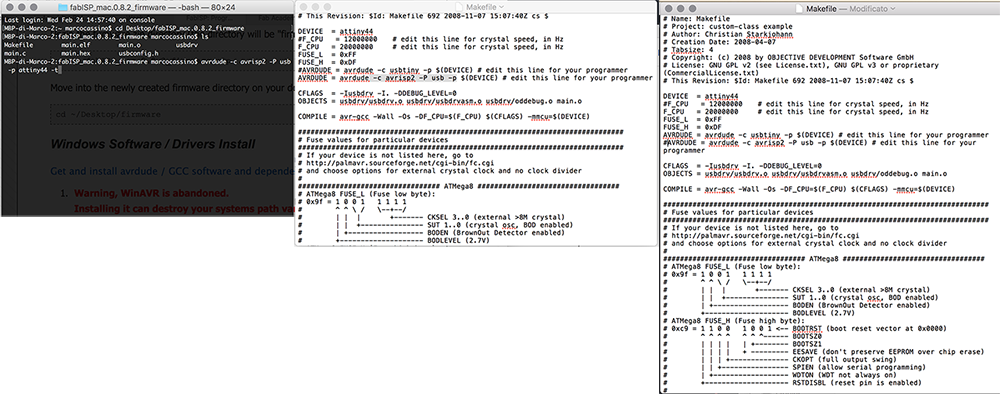
I opened the Makefile with TextEdit and I follow instuction that was suggested in this tutorial.
By terminal, I navigated to the desktop/fabISP_mac.0.8.2_firmware, where I saved the FabISP firmware and I compilated the frimware:
make clean --> make hex --> make fuse and after that make program!
RETURN UP
| ← week 3 / computer-controlled cutting | week 5 / 3D scanning and printing → |
|---|