Week 5 - 3D Scanning and Printing
How to use these 3D technologies
Steps:
* Test the design rules for the Materia 101 and Ultimaker Original
* Design and 3D print a small object that couldn't be made subtractively
* 3D scan something and print it
Test the design rules
First of all, I suggest a troubleshooting guide,
in order to understand your machine.
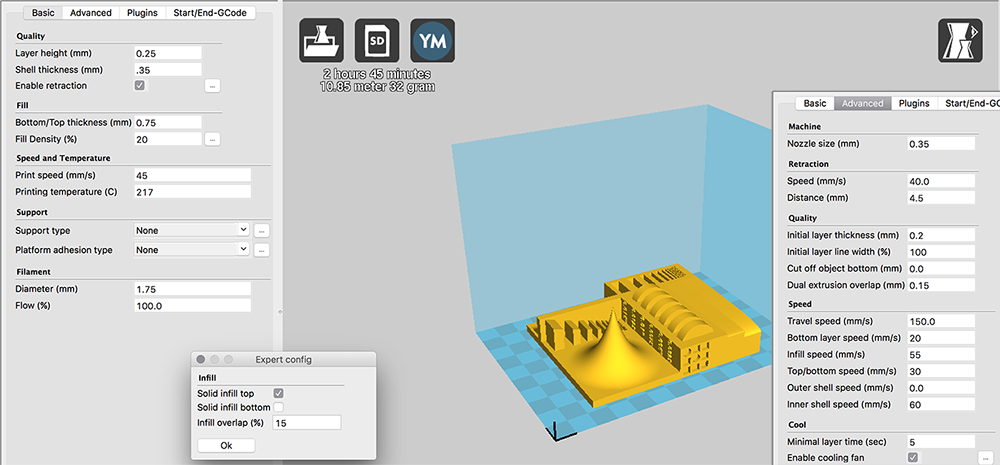
We started testing our printers using a file created by Stefano Paradiso.
In 3D printing, we had to export an .stl file, so we decided to controll the export quality, transforming in advance our object from NURBS to Mesh.
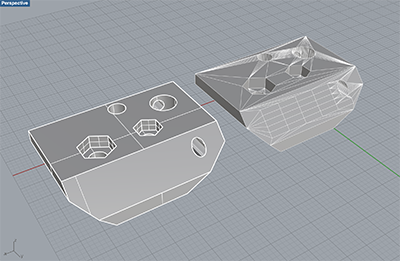
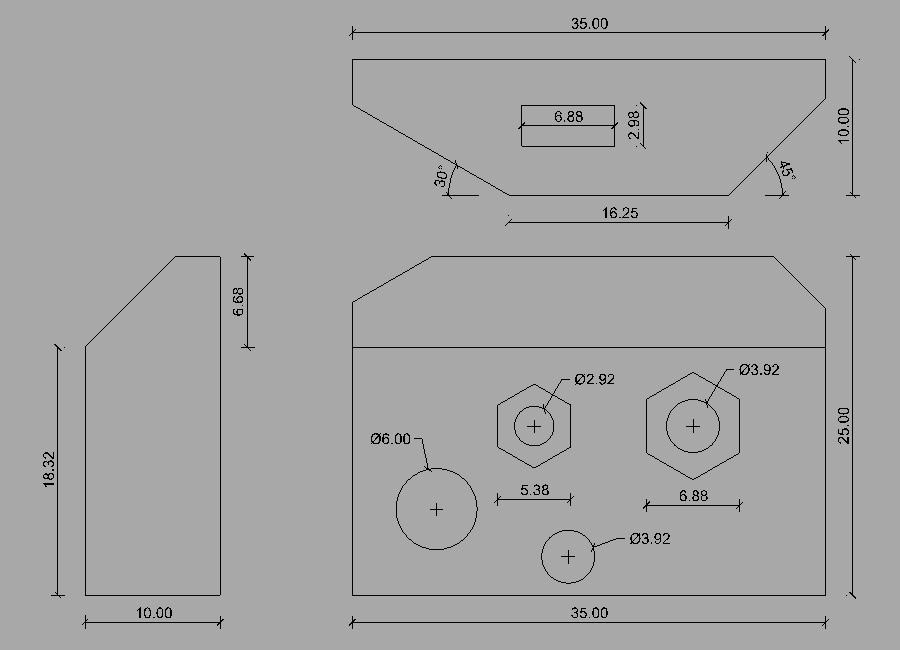
The goal was to analyze the tolerances between the dimensions we had drawing and the real sizes. We also have tried to stressed the two printers making them work without supports with angles up to 30° and complicated bridges.
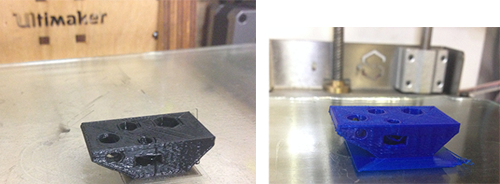
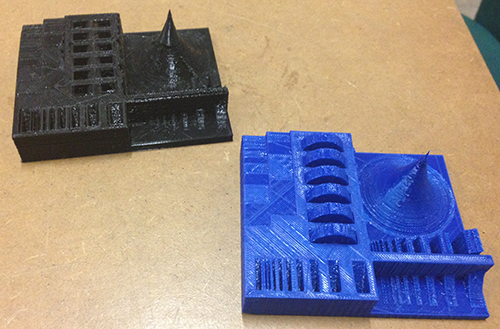
The fan of "Materia 101" didn't cooled well layers, giving an imperfect aspect to the sloping walls.
We observe a very
strange Materia101's behavior: the little particulars are made smaller, while the larger parts are printed with extra dimentions.
The Ultimaker Original instead, print everithing a little bit smaller. I have an Ultimaker Original since 2011 and over
the years I found a scaling coefficient of 1.03, which can solve the problem in most of the cases where I need to print
precise details.
Finally, we can say that the Ultimaker Original
is more precise then the Materia 101, but settings the different kind of speed, I'm sure that we can refine the printing
results.
In the last analysis, the "Ultimaker Original" had some problem with the feeder or with the nozzle (or maybe
the PLA we are using is just too old and it's dry and fragile), because sometimes recive less plastic and some layer doesn't
stick well.
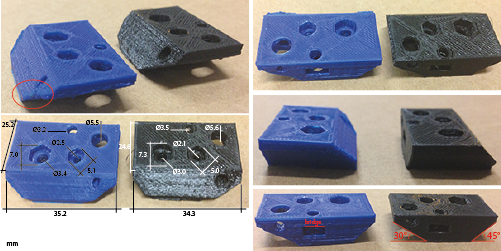
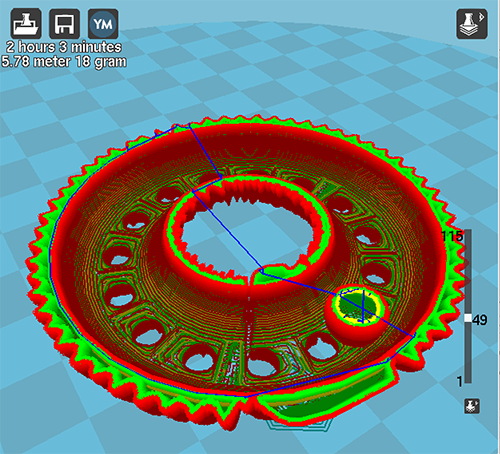
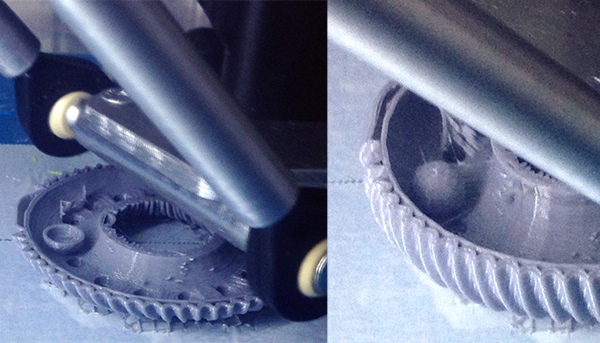
After this first test, we had fixed and calibrated both printers and we are ready to print the Tolerance Test's file. I choose to unflag the “solid infill bottom" in order to waste less material and to facilitate the detachment.
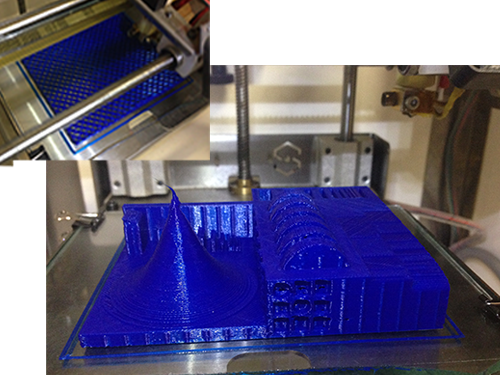
We obtain a similar results. The Ultimaker's problem of unstick are more visible in this bigger test.
Design and 3D print a small object
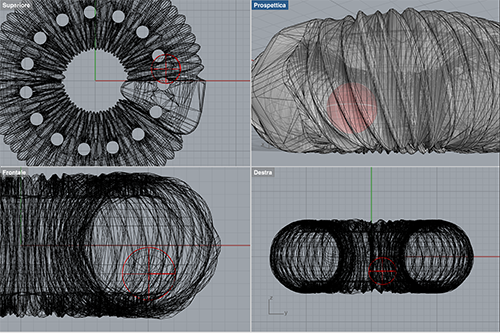
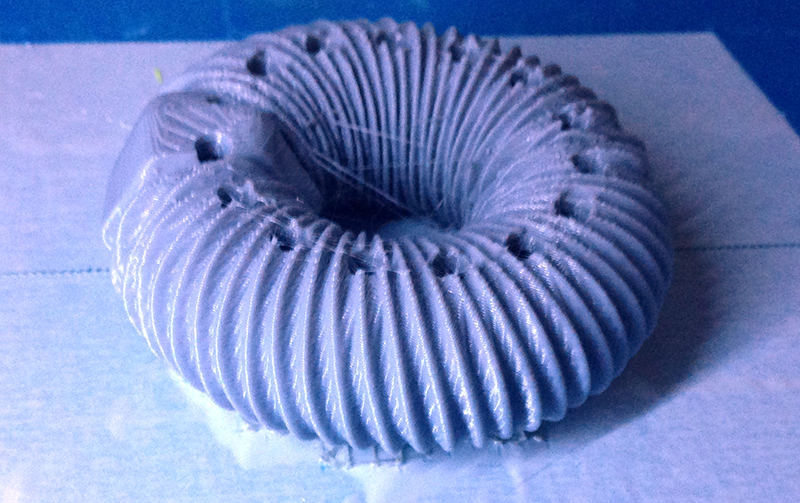
I had to design and print something that could not be made subtractively, so I took the opportunity to practice with grasshopper. Therefore I designed a kind of toroid with a parametric surface, then I imported it into Rhino, where I emptied and perforated it with a series of polar holes. After that I created a sphere inside, intersected with the toroid for 0.1mm and positioned close to a hole.
Once I printed it, I pushing off the ball lightly with a screwdriver through the nearest hole. I obtained a special
Toroid with free ball inside:
impossible to realize with any other technology!
I print it with my Delta 2040 - Wasp,
a very reliable FDM printer, choose after a long screeming.
3D scan
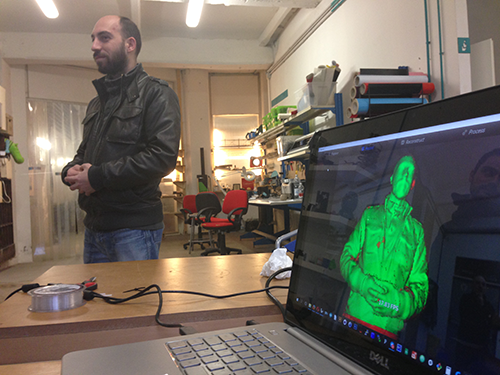
It's about one year that I have a Sense. I did experience and I can say that with this product, is better to hold the object and walk around it with the scanner (here a useful video about that). The "full body scanning" doesn't work well. The software is super easy to use.
The few function integrated to elaborate the scanning subject are easy and intuitive.
Unfortunately, is very limitated
the output file: just .ply, and you can not choose others format or separate the .mtl file (the material file, the one with colors and textures)
from the 3d model.
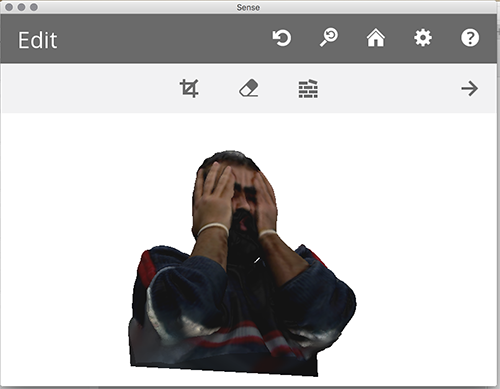
Sometimes is a good idea think different and cheating, telling to the Sense software that you are scanning
a "Head's person" instead of a "small or medium object". Here an example of Pier.ply, one of my class mate.
We also have a kinect in our Fab Lab! A very cheap and easy way to obtain a 3D scanner. I find a super interesting book "Make Things See",
that explain well the potential of this product.
We just download the free version of Skanect,
and we started scanning. Works well, but the free version limit every export file in just to 5000 polygons: very rough in most situations.
Fortunatelly the Pro version is quite cheap (119€).
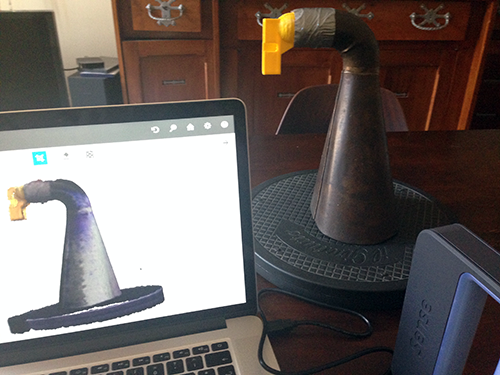
A good 3D scanner application could be to use it to adapt new forms to antiques or handcrafted and asymmetrical strange shapes.
I decided to give a second life to this old gramophone: I realized the support base doing a boolean subtraction with the mesh that
I had obtained by scanning.
I worked with "Meshmixer", a free software dedicated
to the mesh modeling: easy to use like almost every mash modeling software. I think that modeling with mesh is very similar to the
manual modeling of clay: is closer to the people's way of thinking, although it is certainly less precise than NURBS modeling.
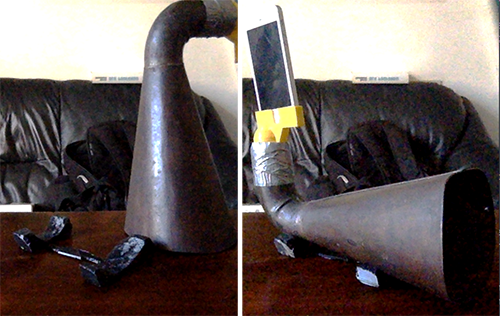
Anyway I am very proud of my new amplifier, it works great!
RETURN UP
| ← week 4 / Electronics Production | week 6 / Electronics Design → |
|---|