#Exercise_5
24/02/2016
Assignment
3D scanning and printingIdentify the advantages and limitations of 3D printing and scanning technology.
- Test the design rules for your printersr
- Design and 3D print a small object that could not be made subtractively
- 3D scan an object
Testing the printer
Tools
- Materia 101 3D printer
- Ultimaker Original 3D printer
- PLA biopolymer
- hair spray
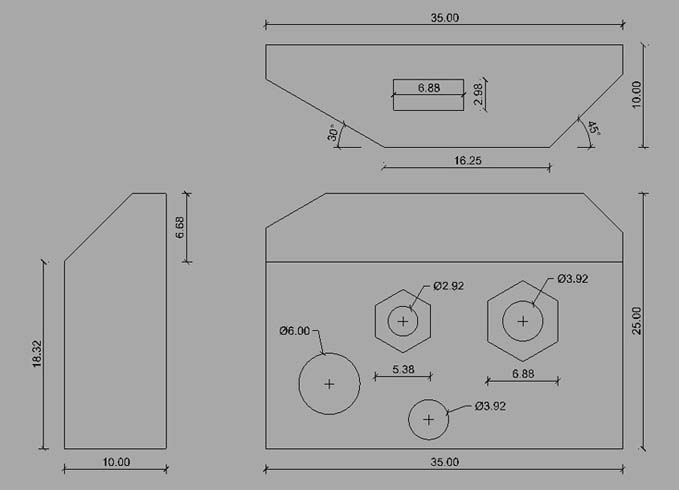
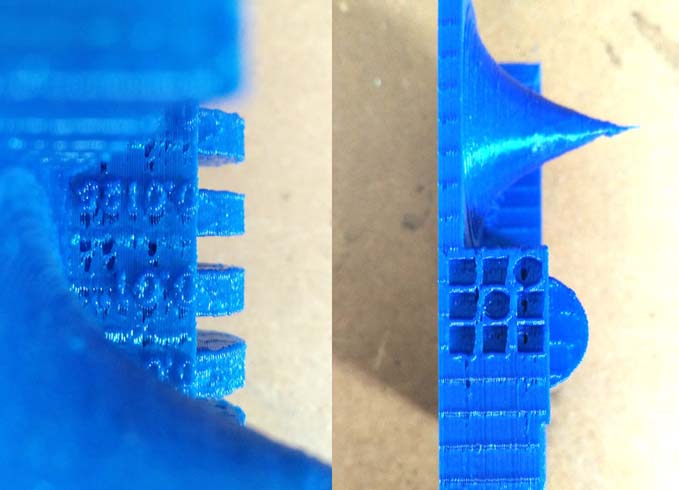
I have designed a little speciment to test the tolerances, the overhang angle and the quality of our printer.
Printing the speciment
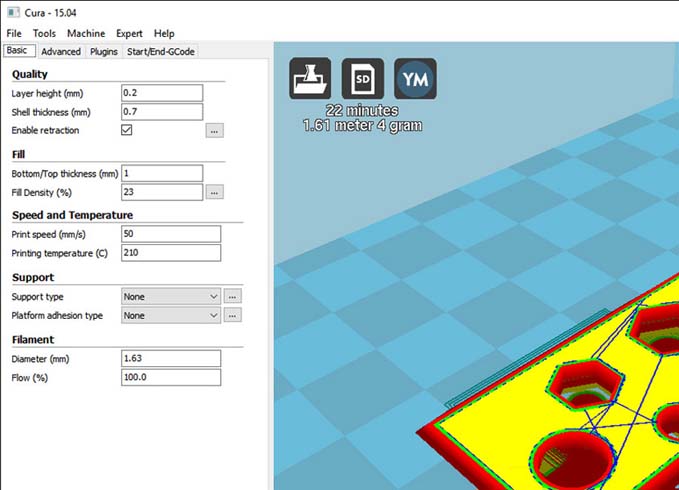
2nd step: import the model in Cura, select the right printer and set up the basic parameters. To obtain a good quality I used 0.2mm layer height; for a strong piece I used 0.7 shell thickness, 1mm bottom/top thickness and 25% infill. After some test I have found the right temperature at 210 C at 50mm/s of speed.
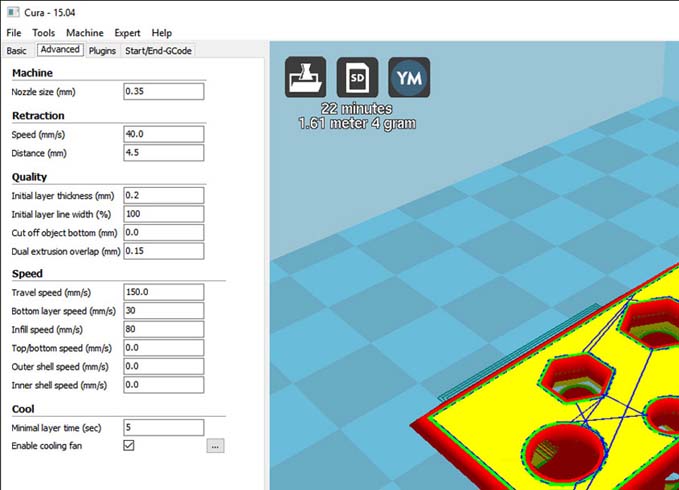
3rd step: set up the advanced parameters to speed up the printing. To obtain a good clinging I slow down the first layer speed (30mm/s); and I speed up the infill speed to 80mm/s.
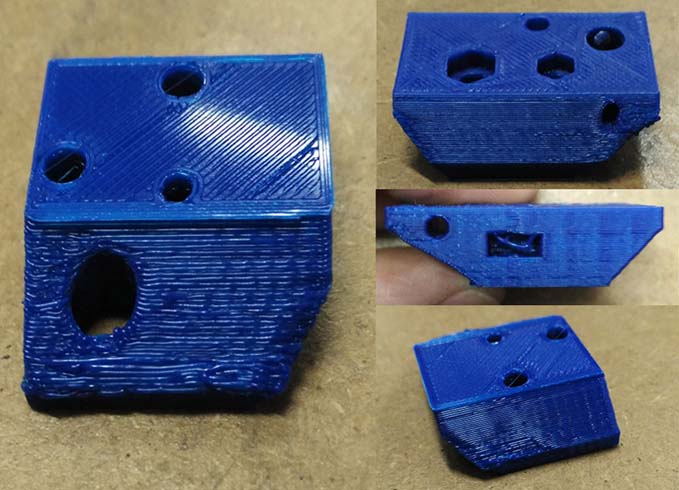
4th step: printing this speciment took 19 minutes, the result is almost good, with a good quality on the 45 overhang angle and passable on the 60 overhang angle.
5th step: using the Roland V-panel I set-up the x,y,z origin.
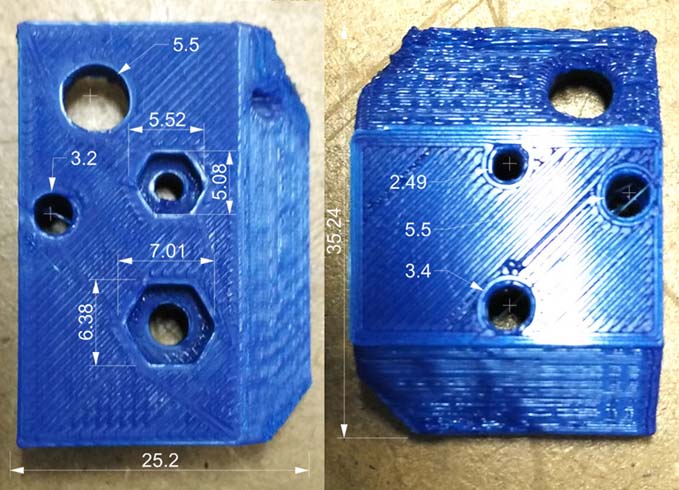
5th step: the tolerances are not acceptable, most of the times we have -0,5mm on the small parts; on the big parts we have better results. So will be necessary to adjust the 3D model to obtain a working piece.
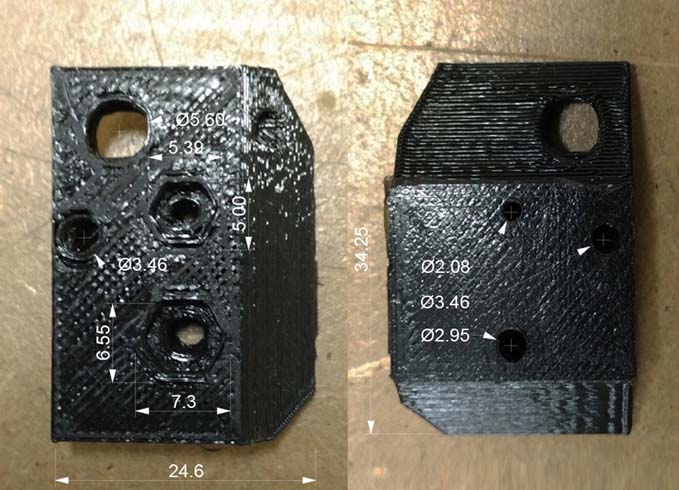
6th step: I have print the same object with the same parameters on the Ultimaker original, in this case the result was a little bit better on the toleraces but slightly worse on the shell finishing.
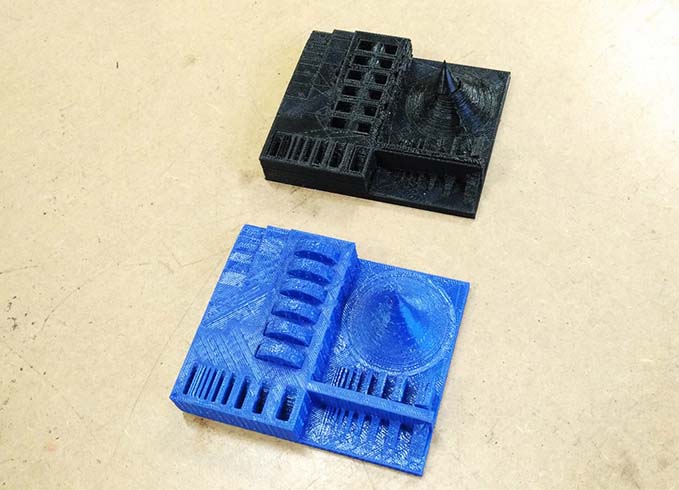
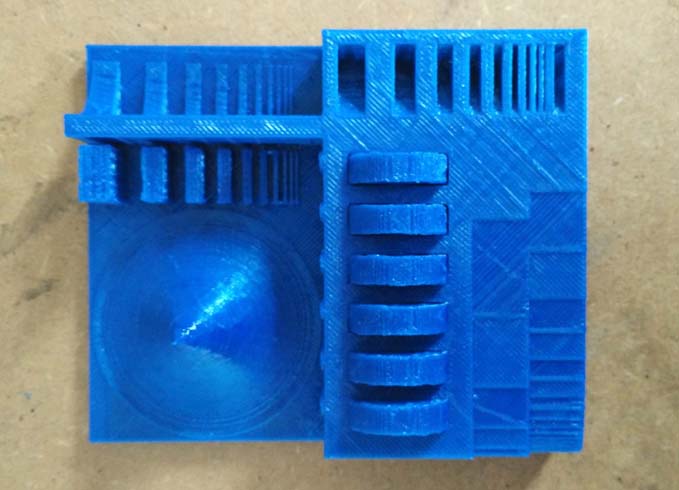
7th step: at the end I have printed the model provided by Neil, the result reflects the above considerations, but took a lot of time to print it.
Printing a filament driven
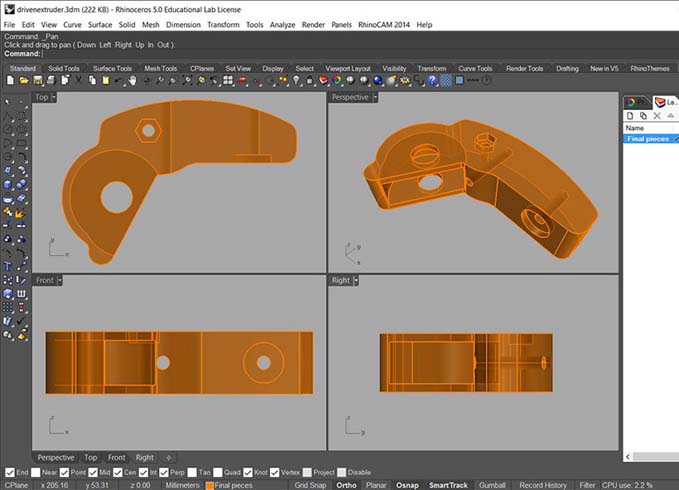
1rst step: we are designig a filament extruder to use with robot too, so I have designed and printed a little piece that work as filament driven. This piece is very difficult to made with a milling machine, it would be possible with a lot of difficulty only with a 5 axes or more. To print the filament driven I used the design rules verified with the pring of the spicement in order to obtain the right dimensions to put the bolts and bearing.
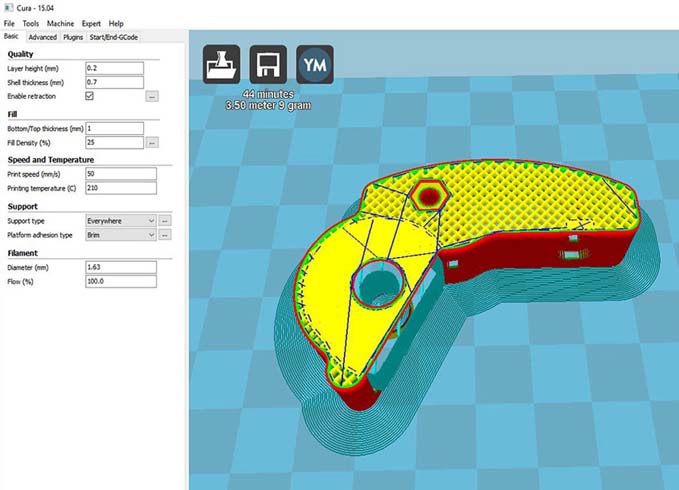
2nd step: import the model in Cura, select the right printer and set up the basic parameters. To obtain a good quality I used 0.2mm layer height; for a strong piece I used 0.7 shell thickness, 1mm bottom/top thickness and 25% infill. After some test I have found the right temperature at 210 C at 50mm/s of speed (same parameters used previously).
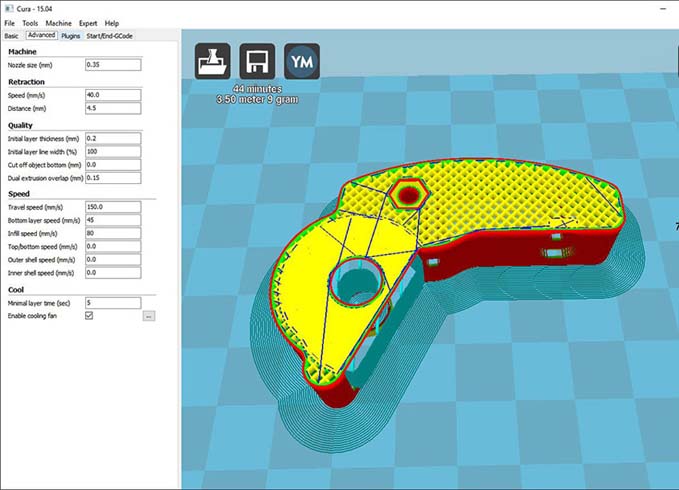
3rd step: set up the advanced parameters to speed up the printing. To obtain a good clinging I slow down the first layer speed (30mm/s); and I speed up the infill speed to 80mm/s (same parameters used previously).
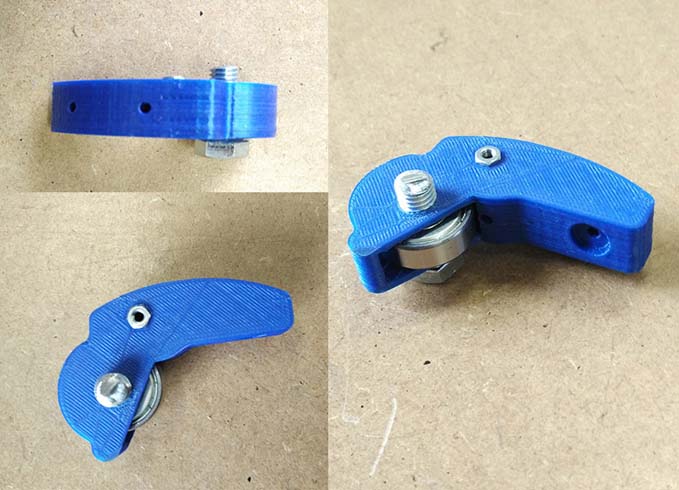
4th step: printing this piece took 38 minutes, the result is very good, with a good finishing and the right dimensions to fit all the mechanical parts.
3D Scanning
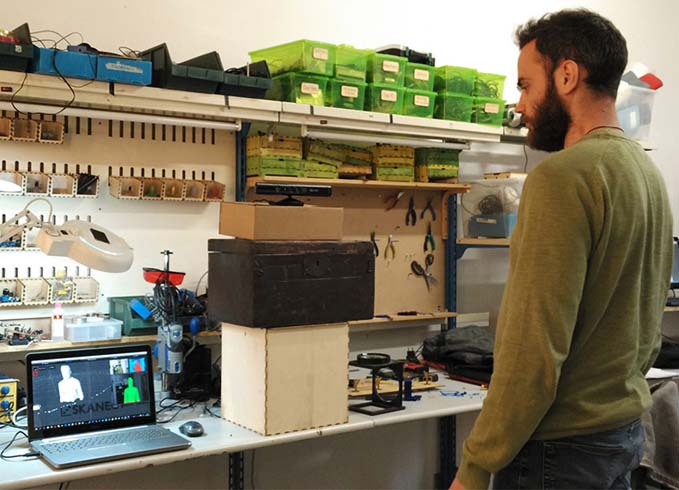
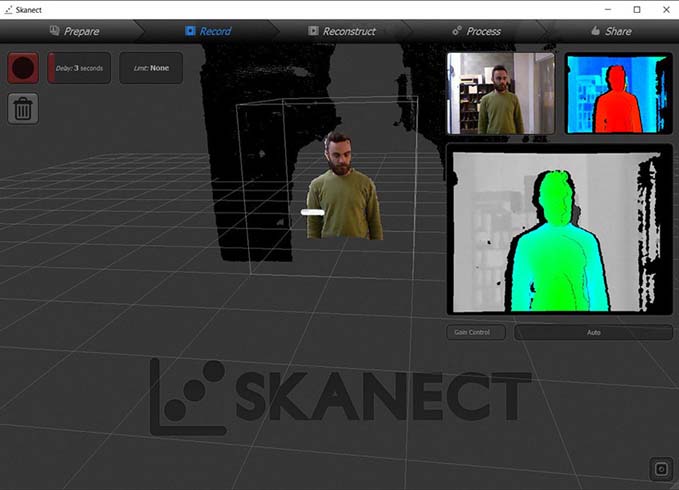
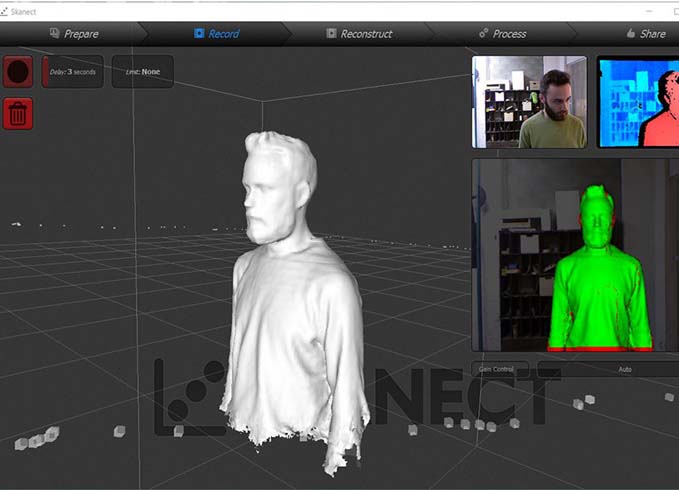
This is the second time that I use a 3D scanning tool, here in the lab we have a kinect 1.0 used with skanect a very easy to use and powerful software. Useful Tutorial
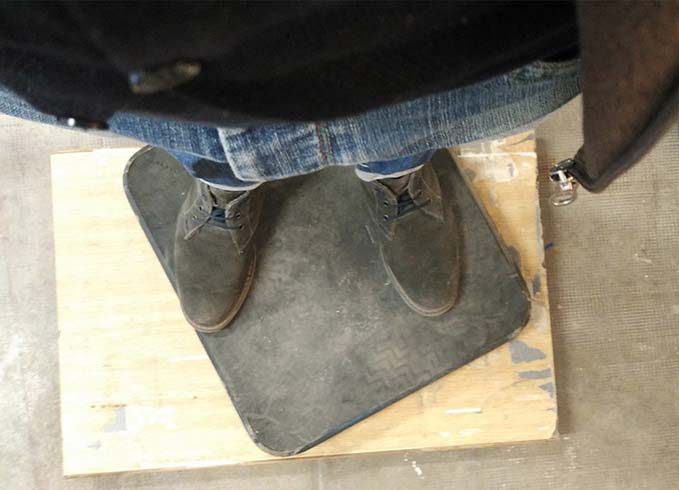
1rst step: I Asked Fabrizio to be my model for this exercise; after I set up the rotating platform in the right position, and select in the software the type of object that we want to scan (person) and the dimensions of the bounding box, in this case 1m x 1m x 1m.
3rd step: Positioning the platform in the bounding box was very easy, because the software helps you showing in green the parts at the right distance.
4th step: then while the software is recording I rotated the platform around. The 3D model obteined was not perfect, have some holes under the chin and over the head. That problem is due to the static position of the kinect; but I don't need a high detail in these parts.
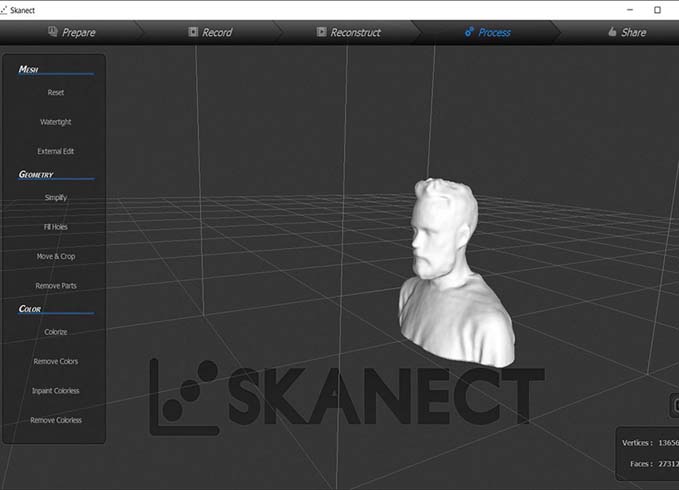
5th step: after finishing to record, the software create the 3D model, and give you the possibility to make some easy operation on the model. For example I cut the model and then used the watertight function to fill all the holes.
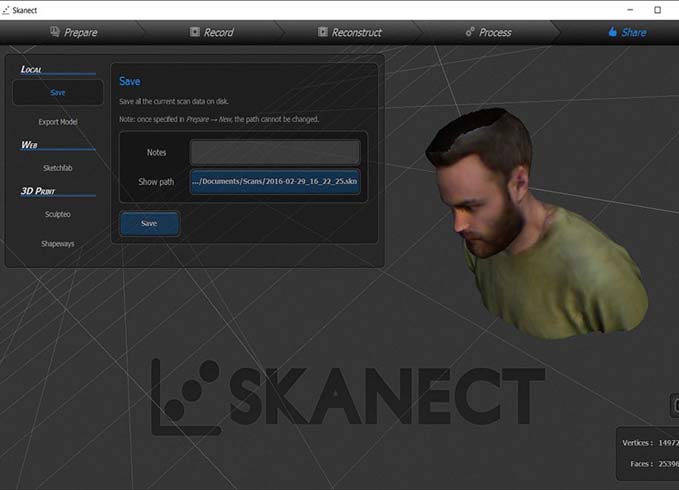
6th step: the last step was to export the model, the software allow to export the model with or without the texture; the free version can export only a mesh with 5000 faces.
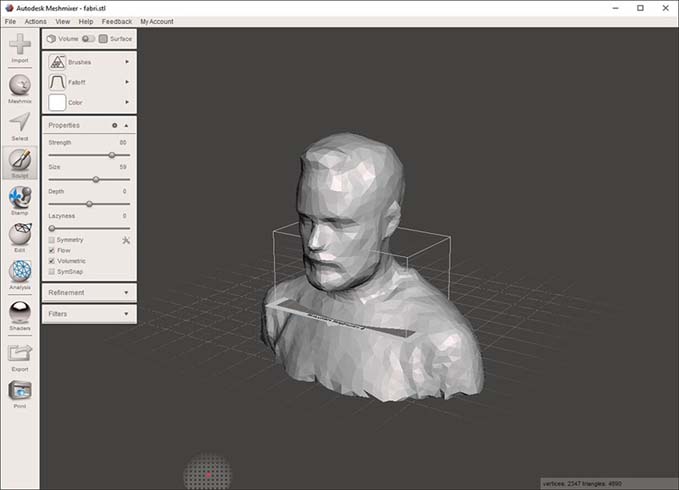
7th step: at the end I have modified the head and the chin with MeshMixer, I have decided to use it because is free but very powerfull and easy to use. At the end I have verified the mesh with Netfab, I'm use to have a check with this software every time before printing a mesh model, it can fix every aweful problem in an easy way; now the model is ready for printing.
Source file Fabrizio and Stefano
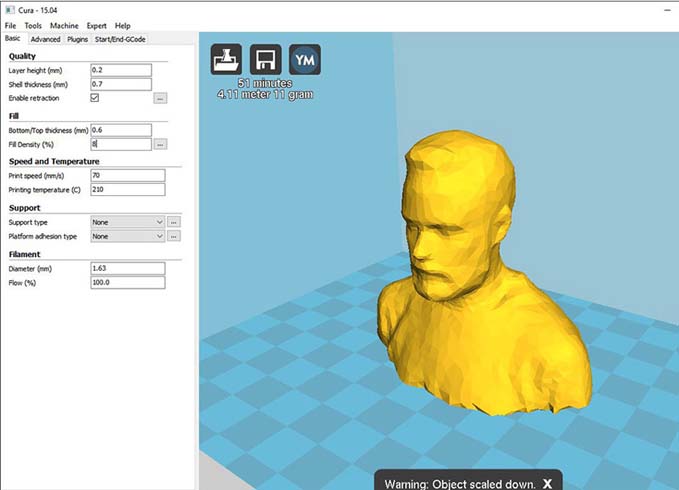
8th step: I have set up a very speedy print with the Materia 101, I have used a very little amount of infill 8%, a thin shell thickness 0.7mm and an high printing speed 70mm/s.

9th step: as expected the model did not printed very well, but give a rough idea. The main problems are over the head, due to the low infill and the definition, after scaling the mesh in cura I lost a little bit of definition.
1rst step: Export the .stl file of the model prepared, with some little holes, a couple of overhang angle (45, 60) and .
Source file - Inspaired by a test of Vincenzo Campanale.