
This week, our assignment is produce a FabISP board and upload the firmware to the board to make it a functional one.
Generally this assignment goes into two parts: use the milling machine to produce one and upload the firmware part.
|| produce a board with a milling machine
The machine we are using to mill the board is srm-20(correct?). It feeds on .rml file to work.
The assignment page provides 4 types of FabISP for us to choose. And we chose Andy. So following is the PNG files of Andy FabISP board. One is the traces and the other one is the outline.
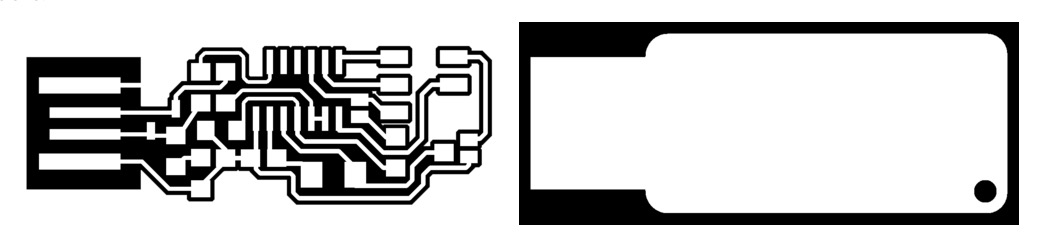
To process the trace, you need 1/64 end mill. To process the outline, 1/32 end mill is enough.
From a PNG to .rml, Fab modules are quite useful. Fab modules are cool, simple interface, several buttons, choose inputs, choose outputs and choose tools and finish.
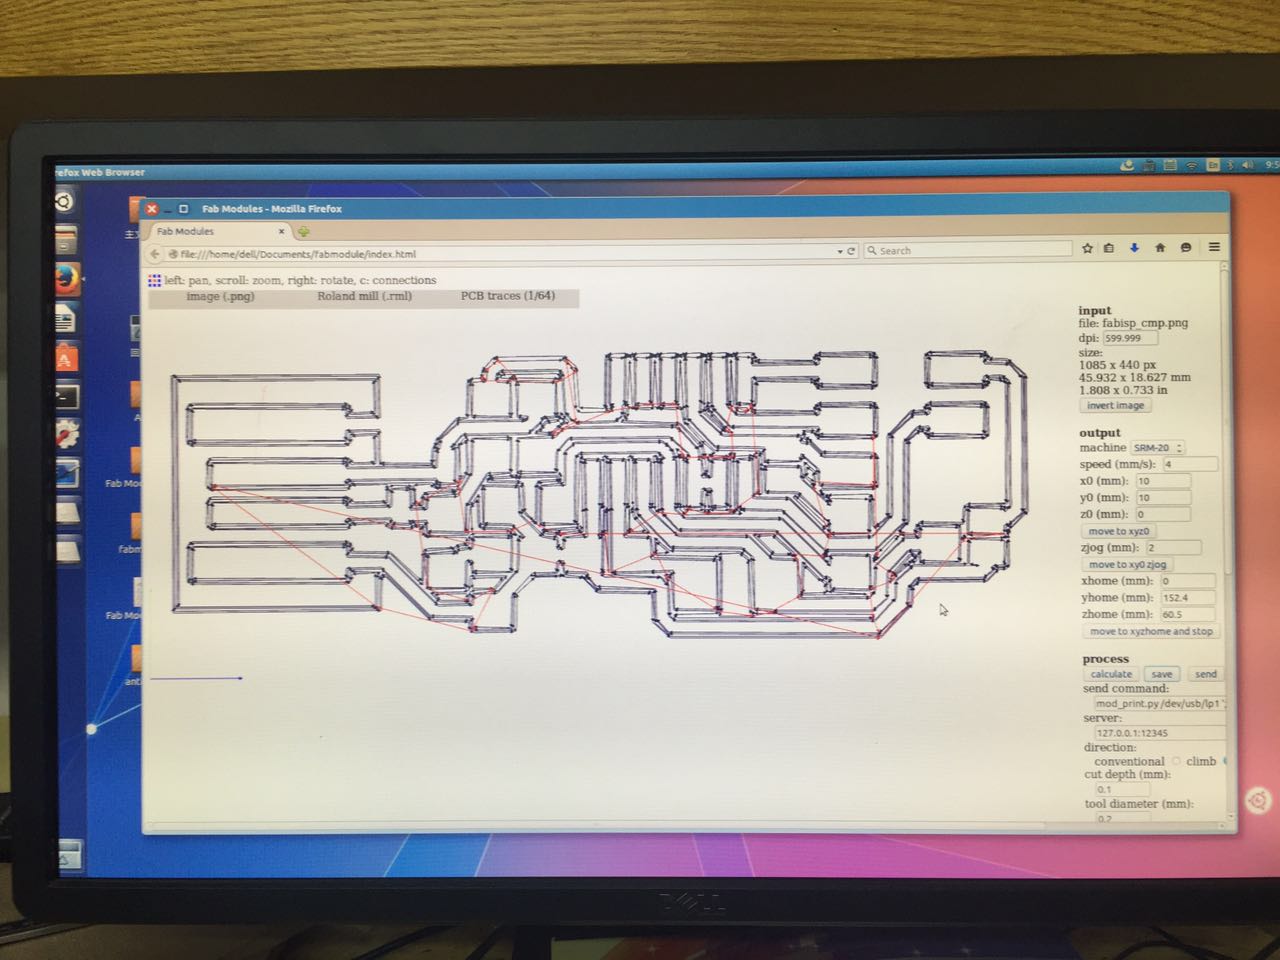
There are settings in the right of Fab modules, in which you can change settings to get better file. Click the “calculate” button to generate the .rml file. Then you get picture describing how the endmill will follow in the center. Then click “save” to save the .rml file.
After saving that, time to spin the machine!!

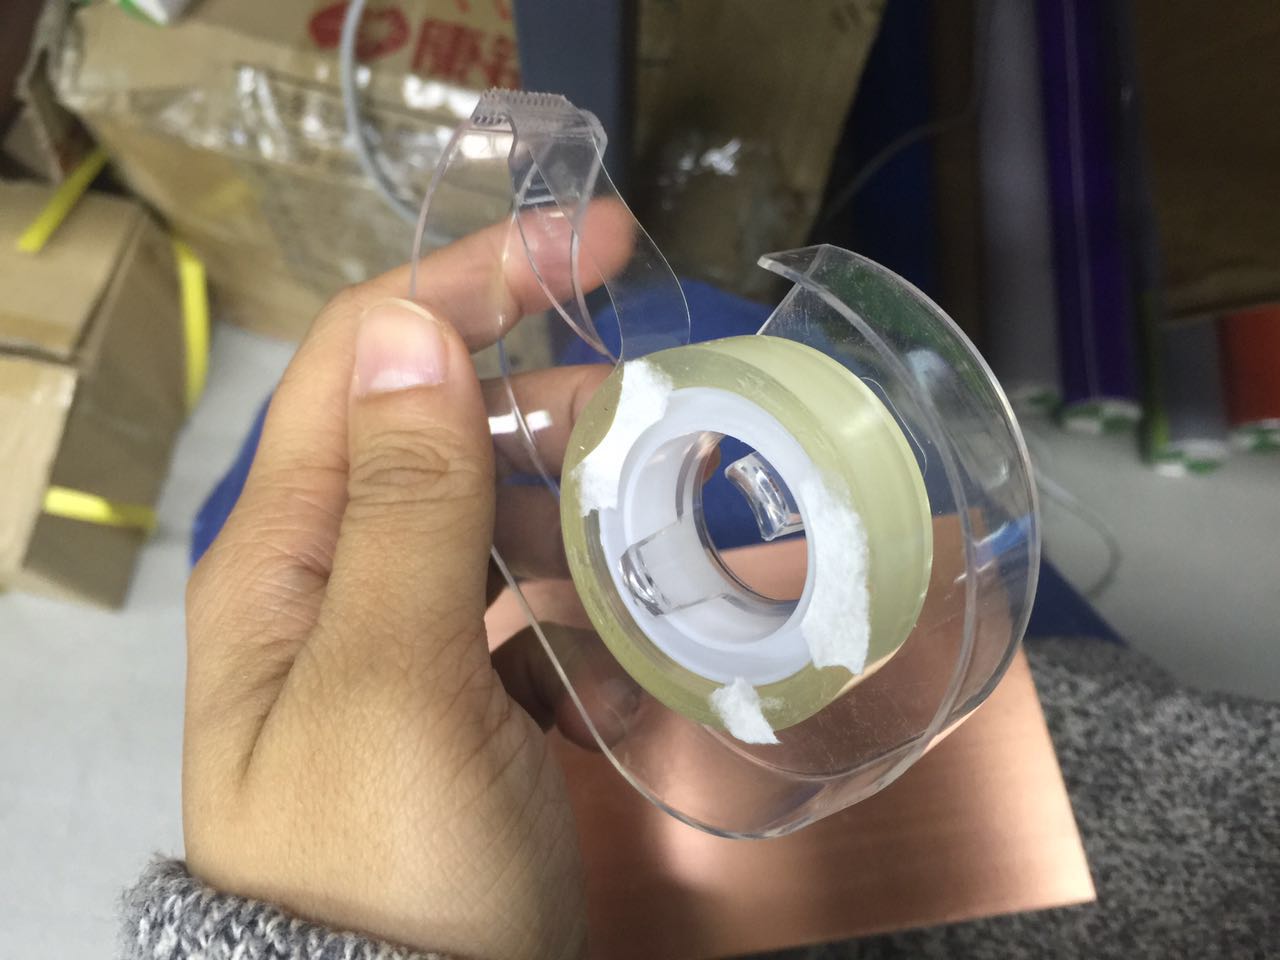
First thing to do is secure the board to the machine. The board we are using for circuit is covered with one layer of very thin copper. The milling machine will help remove the copper at top and leave you the traces that conduct electricity. To secure the board, we need to put double adhesive tape in the back first, and then put the board into the machine, then use plastic tape to secure the board at its edges. Double locked!!
After this, insert the 1/64 end mill to the end mill holder. We need to cut the traces out first, otherwise the position of the board will change a bit when separated from the whole board. When this process done, you will get a board like this:

Then replace the 1/64 end mill with a 1/32 one for the outline. After 1/32 end mill, you should find your elegant and neat board waiting for you.

|| soldering
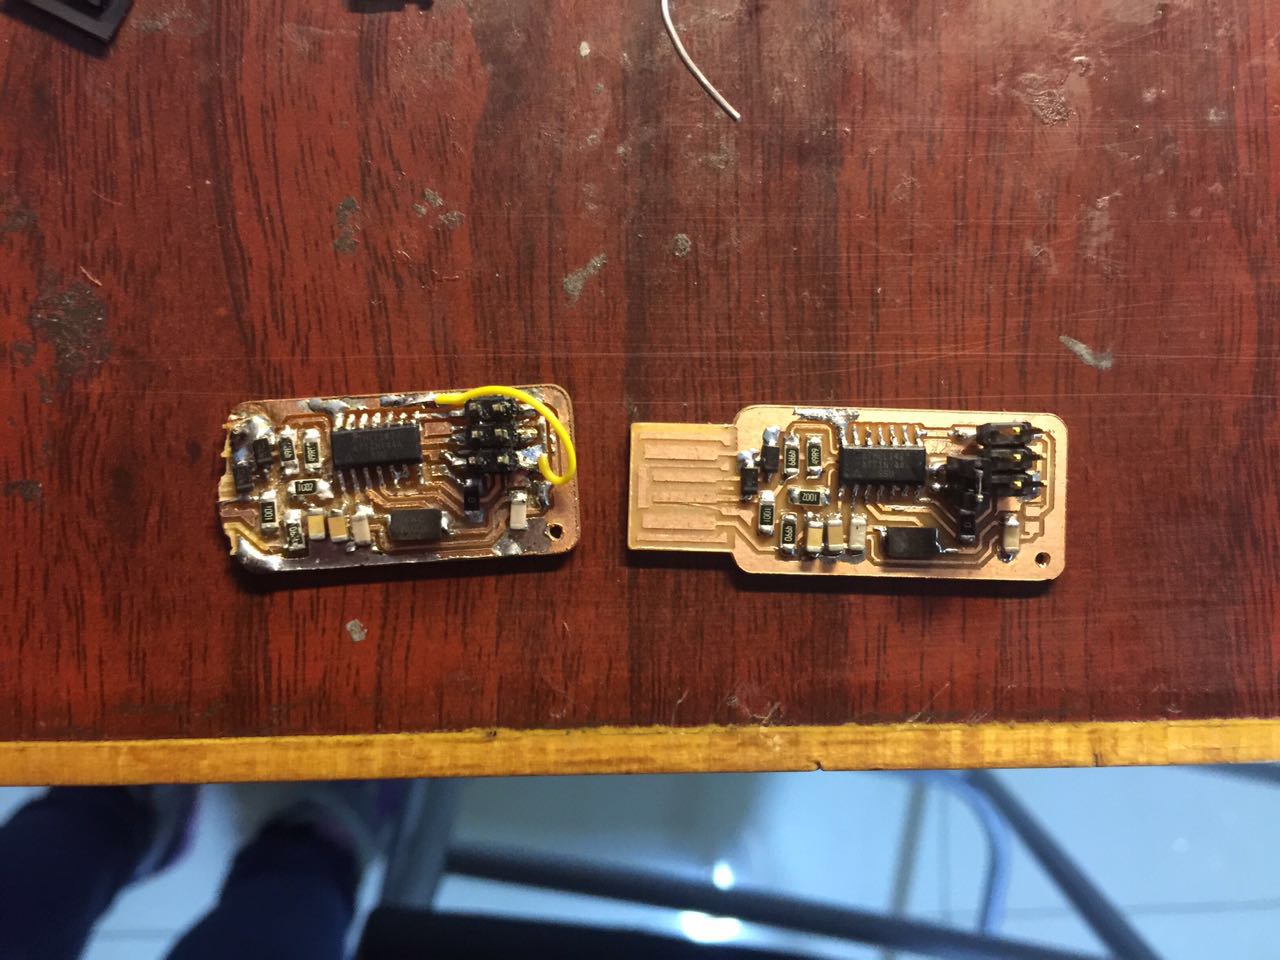
Before this project, my soldering experience is still limited to through-hole parts. This SMD parts seem interesting and then I started my first try.
In the left is my first board. That moment I did not know about how to use flux. And as a result, I used a lot of solder and I thought it would help.
Things not happened in the way I had expected. And after the board got broken down when I tried to pull it from mu USB port, I soldered a new one, which is in the right. So reminder: LEARN ABOUT FLUX BEFORE SOLDER!!
|| Upload firmware
I have met a lot of trouble when uploading the firmware. So I want to make a better record to help others who meet same situation like me.
Environment and tools I have used for uploading firmware are:
1) OS: OS X El Captian
2) Arduino IDE: Arduino 1.6.7
3) Crosspack(find the link in the reference part and download it)
4) Arduino UNO: as a programmer
5) terminal: nothing special
6) atom: as text editor, can be any other
Actually I just followed the steps described in the assignment page which is so brief and simple, then I guess almost everything from it.
And here are all steps:
0) connect the FabISP board to your Arduino;
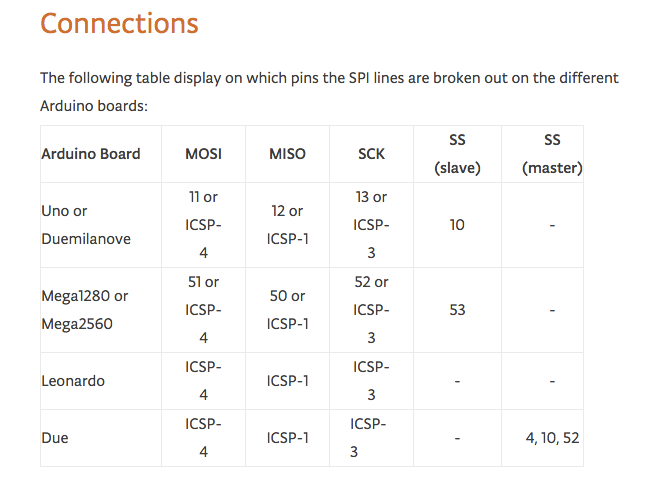
To connect them, you need to understand the usage of the 6-pin header on FabISP and your Arduino UNO board. Find the Ground out with multimeter, and then you can find all other pins one by one. The ArduinoISP page on Arduino.cc and the scheme of FabISP help this step.
And one more thing, connect two jumpers before you move on.
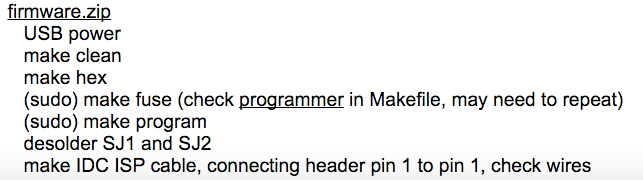
1) download the firmware.zip, unzip it;
2) download Crosspack, Crosspack makes your computer support functions designed for AVR chips. Find the link to download the Crosspack in the reference part.
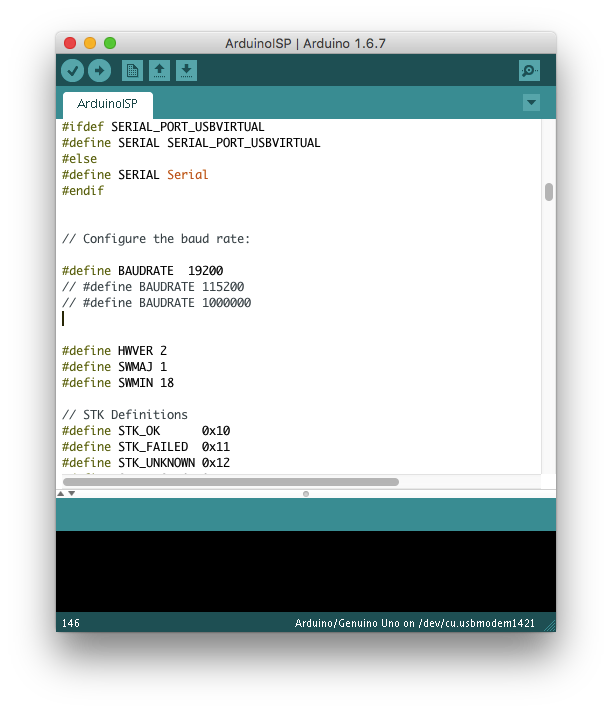
3) Upload ArduinoISP sketch
plug Aruino UNO to USB port, open Arduino IDE, find the sketch named “ArduinoISP” and upload it to Arduino UNO(board and serial port need to be chosen);
4) open terminal, relocate the terminal to the position of the firmware file;

so the location of my firmware is in Downloads. To get this address, you can type by your keyboard, or open the window of the target finder and drag it to the terminal. Both ways work.
5) use the command: make clean, checking if things deleted;

rm means remove. So this command removes some files in the target file.
6) use the command make hex, checking if everything goes well;
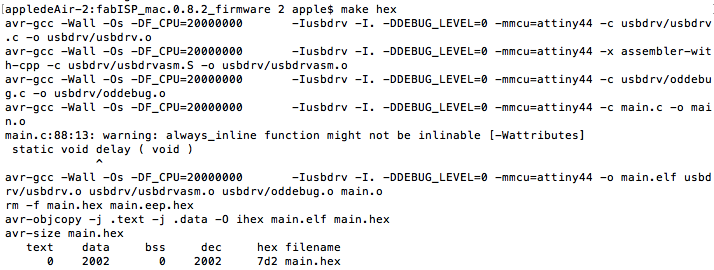
My experience above are alright. Only one reminder: make sure you have downloaded the Crosspack before using these commands: make clean / make hex / … otherwise it will report command not found.
7) use the command make fuse;
my experience with make fuse command is terrible. Alex, a senior software programmer in Litchee Lab, and I spent a lot of time to debug......
Anyway, after all terrible debugging job, we found out the critical part is one line in the Makefile.
Makefile is in the firmware file. Open it with a text editor, any editor. I use Atom, but any can work.
Then find the line defines AVRDUDE, the line highlighted below:
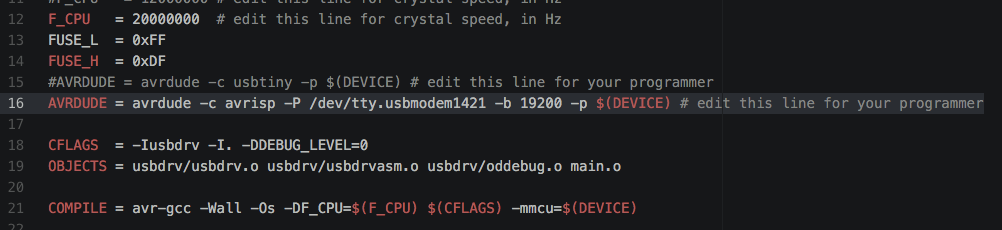
In this line, -c / -P / -b / -p are all commands included in the Crosspack.
-c : following this command we thought from the beginning should be the name of your programmer, in our case, Arduino. But we failed with Arduino, then we tried others, and finally it worked with avrisp.
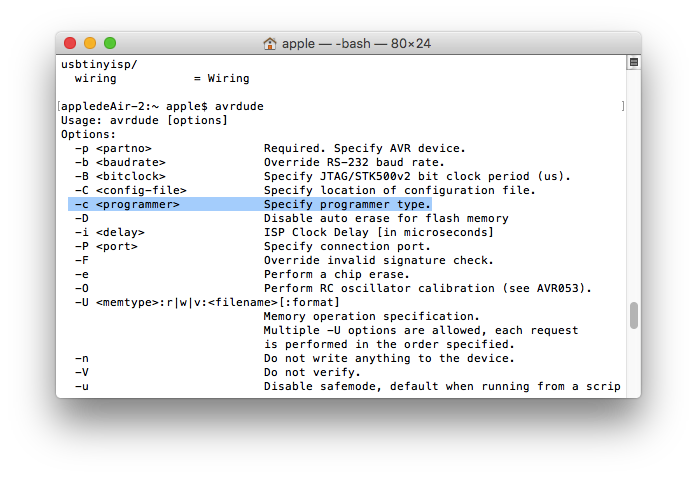
In the terminal window, when enter avrdude, then you can find the usages of all options:
-P: this is for the hardware address of your programmer. In my case, which is:
/dev/tty.usbmodem1421
You can find it via Arduino IDE or the device manager of your computer.
After we set this two commands up right. Still we got an error. After a lot of searching and trying, finally we found the problem was we need to set the baud rate also. So we added the -b command:
-b 19200
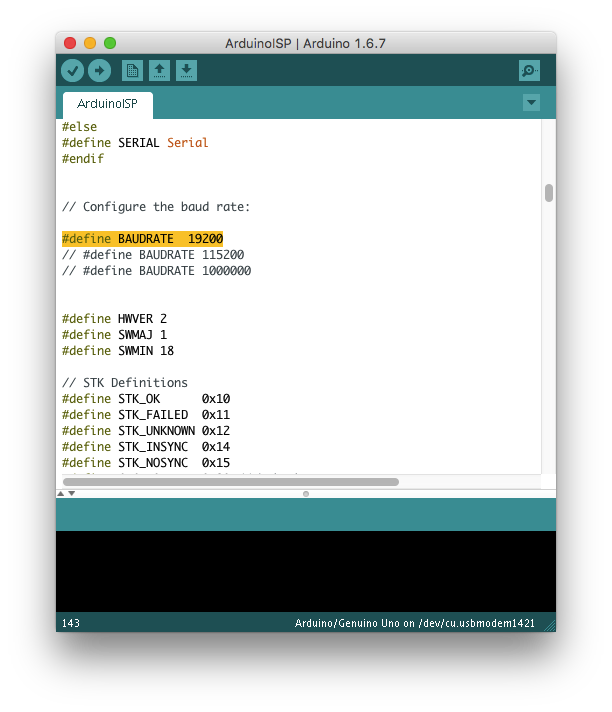
Where did we get this 19200? We found it in the sketch of ArduinoISP:
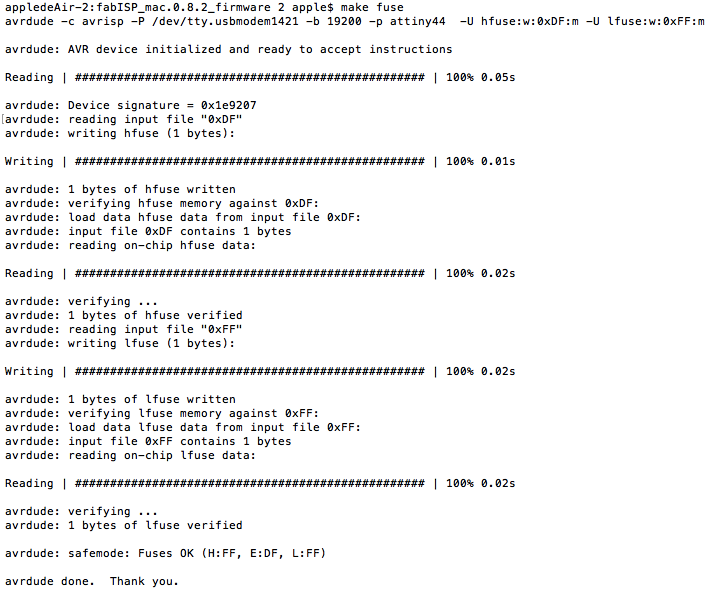
After all these settings. Finally when I entered the make fuse command, no error showed up.
Then move to next step:
8) use the command make program;
Fortunately this step no surprise.
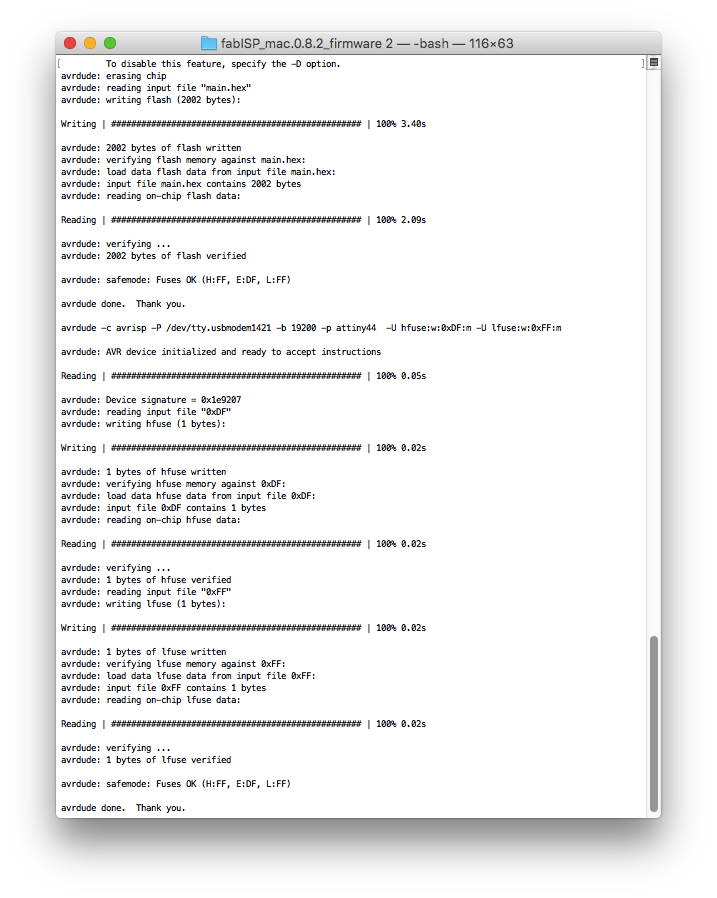
I like the Thank you in the end, and not a fan to error.
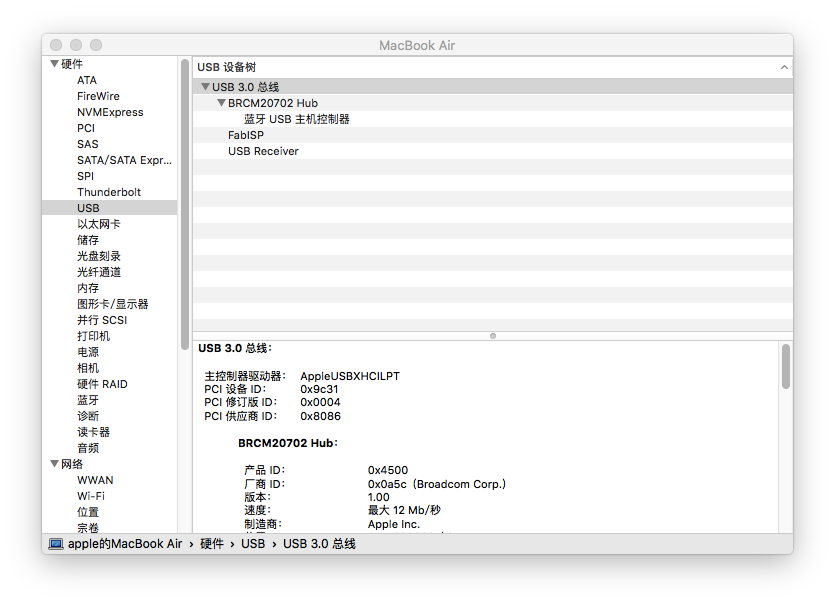
9) Now disconnect both jumpers and plug it into the USB port of your computer.
Check with the device manager. Find a new device named FabISP? If so, congrats!
Notes:
A lot of tricks in this week assignment for me to learn. I tried to make this tutorial be detailed. Hope it can help you somehow.
At last, my gratitude to my great friend Alex for helping me out when I have got stuck!