ELECTRONICS DESIGN
WEEK 6 -FAB ACADEMY 2016
— LEARNING OUTCOMES —
- Select and use software for circuit board design
- Demonstrate work-flows used in circuit board design
— DESIGNING IN EAGLE —
Hello everyone, this week we were asked to redesign the echo hello-world board adding a button and a LED. Thanks to week 4, I understood a little bit more yet I feel totally out of my comfort zone. In order to understand how to redesign any board, you must understand how to use your design tool (Eagle for me). In this case I recommend the following video tutorial, you will make design a board understand all the basic eagle core tools.
Eagle Video tutorial
Once you take the tutorial you are ready to take on the Echo hello-world board. First download the fab library for EAGLE and upload the following component into the schematic just like we did in week 4:
Once you place all the components, wire the circuit by creating connections between the components. Don't forget to name and label and finally you can always verify any open loop by using the ERC button to fix any error. YOU MUST NOT HAVE ANY ERROR otherwise you wont be able to continue. You should have something like this:
You can switch to the board window, you will have to re-arrange all the components like the following picture, make sure no yellow line appears otherwise you made a wrong connection on your schematic:
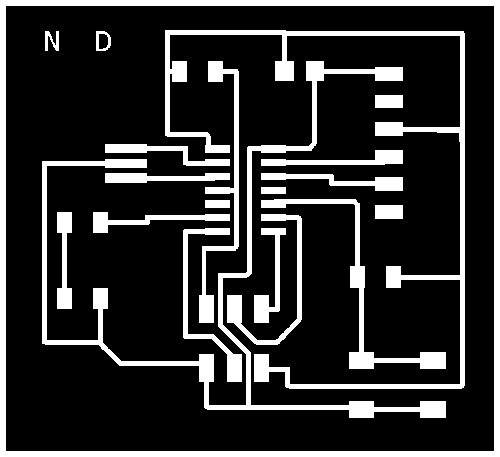
— PREPARING THE FILE FOR MILLING —
In order to make the .png file we must export the image. Turn off all layers and keep only the layer 'top', save it as .png.
Raise the resolution (dpi) between 500 to 1000 and monochrome)
— MILLING —
I had a hard time milling the board due to my scheme design. My overall design was very narrow and when I uploaded my .png images the .rml file would skip sometimes some parts. MAKE SURE your clearance and distance are "wide" too before designing in Eagle, I didn't check those parameters and I had to start all over again. I always had to “trick” fabmodules reducing the tool diameter from 0.4 to 0.35. On the following gif you will see the evolution of the design in order to make it work. As for the soldering, visit my week 4 page to see how to sold components. We are still waiting the Attiny44 in order to finish..
Milling exterior rml
Milling traces rml
Nicolás Díaz Bejarano - Fab Academy 2016