Computer-Aided Design
Follow how I learned some basic 2D & 3D design skills on Gimp, Inkscape, and Rhino.
Our Goals
The learning outcomes for week 2 were to evaluate and select the 2D and 3D software programs I would want to work with, and to demonstrate and describe the processes used in modelling in these programs.
This week's goals were to model (draw, render, animate, simulate, etc.) a possible final project, and post my work on this website with original 2D and 3D files.
Getting Started with Computer-Aided Design
As I was not yet familiar with any 2D or 3D design programs, I started this assignment by selecting a few softwares to experiment with, then downloading and installing them on my Mac. With the recommendation of our instructor, Thomas, I chose to use Gimp. Inkscape, and Rhino for now. After some initial frustration on how/ where to start, as I’ve never used any 2D or 3D software programs before, I began diving into some online tutorials to understand the basics of how to use each software. I used primarily Lynda.com for in-depth tutorials on each software, as well as some Vimeo links that Thomas recommended by his professor last year, Saverio Silli.
Find the online resources I used to learn more about 2D & 3D design here: 2D & 3D with Inkscape & Rhino Lynda.com - Up and Running with Rhino Drawing Simple Parametric Shapes with Rhino Raster vs Vector Info Sheet Compress PNG Images Online Gear Generator
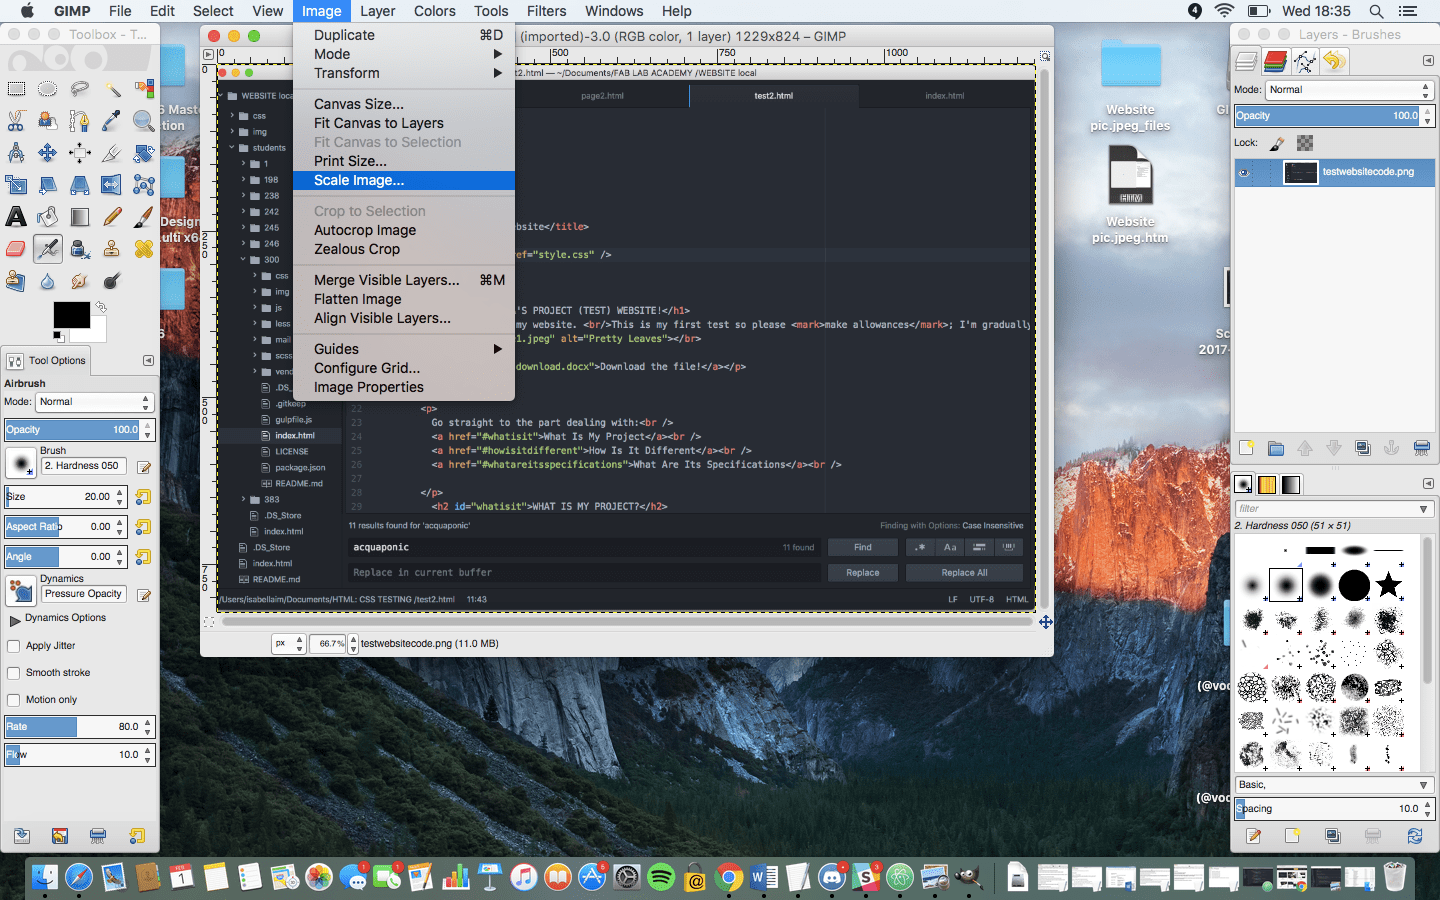
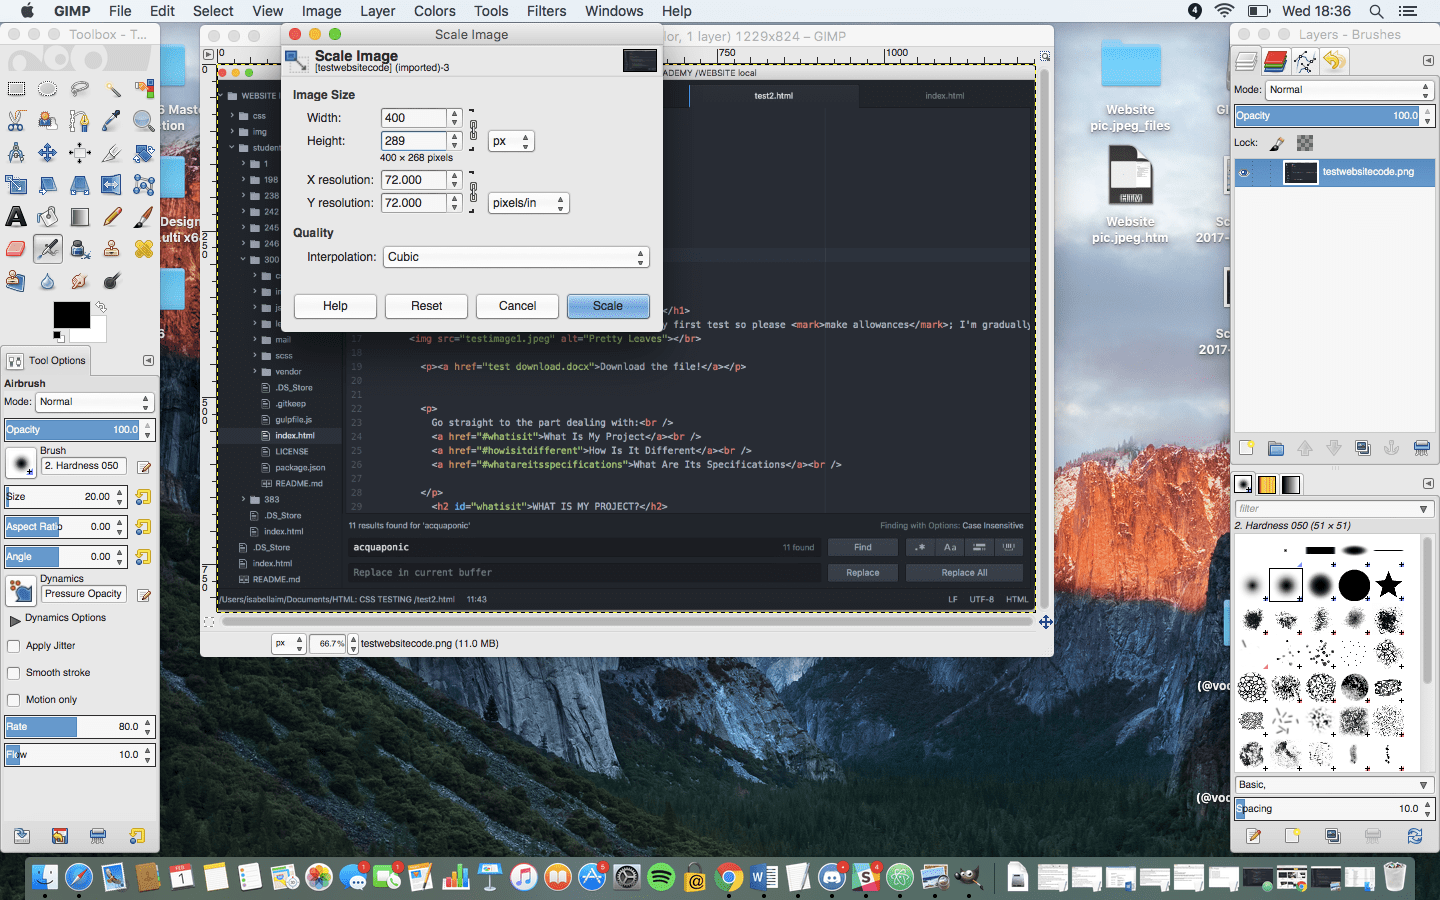
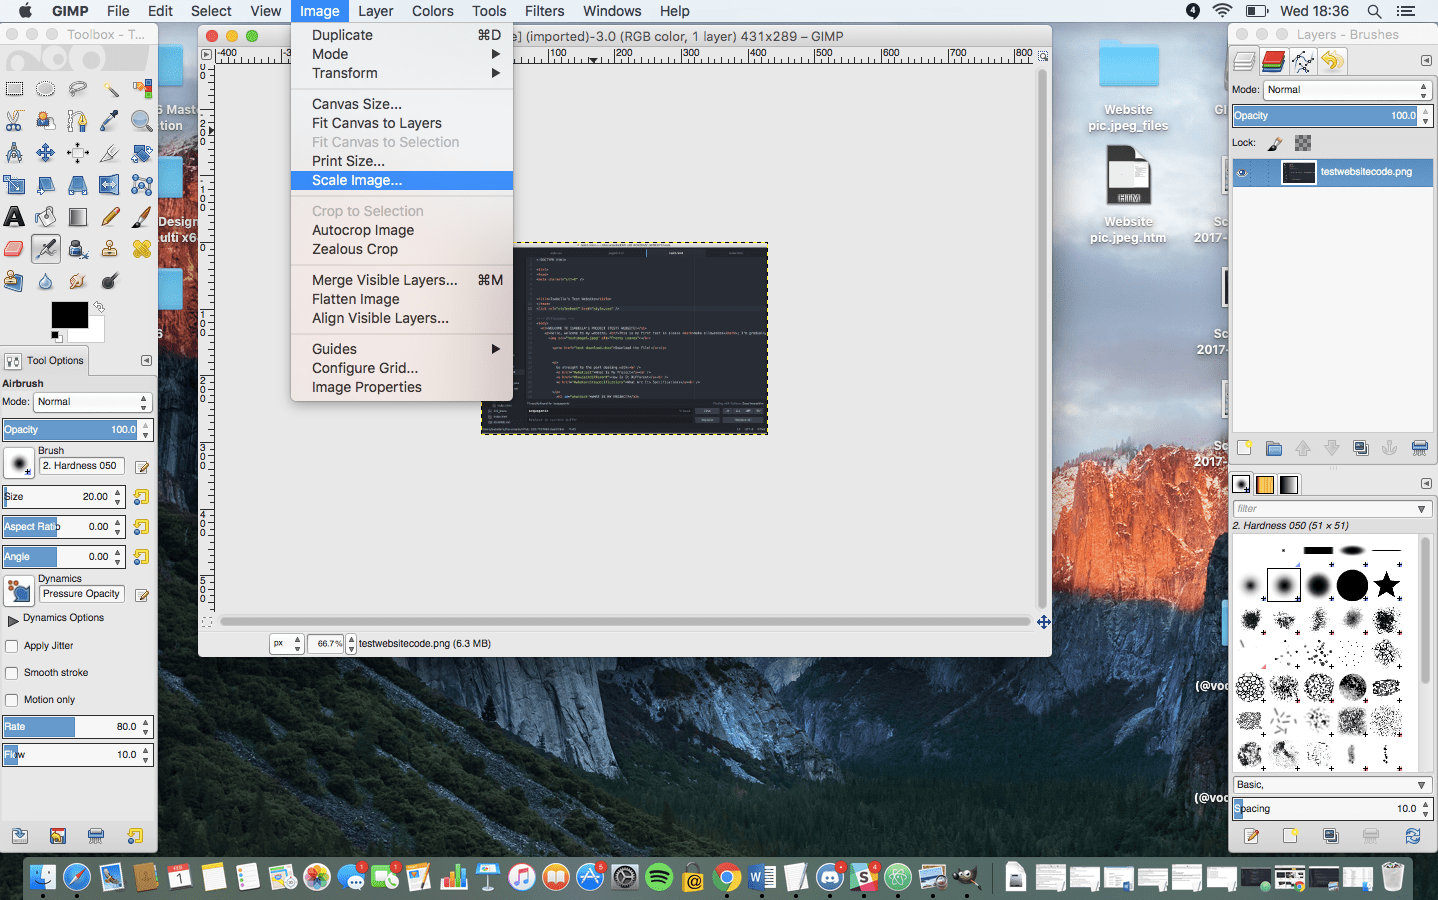
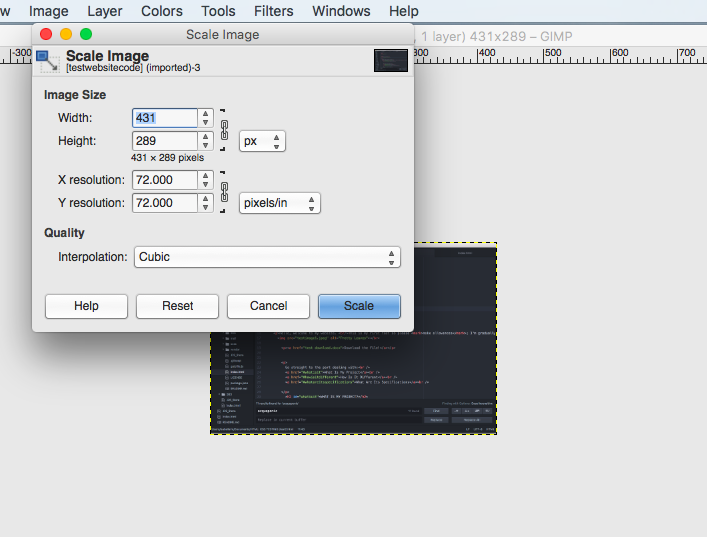
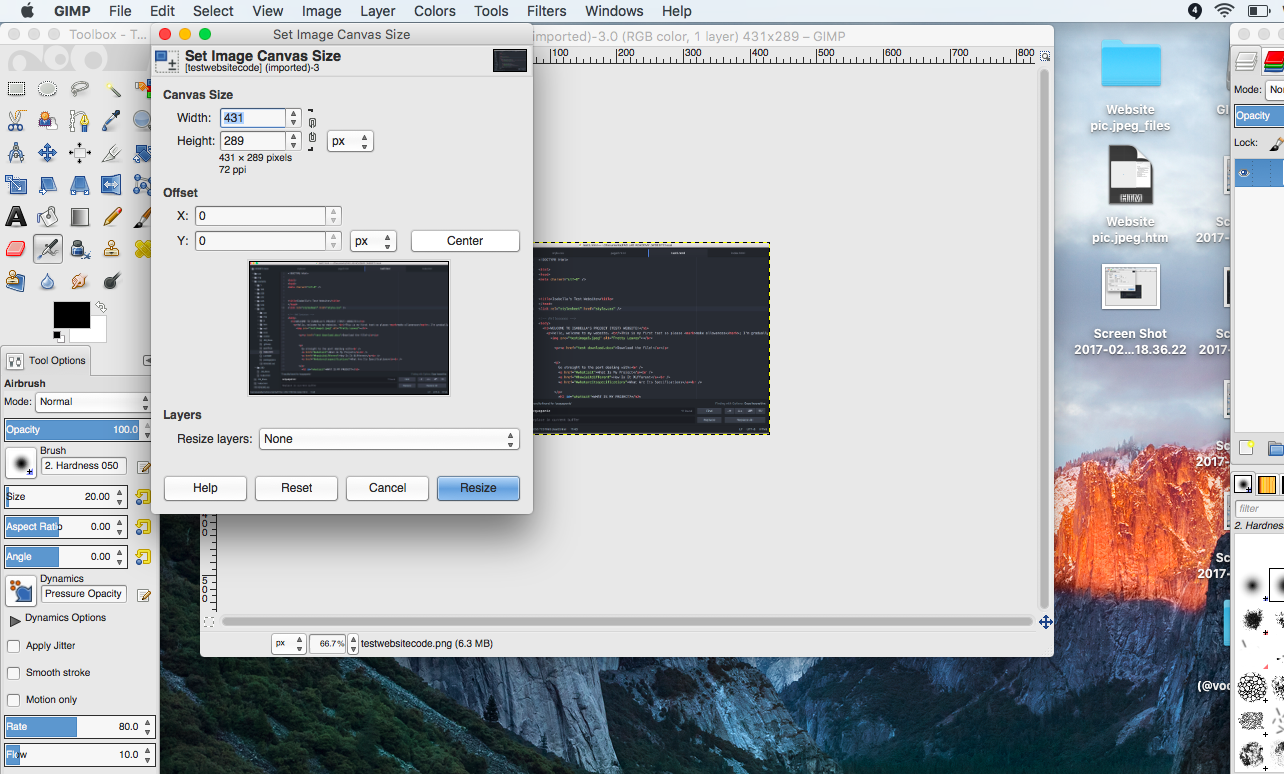
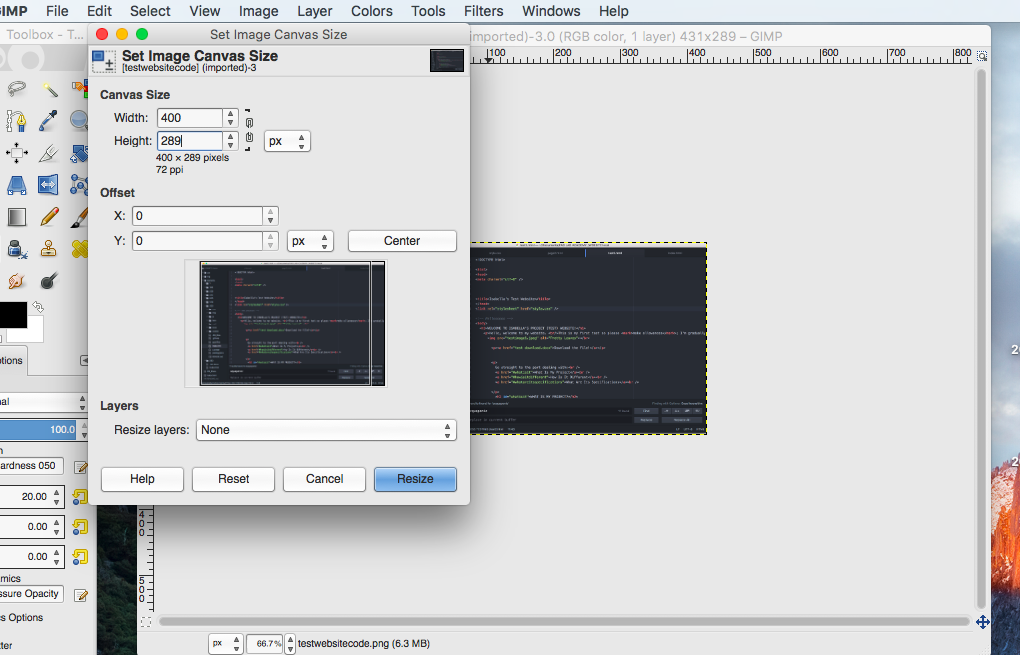
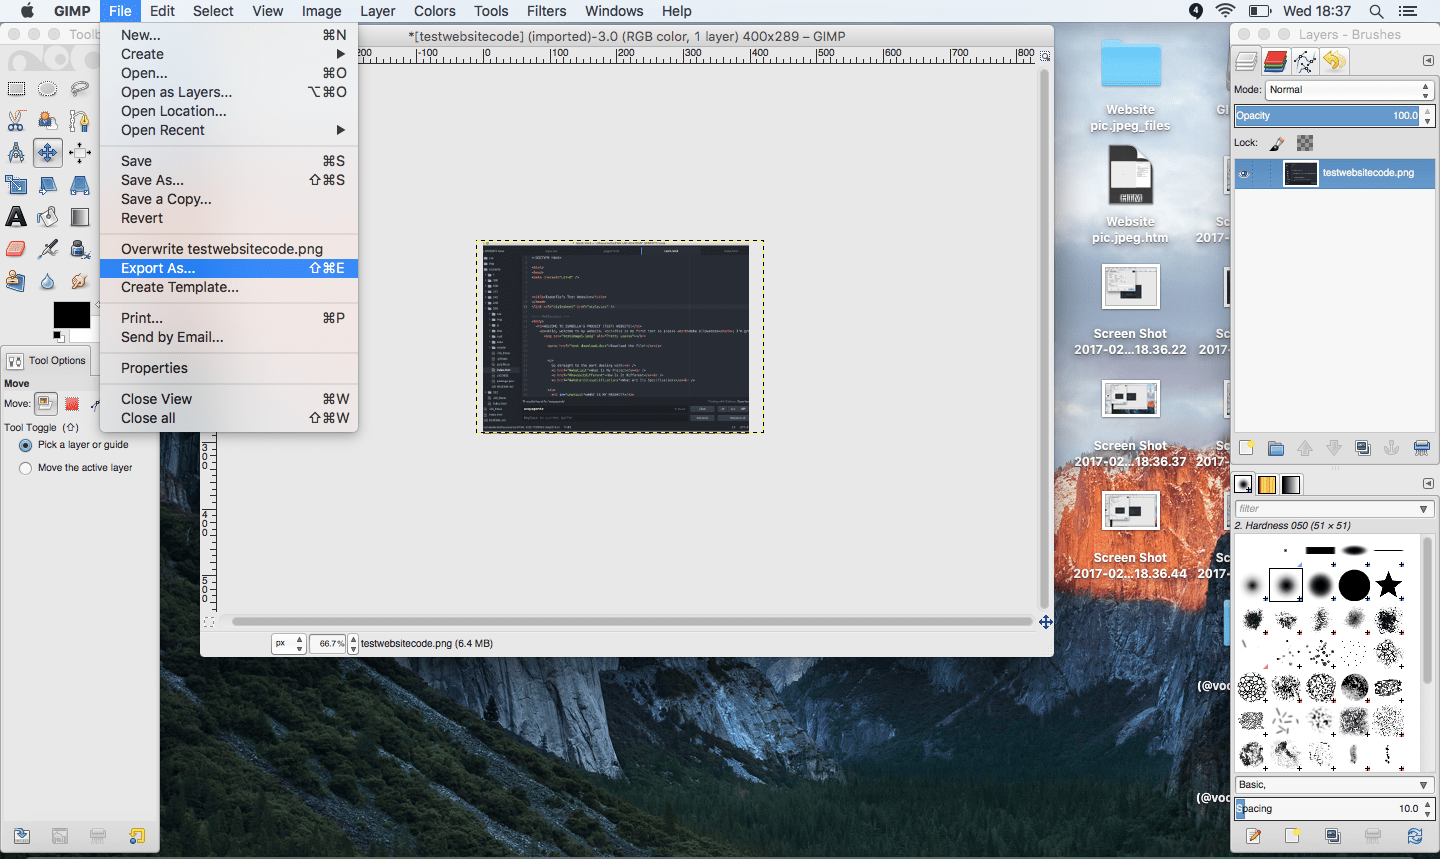
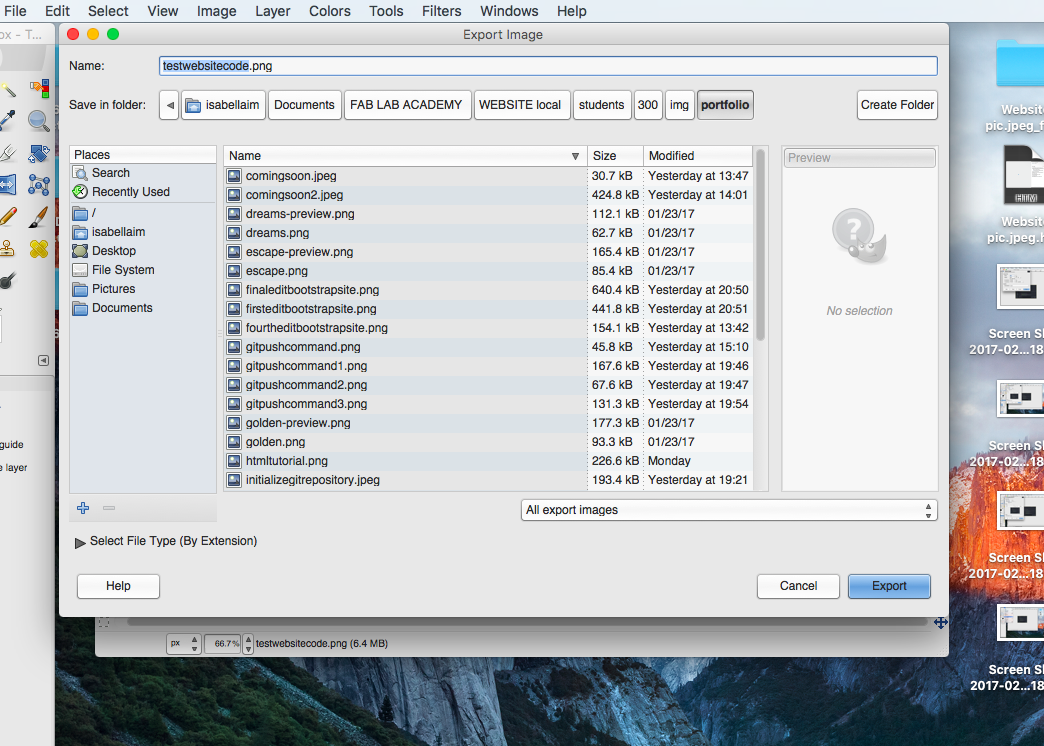
First, I learned how to re-size images in Gimp so that I could upgrade my website’s “Assignments” section on the homepage, since up until today I didn’t know how to change the thumbnail image for each week’s section without distorting the formatting.
See the step-by-step procedure on how to re-size images for your website using Gimp here.
Then I worked through the 2D to 3D with Inkscape and Rhino tutorial to learn how to convert an .svg file in Inkscape to a .pdf file able to be used in Rhino. This is because Rhino cannot import an .svg file, so you have to use another software that can use an .svg (like Inkscape) in order to convert that file to a format that Rhino can import.
See the step-by-step procedure on how to convert an svg file to pdf in Inkscape, and how to import that image to Rhino here.
/step1.png)
/step2.png)
/step3.png)
/step4.png)
/step5.png)
/step6.png)
/step7.png)
/step8.png)
/step9.png)
/step10.png)
/step11.png)
/step12.png)
While learning the commands and specifications of Rhino, I had to google some terms for reference. Find some of these reference terms and helpful tips below!
For example: When importing a file into Rhino it prompts you with an option to keep “Standard Scaling” or choose “Custom Scaling”. You can set Rhino to work with inches, millimeters, and centimeters. You can leave the file as is if the file you are working with is in the same measurement as you need, but if not you have to re-define the scale of measurement you need. For example, if you’re working in inches, but the file you have is in millimeters, you need to do the scaling.
For example:
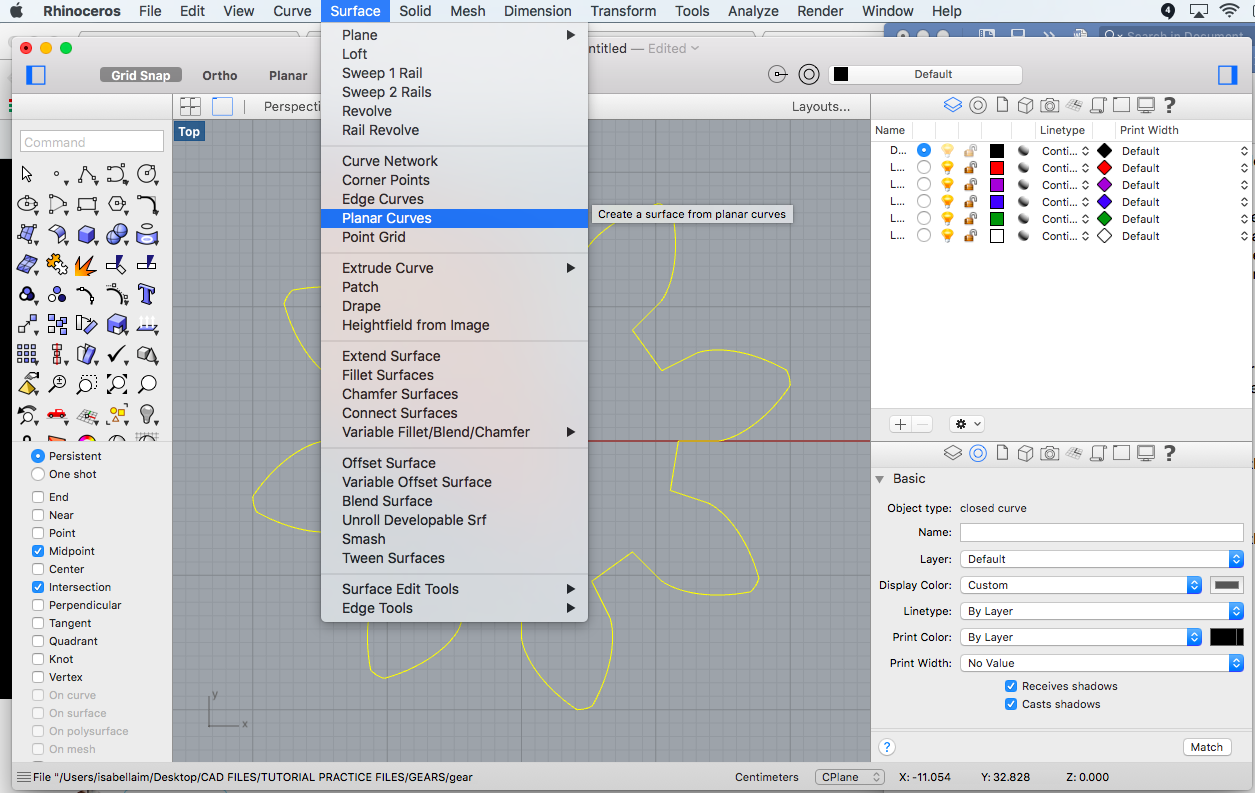
What is a planar curve? (Command = Surface / Planar Curves)
A plane curve is a curve that lies in a single plane. A plane curve may be closed or open.
For example:
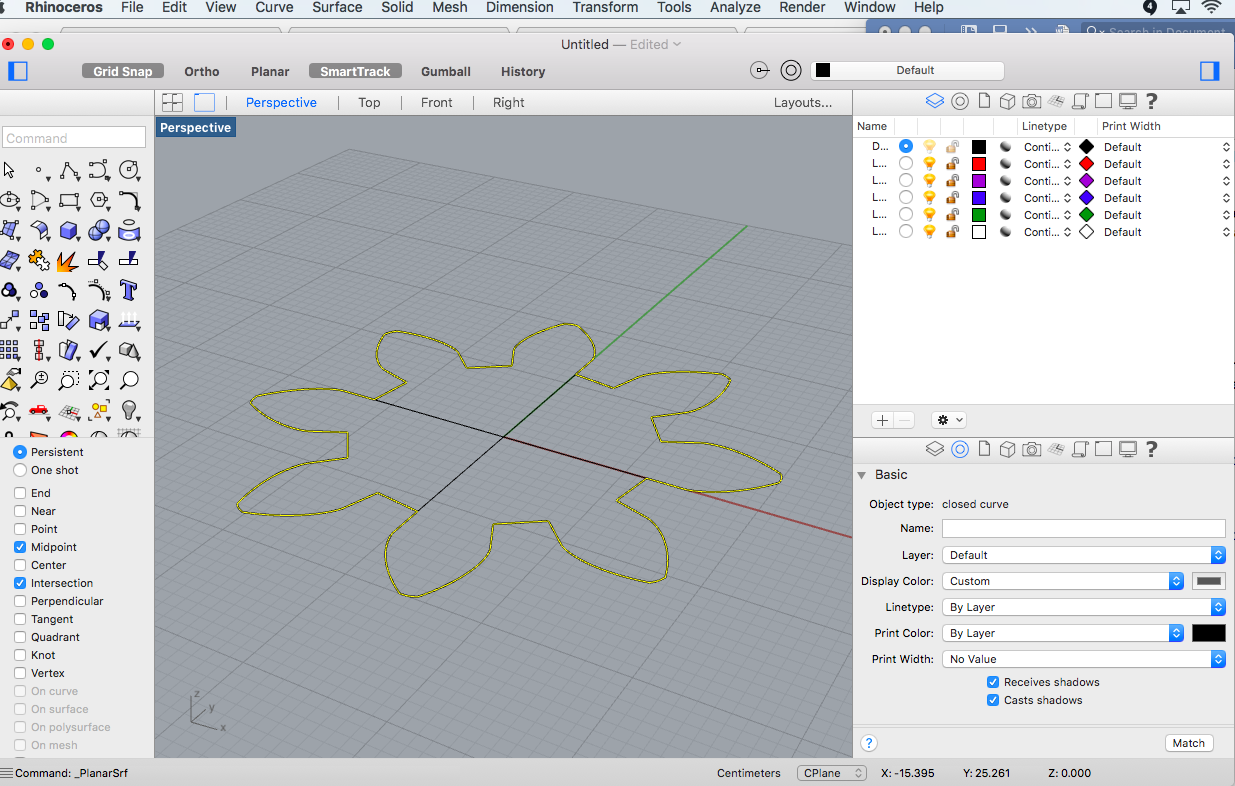
I learned how to make a vector file into a surface, because when you have a surface in Rhino you can extrude it, change something, and manipulate it in different ways.
This function is very important and handy because you could, for example, draw something by hand (like the example Neil gave in the lecture about the student who drew the PCB board by hand and then scanned this and made a vector file from his drawing to use in Rhino.)
For example:
Since the gear file I’m working with is a planar curve (see definition above) I can make it into a surface by selecting the object, going to the menu and selecting “Surface” and then in the drop down menu choosing “Planar Curve".
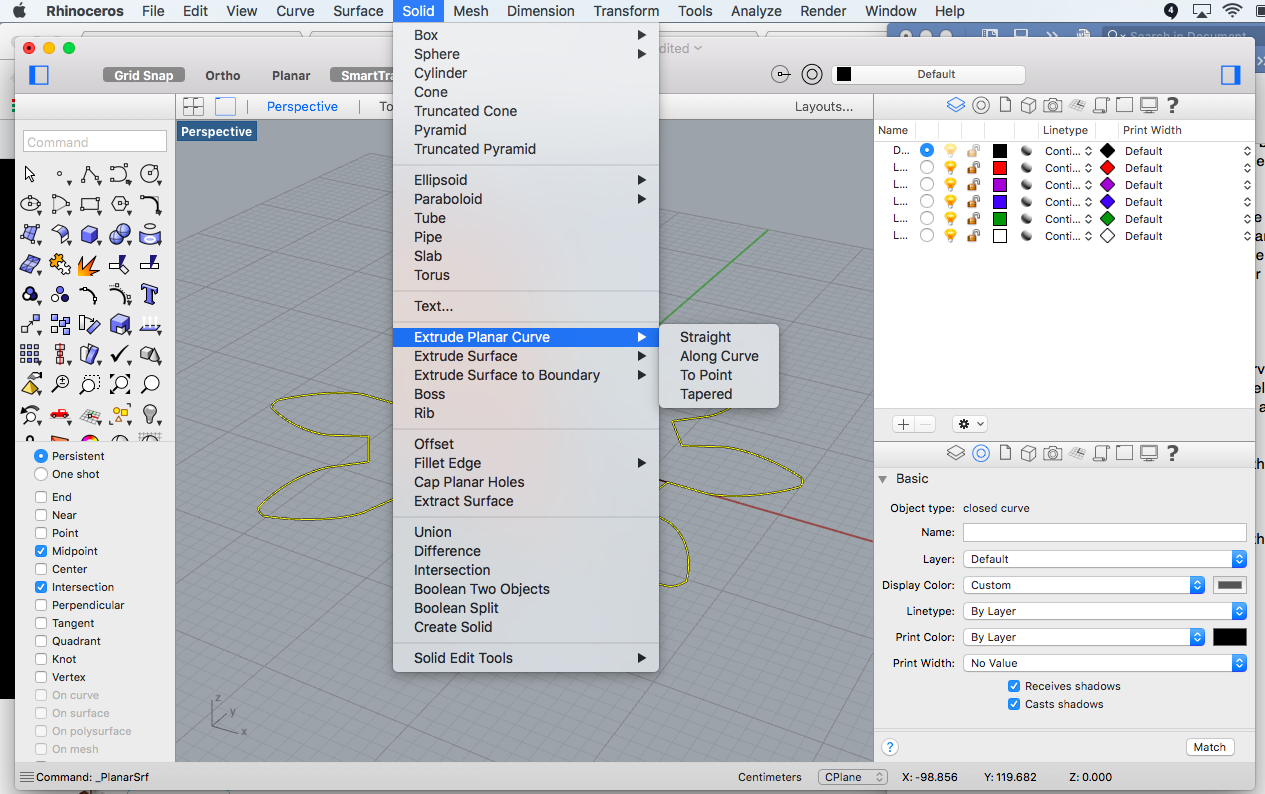
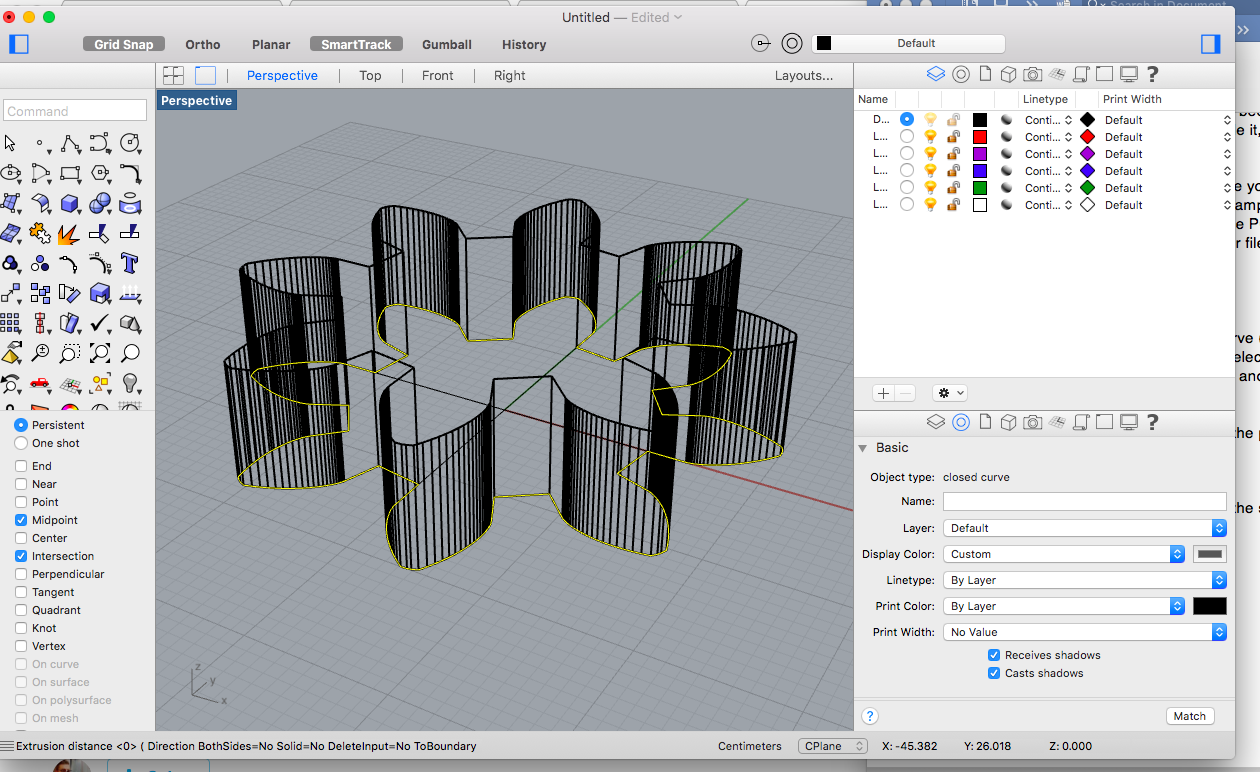
See the step-by-step procedure on how to make the planar curve (my gear) a surface in Rhino here & how to make the surface a solid by extruding it in Rhino here.