NOTE: Vigyan Ashram is known as "Fablab 0" , it is one of the remotest labs with very minimal internet access , therefore, we have been using old version of Fab module which is an offline version.
WEEK 8
Embedded Programming
Learning Outcomes:
WEEK ASSIGNMENT: Program your week 6 (Hello Board) Assignment
Using: Arduino and My FabISP with Arduino IDE and Terminal in Ubuntu (C programming)
1. Reading Datasheets
This week was very important in two ways,
. So i had to manage two major things altogether plus at last moment i had to fly to Chandigarh for PhD.
What i learnt while reading Datasheet:
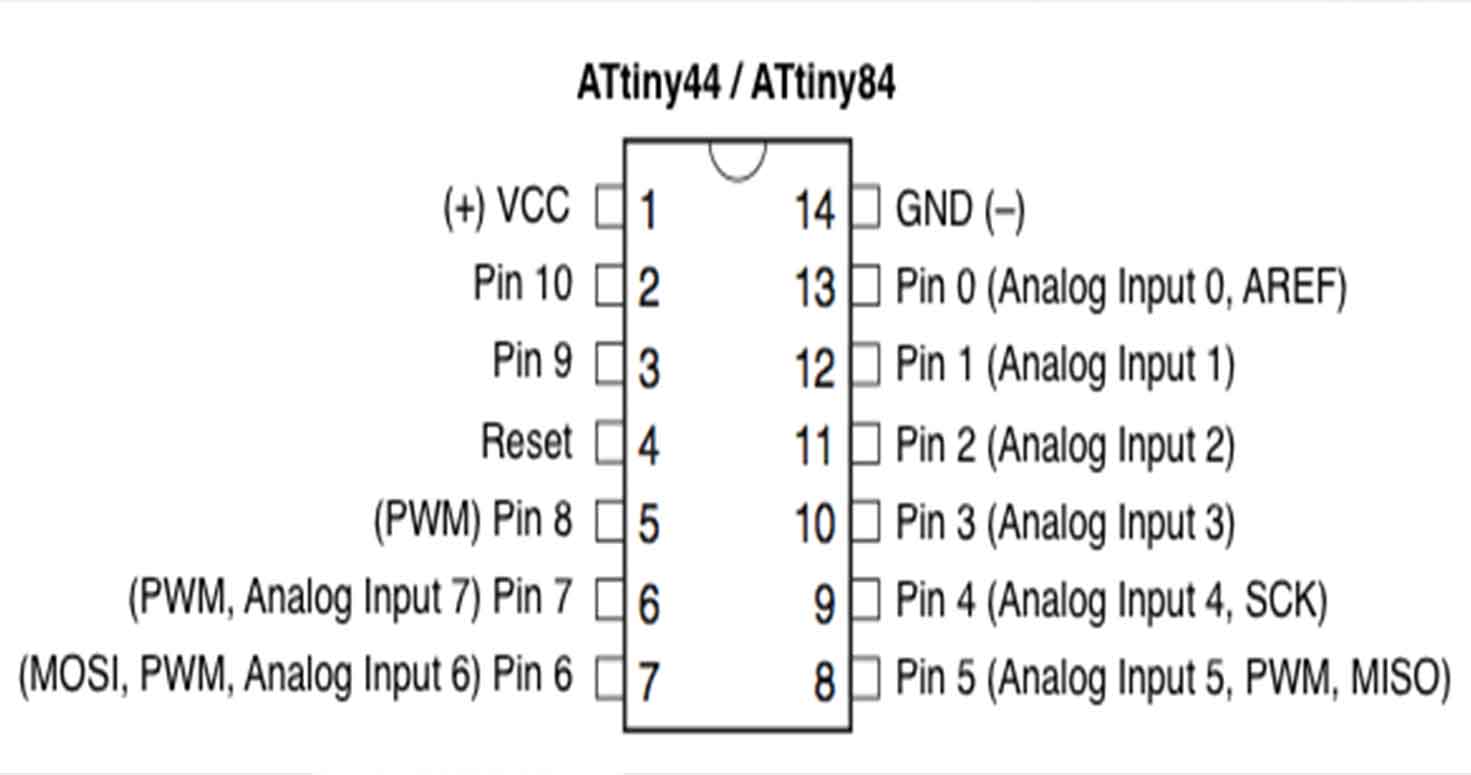
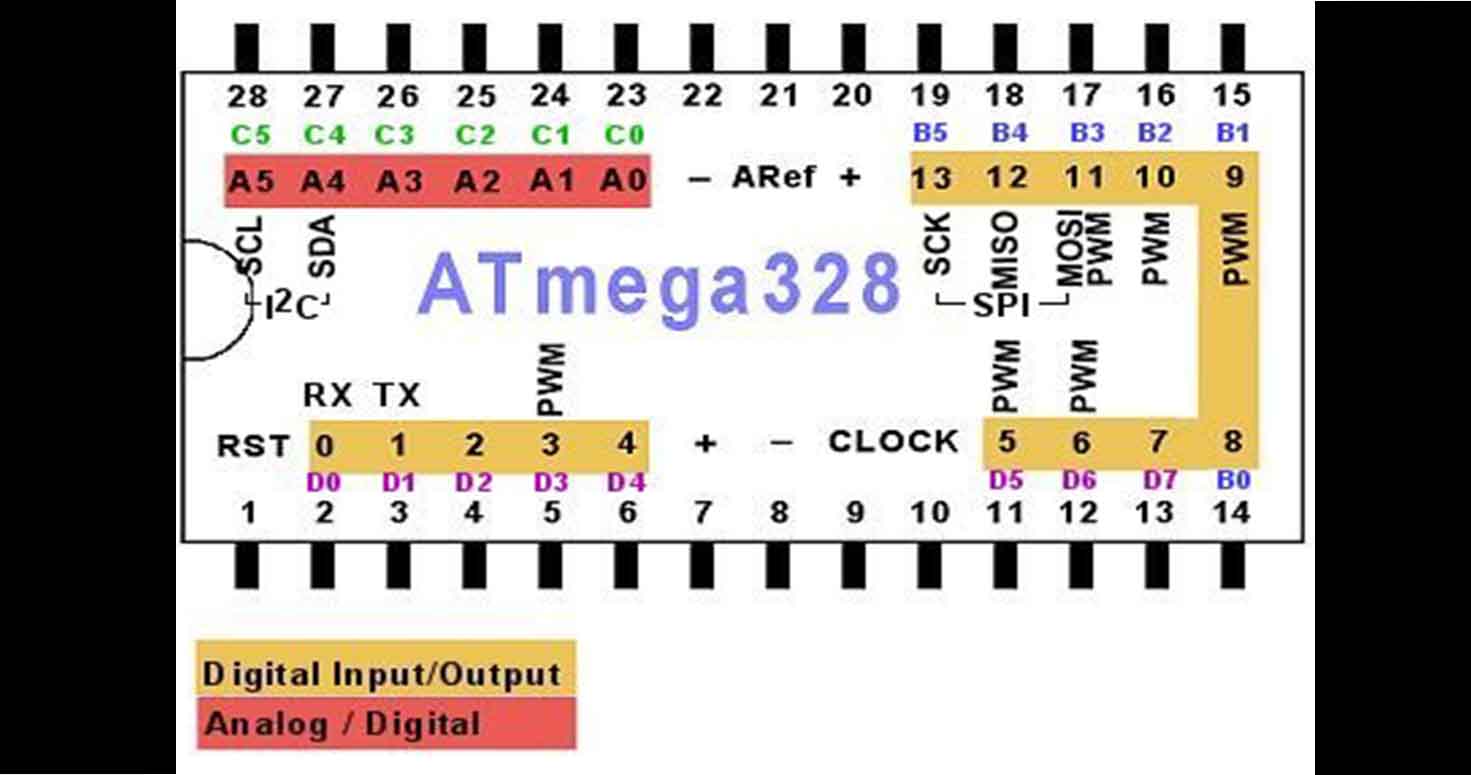
It was actually a useful task to do because we use IC's without knowing whats in it and while reading about it we get to know the possibilities of any IC for example, there is no serial in Attiny 44 or 45 but it exists in 328.
I would like someone to explain me more about features mentioned in the datasheet like :
Then I also started reading book "Arduino" by Peter Dalmaris, which is really a nice comprehensive book for beginners about arduinos.
On our suggestion, Suhasji initiated a virtual meet where all indian instructors will give brief idea about they are aware regarding programming. Well, I was in bus going to airport, so i attended it in bus while travelling. Could'nt attend that well due to poor internet connectivity, obviously it was a bus but it was helpful.
We were also given lecture by Mrs. Swarna on C language , where she gave us a basic introduction to the language, which i attended online back from my home, thanks to Mahavir and suhasji for connecting me to the meeting.
2. Setting up
To know how i milled my hello board, you can visit this page Week 6

I further started programming my Hello board with the help of ARDUINO, arduino first because im really new to programming and arduino videos seemed easier to start with.
You can Install arduino from here.
Following are the steps to program in arduino:
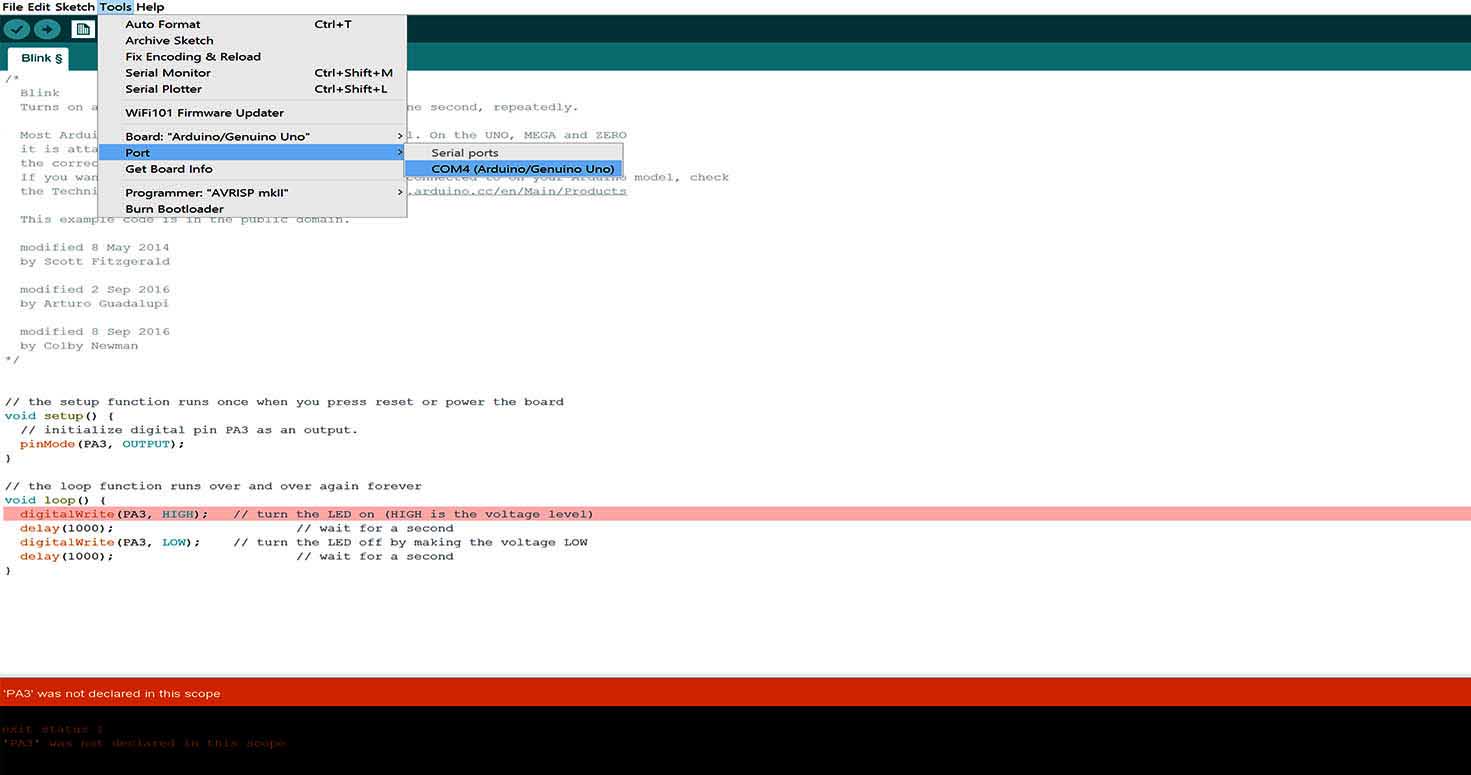
1. Open Arduino IDE, Go to file > Examples > Blink
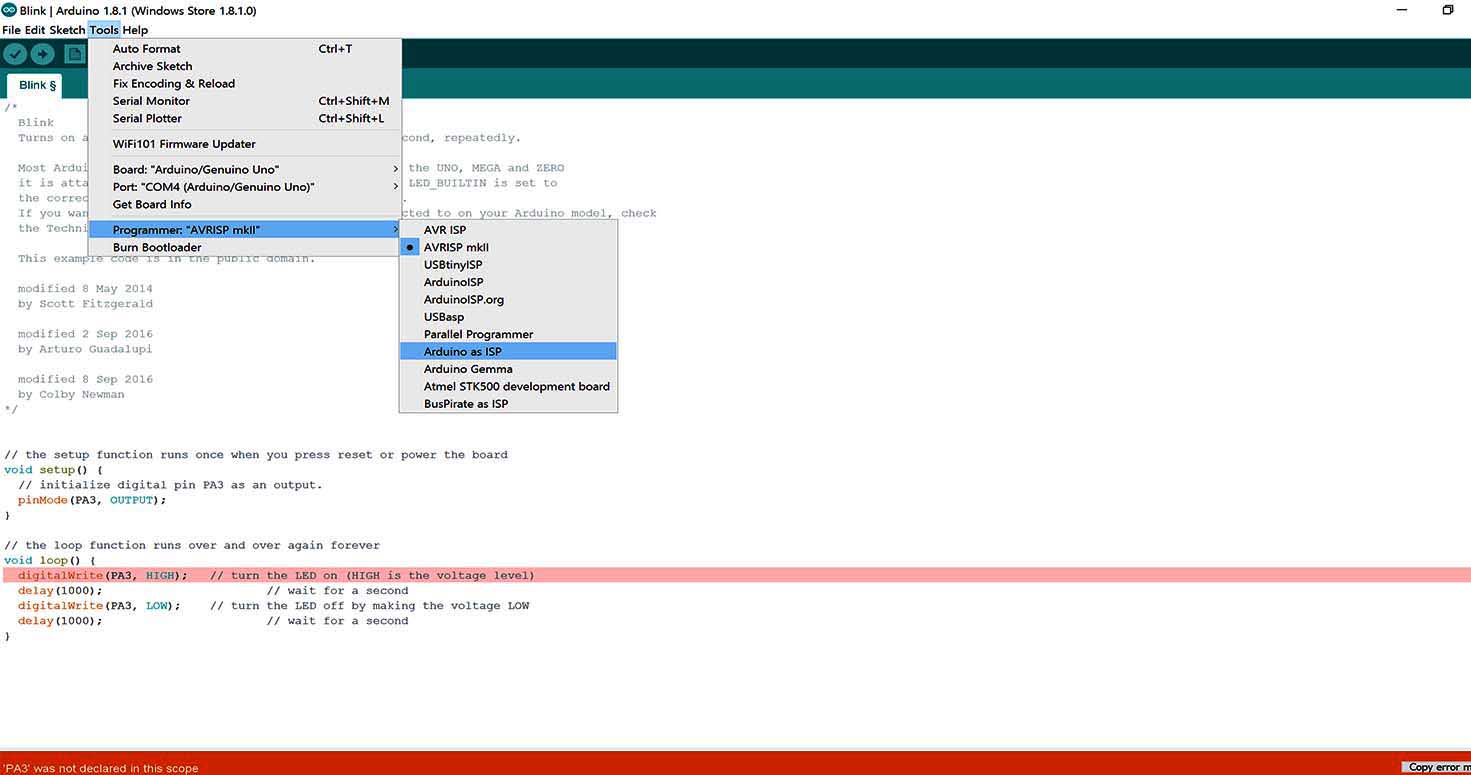
2. Then I went to Tools > Selected the Port to which Arduino is connected, if you dont know which one is it you can always disconnect and reconnect and then check which port is your arduino connected to.
3. Now go to Sketch > Include librares > Manage Libraries, we will be uploading our code on attiny 44 IC on the hello board, so we need to have libraries for the same, you can install for any board or IC like this.

4. You can additionally add libraries by adding URL for that Go to File > Preferences and fill url next to option add additional Libraries 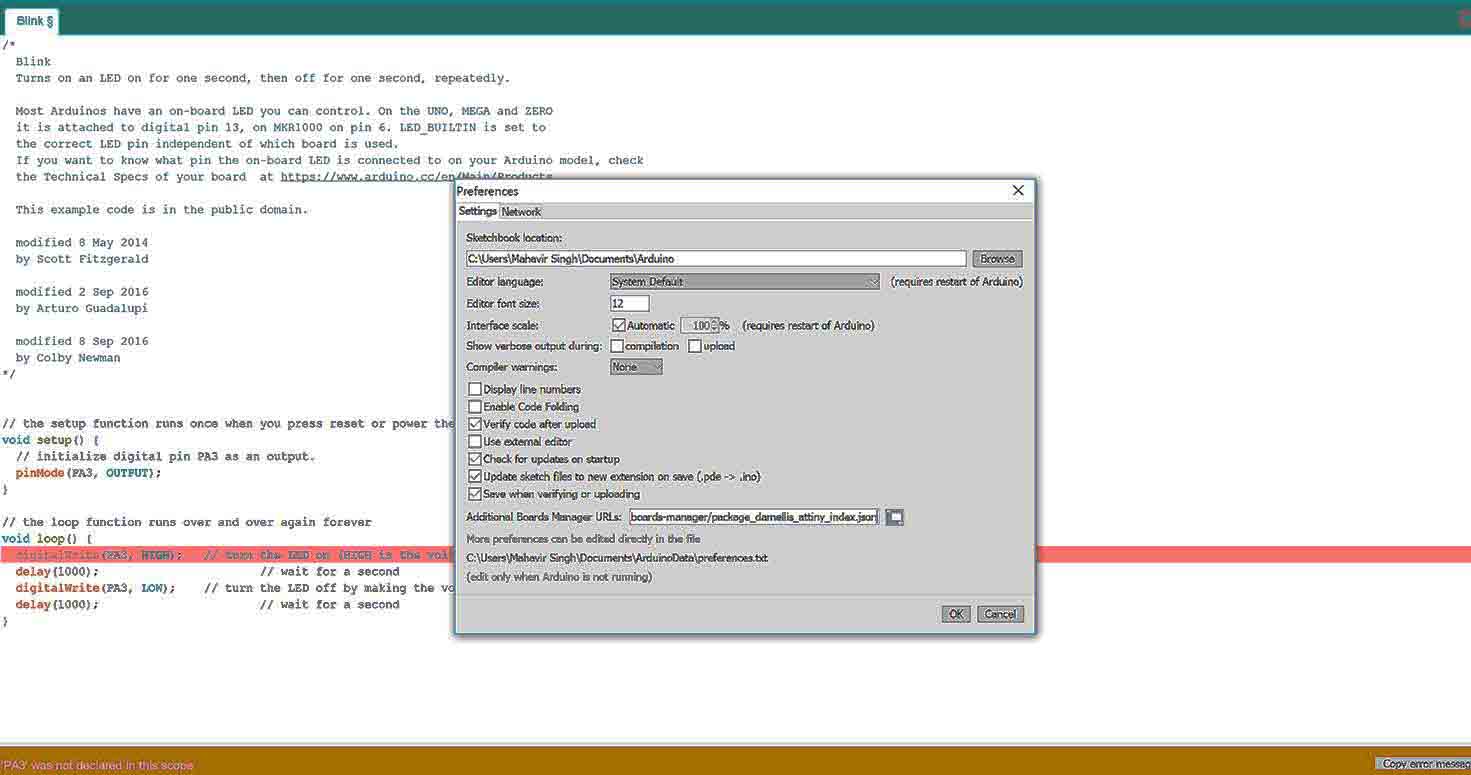
5. Board Manager updates all the libraries 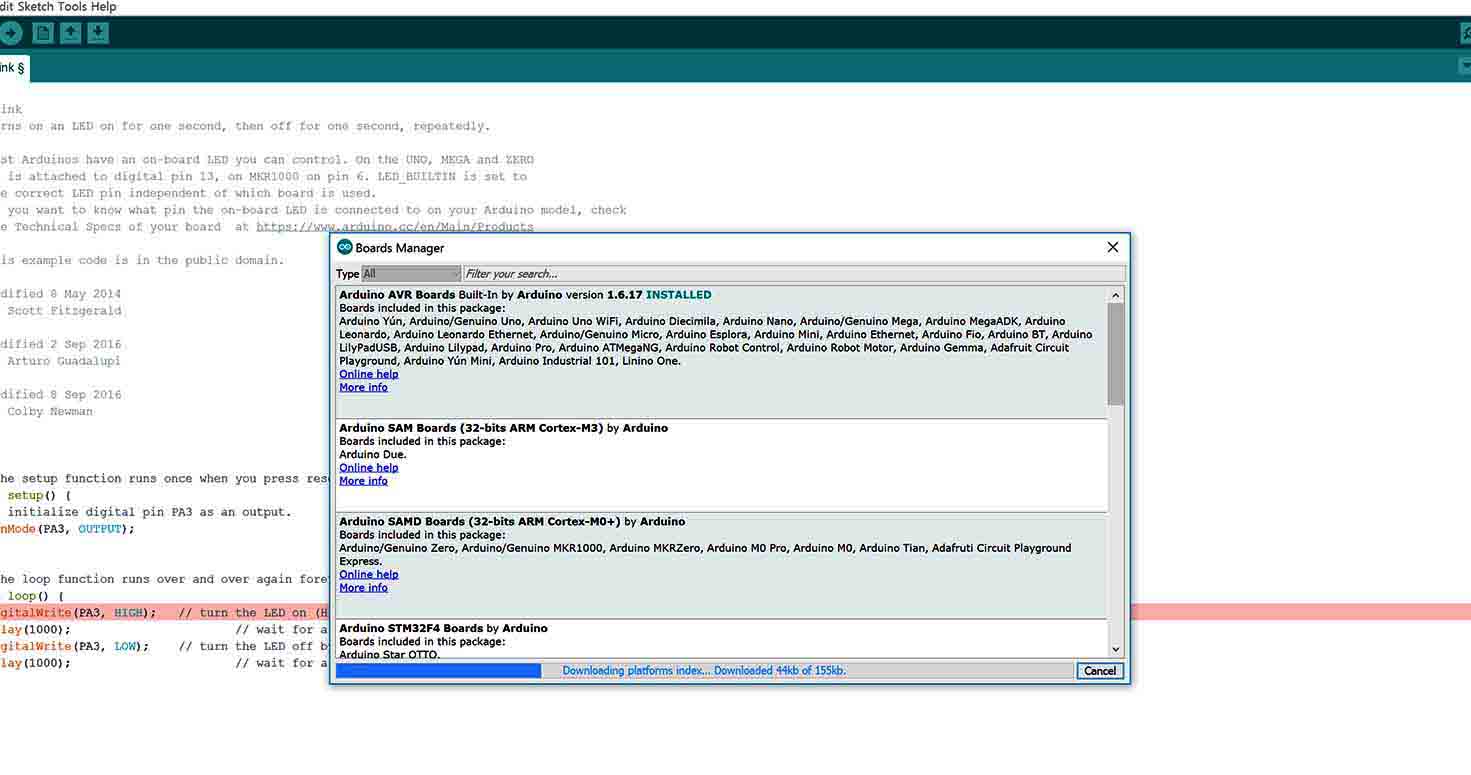
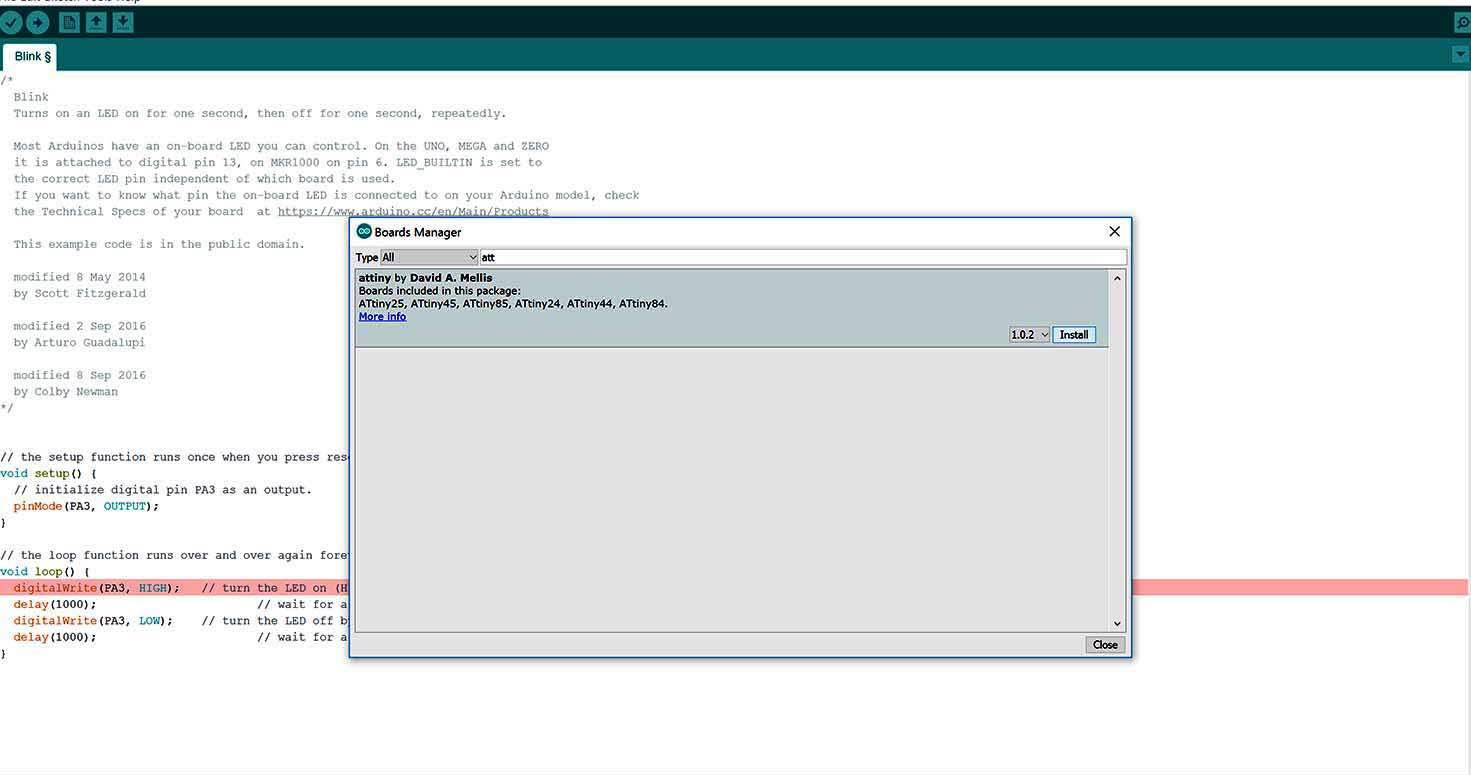
6.Also, you can add like i added attiny 44
7. Here it is , I will select this attiny 44 whenever i have to program my board with IC attiny 44
8. Clock stays as 1 Mhz 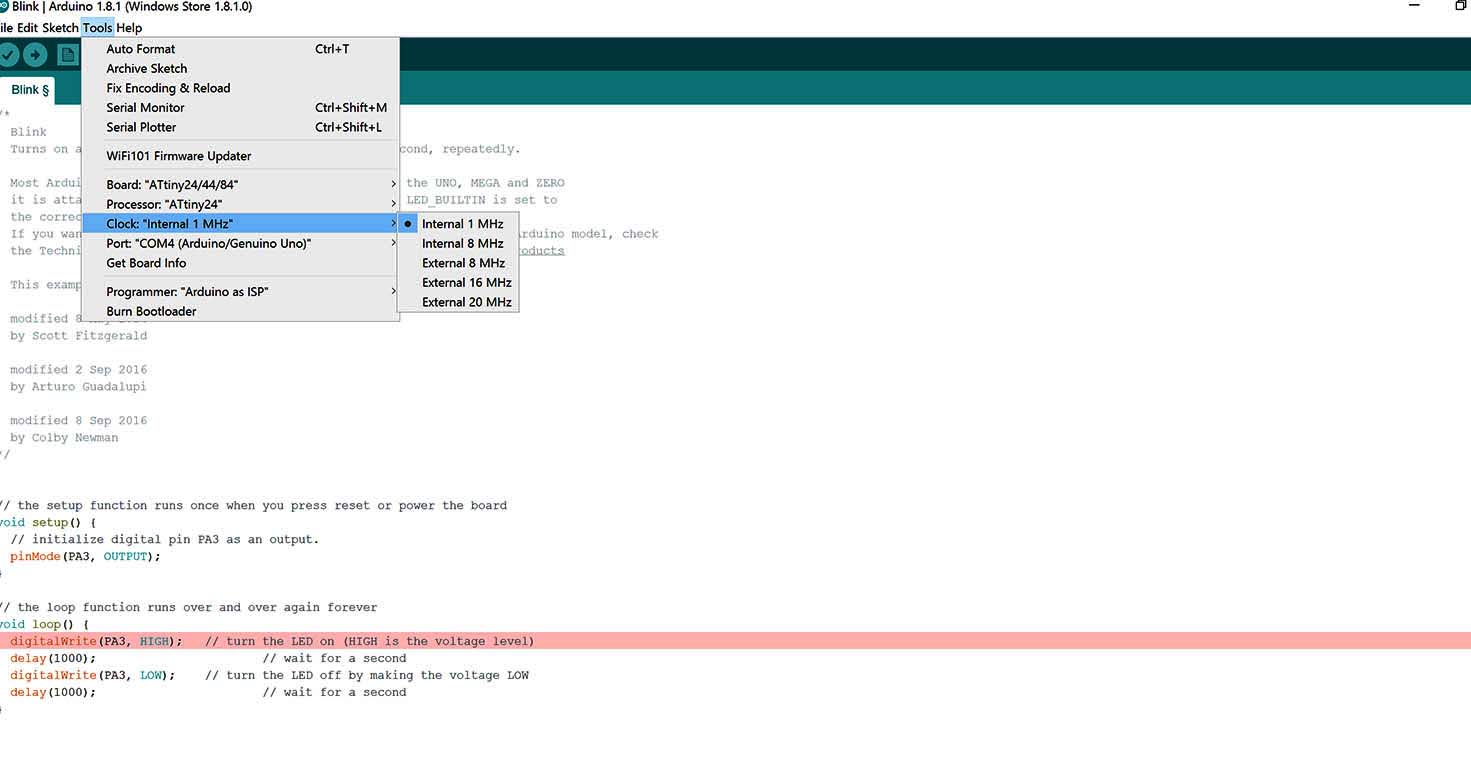
Lets move next to programming after installing Arduino and its libraries.
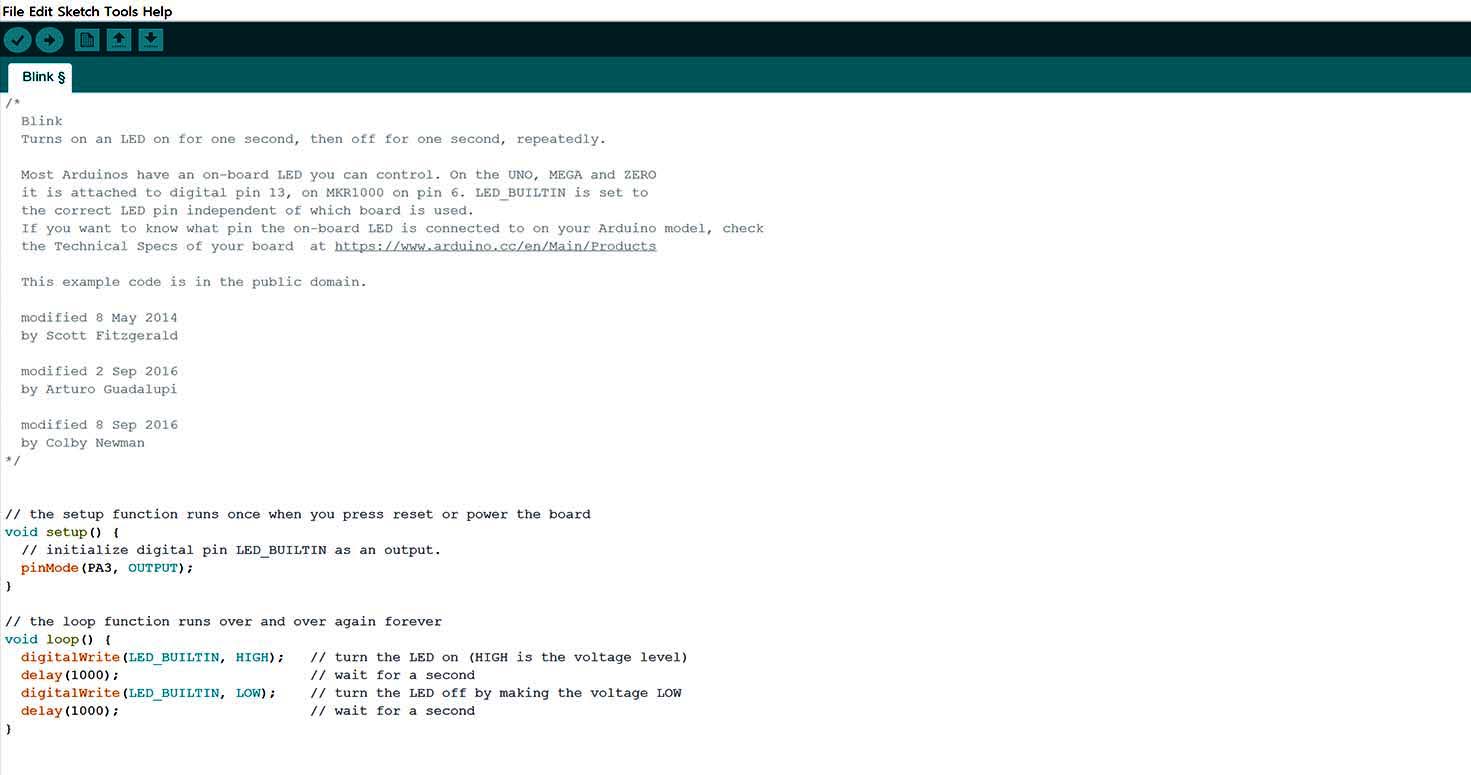
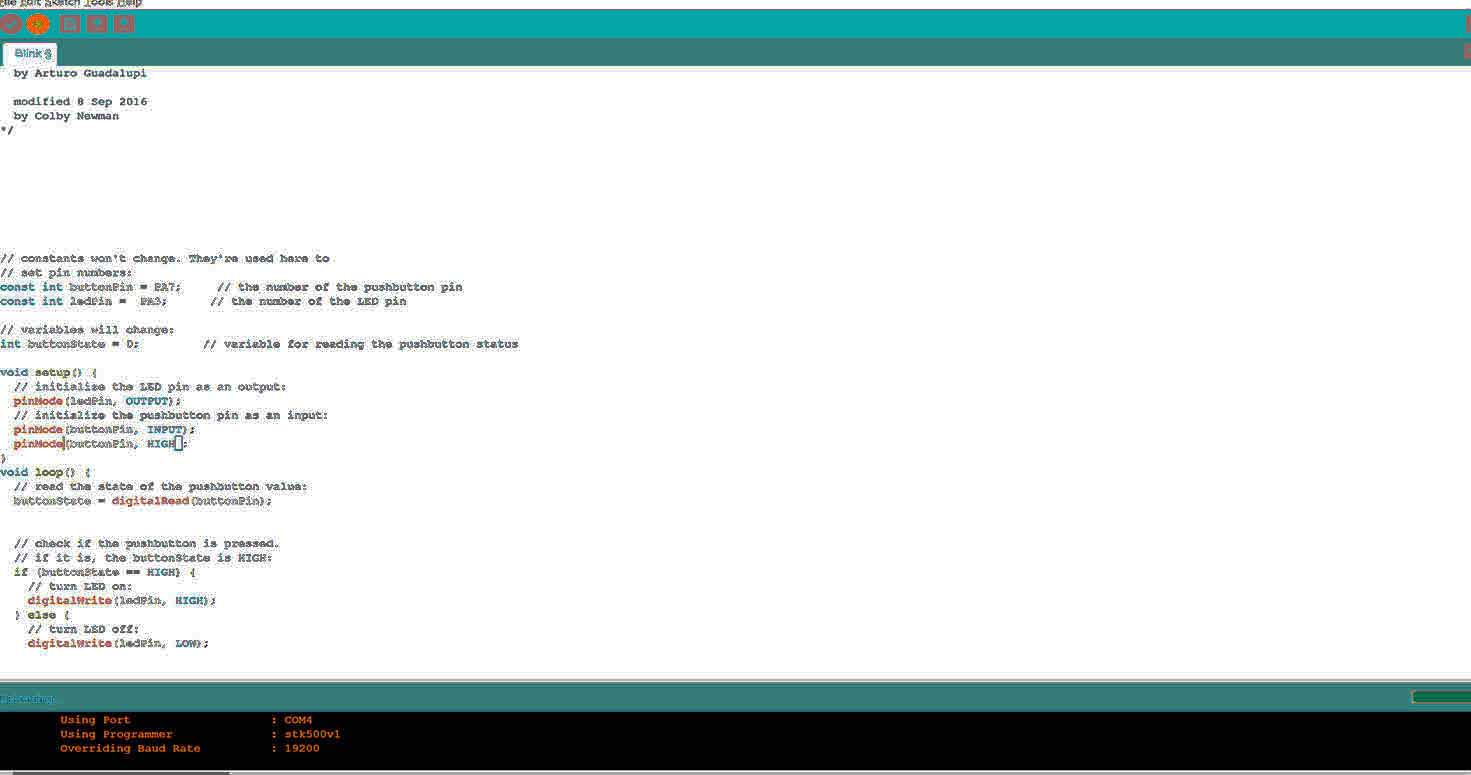
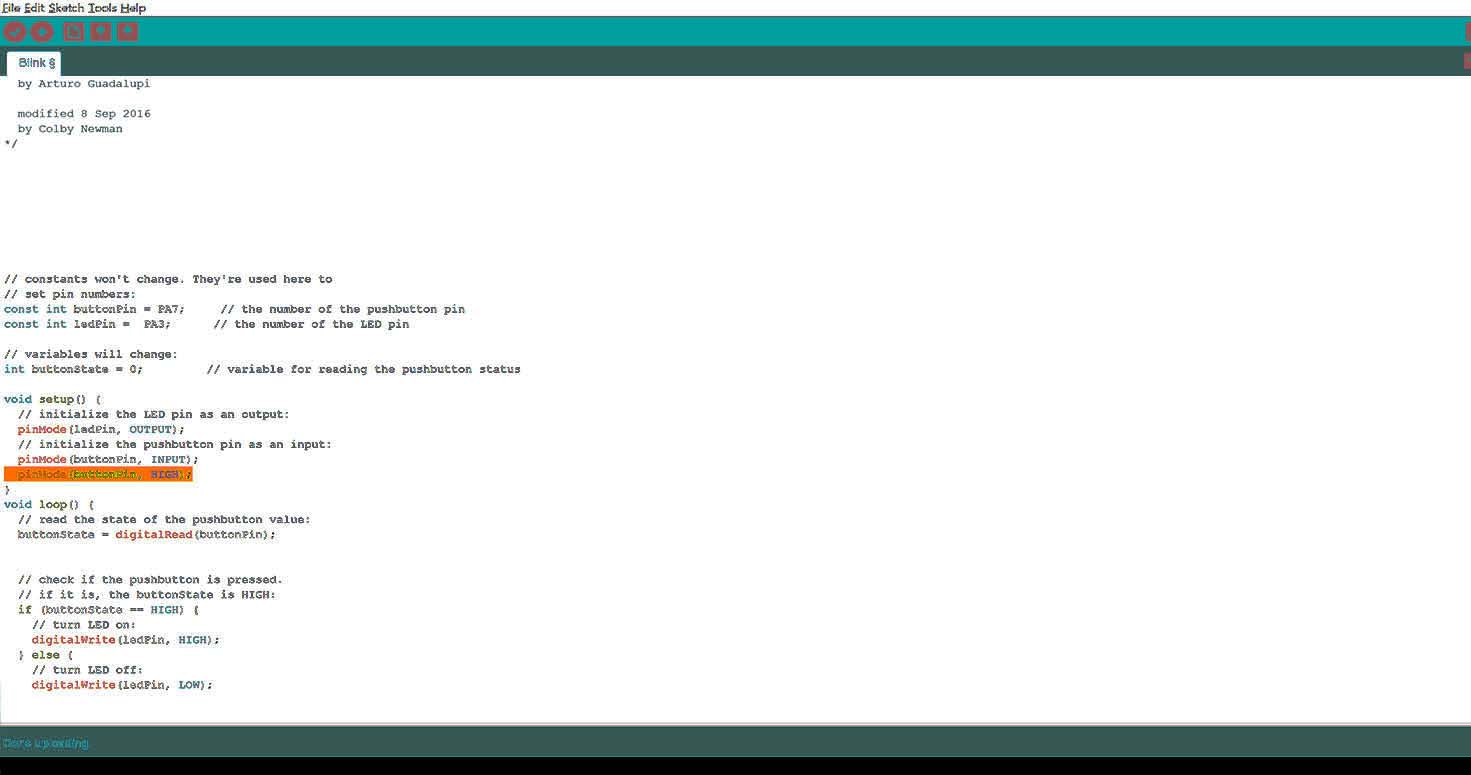
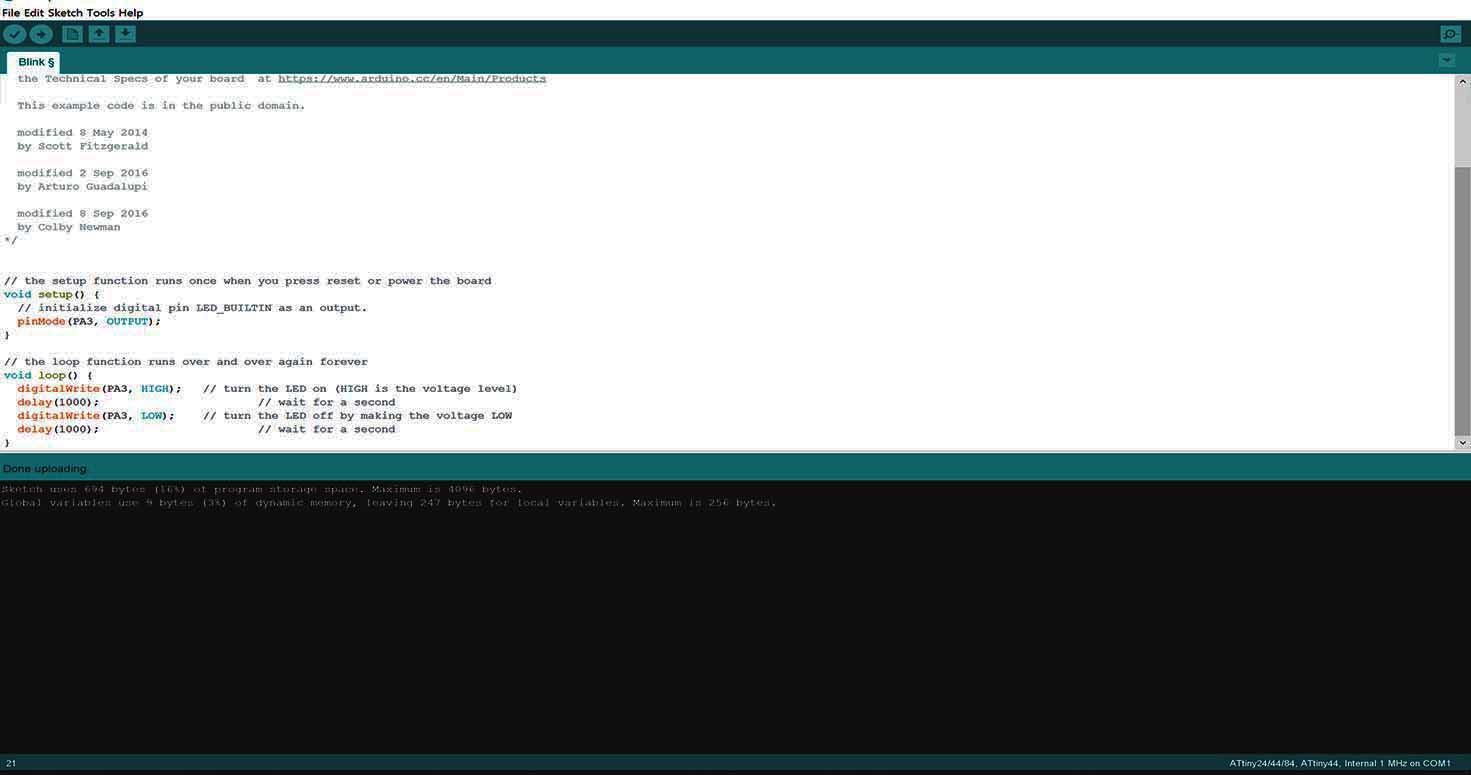
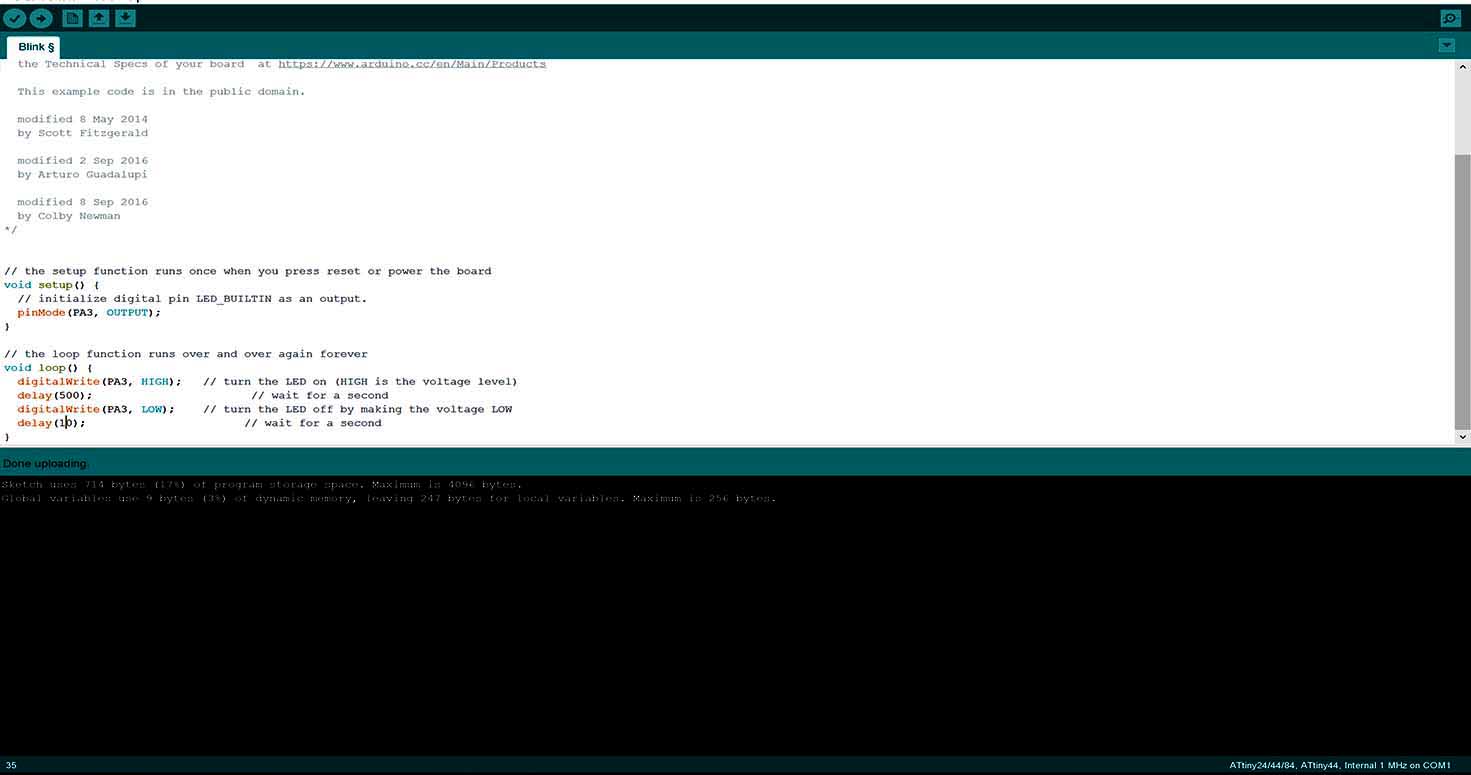
2. Programming Hello board with Arduino and Arduino IDE
Hello board (Hardware) - ARDUINO IDE(SOftware) - Arduino Uno as Programmer
  // the setup function runs once when you press reset or power the board
void setup() {
  // initialize digital pin LED_BUILTIN as an output.
  pinMode(PA3, OUTPUT);
}

// the loop function runs over and over again forever
void loop() {
  digitalWrite(PA3, HIGH);   // turn the LED on (HIGH is the voltage level)
  delay(10);                       // wait for a second
  digitalWrite(PA3, LOW);    // turn the LED off by making the voltage LOW
  delay(10);                       // wait for a second

  digitalWrite(PA3, HIGH);   // turn the LED on (HIGH is the voltage level)
  delay(10);                       // wait for a second
  digitalWrite(PA3, LOW);    // turn the LED off by making the voltage LOW
  delay(10);                       // wait for a second

  digitalWrite(PA3, HIGH);   // turn the LED on (HIGH is the voltage level)
  delay(10);                       // wait for a second
  digitalWrite(PA3, LOW);    // turn the LED off by making the voltage LOW
  delay(10);                       // wait for a second

  digitalWrite(PA3, HIGH);   // turn the LED on (HIGH is the voltage level)
  delay(100);                       // wait for a second
  digitalWrite(PA3, LOW);    // turn the LED off by making the voltage LOW
  delay(10);                       // wait for a second

  digitalWrite(PA3, HIGH);   // turn the LED on (HIGH is the voltage level)
  delay(10);                       // wait for a second
  digitalWrite(PA3, LOW);    // turn the LED off by making the voltage LOW
  delay(10);                       // wait for a second

  digitalWrite(PA3, HIGH);   // turn the LED on (HIGH is the voltage level)
  delay(10);                       // wait for a second
  digitalWrite(PA3, LOW);    // turn the LED off by making the voltage LOW
  delay(10);                       // wait for a second

  digitalWrite(PA3, HIGH);   // turn the LED on (HIGH is the voltage level)
  delay(100);                       // wait for a second
  digitalWrite(PA3, LOW);    // turn the LED off by making the voltage LOW
  delay(10);                       // wait for a second

  digitalWrite(PA3, HIGH);   // turn the LED on (HIGH is the voltage level)
  delay(10);                       // wait for a second
  digitalWrite(PA3, LOW);    // turn the LED off by making the voltage LOW
  delay(10);                       // wait for a second

}
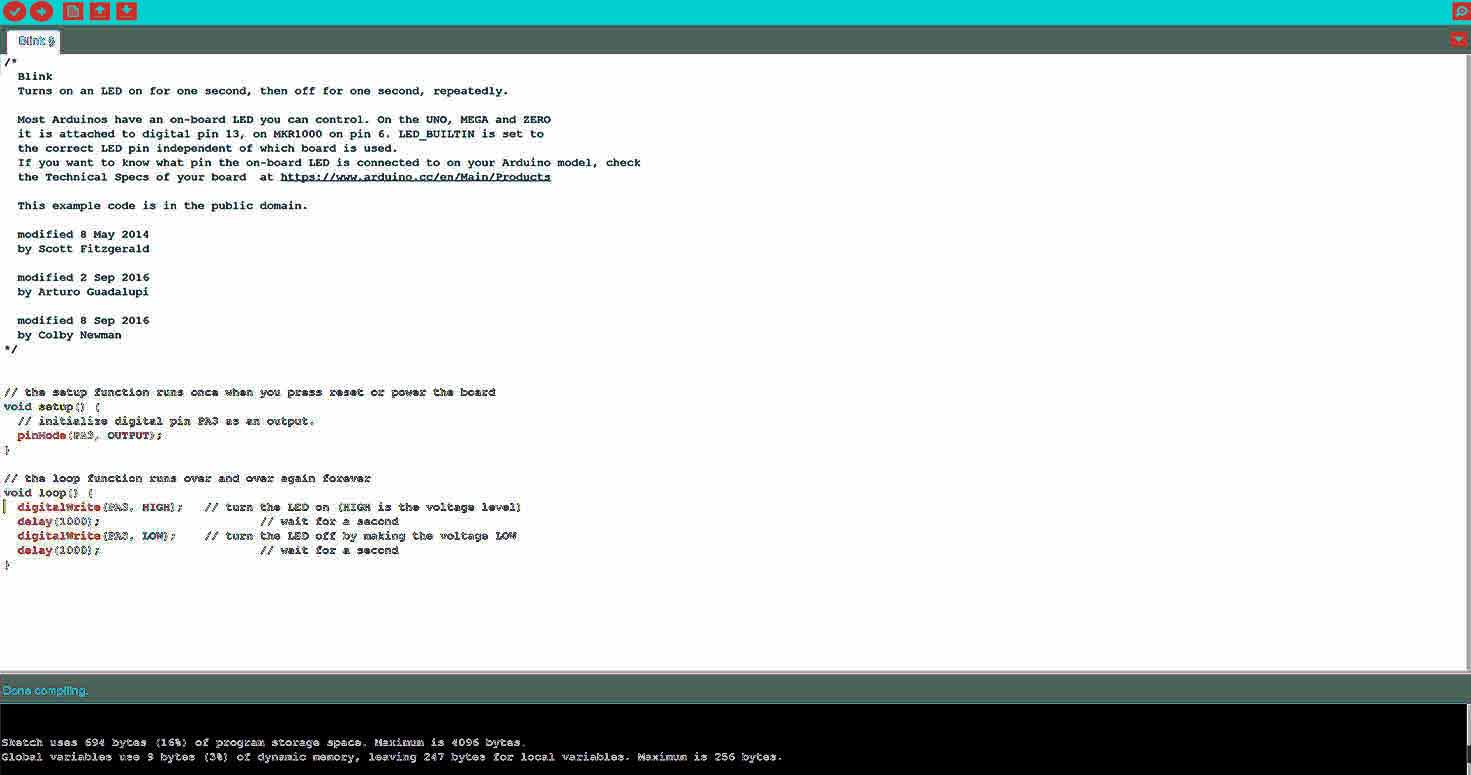
And your board should start blinking.

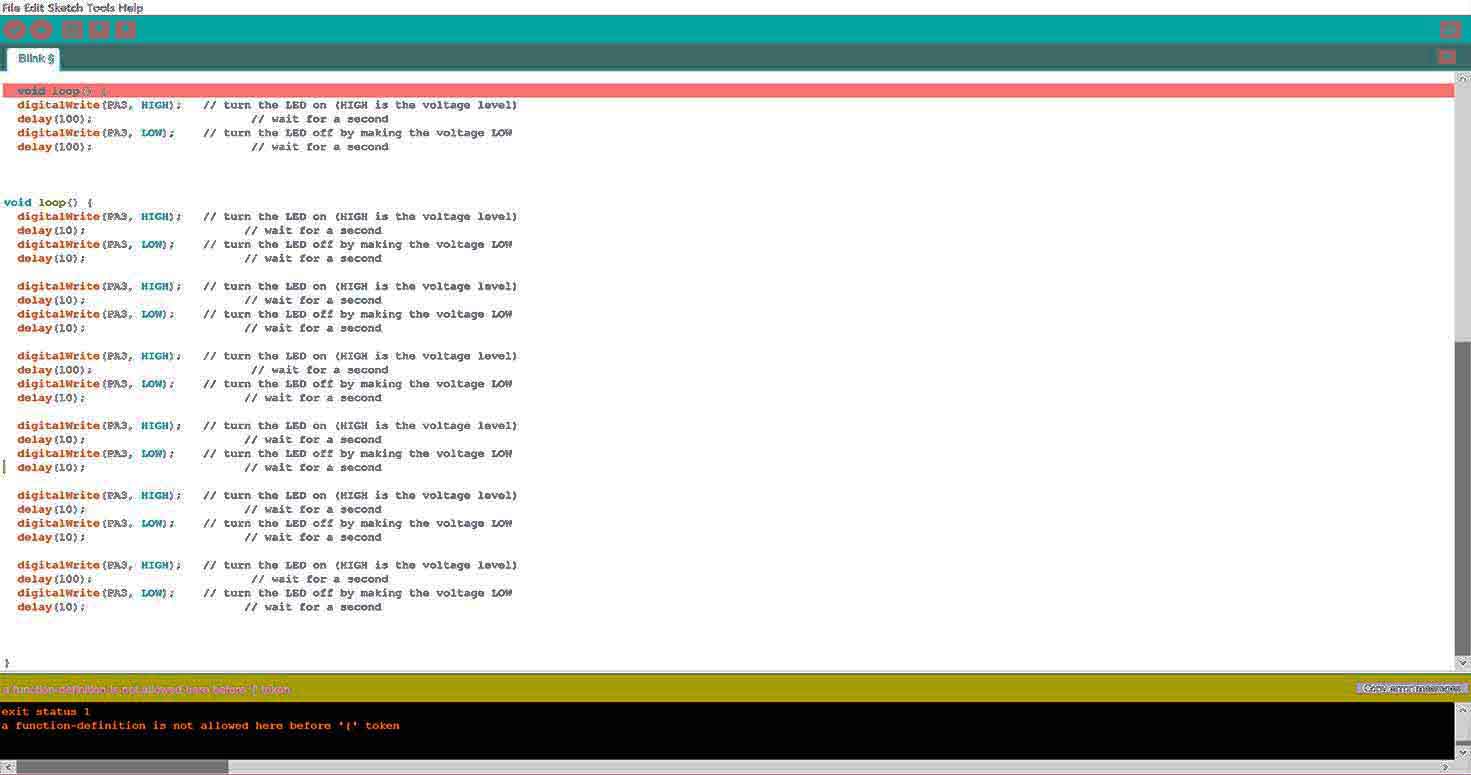
Sometimes you can receive an error. Read it and recheck your code, plus if it says recheck connections then recheck board.
3. Programming Hello board with FabIsp - Arduino IDE and FabISP - Ubuntu Terminal (C programming)
Hello board (Hardware) - ARDUINO IDE(SOftware) & Ubuntu Terminal- FABISP as Programmer
Then I tried programming my Hello board with My Fab ISP
Following are the steps involved, Dont get confused with that green board im using that only for GND and VCC for power:

2.Upload it on your board
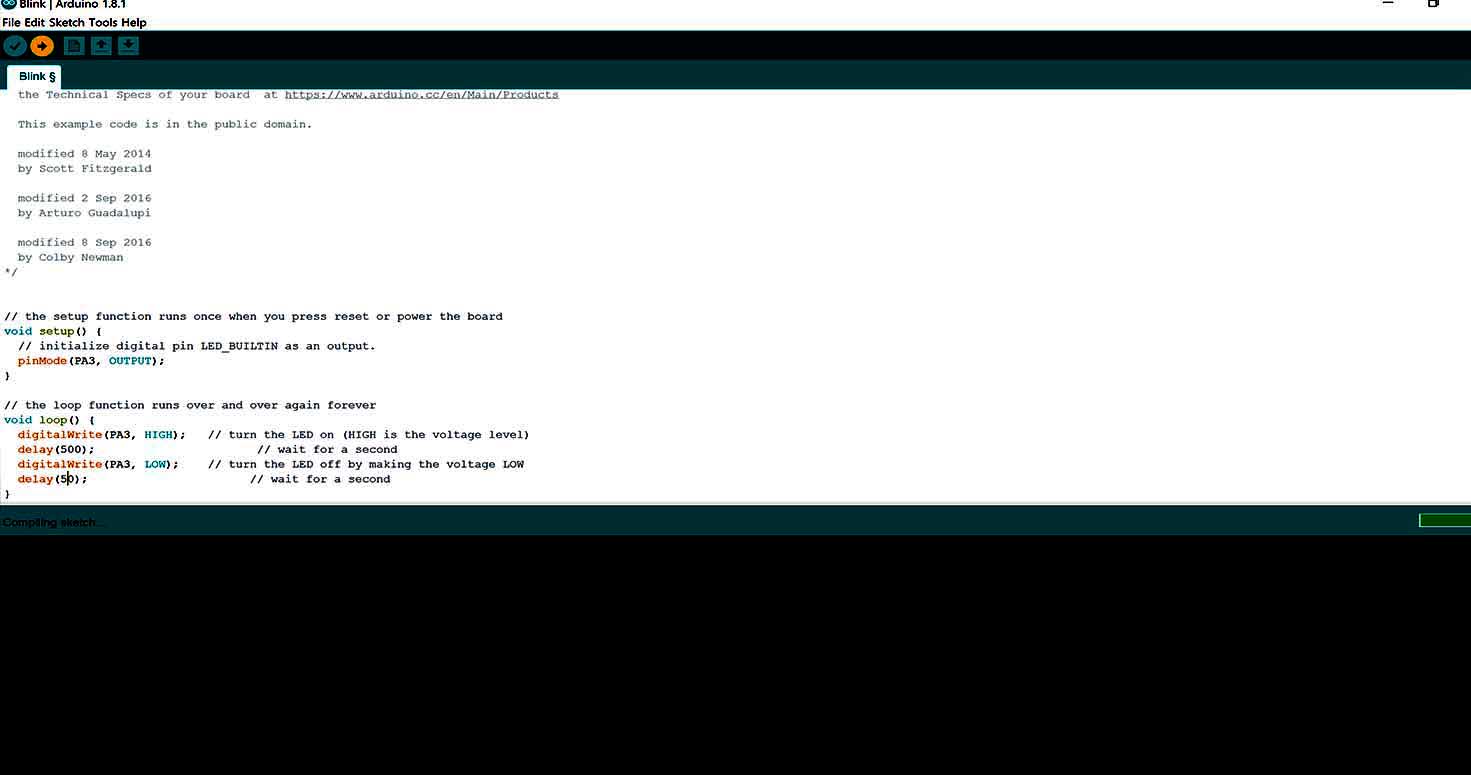
3. Here You can see my cursor is at "delay" in the code, we can change delay time and see the difference in blinking
4. Again, I changed delay.
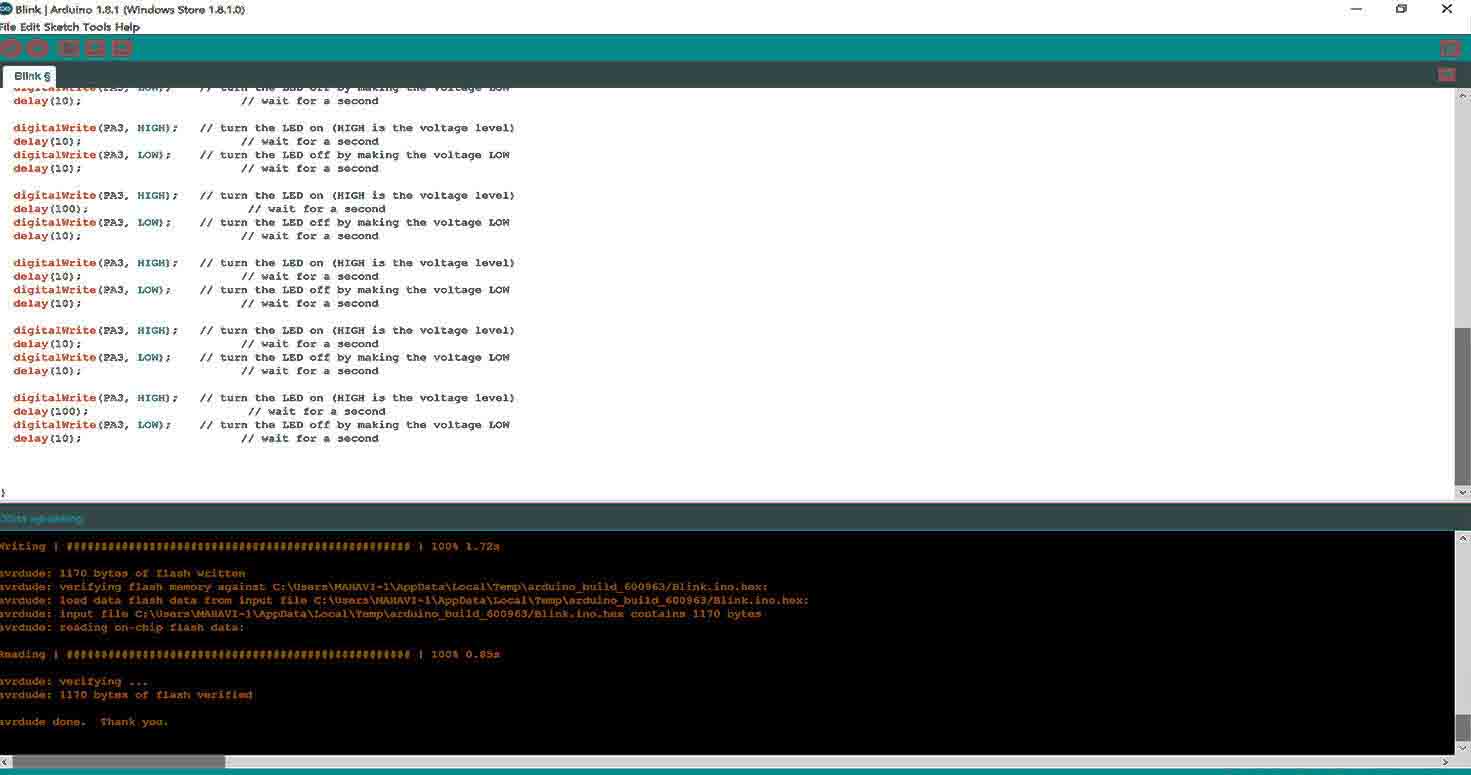
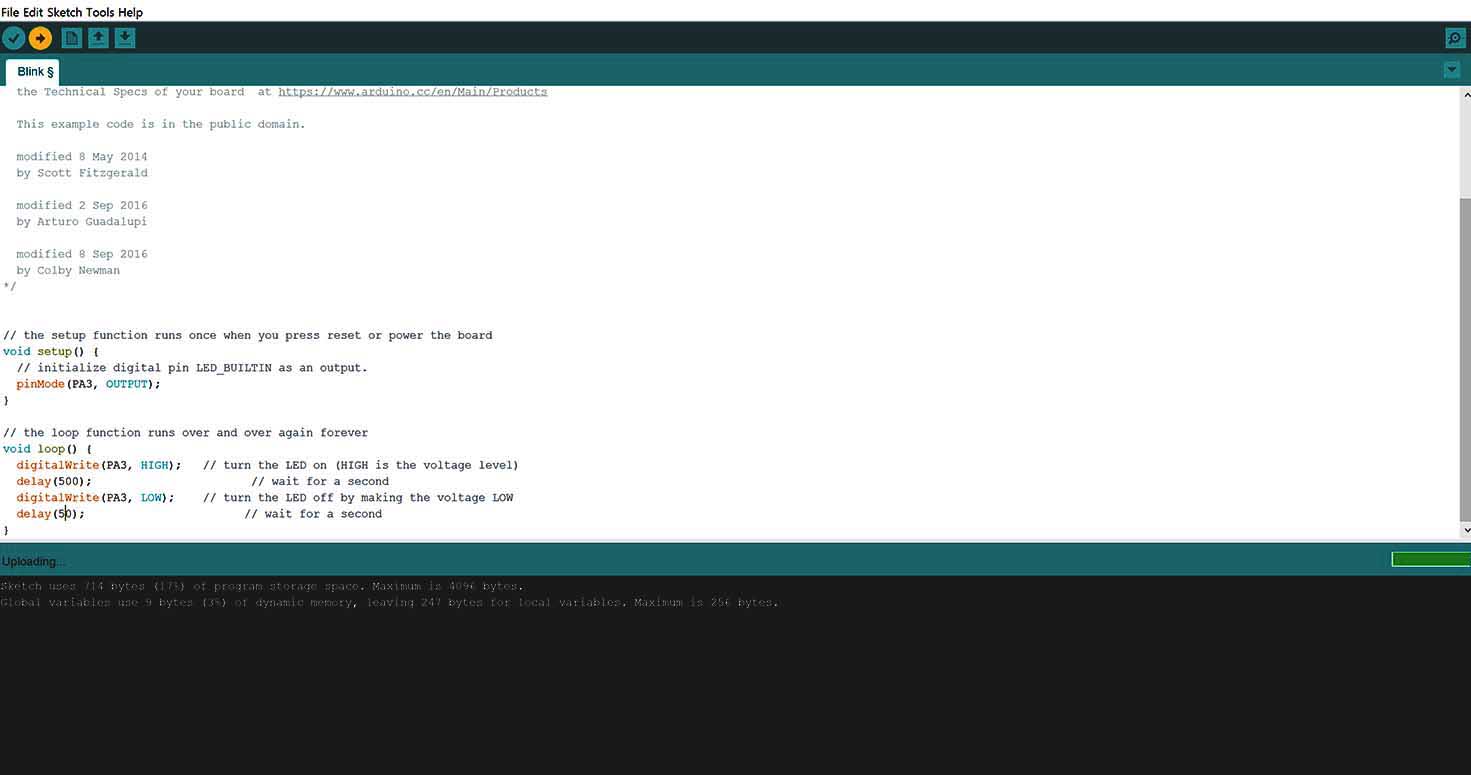
5. Uploading the code
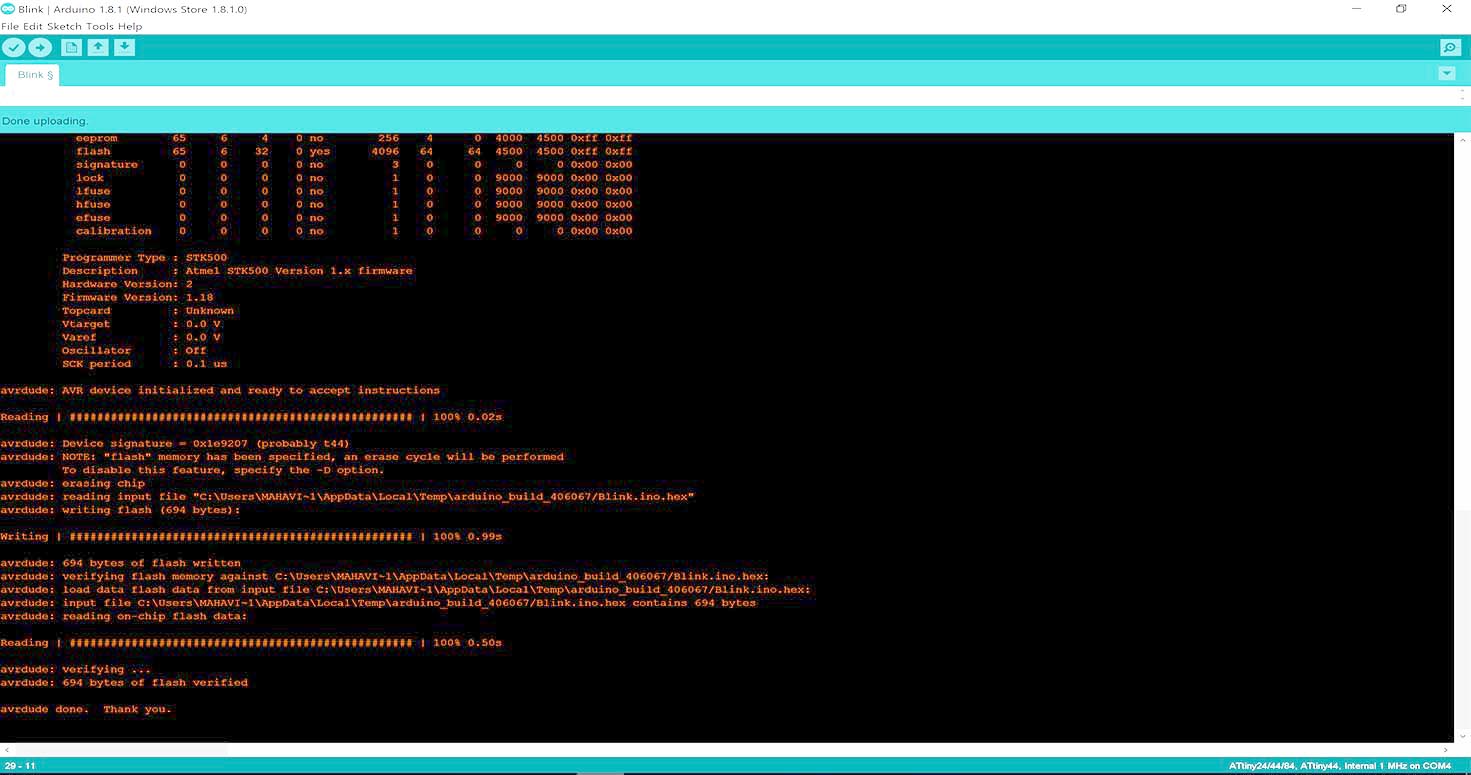
6. "Uploading Done" is a very good phrase in programming
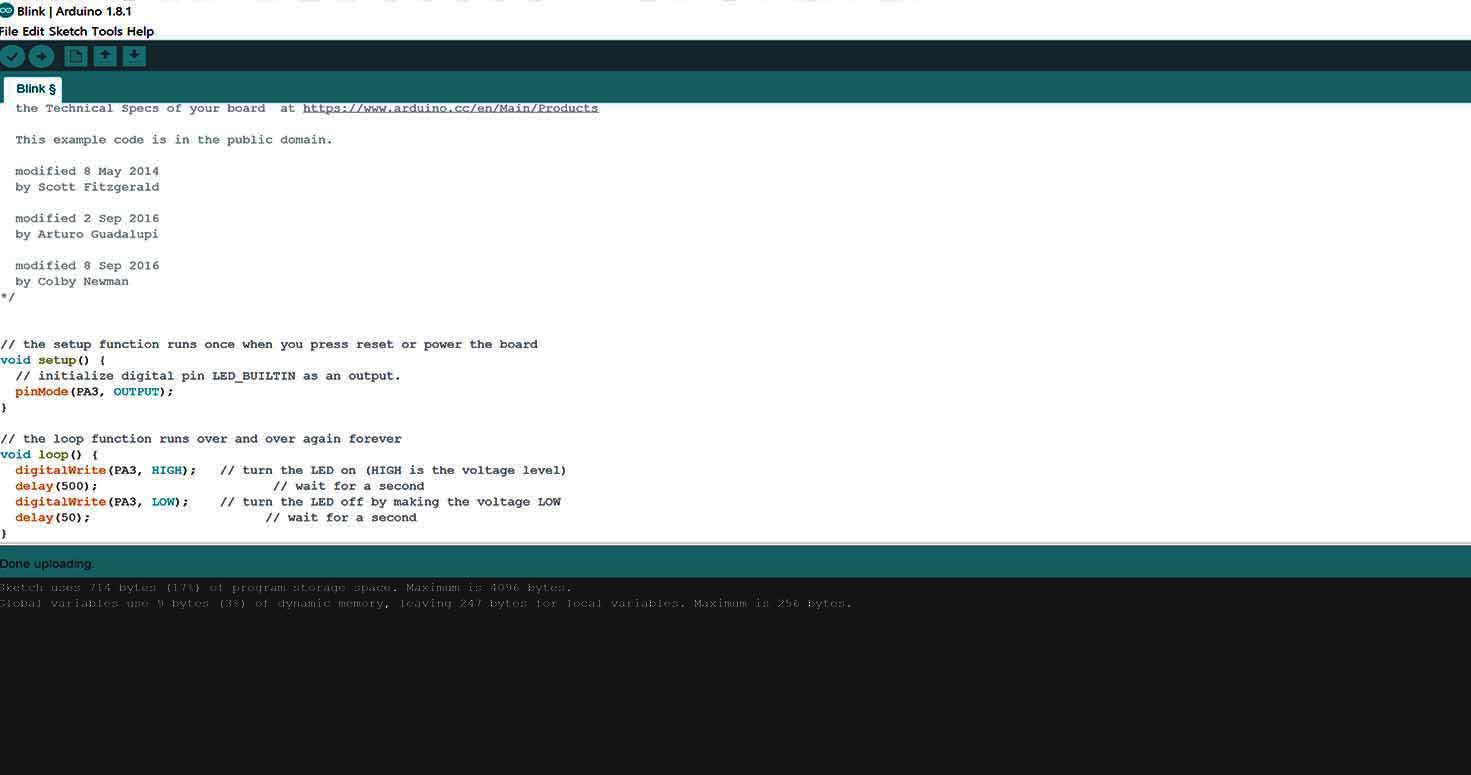
7. This is how "Done uploading" looks like , if you drag the box up , you can see details.
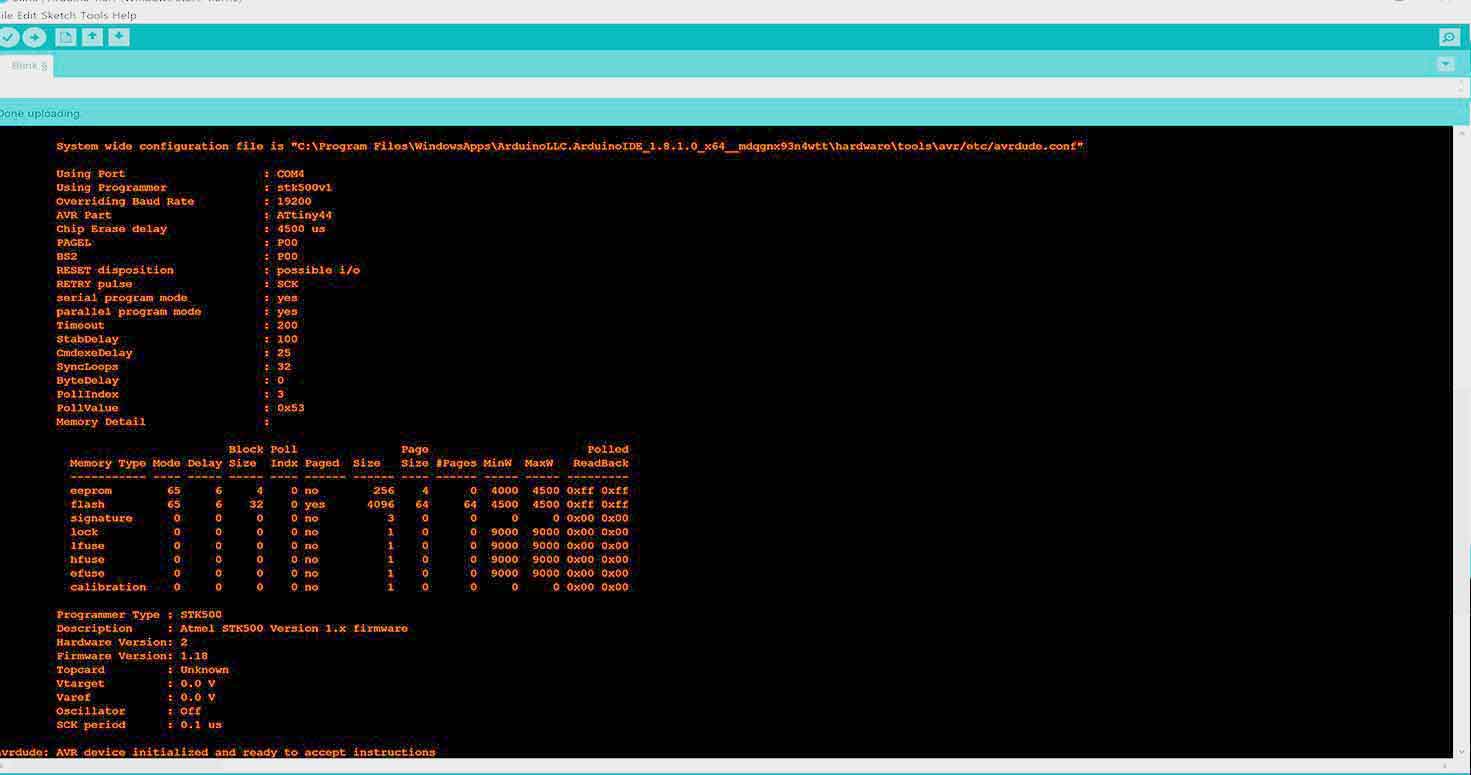
8.Thats where it is complete and verified.
Download board file
Download Schematic file
FABISP AND UBUNTU TERMINAL (C programming)
cd Desktop/abc //folder where my file is cd means change directory
sudo make -f hello.ftdi.44.echo.c.make
sudo make -f hello.ftdi.44.echo.c.make program-usbtiny-fuses

Here if you see , it shows "Double check connections", and i rechecked and my one jumper wire was loose.
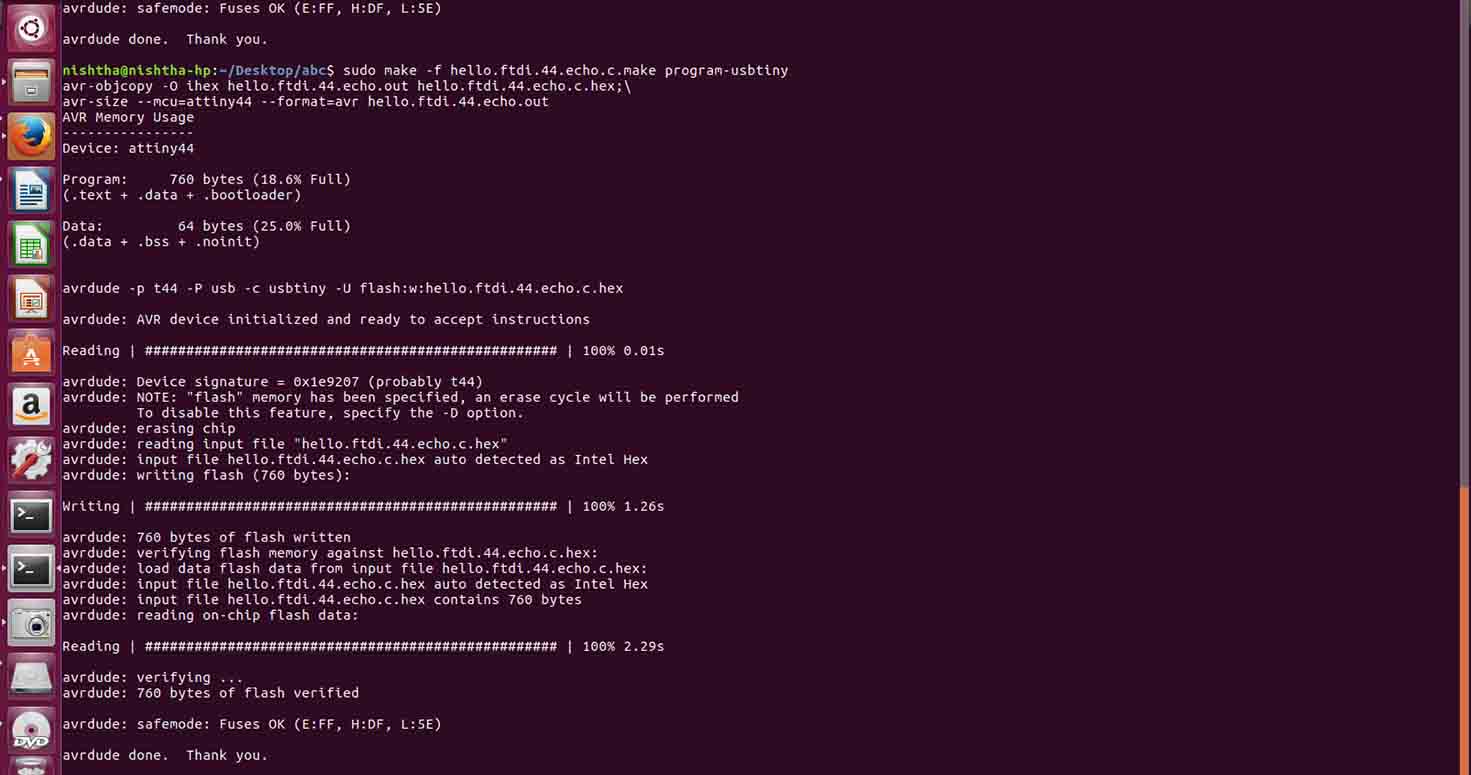
Finally, Verified.
4. Programming Arduino with Firefly
I also tried my hands on Firefly with the help of my classmate Mahavir as we were exploring grasshopper which i really liked because it shows live responses and conenctions plus you can control your components, input , output with their interface.
In my Interface and Application ProgrammingInterface and Applications, you will see Grasshopper as my major task.
I Later on, Also tried blink on my Atmega 328 board of my final project:
The process has been explained on the Final Project page
Download code
Download board file of Atmega 328
Download Schematic file of Atmega 328
