Week 13: molding and casting
April 20 - 26
Assignment
- Design a 3D mold, machine it, and cast parts from it
Object Modeling with Fusion 360
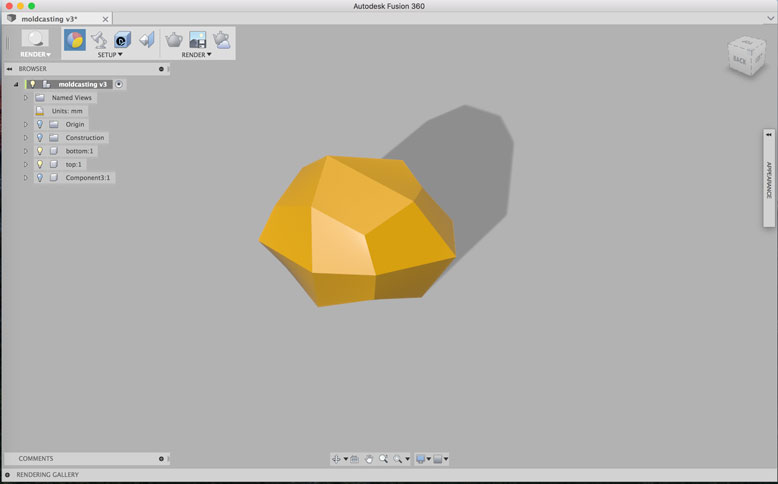
For my molding and casting assignment, I wanted to create a geometric shape with a translucent resin. To create the shape, I used the sculpt feature of Fusion 360 to create my shape. I went with something simple, geometric, and slightly assymetric.
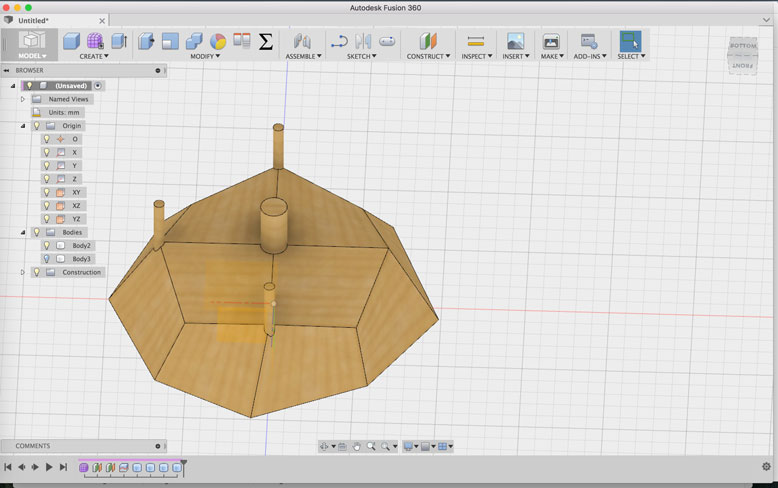
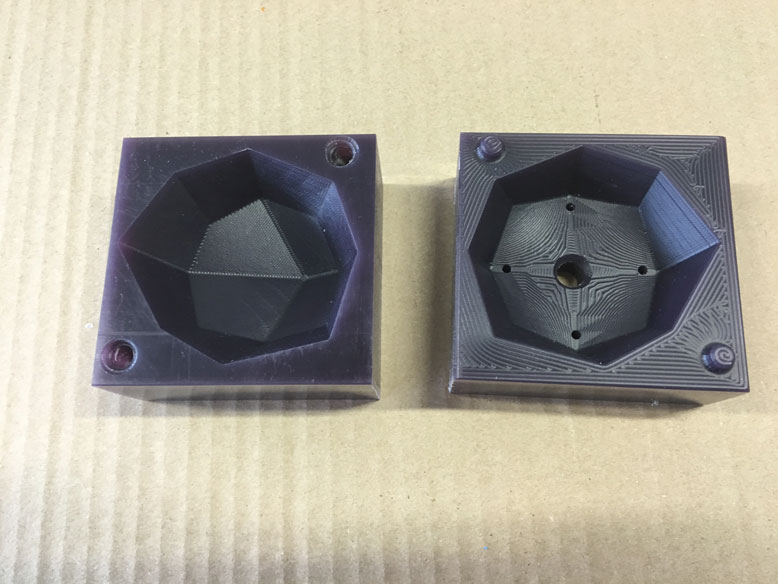
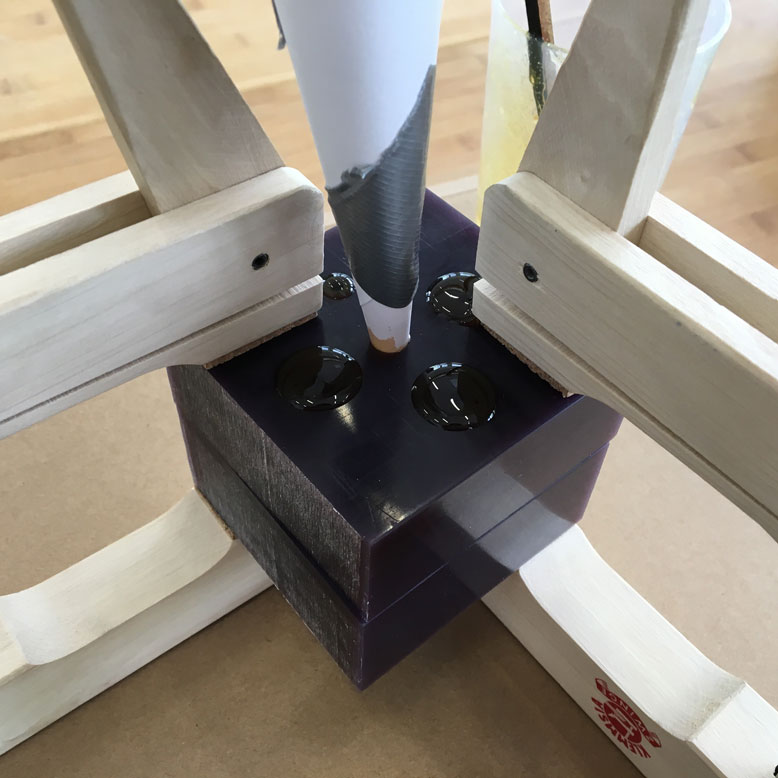
Next, to make the mold, I split the shape in half, making sure to have a proper draft angle so that the object can easily be removed from the mold. Next, I created a series of columns. The large center column is the entry point where the resin will be poured. The four smaller columns act as air holes, so that there are limited amount of bubbles in the final form.

I prepared a rectangle which represented the size and shape of the modeling wax. I cut away a piece, so I could create positioning slots in the positive and negative. On the positive slot, I had to remove extra material to account for left over bezel caused by a bull nosed mill bit.
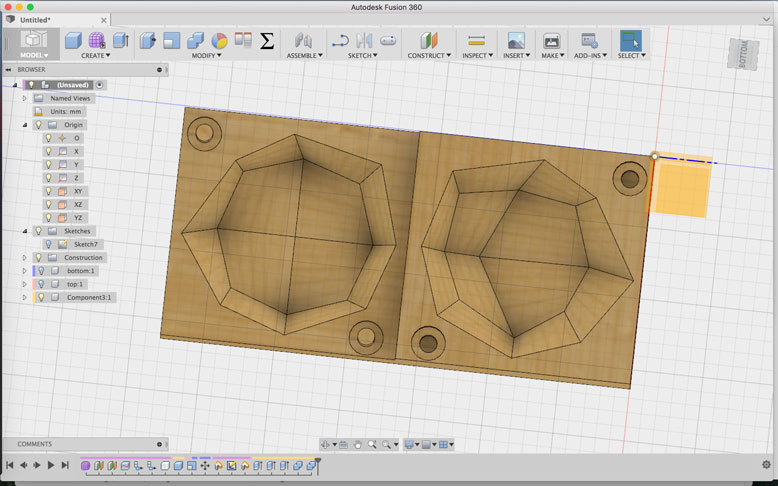
Finally, I did a boolian subtraction of the geometric halves from the wax block facsimile.
Cam Processing with Fusion 360
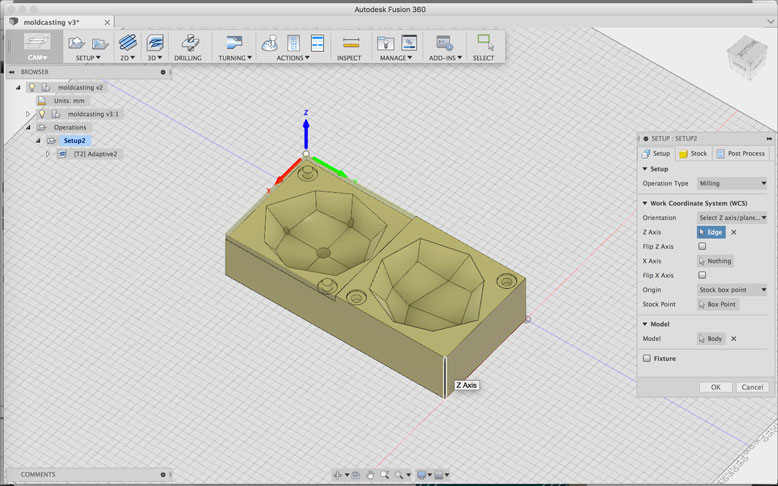
For this, I wanted to explore the CAM ability of Fusion 360. To do so, simple switch over to the CAM environment and create a new operation. The first step is to select the proper orientation for the 0,0,0 point. For the Roland MDX-40A, it happened to be the lower left corner, with the x going in the positive to the right, and the y positive upwards. Simply select the corner and flip the axis of x y and z to get the proper orientation.
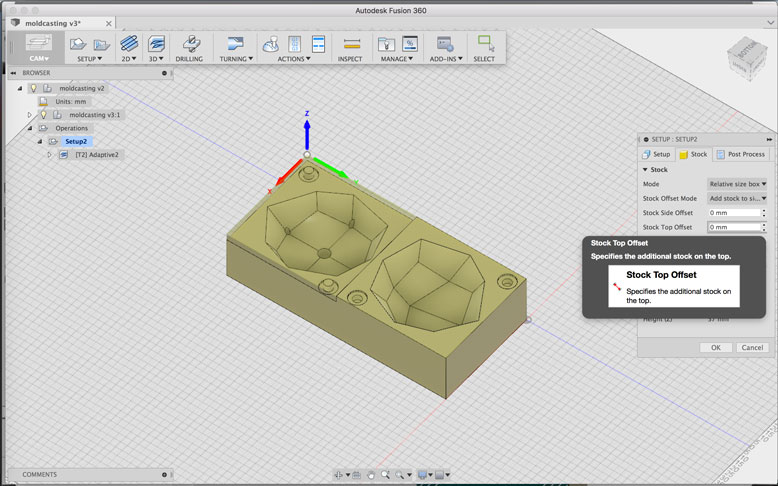
By default there is a box offset of a few milimeters. I suppose this is in place to ensure the outside surfaces are milled to precise levels. Since this is not neccessary for this applications, I zeroed out these values.

Next, I set the feed rate, spindle speeds, and other general milling settings according to what we felt safe to use on the wax. Since the wax is very soft, we weren't to afraid of damaging the bit, but it was best to not push it too far.
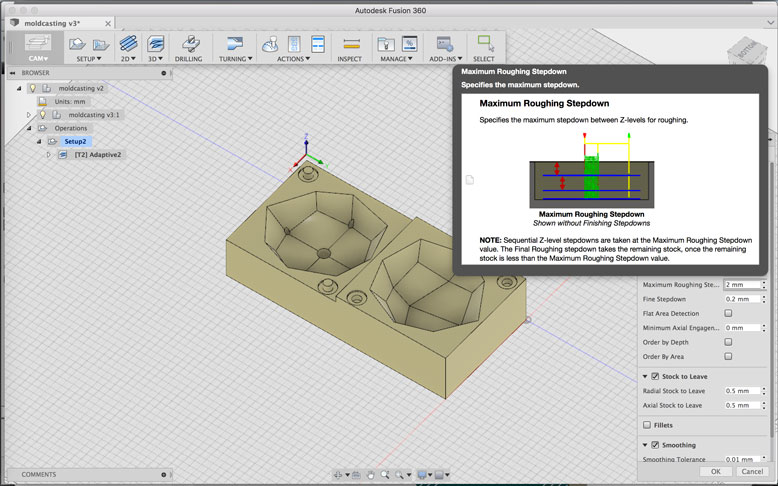
To save time, the CAM process splits the cuts to a rough cut and a final cut. The rough cut can be set to be stepped at a certain interval. For this, I went with a step down of 2mm.
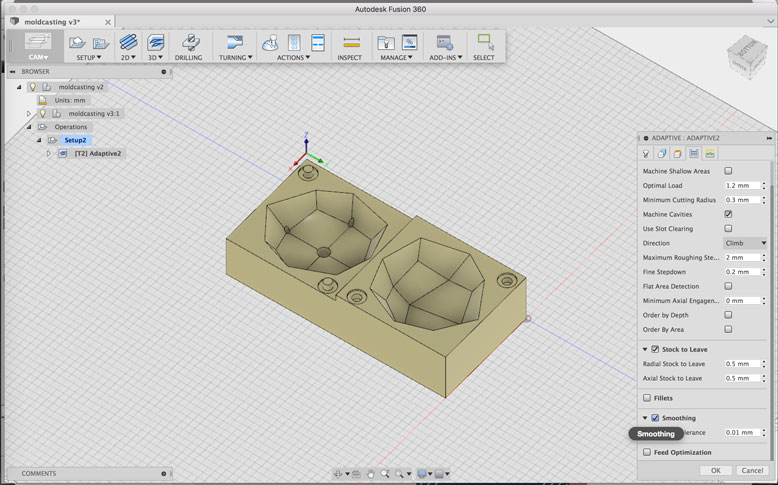
One more setting to turn on, is smoothing. I left the default value in its place.
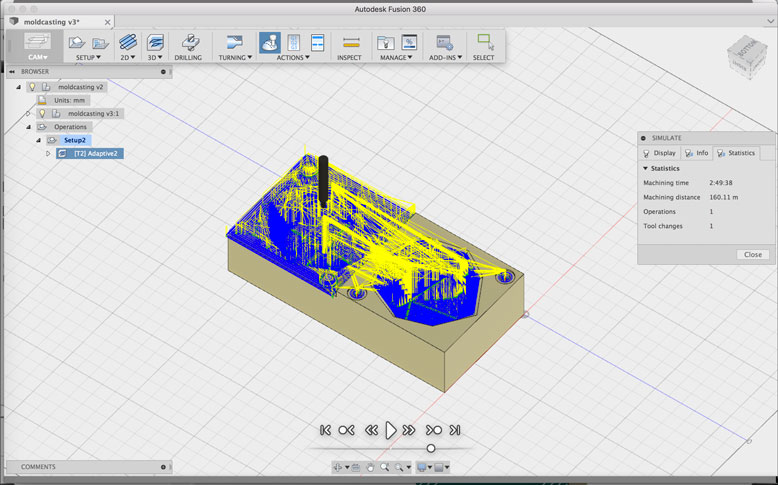
Once the settings are selected, the program will show a simulation path of the milling process.
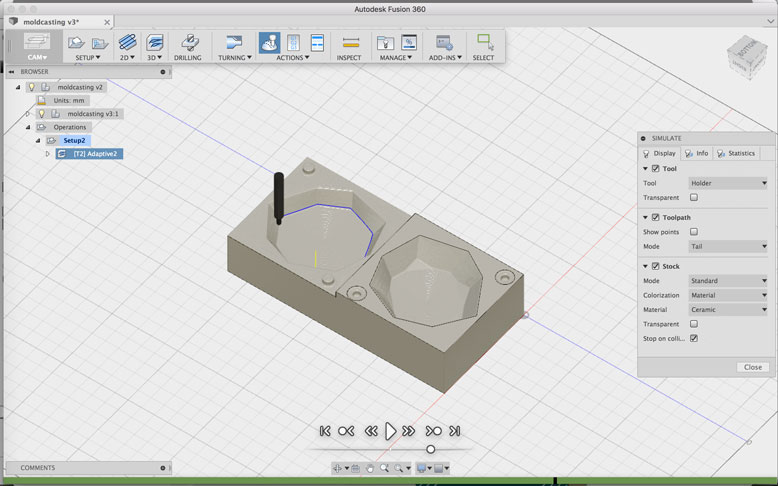
You then can play back the entire milling process in an animation to make sure that it does'nt do something unexpected.
Mold Machining

The mold will be a two step process, where a negative shape is milled into a piece of molding wax. Then a resin is poured into this negative to create the positive shape.
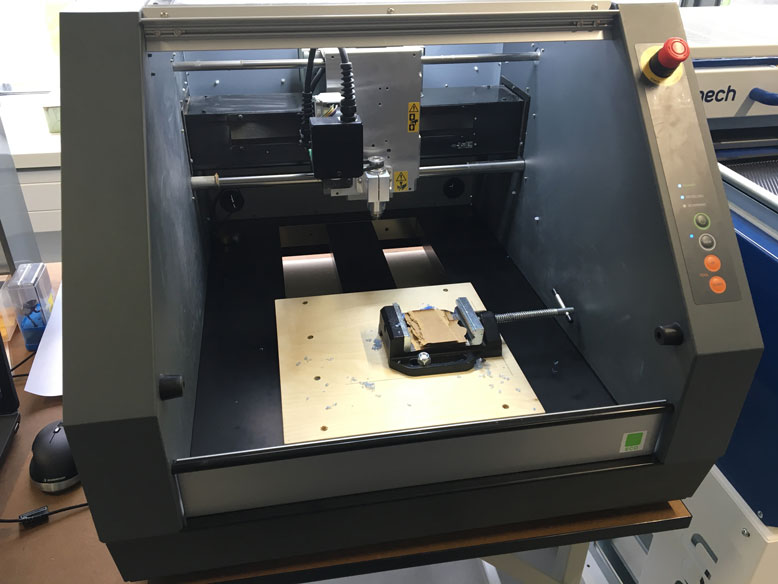
This is the Roland MDX-40A. For the most part we use it as a circuit board milling machine, but for this purpose the machine will work out well. To make sure that the wax does not move, we mounted a vise on the plate and some spare pieces of MDF to raise it up a bit.
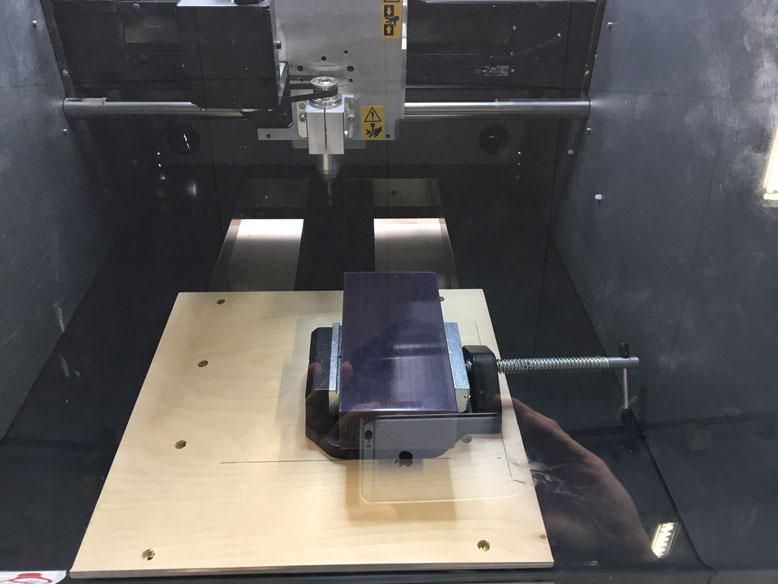
Here the wax brick is mounted in place.
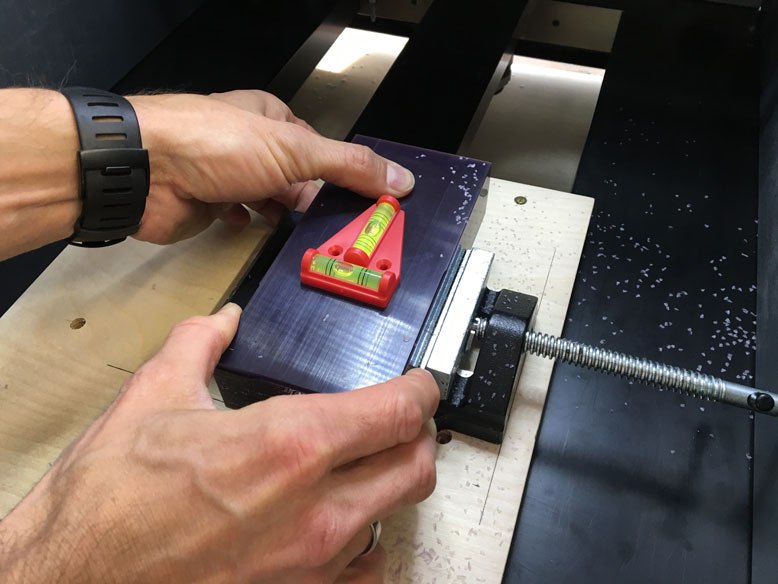
Because, we werent using any offset cuts, it was important to make sure the brick was mounted square. To do this, we used this small level to get it just right.
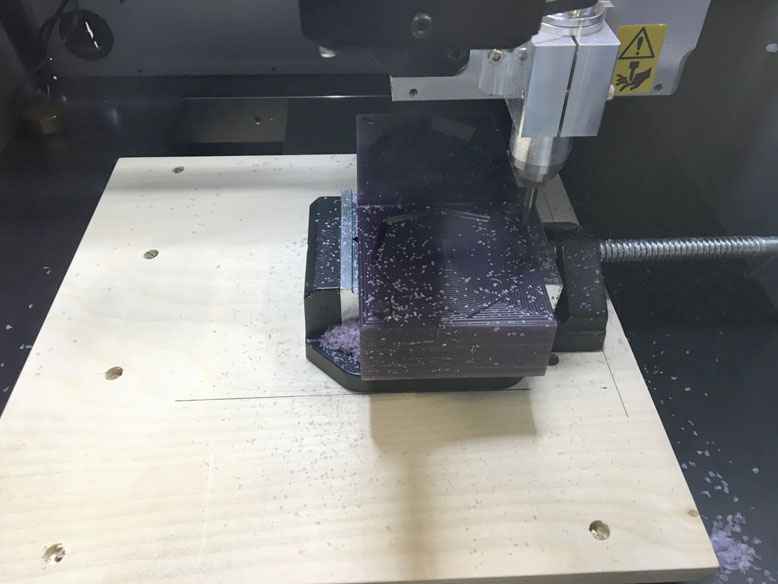
Here is the milling process started.
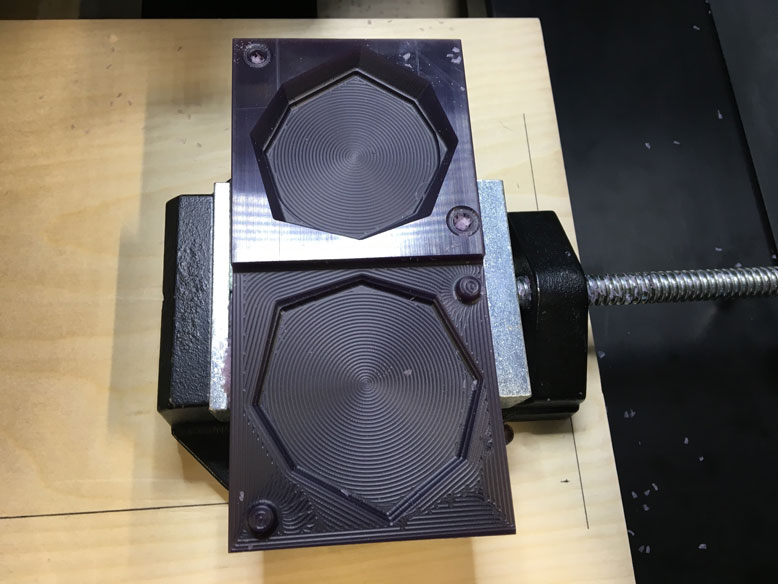
The milling process midway through. It was possible to stop it partway through to just check if everything was going alright. Resumption of the process went smoothly.
Here is the wax brick fully milled.
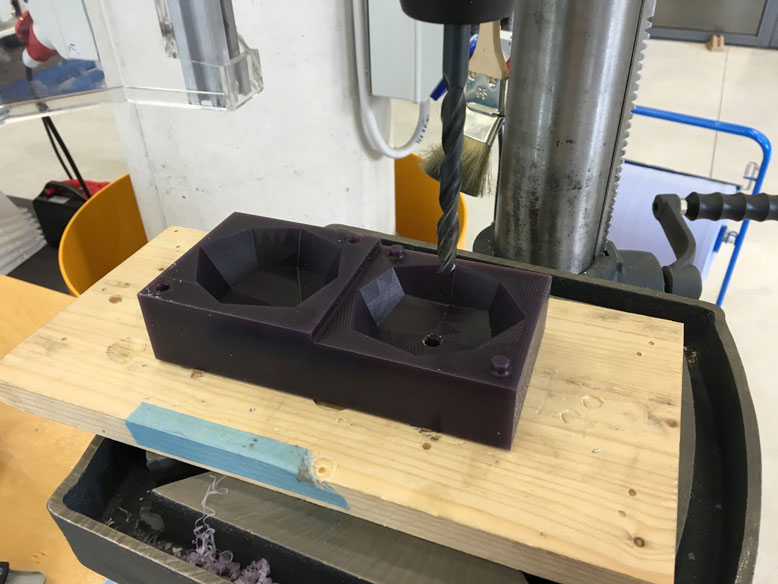
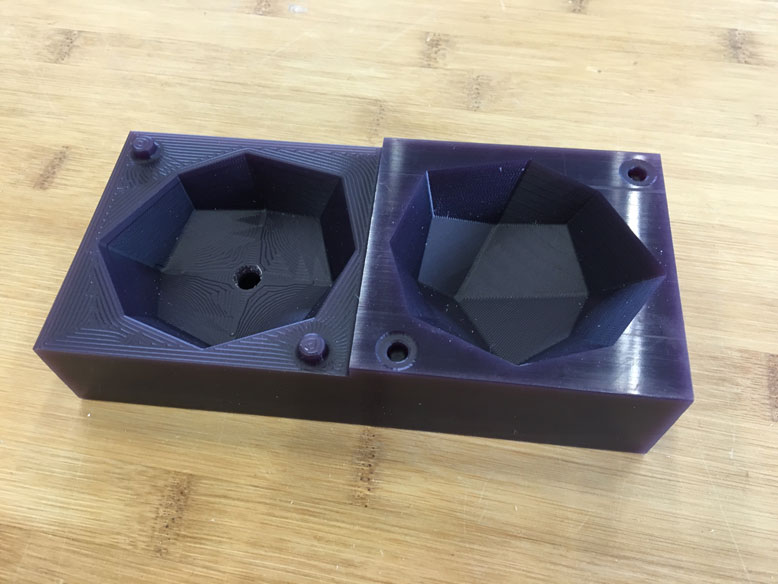
There was an issue where some of the vent holes and pour hole did not fully mill through due to restrictions of the bit length. The collar would have collided with other parts of the mold if I had allowed it to continue. To solve this, I simply took it over to the drill press and made the holes manually.
The process went smoothly, and while I was at it I used a saw to split the top and bottom pieces apart.
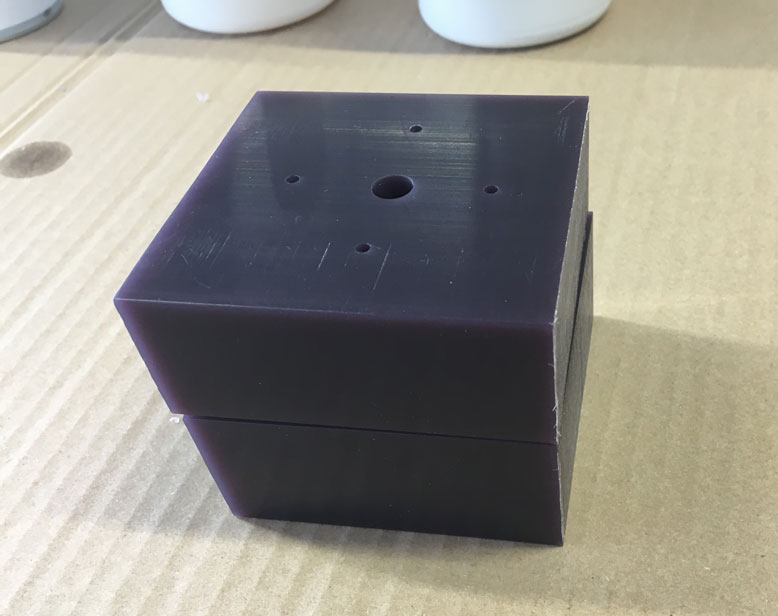
The two halves joined together quite nicely.
Resin Casting
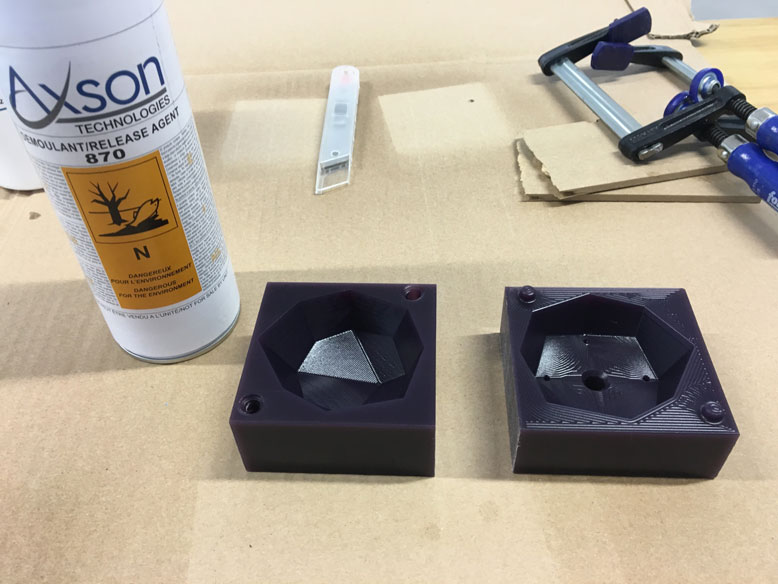
To prep the mold, I sprayed an inner coating of release to ensure that the resin would be able to be removed once set.
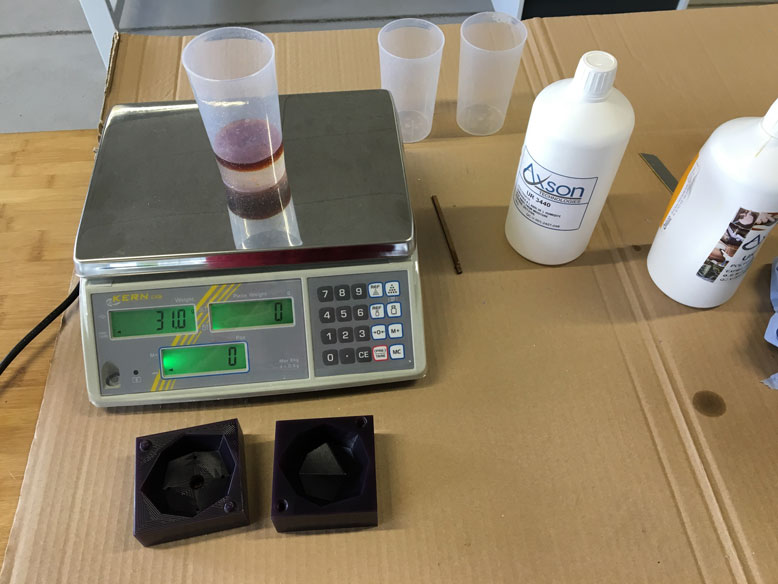
The resin consists of two parts at a two to one ratio. I used a scale to make sure that the amounts were correct.
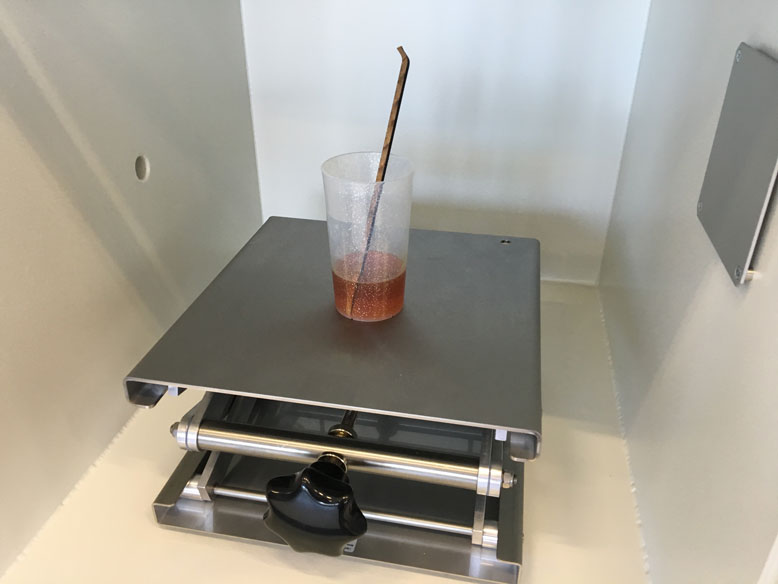
Once mixed up, the working time is quite long, so there was no hurry. Following advice I took the resin to a vacuum chamber to remove any possible air bubbles in the resin.
When the atmospheric pressure reached close to zero, the resin began to boil. Quite the sight!

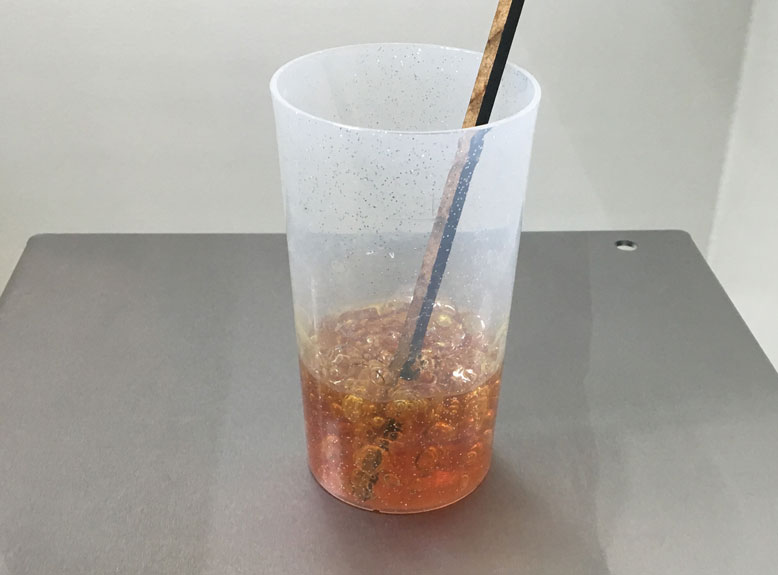
With the mold halves clamped in place, a makeshift funnel was quickly made to ensure the resin did not get all over the place.
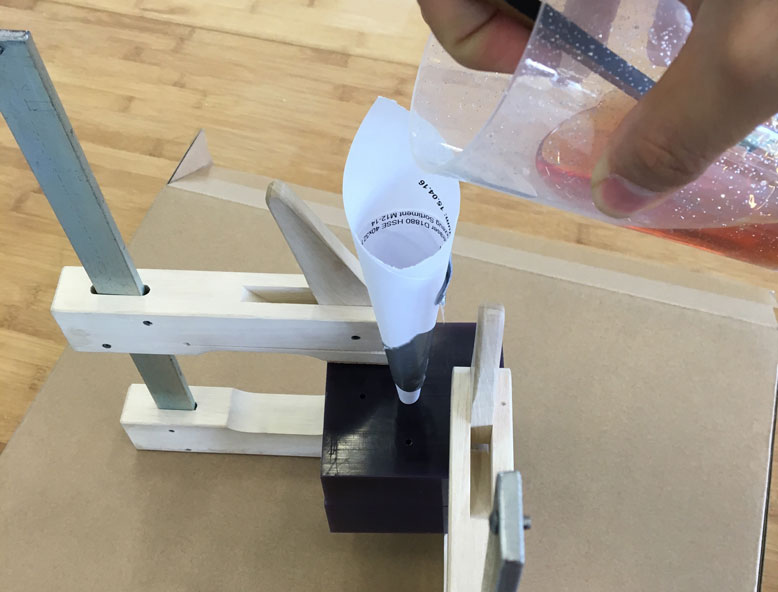
The resin being poured.
The vent holes worked well, and soon the entire mold was filled.
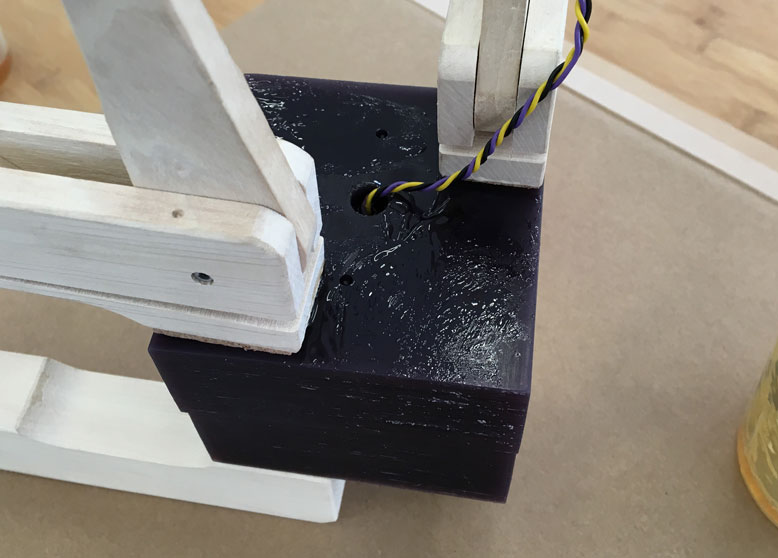
To make things more interesting, I inserted a neopixel into the pour hole. Since the resin is translucent, the neopixel would make an interesting lighting effect to the piece.
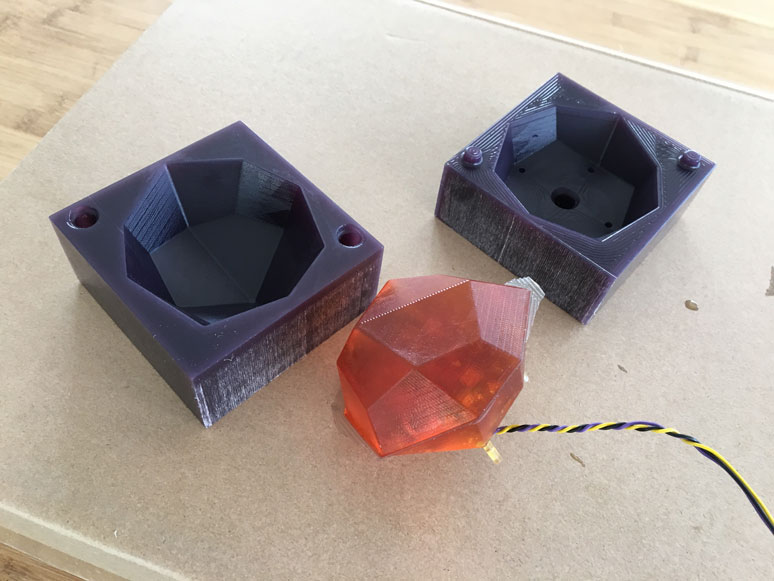
The next day, I opened the mold and the casted object came out very easily. There was a minor misalignment creating a lip of under 1mm. There were no air bubbles to be found, so overall the result was quite nice.
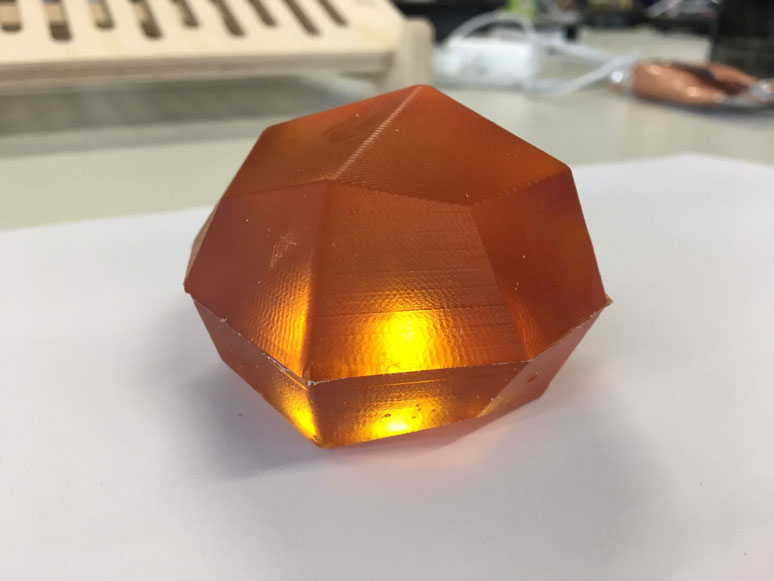
Here the resin is being illuminated.