Week 5: 3D scanning and printing
February 24 - March 1
Assignment
- Test the design rules for your printer
- Design and 3D print an object that could not be made subtractively
- 3D scan an object
3D Printer Tester
I created a 3D printer tester in the past using 123D Design. It turned out a bit simplistic, because it was at the early part of my learning for the program. I had always wanted to create another version, so I jumped at the opportunity to do so.
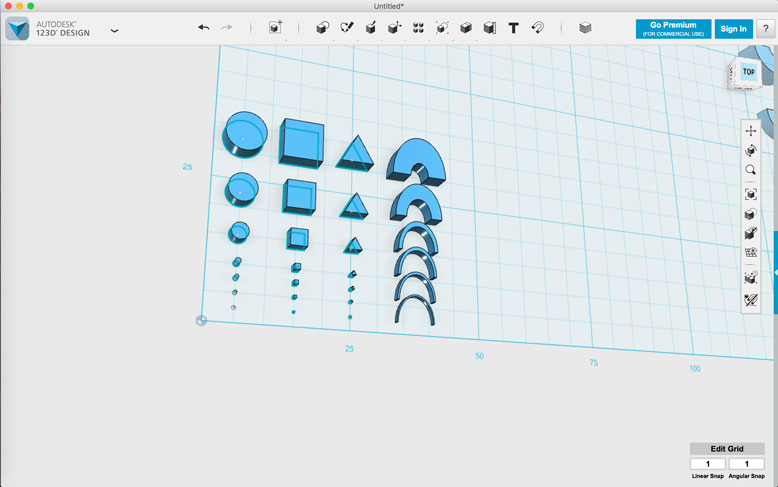
The design for the 3d printer tester started out with a few basic shapes created in 123D Design. The shapes were sized in ranges of 0.3mm, 0.5mm, 0.7mm, 1mm, 3mm, 5mm, and 7mm.
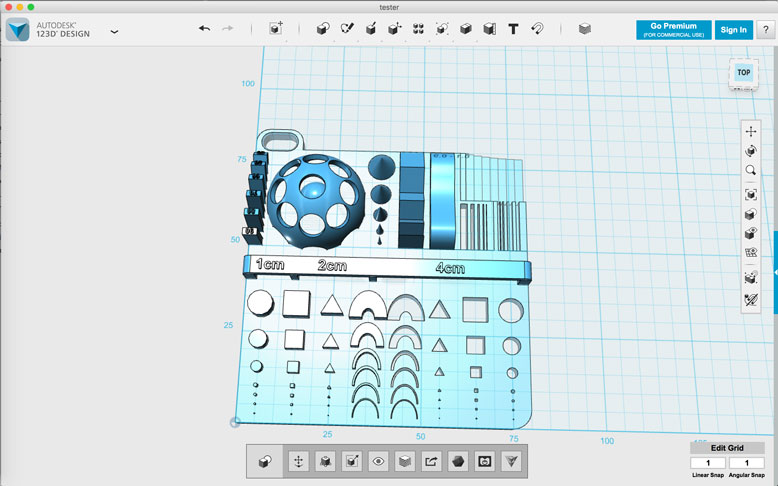
Using basic 3d construction methods such as extrude and transform, the rest of the tests were created. In addition to the positive shapes created, there is a negative equivalent. An horizontal overhang and angled overhang tests. A sharpness test was made using cones and an angular and contour tests are located next to it. There are sets of positive and negative wall tests and a horizontal thickness test. Lastly a domed enclosure with a ball inside is made as an example of a complex shape.
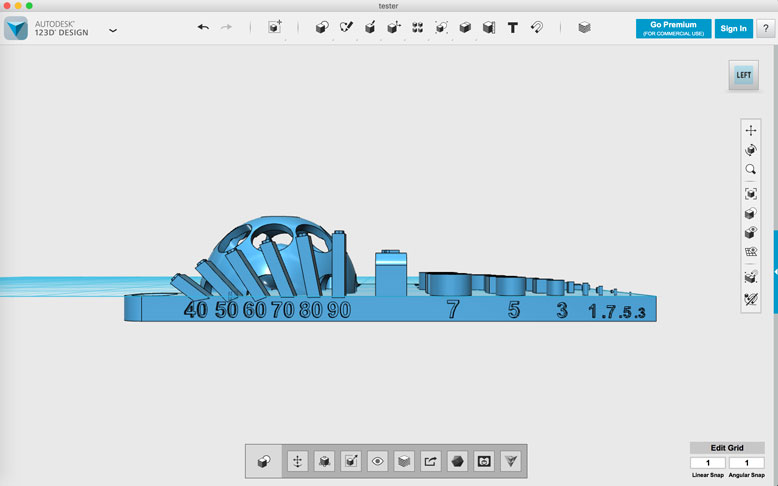
For labeling of the tests, a variety of values are placed along the edge using positive and negative extrudes.
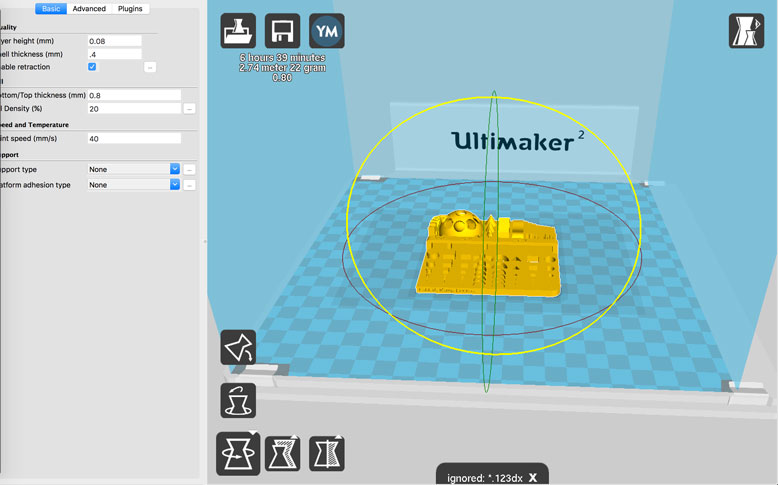
After the modeling was complete, I outputed in .stl format and dropped it into Cura. A low layer height was chosen to create a high fidelity print.

The print is shown here in process, done in an Ultimaker 2 with Silver 2.85mm PLA. This particular machine has had some extrusion problems, so the print was slowed to 70% speed and the nozzle temperature increased to 220 degrees.
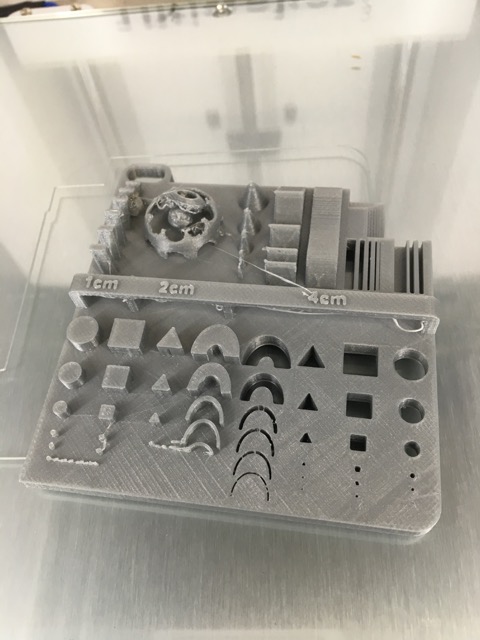
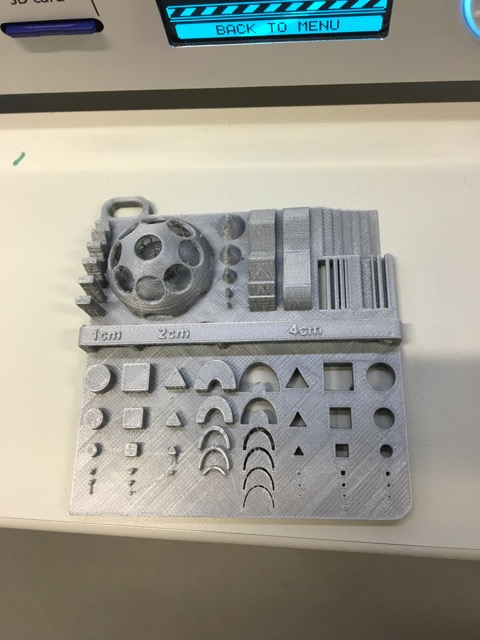
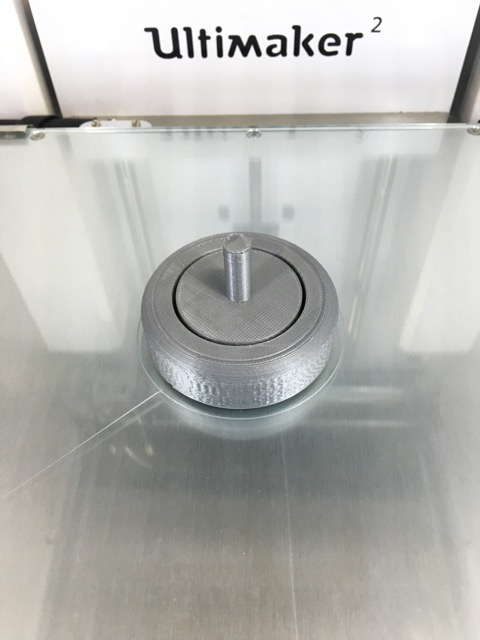
The print finished, and at first glance, the dome did not complete as the connections were too small. However, the rest of the print looked pretty good, showing the Ultimaker's capabilities and limitations.
With extra time, I enlarged the dome, and a second print yielded a much better result
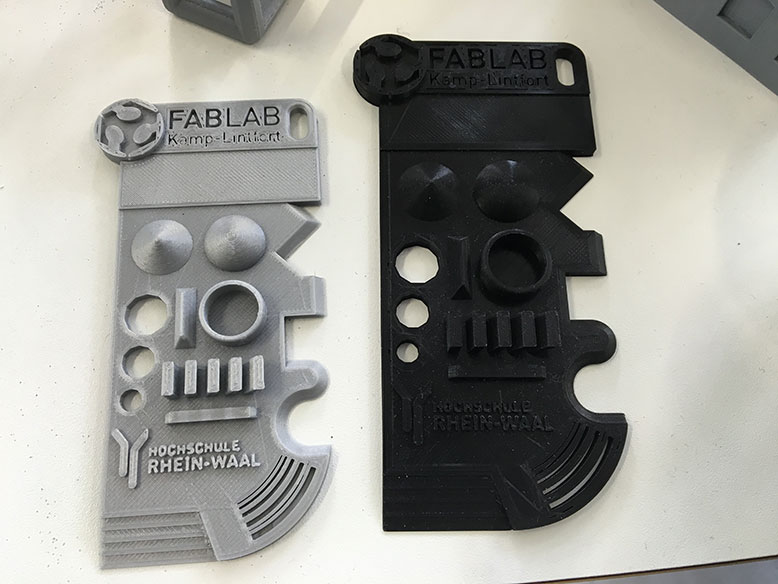
Resin Print and 3D Print Test Results
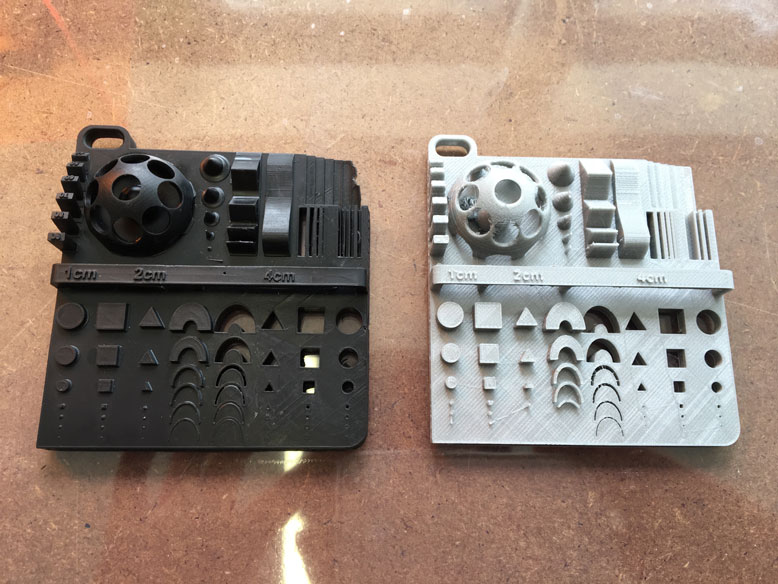
Our lab recently received a couple of Formlabs 1+, so I took the opportunity to test out the printer for the first time. The resulting print showed much higher levels of details. However, having left the print a little too long in the isopropyl alchohol bath, some of the features melted a bit. Showed is the finished resin print next to the extruded 3D print from an Ulitmaker 2. One surprising aspect of the Ultimaker results is the ability to create higher fidelity results for negative space than postive space. This can be seen on the print with missing positive 0.3mm shapes, while they can be just barely seen in the negative form.
3D Printed Ball Bearings

To create a 3d printed object that could not be created via subtractive methods, I went and attempted at making a ball bearing set. Due to familiarity and speed, I chose 123D Design again, although I am beginning to learn Fusion 360.
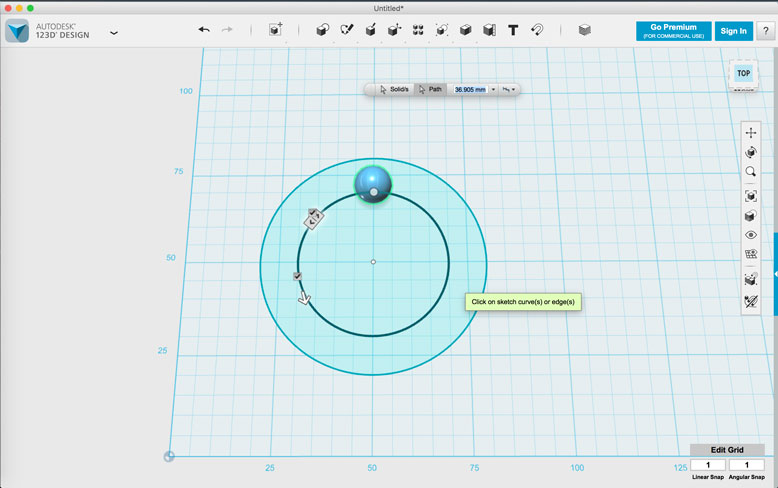
To create the actual ball bearings, I patterned a sphere along a path.
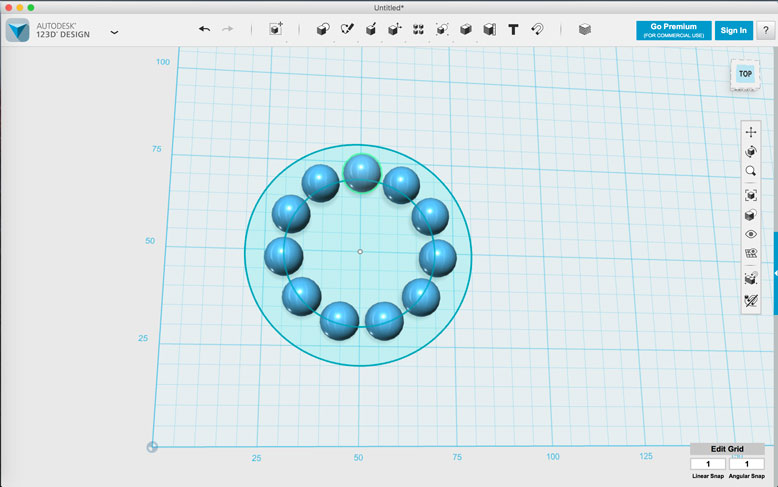
Here are the spheres. I gave them a 1mm spacing to make sure they would not be connected during printing.

Next, I subtrated a torus shape of a diameter larger than the spheres by 1mm from a couple of cylinder shapes to form the rail for the bearings.
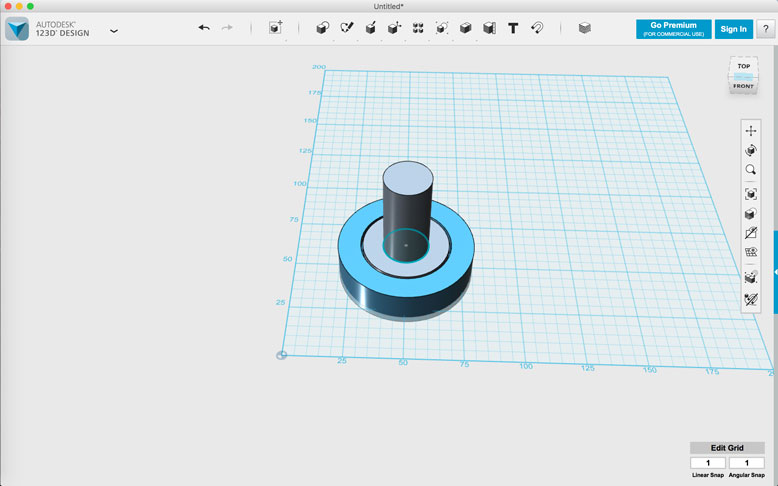
All objects where then placed together and a turning handle was added to the middle section. There is a 1mm space between the outer and inner cylinder.
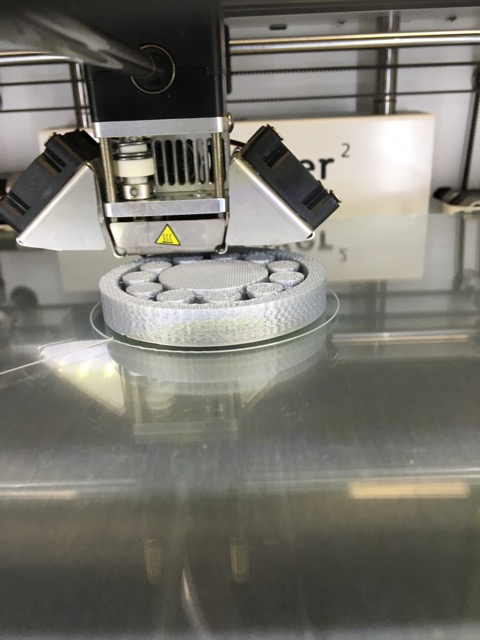
The print in mid process showing that the bearings are separate from each other.
Here is the final print. However, the bearings ended up being attached to the outher cylinder just barely. I could stick a screwdriver in there to loosen them up, but there are other tolerance issues that prevent a smooth turn to the set. With more time in the future, I will attempt another design to get it rolling smoothly.
3D Scanning
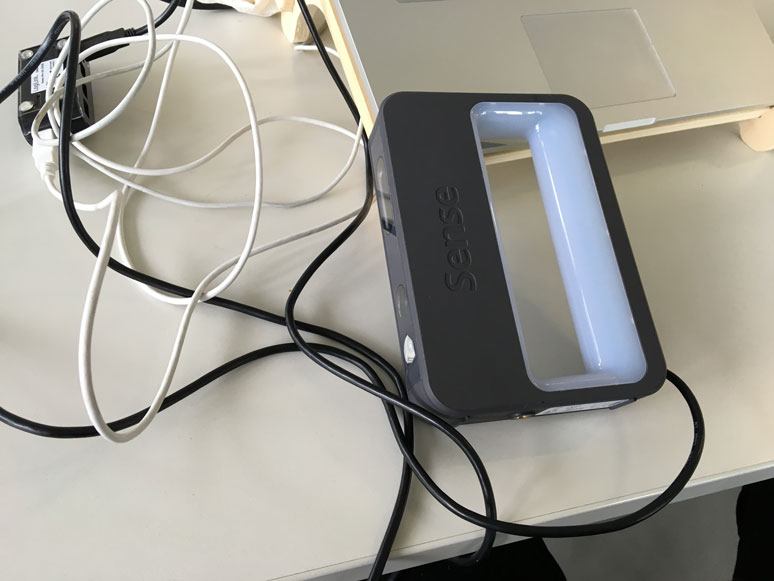
At the lab, we have a variety of 3D scanners, but for simplicity's sake, I went for the 3D Systems Sense 3D scanner. To get it to work with my Macbook, I had to find the OSX software for it, which I found here, which is interesting as the official 3D Systems site only has the software for Windows 8/9. The software installed easily and after a quick code activation, the system was up and running. The scanner is cabled, so it was a bit of a struggle to get the proper reach to scan targets. I found a USB hub and used it as an extension cable for the scanner.
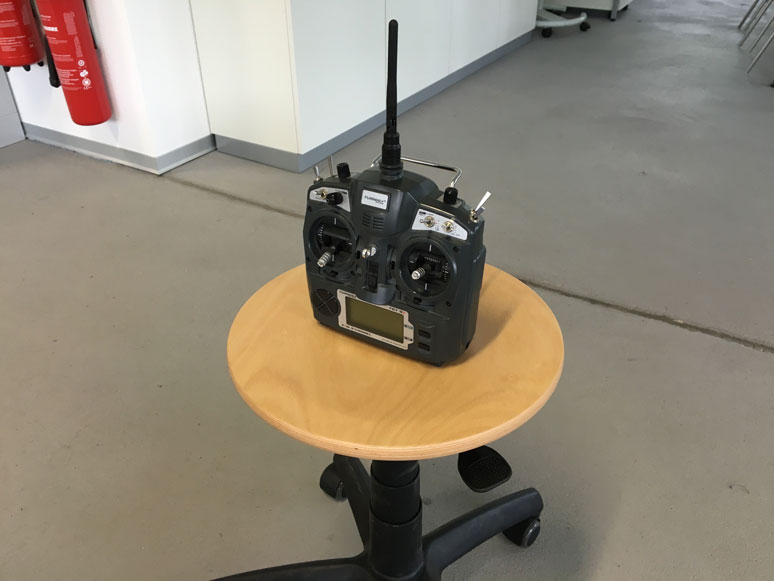
I wanted to scan something relatively simple and small first, so I went with this receiver for a drone. I hope Daniele doesn't mind that I borrowed it.
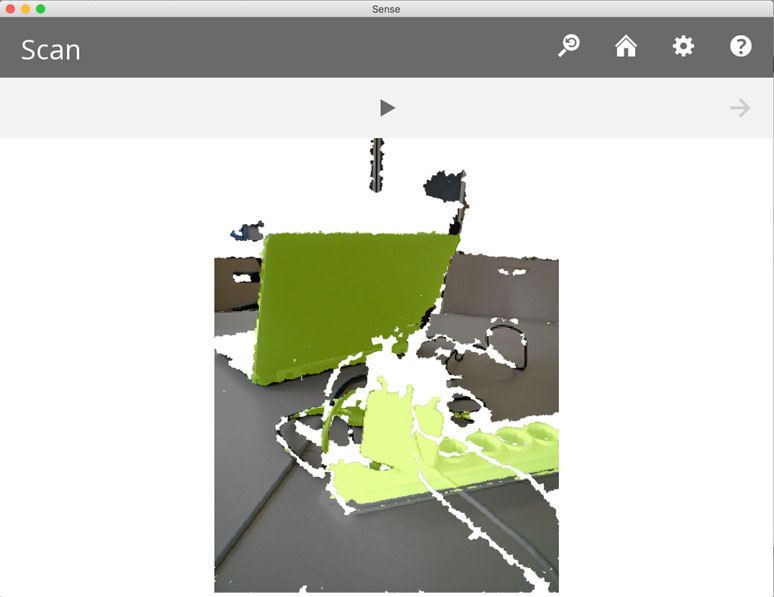
When the scanning starts, the system is pretty smart and will highlight whatever objects it thinks you are scanning in a yellow green. All you need to do is make sure what you want to scan is enveloped in it, and press the start button.
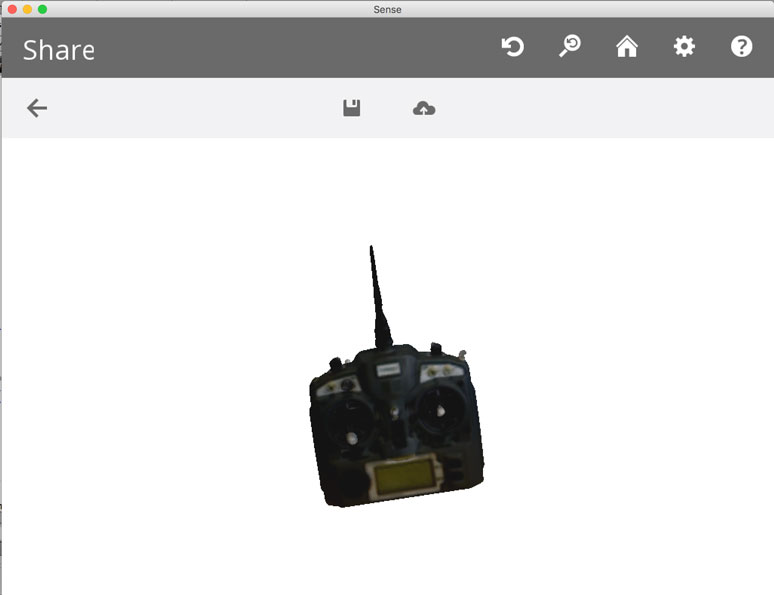
The result for the scan turned out alright. It is nice that it includes the textures. However, the quality isn't exactly high definition.

For a second test, I tried to scan an Ultimaker 2. This object was much more complex because of the inner portion. It took quite a multiple of attempts as I kept losing tracking. With a steady hand and some patience, I was able to get a semi-decent scan out of it.
Files
- 3D Tester - 123D Design File
- 3D Tester - STL File
- Ball Bearing - 123D Design File
- Ball Bearing - STL Design File
- 3D Scanned Controller - PLY File
- 3D Scanned Ultimaker - PLY File