Computer-controlled machining
Assignment
- Make something big (on a CNC machine).
Learning outcomes
- Document the process of design and production to demonstrate correct workflows and identify areas for improvement if needed.
Have you
- Explained how you made your files for machining (2D or 3D).
- Shown how you made something BIG (setting up the machine, using fixings, testing joints, adjusting feeds and speeds, depth of cut etc).
- Described problems and how you fixed them.
- Included your design files and ‘hero shot’ photos of final object.
Hardware
CNC machine
Computer
Mobile

Designing the table
-
I decided to make a table. The first steps in designing it were with the help of my classmate Esteban who has much more experience in designing. We worked the design with Rhino, it's a utility table for a TV screen or computer. It's 45 cm high, and 50 cm wide. I took the design file and translated it into openSCAD. One of my goals was to make the design parametric, so it can be easily modified for different material thickness and different drill bits sizes.
This is the rhino file:
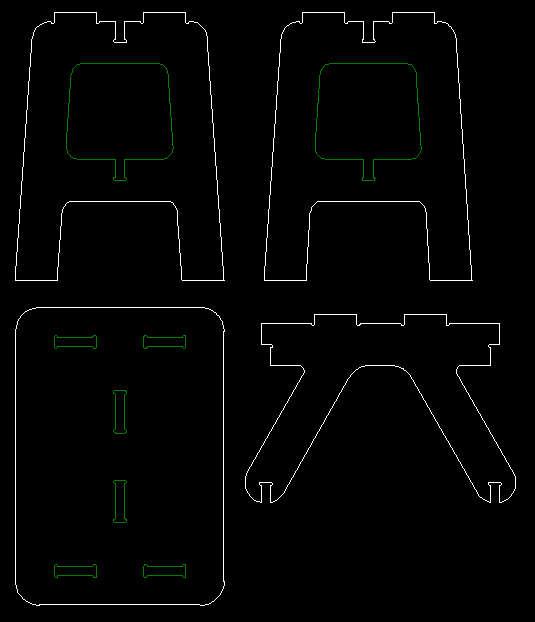
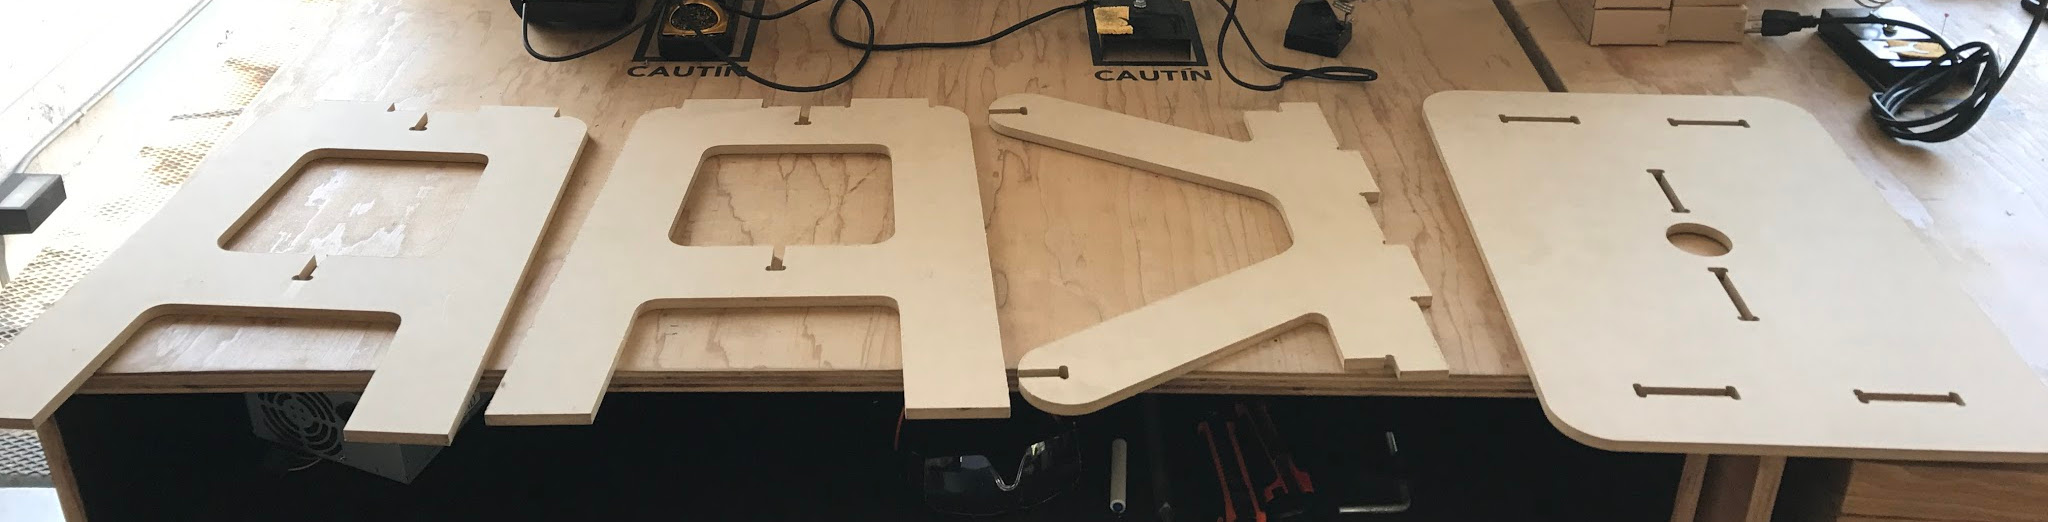
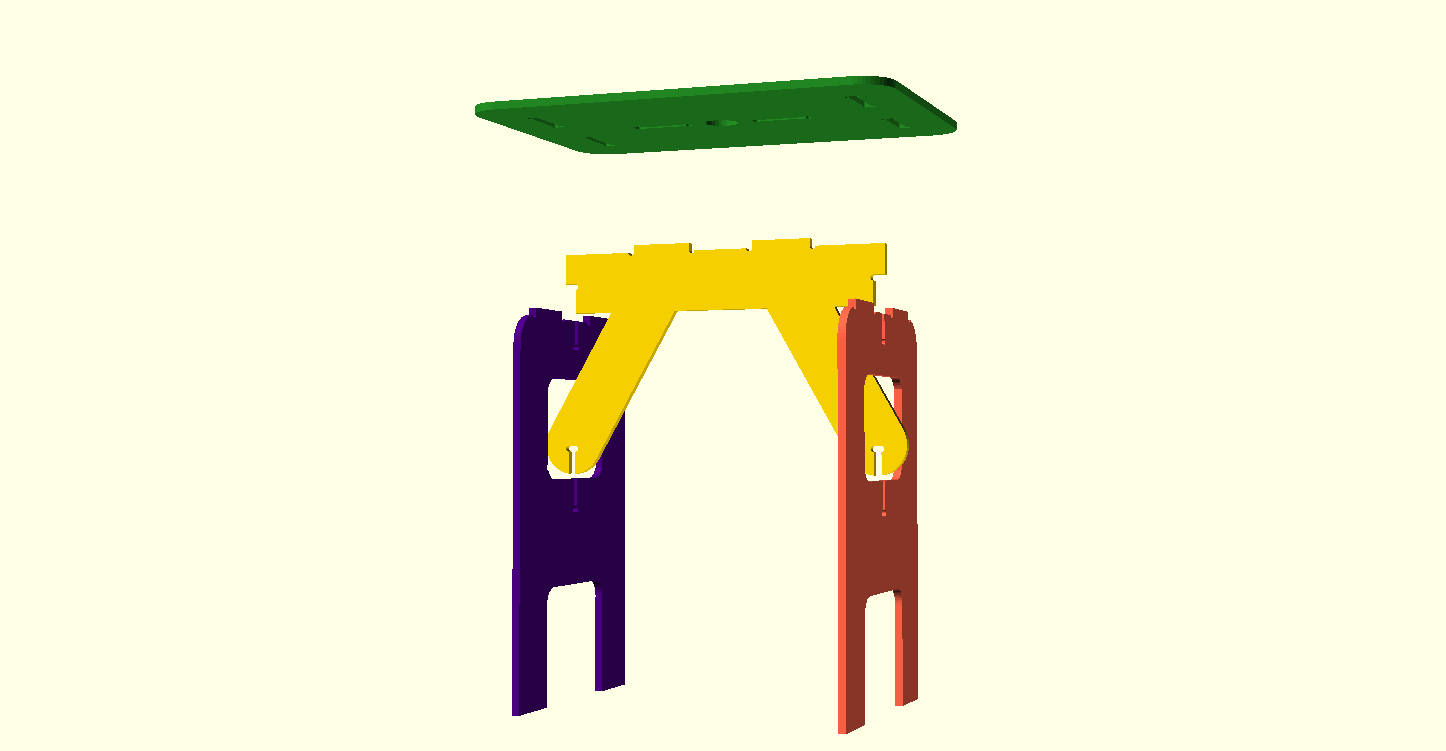
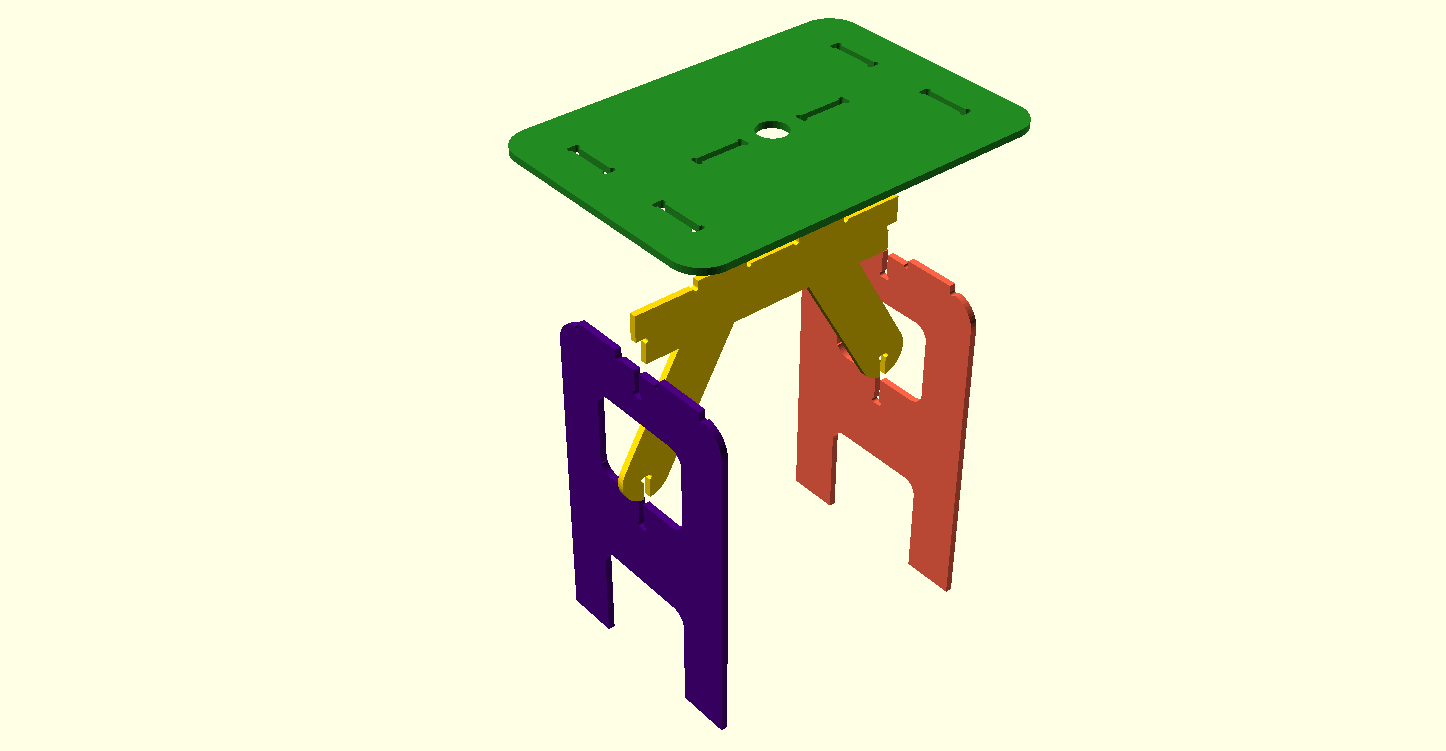
The design has a table top, two pairs of legs, and a central piece for stability. The table top has bone shaped holes for the legs and the center piece. The center piece helps bind toghether the legs and supports the center of the table top.
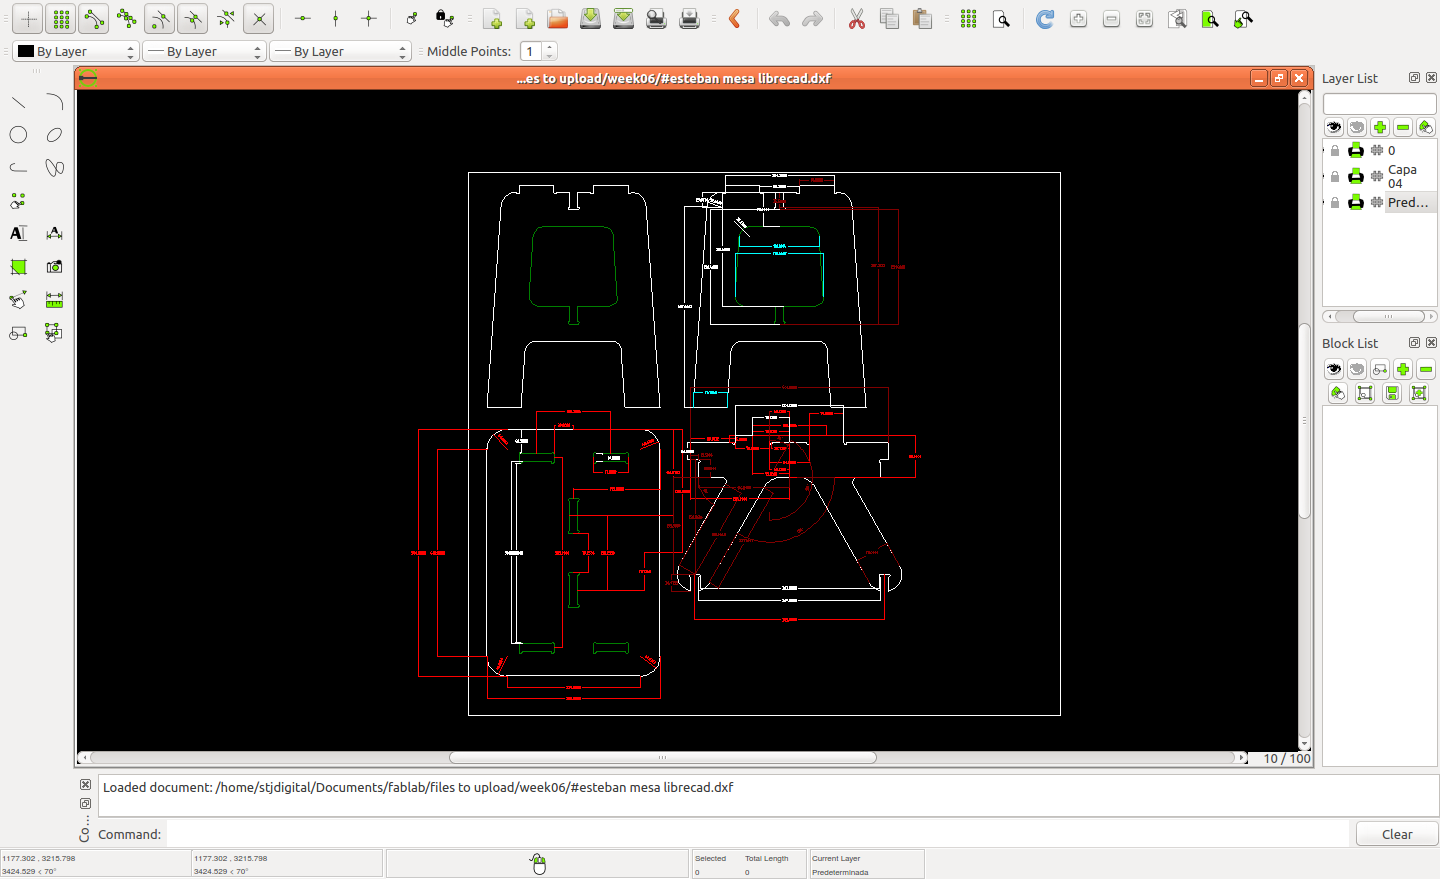
Using LibreCAD, I displayed the measures of the model and medeled it in openSCAD
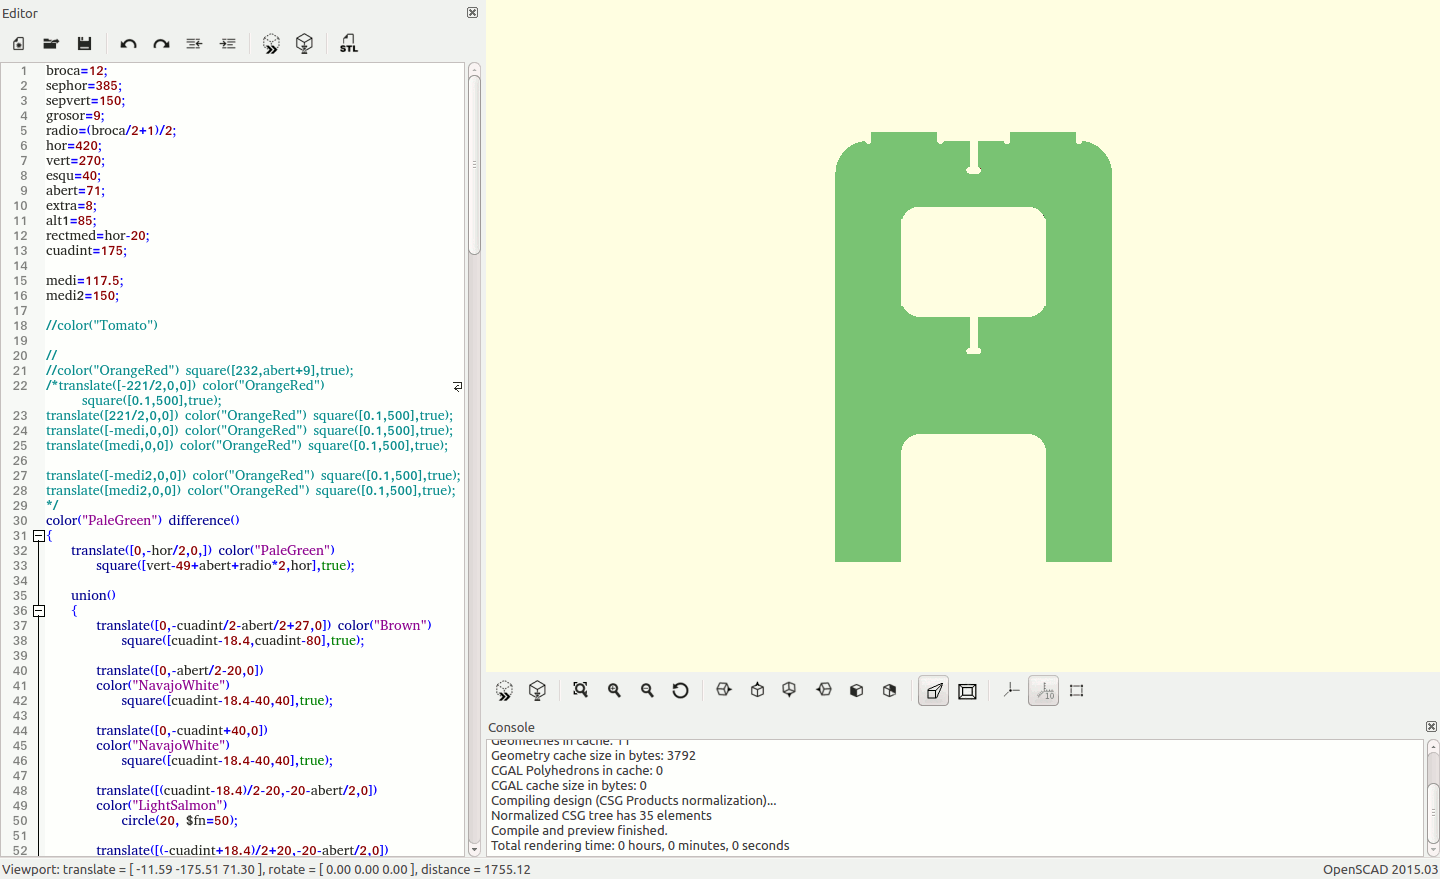
In openSCAD, the parts were modeled using squares and circles of different sizes, translated and rotated, added or subtracted to form the design shapes. In the following pictures, the different shapes I used can be seen:
-

-
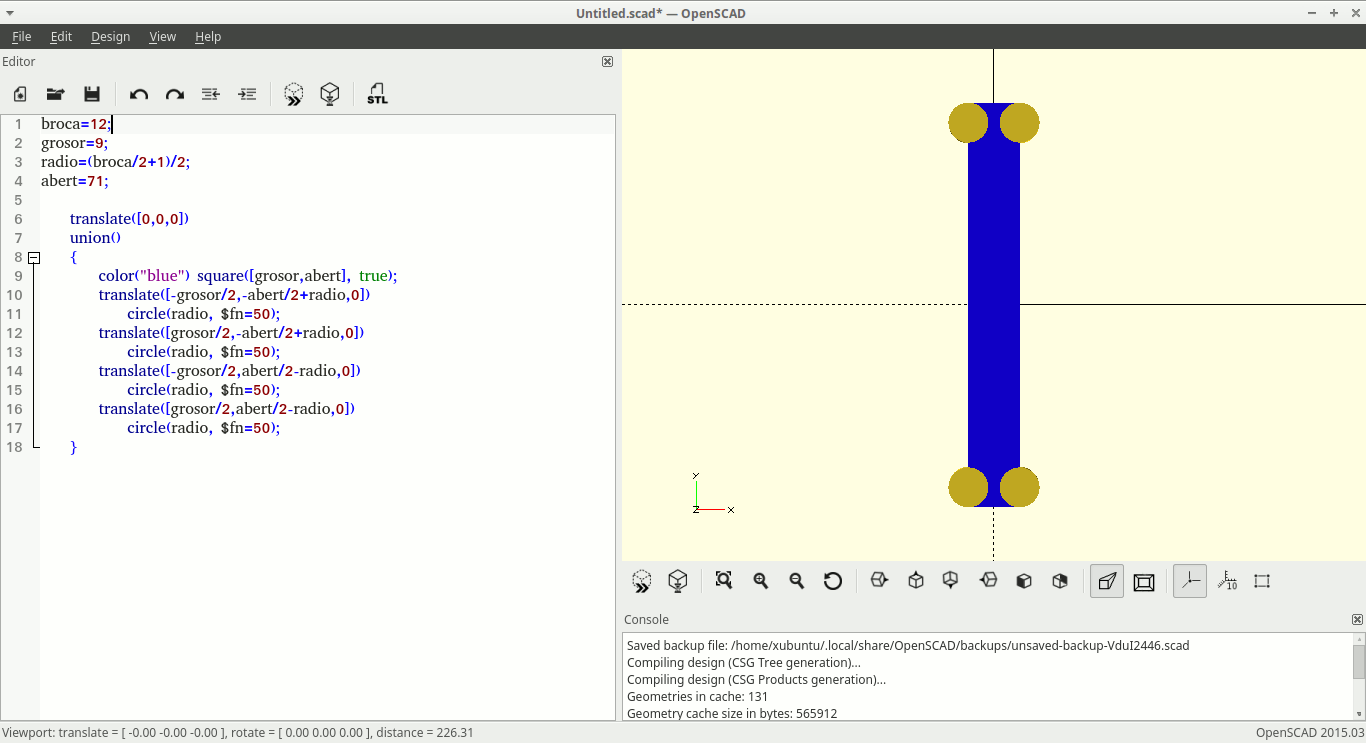
This is the detailed view of the bone shape of the joints:
-
When it was finished, I exported the file to svg and took it to the CNC machine.
Preparing files for the CNC
-
The CNC works with .cnc files, wich can be created with ArtCAM.
These are the steps to create the cnc file:
- Open the design file in ArtCAM.
- Go to toolpaths.
- Select profile side (inside or outside).
- Set start and finish depths.
-
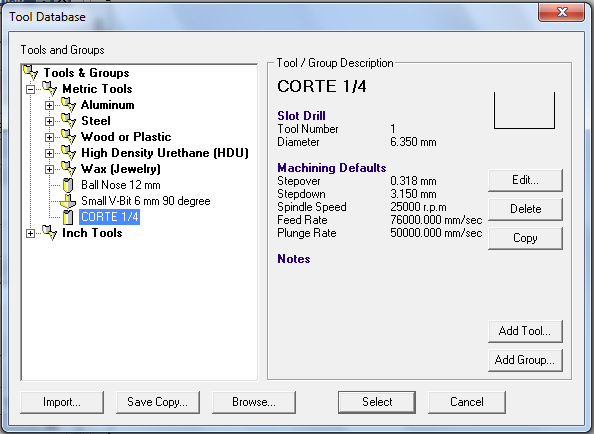
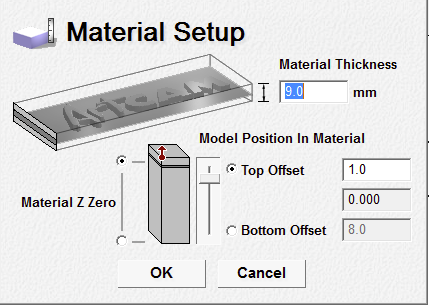
Parameters:
Tool diameter: 6,350 mm
Feed rate: 76000 mm/sec (left unchanged, it worked well like this)
Stepdown: 3,15 mm (calculated for three steps down)
Material thickness: 9 mm
Material Z zero: top
- Define tool profile:
- Define material profile:
- If there are no errors, save the toolpath to an usb memory. There are two files, one for the inside toolpath and one for the outside.
Preparing the CNC
-
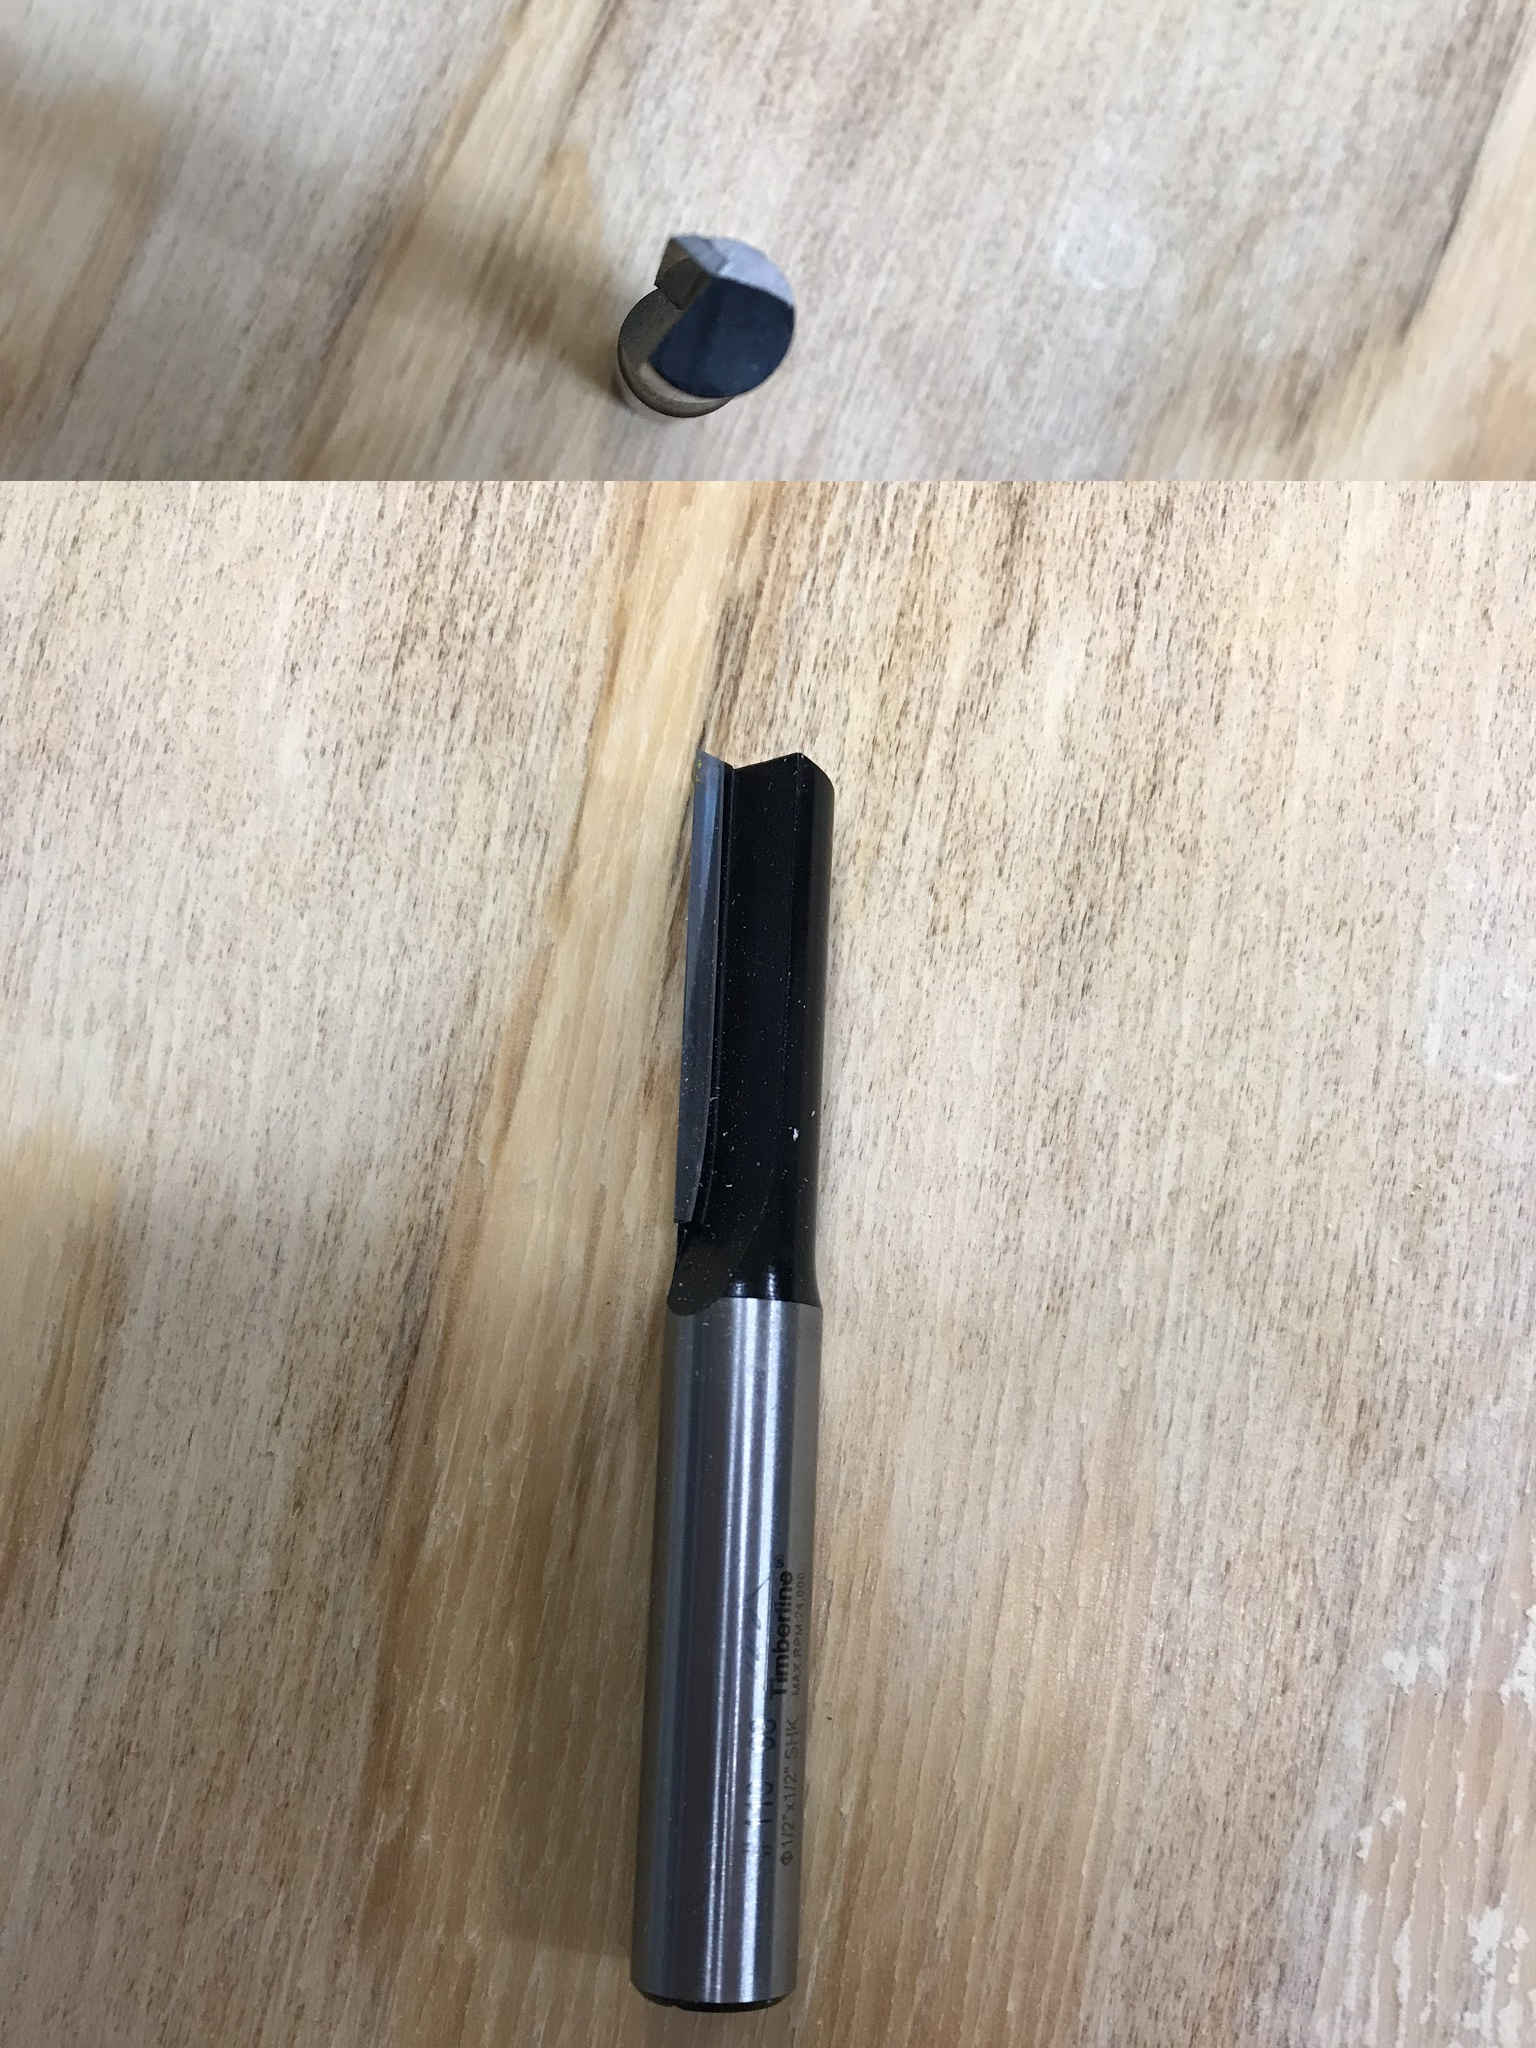
The setup for the CNC includes installing the tool, attaching the material to the bed and setting the zeros for all axes.
The tool must be firmly installed. This is the tool I'll use:
-
To set the zeros, use the control to move the head with the tool to a point out of the clamps line and touching the surface of the material.


-
Finally, use the control to start the job, and don't leave the machine unattended.
-
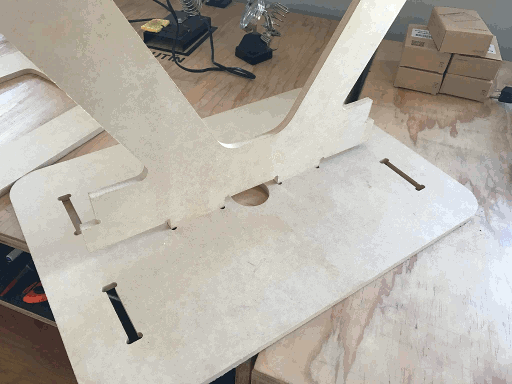
On the joint test of the parts, they came out well, all the parts attached tightly, and there was no need for changes on the joints sizes.
Assembling the table
-
-
To finish the table, I made an ornament to be placed in the circular hole at the center of the top.
I used openSCAD to make a series of geometric forms that resemble a rose:


Back