Exercise 09 Mechanical design
Requirement
- Group assignment - make a machine, including the end effector, build the passive parts and operate it manually
- Document the group project and your individual contribution
Forming of group
This week assignment is to assemble a configurable modular machine- based on the “CardBoard machine” from James Coleman and Nadya Peek. Two weeks later we are to automate it using the Python Programming.
My group mates are Jeff, Louis, Steven Foo and Kenny.
For a more detailed documentation of our group project, check out the group page.
Brainstorming and Planning
This week assignment is to assemble a configurable modular machine based on the "CardBoard machine" from James Coleman and Nadya Peek. Two weeks later we are to automate it using the Python Programming.
This is a group project but given the fact that none of us has mechanical or programming background let alone being a builders or thinkers. Therefore we have decided that whatever decisions made it has to be group decision and each one of us will still contribute, participate and collaborate as an individual.
Upon receiving the MTM Kit, we met and look through past year projects, discuss the possible project we intend to do or built.
|
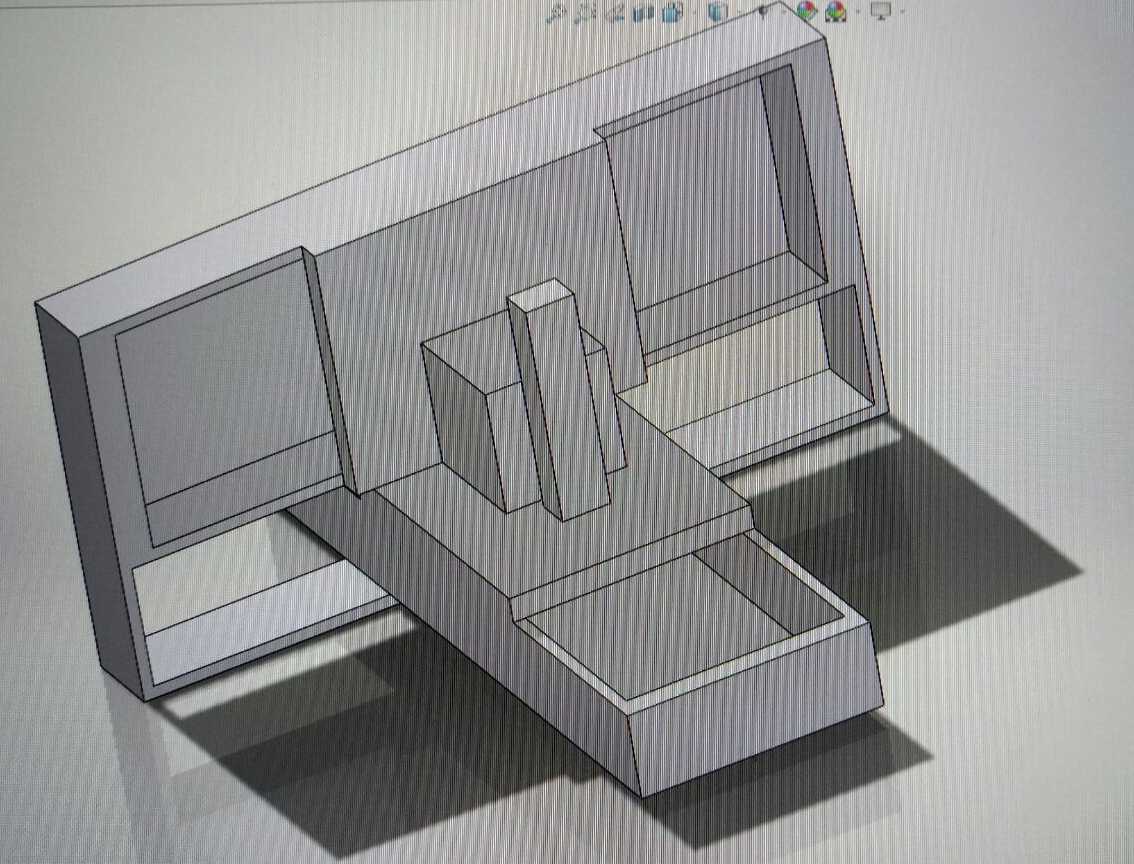
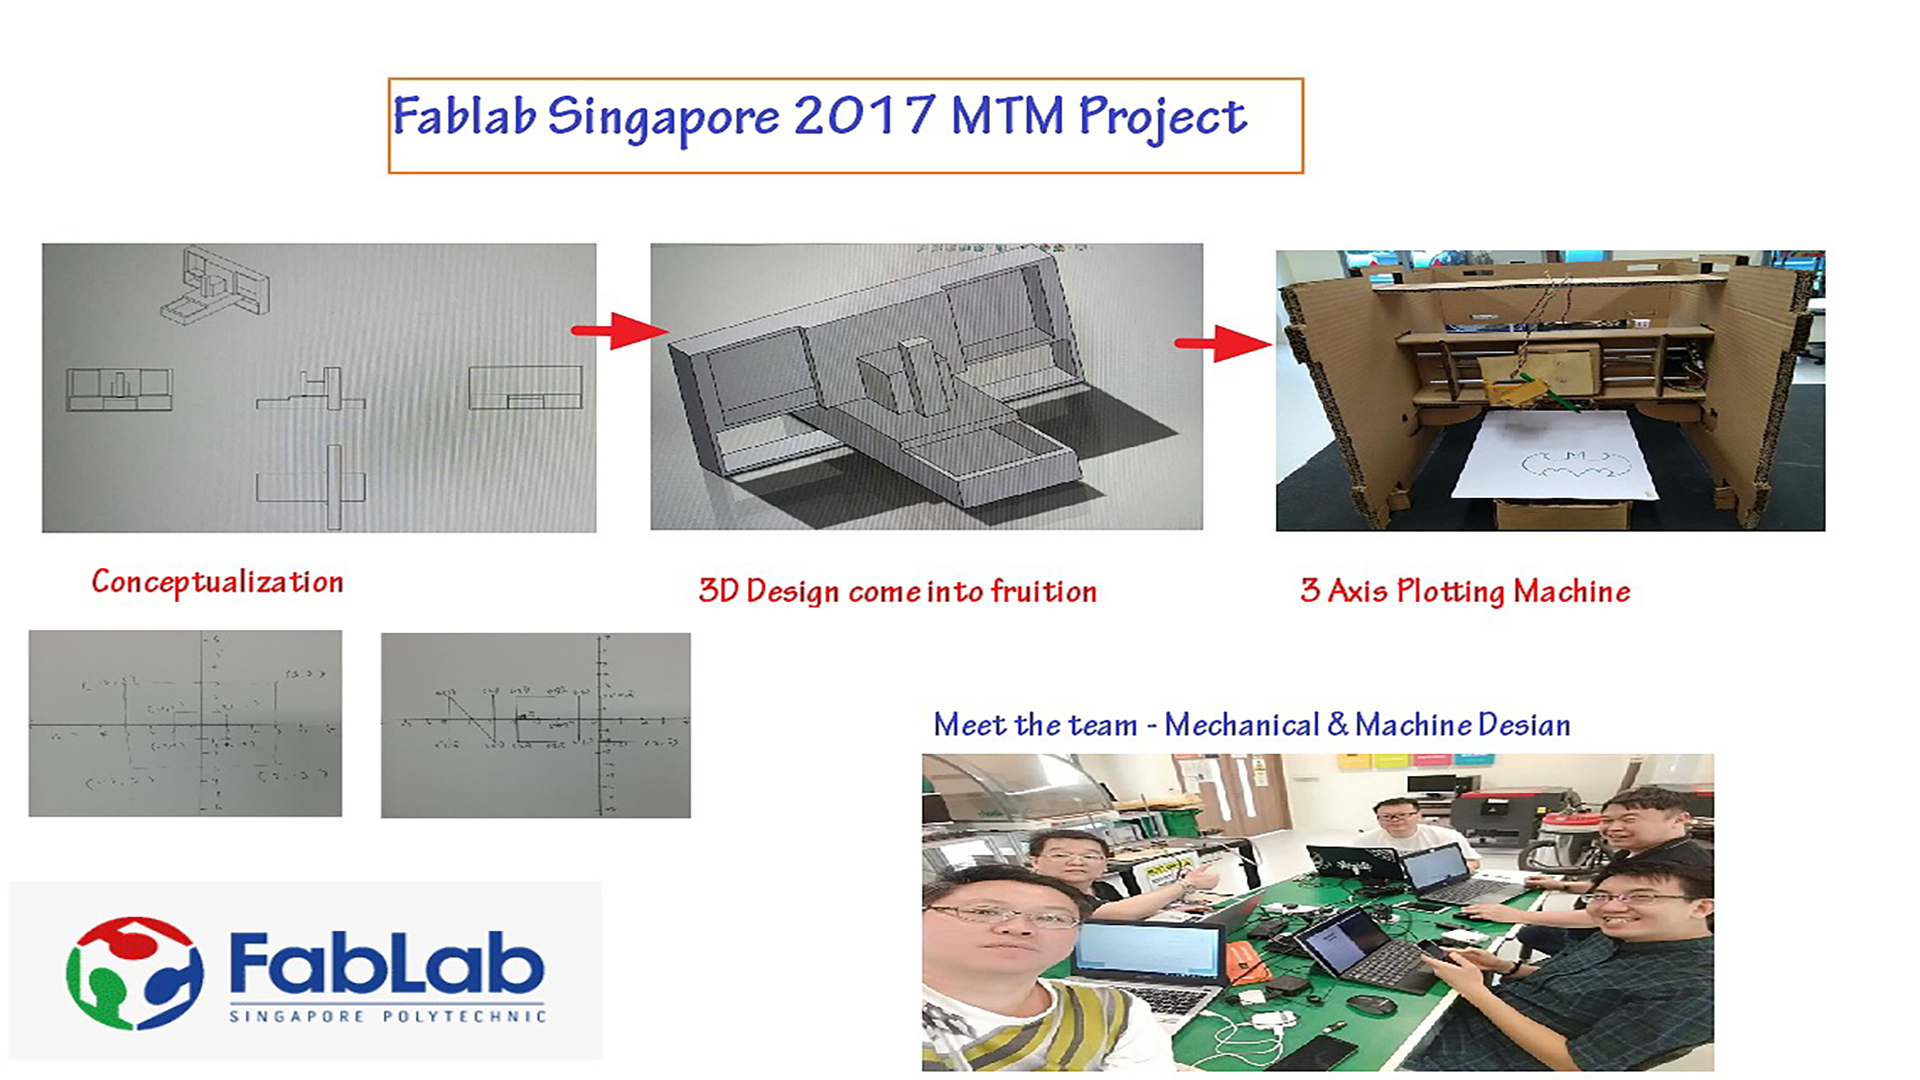
After thorough consideration and looking at the past year project, we decided to build a 3-axis plotter Machine.
We do a quick search for some similar past year projects to have a rough idea on the structure require and materials for the housing. A conceptual design for our plotter Machine has been drafted by Ngiap Peng.

Workload Distribution
As this is a group project that spread over 2 weeks (22 Mar 2017 - 5 Apr 2017), we have decided to split up the workload as follows for the mechanical design:
- Study the suitability of using the Cardboard or Plywood for housing - (Ngiap Peng/Jeff/Louis/Hong Guan/Tiang Seih)
- Design and Lasercut the Paper/Cardboard/Plywood housing - (Jeff/Louis)
- Design and Lasercut the module frame body - (Jeff/Hong Guan)
- Make and Mill the Electronic Parts - (Jeff/Tiang Seih)
- Luggage design - (Jeff)
- Explore the Gestalt Framework - (Ngiap Peng/Tiang Seih)
- 3D design & Print the Pen Holder - (Ngiap Peng)
- Connecting and Testing the Stepper Motor - (Hong Guan/Louis)
- Assemble the housing and test with the Stepper Motor - (Ngiap Peng/Jeff/Louis/Hong Guan/Tiang Seih)
- Documentation
- Creating/Updating the Group and Mechanical Design Page - (Tiang Seih)
- Photographer - (Hong Guan)
- Videographer - (Louis)
Links to my team-mates' contribution:
My contribution
In this group project, I was involved in the following areas:
- Study the suitability of using the Cardboard or Plywood for housing
- Design and Lasercut the module frame body
- Connecting and Testing the Stepper Motor
- Assemble the housing and test with the Stepper Motor
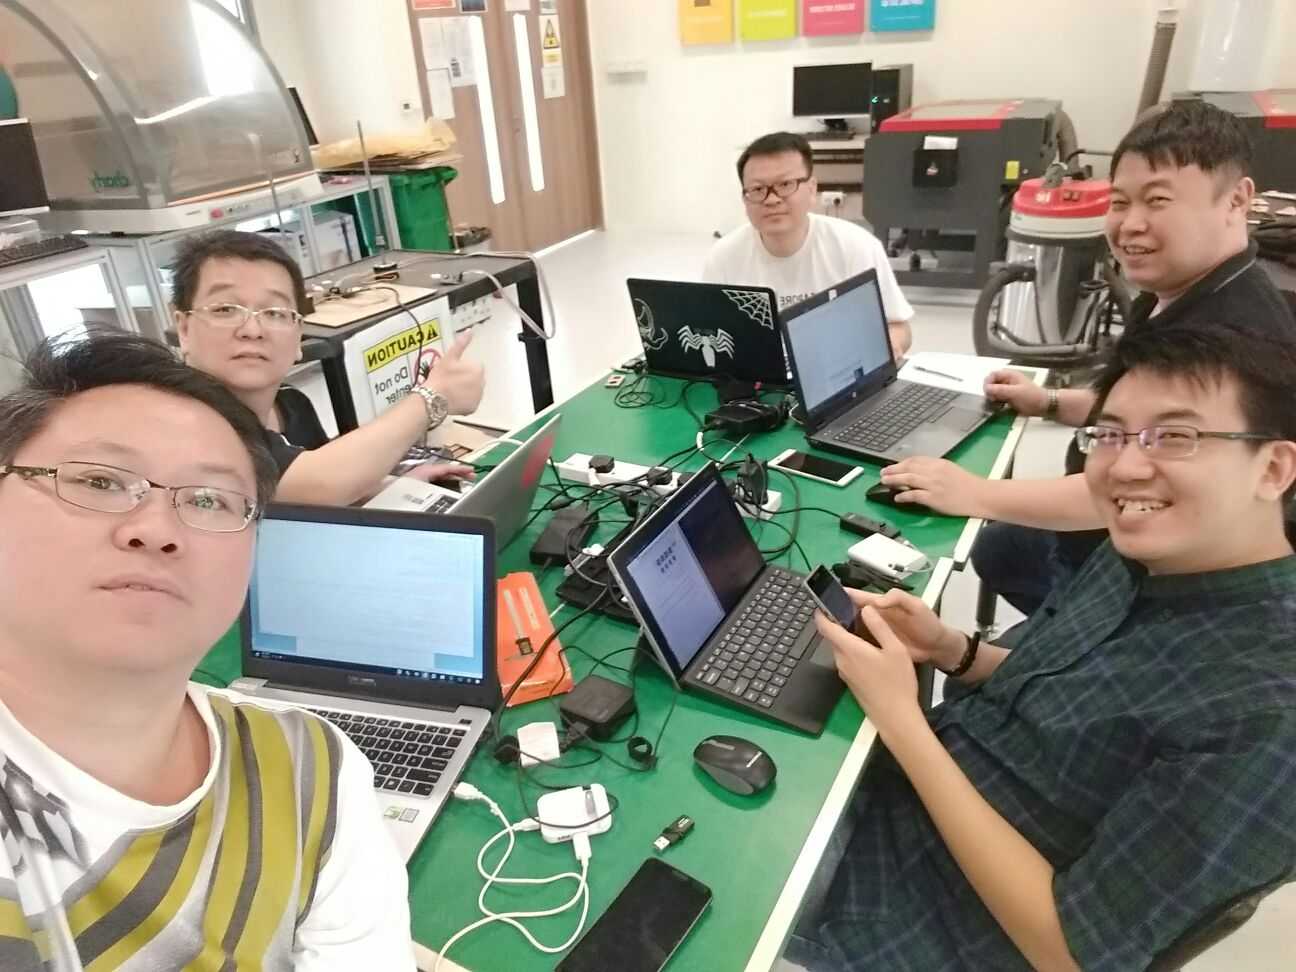
- Photographer
Study the suitability of using the Cardboard or Plywood for housing
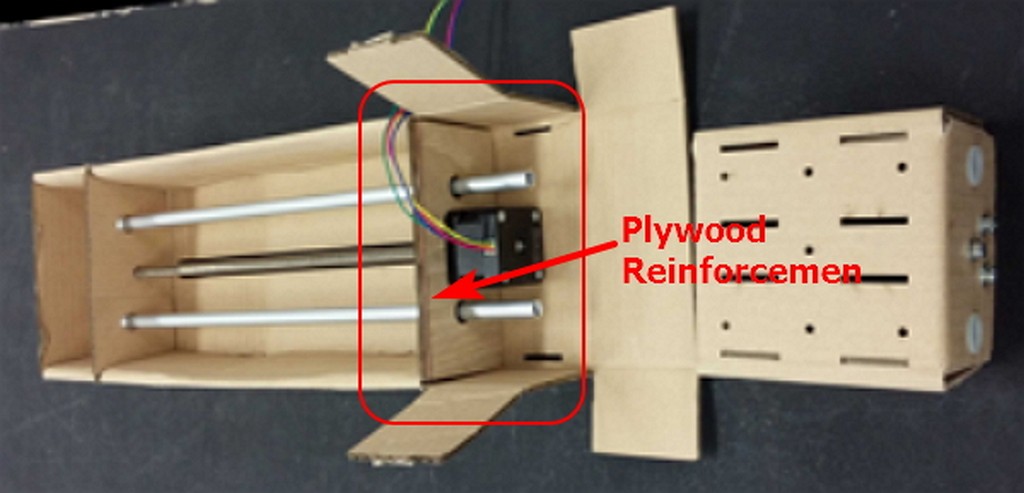
I gotta agreed with Louis on the part that non of us had the experience of using cardboard and plywood in machanical housing design. As a ex-student with some little mechatronics product design knowledge, what I had experienced before were either plastic parts or aluminium and stainless steel profile structure but never on paper cardboard and certainly ply. Usually such structures and parts would be rather costly and bulky. So after the team have decided to work on ply or cardboard structure, what I did was to provide my best knowledge of how to reinforce the cardboard structure being produced, with merely plywood incorporated into cardbaord.
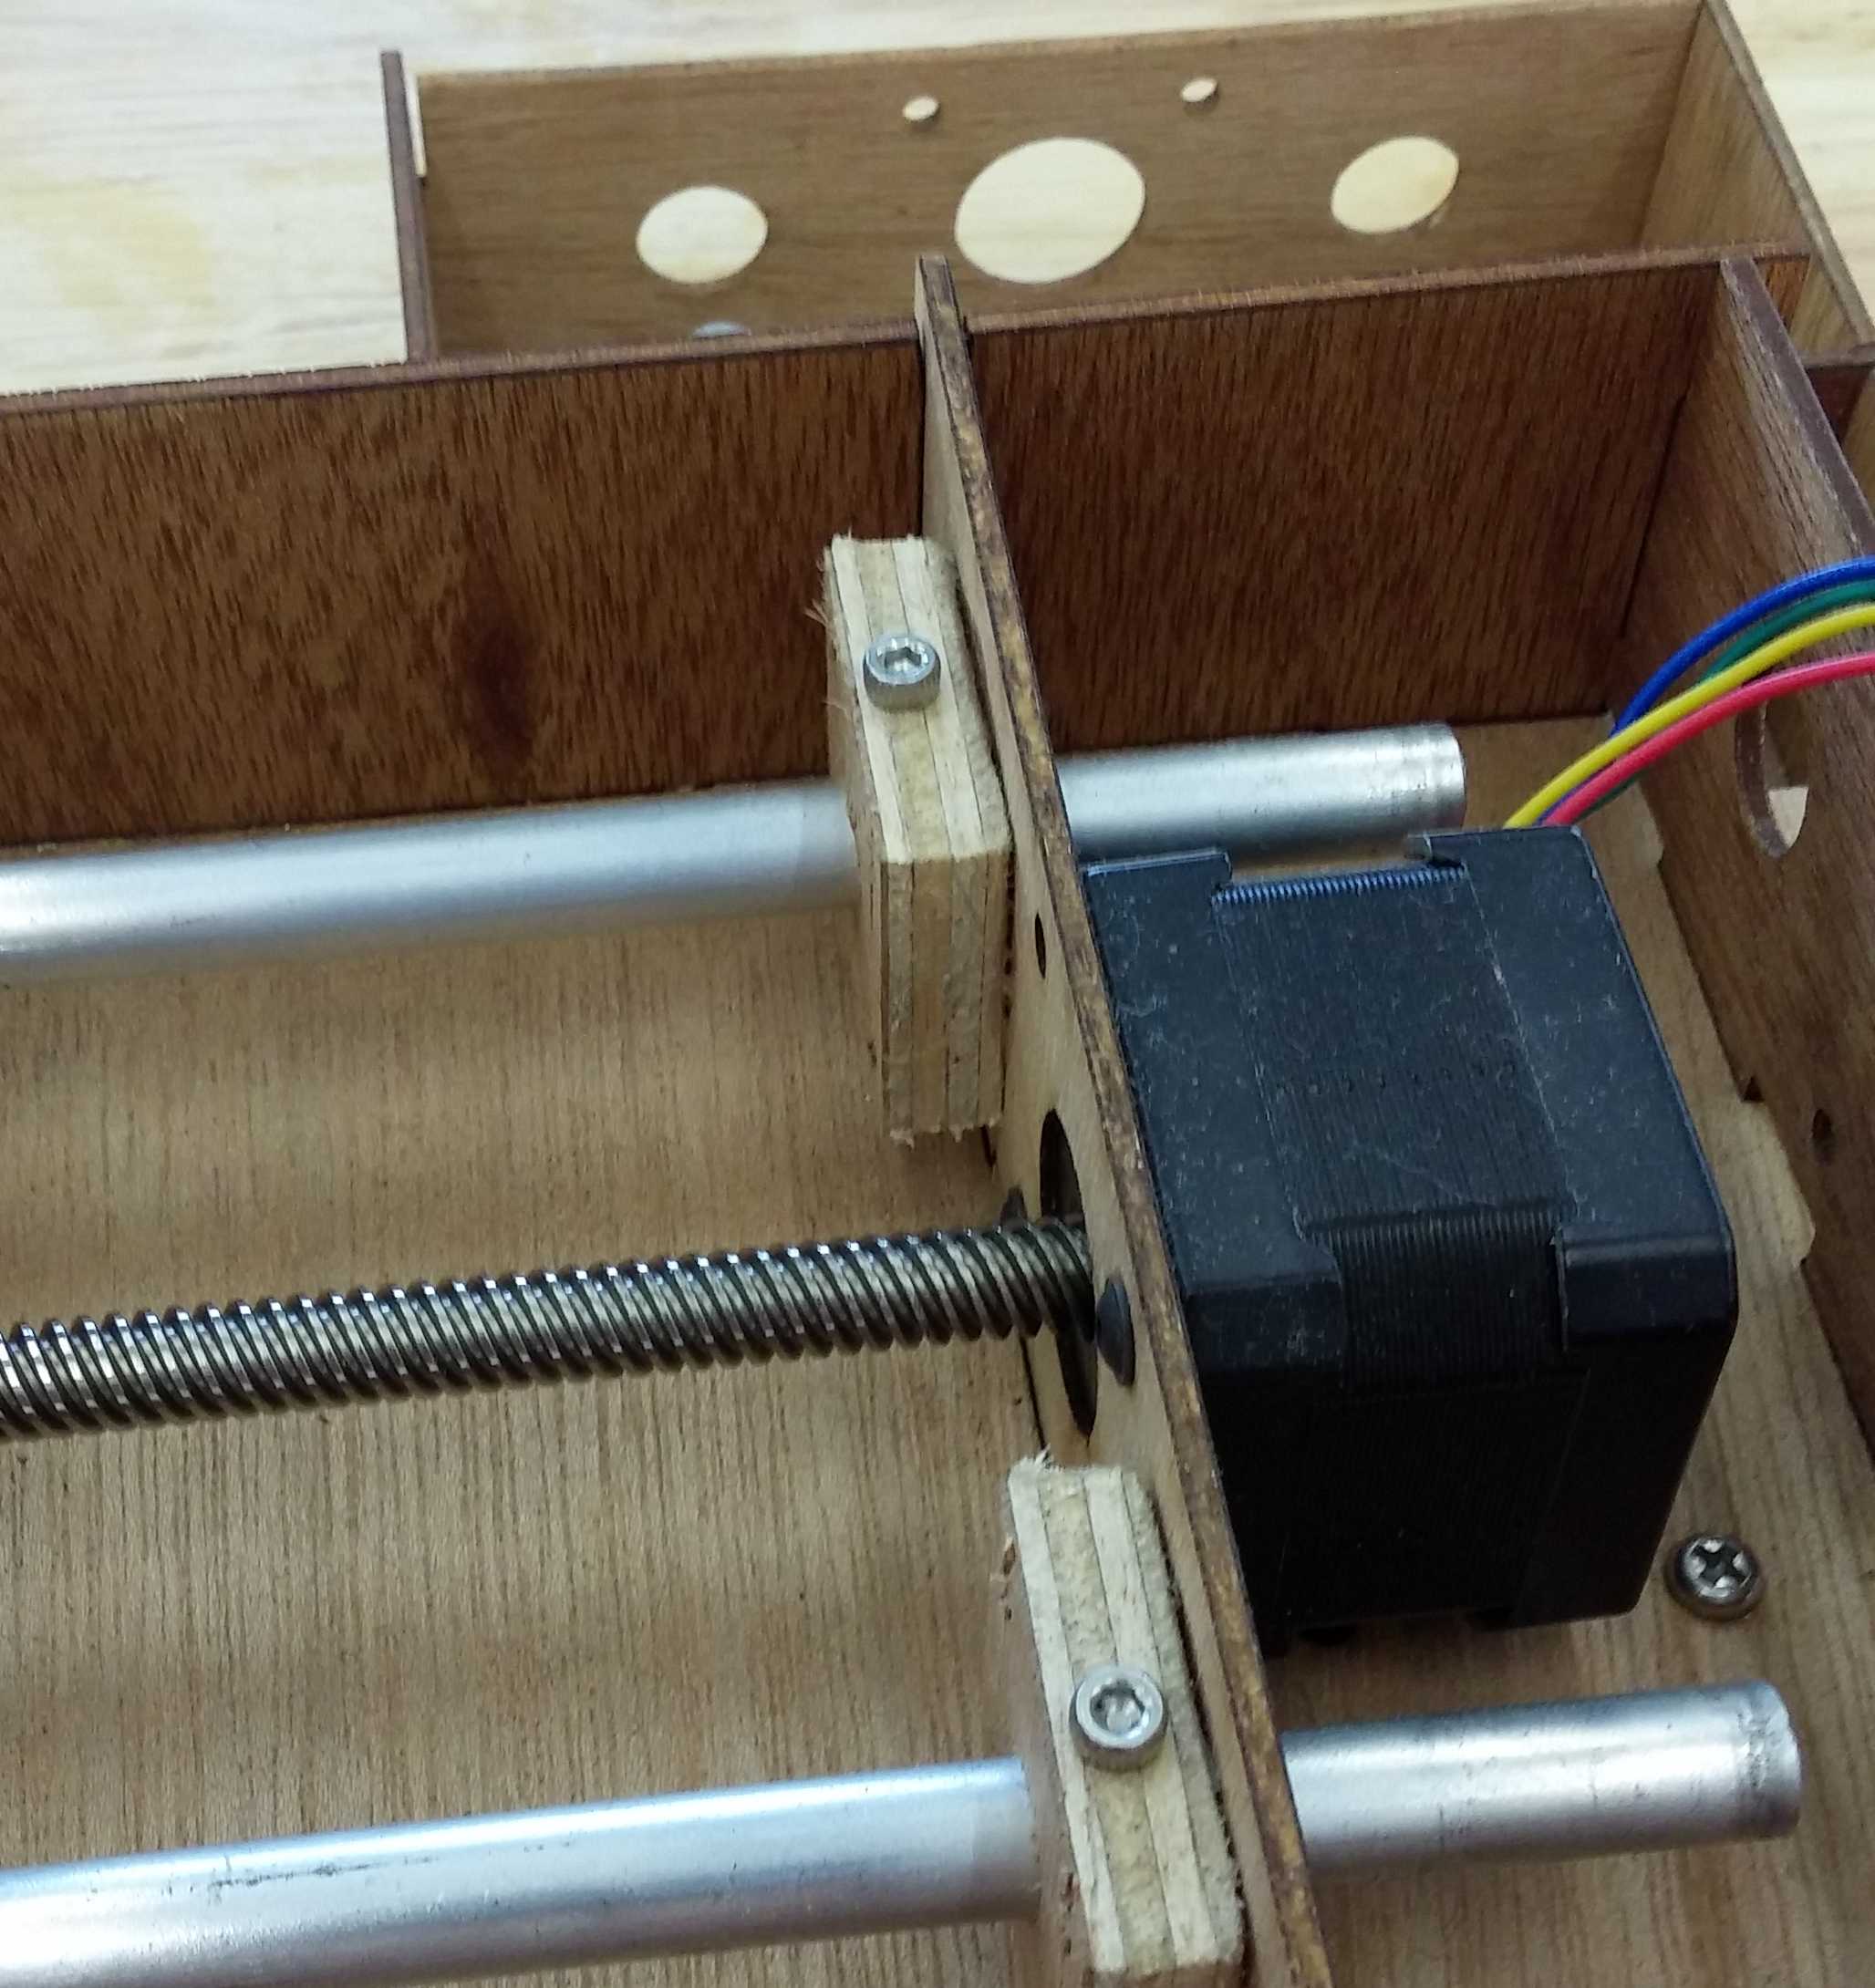
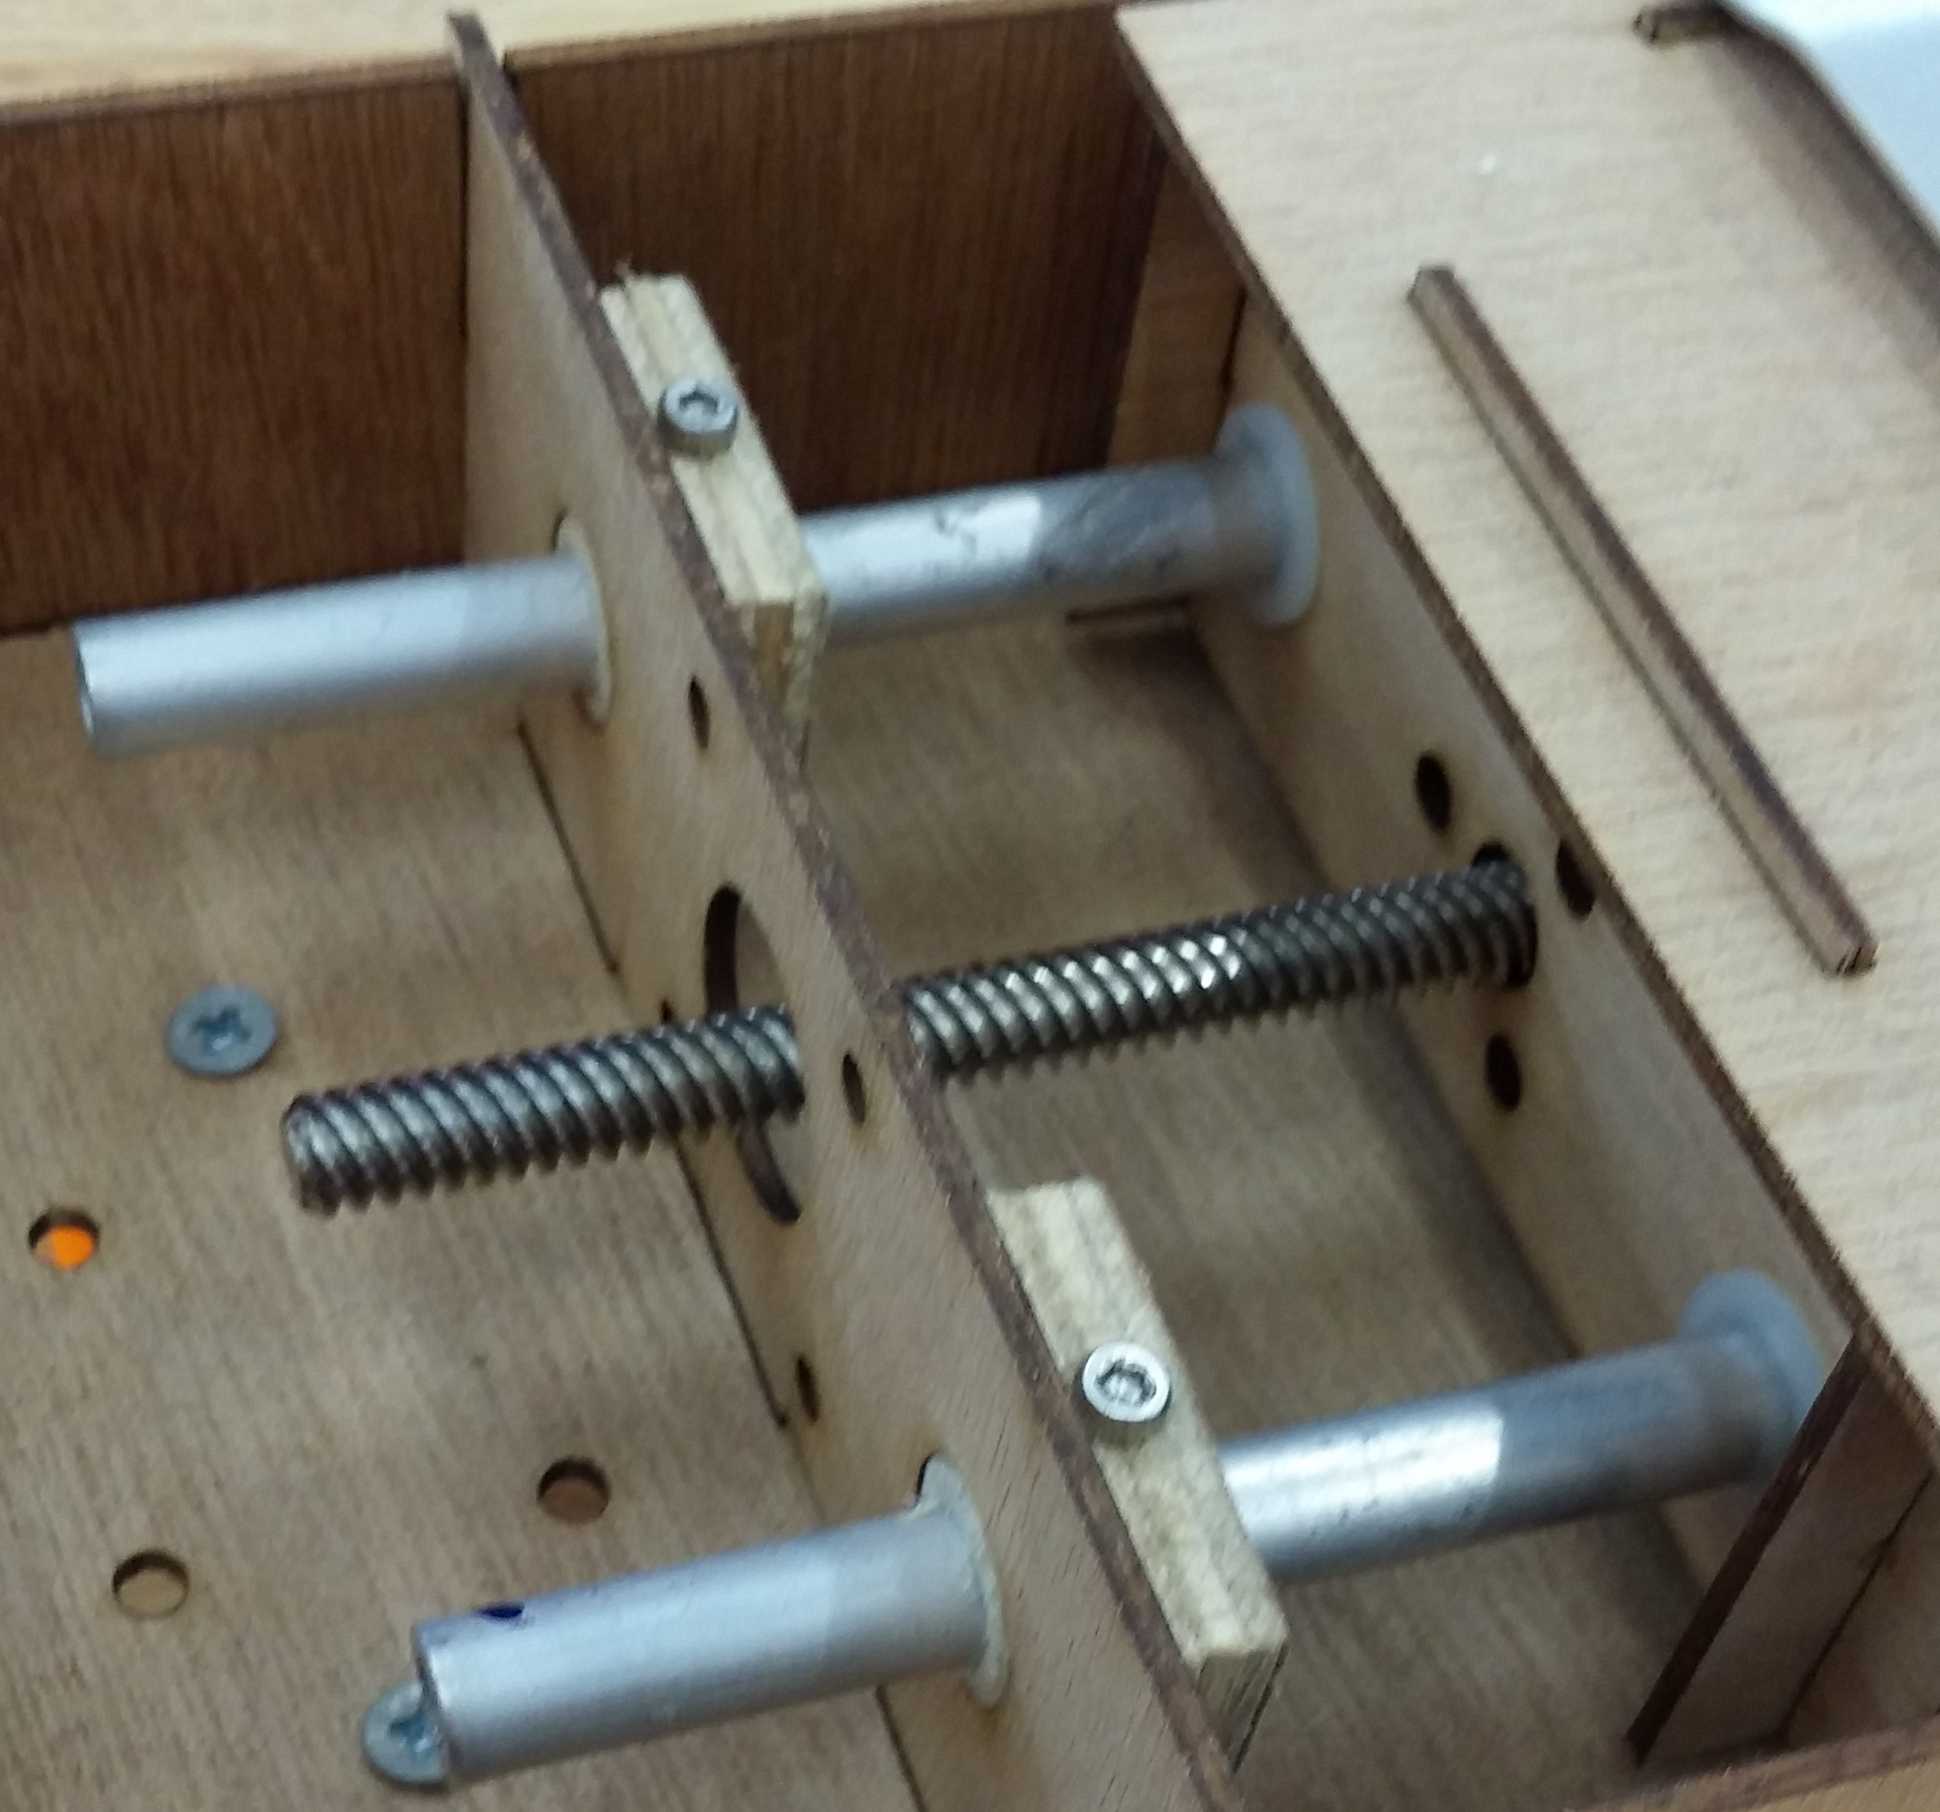
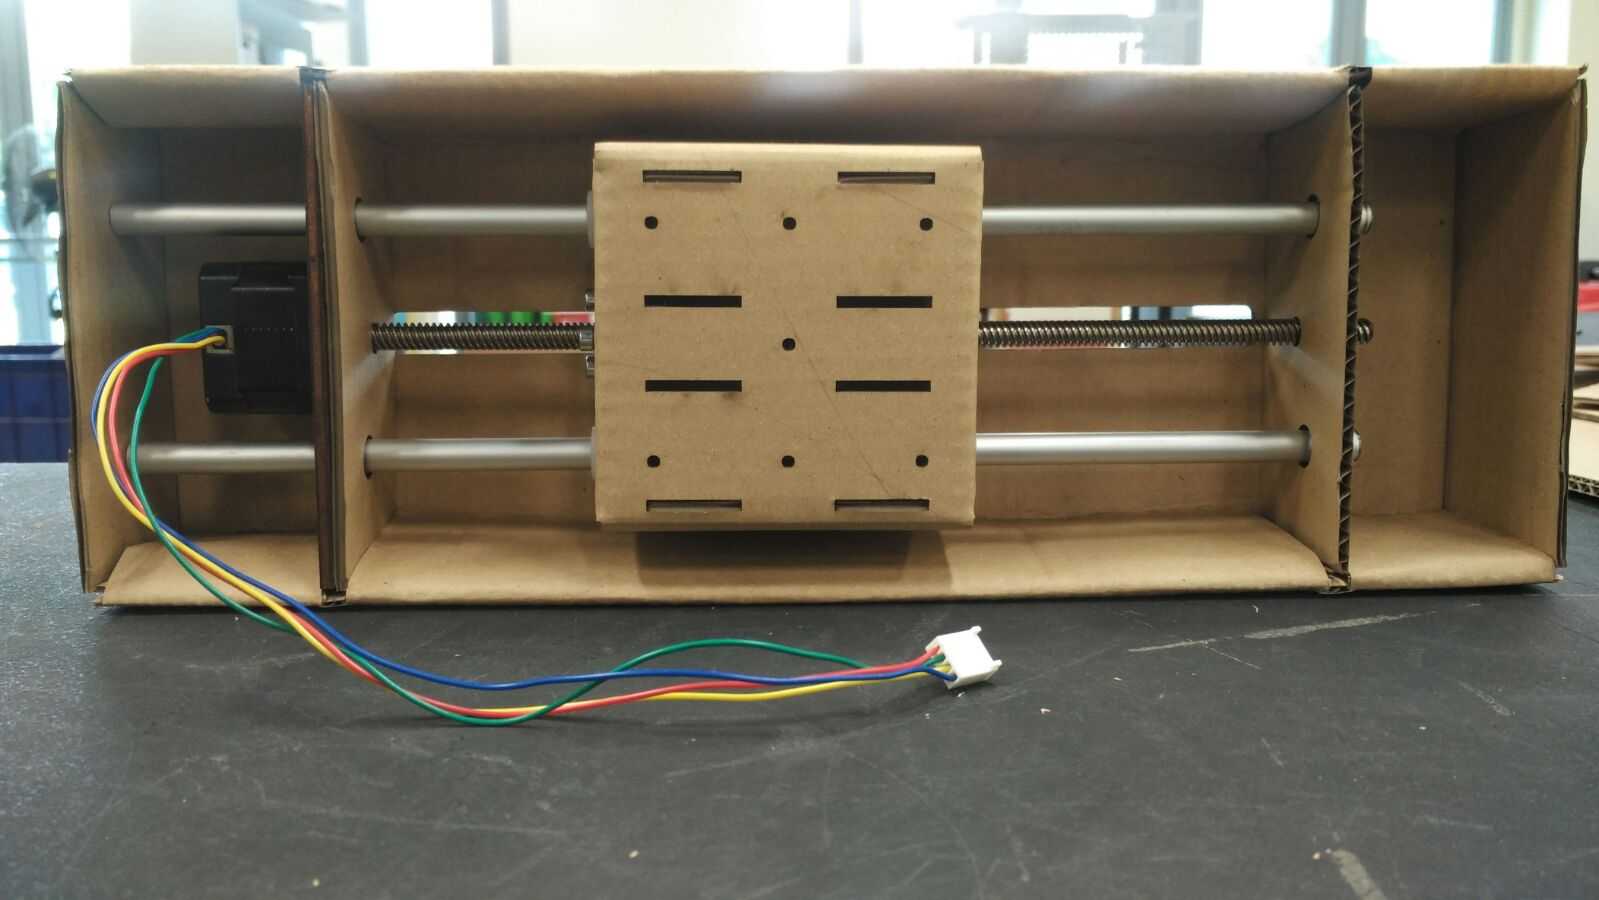
In the study of past years seniors mtm project which solely using plywood housing, we came out with an improvement on the housing to limit the degree of freedom and provide enough support for the gliding rods where the entire X-Y axis were sitting on. The best thing was using cardboard to which provide the flexibility of banding and folding and thus provided the opportunity to have relatively tight fit mounting as the support structure of our paper cardboard machine. At the critcal joint/node area, I suggested to the team for using ply for reinforcement. I am glad that everything work out just fine at the end of the day. A typical example of my idea (as illustrated in the following picture) was materialised when our team adapted the idea and laser cutter the additional ply support as illustrated. To my surprise with such a thing ply of 3mm thick the support is quite firm.
Design and Lasercut the module frame body
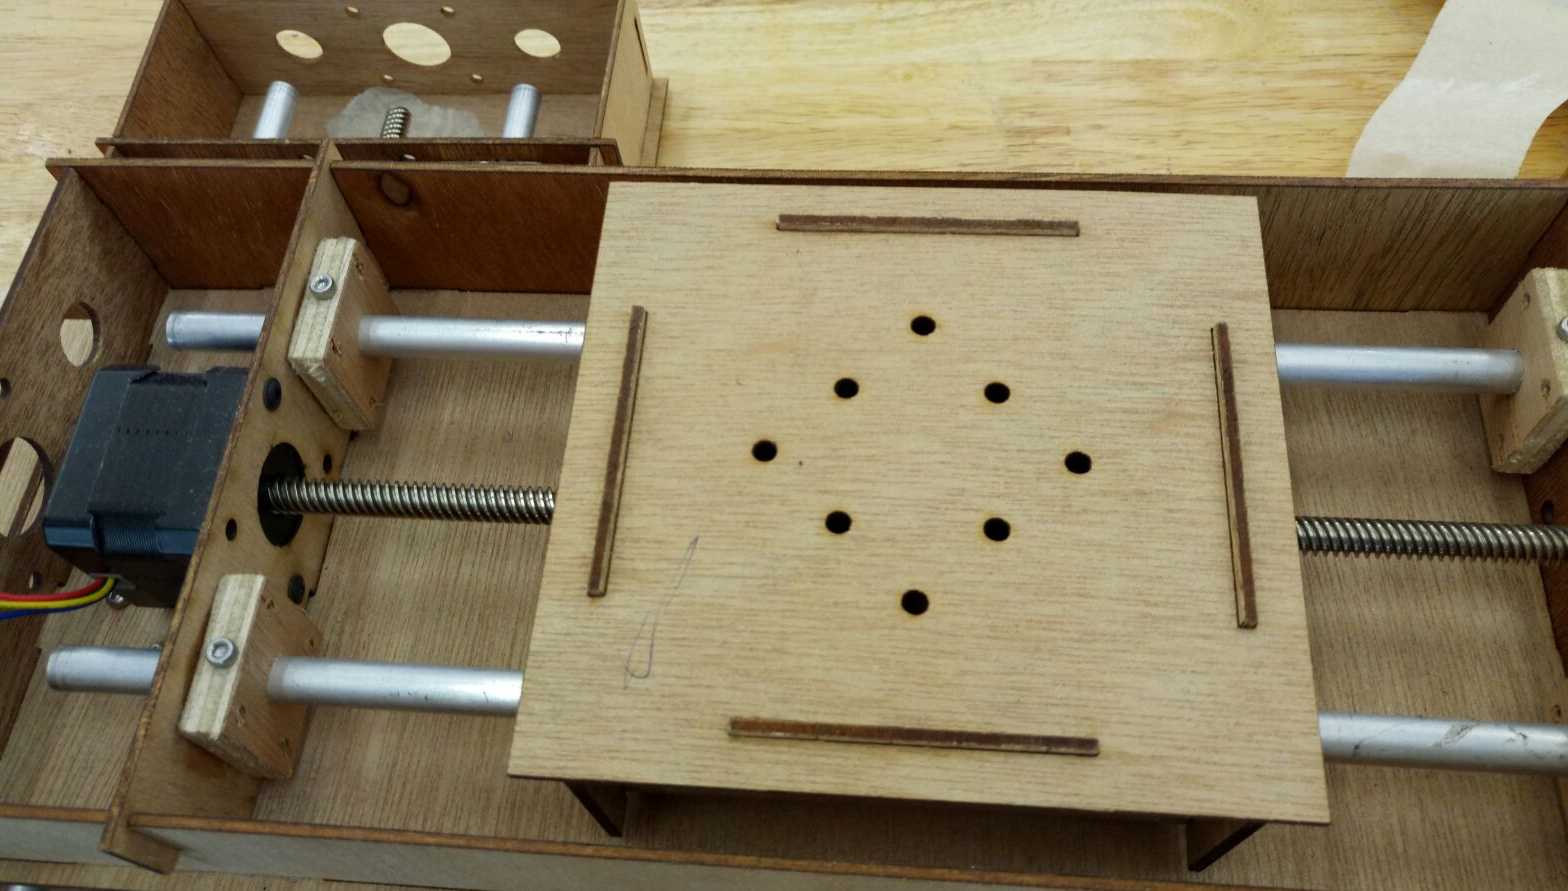
Similar concept were being implemented through out the entire structure of the card board machine. Reinforcement were achieved using 3mm ply cut to othe size that provide support and tight fit to limit the degree of freedom and maintain parallellism for the gliding rods of x and y axles. While for the pen holding support additional ply frame support of 3mm is being implemented. All these were being illustrated in the picture as shown:
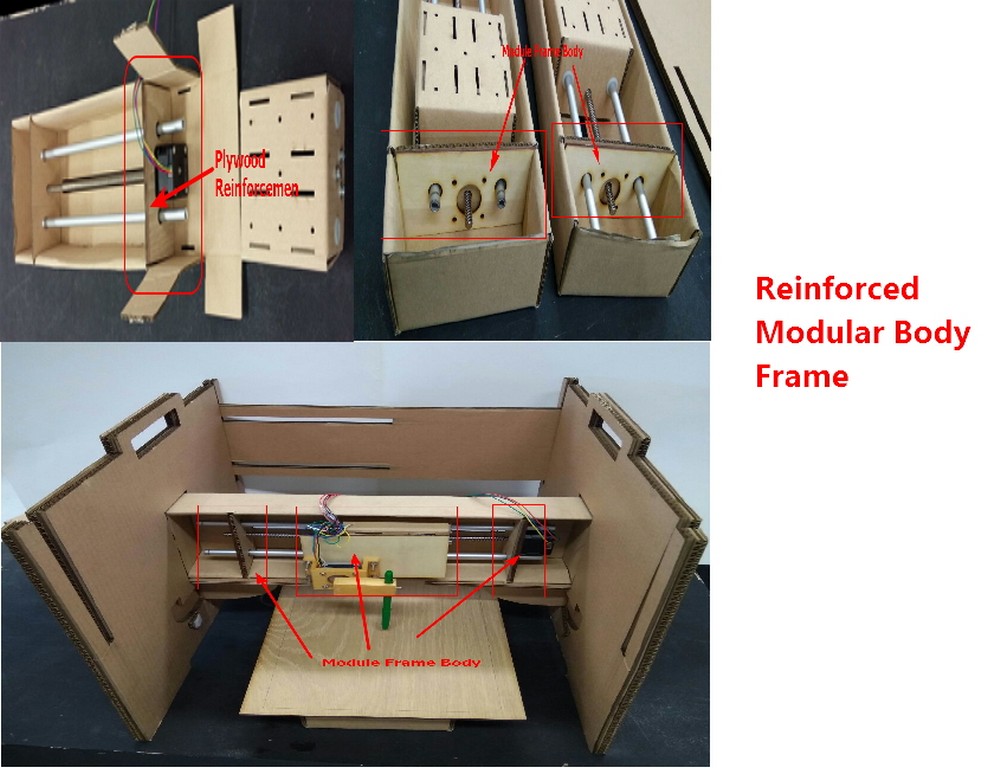
With just minimum 3mm ply at the critical node and support location, we are able to maintain the flexibility of cardboard while still keep it as light weight as possible for a suitcase machine concept. The actual laser cut was being handle by my classmate Jeff.
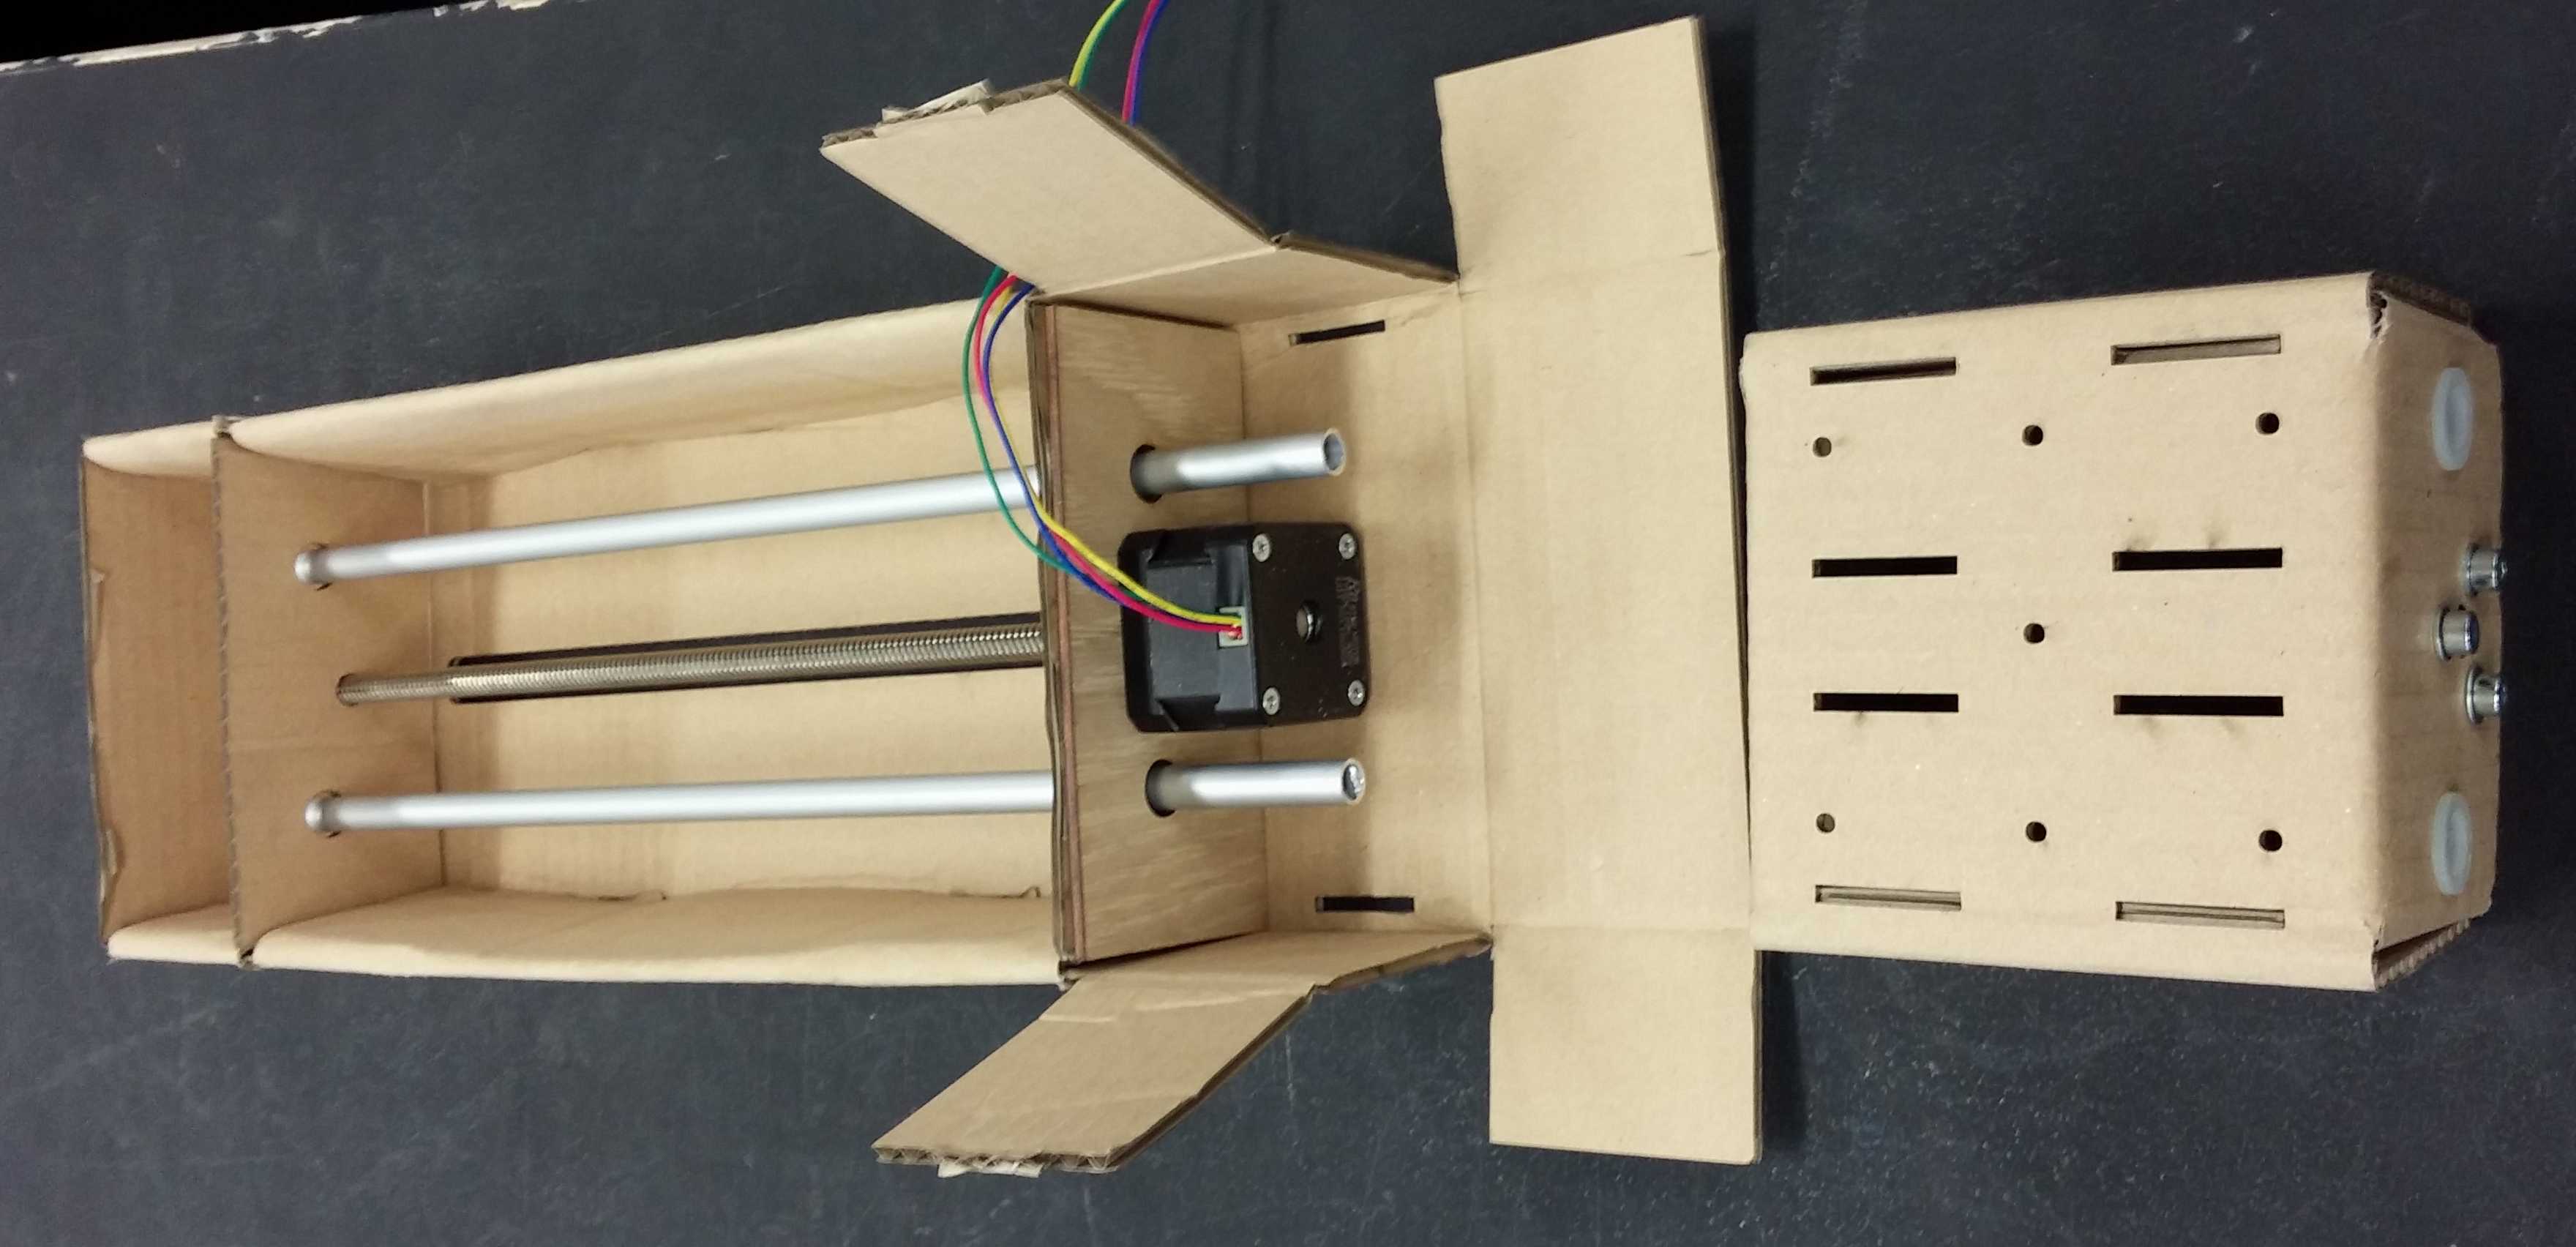
Connect & testing the stepper
Before mounting into the cardboard, Louis and I tested the stepper motor with the bridge and followed this instruction from this website (here)to test run the code to test the stepper motor. The main purpose is to understand how the code works and see if the stepper motor works. We started with testing on single axis in Python and windows as well as Mac Operating platform. Then slowly move on to three axis.
Assemble & fix up the motor
After laser cutting the cardboards, testing of motor, all of us begin to do assembly test and to see it if it works and it moves smoothly with the guide rails.After a manual testing of the smoothness of the drive and parallellism of the gliding rods, we start to assemble the stepper motor into the housing.
Working on Python
For this week, I spent most of the time figuring how to set up the python environment for both my Windows 10 and my Ubuntu Platform so that I can run the py files. For Ubuntu environment, it was a continuation from my week2 exercise where I had setup the virtual machine platform because of testing with "Antimony". I did exactly the same for both ubuntu and windows 10 platform by Referring to the Tutorial on wxGestalt, I found that there are many steps to prepare the environment for programming. I need to use Python 2.7.x instead of 3.x because the programming syntax of the example files we are working on is written for python 2. So far, I have completed the steps listed below and installed the relevant libraries of the packages.
- Install Python 2.7.13
- Install pip on windows. At command prompt, type python get-pip.py.
- Install pyserial 3.0.1. At command prompt, type pip install pyserial.
- Install pygestalt.
- Install FTDI drivers for windows. PDF Instruction
- Install wxPython 32bit for python 2.7
- Execute wxgestalt
Website Documentation - Poster Design
While taking photo for most of our activities during the group discussion, I was also taking some short video clips that was later being edited by Louis into our presentation video as shown in our mtm group page. While at the same time, I had design the MTM page presentation slide and saved into poster.png file as shown in the snapshot below.
References
- Fab Academy Recitations - Nadya Peek
- How to install pip on Windows (The easy way)
- How to download and install Python Packages and Modules with Pip
- Tutorial on wxGestalt
- Installing Python and PySerial
- pySerial