Exercise 9 - Mechanical Design
Pre-lude
This page will show my contribution to the project.To view the MTM group project, click here: MTM Group Project
Brain storming
My Group brainstormed on the idea of the whole Mechanical design of our group project, we are very focused on:- what kind of machine we want to do and what it would do.
- What kind of design would fit the requirement of the group project.
Workload Distribution
As this is a group project that spread over 2 weeks (22 Mar 2017 - 5 Apr 2017), we have decided to split up the workload as follows for the mechanical design:
- Study the suitability of using the Cardboard or Plywood for housing - (Ngiap Peng/Jeff/Louis/Hong Guan/Tiang Seih)
- Design and Lasercut the Paper/Cardboard/Plywood housing - (Jeff/Louis)
- Design and Lasercut the module frame body - (Jeff/Hong Guan)
- Make and Mill the Electronic Parts - (Jeff/Tiang Seih)
- Luggage design - (Jeff)
- Explore the Gestalt Framework - (Ngiap Peng/Tiang Seih)
- 3D design & Print the Pen Holder - (Ngiap Peng)
- Connecting and Testing the Stepper Motor - (Hong Guan/Louis)
- Assemble the housing and test with the Stepper Motor - (Ngiap Peng/Jeff/Louis/Hong Guan/Tiang Seih)
- Documentation
- Creating/Updating the Group and Mechanical Design Page - (Tiang Seih)
- Photographer - (Hong Guan)
- Videographer - (Louis)
My contribution
In this group project on mechancial design, I was involved in the following area:- Study the suitability of using the Cardboard or Plywood for housing
- Design and Lasercut the Paper/Cardboard/Plywood housing
- Connecting and Testing the Stepper Motor
- Assemble the housing and test with the Stepper Motor
- Videographer
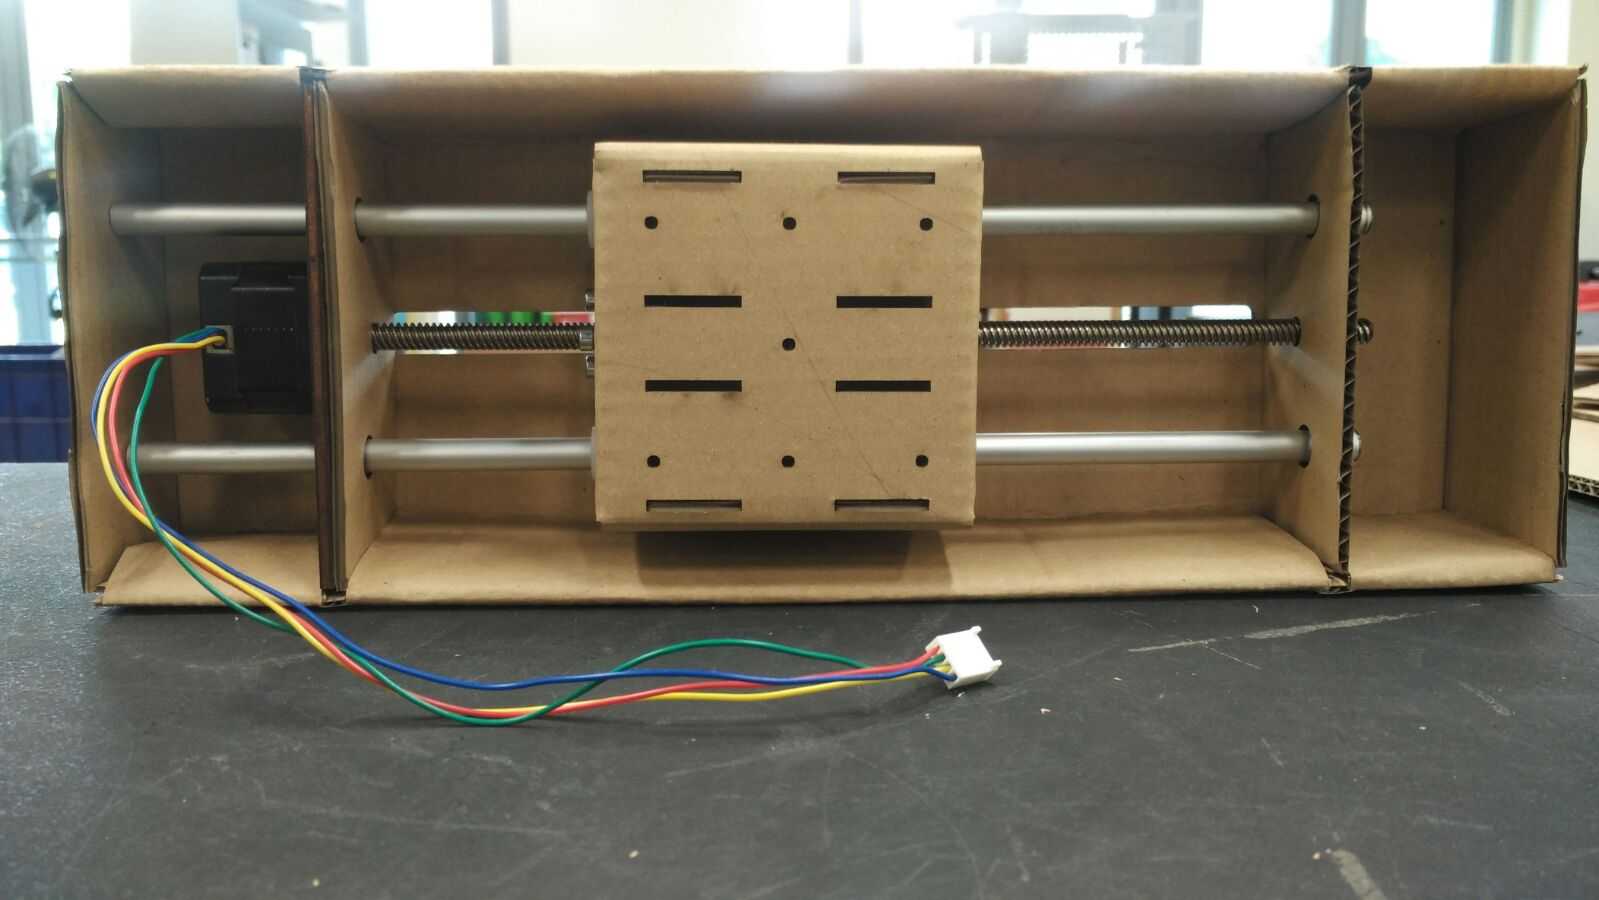
Design and Lasercut the Paper & Cardboard housing
Jeff is a great designer, I wasn't an expert in designing it in 2D cad. I was learning on the job with him and gained many valuable experience.We looked at Nayda Peeks original design and it was in Rhino based, which we are not an expert on it. But luckily we found Nadya's housing in DXF dormate, we scaled it up in AI and made some modification to it.
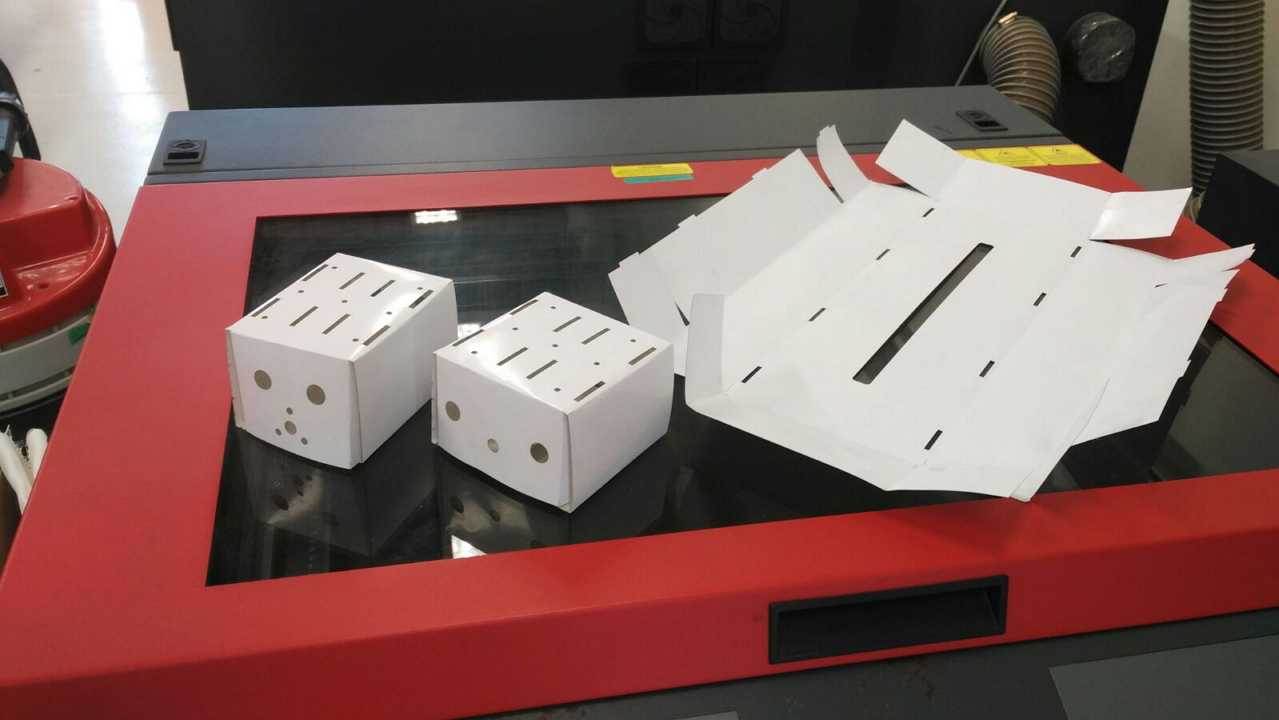
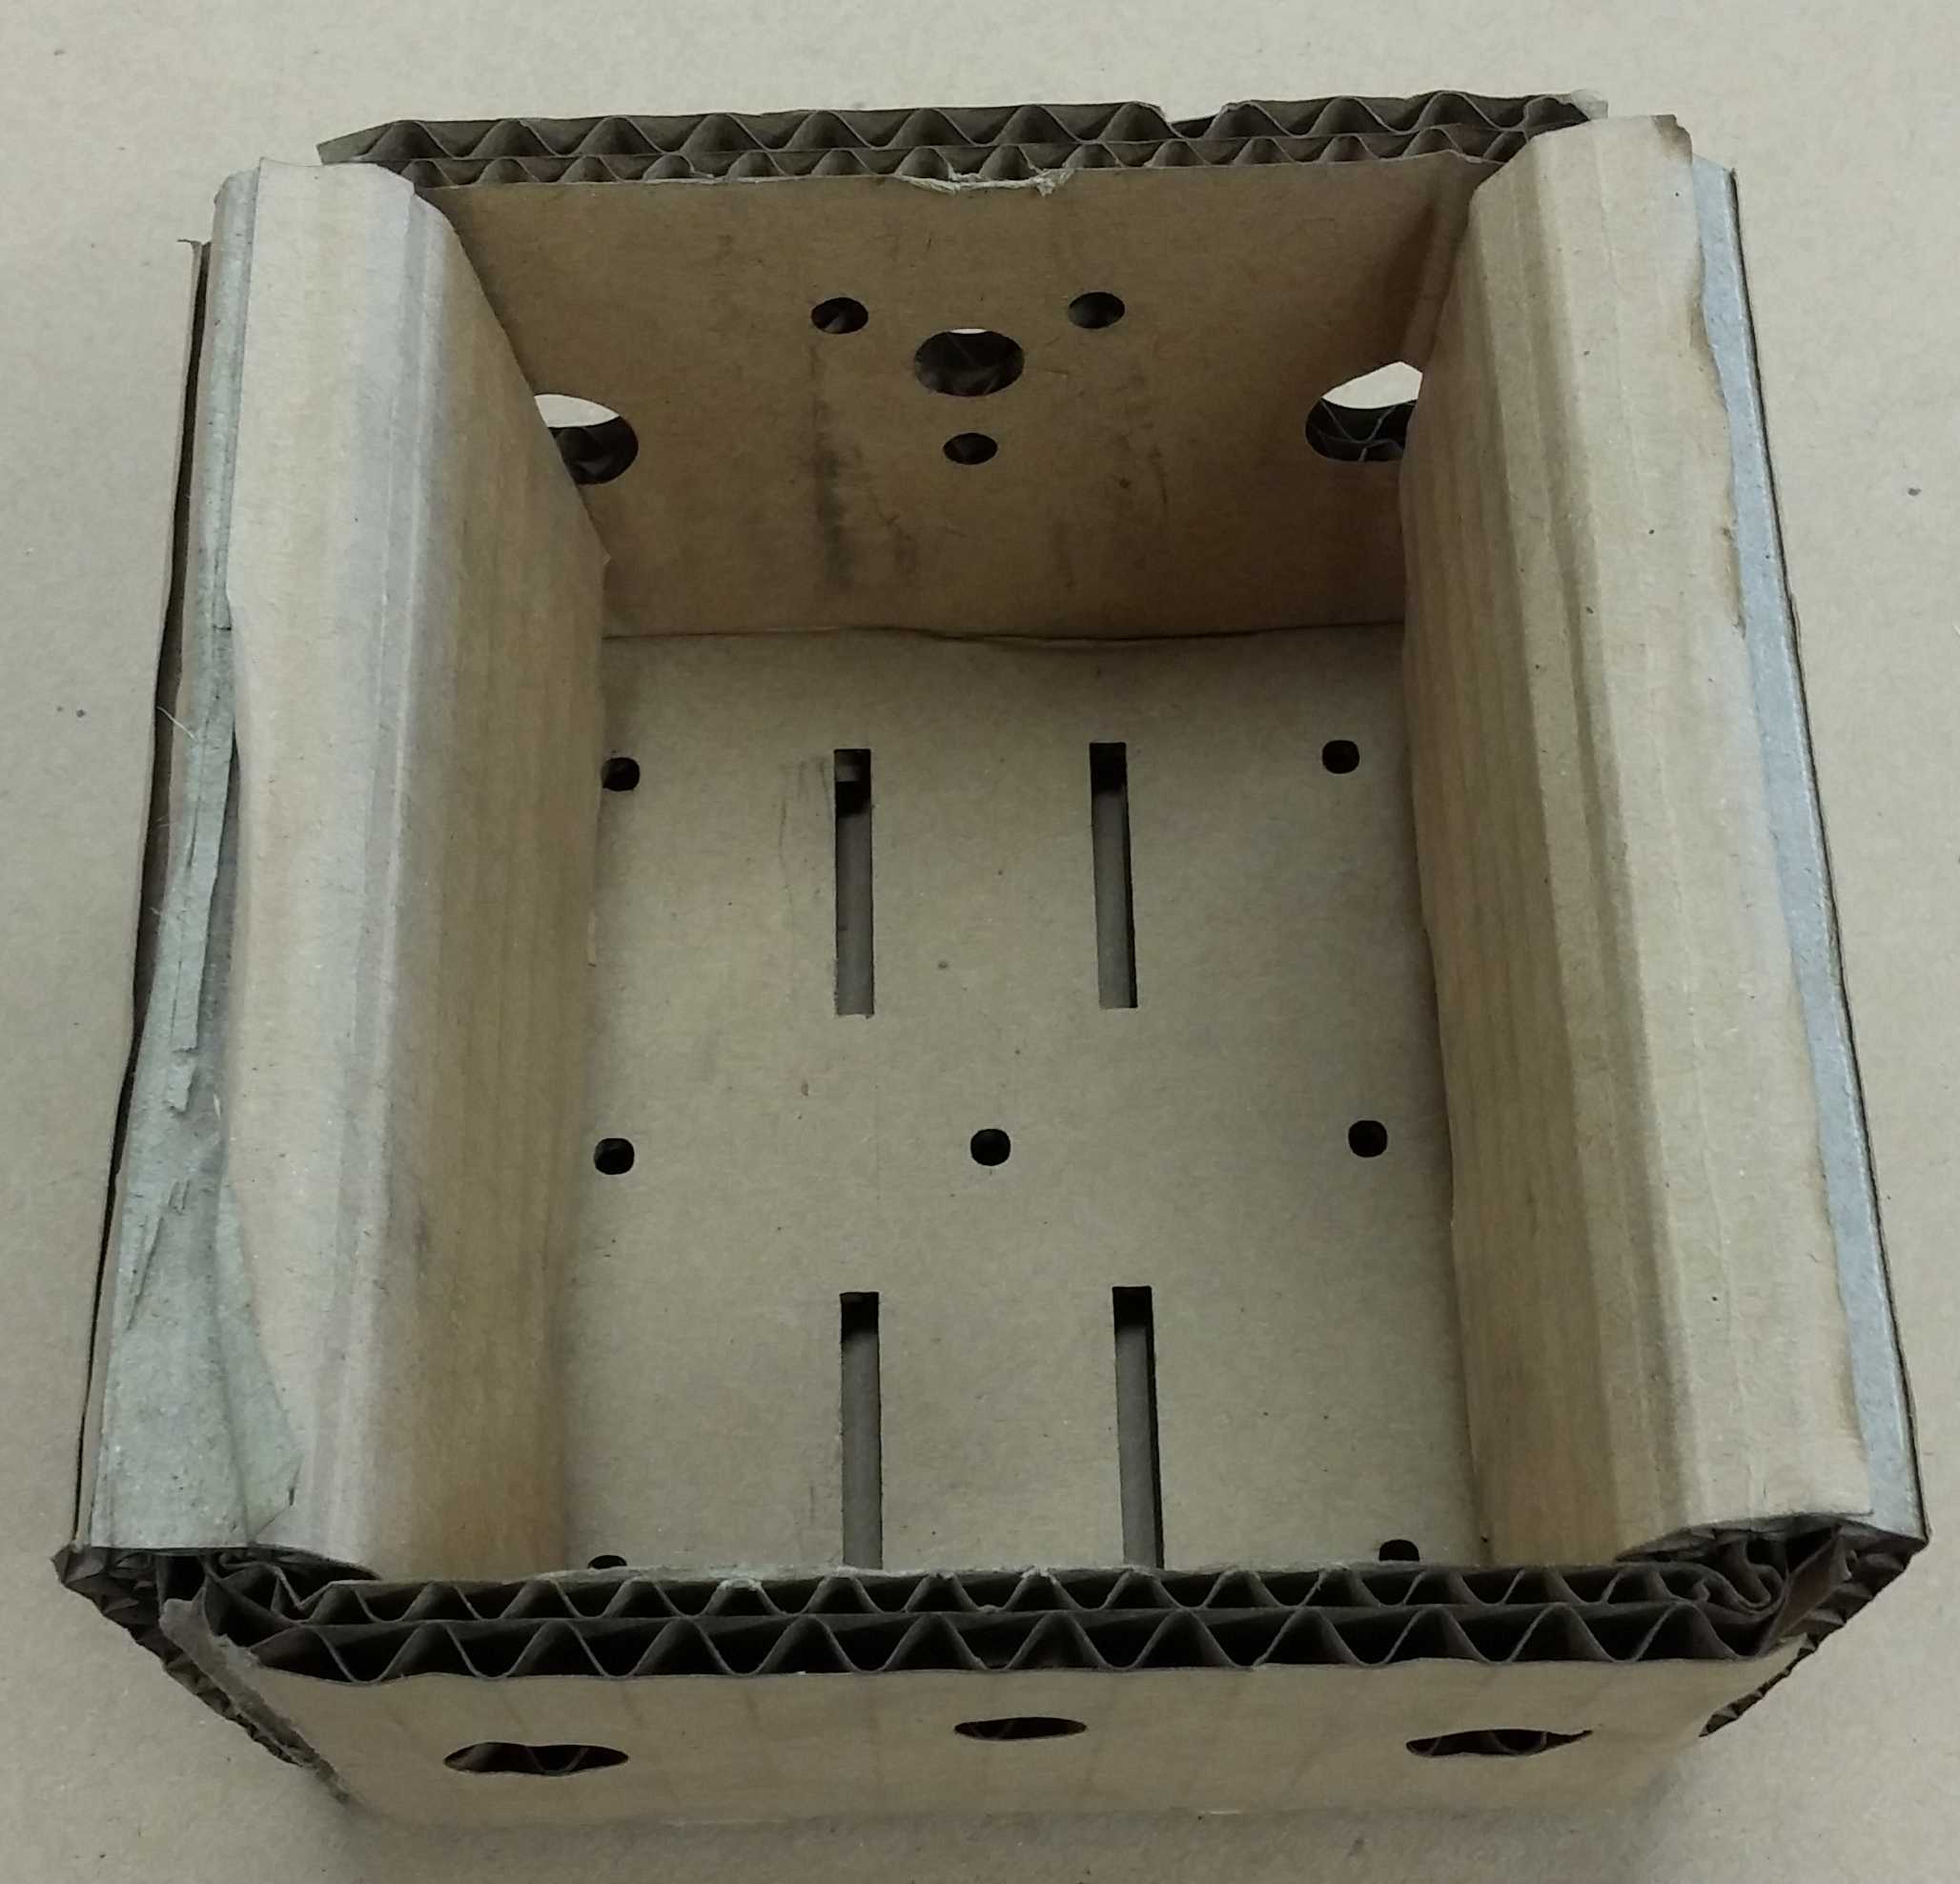
After laser cutting in paper, we tried to do fitting for the stepper motor, then upgrade to laser cut cardboard.
We realised it was too thick and thus we changed to a thinner and better cardboard to a thinner one.
But the thinner ones also has issue where the engraveing causes tearing on the cardboard

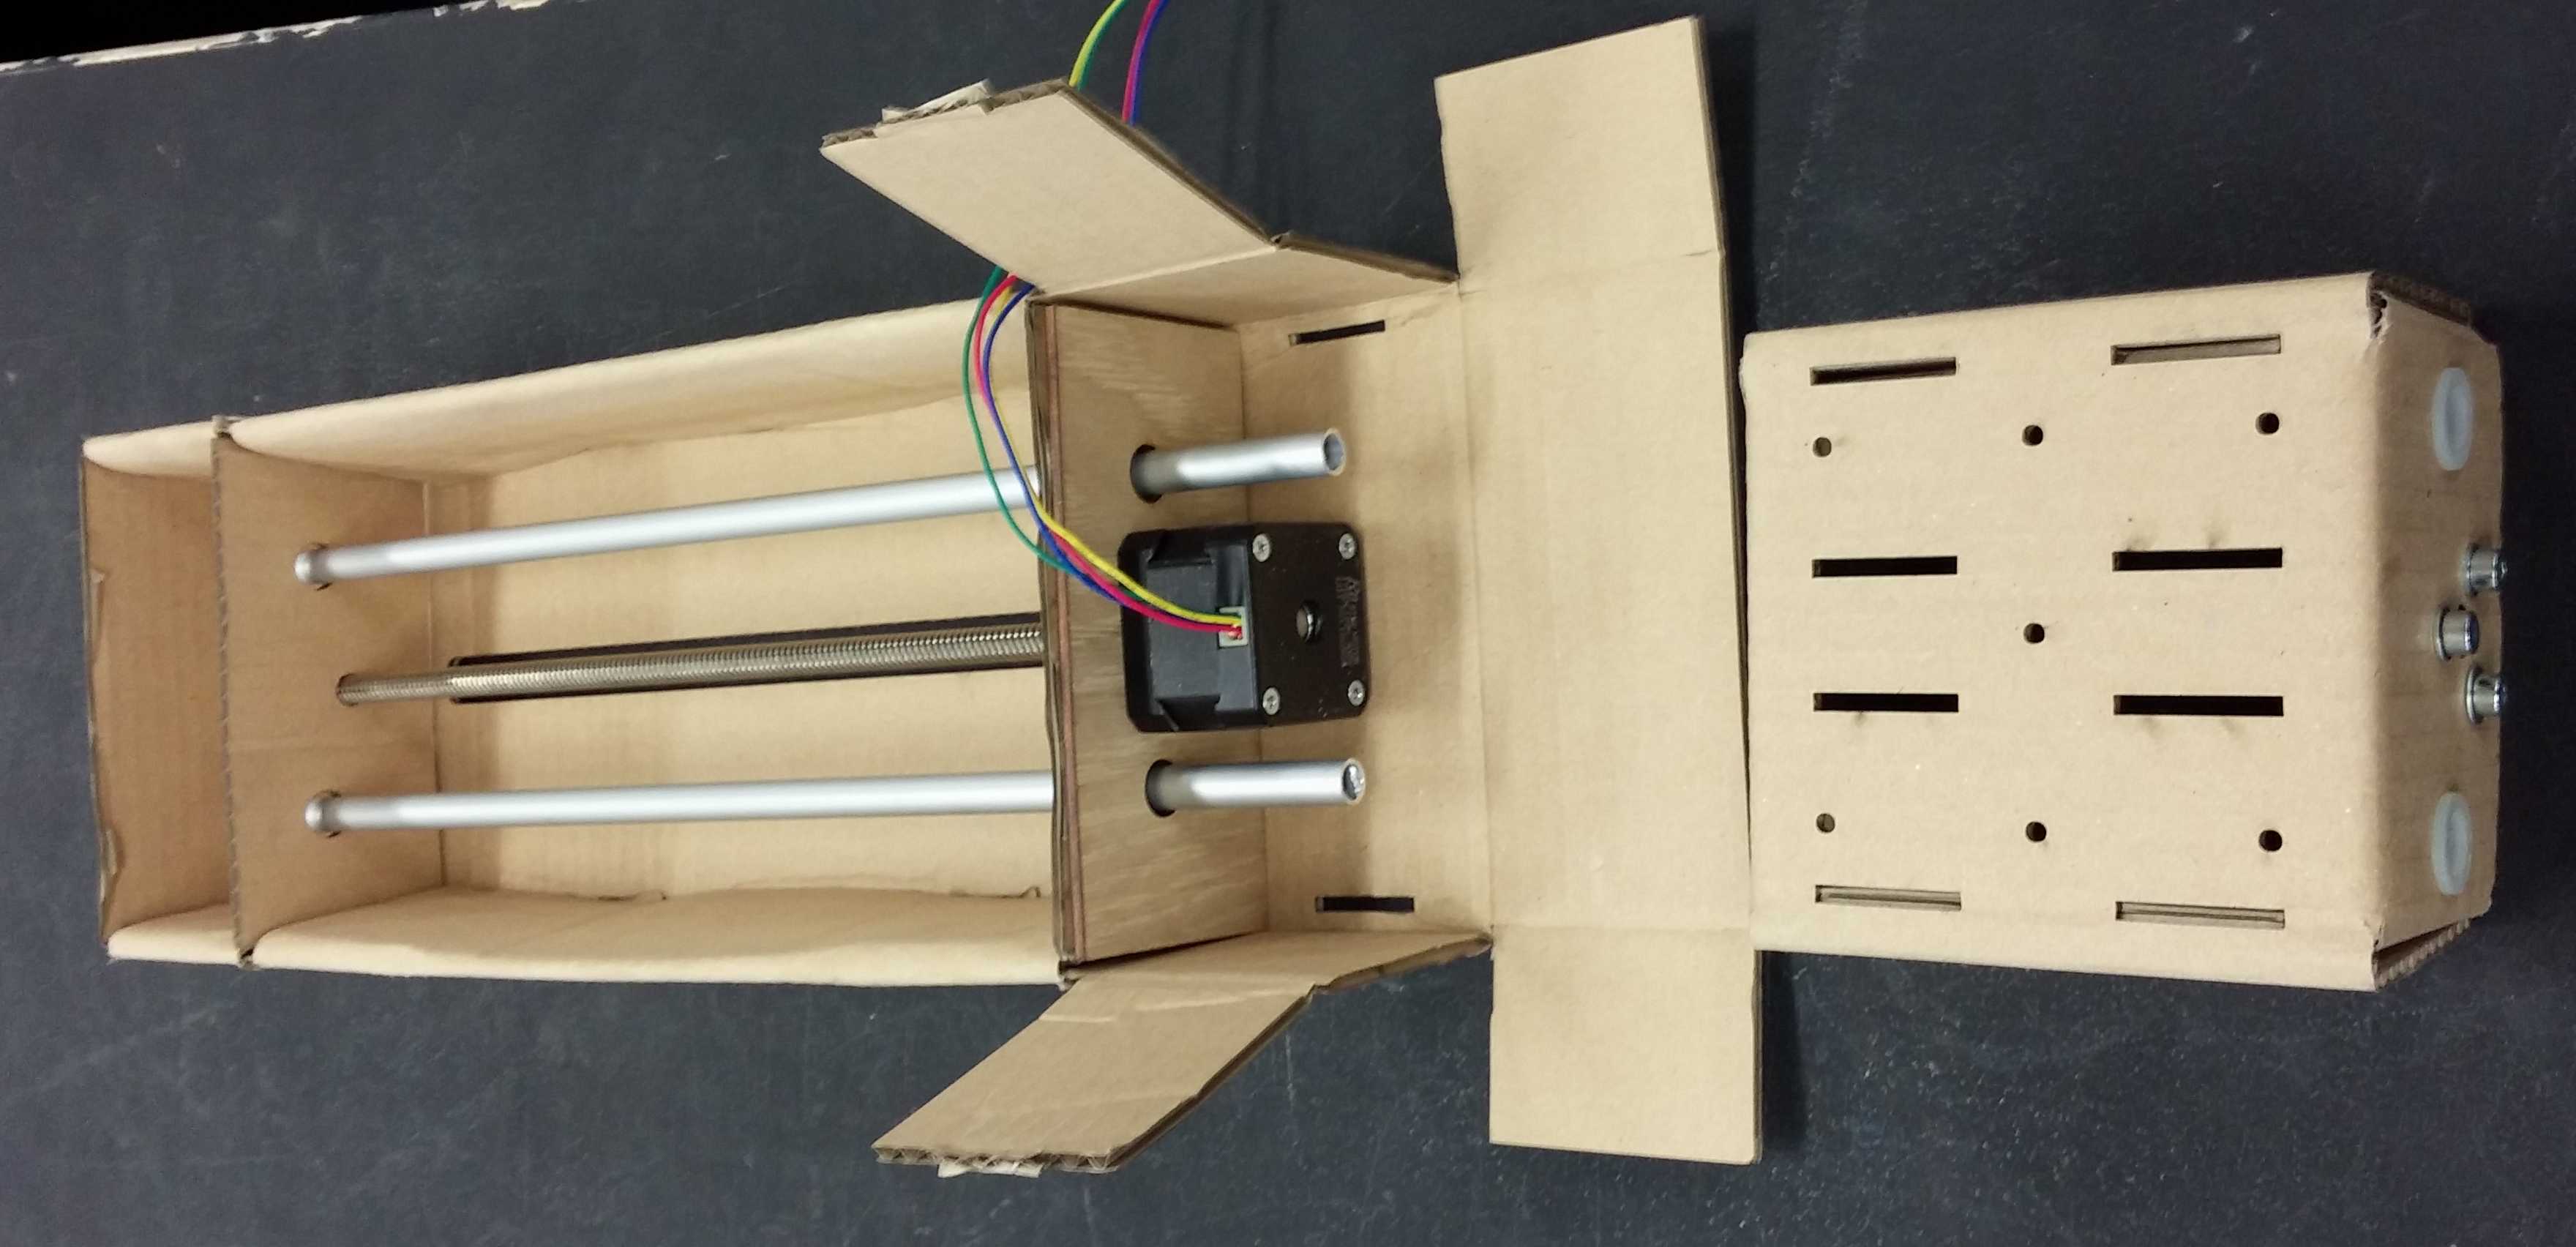
Connect & testing the stepper
Before mounting into the cardboard, Hong Guan and I tested the stepper motor with the bridge and followed this instruction from this website (here)to test run the code to test the stepper motor. The main purpose is to understand how the code works and see if the stepper motor works.Assemble & fix up the motor
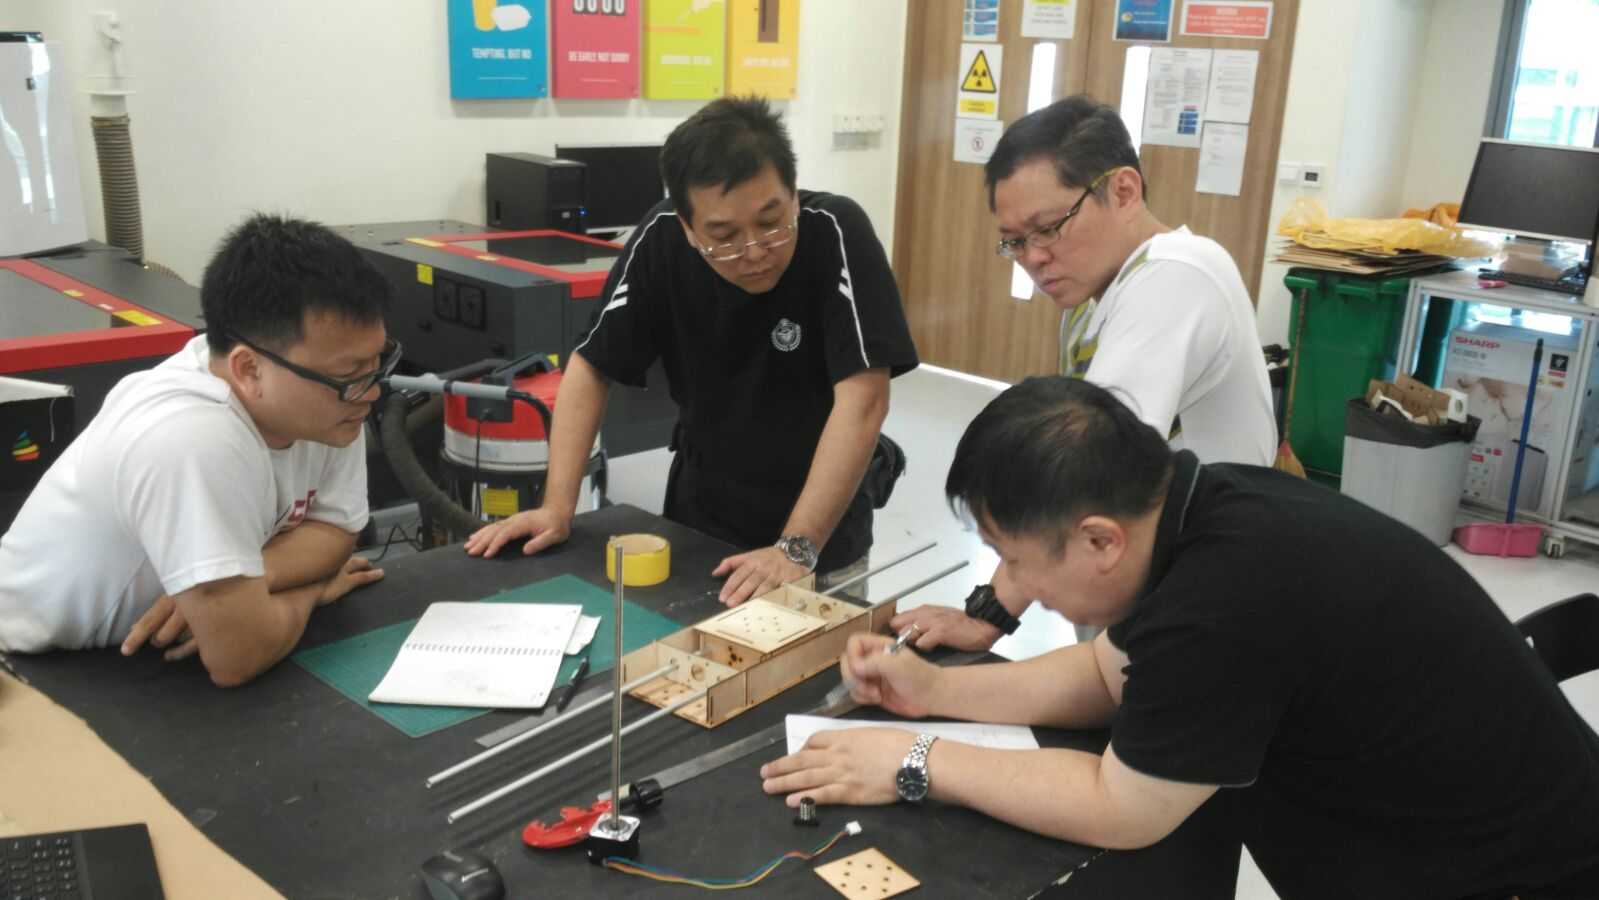
After laser cutting the cardboards, testing of motor, all of us begin to do assembly test and to see it if it works and it moves smoothly with the guide rails.After with the results looking good, we start to assemble the stepper motor into the housing.
Videographer
As the role suggest, I will be doing the video recording and compiling it into a video for the Group website and some of the test videos as shown in our websites.The Video editing software I'll be using is Davinci Resolve
It is very similar to Adobe Premiere and best of all, it is Free!
I would encourage you to watch this video from YouTube to have a kick start!