Exercise 9 - Mechanical Design
Assignment for this week
- Group assignment - make a machine, including the end effector, build the passive parts and operate it manually
- Document the group project and your individual contribution
Forming of group
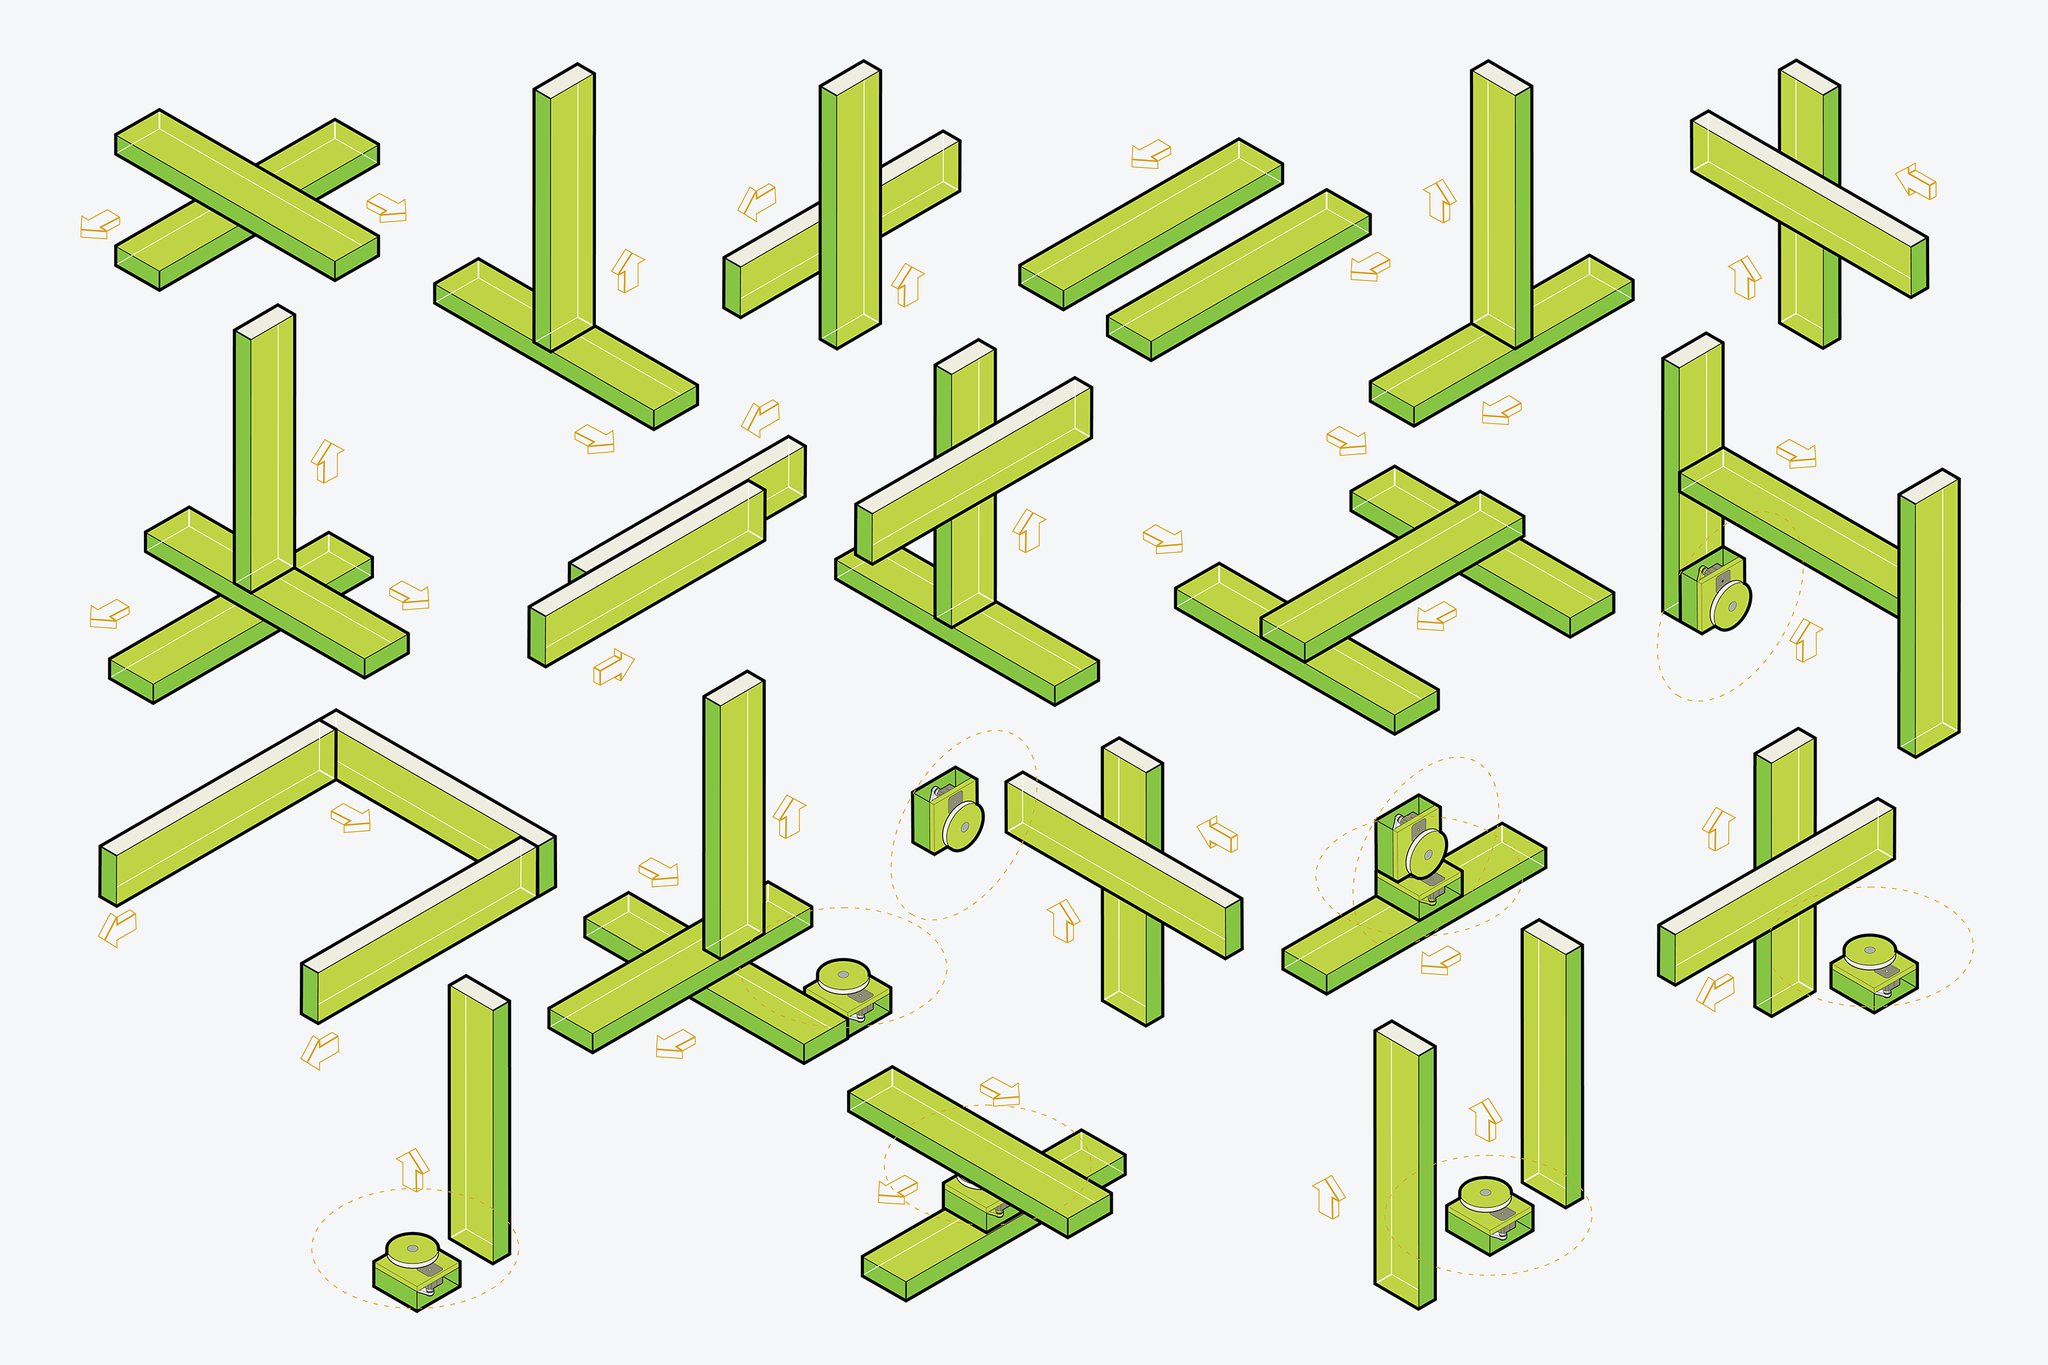
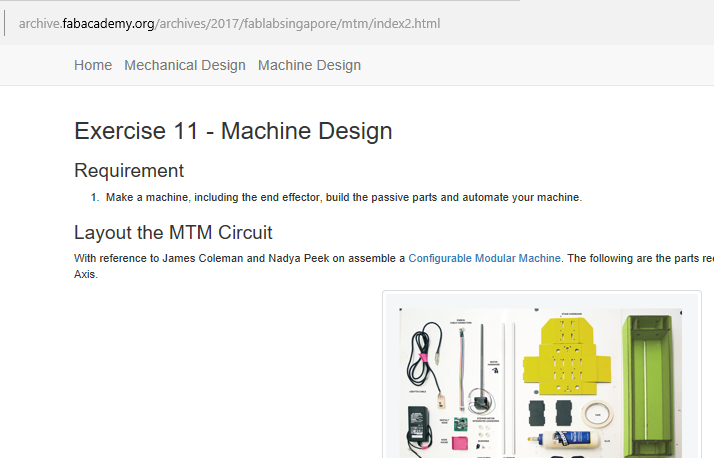
This week assignment is to assemble a configurable modular machine based on the “CardBoard machine” from James Coleman and Nadya Peek. Two weeks later we are to automate it using the Python Programming.
My group mates are Jeff, Louis, Hong Guan and Kenny.
Assess the MTM Group Page.
Planning
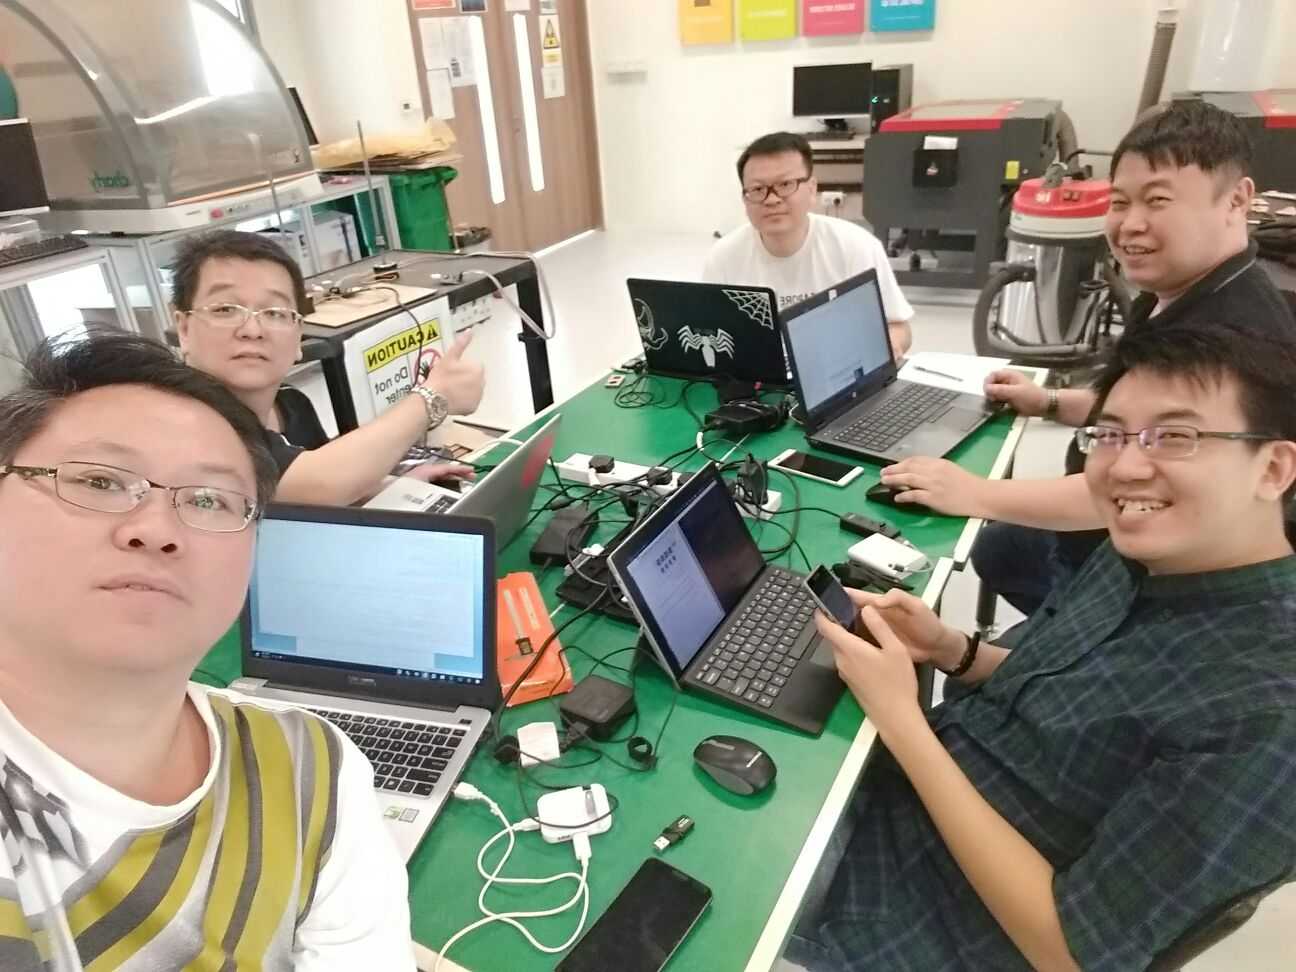
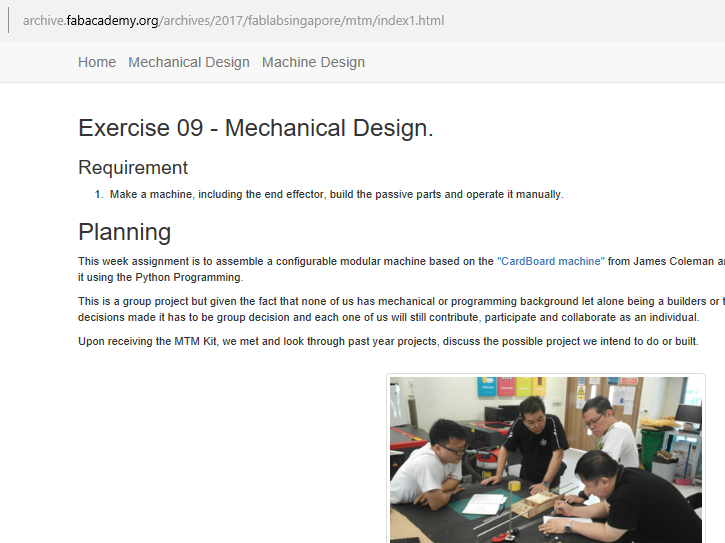
Our group meet and brainstorm the possible project we intend to do or built.
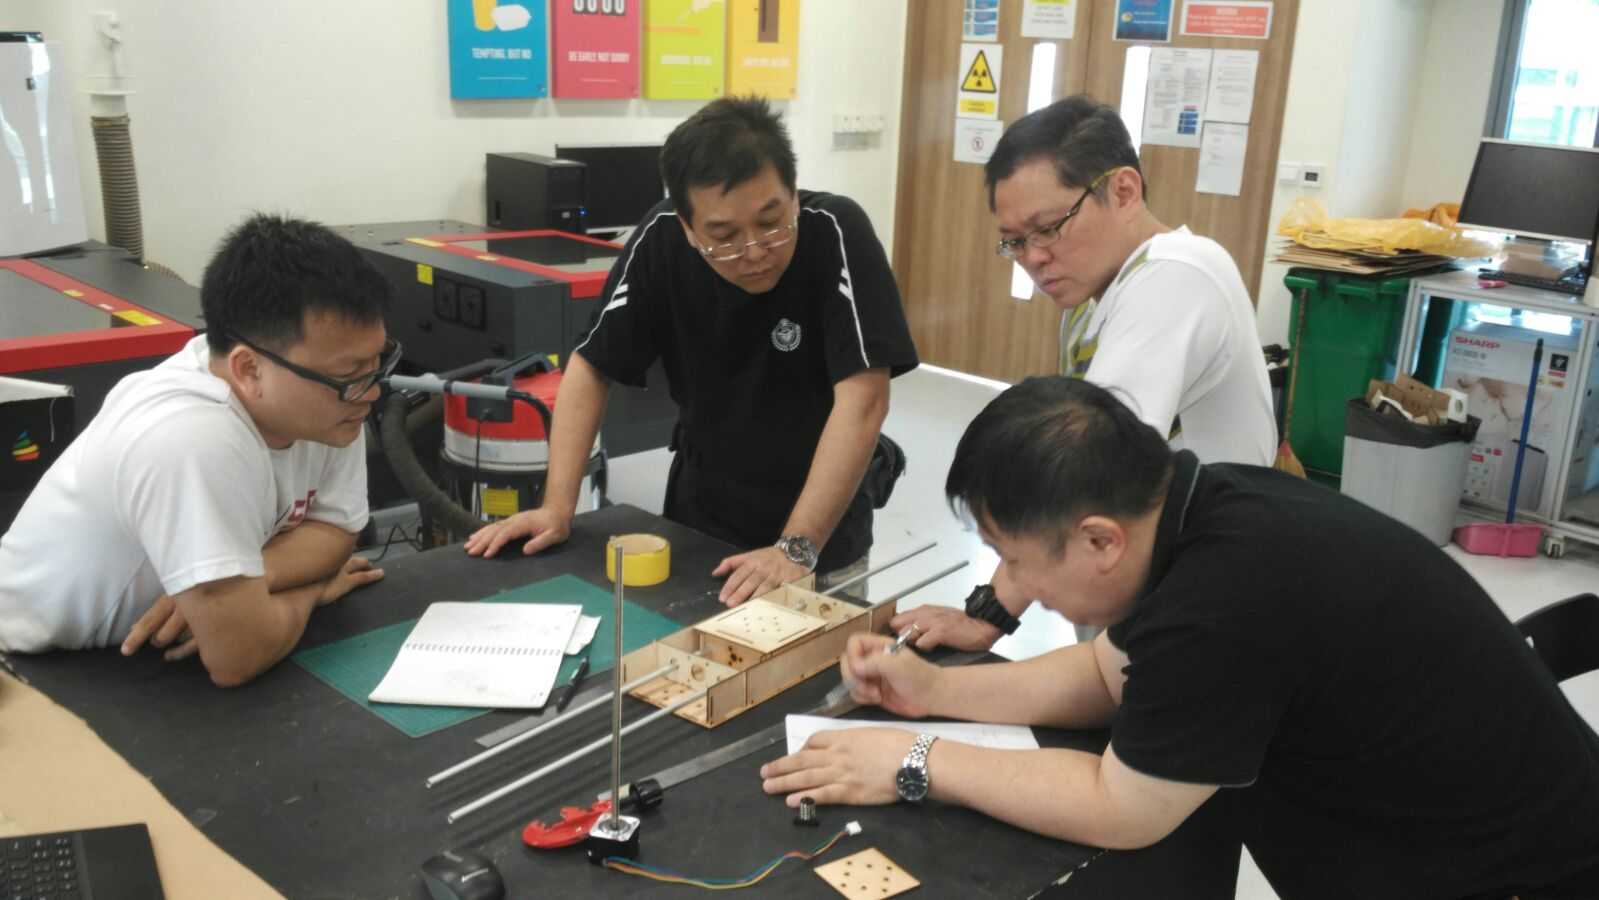
After much discussion, we decided to build a 3-axis plotter Machine.
Workload Distribution
As this is a group project that spread over 2 weeks (22 Mar 2017 - 5 Apr 2017), we have decided to split up the workload as follows for the mechanical design:
- Study the suitability of using the Cardboard or Plywood for housing - (Ngiap Peng/Jeff/Louis/Hong Guan/Tiang Seih)
- Design and Lasercut the Paper/Cardboard/Plywood housing - (Jeff/Louis)
- Design and Lasercut the module frame body - (Jeff/Hong Guan)
- Make and Mill the Electronic Parts - (Jeff/Tiang Seih)
- Luggage design - (Jeff)
- Explore the Gestalt Framework - (Ngiap Peng/Tiang Seih)
- 3D design & Print the Pen Holder - (Ngiap Peng)
- Connecting and Testing the Stepper Motor - (Hong Guan/Louis)
- Assemble the housing and test with the Stepper Motor - (Ngiap Peng/Jeff/Louis/Hong Guan/Tiang Seih)
- Documentation
- Creating/Updating the Group and Mechanical Design Page - (Tiang Seih)
- Photographer - (Hong Guan)
- Videographer - (Louis)
My contribution
In this group project on mechancial design, I was involved in the following area:
- Study the suitability of using the Cardboard or Plywood for housing as a group
- Make and Mill the Electronic Parts
- Explore the Gestalt Framework
- Assemble the housing and test with the Stepper Motor as a group
- Documentation - Creating/Updating the Group and Mechanical Design Page
Make and Mill the Bridge Board
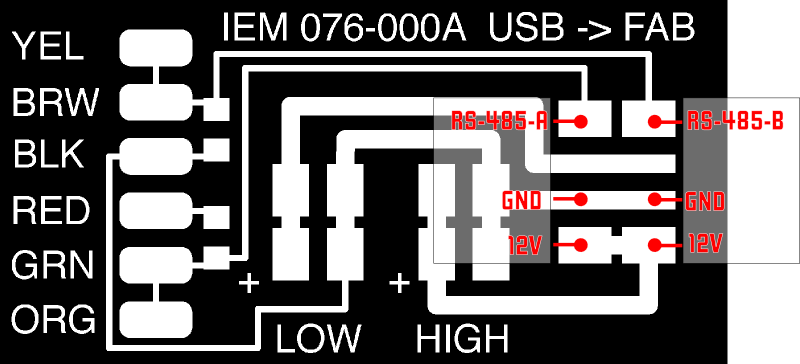
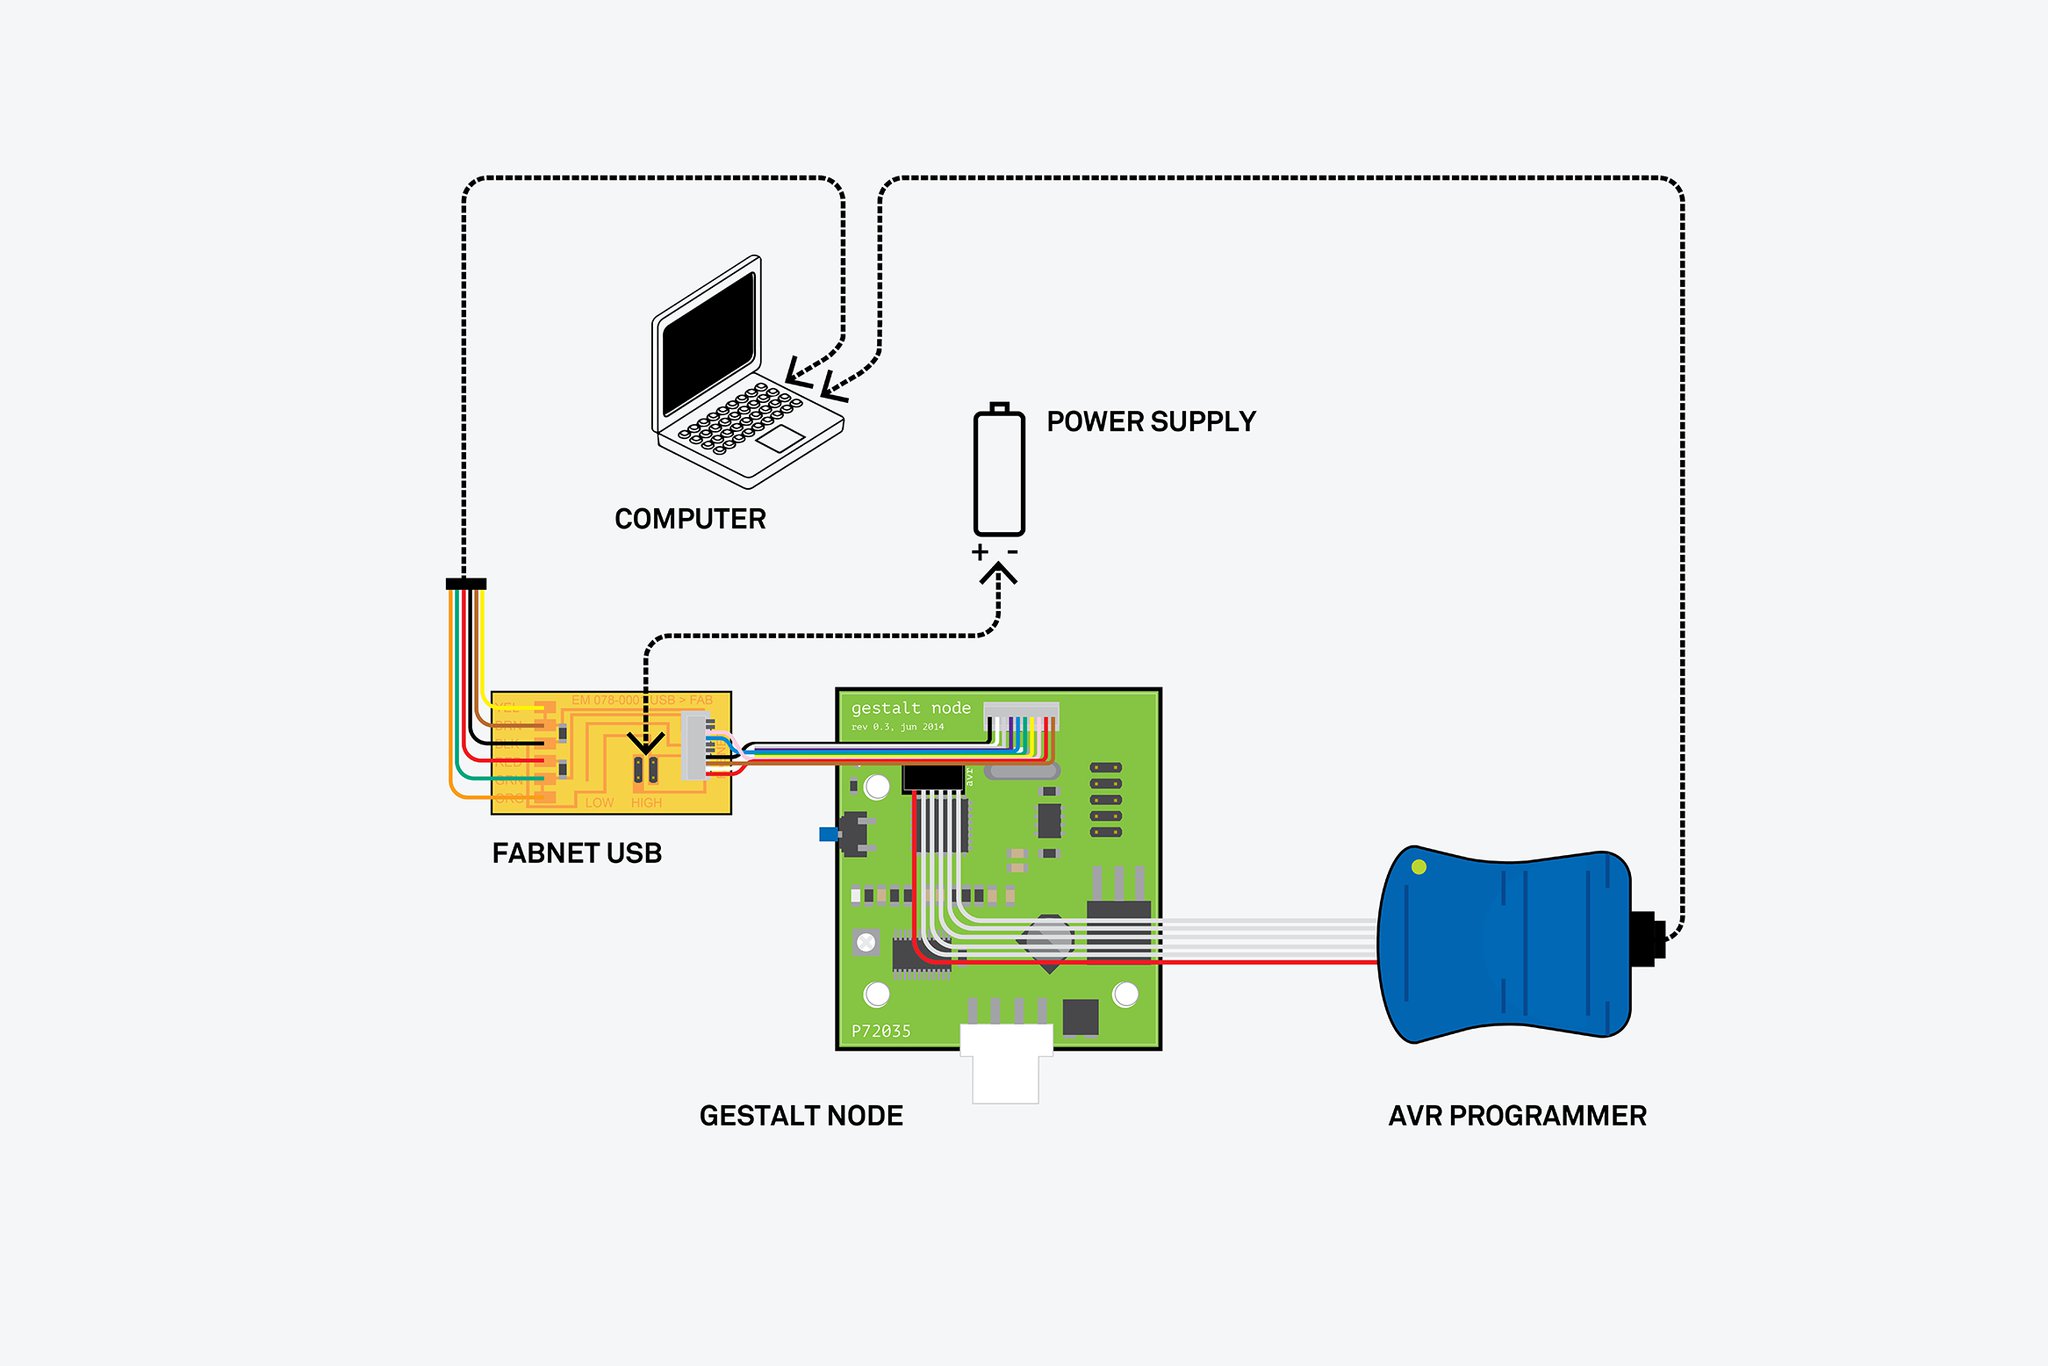
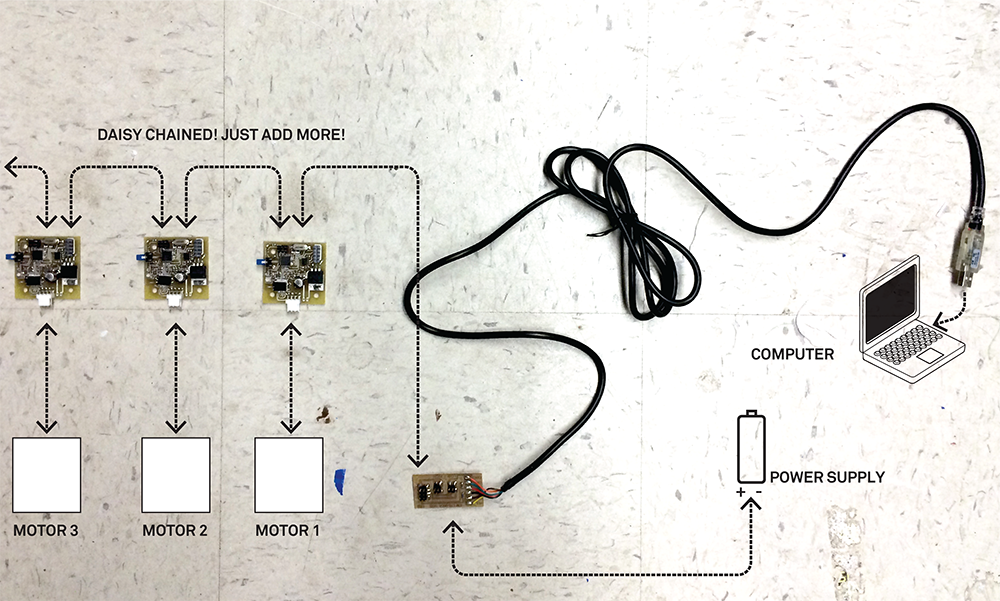
We need to mill and make the brige board that connect to the FABNET. The FabNet is a multi-drop network, meaning that multiple modules (a.k.a. nodes) share a single set of communication wires. Signaling is differential based on the RS-485 specification. Each node is assigned a four-byte IP address which uniquely identifies it over the network.
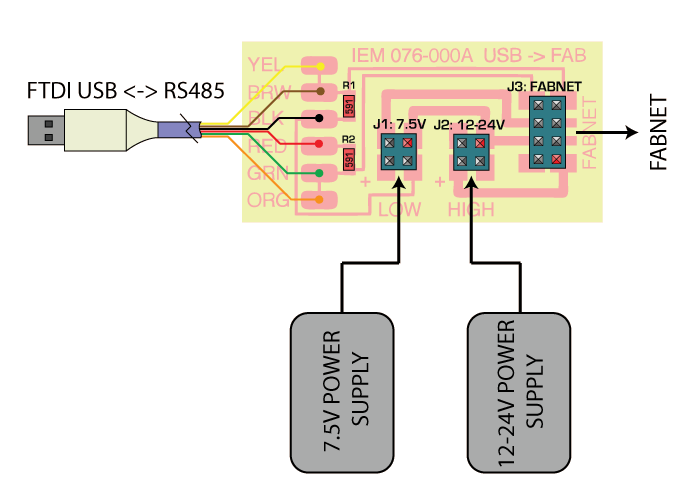
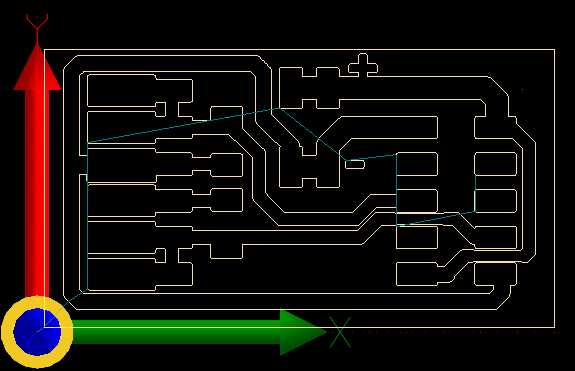
The bridge board is necessary as it will supply voltage to the cards, allow communication between the Fabnet and the computer. It's schematic and layout can be downloaded at this site.
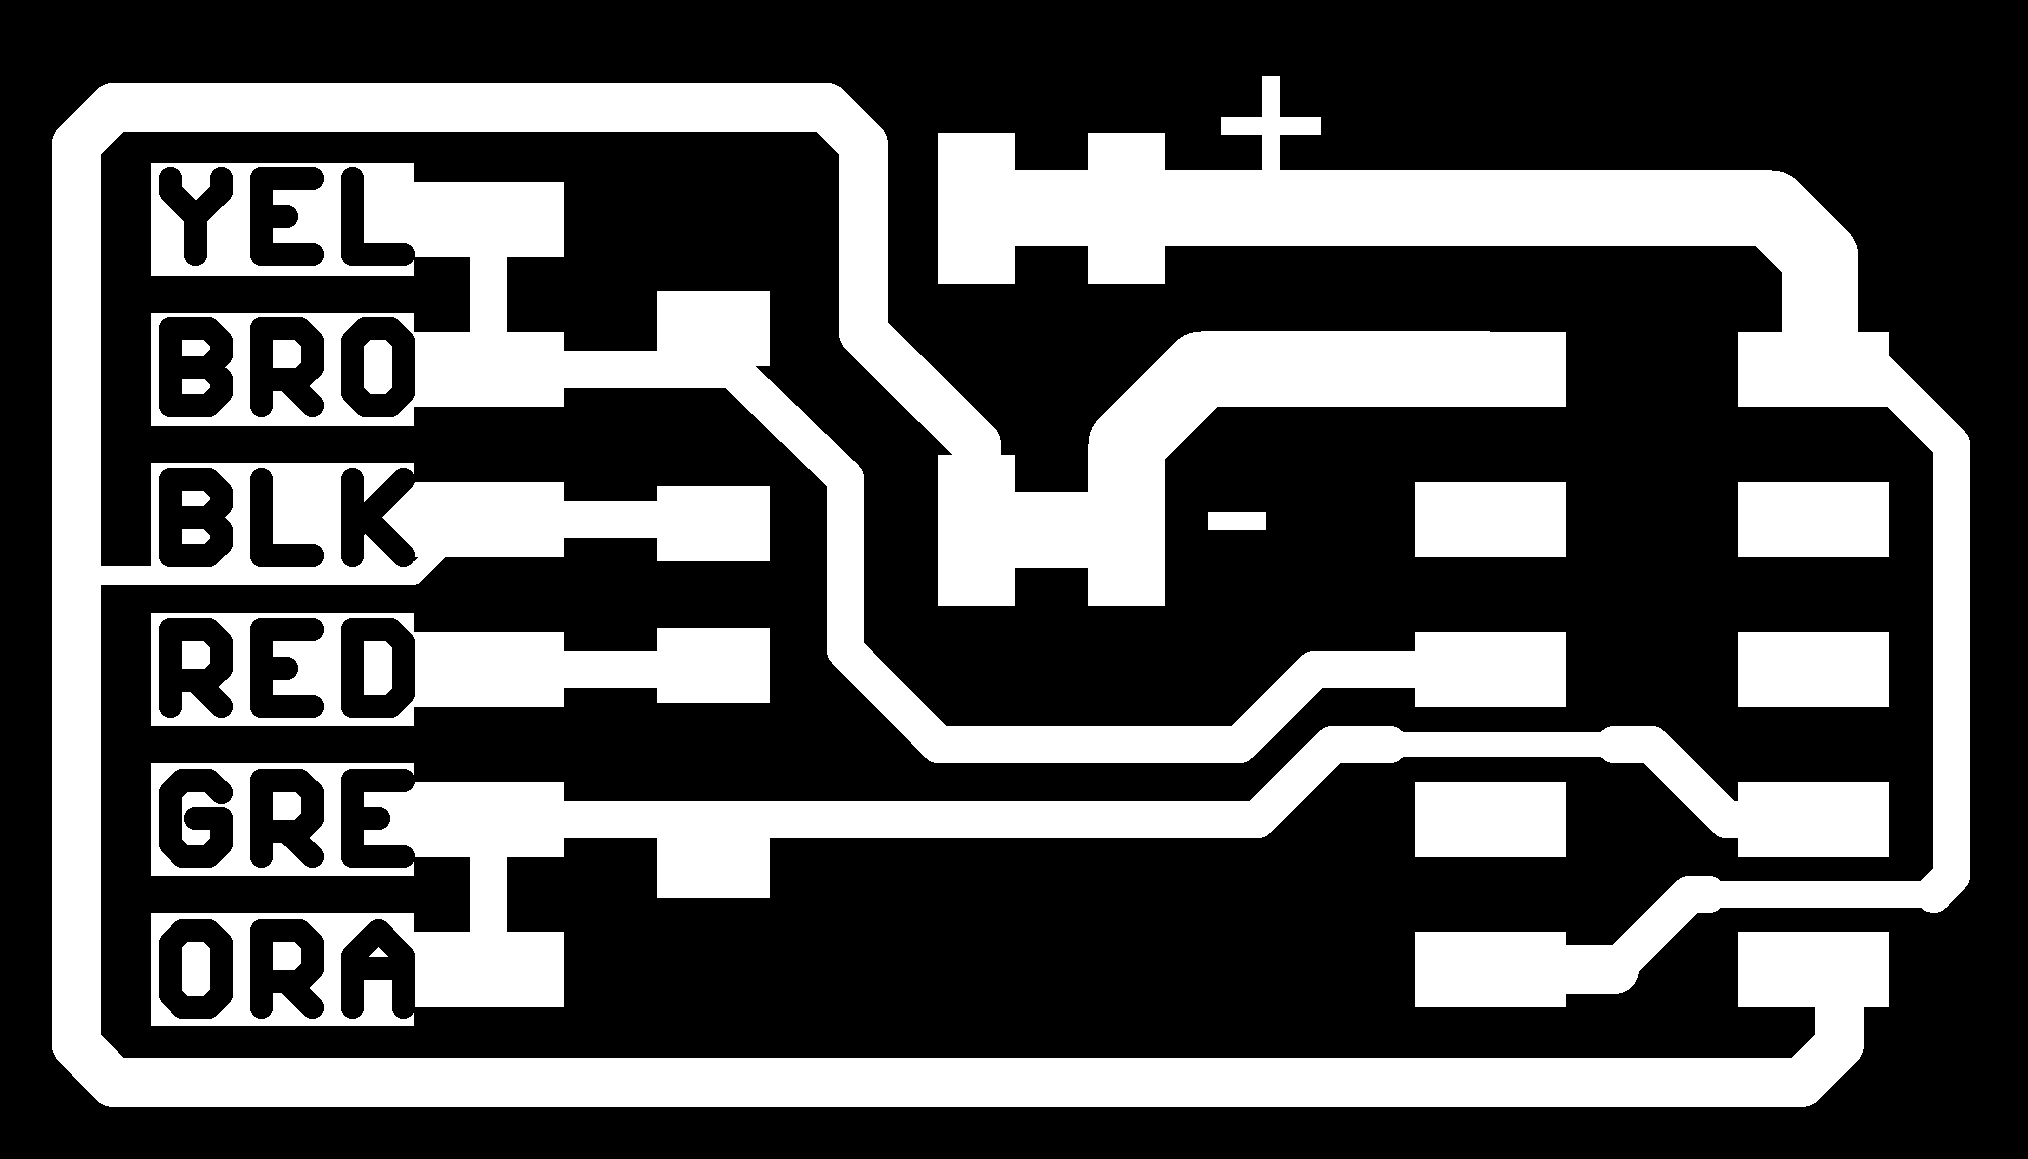
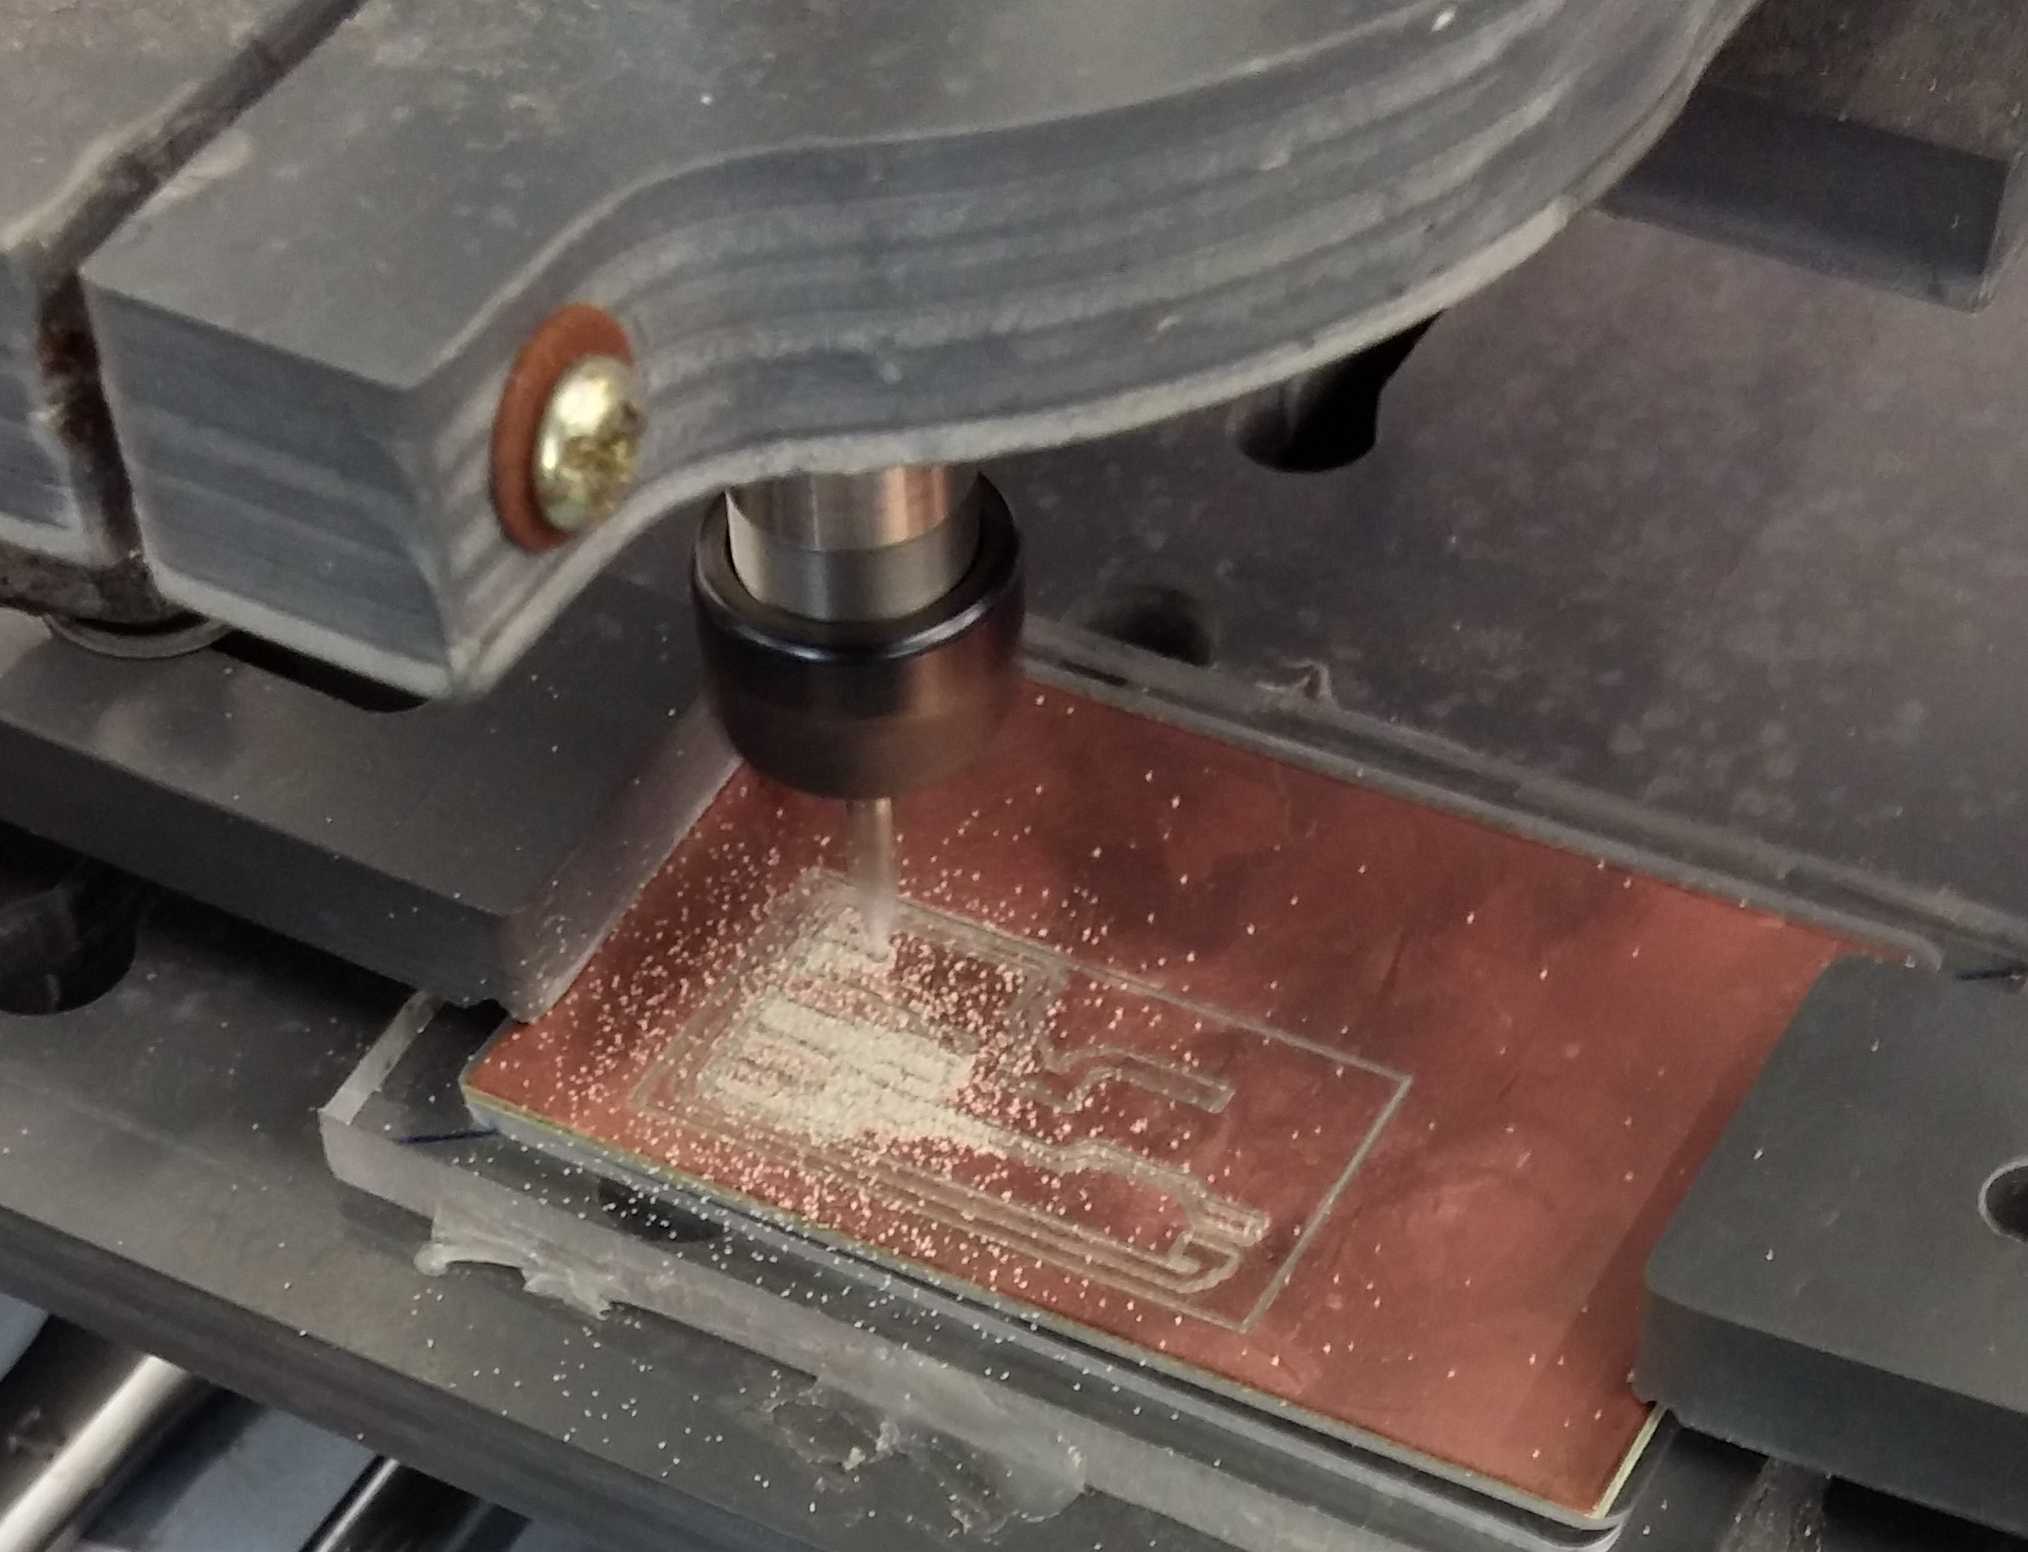
With the board layout, go to Eagle > Run ulp > Create *.etch file to be mill using the CNC USB Controller software comes with the milling machine PCB2020B.
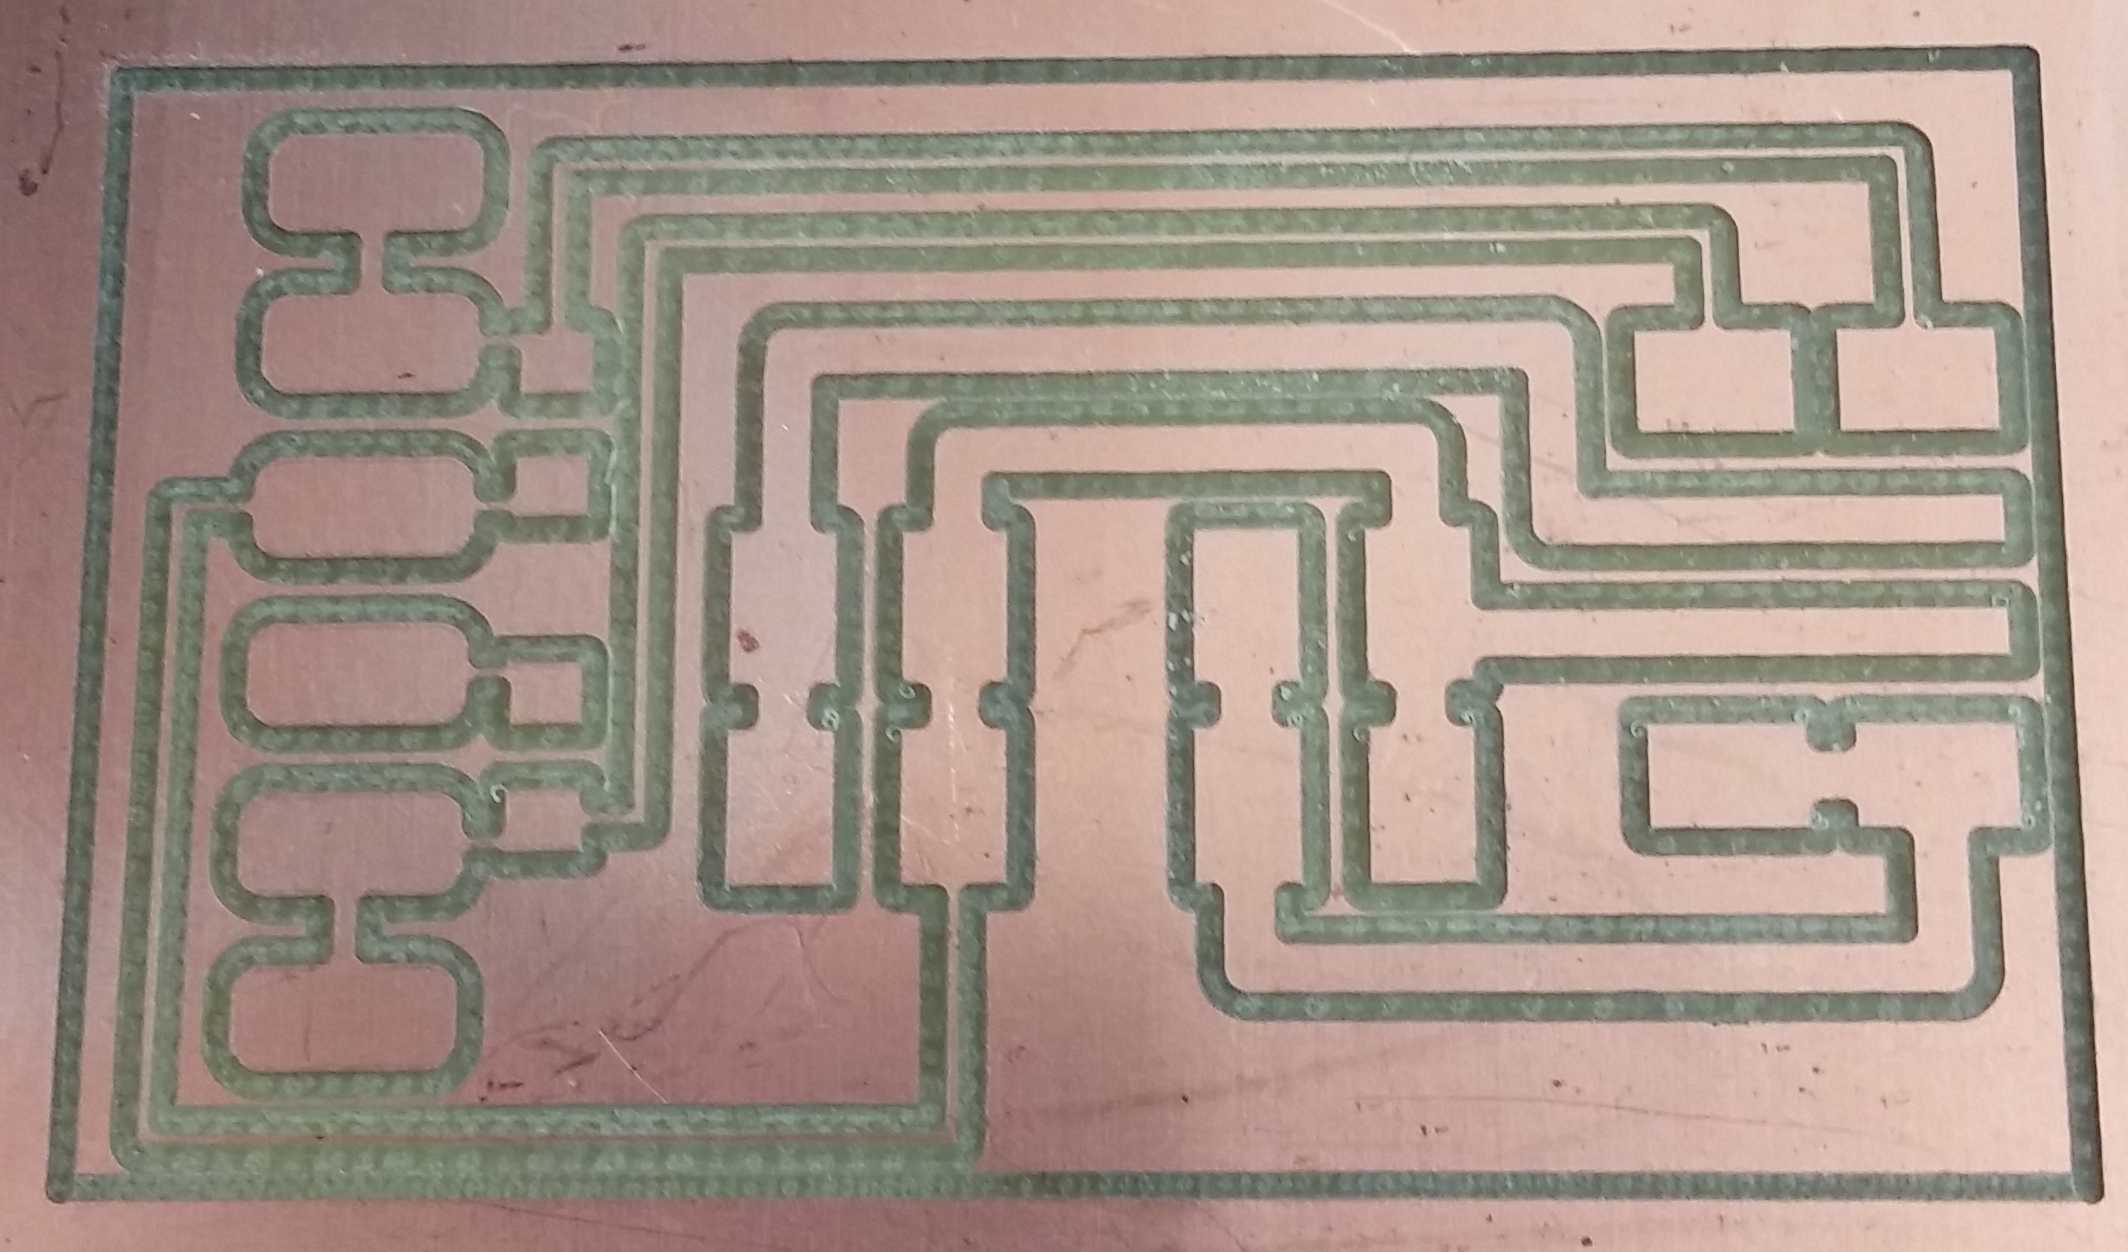
After milling out the board, was told by local instructor to use the design by Bas instead as it allows you to use a straight through ribbon cable.
To make the board we need the following components
- One 2x5 pin connector
- 1 x 4 pin connector
- 2 x 600 Ohm resistors
- 1 x 6 pin connector
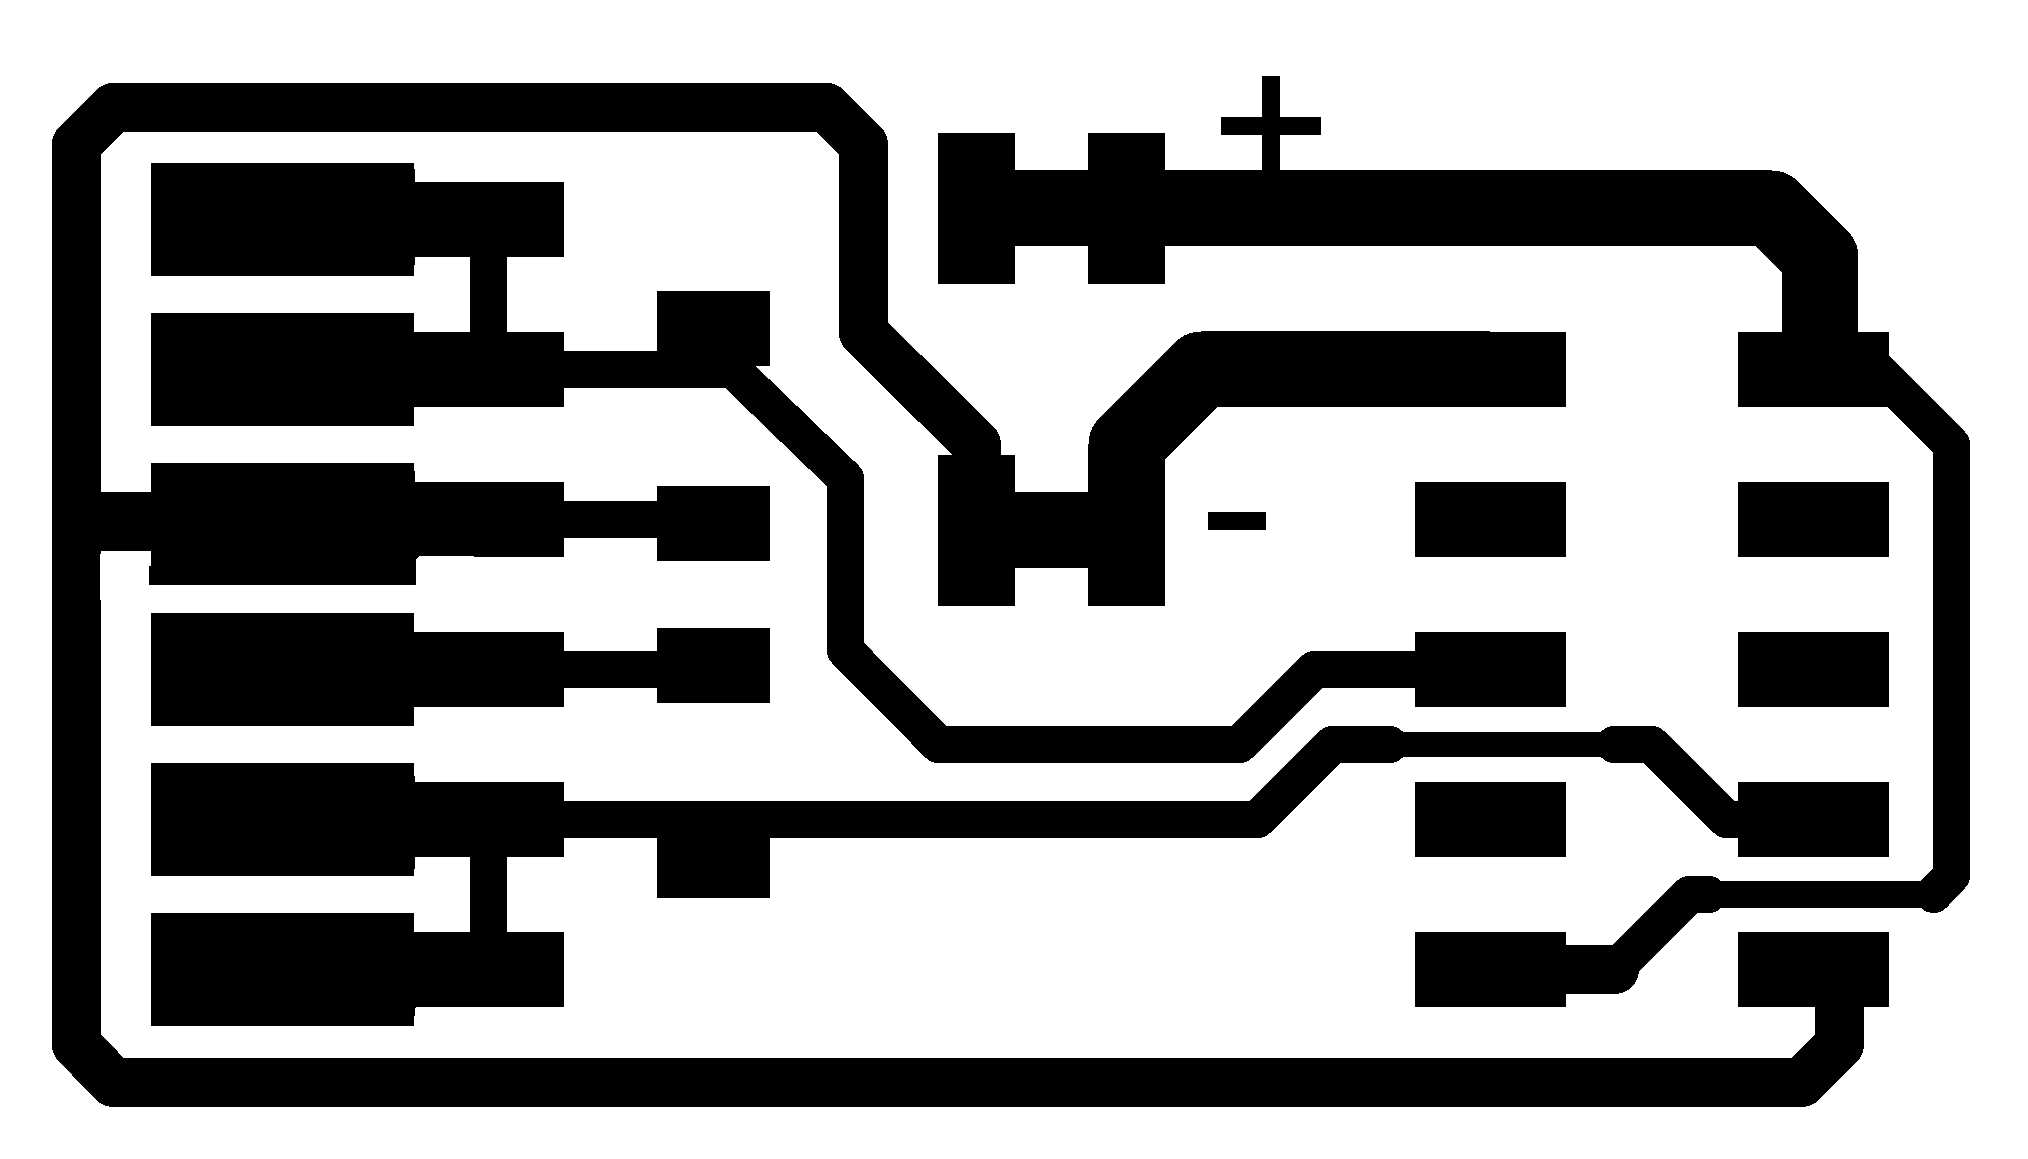
We made some modification by removing the text and reduce the track. Upon milling the board, proceed to solder the components onto the bridge board. Realise that the PADS on the board is too big and the components legs were too thin. This is especially so for the 2x5 Pin connectors. The connectors have to be placed in a such position whereby it doesnt create a short circuit between the GND and VCC. Have to re-work and resolder on the connectors a few times before getting it done.
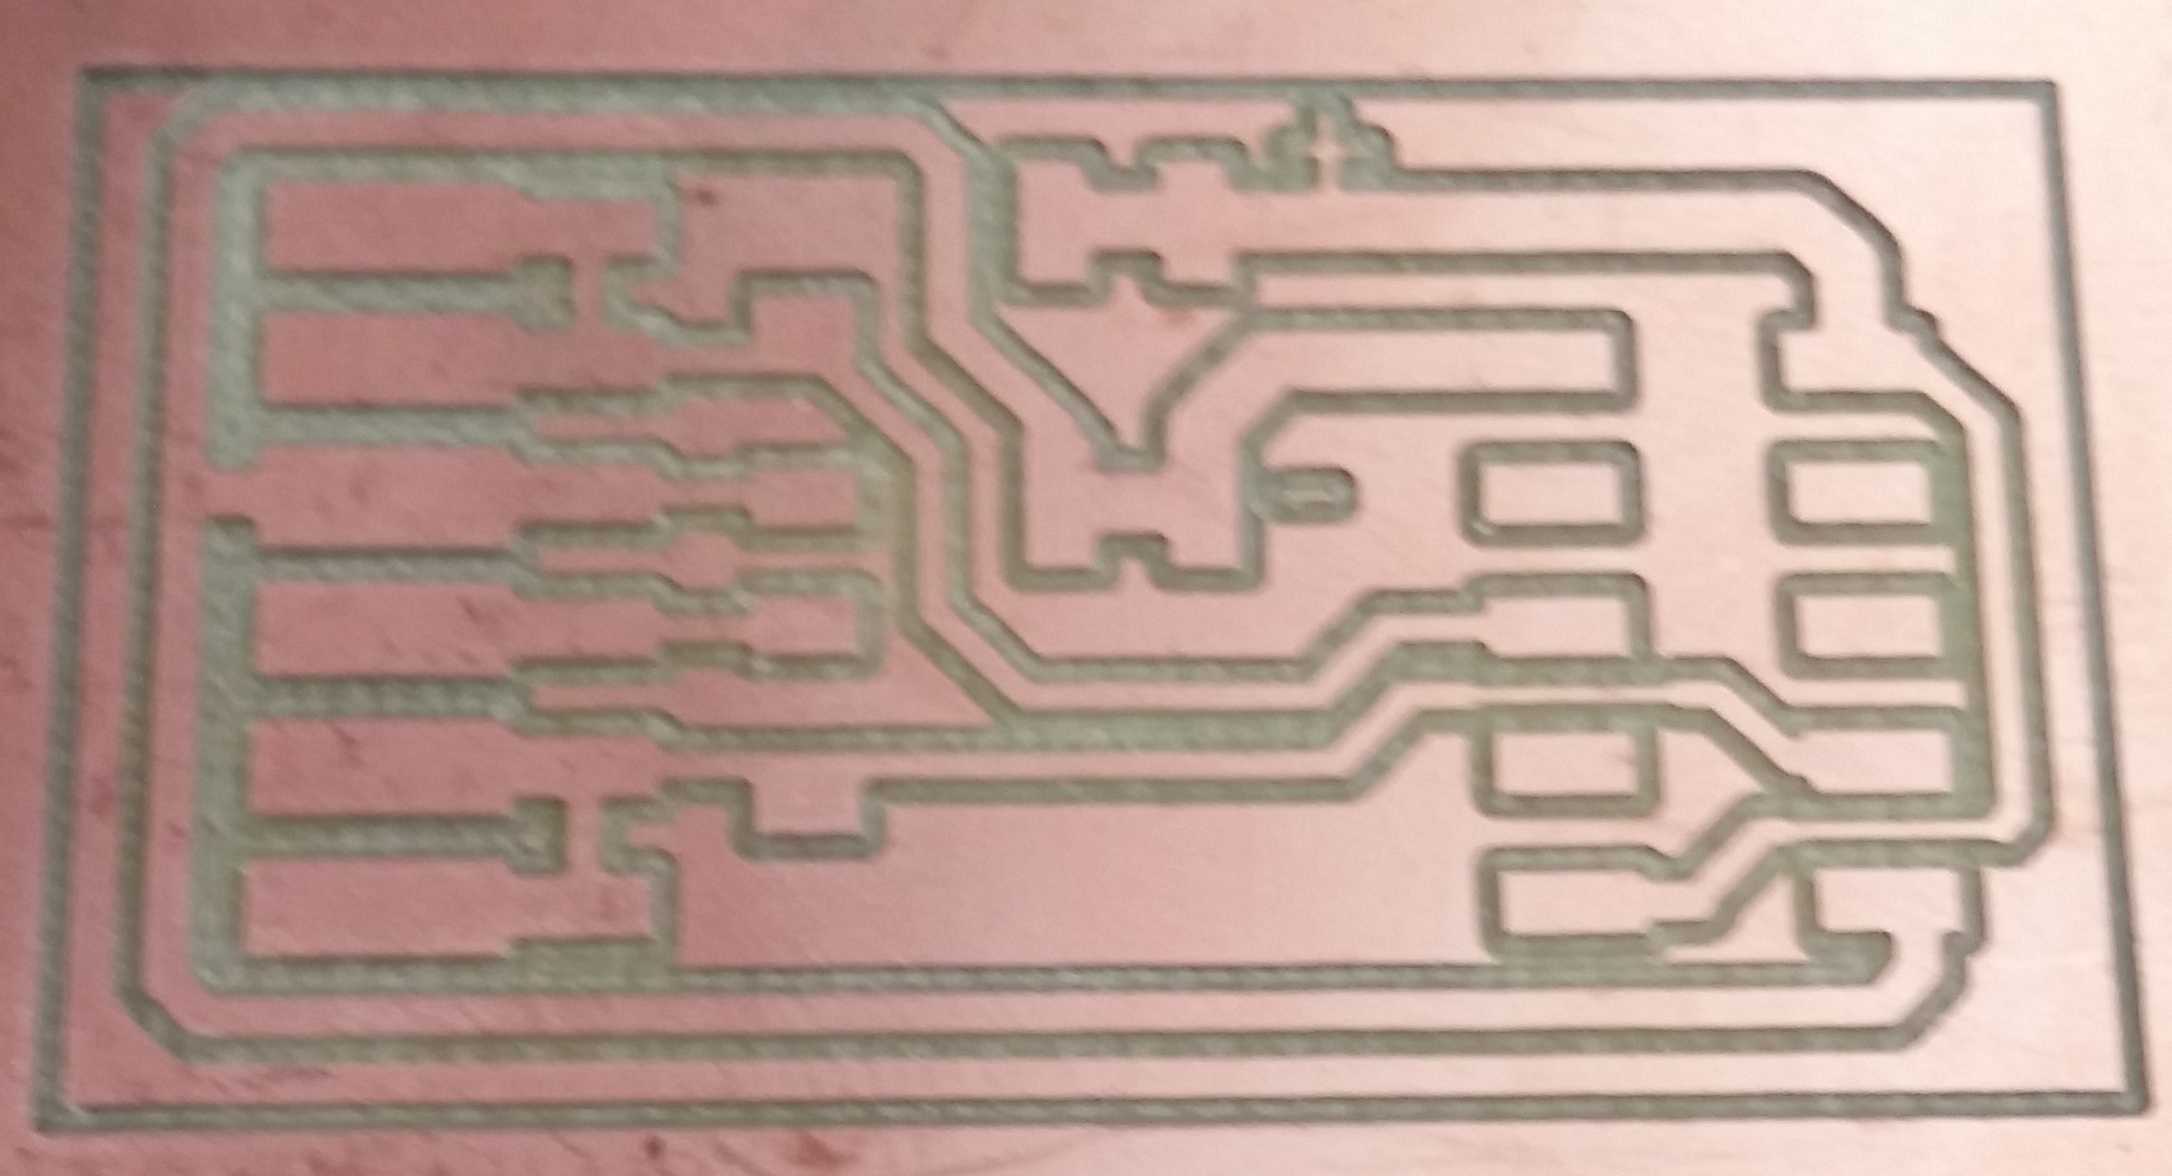
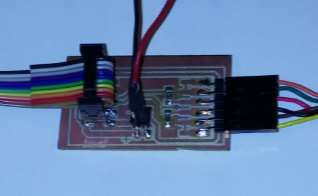
With the mill board ready, proceed to stuff the board and connect up the FTDI cable, we are ready for the next step.
Explore the Gestalt Framework
Gestalt is a framework for building controllers for automated tools. It comprised of an extensible collection of software modules that can be combined in many ways to quickly realize machine controllers. A physical machine comprises a number of electronic and electromechanical hardware components.
A series of physical control nodes provide low-level control of the machine components, and connect to the Gestalt virtual machine via either a direct connection or a network bus. Each physical control node is matched by a virtual node that exposes to the virtual machine the functions needed to control its specific hardware. The virtual machine additionally might contain kinematic definitions, memory of state (i.e. position), machine-level functions (e.g. to move the machine) and external interfaces through which user applications can control the machine. It enables you to import your machines as Python modules, and makes it easy to connect machines to browser-based user interfaces.
The following tutorial gives an idea for programming for Gestalt nodes.

Documentation - Creating/Updating the Group and Mechanical Design Page
I look through some past year archive on MTM Project. Decided to adopt the same design page we have used for our own personal website.
The Group Page will have a main page - index.html where it will show our Group MTM Poster and also our Video Presentation. At the top there will be a menu which show Home, Mechancial Design and Machine Design.
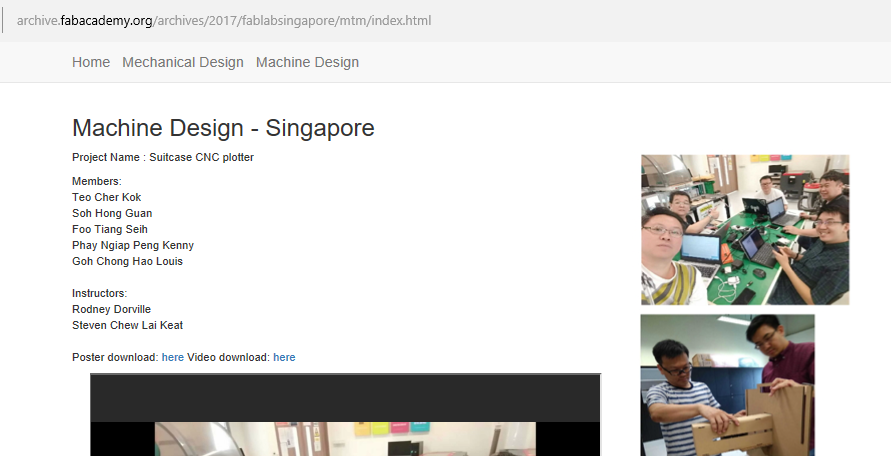
The Home tab will be linking back to the Home Page for our FabLab Singapore which shows who are the instructors, participants for Fab Academy 2017 and also our MTM Group Project detail and URL link.
The Mechanical Design tab will bring us to the week assignment on how the group make the machine and operate it manually.
Finally the Machine Design tab will then link us to the week assignment whereby how the group automate the machine.
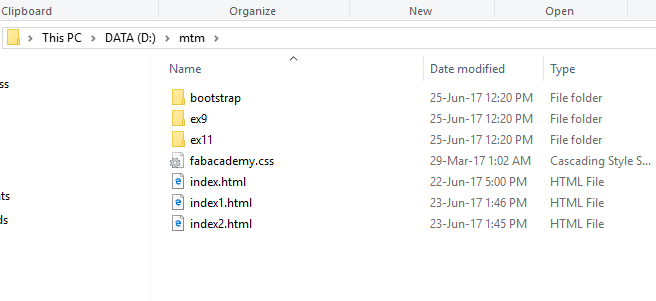
Both the Mechanical and Machine Design will have a page with index1.html and index2.html respectively. In order to show the above menu tab exactly how we will see on our personal website, I will need to place the bootstrap at the mtm root folder.
To edit and format all my content, I use Sublime text 3. As for photograph taken, I will be using PicPik to crop the images.