
Assignment
* Read a microcontroller data sheet
* Program your board to do something, with as many different programming languages and programming environments as possible
* Extra credit: experiment with other architectures.
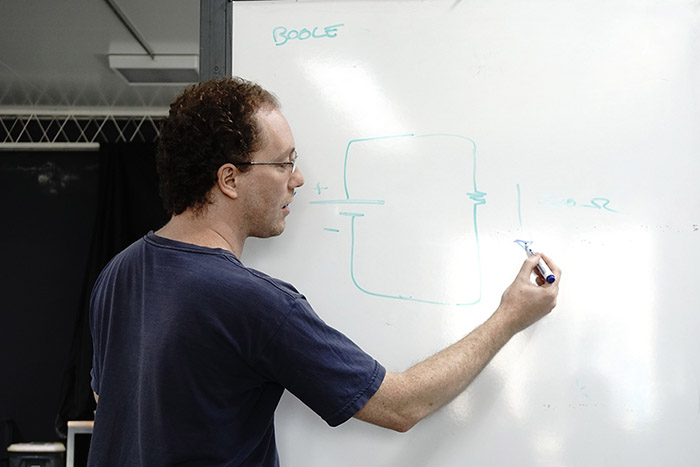
Neil's class Summary
Boolean operations ...
This week's weekly class at
Sinergia Tech
was led by
Pablo Gindel
, our teacher and guru in programming and electronics. We went from abstract concepts and physical laws that regulate the behavior of electrical energy to prototyping and programming a simple circuit using an
Arduino UNO board
.
 We learned to recognize the basic differences between the
different architectures
and the computing capabilities each offers. Arduino UNO has an architecture of 8 Bits, works at a speed of 16Mhz and has an internal memory of 32Kb while a regular desktop PC, for example, has a 64-bit architecture (8 times more powerful than Arduino), can Processing at a speed of 3.4Ghz (3400Mhz) and has an internal memory of 32Mb (32000Kb). This comparison provides a quick view of the actual capabilities of each tool.
We learned to recognize the basic differences between the
different architectures
and the computing capabilities each offers. Arduino UNO has an architecture of 8 Bits, works at a speed of 16Mhz and has an internal memory of 32Kb while a regular desktop PC, for example, has a 64-bit architecture (8 times more powerful than Arduino), can Processing at a speed of 3.4Ghz (3400Mhz) and has an internal memory of 32Mb (32000Kb). This comparison provides a quick view of the actual capabilities of each tool.
We talked about the difference between analog and digital:
Boolean
concepts, their symbology and the phenomenon of
aliasing
in analog readings.
We then sketch, prototype and program - with Arduino IDE - some simple circuits to observe the concepts in the field.
 Great class Pablo! Thank you very much!
Programming the Hello board
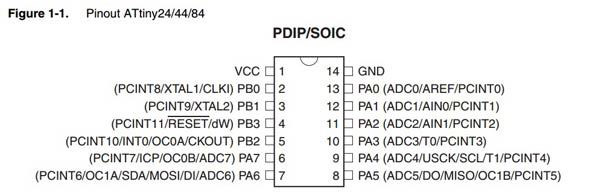
After a quick reading of the
ATiny44A data sheet
and to consult some sites of
students
of previous years i went straight to program my Hello board.
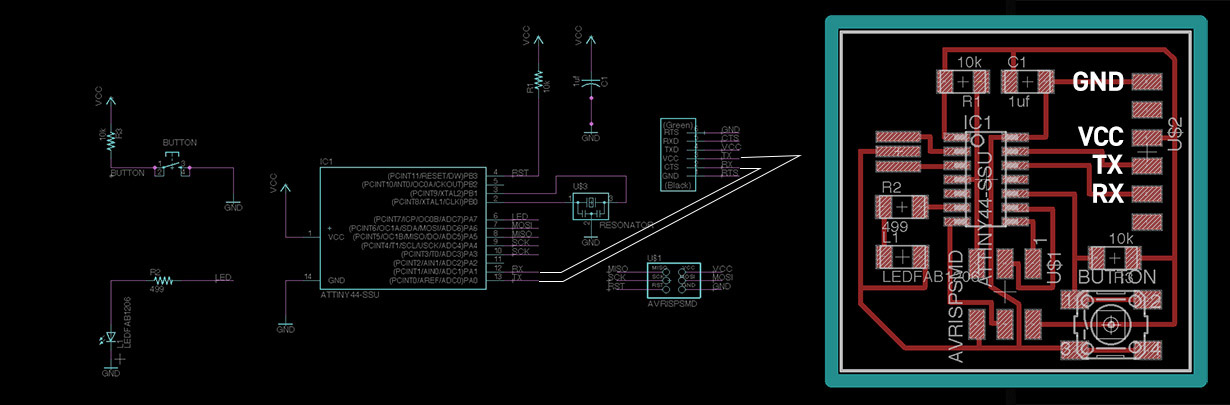
It is very important to handle the nomenclature of the pins and their correspondence with Arduino IDE.
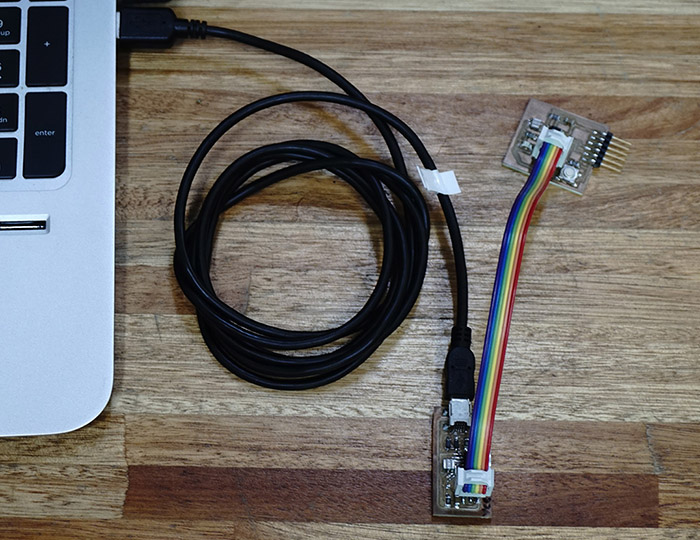
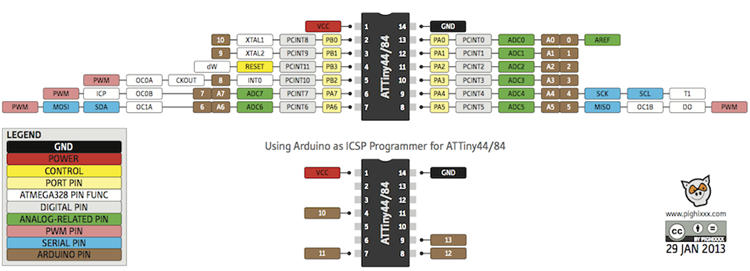 These are the appropriate connections for programming: we must connect the Hello board to our FabISP and from there to the pc using a USB cable.
 It is not possible to program the board using the FTDI connector, i think that it only allows monitoring the status of the board. If you carefully observe the design you will see that we just have connections to VCC, GND, TX and RX.
 At the beginning I had many problems to program it using Ubuntu: both running on a virtual machine and running directly from boot. I could not get Ubuntu to recognize and be able to write through the USB port to which I plugged my board. After several failed attempts, I decided to program it directly from
Windows 7.
At the beginning I had many problems to program it using Ubuntu: both running on a virtual machine and running directly from boot. I could not get Ubuntu to recognize and be able to write through the USB port to which I plugged my board. After several failed attempts, I decided to program it directly from
Windows 7.
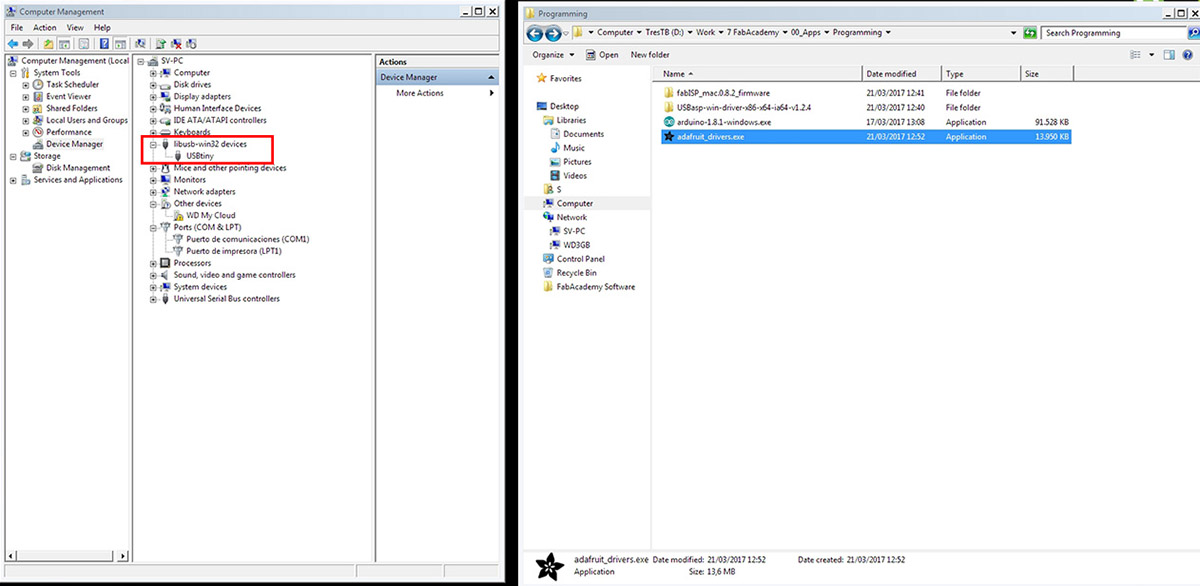
The first thing was to install the driver for the USBTinyISP card to work. I recommend doing it
this way
.
Verify that the device is properly installed from Device Manager.
 Then download and install
Arduino IDE
.
Then download and install
Arduino IDE
.
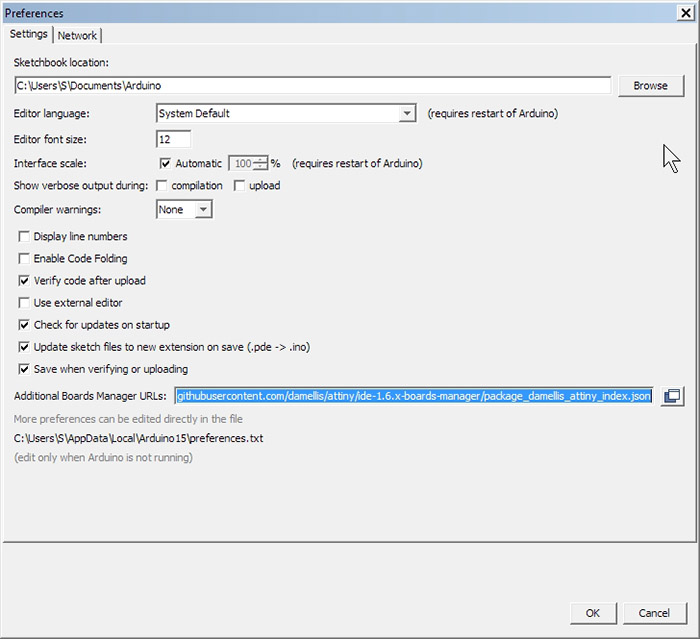
Now we must add the Attiny44a microcontroller to the list of chips that Arduino can program: under File/Preferences go to "Additional Boards Manager URLs" and paste the following route:
https://raw.githubusercontent.com/damellis/attiny/ide-1.6.x-boards-manager/package_damellis_attiny_index.json
For more information about configuring the Arduino IDE to program oher microcontrollers please check
this link.
.
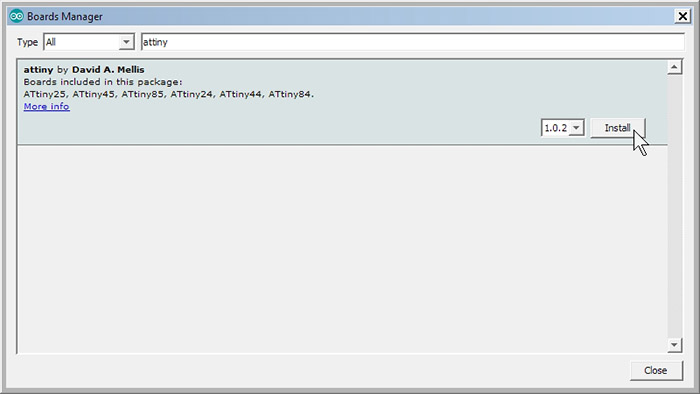
 Then, under Tools/Boards Manager .. search for "attiny" and install it.
 Now we set the ATTiny 44 board, the clock to 20Mhz, the port (COM3 for me), the programmer to USB tinyISP and burn the bootloader.
 I did several tests uploading differents Arduino sketches to the board.
1. Blinking LED (File / Examples / 01.Basics / Blink)
2. Button (FIle / Examples / 02.Digital / Button)
3. Button toggling from LOW to HIGH (more information
here
).
Download the Arduino sketches.