
Assignment objectives:
* Redraw the echo hello-world board,
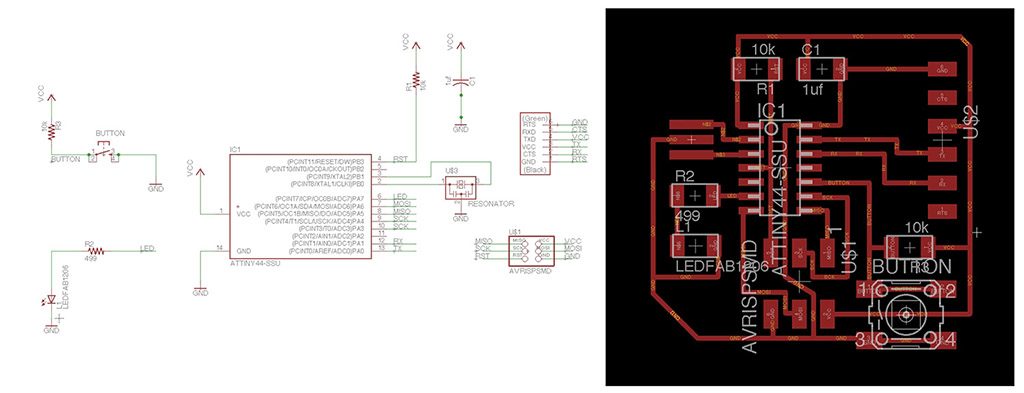
add (at least) a button and LED (with current-limiting resistor)
check the design rules, make it, and test it
Neil's class Summary
Designing in Eagle
We went straight forward to the most used software at
Sinergia Tech
for electronics design:
Eagle
from Autodesk.
Carolina Vignoli
, our local instructor, gave us some lessons on Eagle, as: adding
Fablab component library
, schematic and board views, basic commands and tools.
 For using components of Fablab component library always refer to
Fab Inventory spreadsheet
which contains a list of all parts with codes and suppliers, and check with the datasheet of each component.
For using components of Fablab component library always refer to
Fab Inventory spreadsheet
which contains a list of all parts with codes and suppliers, and check with the datasheet of each component.
 We also set up the standard grid size and the clearence distances for DRC checking.
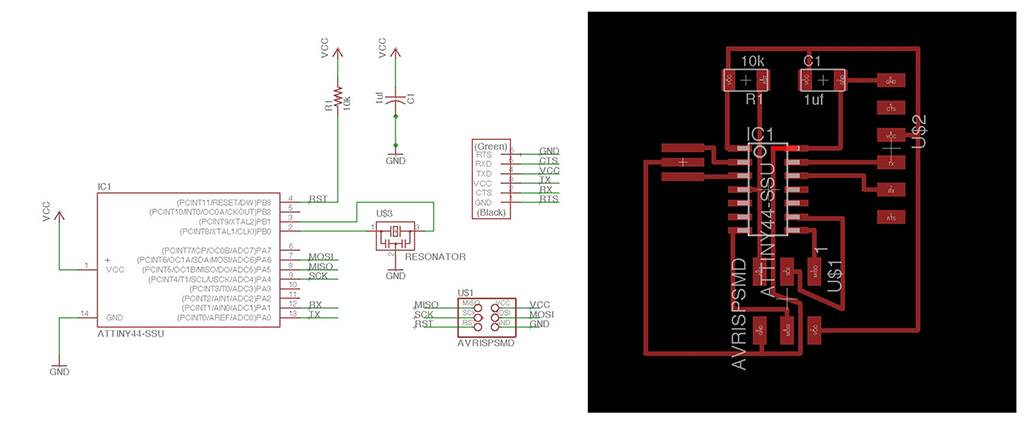
![]() I firstly drawed the original board following the
"Electronics Design - Eagle"
Fabacademy tutorial. Please also check the list of components to use from the above tutorial and don't forget to add a capacitor CAP CER 1UF 50V X7R 10% 1206 (P/N: 445-1423-1-ND)
I firstly drawed the original board following the
"Electronics Design - Eagle"
Fabacademy tutorial. Please also check the list of components to use from the above tutorial and don't forget to add a capacitor CAP CER 1UF 50V X7R 10% 1206 (P/N: 445-1423-1-ND)
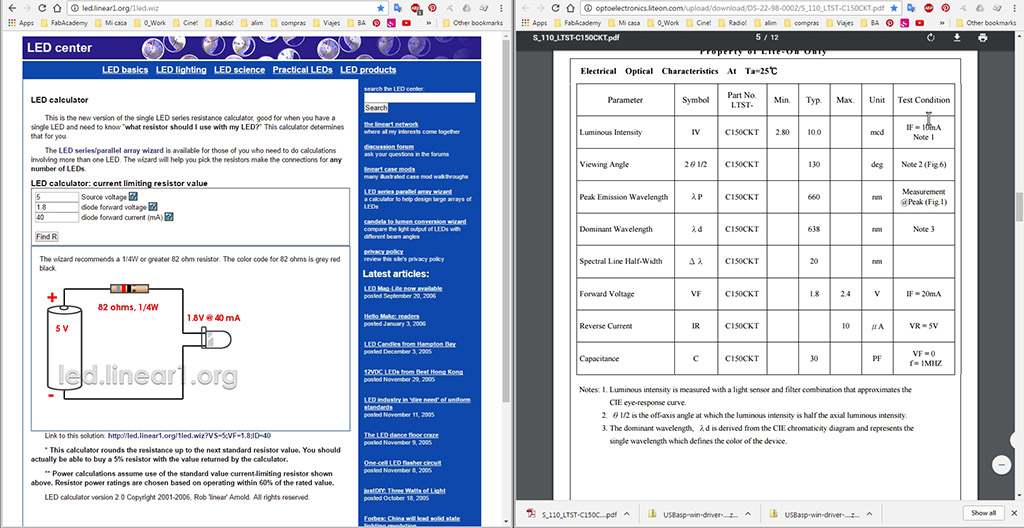
 After that, i calculated the led's resistor ohm value using this
online application
and checking values from
led´s fabricator datasheet
.
After that, i calculated the led's resistor ohm value using this
online application
and checking values from
led´s fabricator datasheet
.
 I added the new components from Fablab library again and redrawed the board.
Download the EAGLE files.
Exporting from Eagle to GCode
For milling the board in
"Gava Milling Machine"
we must export our board in GCode language. We will use
PCB-GCode Release 3.6.2.4
.
After unzipping the files, you must copy the entire content to ULP folder located in the eagle's main program folder:
C:\EAGLE 8.x.x\ulp\
Now in Eagle, open the board view and click on ULP yellow icon ("Run ULP") and search for the file pcb-gcode-setup.ulp. Once on setup window you can set up the values and options for file generation and machine capacities.
 These are the values for using our local machine.
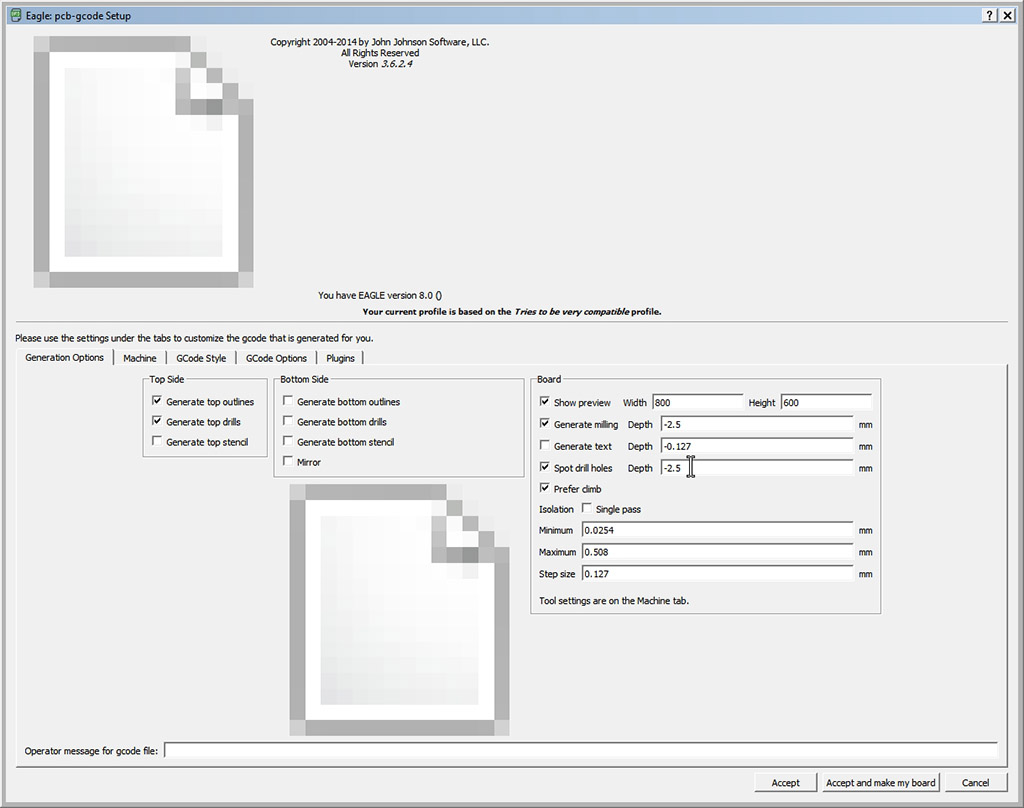
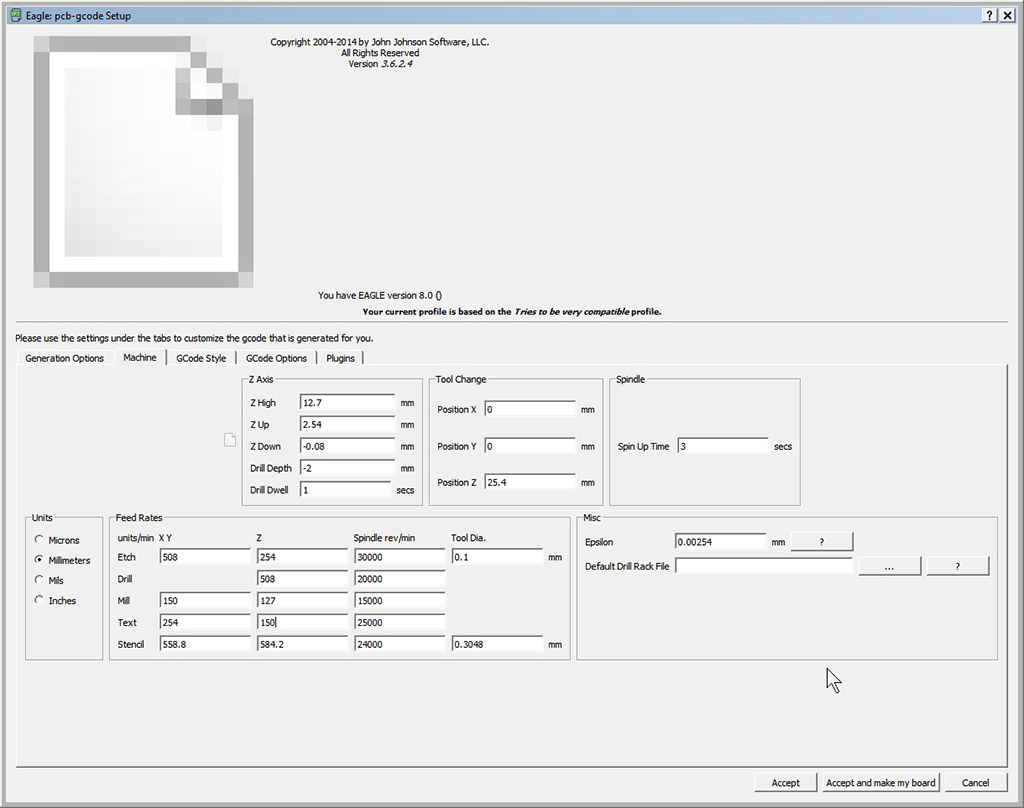 By clicking "Accept and make my board" the values are saved and the app generates several .tap extension files.
* "top" files correspond to the top operations on the board.
* "bot" files correspond to the bottom operations on the board.
Download the TAP files.
Milling & Solering
The solder went fine and here is a short video of it.
Completed!
