networking and communications
This week I try I2C(board did not worked),wifi and Serial bus.
download all files
I2C
first I try I2C.
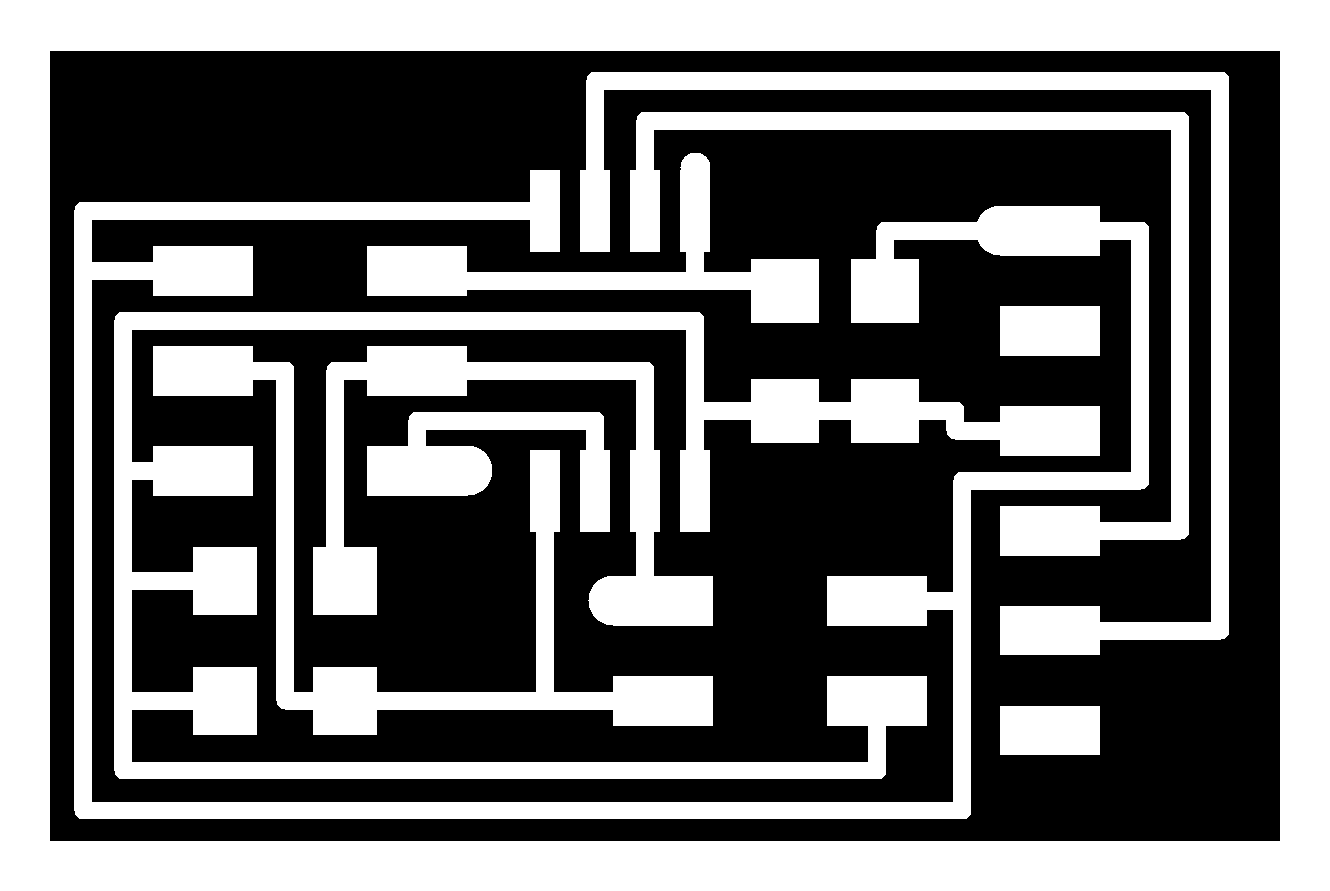
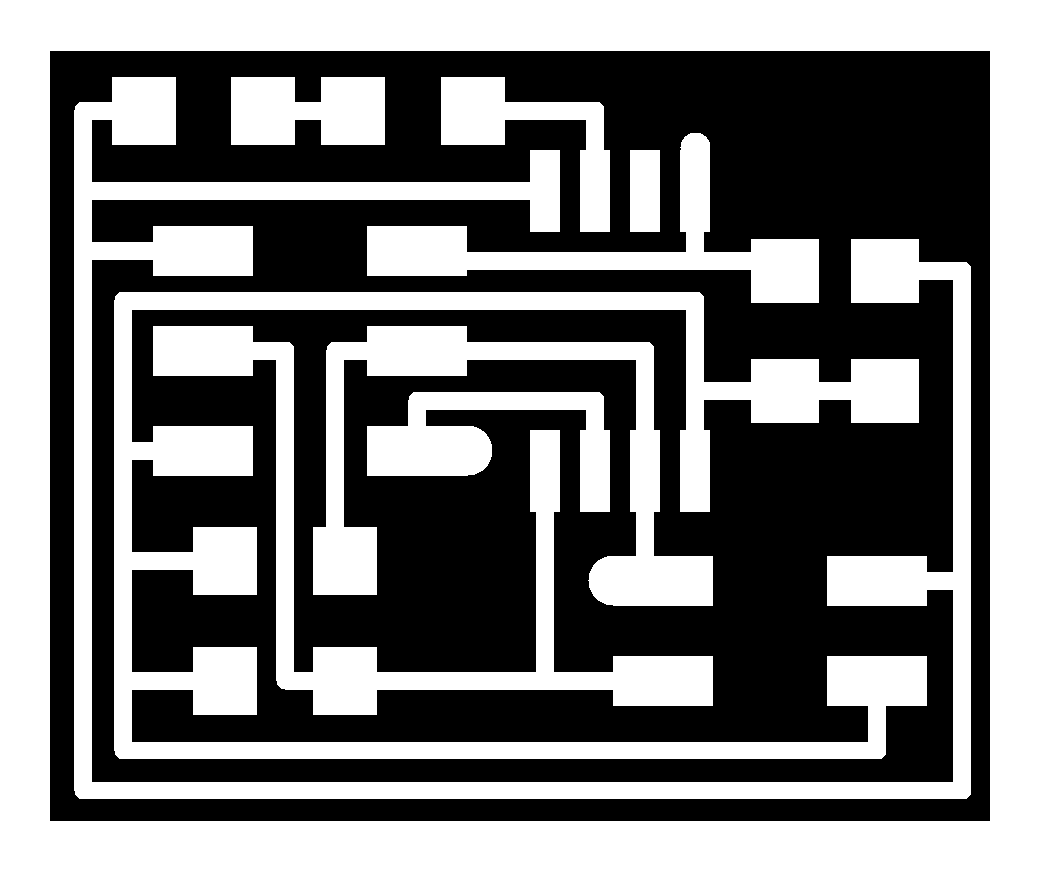
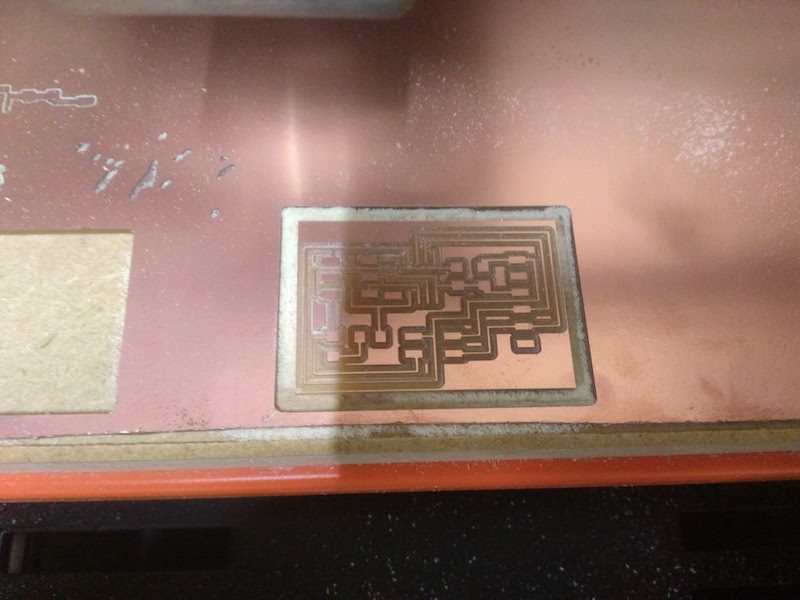
I use hello.I2C.45.bridge.(trace interior) and hello.I2C.45.node(trace interior)
making board
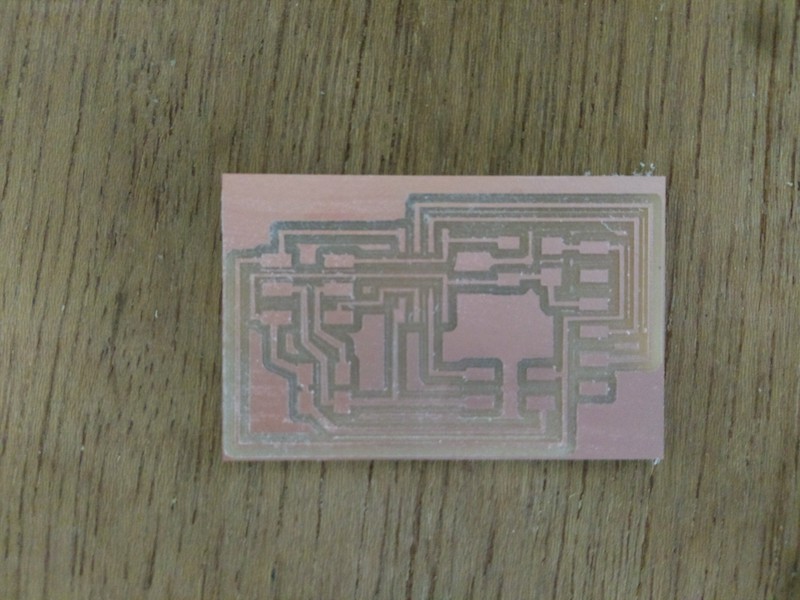
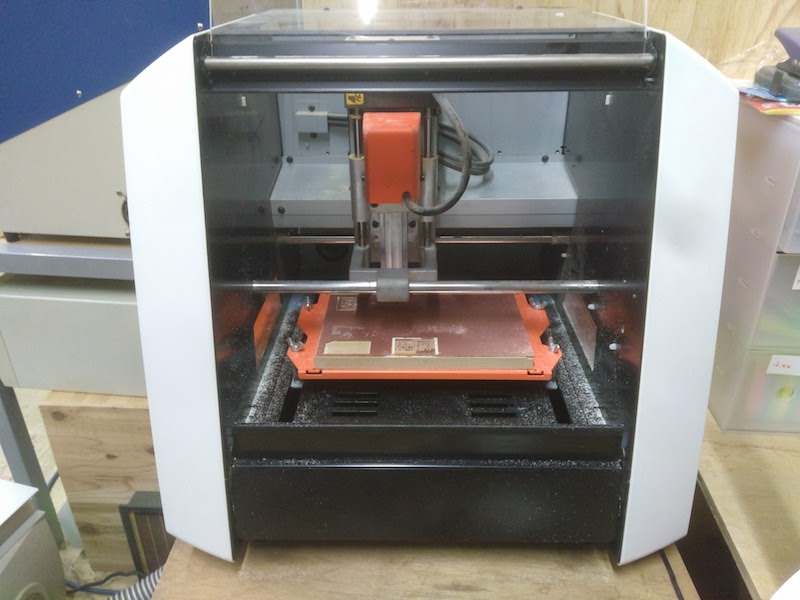
I used SRM-20 90°and mill for trace and 1.0 rutor for interior.Result is below.It was not so good, I cut off the remaining part with a cutter.
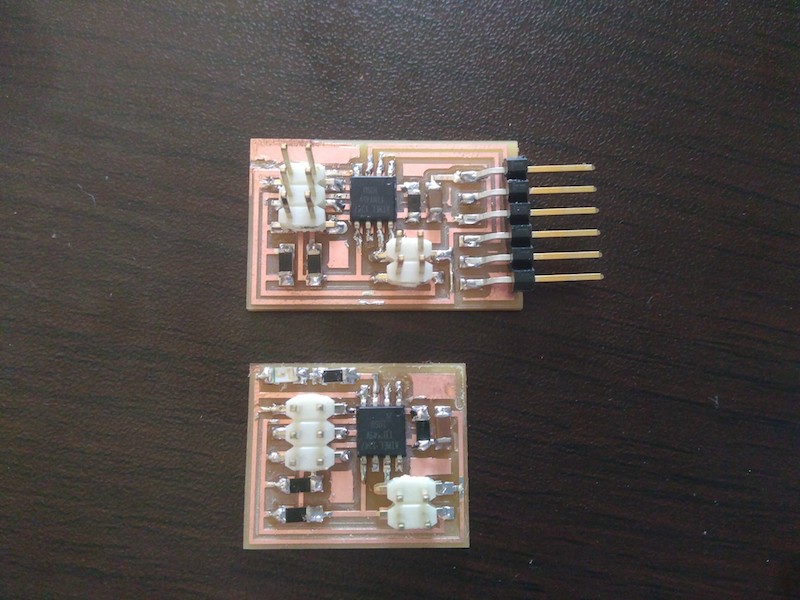
And After soldering
Programing
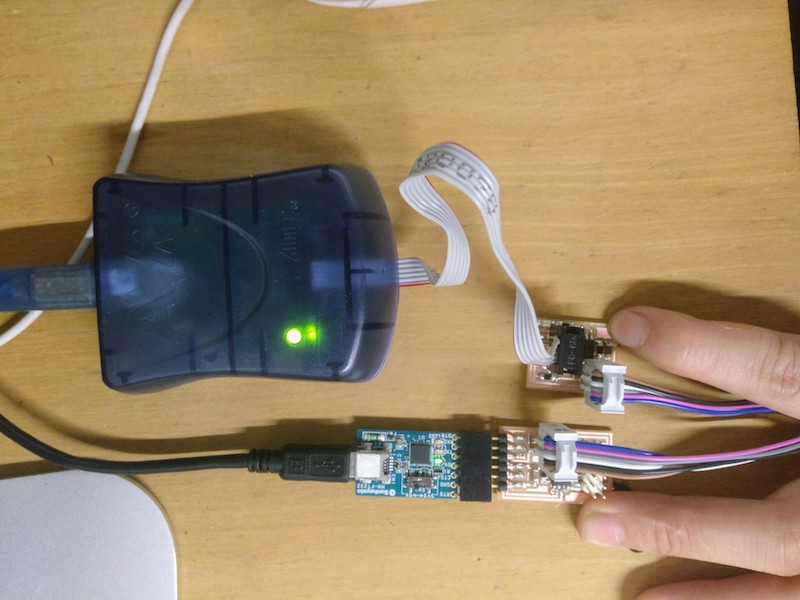
I burned bootroader using AVR-mark2,ftdi and ribbon cable. Bridge and node succeed.
Next I test slave reciver, example skeche of Wire.h library. But It could not be compiled. As a result of my search, And I found TinyWireS that can use for attiny45.
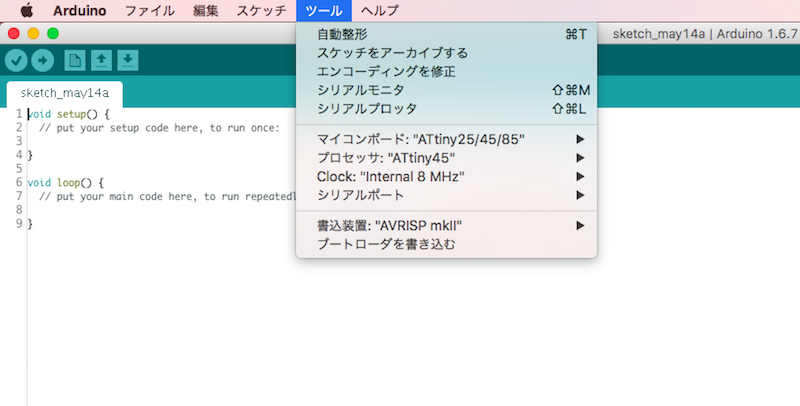
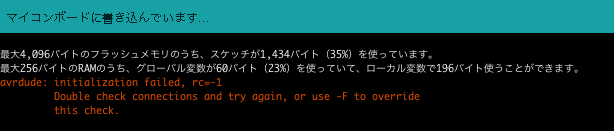
I used example code, it was compiled, but I could not write it to board. After that, I could not write any code even bootloader.
I replaced chip of hello_I2C branch board ,then it worked again.(Becsuse I do not have alternative chip anymore, so node board chip did not be replaced and still did not work.)
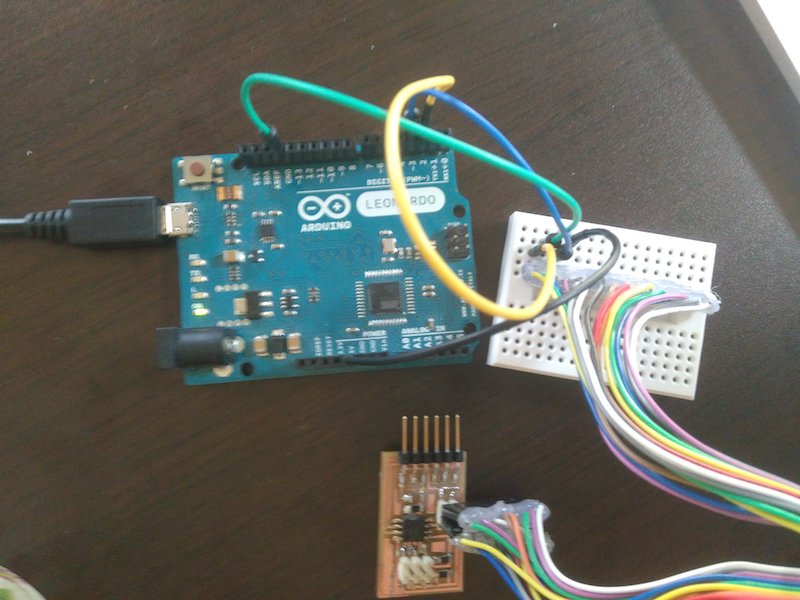
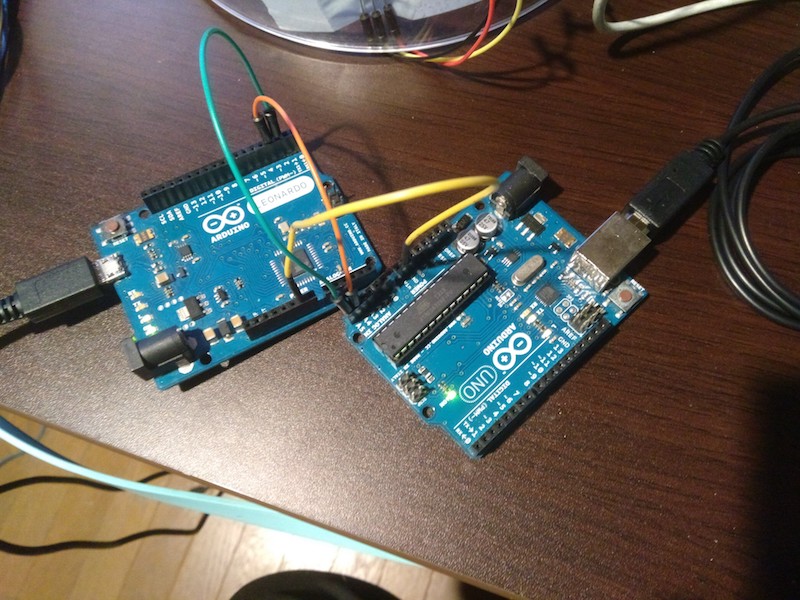
I try to use Arduino Leonardo as master, hello_I2C as slave.
I connected like this.
- [Leonardo] - [hello_I2C bridge]
- 5V - V
- digital 3(SCL) - SCL
- digital 2(SDA) - SDA
- GND - GND
Master code
slave code
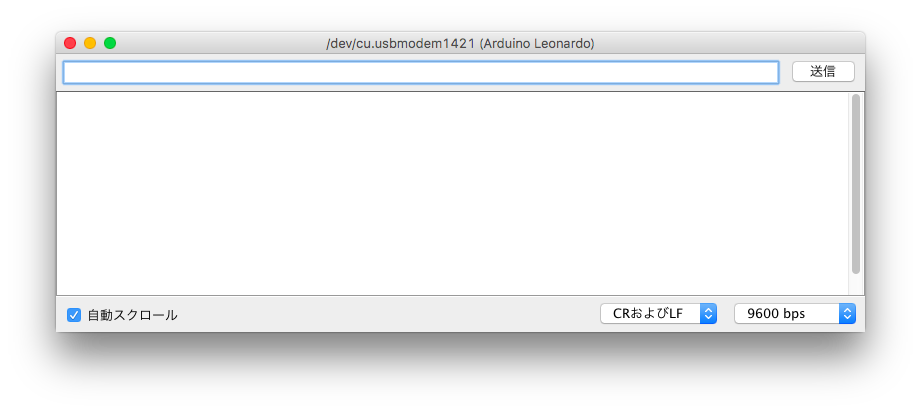
But I could not see any thing on my seerial monitor.
Arduino to Arduino
Finaly I use Arduino Leonard and Uno.
- [Leonardo] - [Uno]
- digital 3(SCL) - A4
- digital 2(SDA) - A5
- GND - GND
slave
master
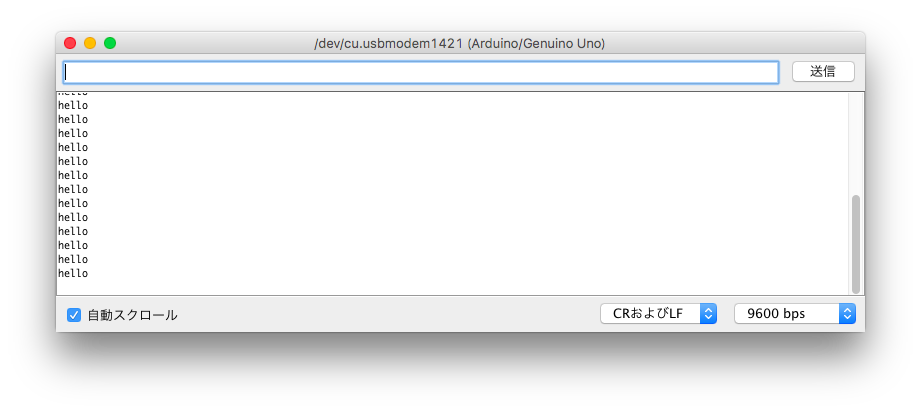
result
wi-fi
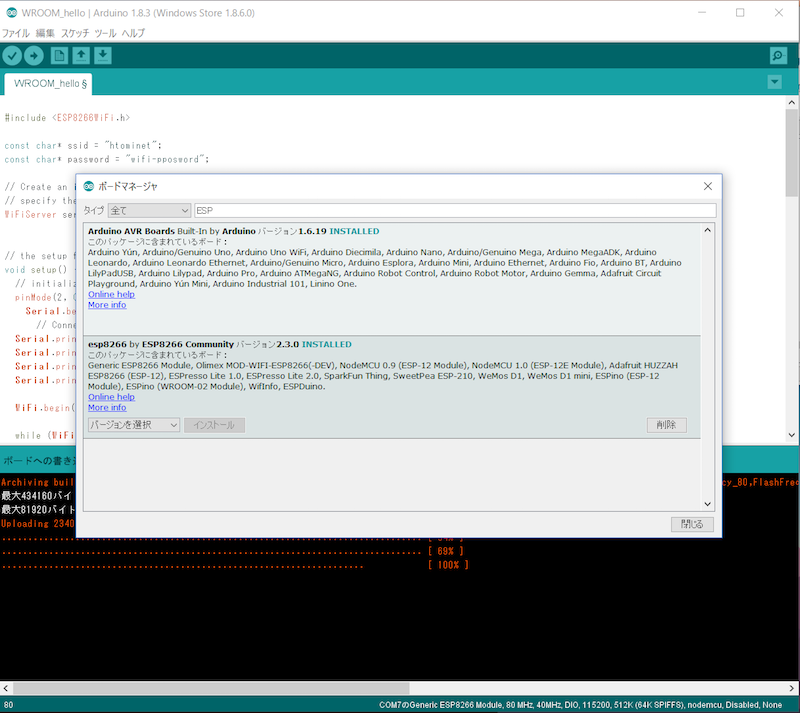
I try ESP-WROOM-02.
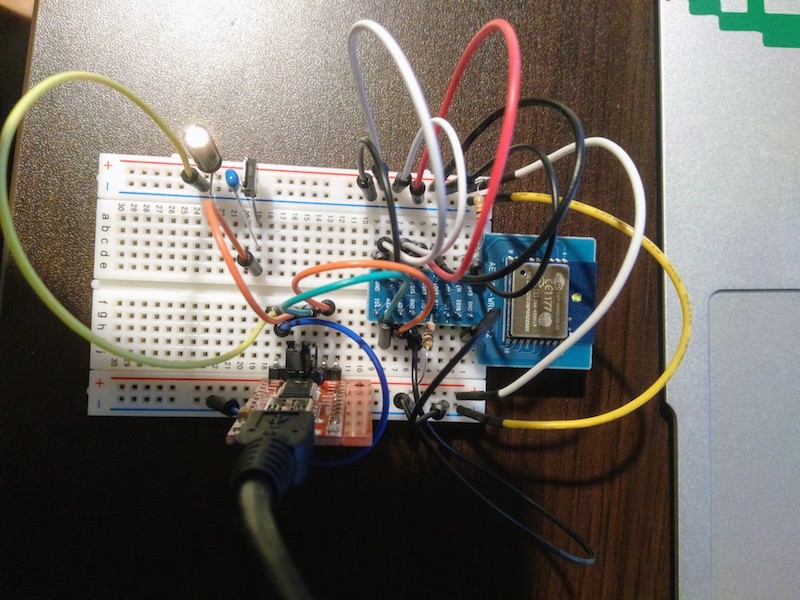
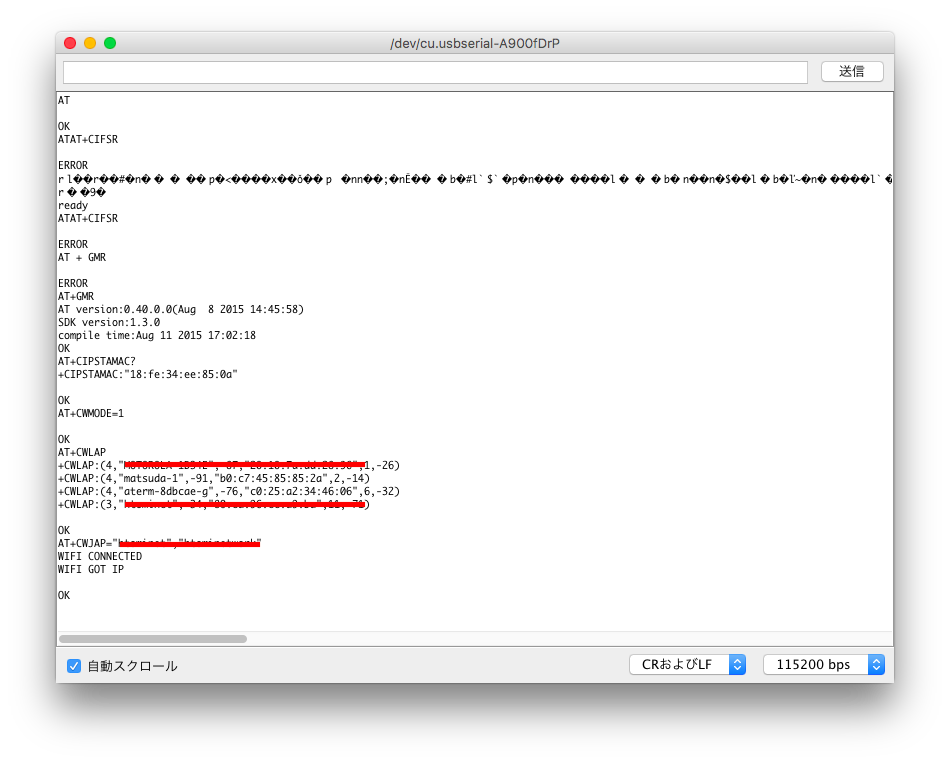
I could access my access point.
I set to use WSP8266 as Arduino.Install esp8266 board from boad manager.Some time I could not write.error: espcomm_open failed
error: espcomm_upload_mem failed
error: espcomm_upload_mem failedwas appear.It solve to reset before writing.
Then I made "tell you light".When I acsess an adress,Led light turn on.
The code is below.I refered example "ESP8266WiFi>WiFiWebServer".
#includeconst char* ssid = "htominet"; const char* password = "wifi-pposword"; // Create an instance of the server // specify the port to listen on as an argument WiFiServer server(80); // the setup function runs once when you press reset or power the board void setup() { // initialize digital pin LED_BUILTIN as an output. pinMode(2, OUTPUT); Serial.begin(115200); // Connect to WiFi network Serial.println(); Serial.println(); Serial.print("Connecting to "); Serial.println(ssid); WiFi.begin(ssid, password); while (WiFi.status() != WL_CONNECTED) { delay(500); Serial.print("."); } Serial.println(""); Serial.println("WiFi connected"); // Start the server server.begin(); Serial.println("Server started"); // Print the IP address Serial.println(WiFi.localIP()); } // the loop function runs over and over again forever void loop() { Serial.println(WiFi.localIP()); // Check if a client has connected WiFiClient client = server.available(); if (!client) { return; } // Wait until the client sends some data Serial.println("new client"); while(!client.available()){ delay(1); } // Read the first line of the request String req = client.readStringUntil('\r'); Serial.println(req); client.flush(); // Match the request int val; if (req.indexOf("/tell/0") != -1) val = 0; else if (req.indexOf("/tell/1") != -1) val = 1; else { Serial.println("invalid request"); client.stop(); return; } // Set GPIO2 according to the request digitalWrite(2, val); client.flush(); // Prepare the response String s = "HTTP/1.1 200 OK\r\nContent-Type: text/html\r\n\r\n\r\n\r\nI have "; s += (val)?" something to tell you":"nothing to tell you"; s += "\n"; // Send the response to the client client.print(s); delay(1); Serial.println("Client disonnected"); }
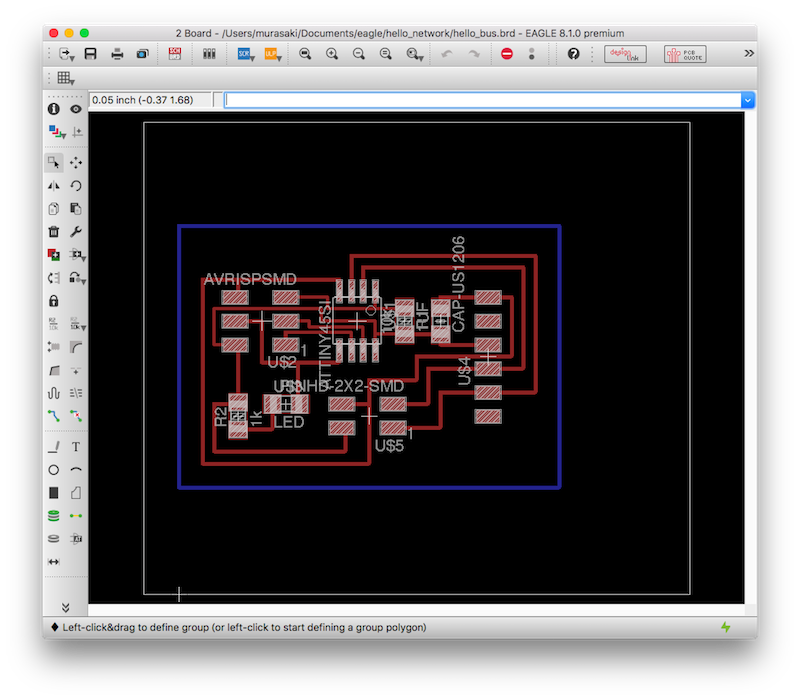
Serial bus
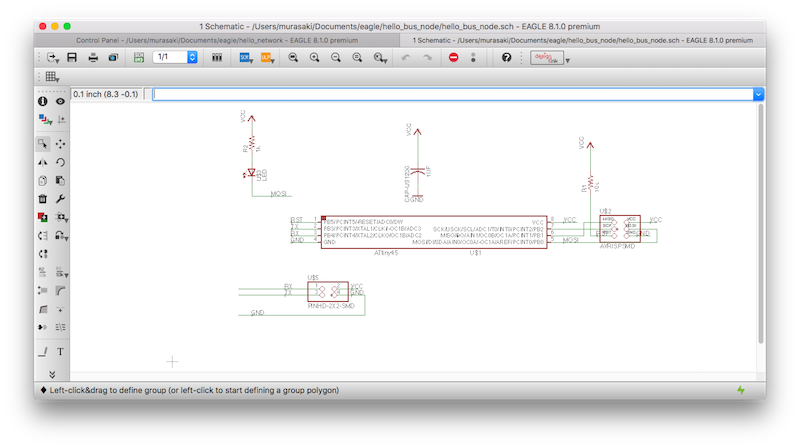
And I try Serial bus.
I refer hello.bus.45
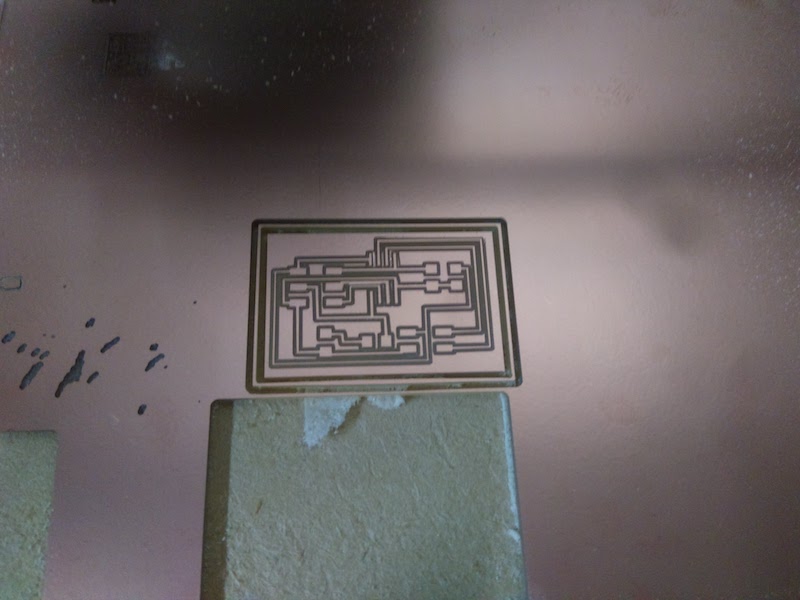
I made 1 bridge board.
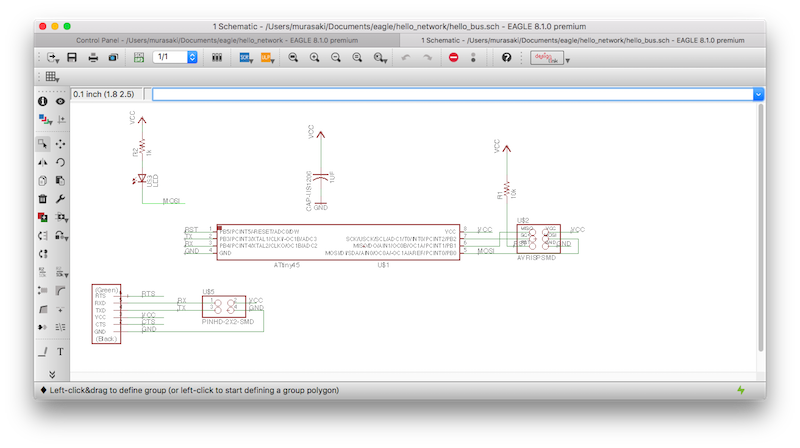
And I made 1 node board
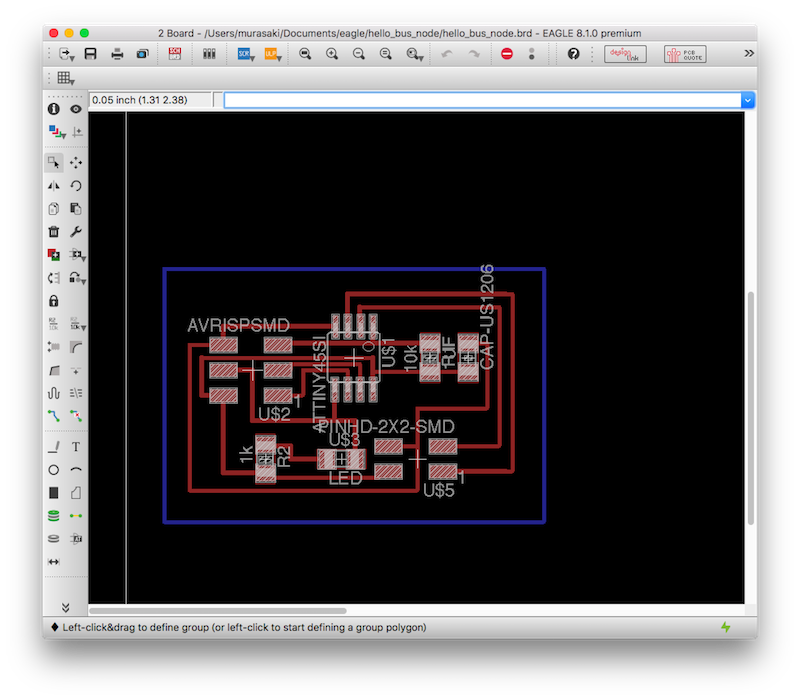
I used fab module setting like below.bridge and node are same setting
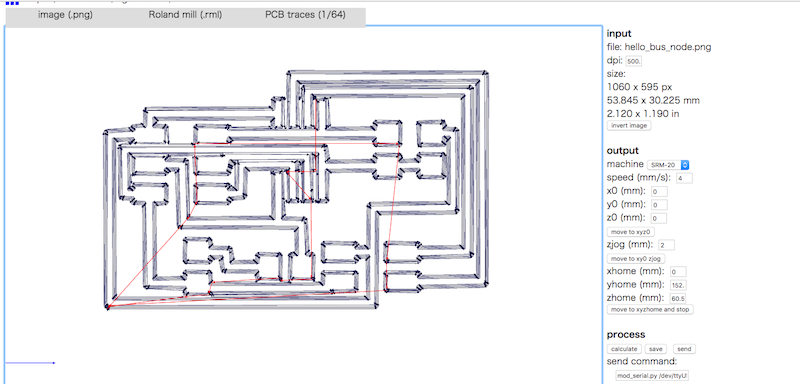
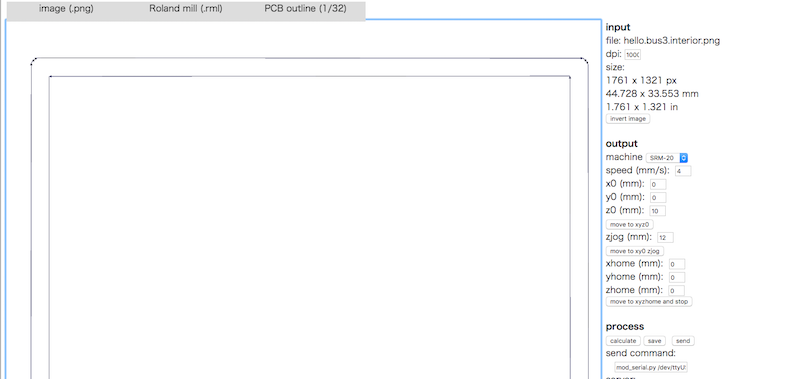
Then I milled by SRM-20.I used 45°end mill and 1.0 mm drill.
bridge
node.As I left a little, I cut off extra parts with a cutter.
Then I soldered components.
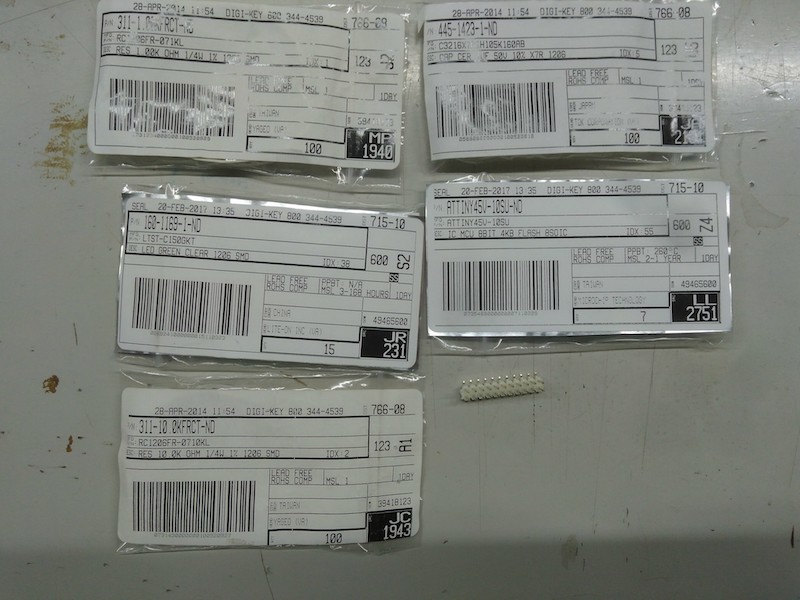
| name | Number | Quantity | |||||||||||||||||||||
| ATTINY45 | ATTINY45V-10SU-ND | 1 | |||||||||||||||||||||
| Capacitor 1uF | C3216X7R1H105K160AB | 1 | |||||||||||||||||||||
| Resistor 10K ohm | RC1206FR-0710KL | 1 | |||||||||||||||||||||
| Resistor 1K ohm | RC1206FR-071KL | 1 | LED Green Crear | 160-1169-1-ND | 1 | ||||||||||||||||||
| ISP/6-pin header | 1 | bus/4-pin header | 1 | ||||||||||||||||||||
| FTDI header | 1 | ||||||||||||||||||||||
| name | Number | Quantity |
| ATTINY45 | ATTINY45V-10SU-ND | 1 |
| Capacitor 1uF | C3216X7R1H105K160AB | 1 |
| Resistor 10K ohm | RC1206FR-0710KL | 1 |
| Resistor 1K ohm | RC1206FR-071KL | 1 | LED Green Crear | 160-1169-1-ND | 1 |
| ISP/6-pin header | 1 | bus/4-pin header | 1 |
After soldering

programing
I write program that when I call boadname from serial monitor,the boad called is blink same times as their name.
First I use Serial.read but then recieve error message.I use Software Serial.
It work like this