
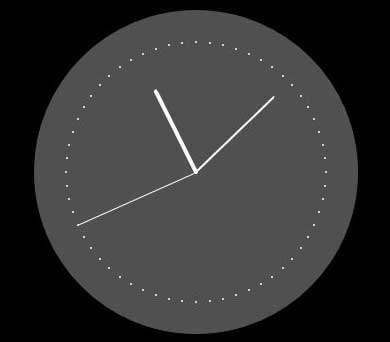
This week, I have worked with the input-output assignment's code. I did an speedmeter based on a hall sensor, and used a display to print the speed and the distance. I wanted to do an analog speedmeter that represents the speed on a graphic way. This is my first aproximation to processing, so I started by checking the analog clock code they have as an example in their web-page. After having understood it I wanted to transform it to an analog speedometer.
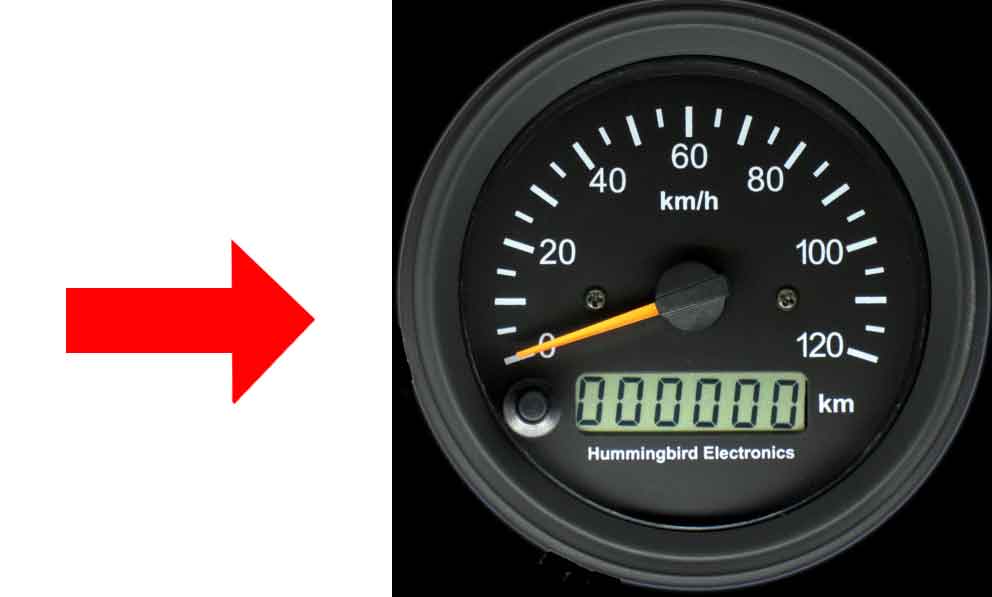
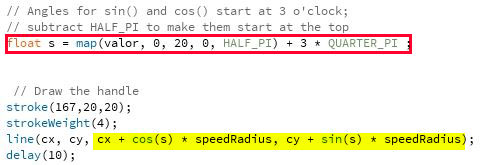
I founded this useful as I wanted to do an analog speedmeter sort of what exist on cars. So I needed a circular display, a bunch of ticks to represent speed and a handle to move as the speed changed. I based my code on the example one. What I found very interesting, was that instead of making rotate the handle to change position, it was solved with a variable on the end point of the line. To get that variable, I maped the speed value between 0 & half pi, which result on three quarters of a circle and shifted 3/4 PI, to rotate the values between 135 and 315 degrees.
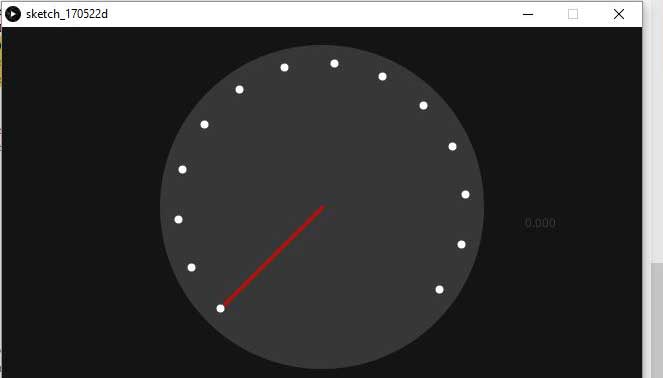
The arduino code I have used is basically the same as in week 11, but I cleaned a bit, so only the speed value was transmited.
int Actualstate1=0;
int Actualstate2=0;
int lastState=0;
int counter=0;
float radious_cm=30.0;   //ingresar radio de la rueda en cm
float pi=3.1416;
float wheelPerimetre=2*pi*(radious_cm/100);  //Calcula Perimetro en metros
int timer1=0;
int timer2=0;
int timer3=0;
float timer4=0;
int sp=0;


void setup(){
        pinMode(3,INPUT);
        Serial.begin(9600);

}

void loop(){
        Actualstate1=digitalRead(3);
        delay(60);
        Actualstate2=digitalRead(3);
//Si los estados no son iguales, el sketch no hace nada.
        if (Actualstate1 == Actualstate2) {
              if (Actualstate1 != lastState){
                    if (Actualstate1 == HIGH) {
                        counter = counter + 1;
                        velocity();
                    }
              }
        }
        lastState= Actualstate1;

        if (counter%2 == 0 ) {
              digitalWrite(4, LOW);
        }
        else {
              digitalWrite(4, HIGH);
        }

}


void velocity(){

  if(counter%2 == 0){
    timer1=millis();
  }else{
    timer2=millis();
  }
  timer3=abs(timer1-timer2);
  timer4=(((timer3/1000.0)/60.0)/60.0); //hours
  sp=((wheelPerimetre/1000)/timer4);// km per hour

  Serial.println(sp);


}
I had loads of problems with the serial communication between arduino and processing. My sppedometer work is based on a hall effect sensor and a magnet. When the magnet is close it change it status to high and when it is not close it changes to low. It works by contrast, when there is a change of status a counter start. The speed is calculated based on the time it takes to increment the counter and the perimeter of the wheel. So each time the magnet approaches the sensor I should get ONE value. On arduino IDDLE it works fine, each time I approach the magnet I get ONE value.
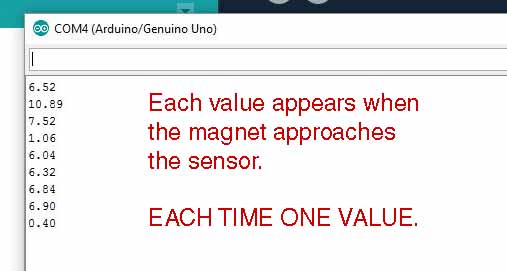
The problem is I get 3 values on processing for each value of Arduino Serial monitor. Which didn't make sense at all.
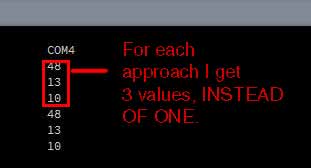
Thanks to Xavi we realised the problem was that I was using serial.println() on arduino to transmit my data. That results on a string being send. So my procesing code should use port.readString() instead of port.read(). After this change was made the values I got were the right ones, but I still needed int number for being able to move the handle, so I used the Integer.parseInt() funtion. But when I run the sketch I got an error.

Xavi again was the one that pinted me to the error. As I was using serial.println() on arduino, I was sending both the string with numbers and the special character of the line change. The trim() funtion is used to filter special characters as line changes and spaces, so by changing the code to Integer.parseInt(trim(speed)); my sketch started to make sense.
import processing.serial.*; //Import Serial library

Serial port; //Serial port name

PrintWriter output;  //Text file for writing sensor data
int cx, cy;
float circleDiametre;
float speedRadius;

int valor;//Sensor value
String speed;

void setup() {
  size(640, 360);
  stroke(255);

  int radius = min(width,height) / 2;
  circleDiametre = radius * 1.8;
  speedRadius = radius * 0.8 ;
  cx = width / 2;
  cy = height / 2;// divide la altura y anchura de la ventana entre 2, asegura que el centro del reloj esta en el centro de la ventana

  println(Serial.list()); //Serail port list
  port = new Serial(this, Serial.list()[0], 9600); //Open first serial port from USB

  output = createWriter("speed_data.txt"); //Create Text file . By default in same sketch folder

}

void draw() {
  background(20);

  //Getting data sensor from Arduino
  if(port.available() > 0) // si hay algún dato disponible en el puerto
   {speed = port.readString();
     valor = Integer.parseInt(trim(speed));
     println(speed);
   }
   //Data visualization
   text(valor,0.8 * width,height/2);
   text("km/h", 0.8 * width,(height + 50 )/2);


   //Writing data in the text file
   output.print(valor + "km/h");
   output.println("");

  fill(55);
  noStroke();
  ellipse(cx,cy,circleDiametre,circleDiametre);//draw the speedometer background


  // Angles for sin() and cos() start at 3 o'clock;
  // subtract HALF_PI to make them start at the top
  float s = map(valor, 0, 25, 0, HALF_PI) + 3 * QUARTER_PI ;


   // Draw the handle
  stroke(167,20,20);
  strokeWeight(4);
  line(cx, cy, cx + cos(s) * speedRadius, cy + sin(s) * speedRadius);
  delay(100);
   // Draw the speed ticks
  stroke(255);
  strokeWeight(8);
  beginShape(POINTS);
  for (int a = 135; a < 410; a+=20) {
    float angle = radians(a);
    float x = cx + cos(angle) * speedRadius;
    float y = cy + sin(angle) * speedRadius;
    vertex(x, y);
  }

}
For a more funtional speedometer I will need to add a couple lines of code that makes the handle to go back to 0, if there is no next value in x amount of time. Unfortunately I had no time to finish it yet.
BACK HOME <<<