
My final project consist on an Open Source bike Powermeter.
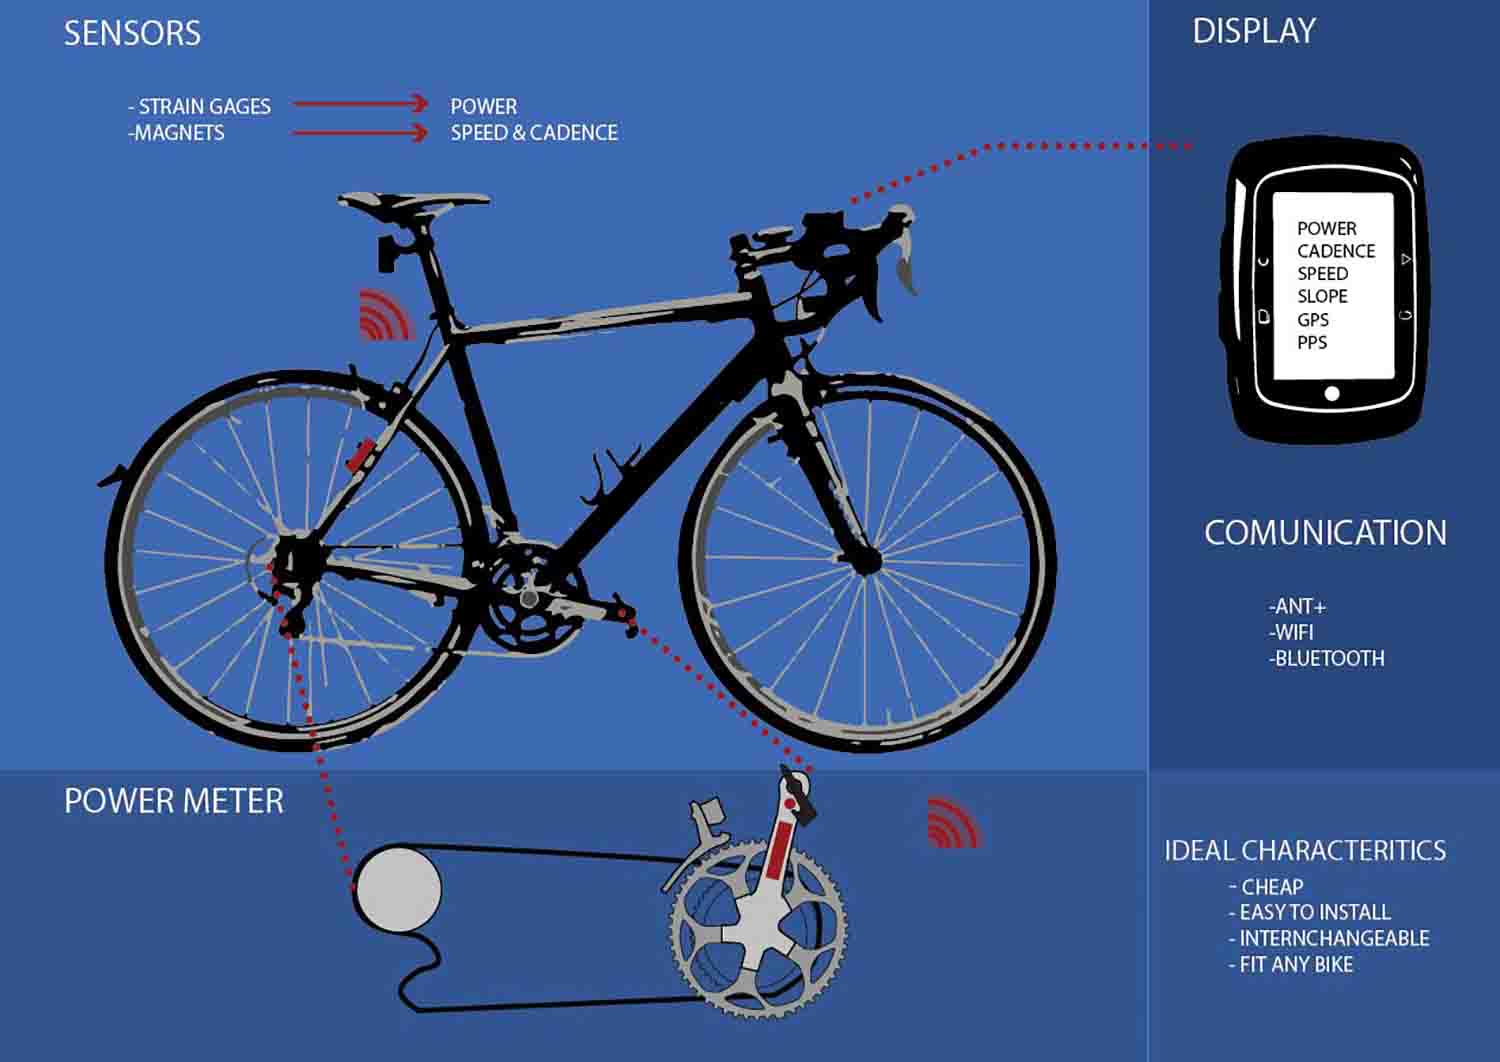
This is a device that calculates the power you implement on each pedal cycle. This is very useful in bike training as it is the only value that doesn't varies on external factors as speed, cadence and hearth rate do. Most trainers want to train their cyclist on watts, but the high price of the market devices needed for this kind of training make it available only to a few.
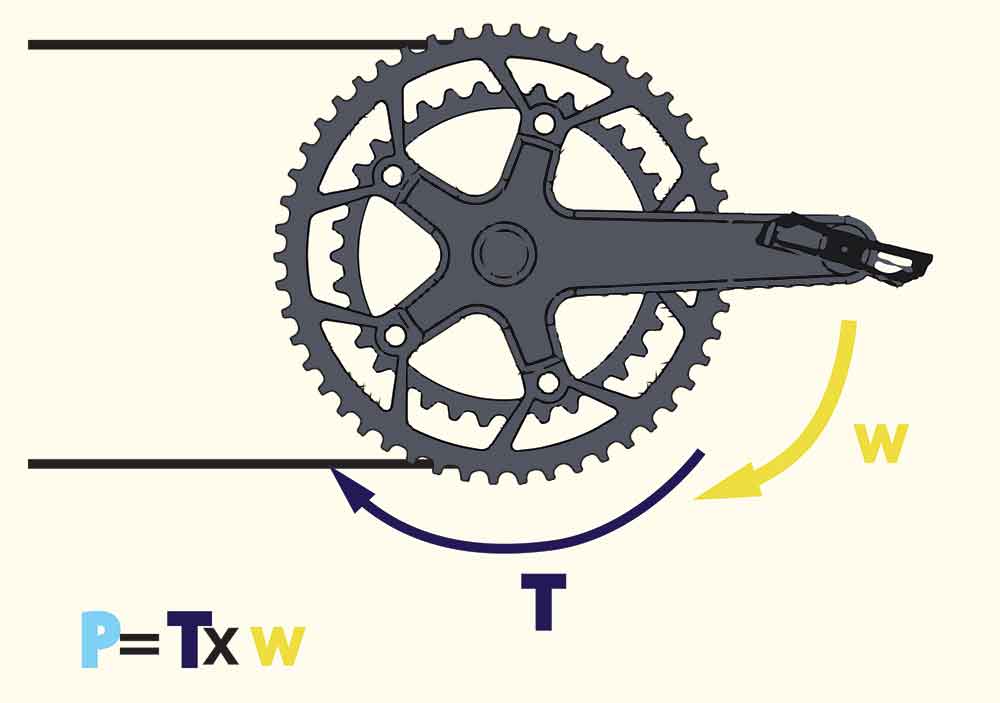
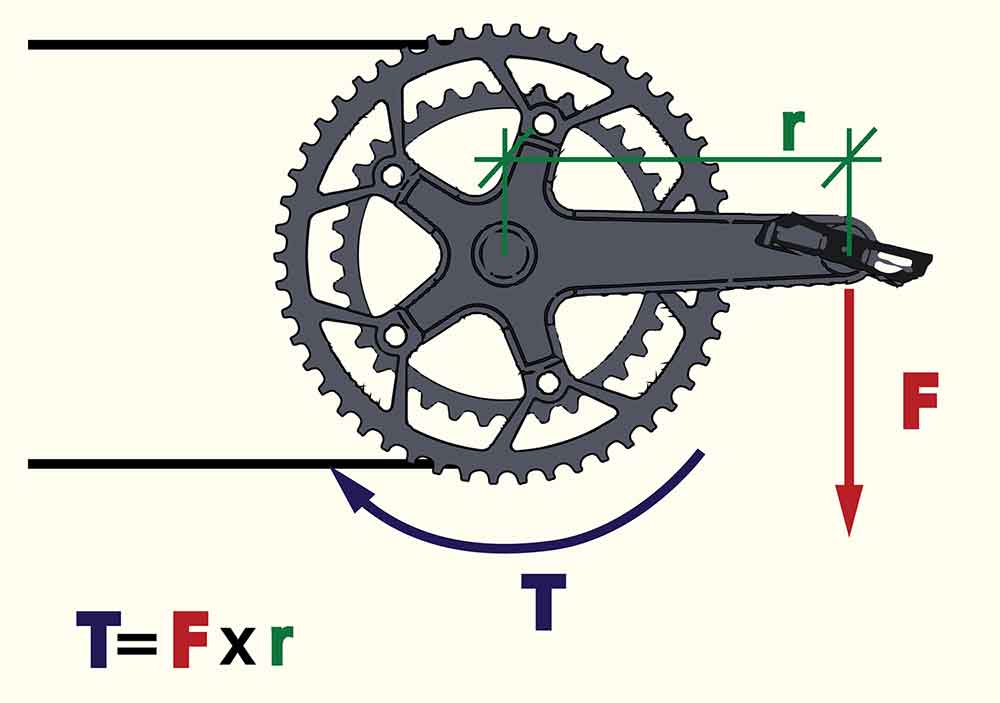
My power meter is based on strain gauges measure, this allows me to calculate torque, and with this value, plus the angular speed, I will be able to calculate Power.
There are a lot of brands commercializing powermeters. At the beginning there were only the biggest ones as Garmin, Sram... But there has been a huge growth of powermeter market, and a lot of new companies are compiting anf lowering the prices.
There are a few of DIY powermeters online, such as (actually these are the only ones I have been able to find):
Keith Hack blog
Hack a day project
Instructables project
But none of them do a whole project development process documentation.
As I said before a powermeter is based on the funtion of strain gauges, so that is the main sensor.My project will also be using:
- Oled screen
- Attiny 85 pcb
- sc-hc 08 Bluetooth module
- Display case
- Display holder
-nRF5285 sparkfun breakout board (Bluetooth & ant+ communication board)
-Hx711 amplifier
-2 full bridge strain gauges (or 8 simple strain gauges)
- Amazon:Oled screen, Hx711 amplifier,nRF5285 sparkfun breakout board
- Fab Lab base (Digikey)Attiny 85 pcb,sc-hc 08 Bluetooth module
- Omega:2 full bridge strain gauges (or 8 simple strain gauges)
-Strain gauges: 40 Euros a packatge of 5 (Only 2 needed)
-HX711 Load cell amplifier:3 Euros
-nRF5285: 26 Euros
-sh-hc 08 Bluetooth Module on master role: 4,5 Euros
-7.4 Lipo Battery: 9-10 Euros
-Acrilic: 4 Euros
-Oled screen module: 9 Euros
-Sh-hc 08 Bluetooth Module on slave role: 4,5 Euros
-ATtiny 85 pcb: ATtiny 85, 10 K resistor, 1uF Capacitator, 0 Omhs resistor, 5 v voltage regulator, 3x2 pin male header,2x1 female header, 6x1 female header,4x1 female header. 3-4 Euros
-7.4 Lipo Battery: 9-10 Euros
The overall cost with these more expensive gauges would be around 115 Euros. (UPDATE: I ended up using Arduino nano instead of nRF5285 breakoutboard so the cost would be reduce around 23 Euros)
- Attiny 85 pcb
- Display case
- Display holder
- nRF5285 + Hx711 amplifier pcb (Making this board would be ideal, but realistically I don't think I will have time)
-Pcb deisgning, milling & soldering
-3d design display case & display holder
-3d printed (filaflex) display holder
-Molding and casting display for a waterprof guarantee
-Laser cut & engraving the display transparent protector
-How do we calculate Power?
-How can we measure Torque?
-How can we integrate this system on a bike crank?
-How does ant+ radio frequency works? How does it pair?
I have been organising my time with trello which is a project management tool. It has been very useful for planifying myself.
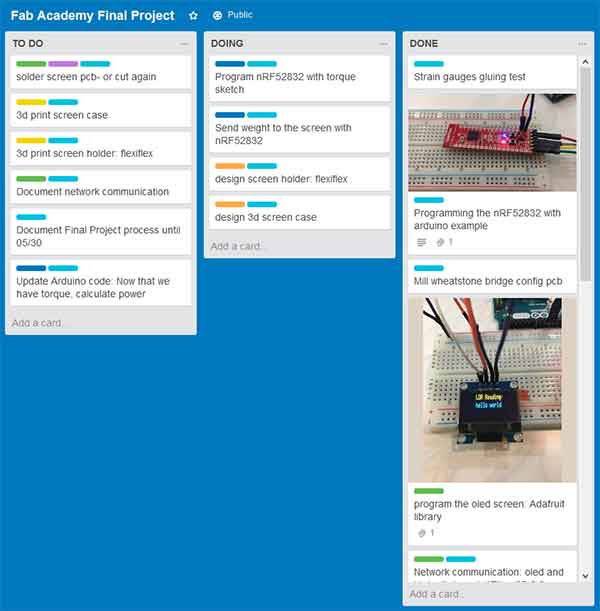
My schedule can be check there, but basically will consist on:
Done:
-Display bluetooth sent info on Oled display-Network and communication assignment.
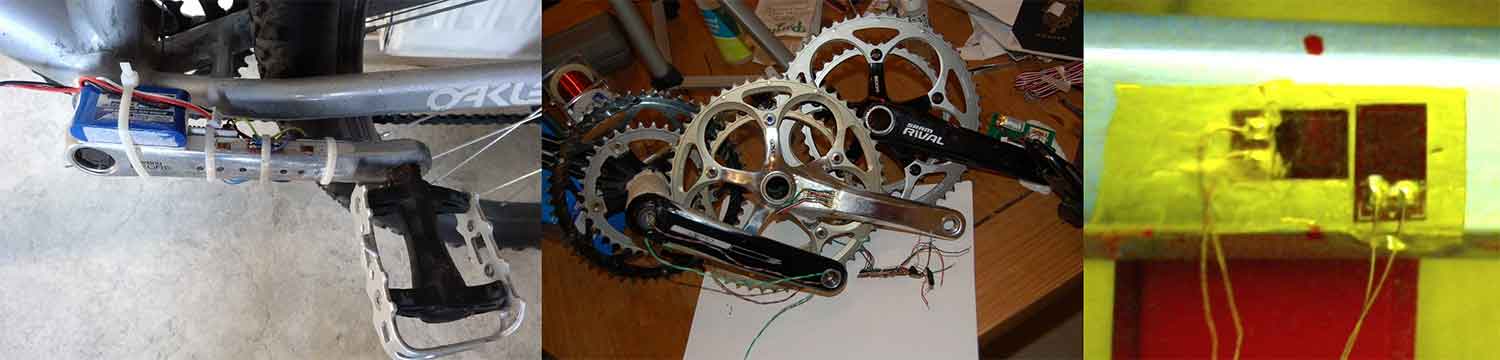
-Strain gauges gluing test.
-Calculate torque with an arduino hooked to Hx711 amplifier and the strain gauges.
This week:
-Design screen Display holder and case.
- 3d print prototypes of display holder and case.
- Program nRF52832 with torque sketch.
- Send data with nRF52832 to disply via bluetooth.
Week 2:
-glue strain gauges on bike and crank and calibrate.
-Mold and cast the display case.
-Laser cut the screen protector.
-Water seal the display case.
-Put all the pieces together and asemble everything.
FINAL 2 DAYS:
-Put together the video and slide.
-FINAL PROJECT PRESENTATION.
-Does it works?
-The design of the case.
-The integration and protection of the system on the bike.
HOME