Week Two
This weeks assignments
- Get started with 2D design
- Get started with 3D design
- Get started with animation
Another week designing
2D design - Inkscape
Inkscape was the program that I decited to use for 2D developing. Later on I realized that maybe I did not go the shortest distance, but I had already gotten myself familiar with inkscape so I thought I'd improve my knowledge of inkscape and design something rather complex. During the week I didin't use it extensively, but I plan on updating soon.
UPDATE 16/5 2016:
I started to draw the frame of the incubator in regards to the final project.
I had already decited the measurements of the incubator itself in the 3D modeling part, so I started drawing. I realized later that I could have done things easyer by exporting faces from either fusion 360 or inventor, but at the time when I started I didn't think about it...
I first started with just the rought dimensions of the boxes, the neck and the head of the incubator.
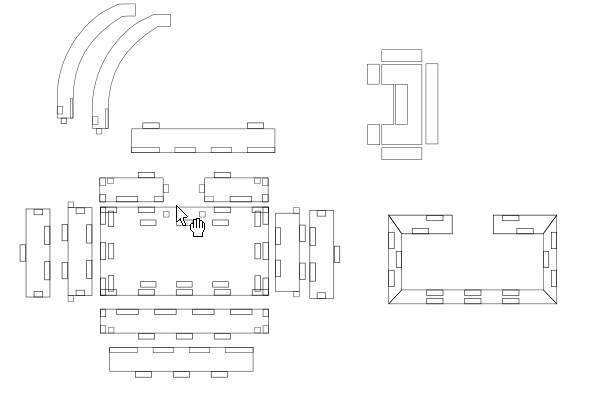
I wanted to try and make it pressfit and practice with the principle of assembling it that way. As can be seen in the laser cutting week there were many obsticles and things that I needed to improve before actually milling out the object - but we'll talk about that later.
Anyways, using inkscapes clone function and then combine function I finally arrived at a place where I could scale the whole thing down and lasercut a model piece. After a little while I stoped using the clone function and just used boxes where I either added or subtracted from the original. Here is the first picture I lasercut out into MDF
Bas showed me how it would be much easyer to actually design in sketchup the whole thing and import that directly to the big milling machine. I'll update that part some other day, but its an interesting process.
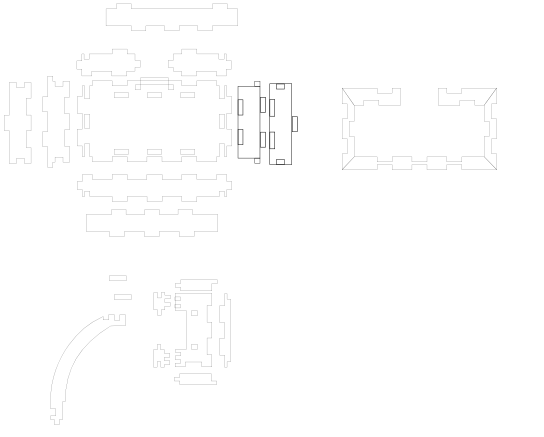
Here are the inkscape models of the final product:
3D design - Inventor
Inventor was my go-to program to draw this weeks assignment. Although I had been using Inventor a bit through my university, I still learnt a tonn more. I drew up a wooden frame for my smart flowerpot/bonsai caregiver. Starting a 3D project always begins with a 2D sketch.
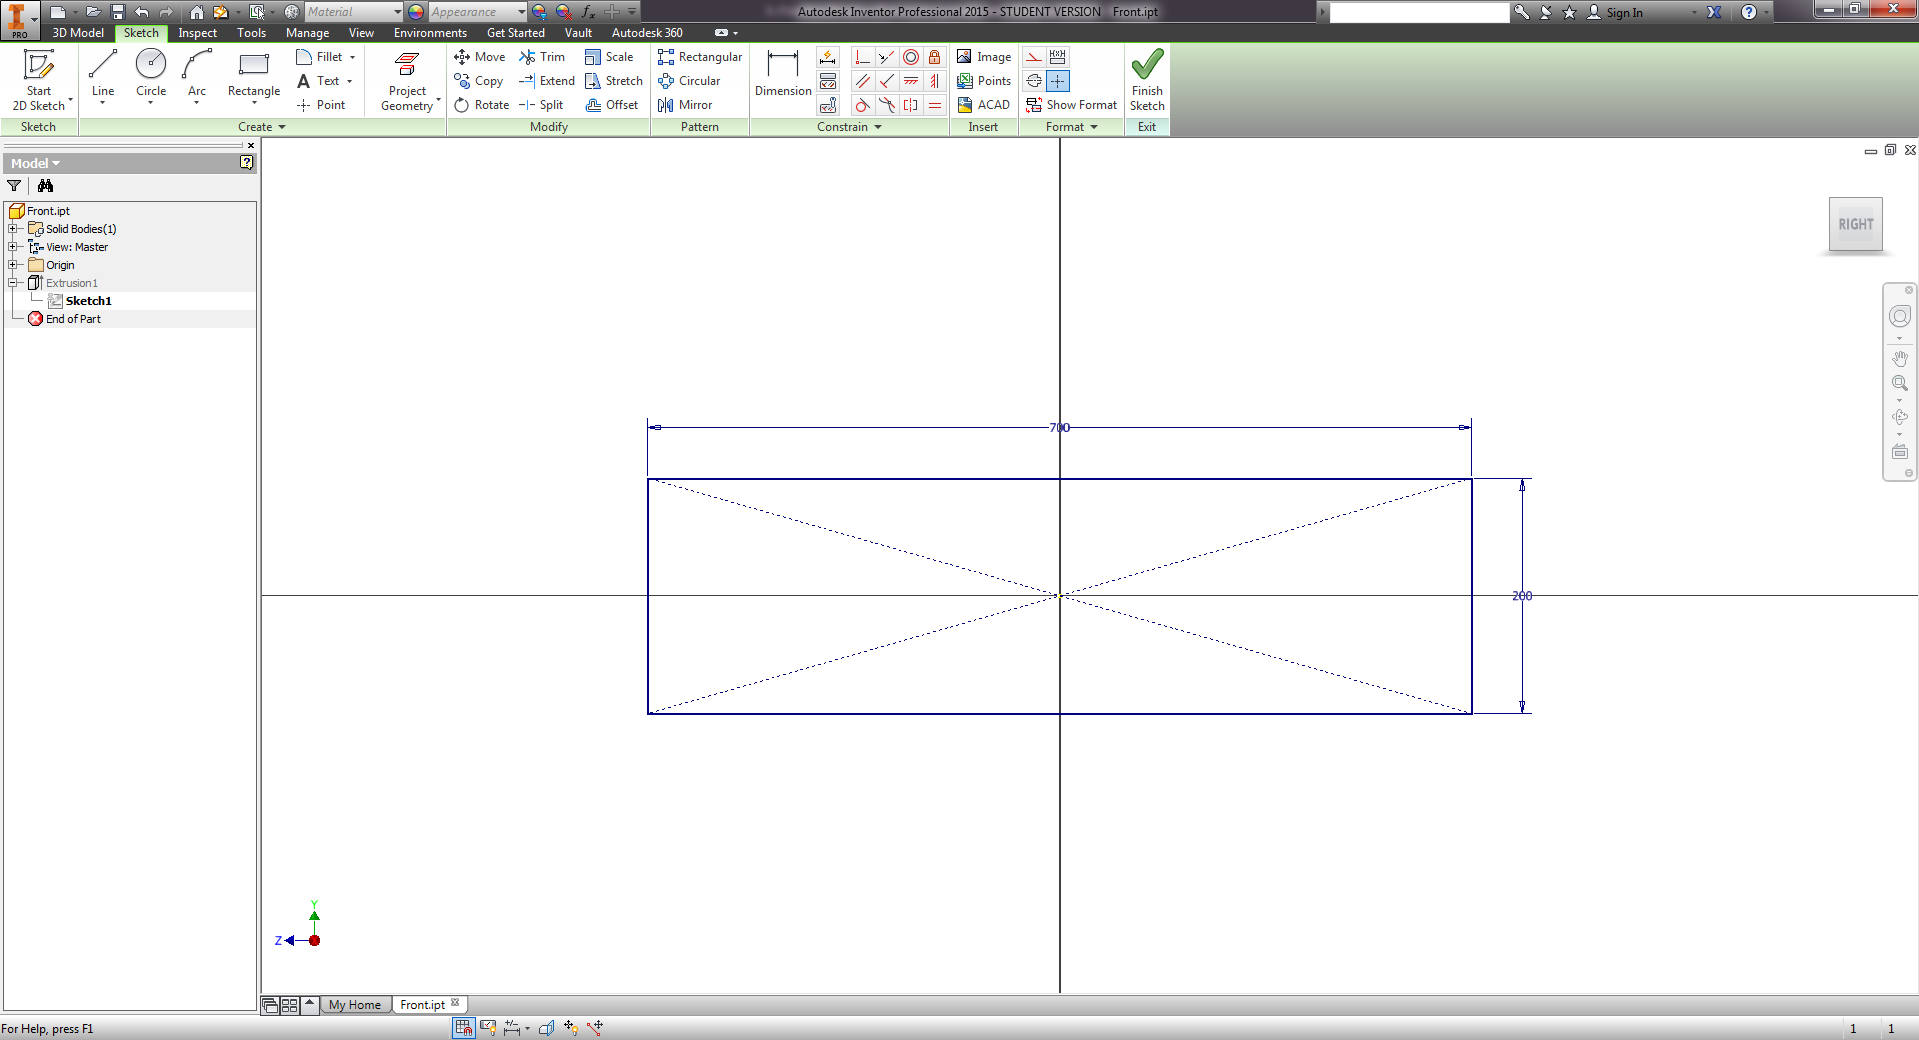
Here we see an example of the front being drawn, but all of the components of the wooden frame of the caregiver were drawn. Inventor even has an option for materials!
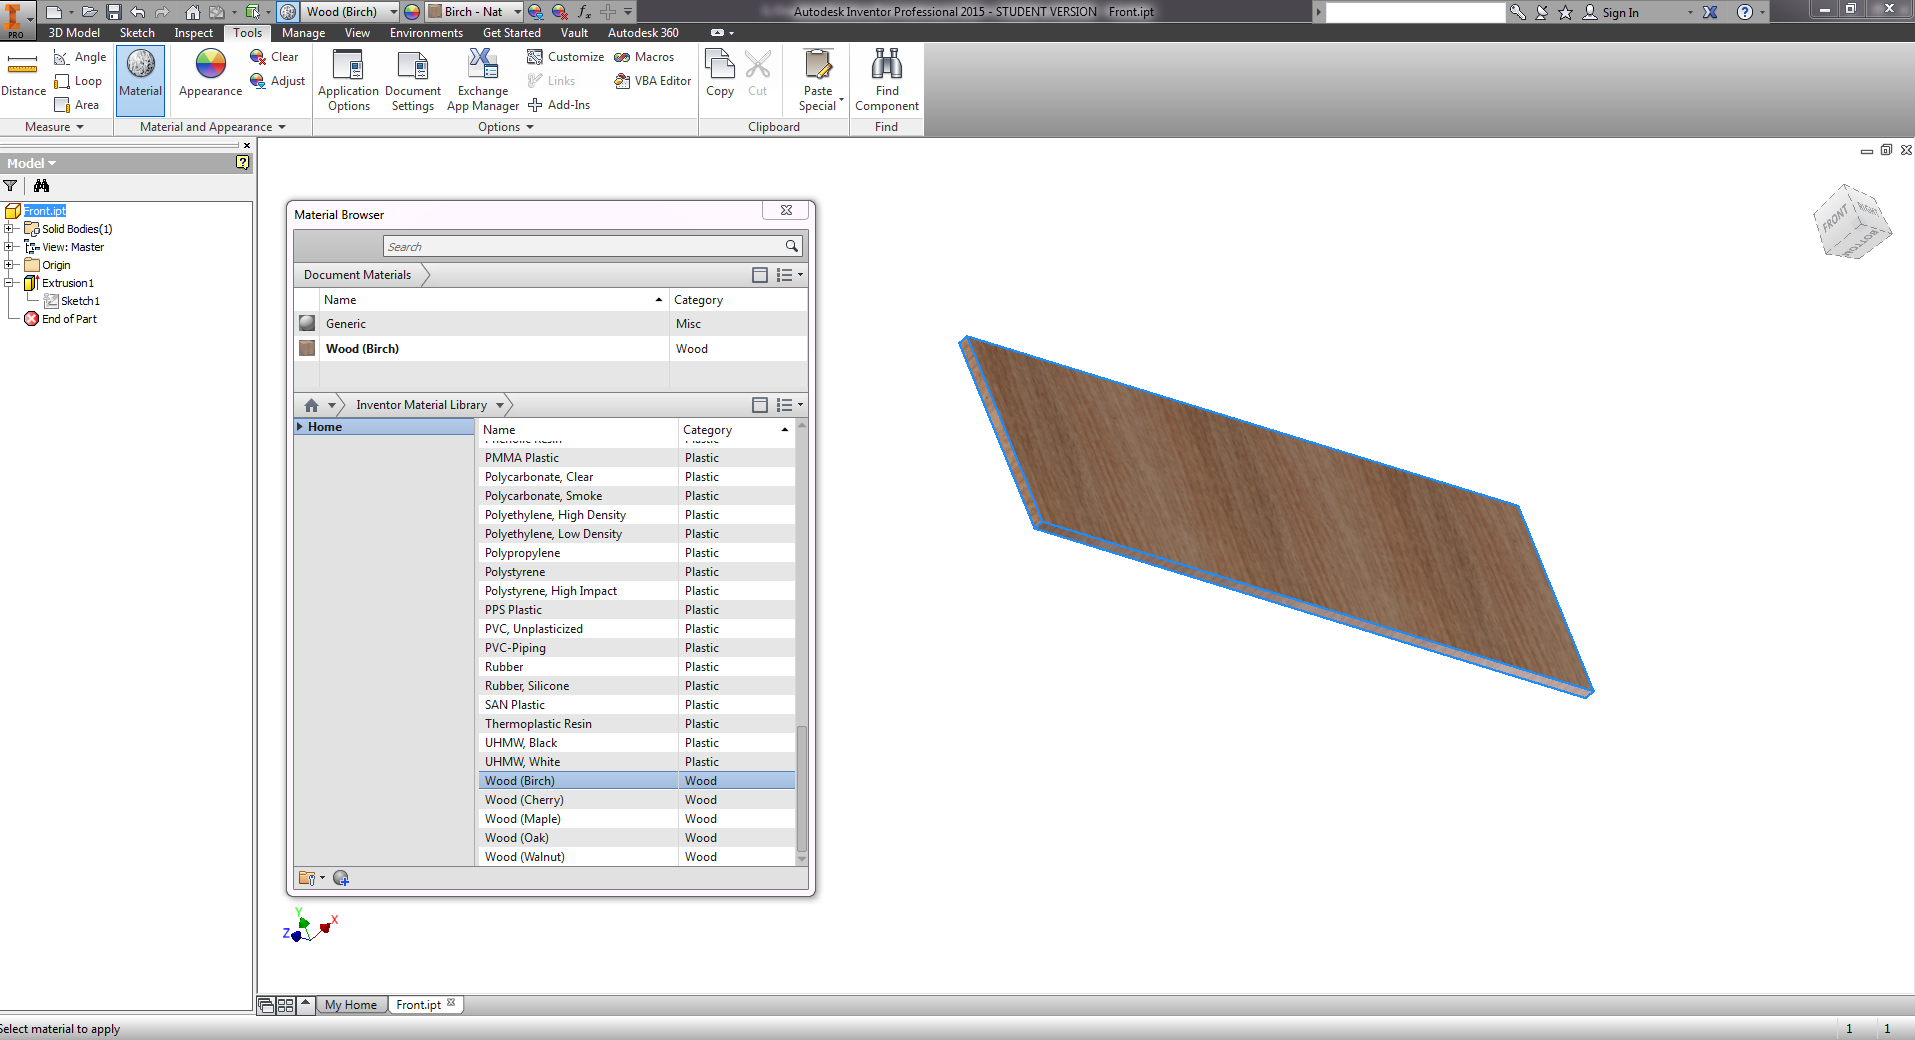
When all of the components have been drawn, they needed to be assembled in order to realize if the final picture would be anything similar to the thing I had imagined. I adjusted a few things, but Inventor supports realtime ground up re-sizing. To fasten the pieces togeather within the program, the joint or constrain features are used.

Here are the inventor files for the original idea:
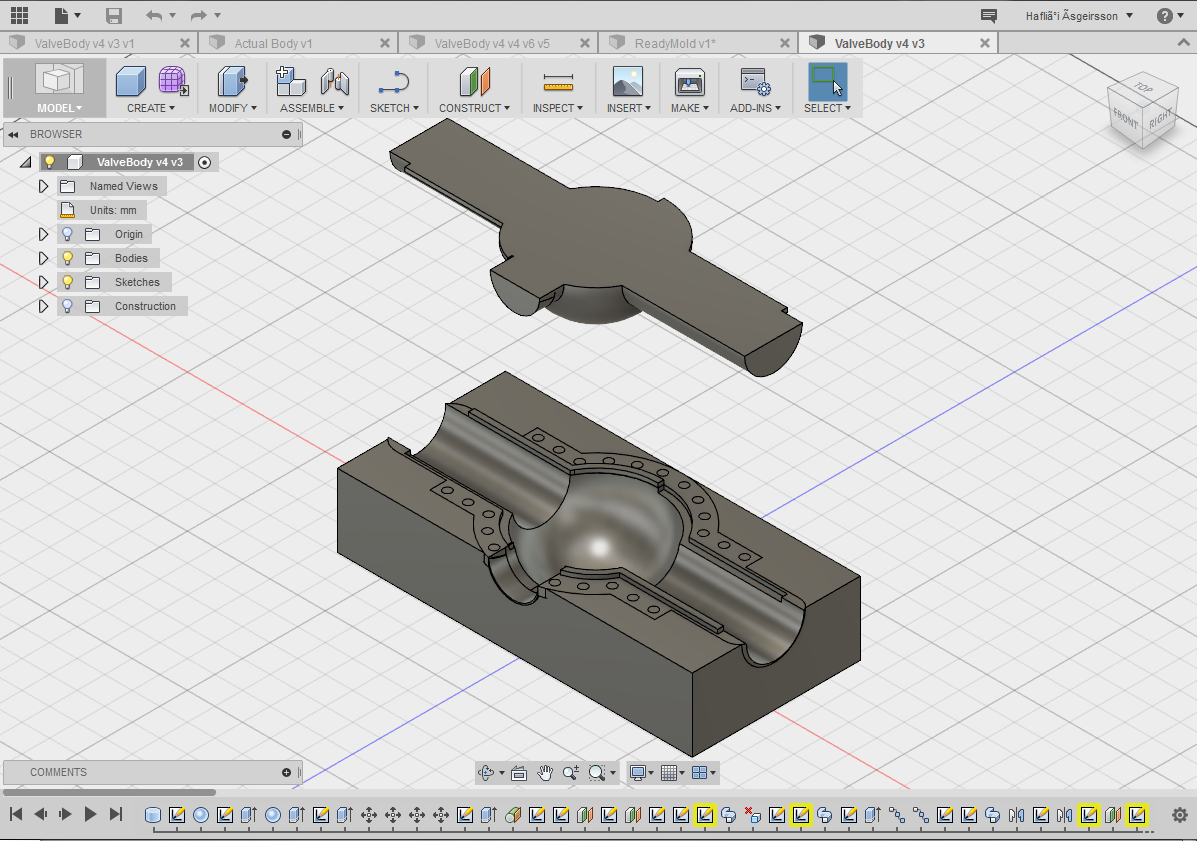
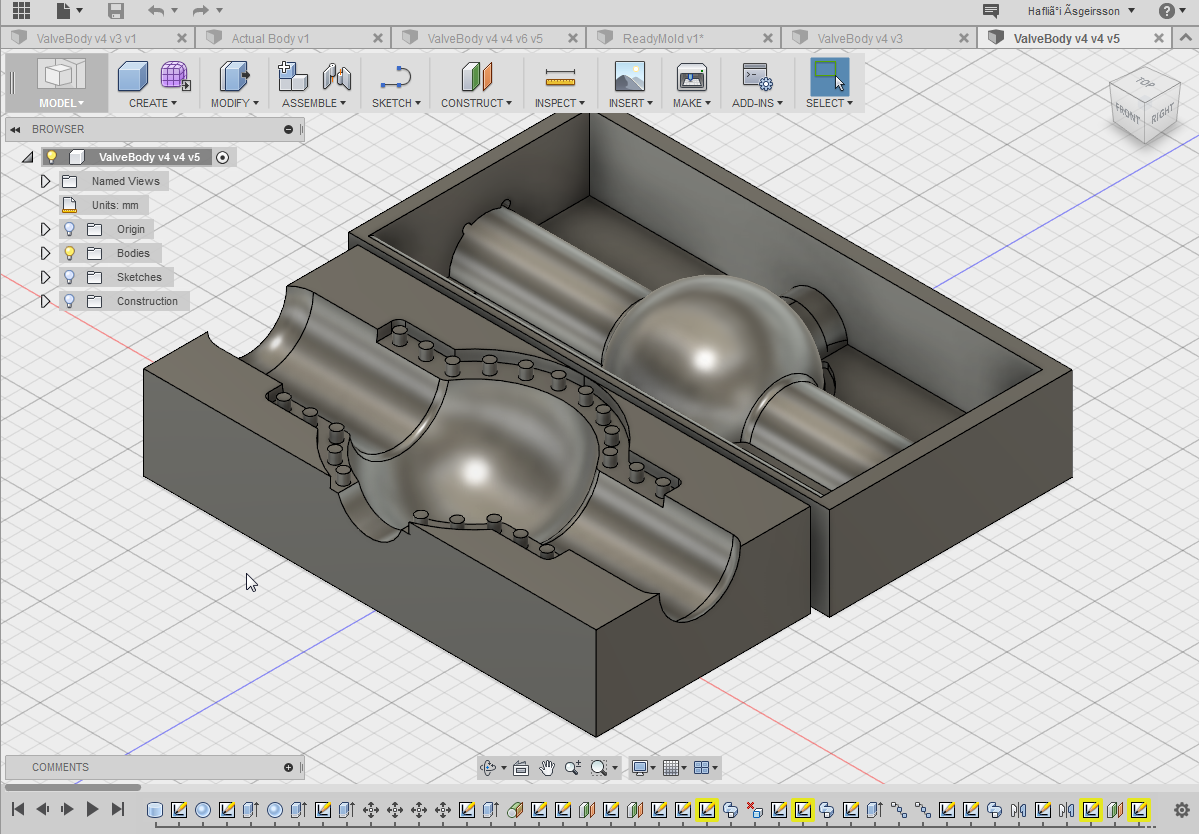
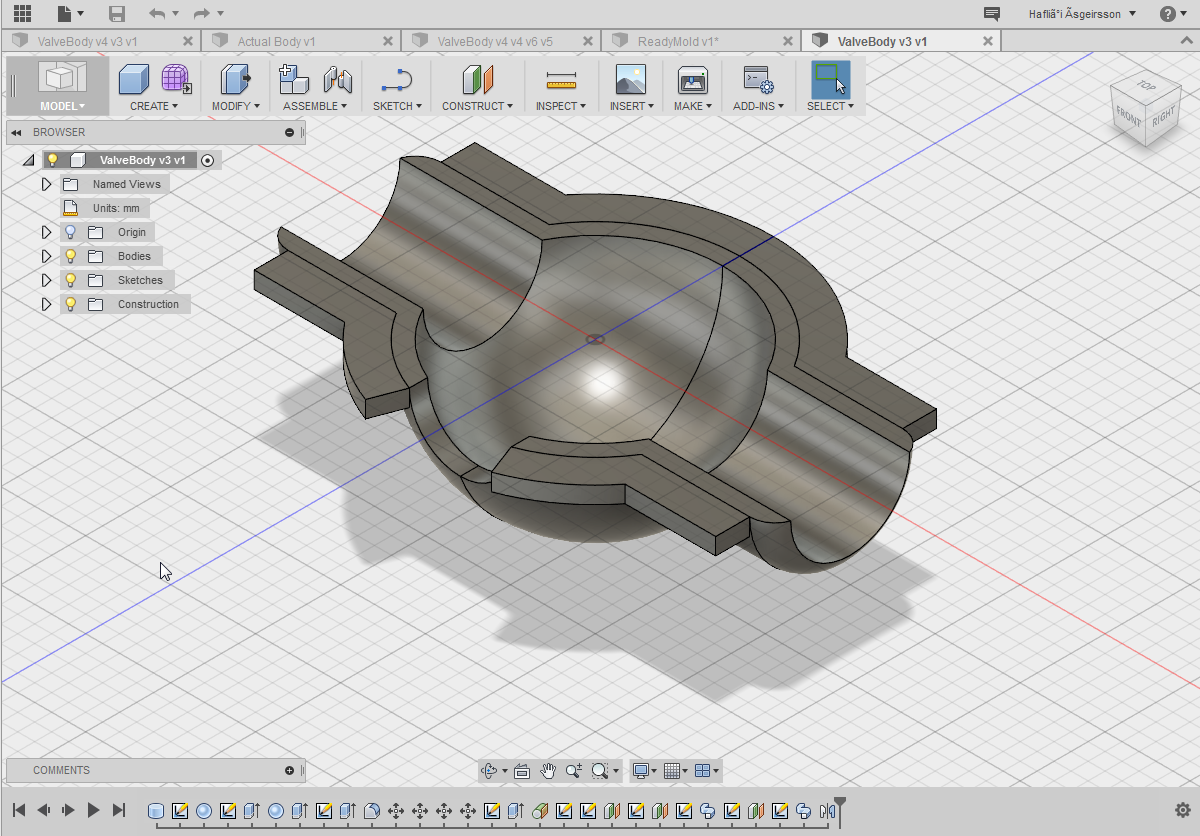
3D design - Fusion 360
UPDATE 20/5 2016
Fusion is actually a friendlyer program for 3D modeling that Inventor. It has certain limitations compared to Inventor, but non that would affect any modeling I would do in the academy. As I've read, fusion does not do well when there are many parts that need to be combined and constrained, but does much better in terms of processing any models since that is done on a webserver sponsored by autodesk. Fusion can also be downloaded and tried by anyone for a limited time, that can be renewed. So, if you're an entreproneur and just need fusion to try out some ideas or to make the first prototype, its awesome. If you're an engineer working with 3D modeling everyday all year round you've got to pay - which is fair.
I used fusion to design my mold in modling and casting, to redesign my incubator at one point and to design the tub for composites.
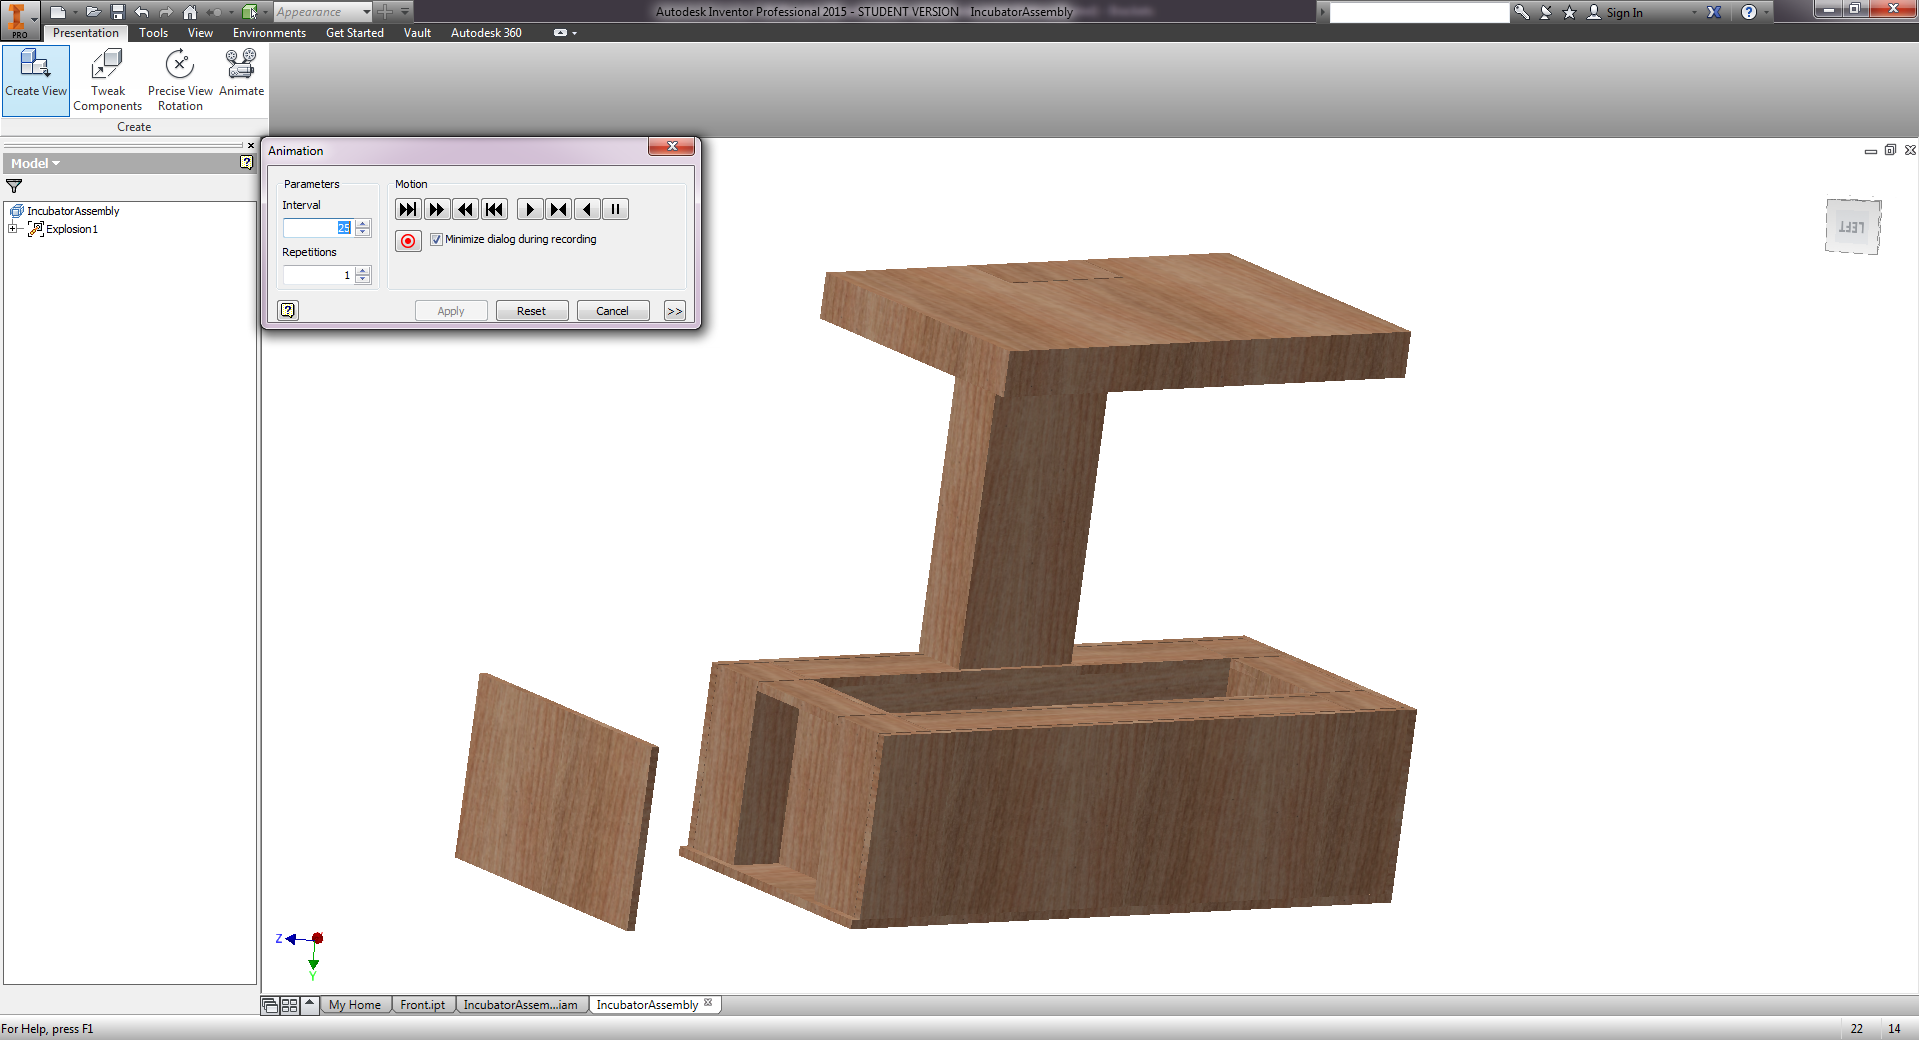
Animating assembly
After assembling the part I wanted to try to simulate an assembly/explosion. Using the presentation feature within Inventor, that was made possible. First the pieces need to be plucked apart from the assembled unit and afterwards the program allows for some animation.
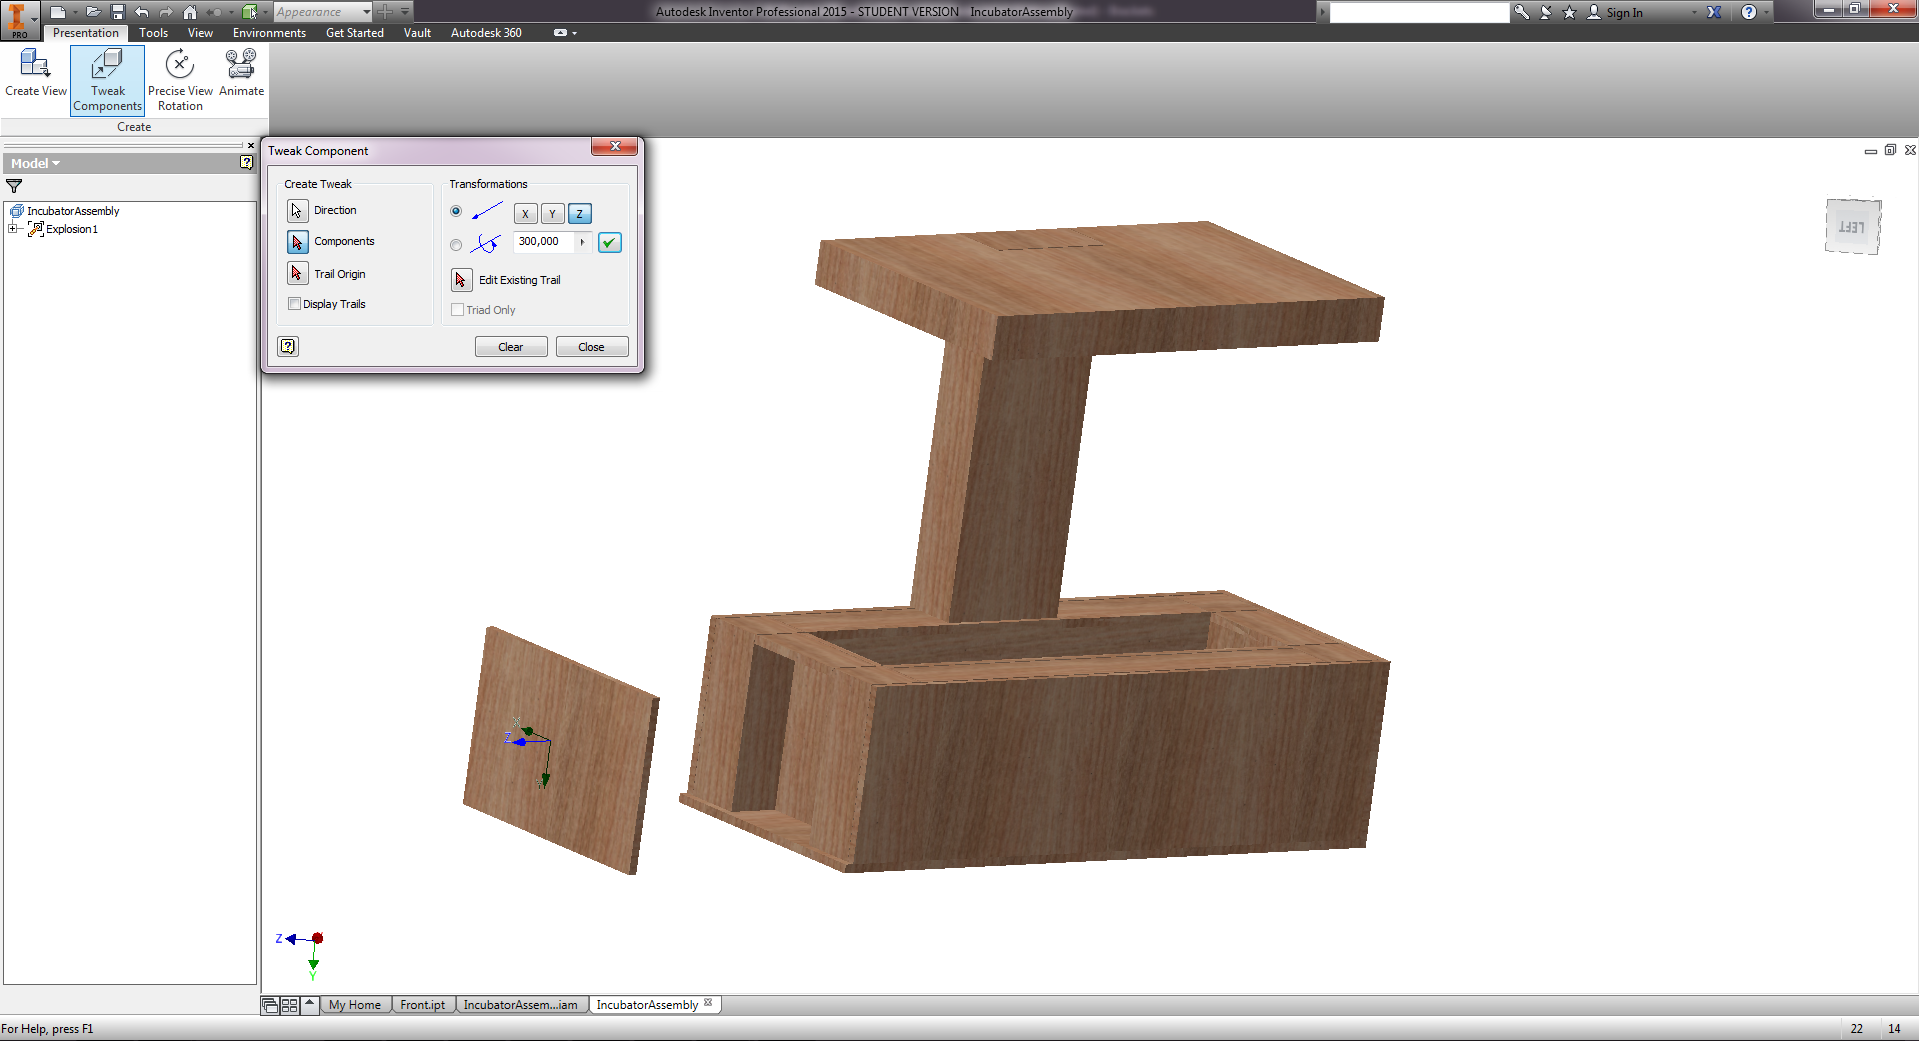
And after setting the pieces up the scenario like I wanted it, the only thing left was recording!
I had some trouble with the recording. The rendering came out horrible, very grainy and with some odd green and red coloring.
So unfortunetly I had to turn of the wooden animation... But the color was alright, I guess.