Week 12: Molding and casting
This lesson is the first one I'm attending at Fab Lab León because I can use machines at LABoral but is not an environment for trial and error experimentation. So I've picked a cheap AirBnB room to get there on Monday, mill and make the mold and then casting on Tuesday morning, have the regional meeting there and back home. It's not a really long trip, about an hour and a half, but trough some mountains and pay a 26€ round trip toll.
We've done some molding at the fabLAB during the last 3 years, the first was a collaboration with a geo-location-sound-landscape project: Mapa Sonoru. By that time we were experimenting with quadcopters and thought about the possibility of landing the quadcopter on remote spots like roofs, or other hard to reach places and have an audio recorder to get the sounds. So we used a quadcopter similar to this one to mount a set of binearl microphone, and no, it's not a mistake, we called like that because they only reproduced the ear shape, and had non-binaural cavities. But we wanted a soft material for the ears, to have a more realistic feel, and we had some urethane rubber available. So we printed some ears from Thingiverse and used them to make a silicone mold and then cast the urethane rubber. The result was very nice and directivity of each channel was easily noticed.
Last year, on a project called 200 metros we also used molding, because we wanted to make o-ring seals for a capsule to go down 200 meters with a camera and some other electronics. We milled pieces of PMMA with a 6mm mill bit just on a circumference path, then put silicone grease and then cast the urethane. The rest is a very long story of shame, fail, win, whales and Aussie sensors that I would be happy to tell to anyone asking during FAB12.
On Wednesday as the lesson finished I met with Nuria and Borja to talk about this week assignment, so they told me their mills available, molding and casting materials and so on. And Nuria suggested using the food-safe material mentioned during the class, and the idea of some fun ice tray. So I started looking for inspiration here and got me thinking about positives, then negatives then positives again. It even took me to this 1000$ ice ball maker!!! and you have to make them manually one at a time, though it seems to be very precisely machined.
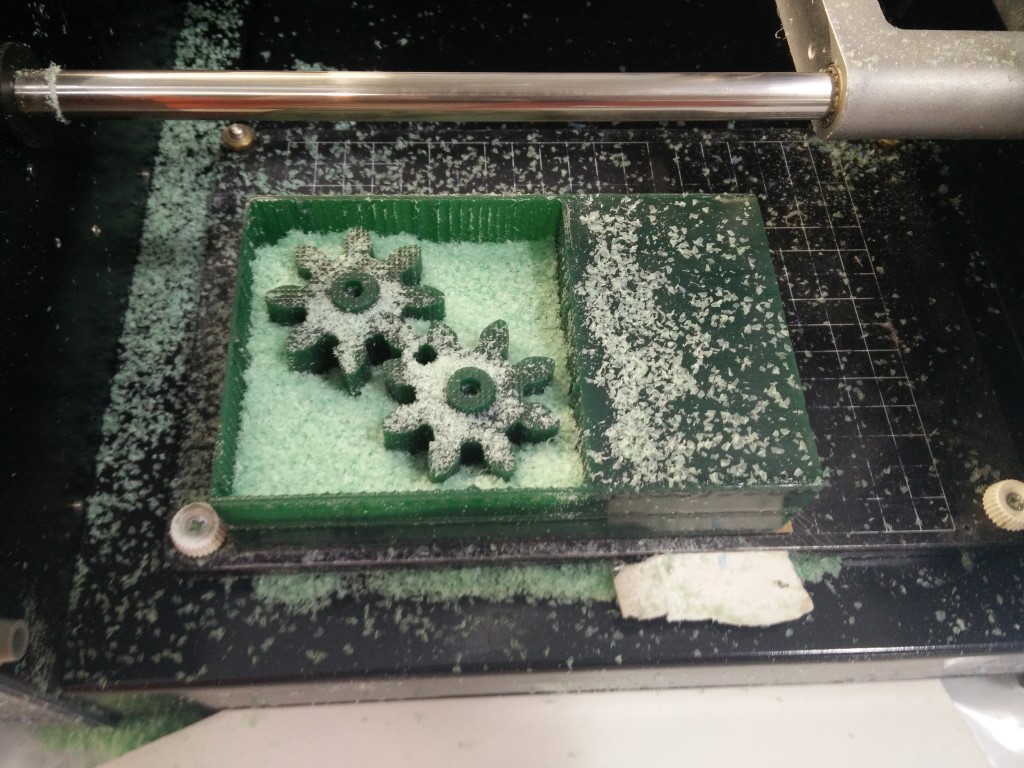
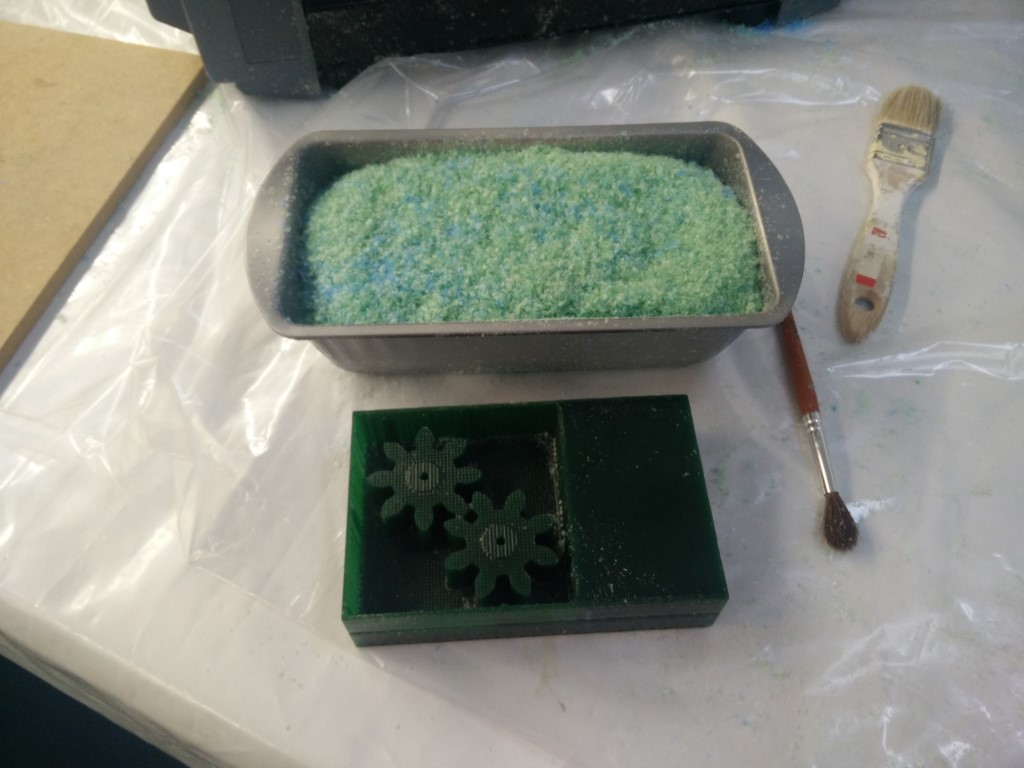
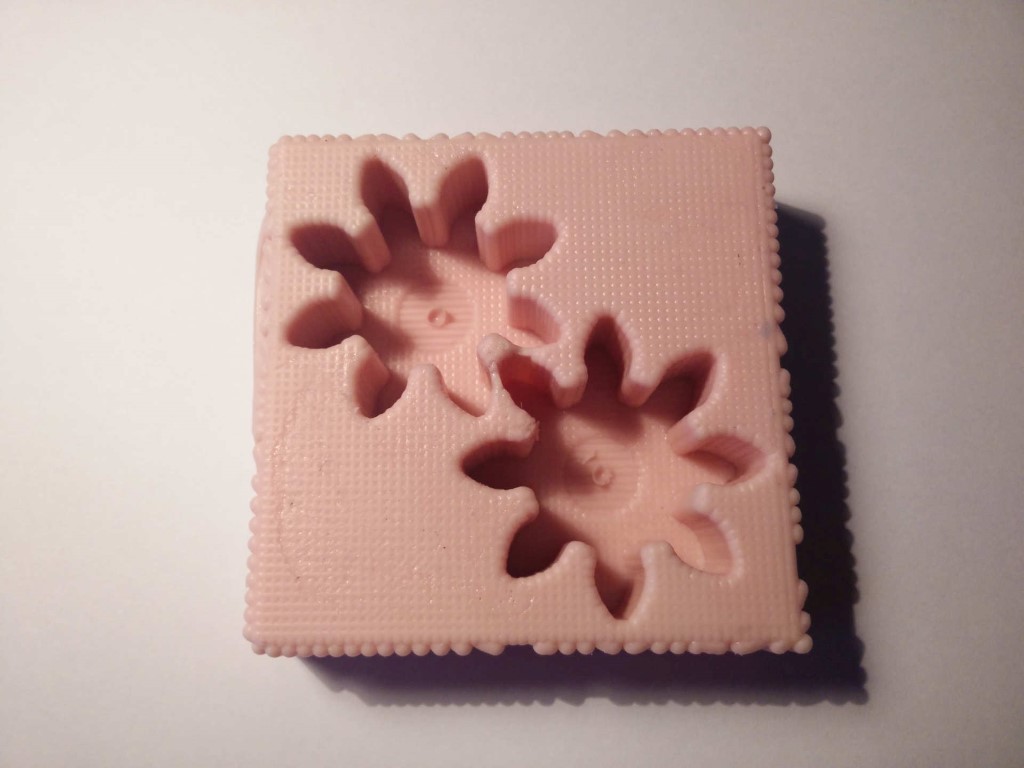
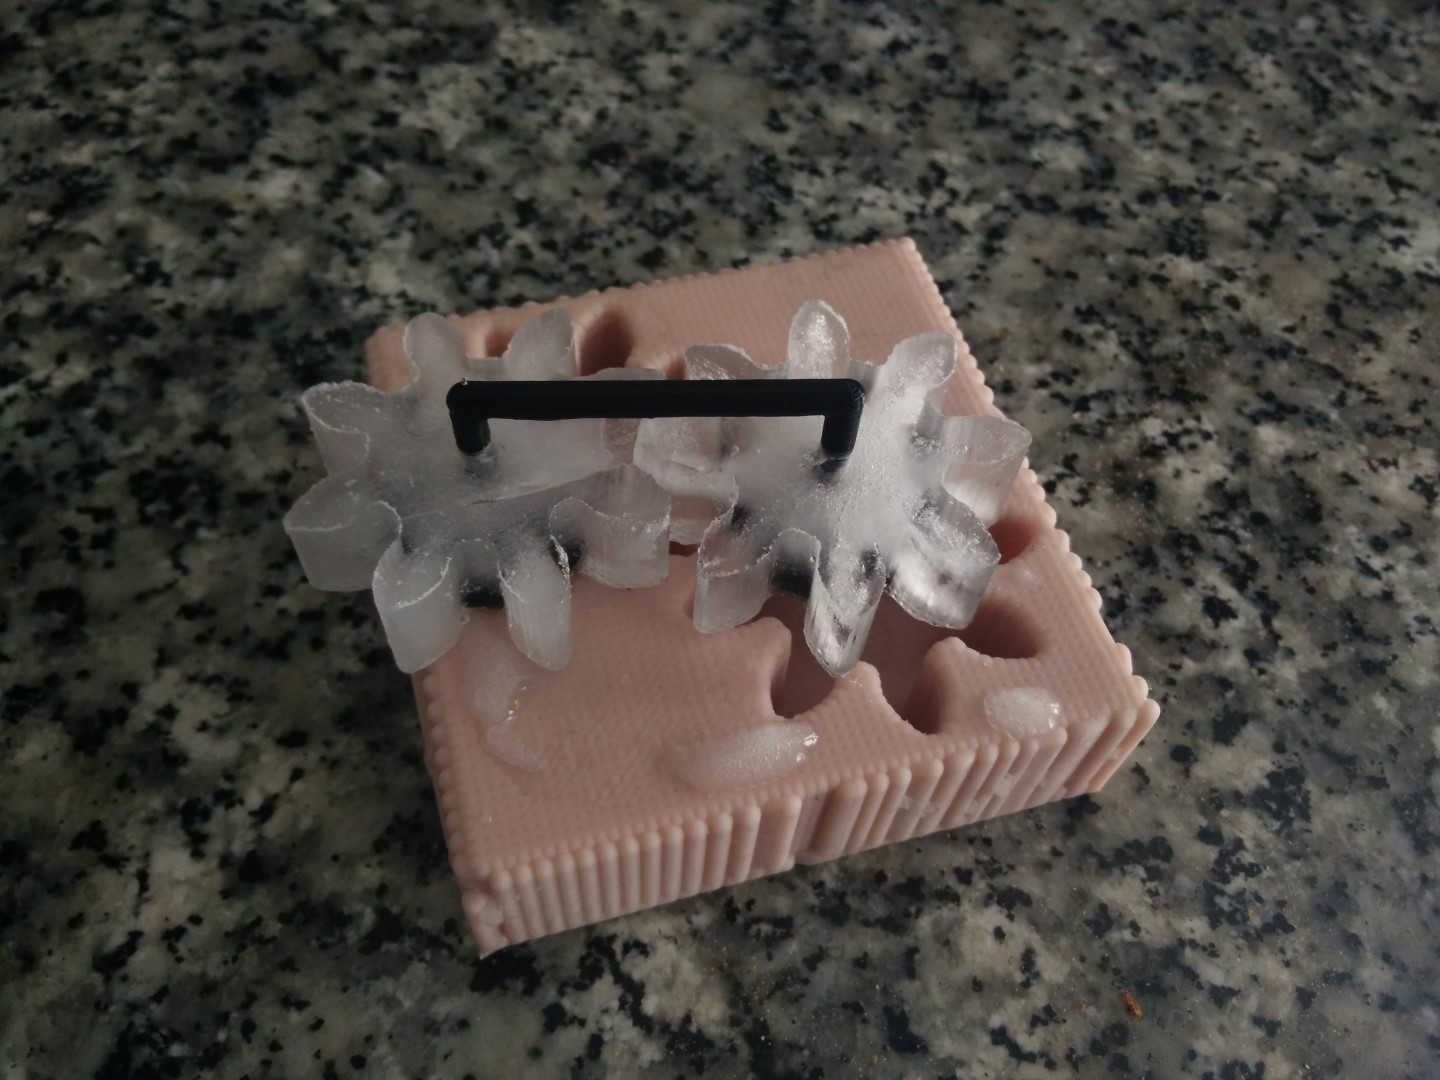
And I got an idea, to design an ice tray so you can take a couple of ice gears geared out of the tray. So for that I will also need a link between them, I'm thinking 3D printed right now. So tomorrow I'll start modeling it.
So I modeled a couple of things, first the gears. Even when I spent some time remembering what I've studied about gears, being the purpose of the design to make an ice tray I just grabbed a design that I made using Geargenerator.com just a small pinion with just 8 teeth. The gear generator tool is quite useful and allows you to make multiple combinations and edit some parameters of the gear. Then I got an .svg file that I cleaned with Inkscape, then exported as .dxf and then imported in in SolidWorks
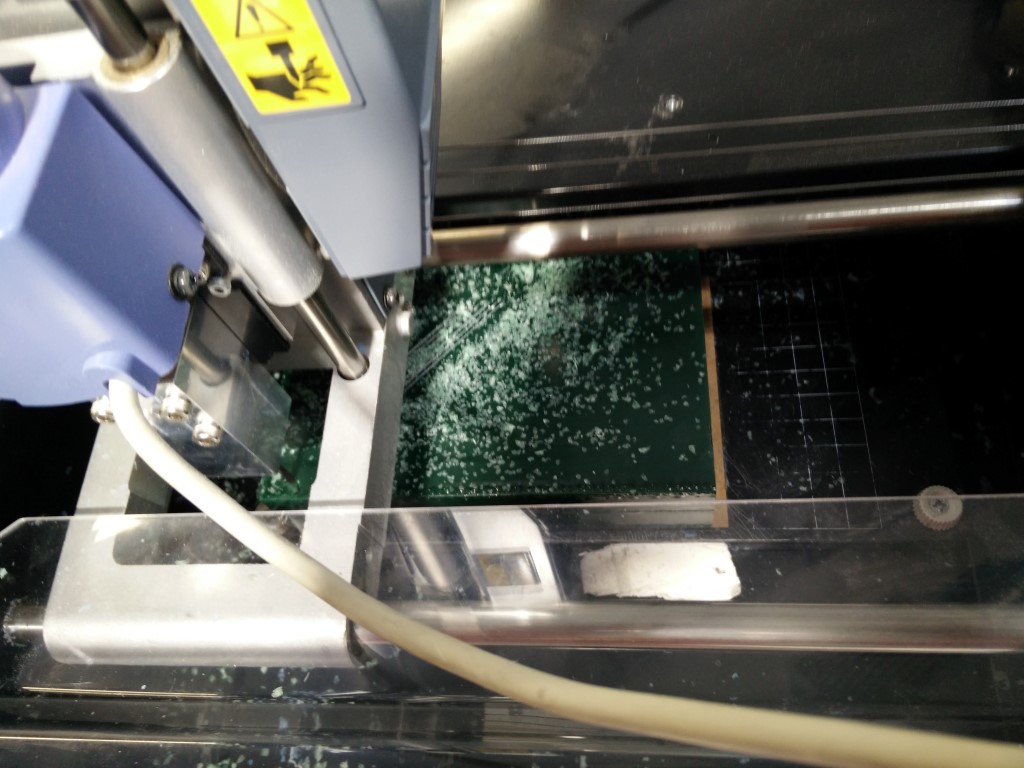
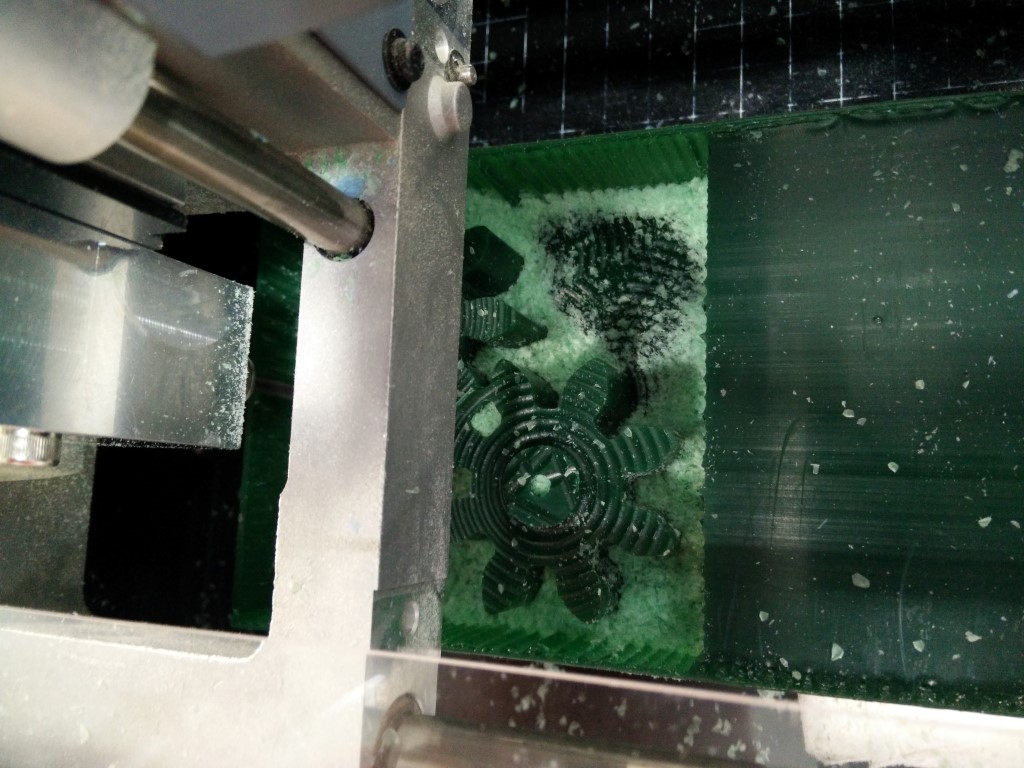
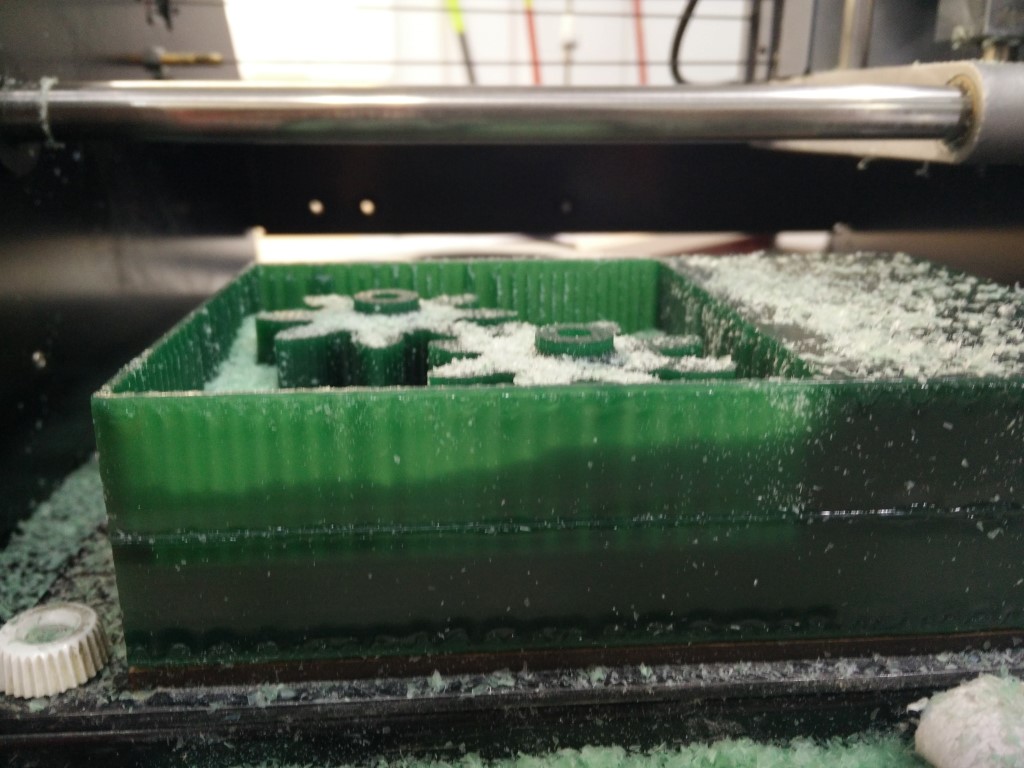
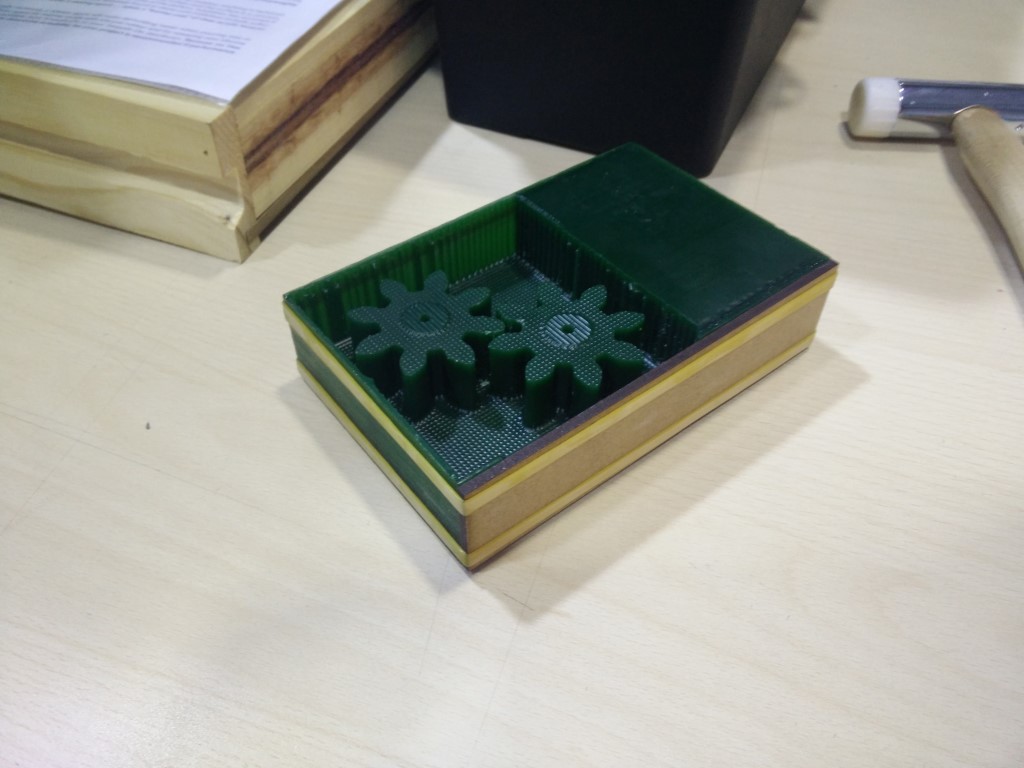
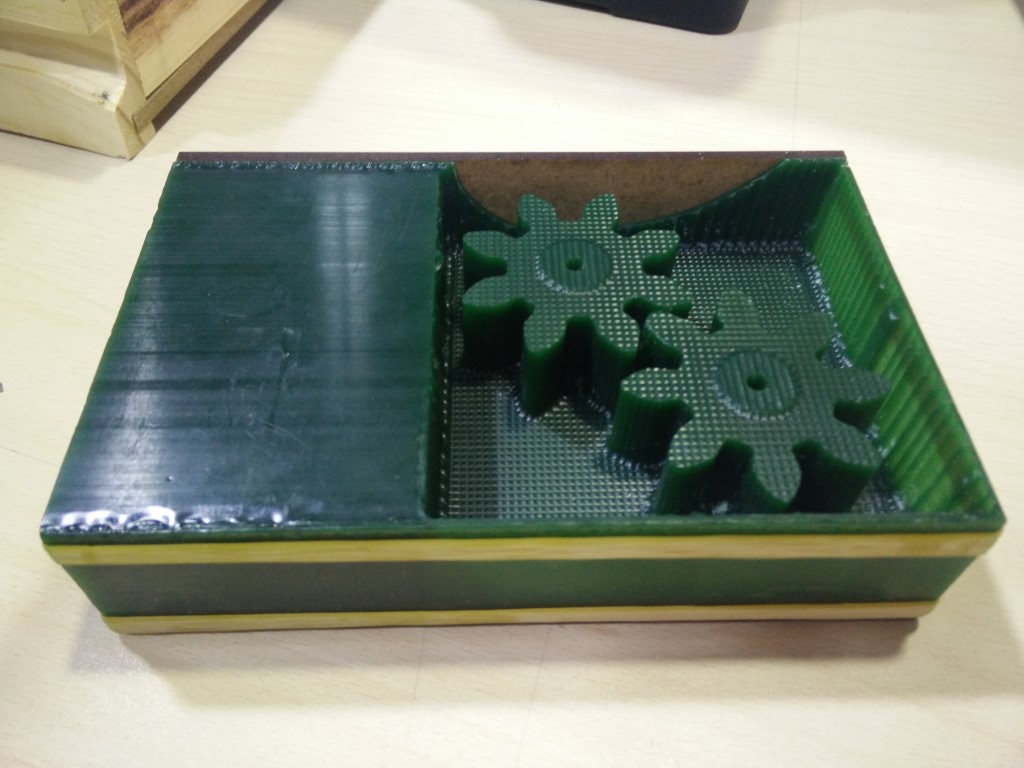
Yesterday was a fun day at Fab Lab León working with Nuria and Borja. I got there in the morning and showed Nuria what I wanted to mill. At fabLAB Asturias we used the big milling machine most of the time with Vectric software, but for this week I used the fabmodules to MDX20 workflow. I've made an assembly in SolidWorks using the model of a wax block to have an idea of the size. So from that assembly, I exported just the two gears as an STL. I've imported that STL in fabmodules that generated a .png file. The problem was, as it happened with the PCB milling, that the bounding box is fitted to the design so it's not possible to mill the borders. From there I took the .png file and edited it. I made sure that I drew an outside black rectangle with 3mm clearance from the border to the gear, so the tool can fit. To be sure of the gears fitting in the block, I've also resized it down a bit.
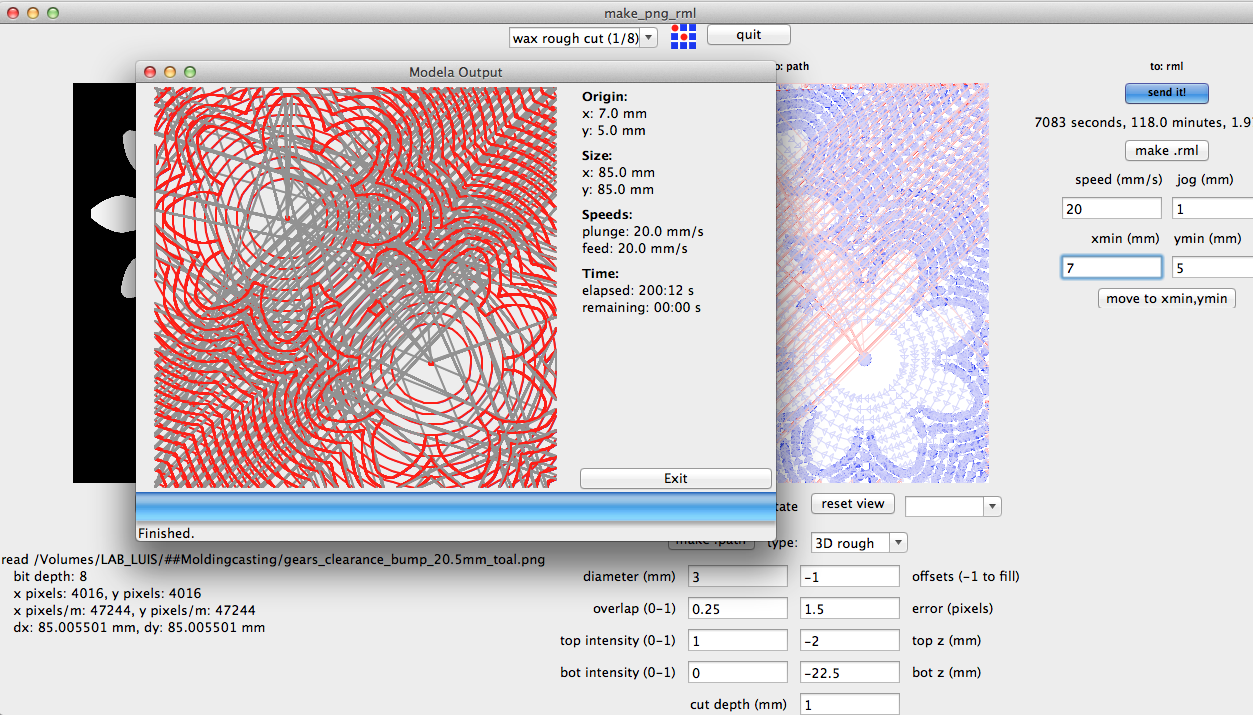
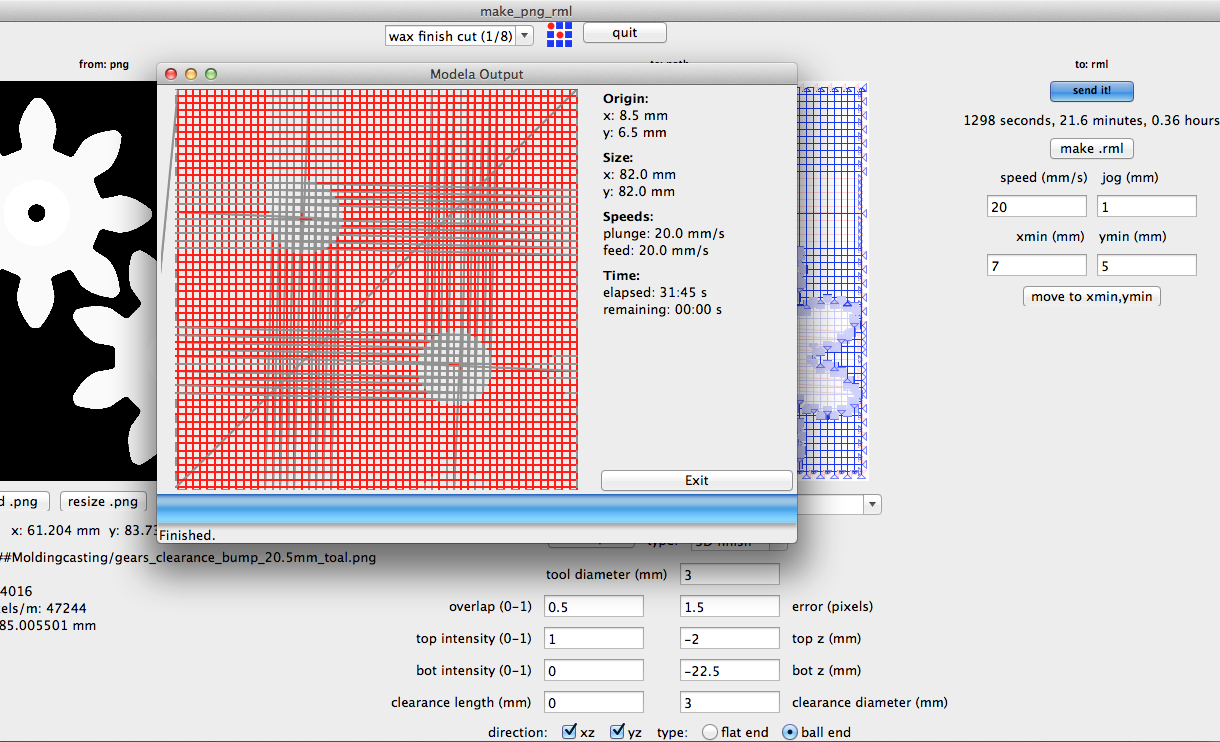
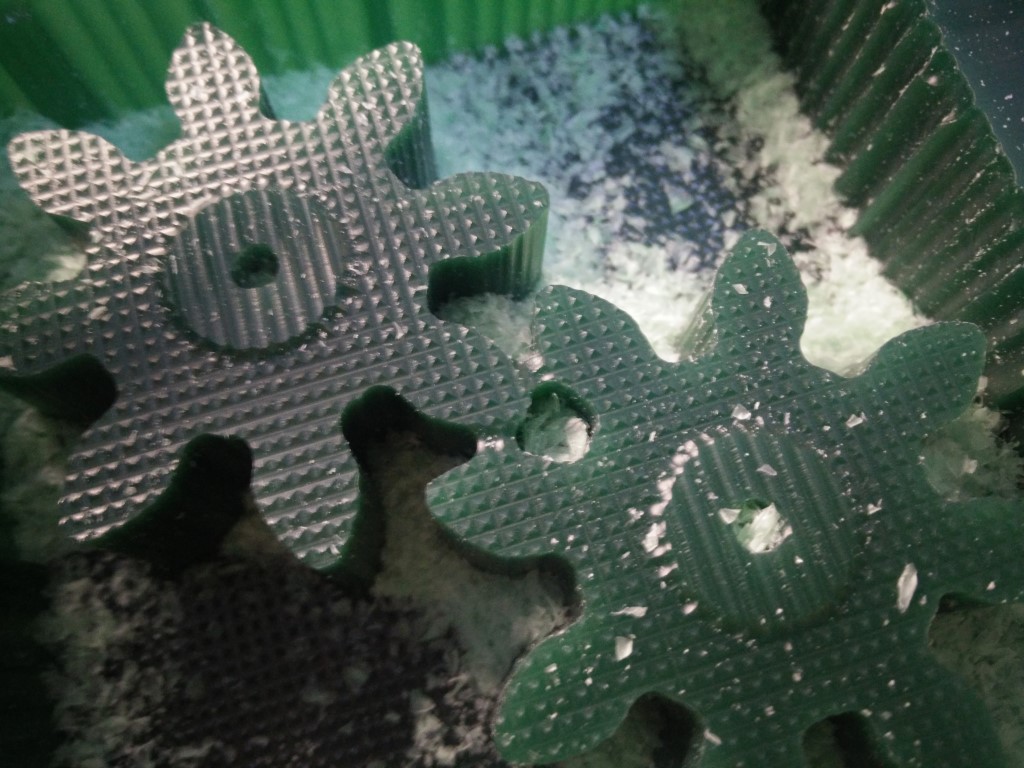
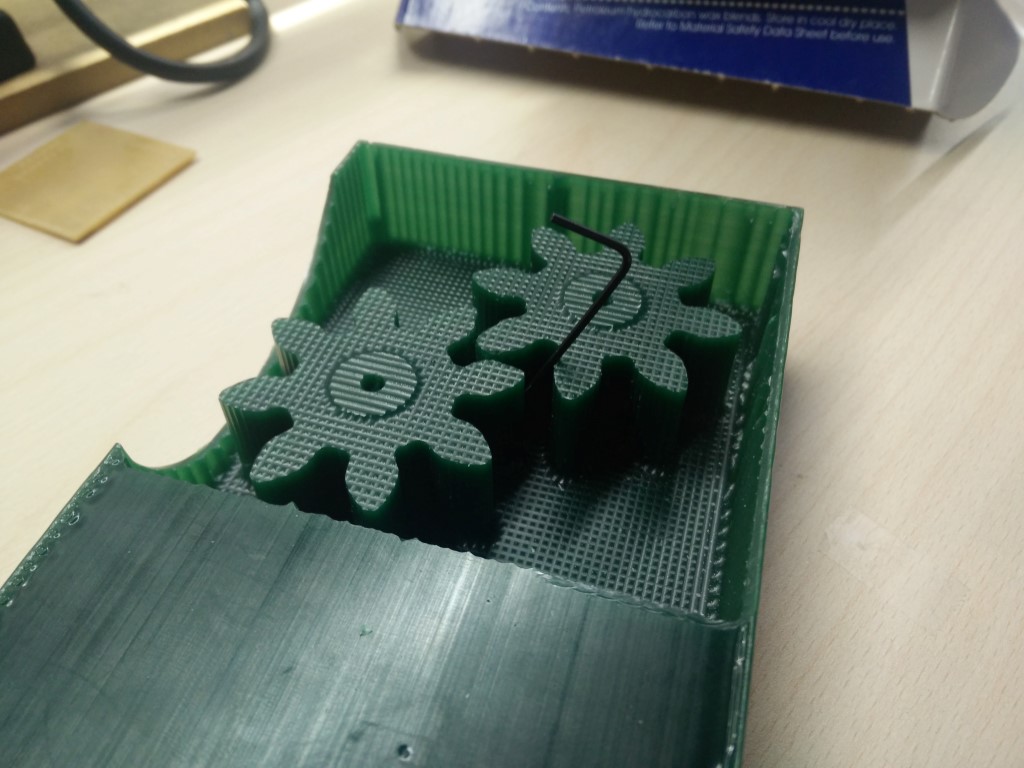
There was a dimension problem, because when I made the assembly on SolidWorks I've checked for 3mm clearance between the gears, and I left them so the closest points were 3.06mm apart. But the problem came when I had to add the bounding box and resize the whole design, that 3.06mm became less than 3mm and the milling left both gears united by wax. So being the material wax for carving I opted for a bit of "HTC" (Human Tool Control) to complement the CNC. So I grabbed a small Allen wrench and started carving.
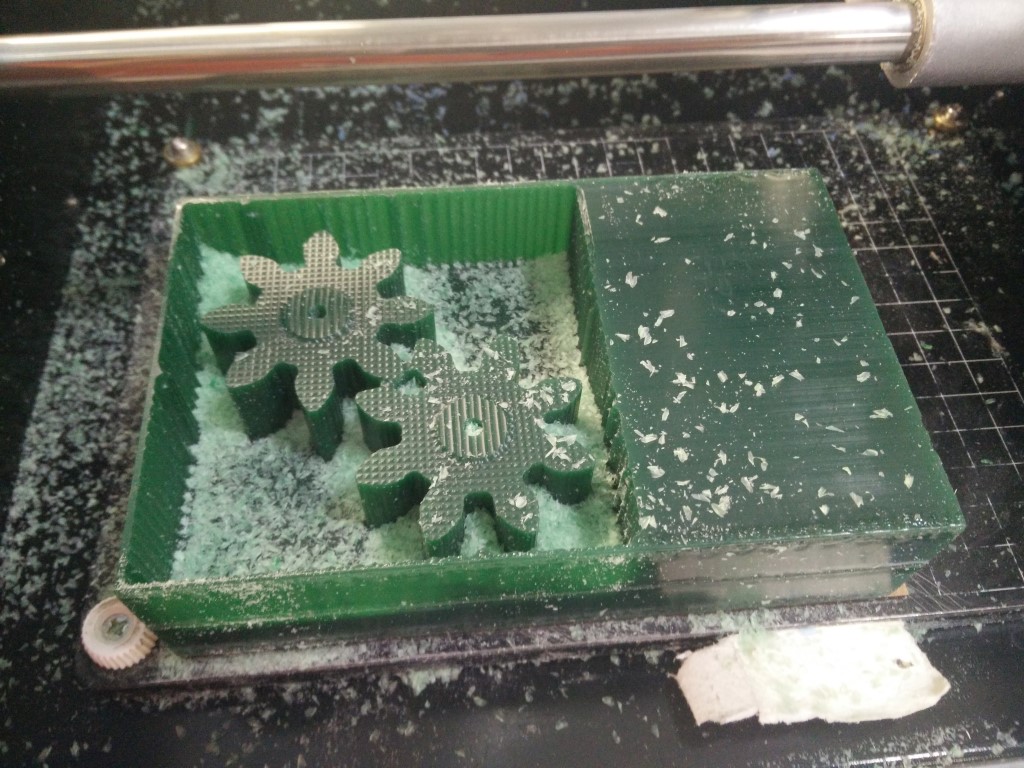
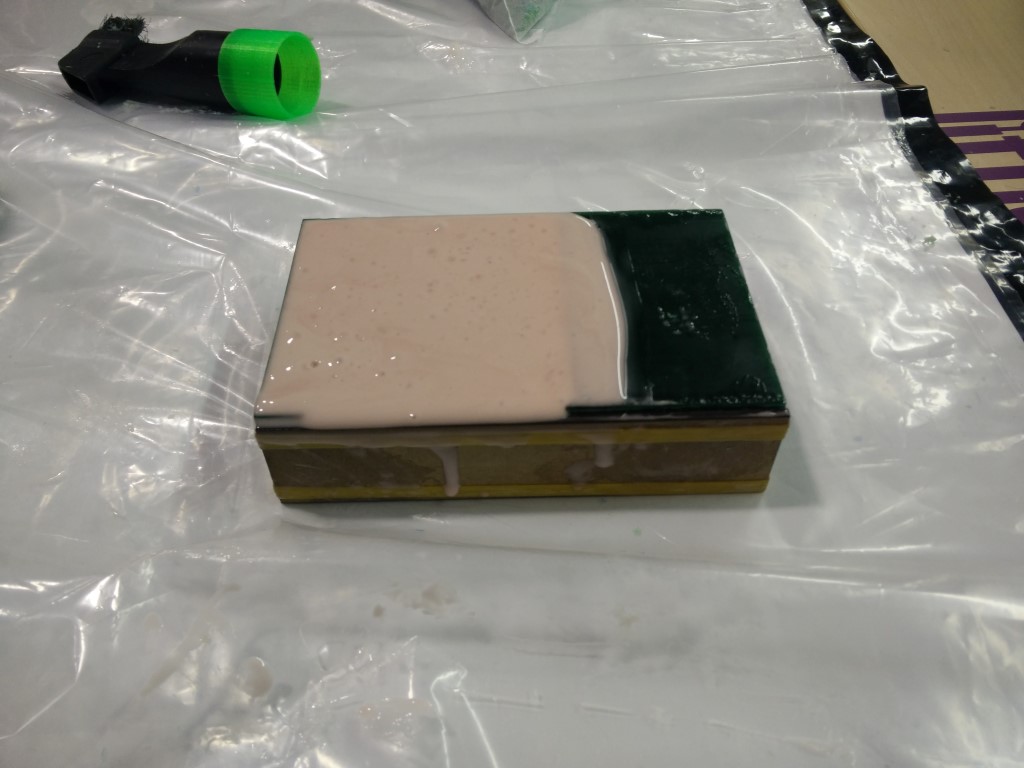
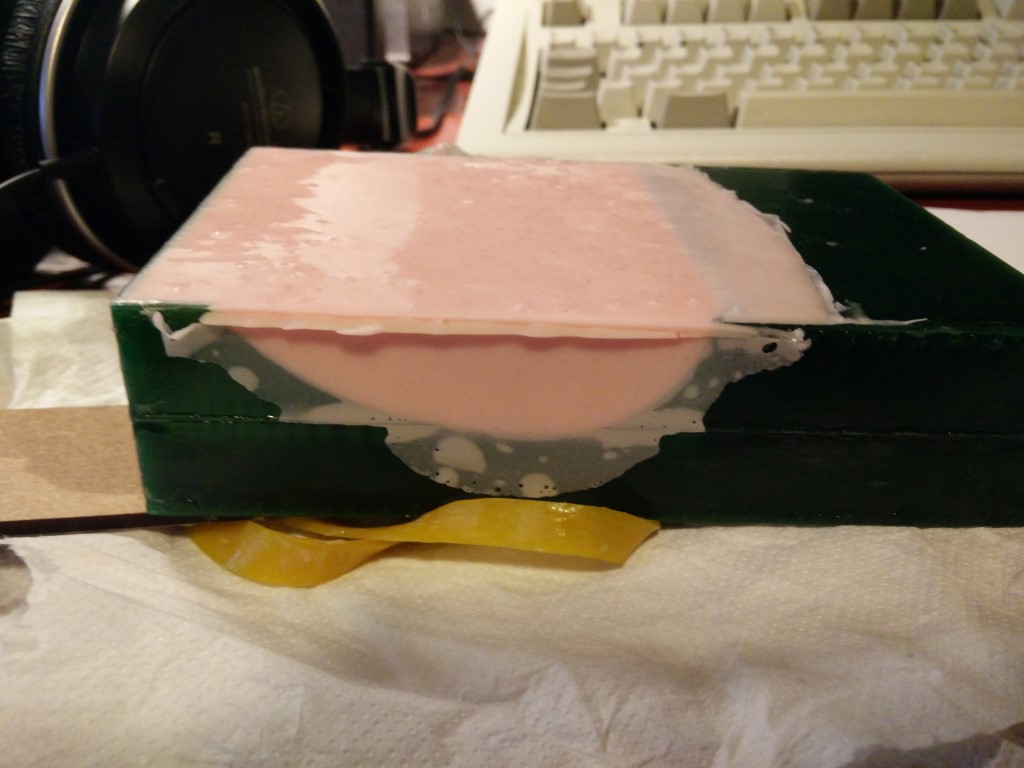
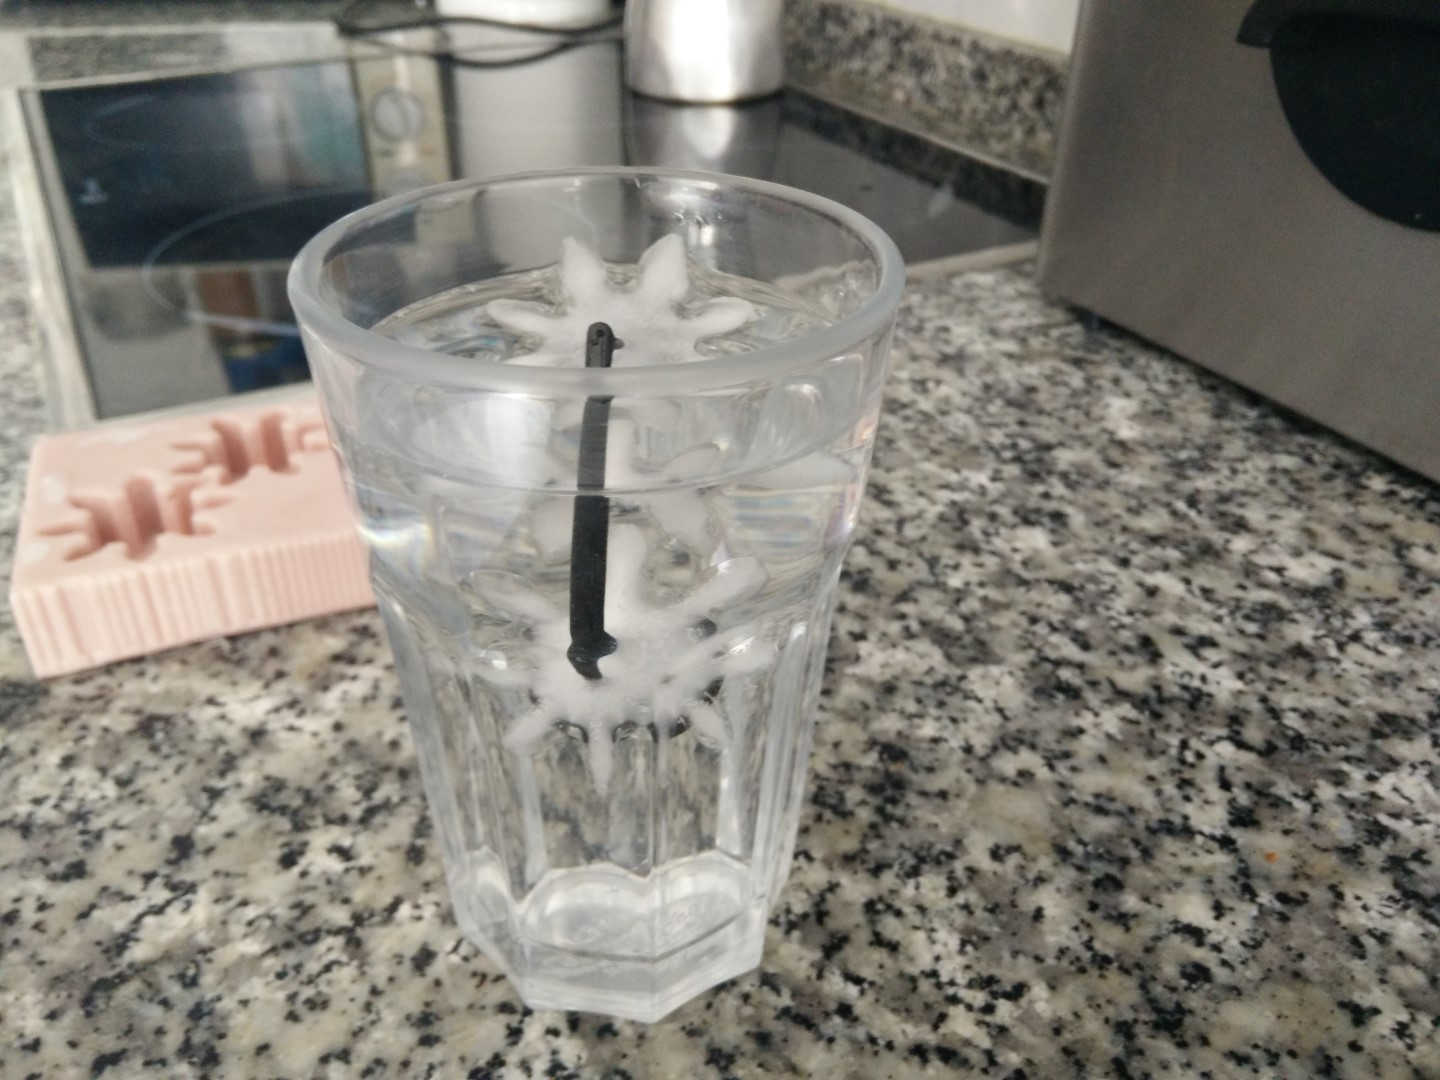
After leaving the Fab Lab at night, we cast the Smooth-Sil 940 on our molds, and as it takes 24h to cure, I'll take the wax block and mold back to Asturias. I won't be able to post-cure it on an oven until Thursday though, so I'll keep updating this weekend.
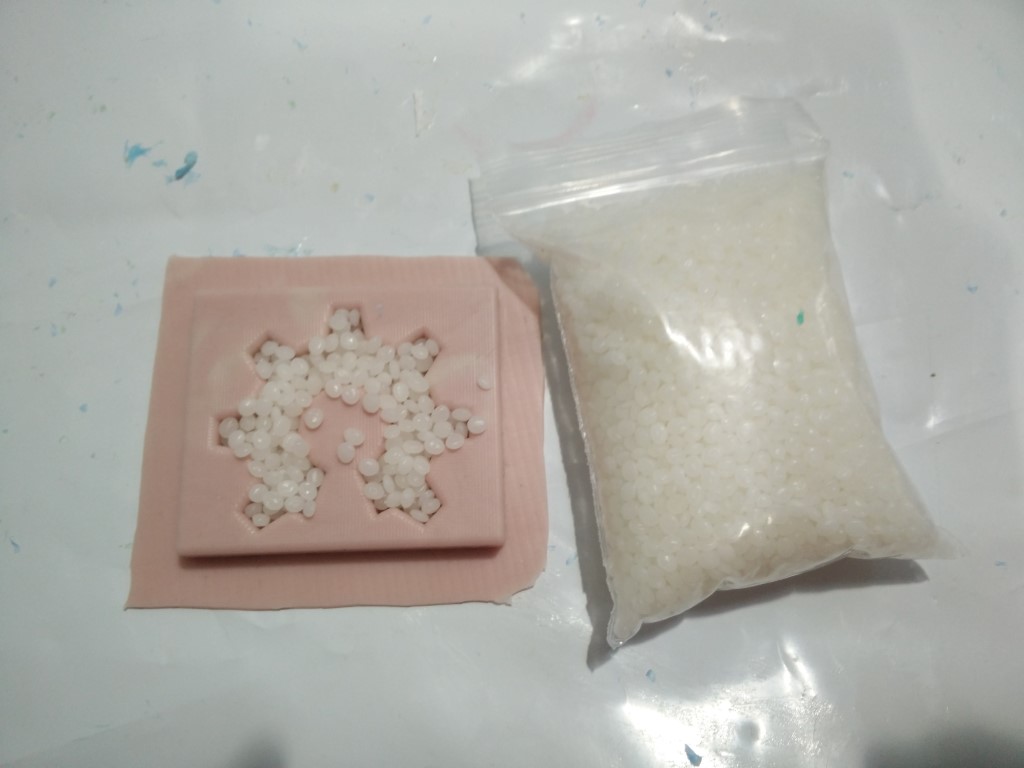
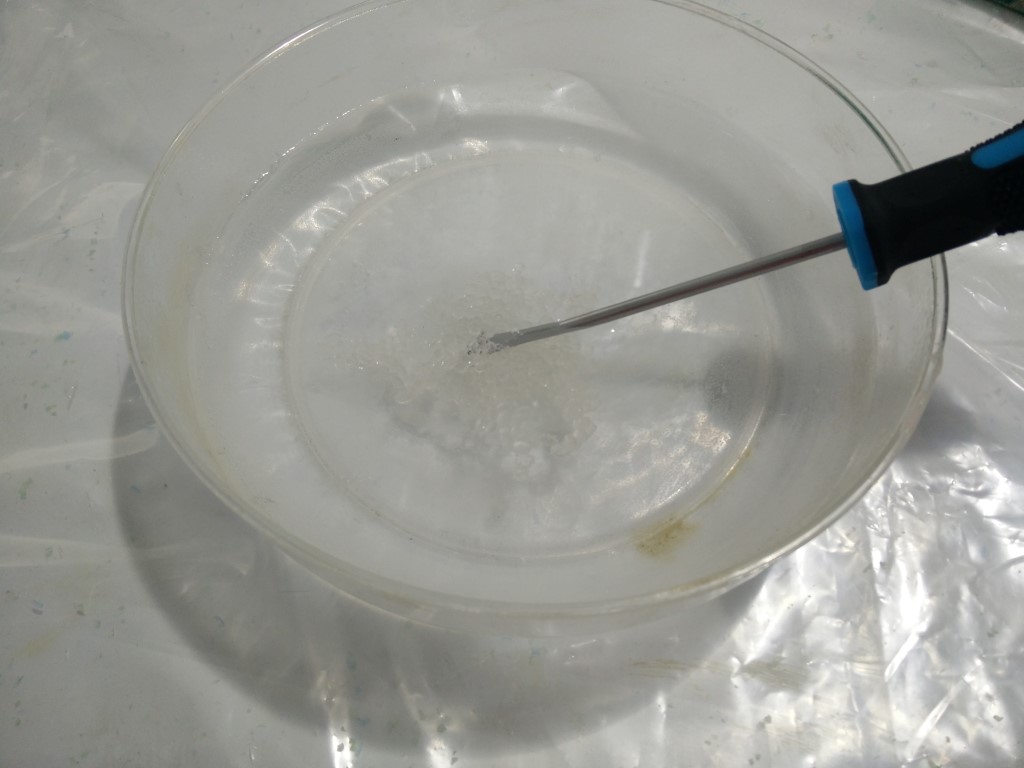
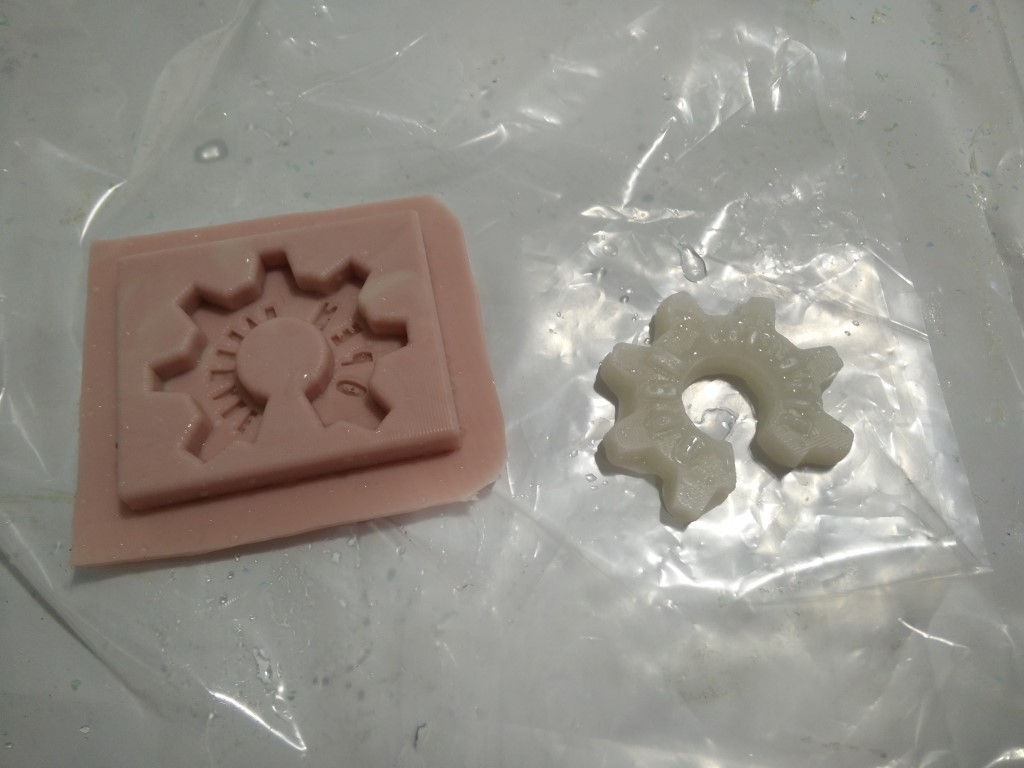
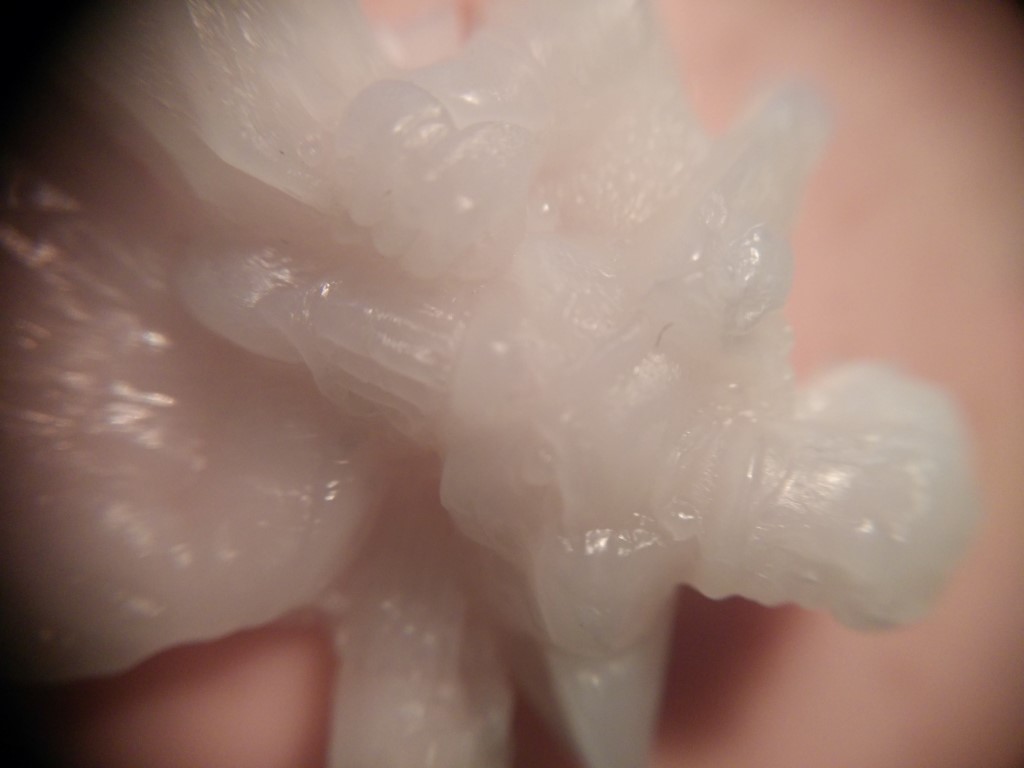
I also had some Polycaprolactone that sounds cool, but many of you'll know as Polymorph plastic. I got a 100g bag from Aliexpress for about 3.5€. So before the regional meeting while we waited for the Smooth-Sil to cure and the OOMOO to post-cure. I took a mold made by Raul Diosdado last year and heated a bowl of water in the microwave to test some pellets. The melting point is 60ºC. To calculate approximately the amount of pellets needed I've filled the mold with pellets and added around 20% more and it was still not enough plastic so I've tried to melt everything back again but the water didn't keep the temperature and had to microwave it again. It gets detail pretty well so I'm thinking about using it to make a mold. Best thing is that you can put it back in hot water again and re-shape every time.
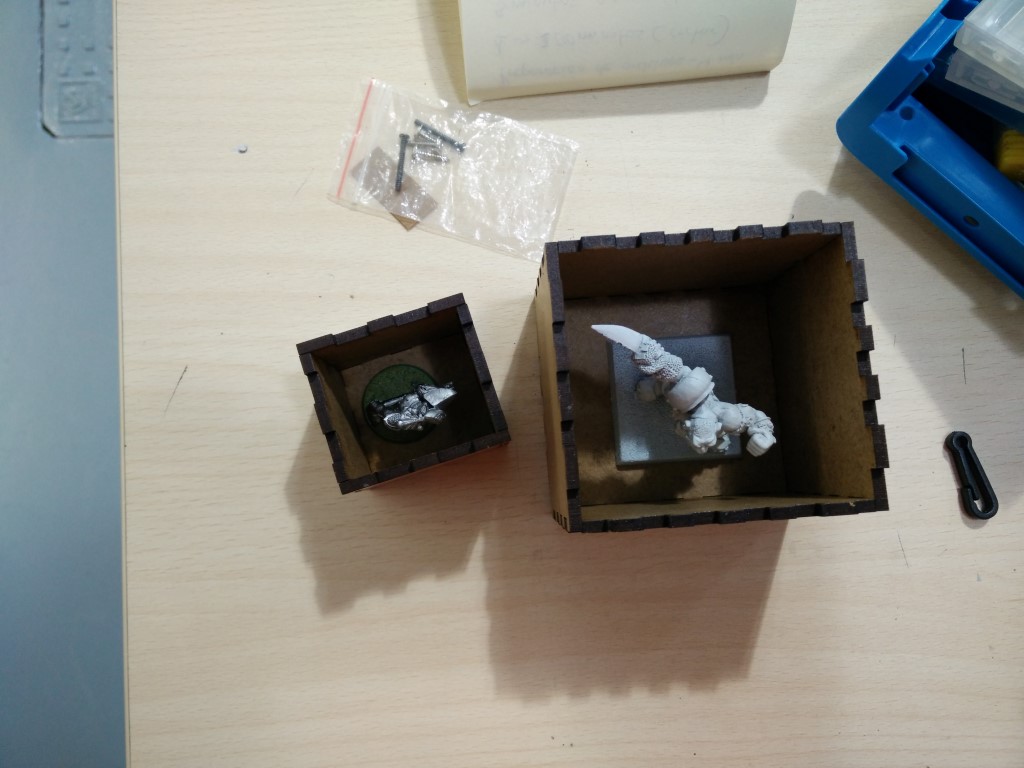
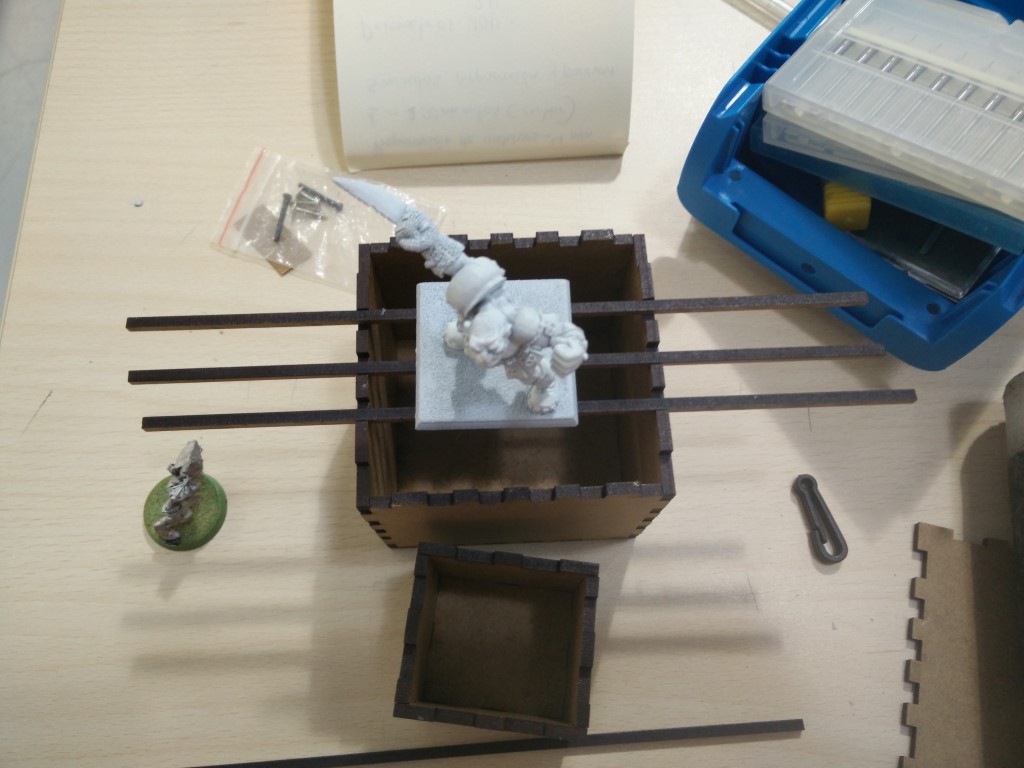
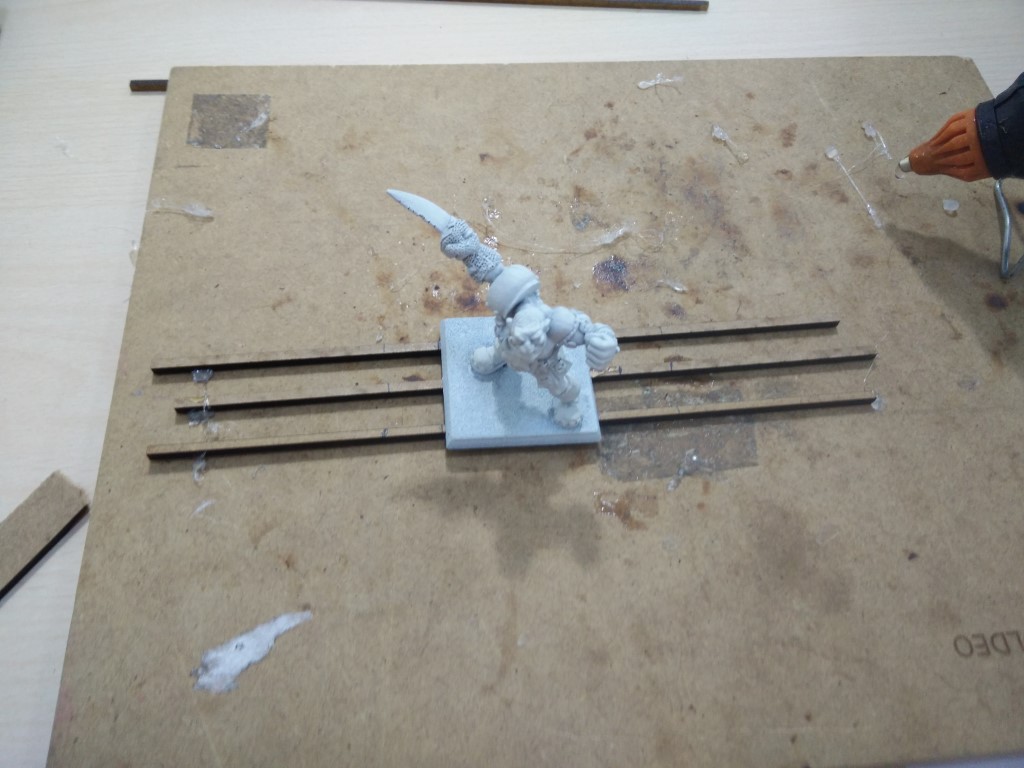
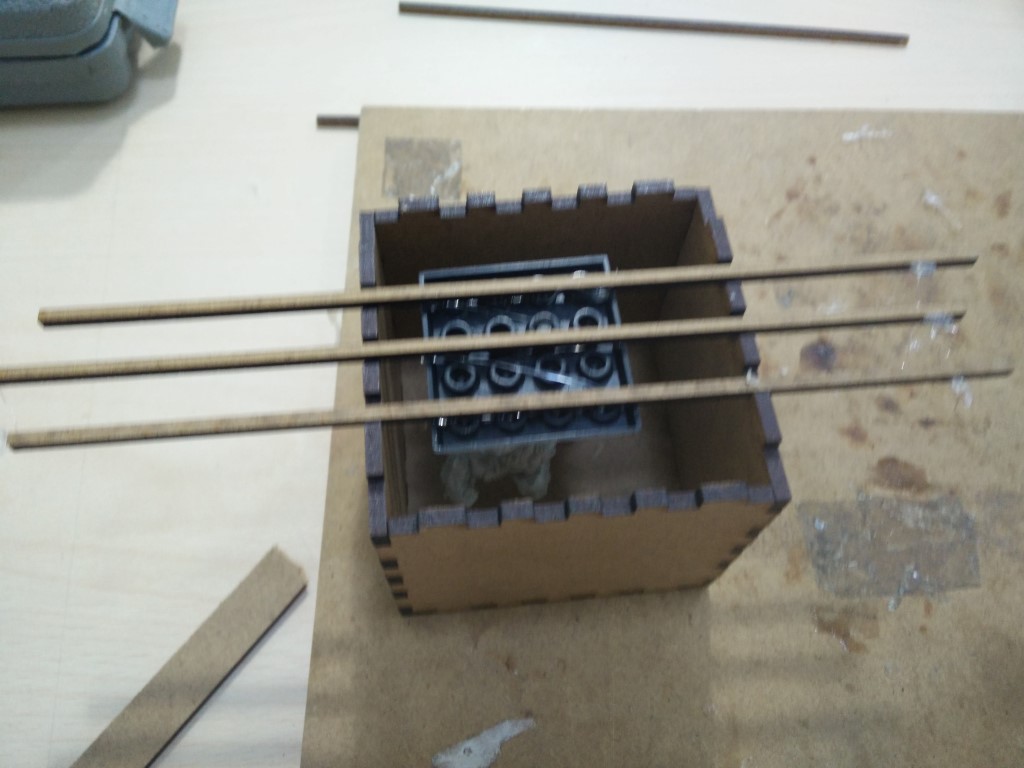
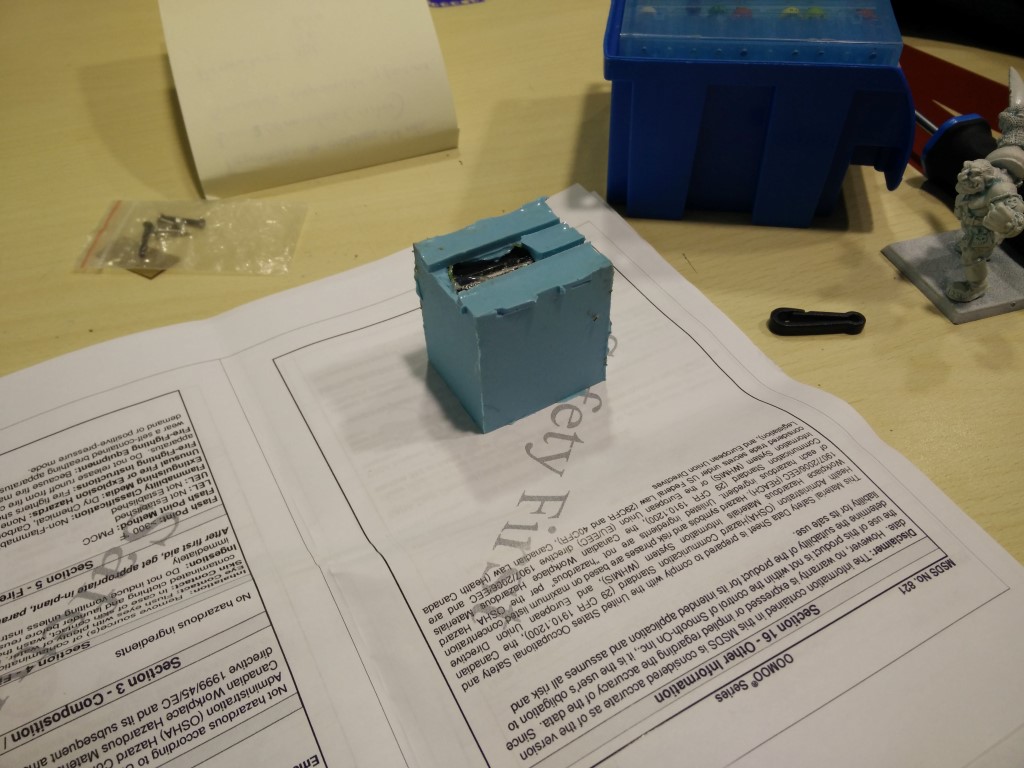
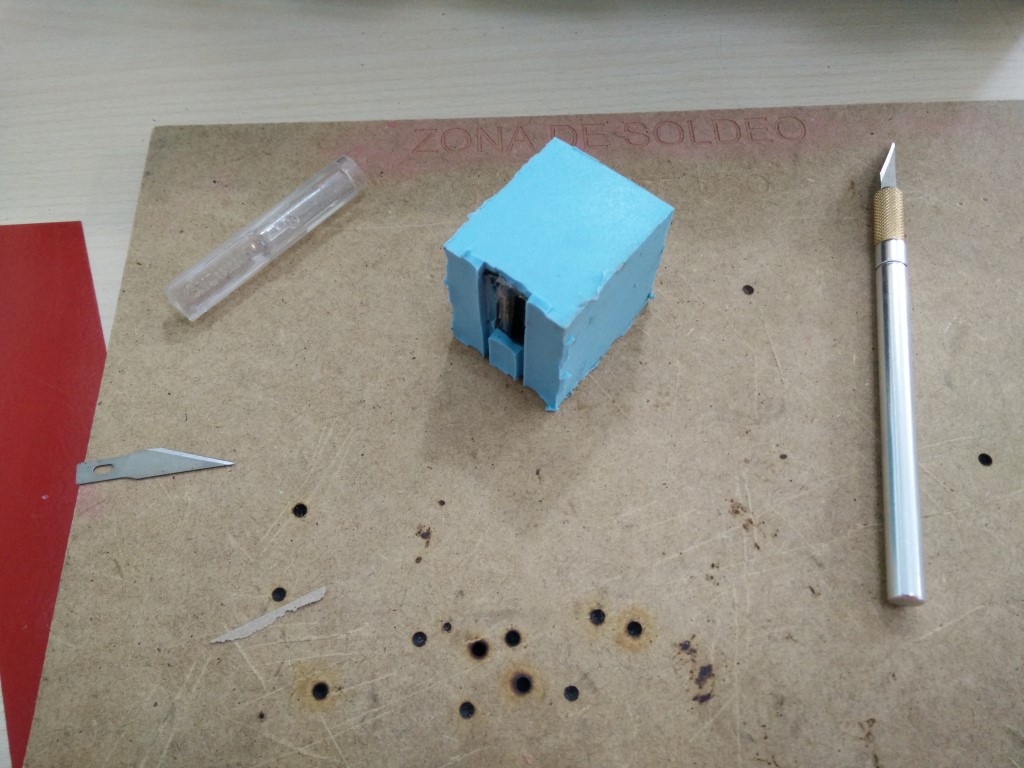
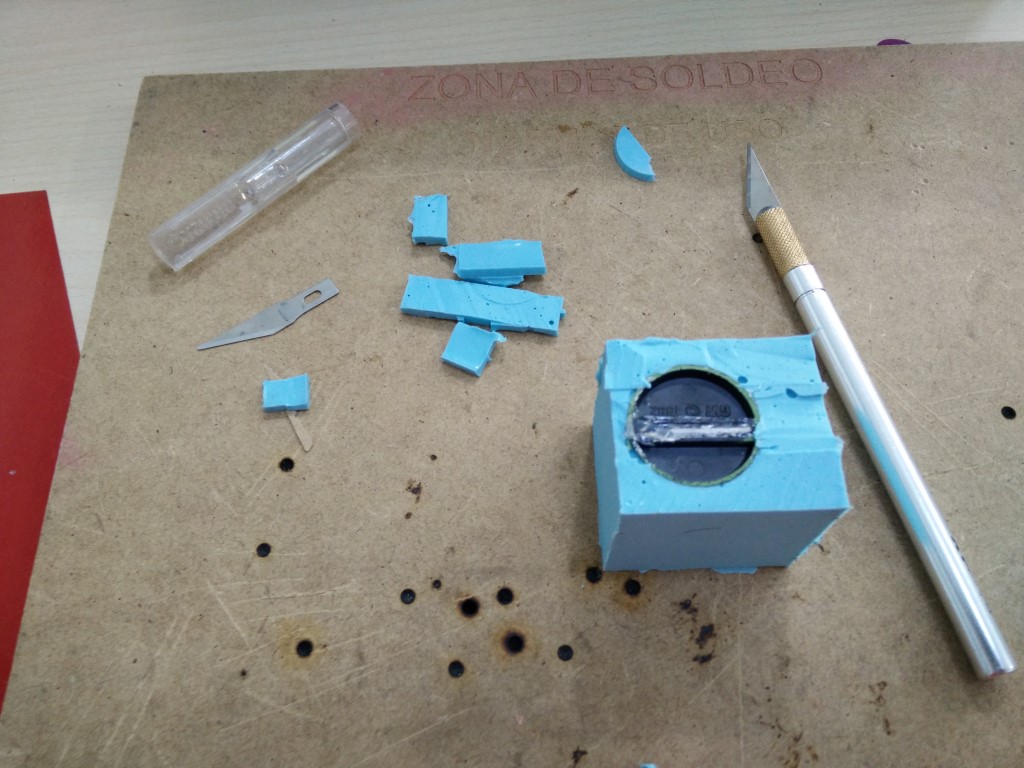
So while the ice tray is the main project for the week, we wanted to try some other stuff. I got OOMOO 25 to try it, and as Borja was also interested, we made some molds of existing objects. I picked a miniature figure from a board game. As I said in week 5, the replication was made for educational purposes and the molds and casts were destroyed afterwards. So I made a little MDF box with the laser cutter using makercase.com and hung the miniature sticking it to a couple of MDF bars. The miniature was hot-glued to the bars, hanging upside down from the top of the box, so I would fill the box up to the base of the miniature. But I didn't control the quantity of OOMOO I was pouring and all the box was filled.
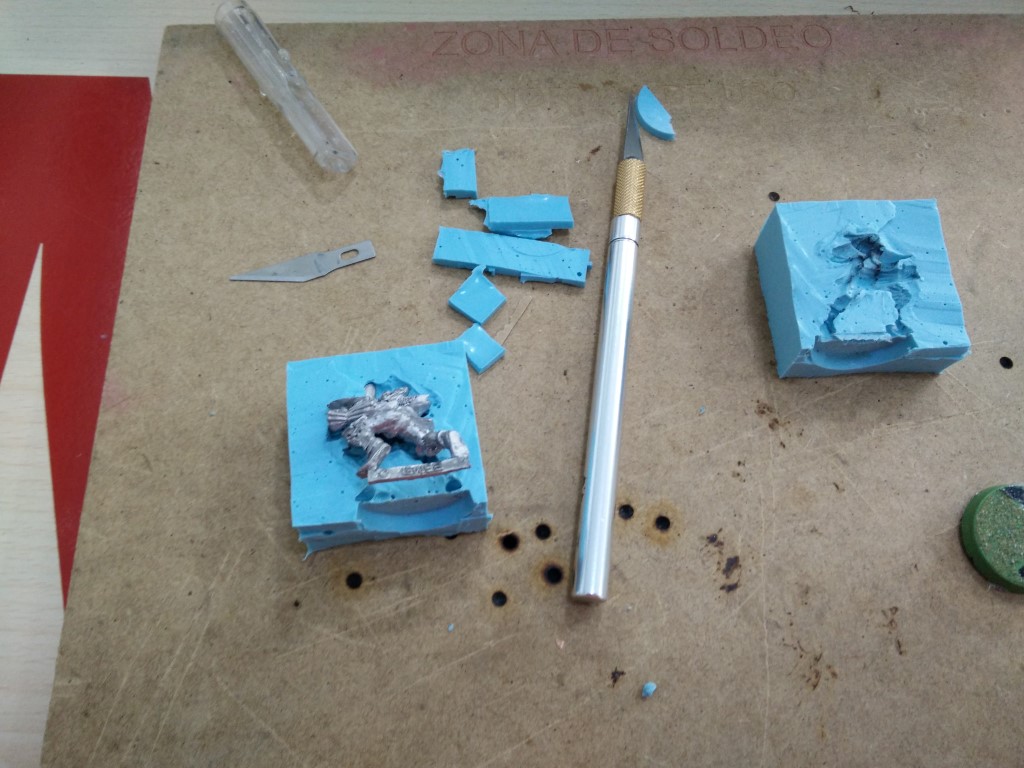
The mold is far from ok, but I've learned a lot. The miniature is too small and the opening on the base (the two legs" are too small for anything viscous to pour. So I'll try casting something on each half and then apply pressure to get it out. Polymorph is too viscous even for that but I've tried it anyway to see how it catches detail.

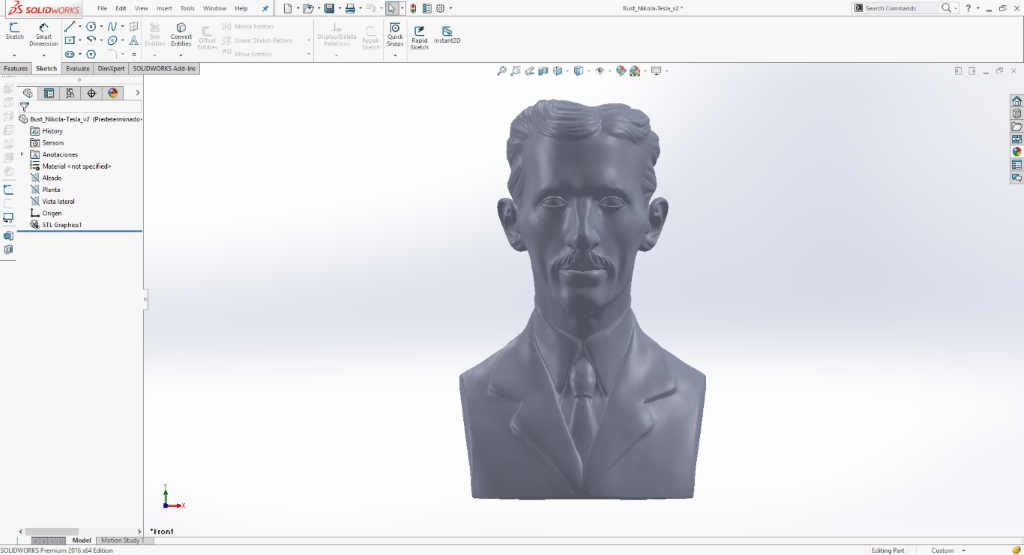
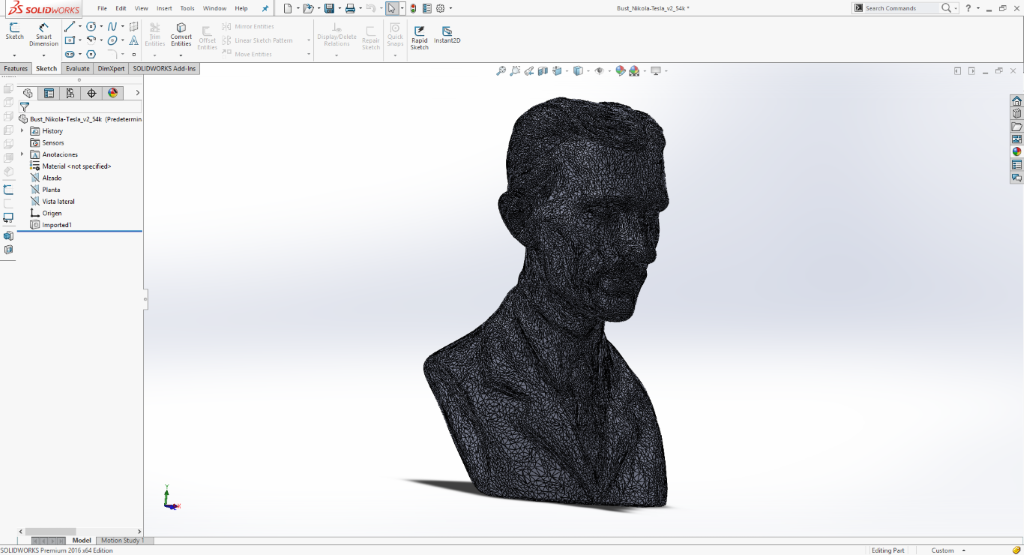
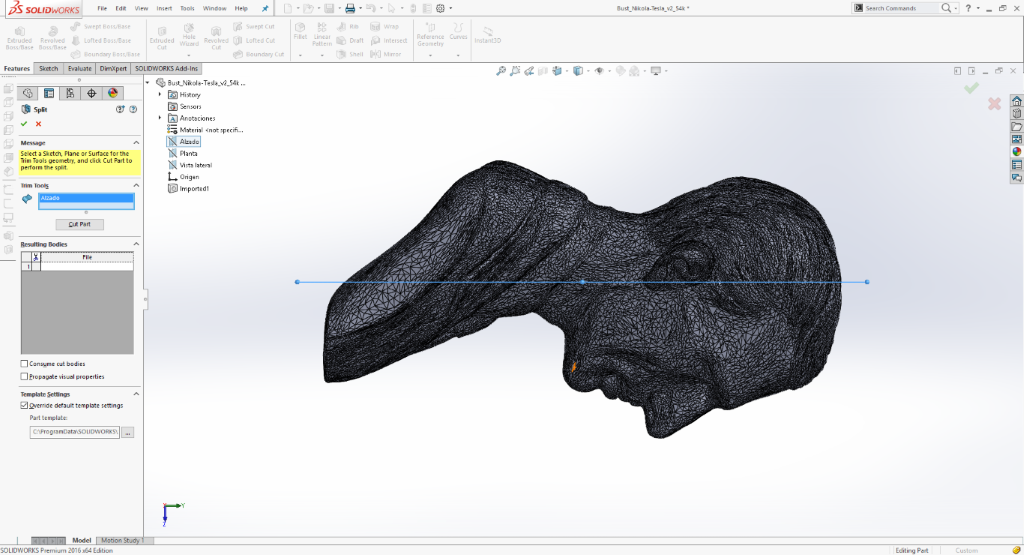
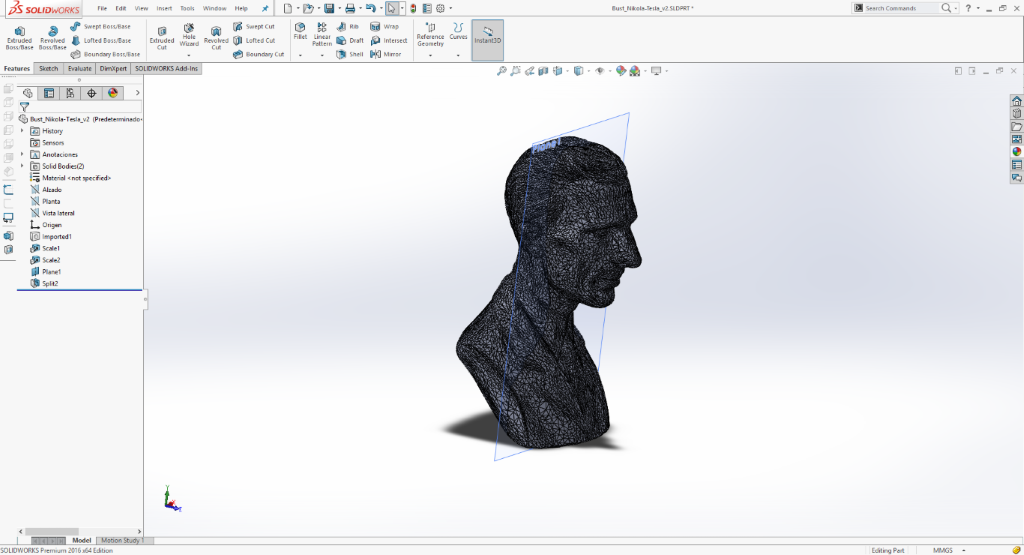
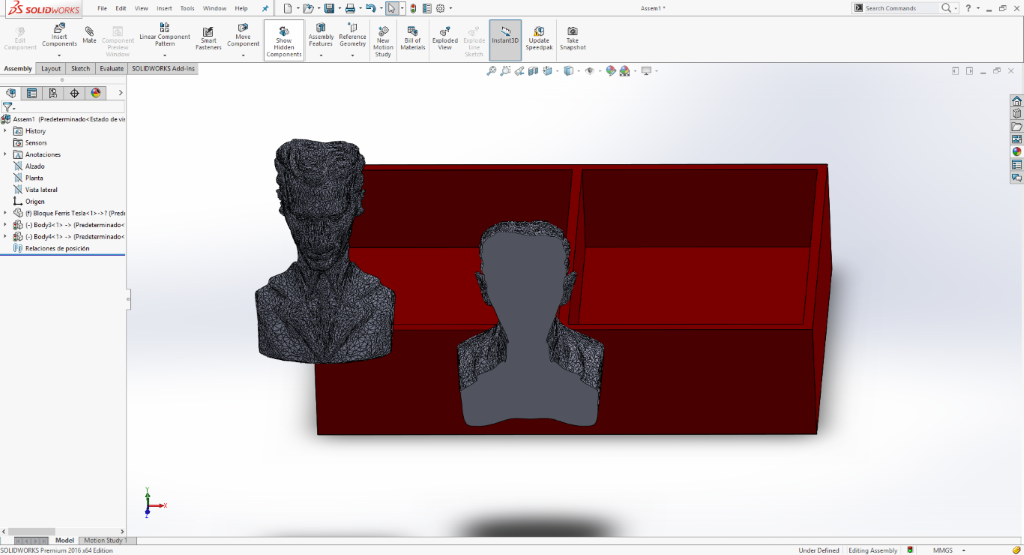
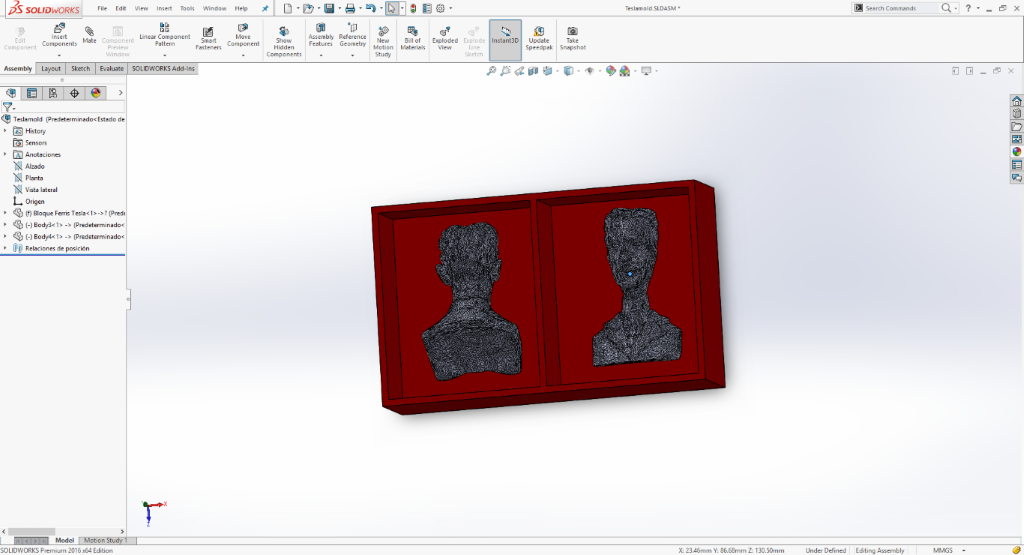
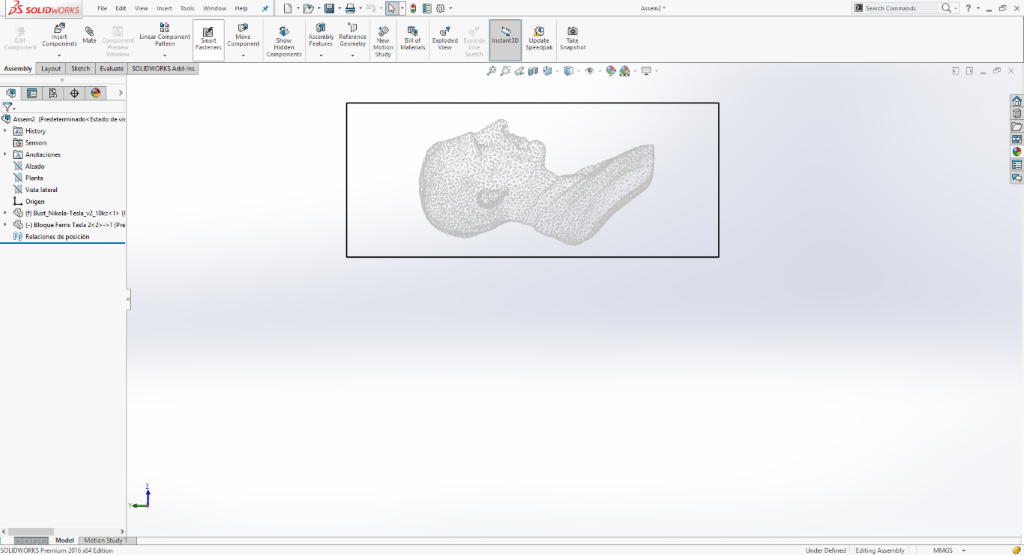
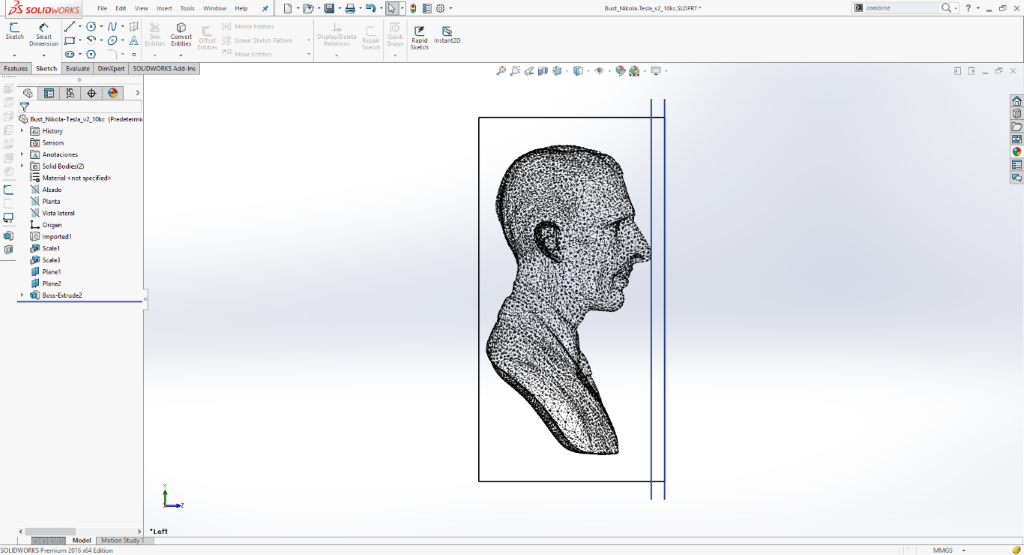
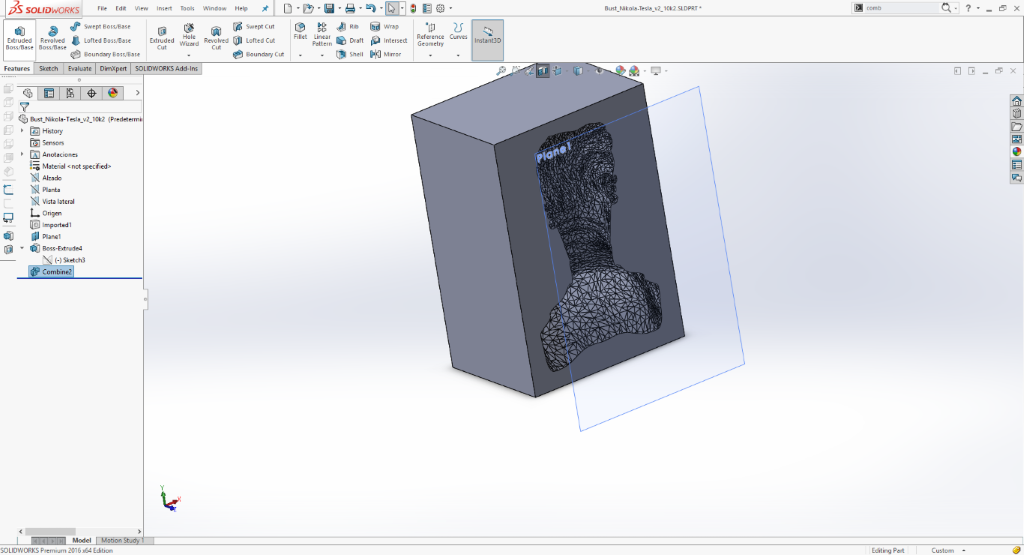
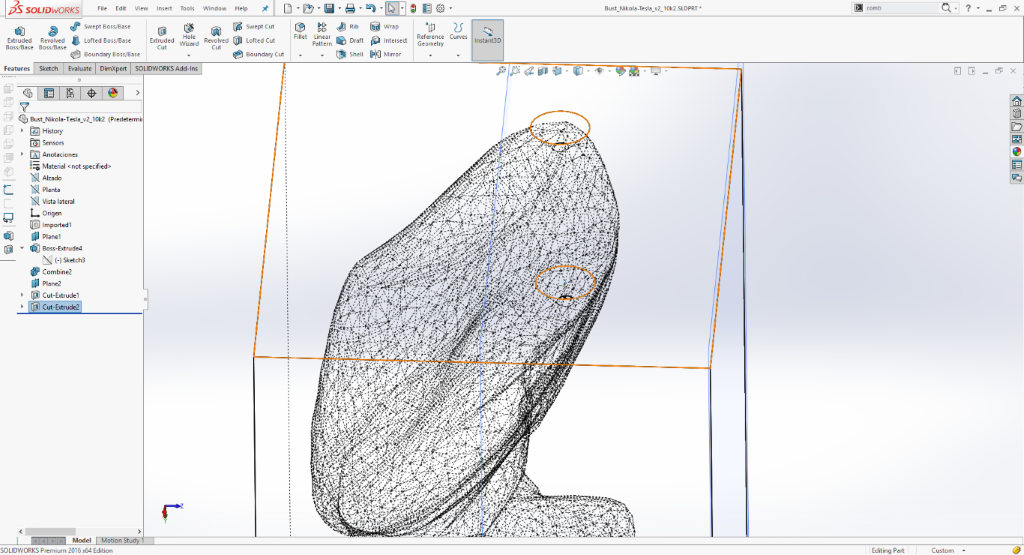
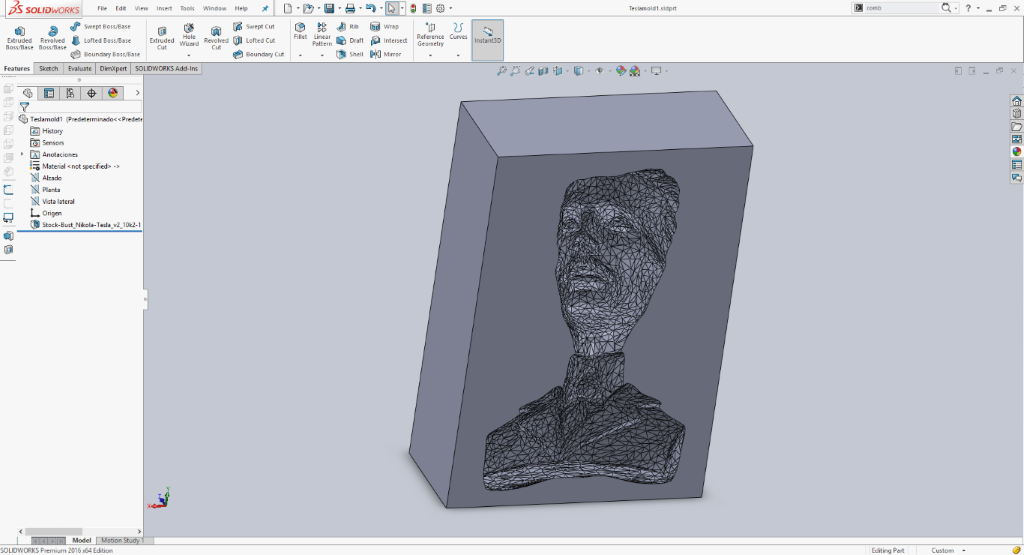
Another thing I wanted to try was to design a mold in SolidWorks, not the positive to make a mold, but the mold itself, and for that, I thought it would be nice to find a workflow from an .STL to a mold. So I downloaded a Tesla bust from Thingiverse and started working with it in SolidWorks. Sculpture mesh models usually have a lot of faces, the v2 I've used had around 110 000 faces, and SolidWorks had some issues working with so many faces. So first thing was to reduce the resolution. For that, I've used Meshlab, a filter in the remesh section called quadratic edge collapse decimation, that lets you set the target faces for the mesh. I reduced to 25 000 faces and it was a bit slow in SolidWorks but ok.
Machines and software used
SO: Windows 10, Ubuntu 12.04fabmodules offline
SolidWorks
Roland Modela MDX20
3mm sphericall mill bit
Files
smallgear.SLDPRT
smallgearsMold.SLDASM
link_gears_large_base.SLDPRT
link_gears_large_base.STL