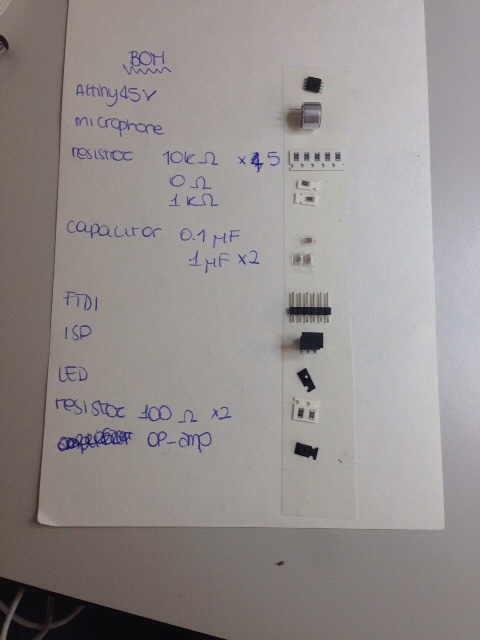
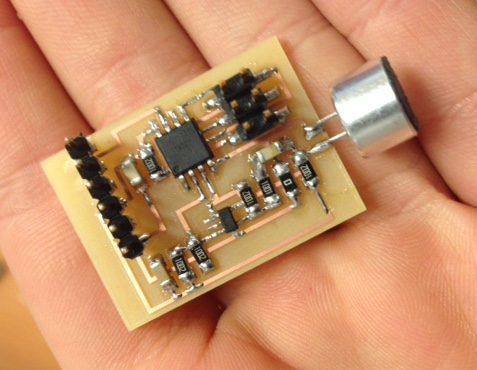
Analog Microphone
What all that resistor and capacitors are for?!
I chose to work on this input device because I was quite busy with studies this week and I needed to face with this tool (which I made a capsule for in week 12) for my
final project.
While I worked on a minimal arduino circuit in week 10,
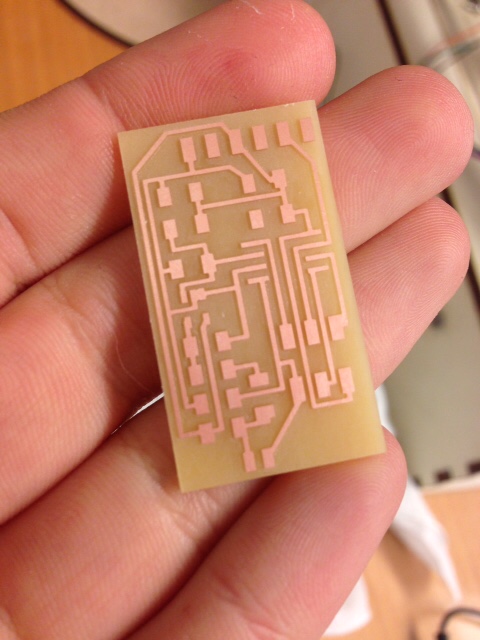
this time I started from Neil's board.
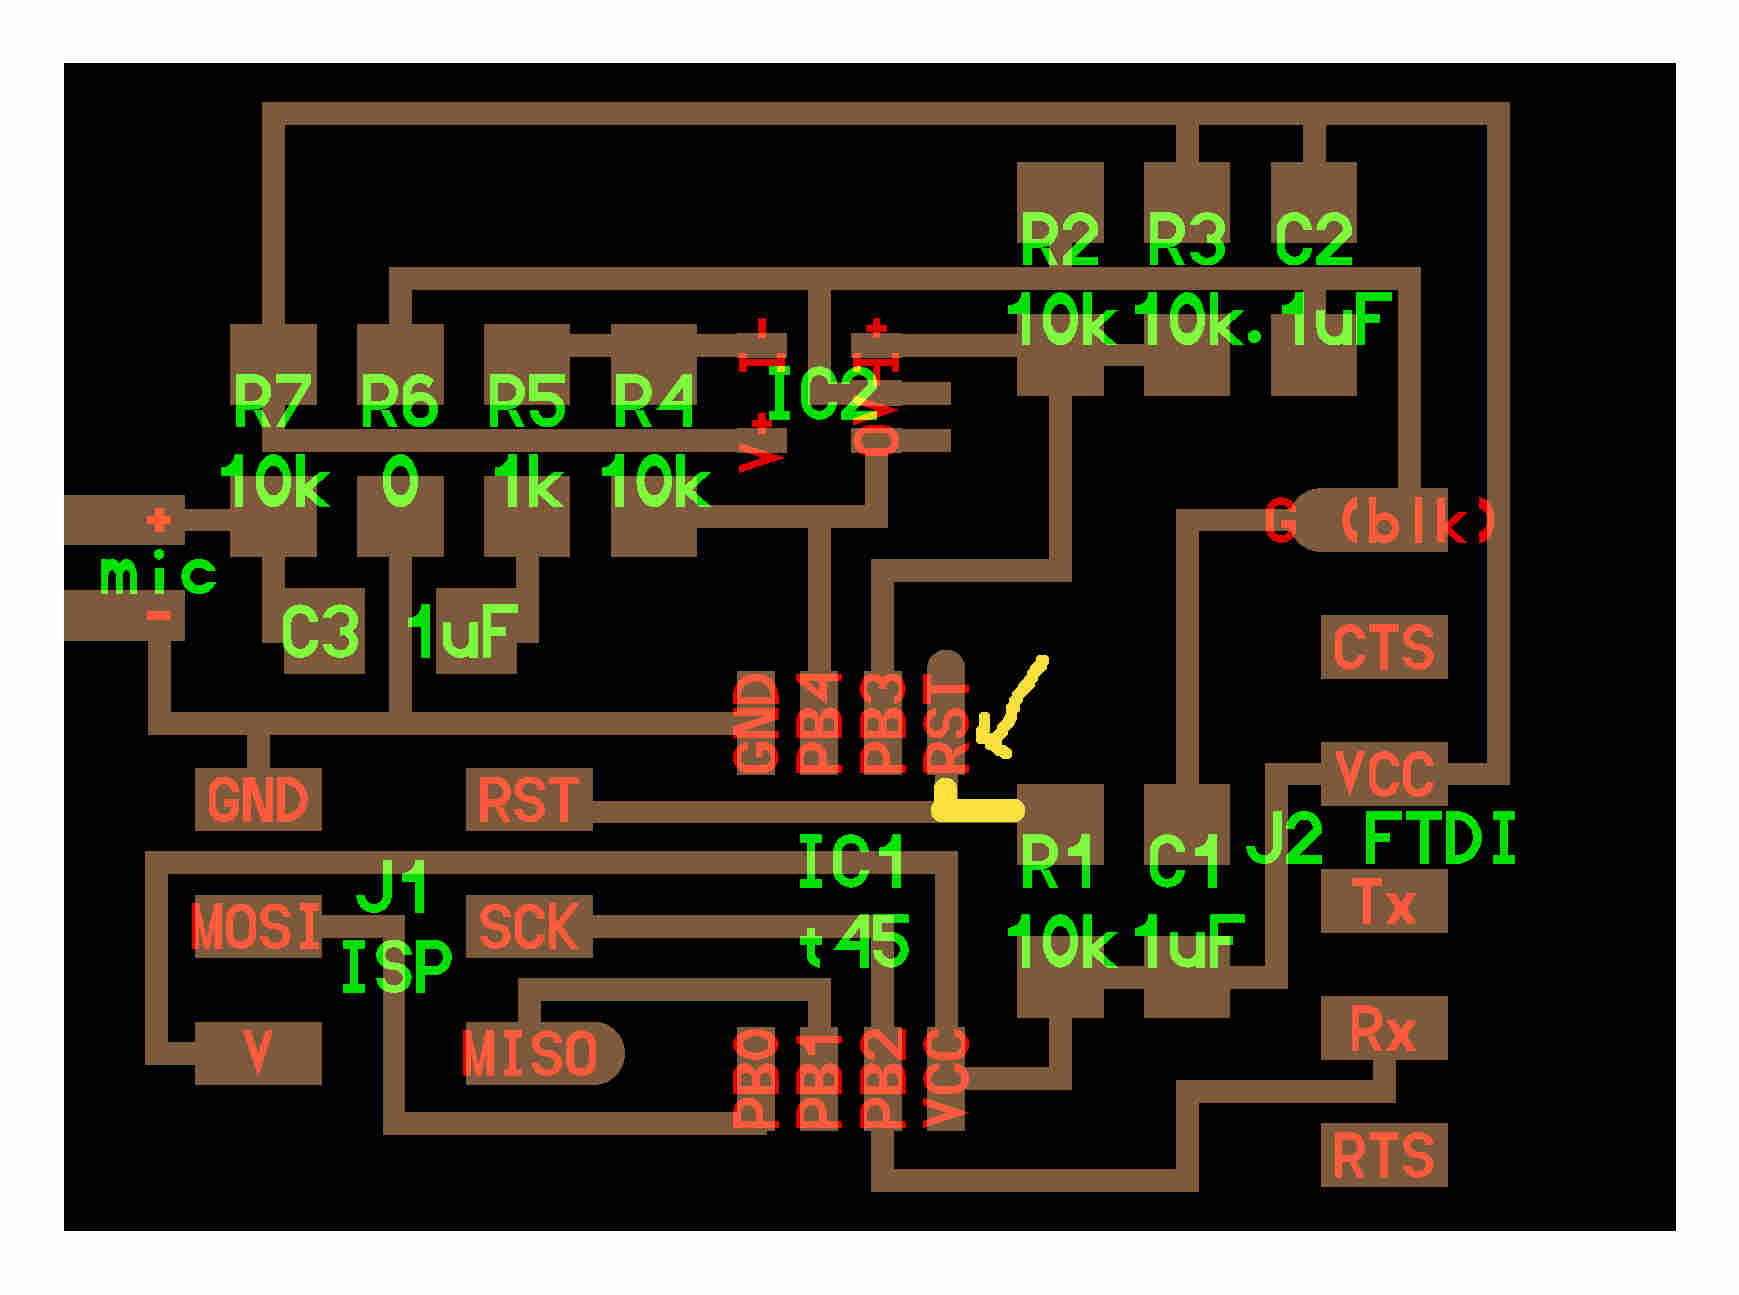
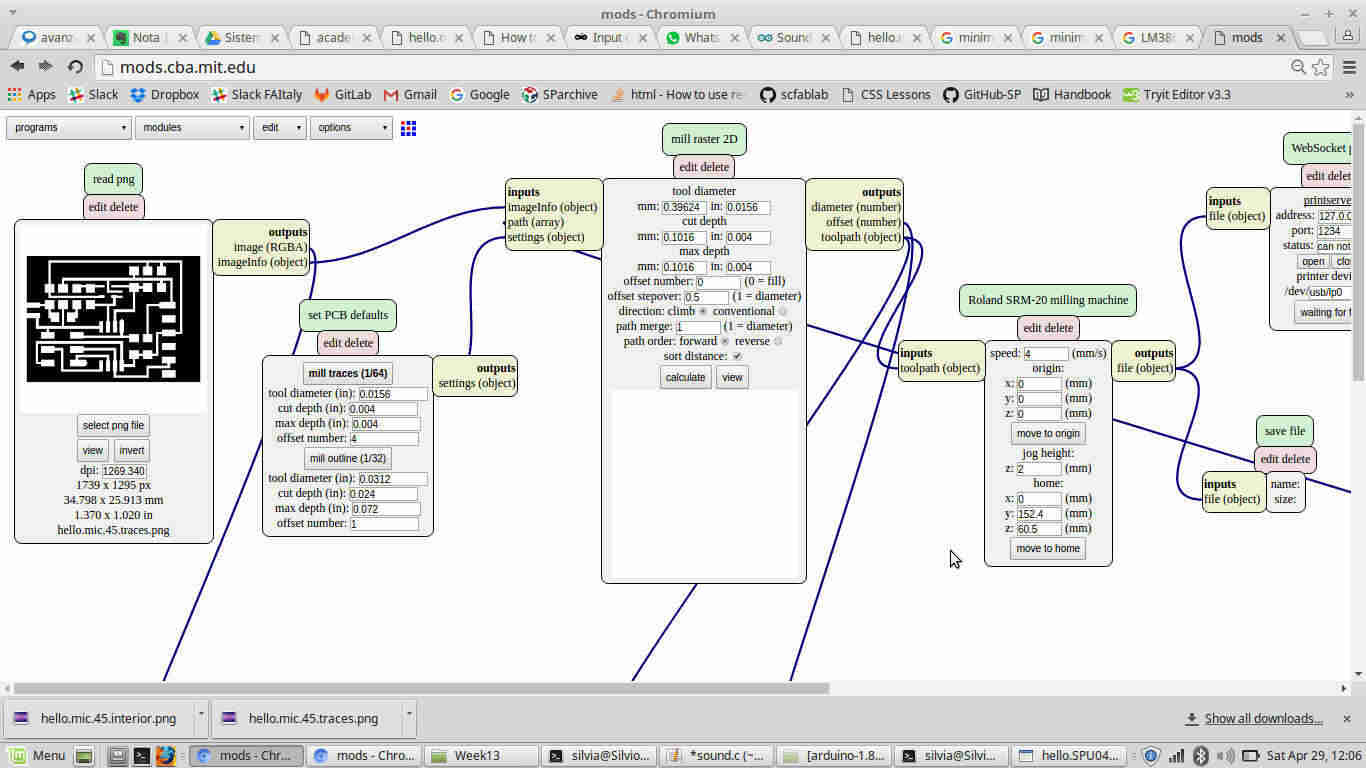
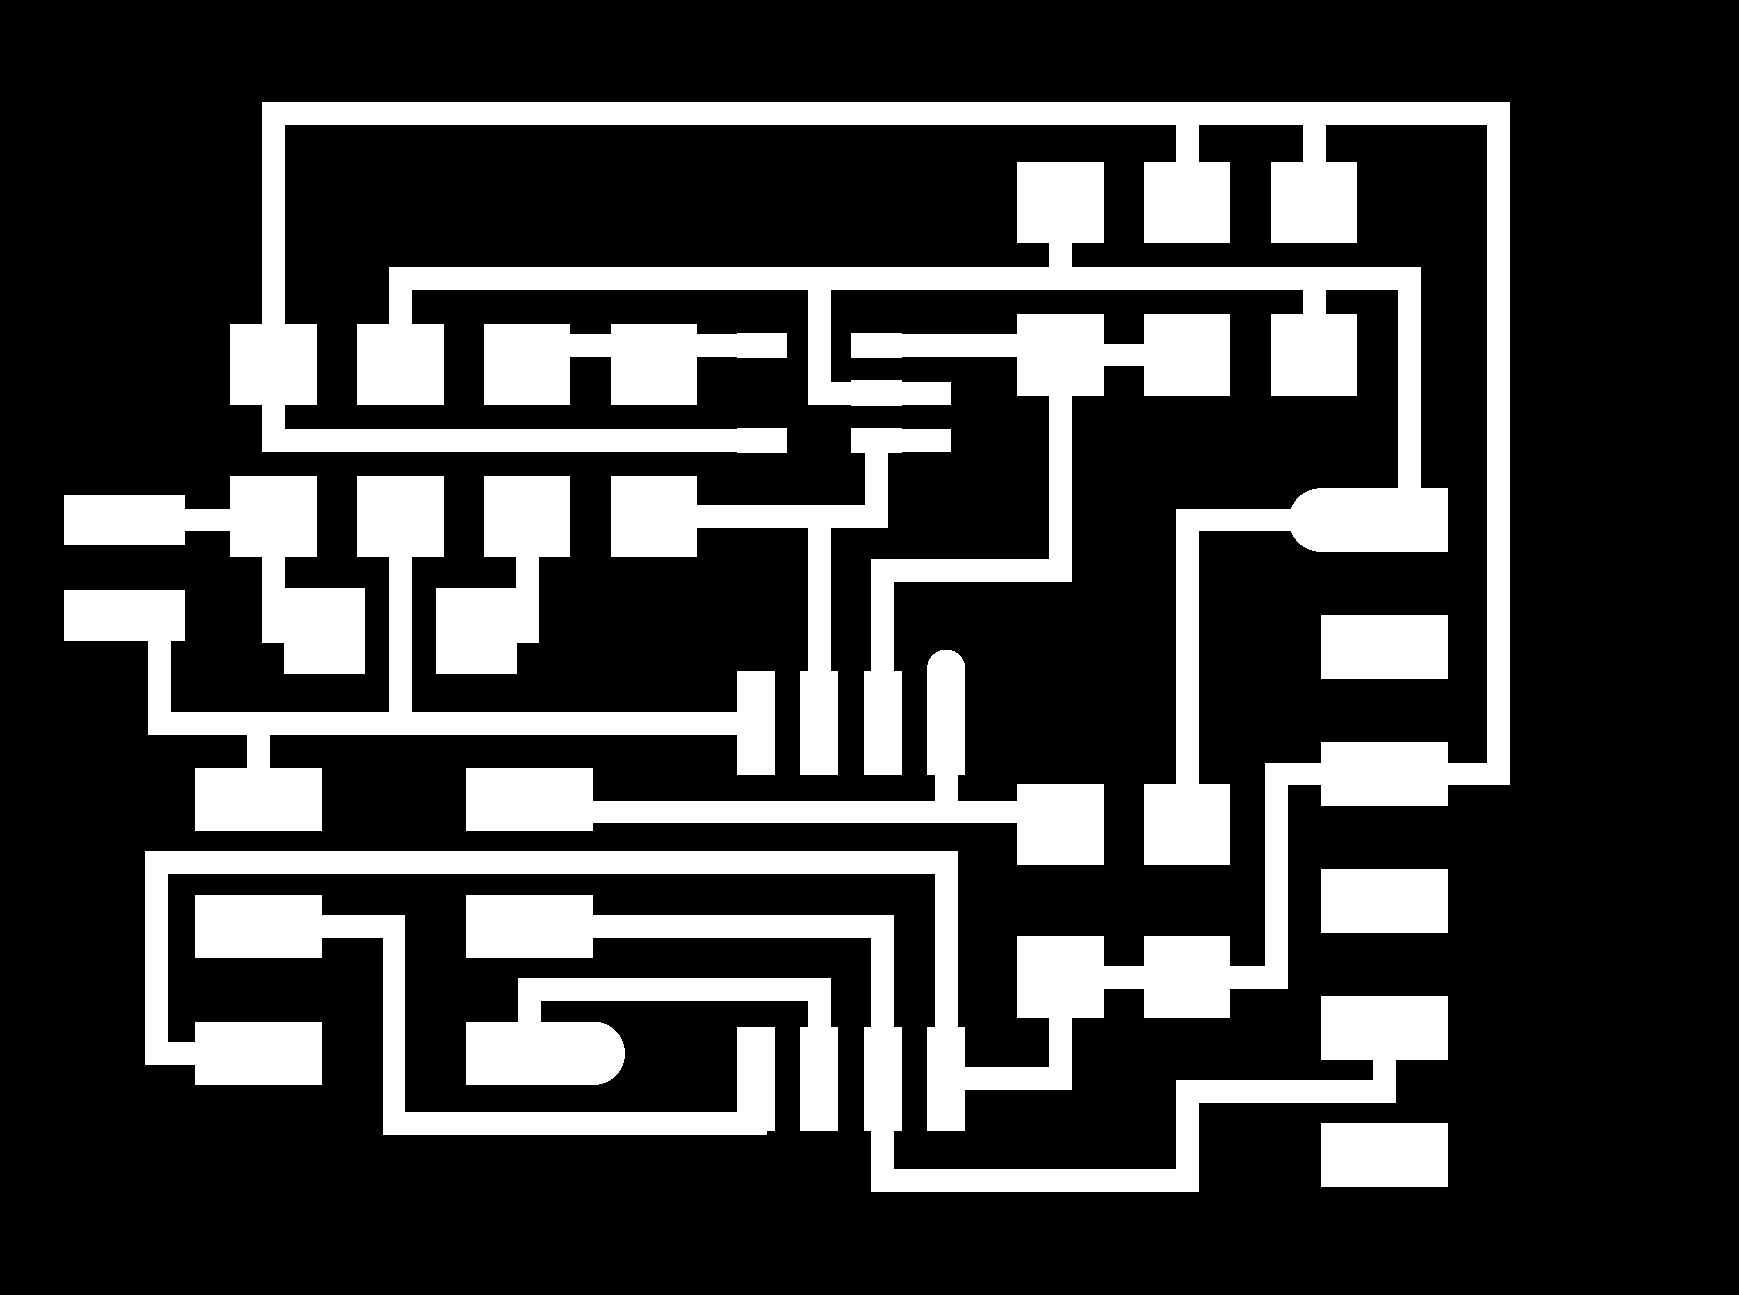
I so redesigned it on Eagle:
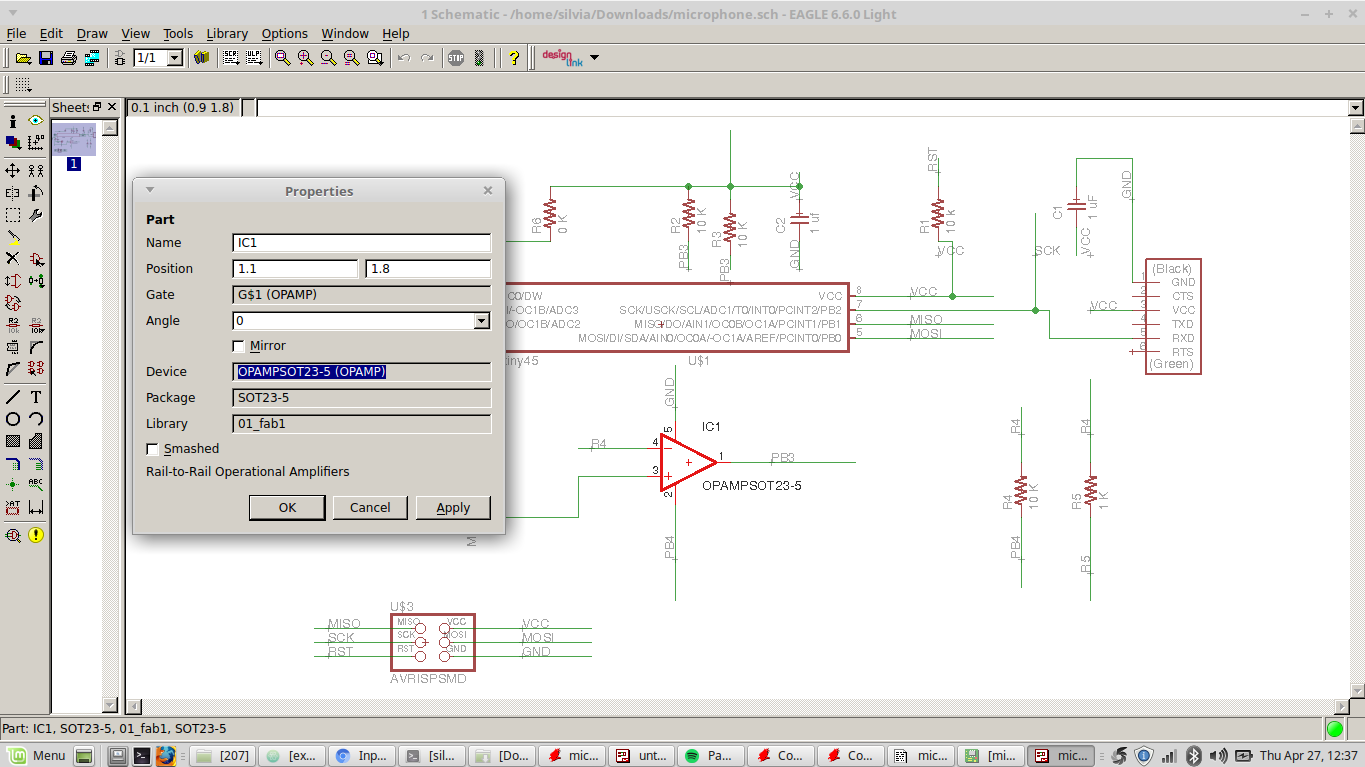
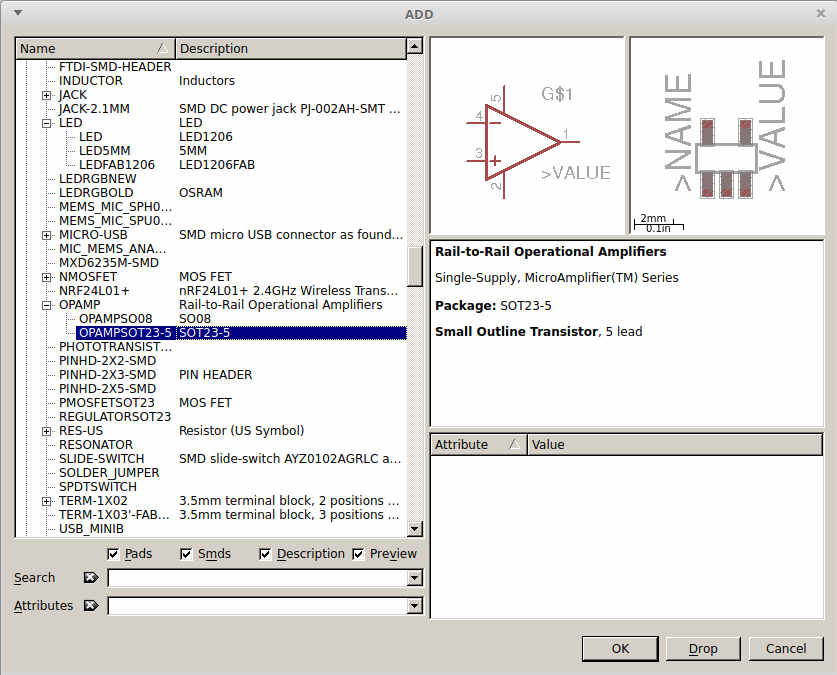
 NB: to know amplifier name on Eagle, I downloaded Flavio's Sound board
files and checked component properties from the schematic and then looked for it on fab.lbr:
NB: to know amplifier name on Eagle, I downloaded Flavio's Sound board
files and checked component properties from the schematic and then looked for it on fab.lbr:
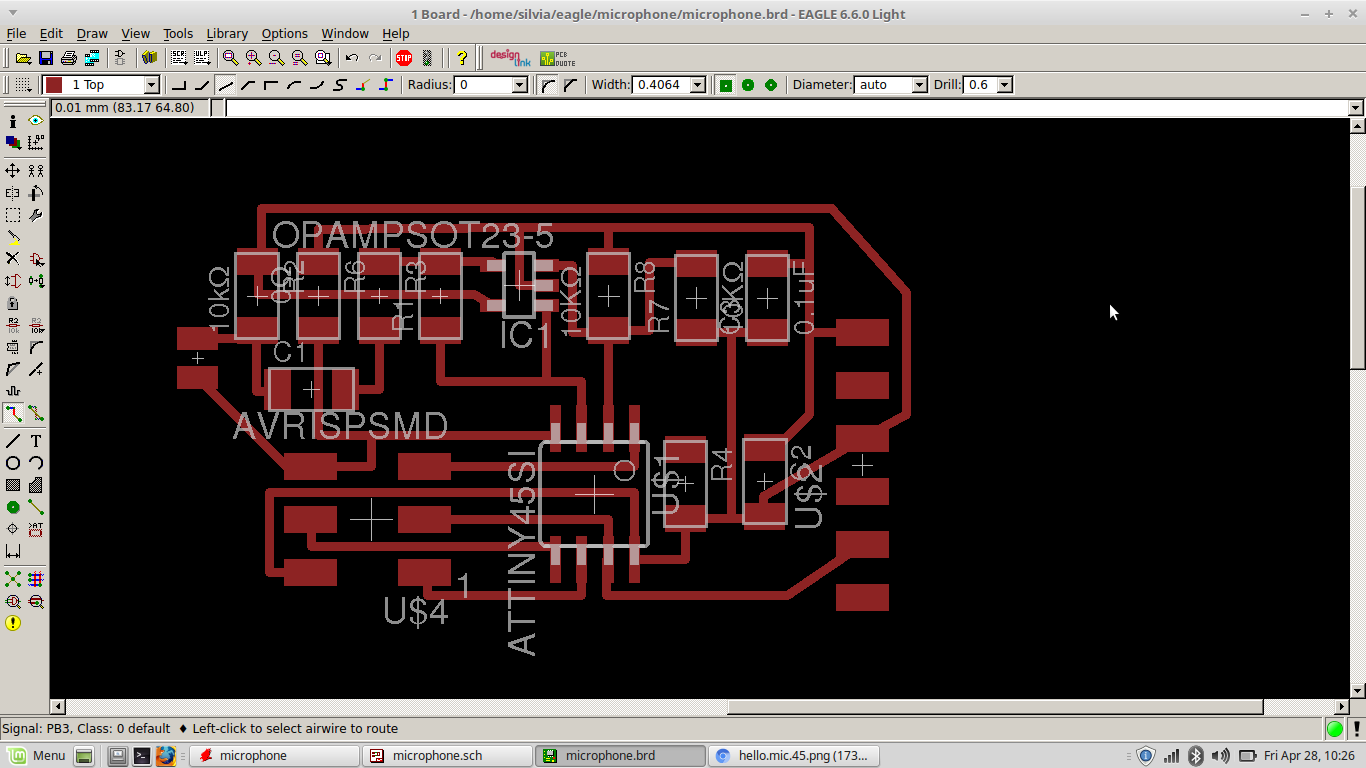
 As soon as I looked at board traces, I realised I made slightly difference in VCC connections from Neil's design:
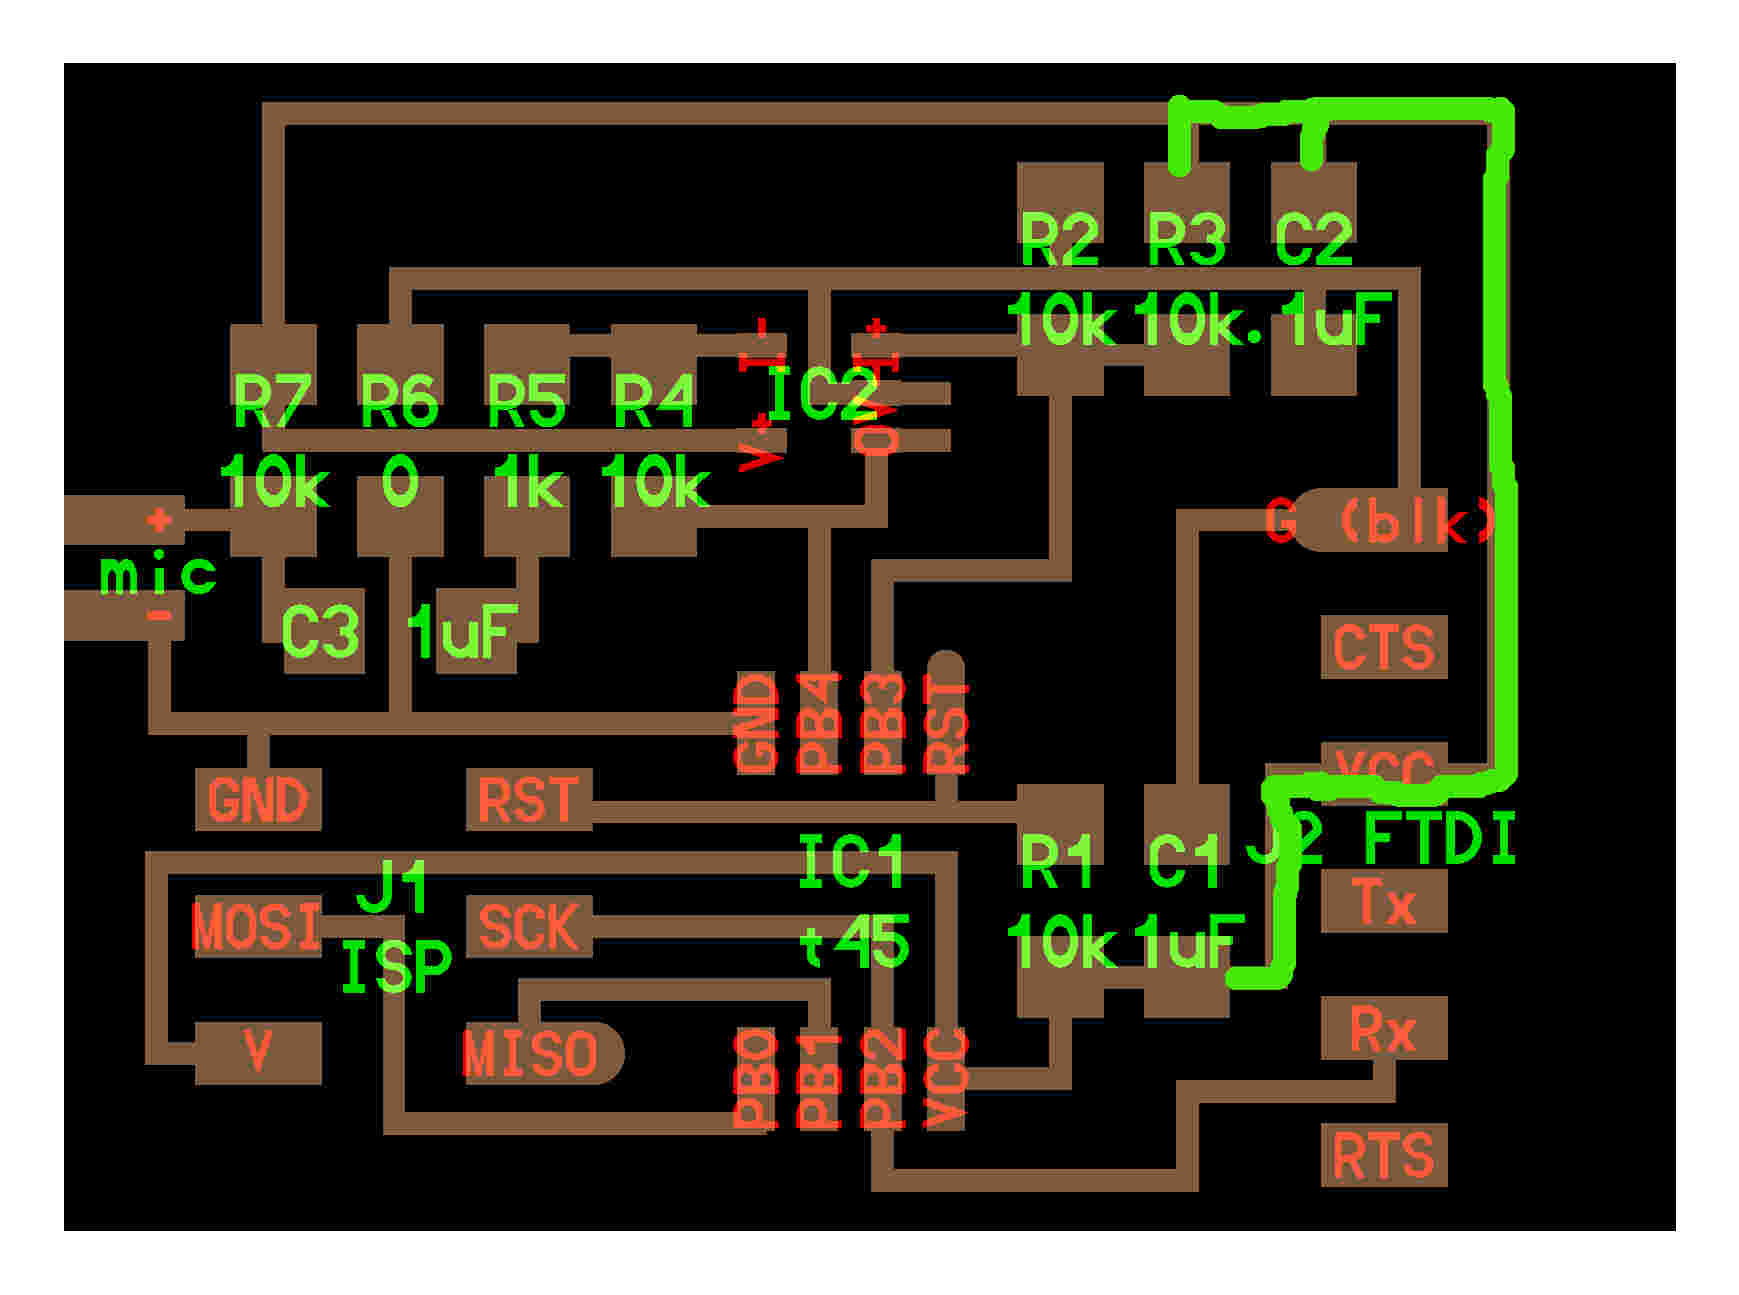 I thought it made no difference in board functioning but I also understood I had no deep knowledge about what each component was doing on the board. I think
such a confidence with electronic circuit can come only with time and practice, I mean, I know what a resistor, a capacitor or a diode works for but still I can't understand
why some examples I found on the internet use polarized capacitors instead of some resistors I had on my board and things like that. I would like to have full days to spend on
diving in electronic ocean but during Fab Academy I'm lacking this time and I can just take a note of all doubts I can't work out during weekly assignments and postpone their analysis to
the months after June.
I thought it made no difference in board functioning but I also understood I had no deep knowledge about what each component was doing on the board. I think
such a confidence with electronic circuit can come only with time and practice, I mean, I know what a resistor, a capacitor or a diode works for but still I can't understand
why some examples I found on the internet use polarized capacitors instead of some resistors I had on my board and things like that. I would like to have full days to spend on
diving in electronic ocean but during Fab Academy I'm lacking this time and I can just take a note of all doubts I can't work out during weekly assignments and postpone their analysis to
the months after June.
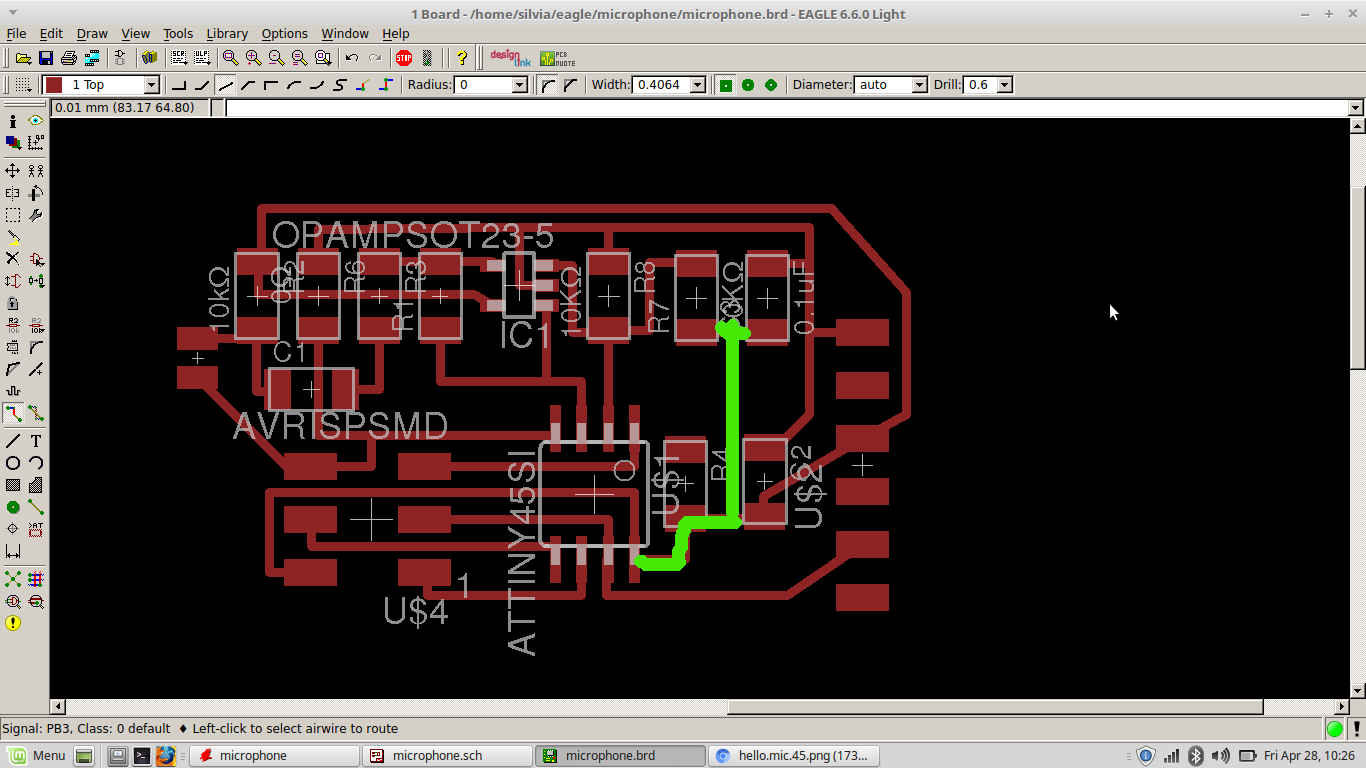
NB: as usual, if you see something wrong in board design, you'll soon discover what is missing in debugging part.
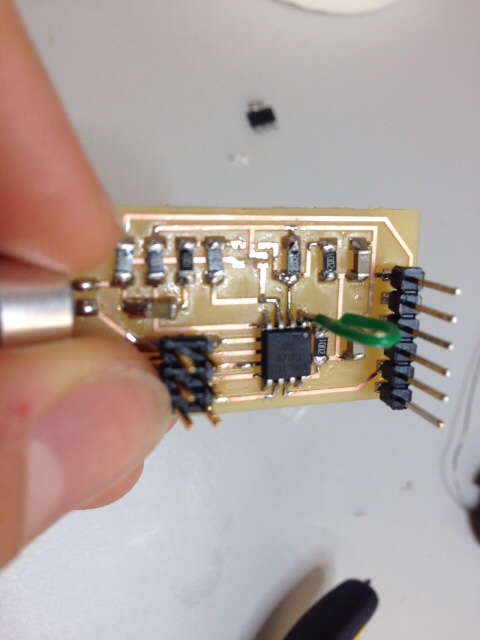
Soldering
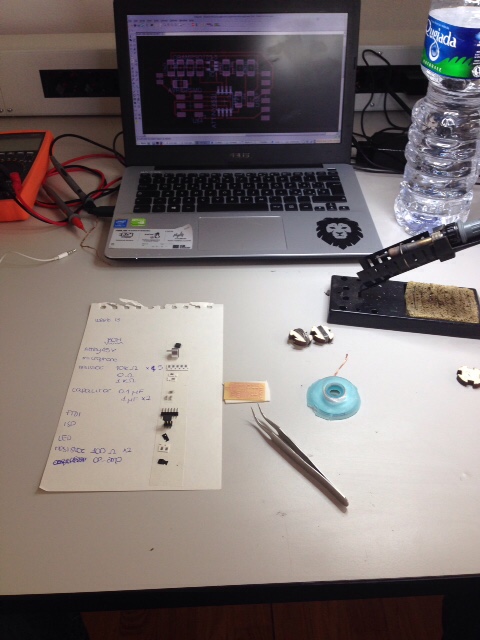
 NB: amplifiers are really tiny components and I used a bit of soldering paste to help in precision so as not to solder two pins together.
IMPORTANT:remember to check connections with multimeter but also that it doesn't tell you if you designed your board well ;)
Programming
As usual (see week 6 for makefiles and c code)
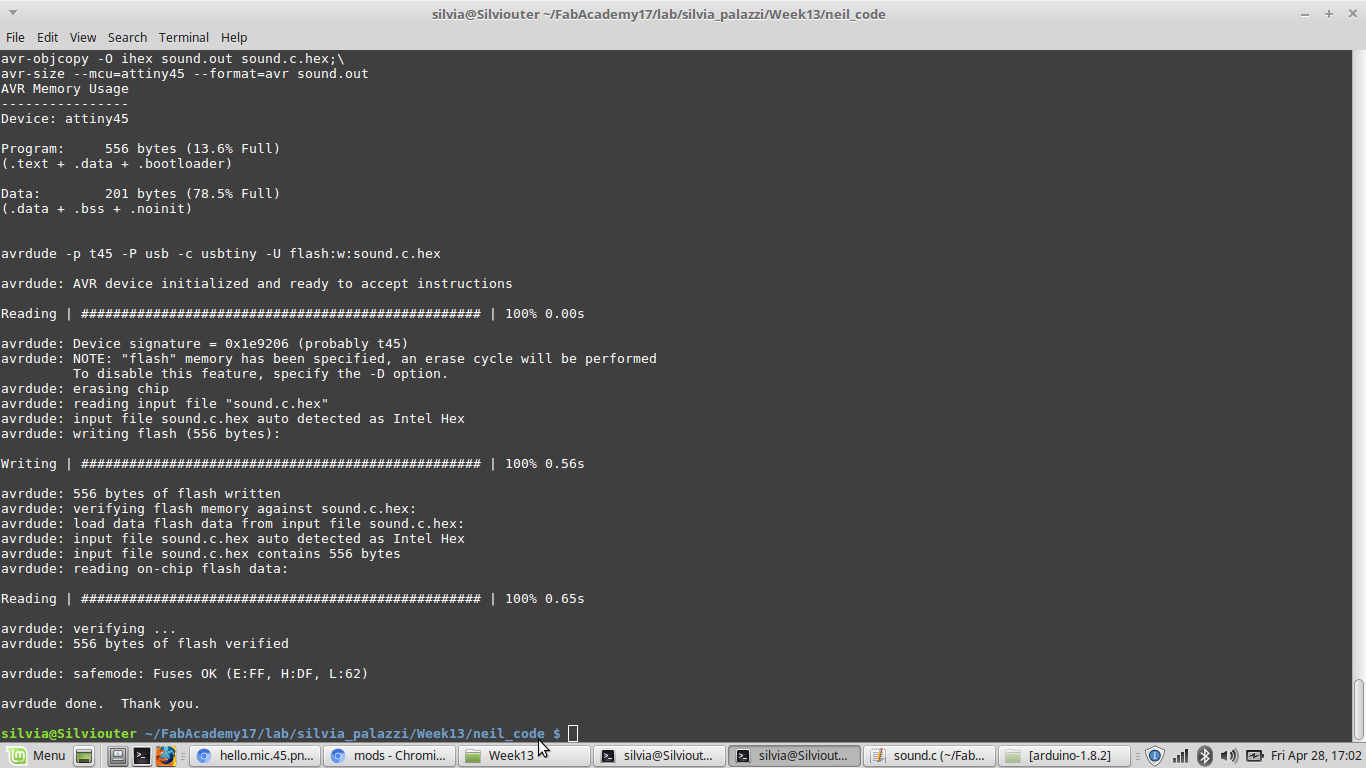
I downloaded Neil's makefile and c code,
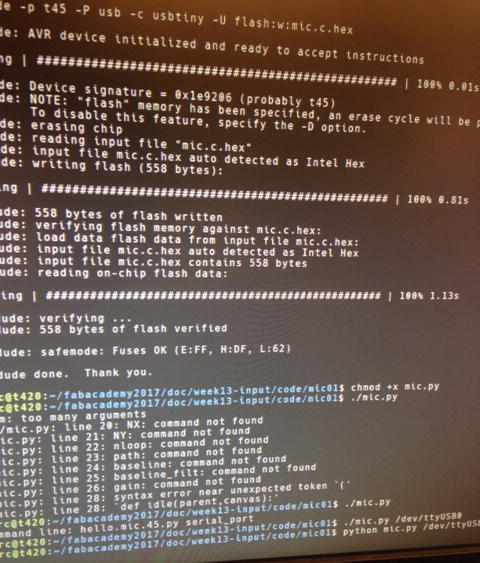
I then opened terminal and I ran make -f filename.make to create .hex and .out files, then I typed make -f filename.make program-usbtiny
and the program was sent to my board correctly:
 Now I needed an interface to see if my board was working well (I had no output device on the board to tell me that and I wanted to se sounds curves).
I realized I needed to install Python: to do that I simply typed sudo apt-get install python and accepted additive packages installation.
Since the program was sent successfully to my board, I so disconnected it from the programmer and connected it with FTDI cable directly to my computer.
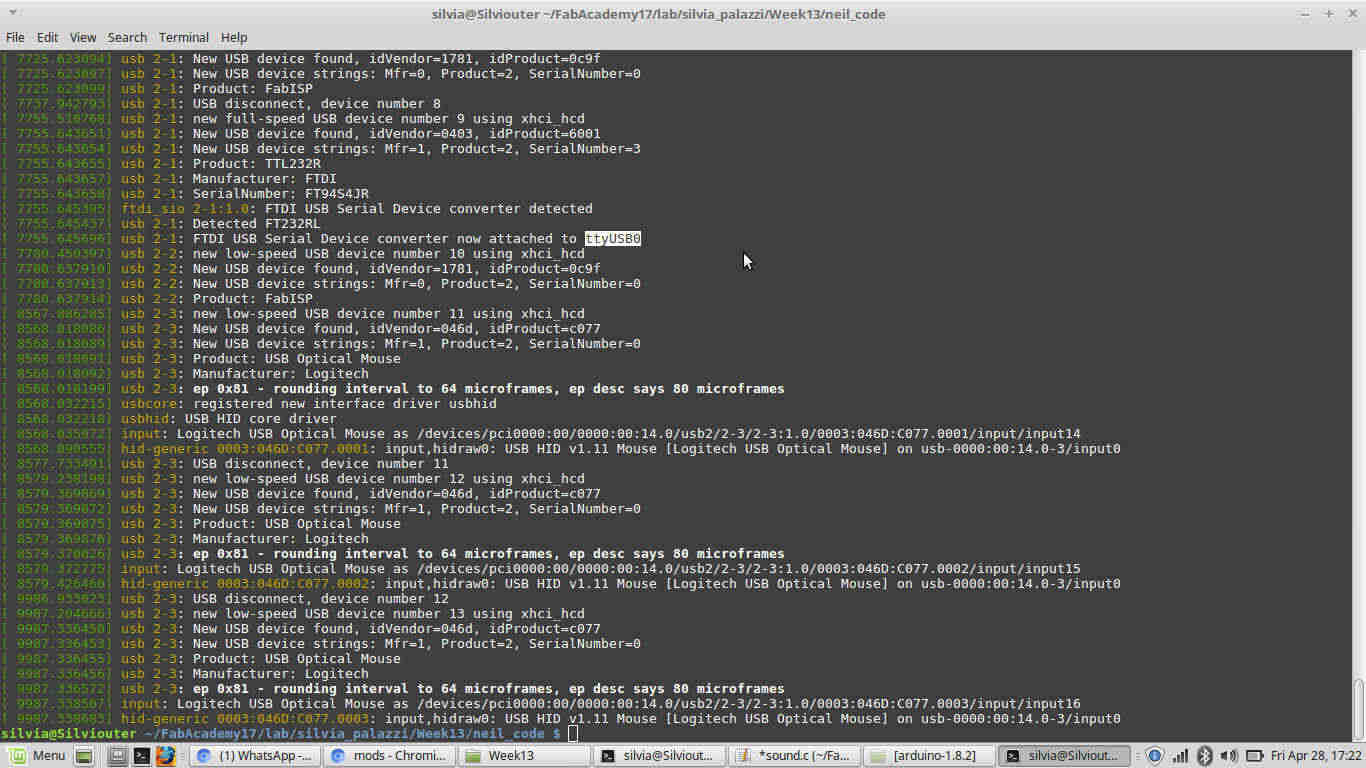
I then moved into the folder where I downloaded Neil's python file, I looked where my board was connected to with dmesg command:
 and then I ran
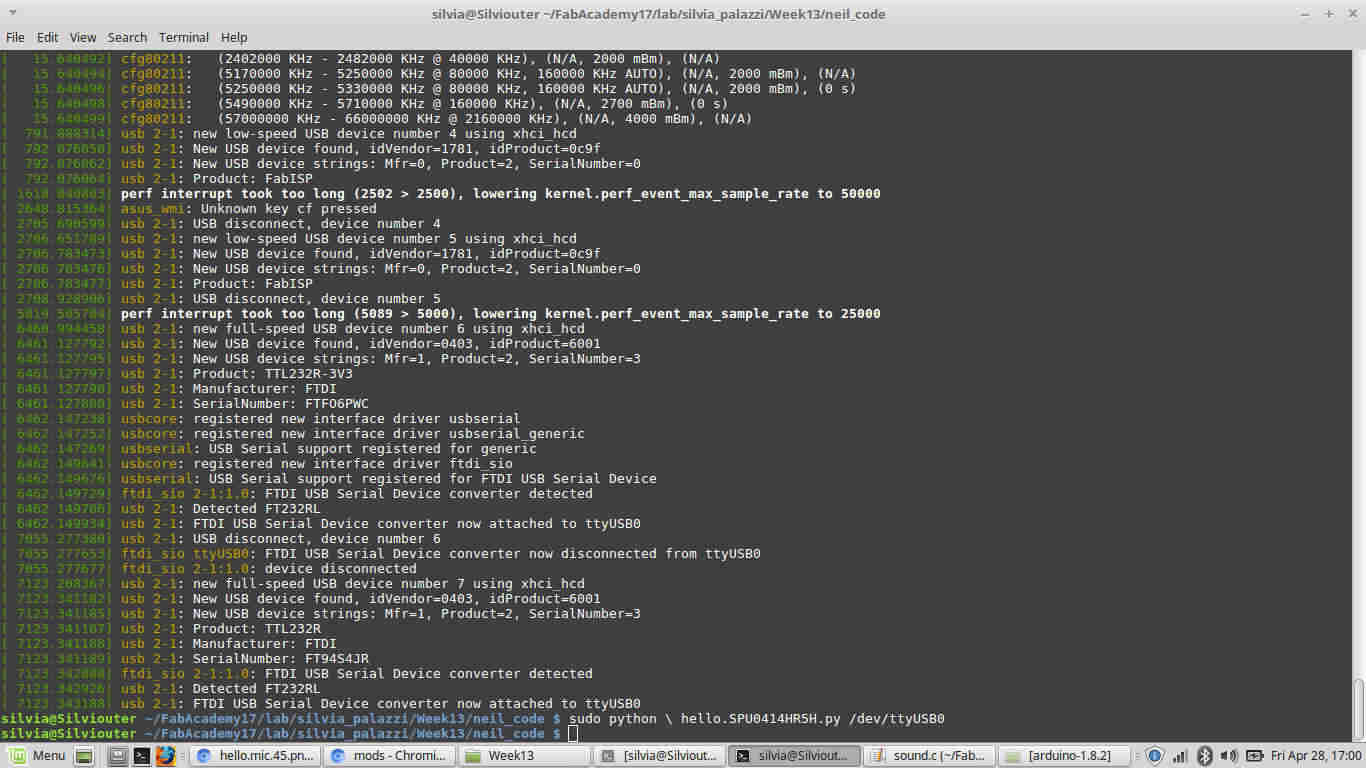
 sudo python filename.py /dev/USBportname
 NB: "\" before file name is just because I made a mistake in name typing and I had a space at the beginning
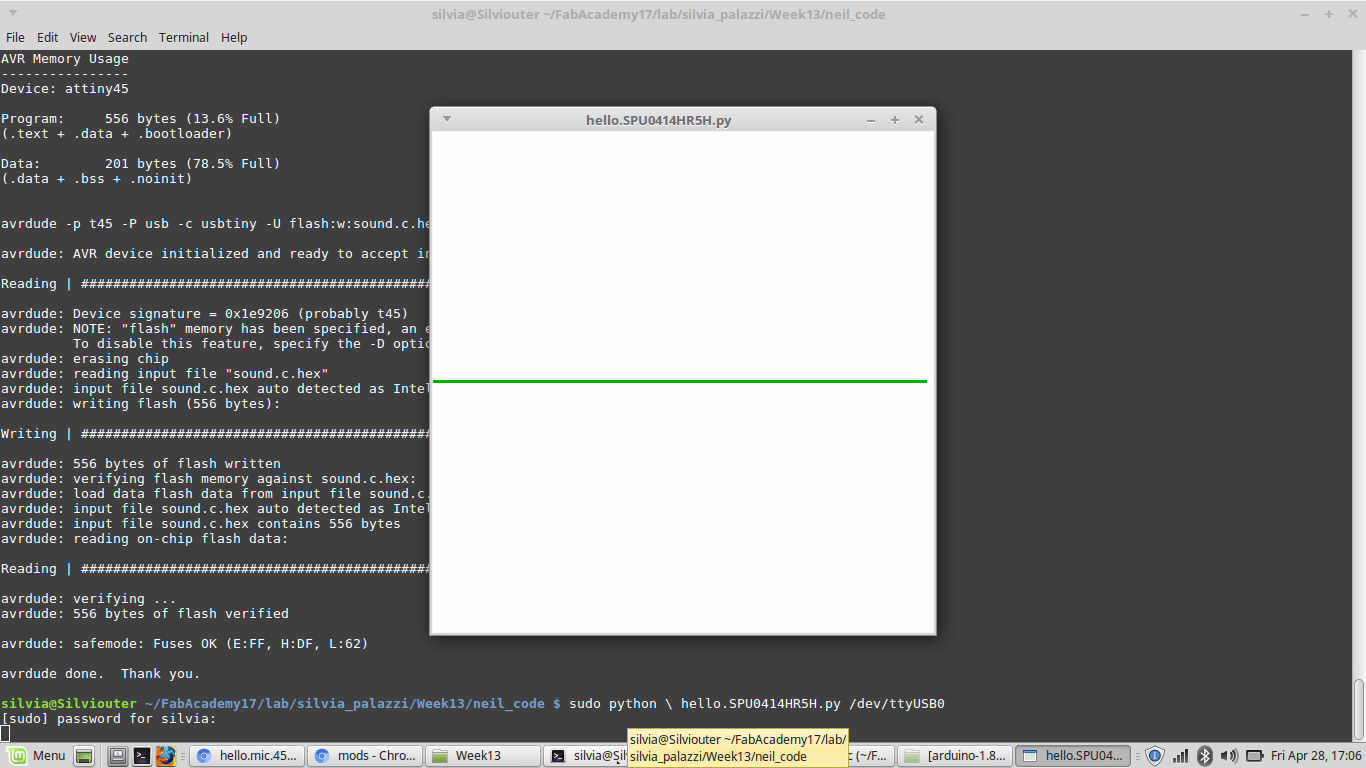
Result was quite unsatisfying:
 Where could this problem come from??? Let the debugging party start!
Debugging
If maybe somehow debugging can be the most entertaining and educative part of boards production, I still can't imagine all the possible mistakes my errors can come from.
First things that come to your mind (design, soldering, ISP programmer and board connection,typing errors) are quite easy to be fixed but when it comes to inner specific troubles
I find it harder to fare well.
1- Fixing some solderings: Smooth and shiny, Silvia, remember! Smooth and shiny!
I admit some of the components showed weak or cold solderings and even if with multimeter they worked well, it may cause problems for signal sending anyway
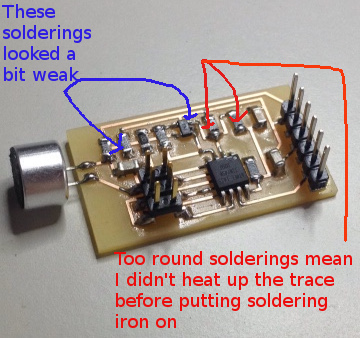
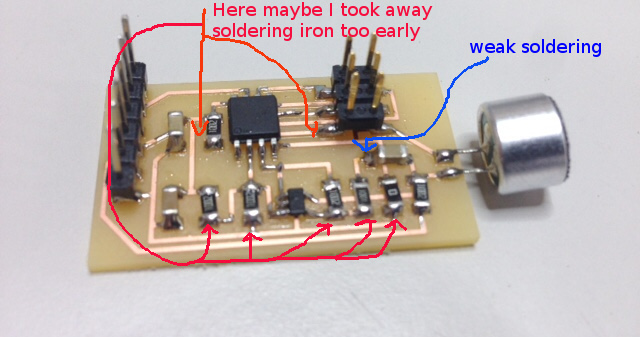 I therefore fixed components connections.
2- Trace fixing: I start to think I have a problem with RESET pin
When you work on the schematic drawing on eagle, it's not that easy to keep all connections under control even with labels
(see week 6), but
board parallel visualization helps quite a lot. Despite that, if you are trying to replicate someone else's board it's not always the path can be not so smooth out: if you start without considering a tiny
connection trace on the reference board, it's probable you work sweeping this mistake along.
This generic second person I'm referring to it's always an hidden me. In fact after 3 times I checked
board corresponded to Neil's one in traces, I hadn't notice I was missing ATtiny45's RESET pin connection to the resistor on its right
 In order not to do a discourtesy to my previous flying boards (hello board
and Braino) I chose this solution:
In order not to do a discourtesy to my previous flying boards (hello board
and Braino) I chose this solution:
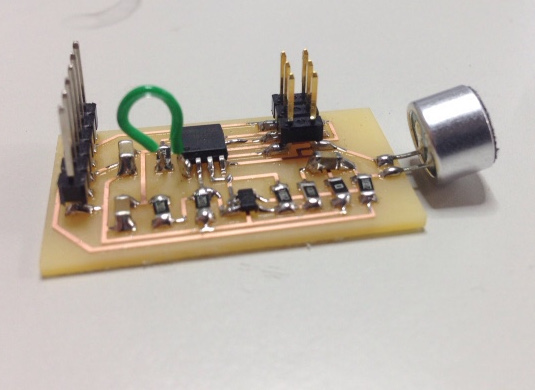 I then souble checked with multimeter and amplifier connections still looked weak. I so de-soldered and re-soldered it:
3- Getting mad: let's see if it depends on that difference in VCC traces
Despite all fixings and checks I had that problem with Python interface still and at this point I thought that difference in tracing (see above for details) could play a signifiant role.
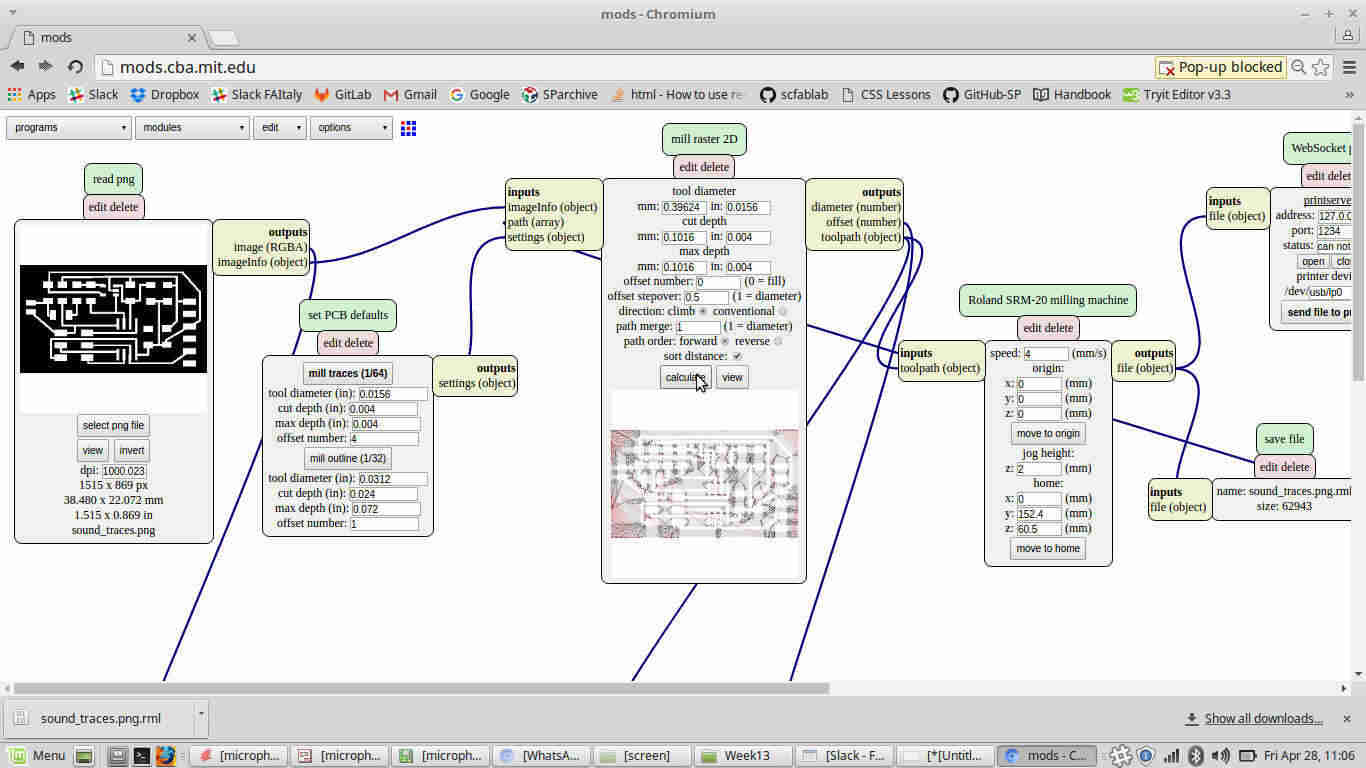
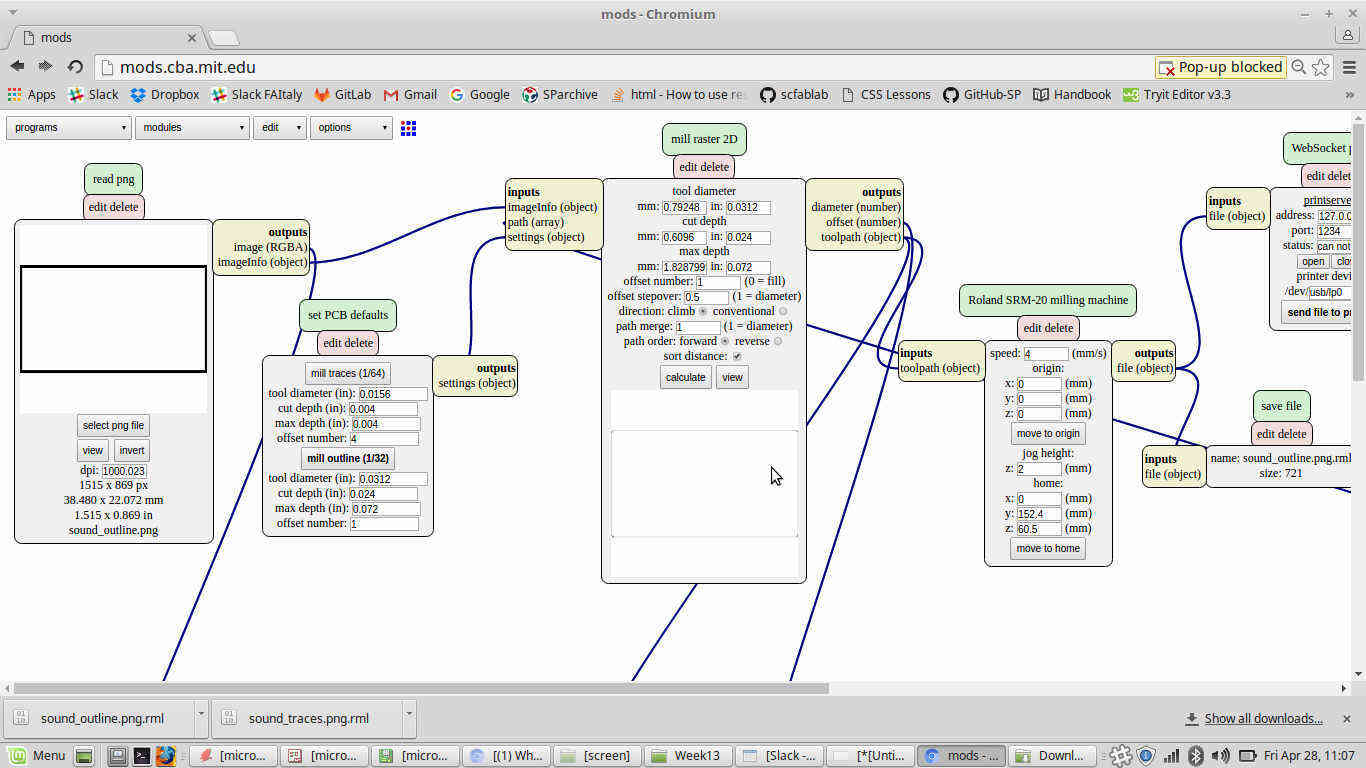
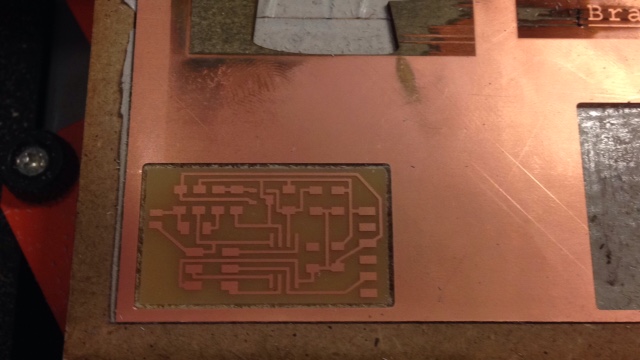
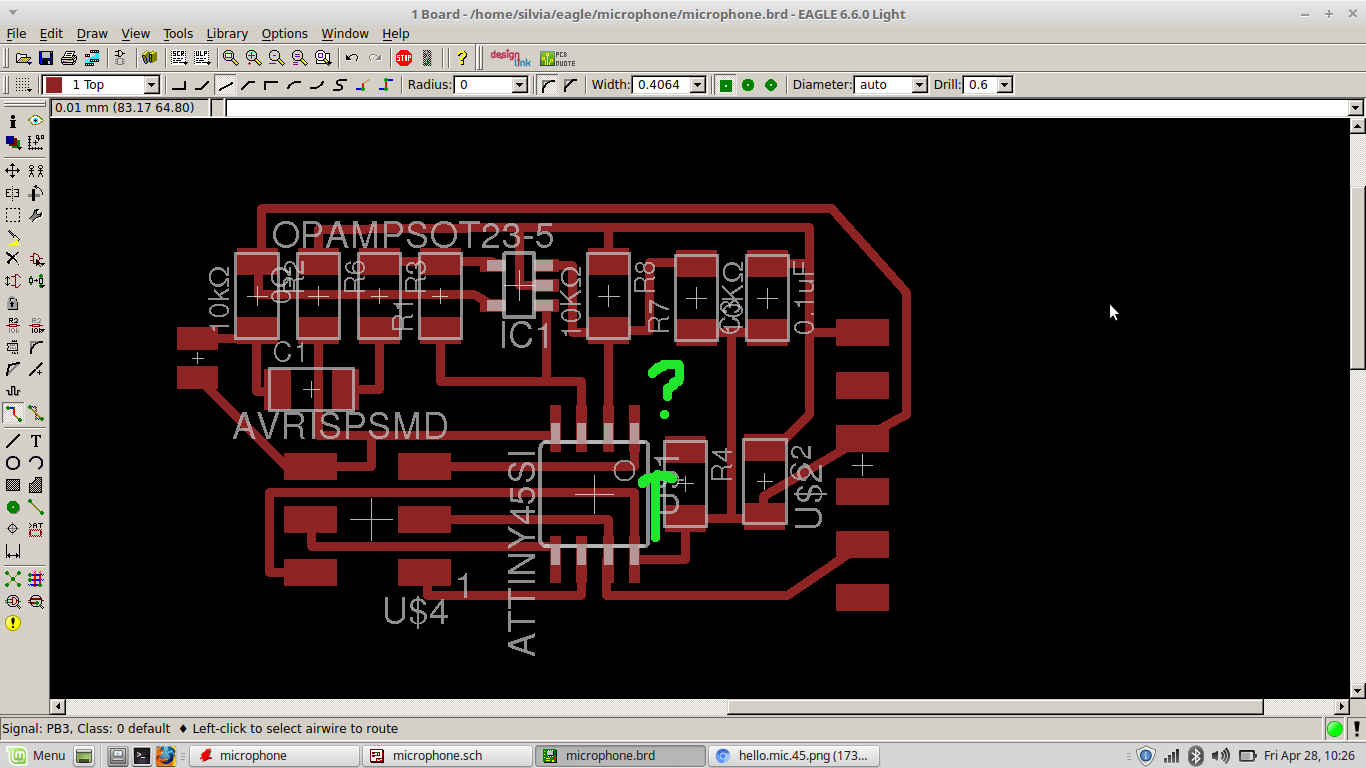
I therefore milled Neil's board directly (traces and outline).
I made .rml files to use on VPanel with newer Fab modules:
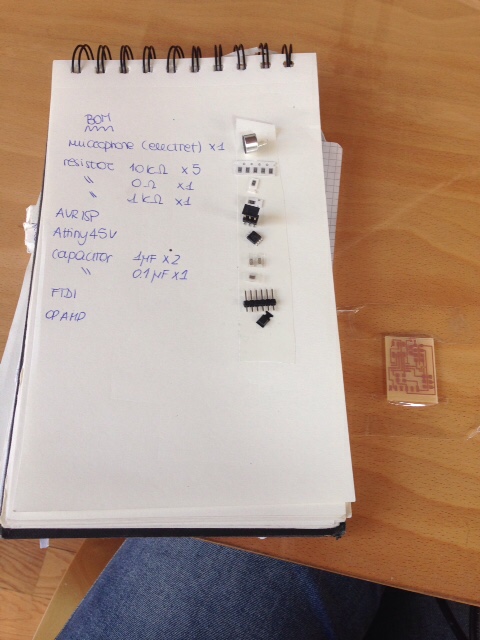
 I then re-wrote my BOM and soldered it:
 Then I repeated
 make -f filename.make program-usbtiny and code sendind ended successfully but when I launched python file (sudo python filename.py /dev/USBportname)
I still had same result.
4- Changing python interface parameters
I saw in Flavio's documentation that he had to change
some parameters in Neil's python file to make it work right
 I repeated his steps but still I gained bad results even if now my microfone seemed to work independently from sounds around: I saw rectangular shapes of slightly different amplitude
which but repeated periodically even with no sound in the space around.
I repeated his steps but still I gained bad results even if now my microfone seemed to work independently from sounds around: I saw rectangular shapes of slightly different amplitude
which but repeated periodically even with no sound in the space around.
5- Launching python file in another way
When I typed sudo python filename.py /dev/USBportname before, it was like I opened Python as a program and then opened my file from there.
It is also possible to run the file as a program directly into terminal if you make it an executable file.
To do that, I first added an heading to the file that something like said "hi there, I'm a python file":
#!/usr/bin/env python
 I then moved into file folder and typed
chmod +x filename.py
(+x makes a file executable, -x makes it unexecutable)
Then I launched file with this command:
./filename.py
and I received this message:
command line: hello.mic.45.py serial_port
I then launched it again specifying serial port the board was connected to:
./filename.py /dev/ttyUSB0
 ...Still bad results :/
6- Start to miss ideas: may it be baud rate?
Last epiphany I had was to change baud rate from file.
NB: baud rate is a parameter that defines quantity of bits sent per second; baud is unit of reference in sampling process of a analog signal when it's brought to digital.
I looked at this article to have precise baud rates to test and I one by one substituted those values
in python file where indicated in the picture below
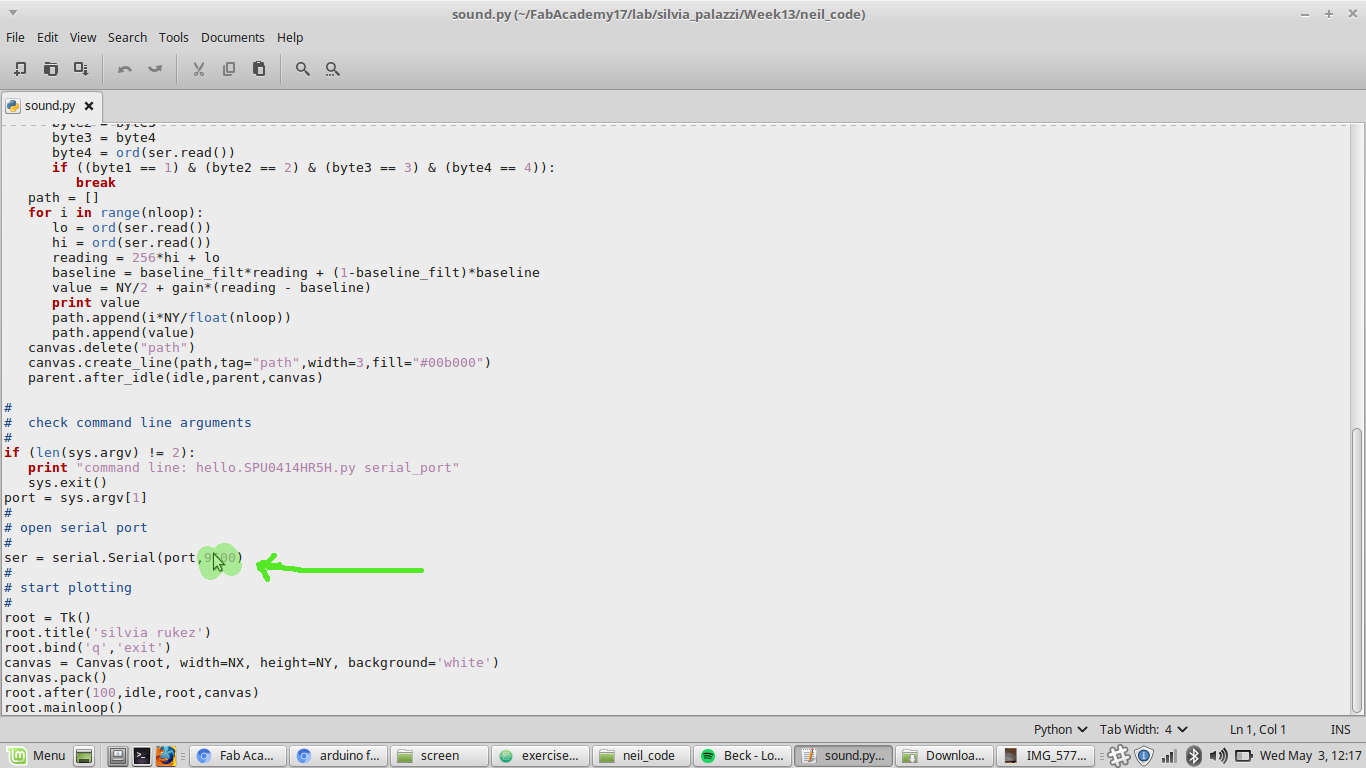 Actually just wave shapes changed but the microphone worked independently from the sounds heard.
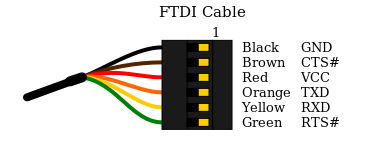
7- Simone's suggestion #1
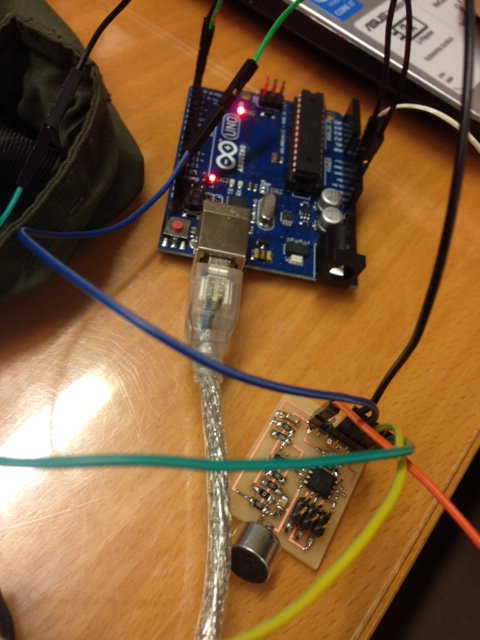
My mate Simone suggested to see if the problem came from the FTDI cable so we saw how to use Arduino ad FTDI, referring to the scheme below to help us
in cable connections:
 We then tried to read data from device but they looked reallu much like when rectangular shapes repeated into Python
interface independently from sounds around.
We then tried to read data from device but they looked reallu much like when rectangular shapes repeated into Python
interface independently from sounds around.
Using Arduino as FTDI from my computer from Silvia Palazzi on Vimeo.
8- Simone's suggestion #2
Next step was to see if my user was into dialout group,
so as to talk to device directly from terminal. To add your user to that group you have to type
addgroup -a -G username dialout
Unfortunately reading results didn't change.
9- Changing computer
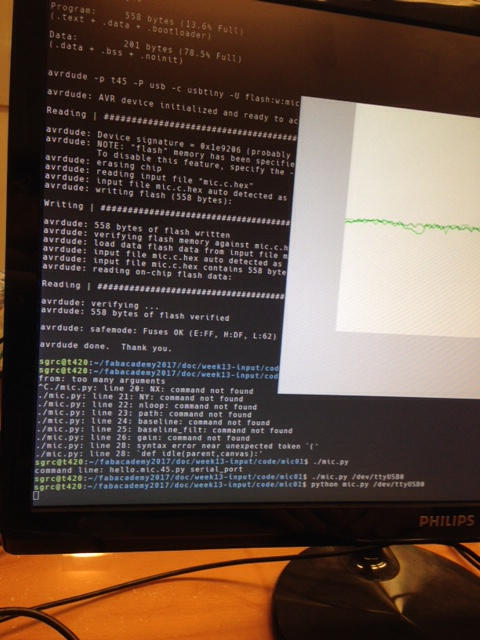
Last thing I could do was to test my boards with another computer. I therefore opened terminal from Simone's pc
and I re-sent the program to the board when it was connected to FabISP (make -f filename.make program-usbtiny) and program was successfully sent.
Then I disconnected Fab ISP and connected the board directly with FTDI cable to the computer. Moving into Python's file folder and launching python filename.py /dev/USBport
command, suddenly I gained what I wanted, both with Neil's board and mine:
Neil's microphone board correctly working from Silvia Palazzi on Vimeo.
My microphone board correctly working from Silvia Palazzi on Vimeo.
Conclusions
I'm quite happy to see that my board, despite those little differences in tracing, works well, though I still haven't found the problem yet.
Board problem? Nope, both boards work well in another computer;
Python file? Nope, I used always the same .py file and with another computer it ran well;
Permissions denied? Nope, I checked my user was in dialout group and the board worked when using sudo python etc;
Wrong Python installation? Nope, if it was that, python wouldn't even open or it would tell you it can't talk to serial port;
USB 3.0 port? USB 3.0 ports are known for giving problems in serial comminication but I tested my board also in 2.0 ports;
FTDI cable issue? Nope, when the board worked it was connected with FTDI cable
...I have no further question to ask to myself by now but I really hope to find a solution soon for weeks to come since I'll be using serial communication a lot
and also I want to test my final project.
I don't know what my mum did eat the day my dad and her conceived me but since that day unluckiness is grabbing my hand day by day so heartily that when I looked
for a nice translation from italian of "sfortuna" connection crashed.