What tasks have been completed, and what tasks remain? What has worked? What hasn't? What questions need to be resolved? What will happen then?
This status is based on the schedule proposed on week 17:
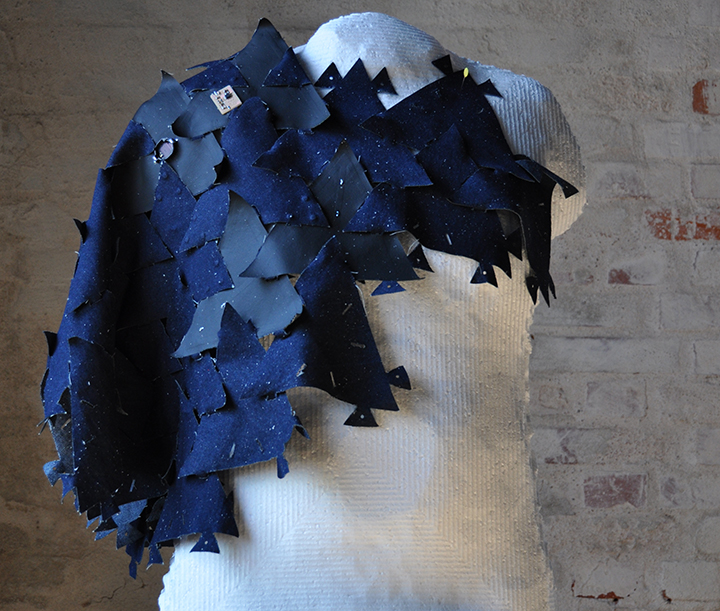
FINISH MANNEQUIN: I still need to finish the mannequin that I started on week 7. I believe it will be quite useful in the last part of the final project, where I would like to "weave" the modules together and create a dress as an example.
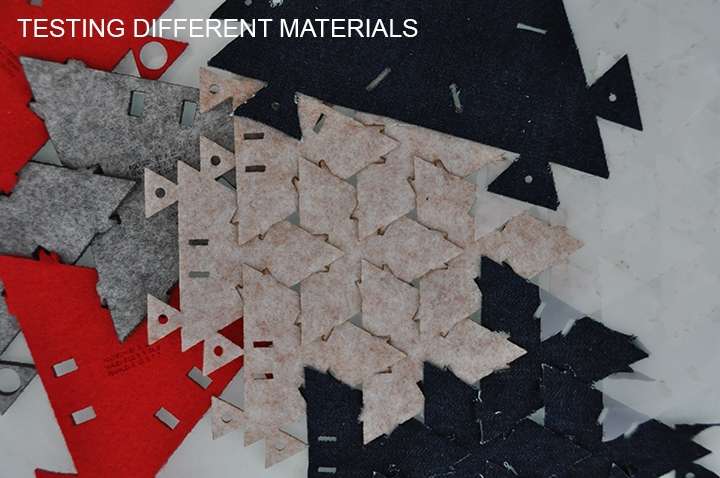
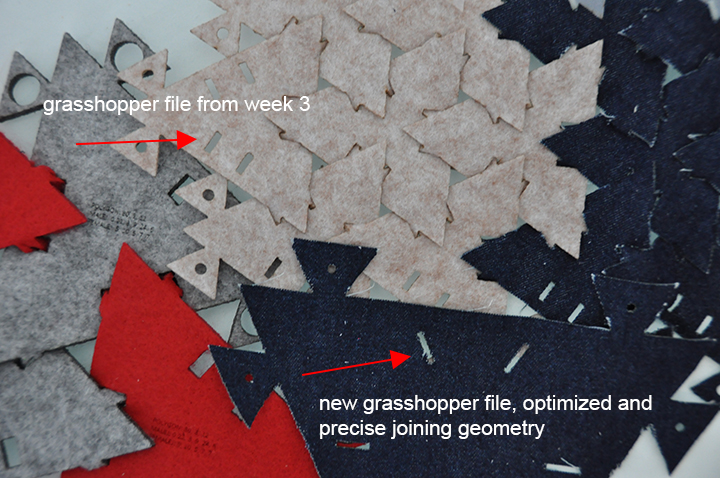
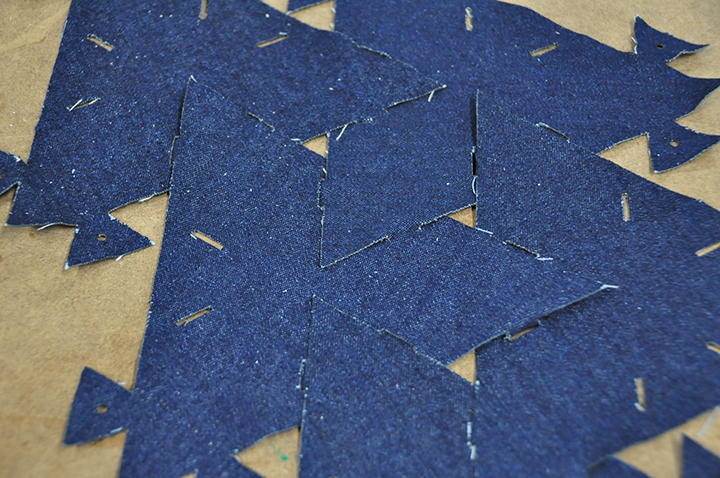
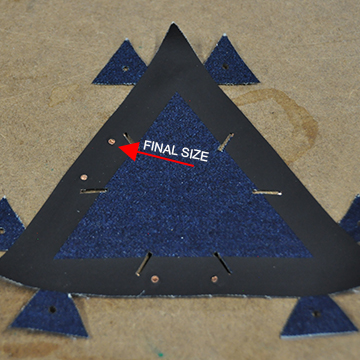
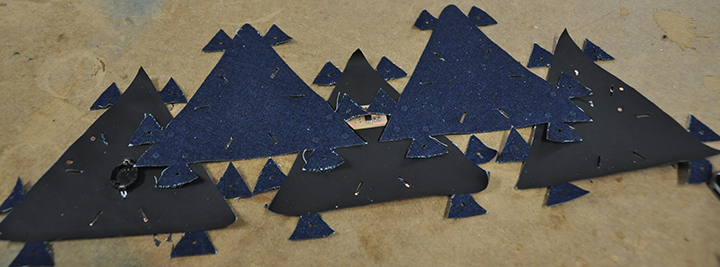
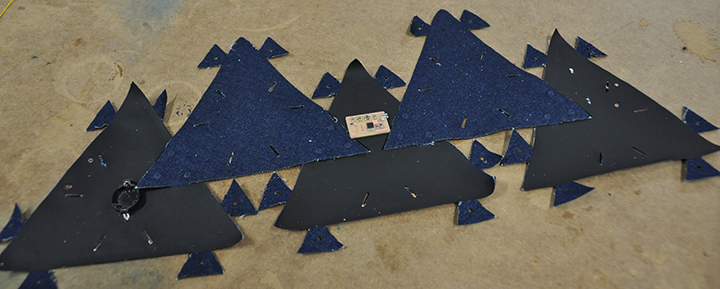
DEVELOP AND TEST TEXTILE MODULAR DESIGN: in the last few days I have managed to work further with the textile modular system and improve the parametric design developed in Grasshopper in week 3 to a really satisfying level.
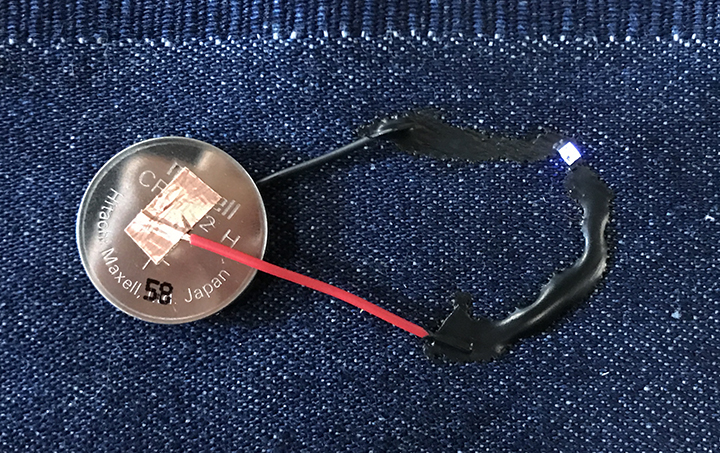
DEVELOP AND TEST CONDUCTIVITY STRATEGY: I have tested conductivity strategies, namely BARE CONDUCTIVE paint. I was quite satisfied with the samples I had made.
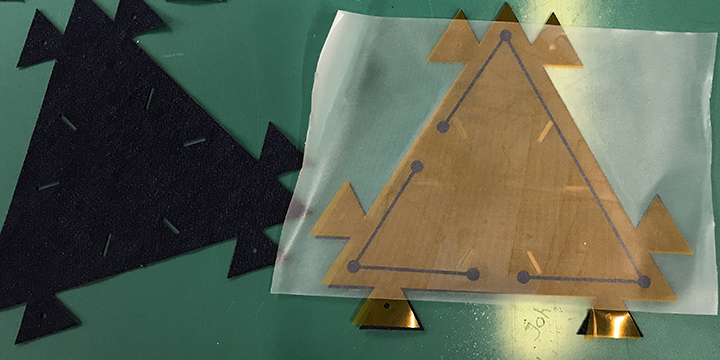
I tested different techniques to apply it in a precise way to the textile modules, both with screen printing (textile vinyl heat pressed on a screen printing mesh) and simple vinyl mask. The last proved to be much more reliable, making a more consistent path, with less resistance.
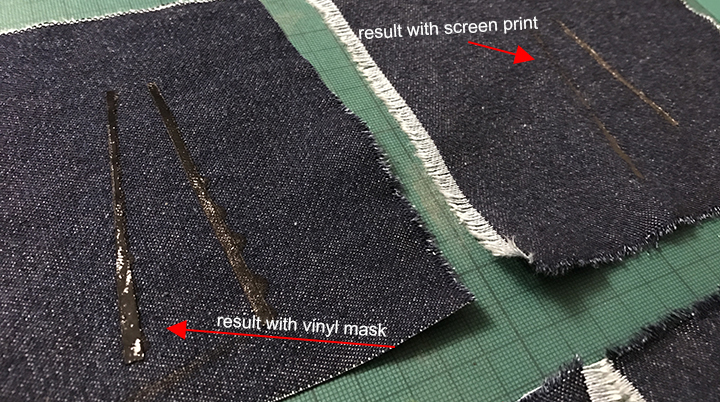
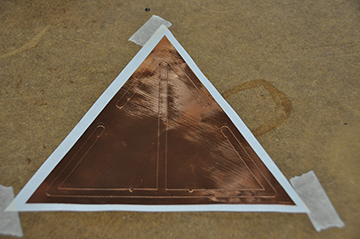
However, when I applied it to the modules, it showed it was not reliable. It has too much resistance and cracked easily when connecting to harder components (f.x. led, battery holder, magnet). So, I had to compromise on using copper vinyl together with textile vinyl, in order to have time to develop other aspects of the project.
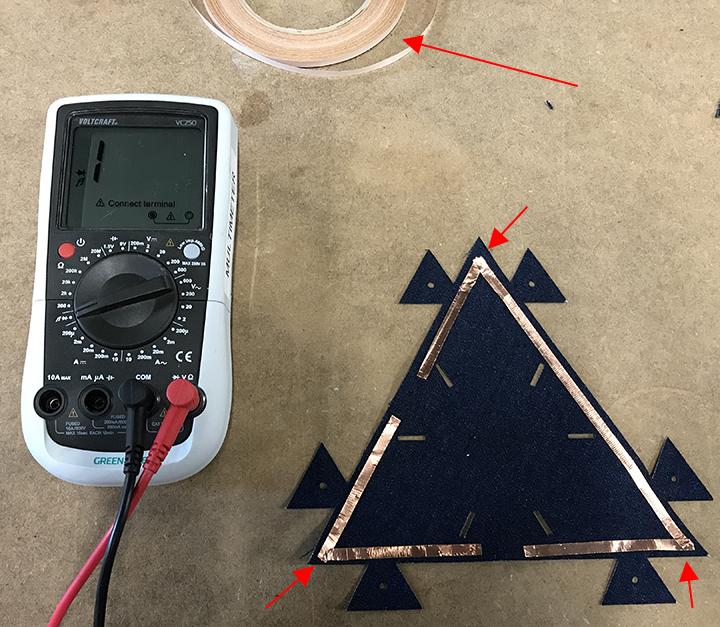
While considering to use copper vinyl, I tested with 5mm copper tape. Here, because I would cut and built the paths using multiple pieces of tape, I encountered some problems with continuity. But that wouldn't be a problem later on, when the copper tracks would be cut from a single piece using the vinyl cutter.
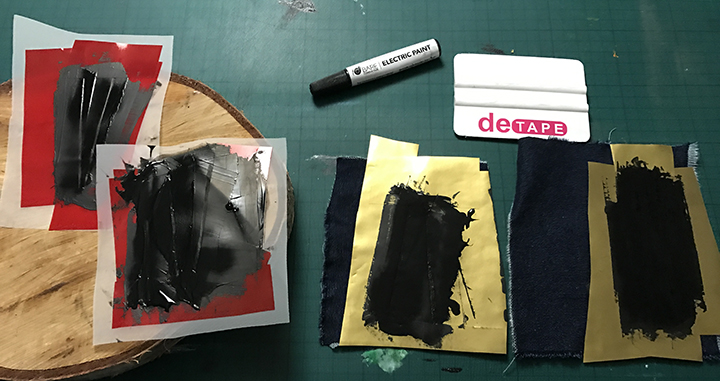
DEVELOP AND TEST CONDUCTIVITY BETWEEN MODULES: I started by making 2 small samples with conductive paint (BARE CONDUCTIVE), a battery and a led. On both samples, the battery was in one piece of fabric and the led in another. The goal with the samples was to test electrical continuity between the two pieces of fabric, in one just by touching and in the other by making use of magnets. Both worked, but the one without magnets required that man applied some pressure and made sure the paint was touching.
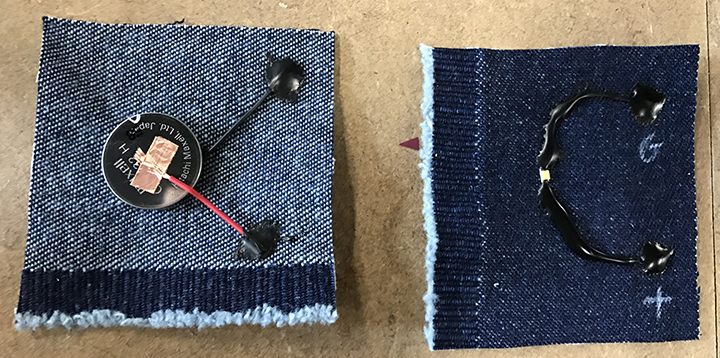
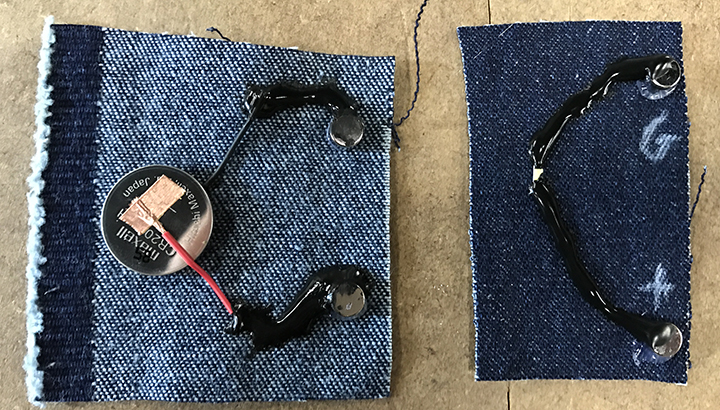
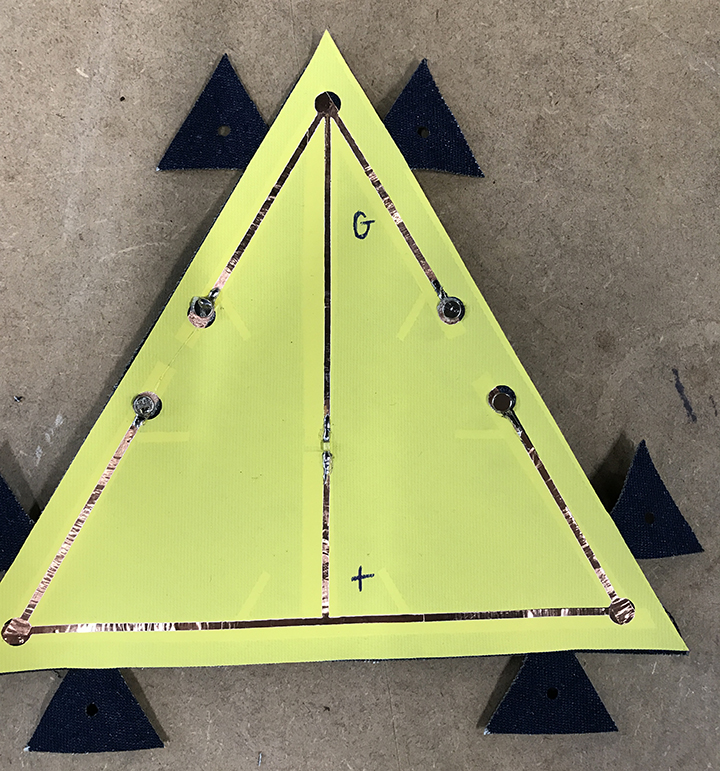
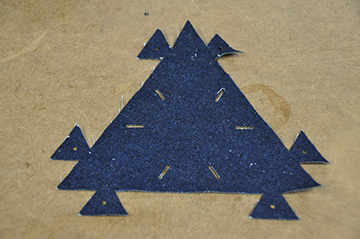
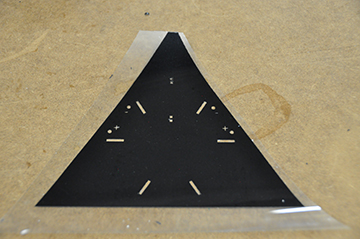
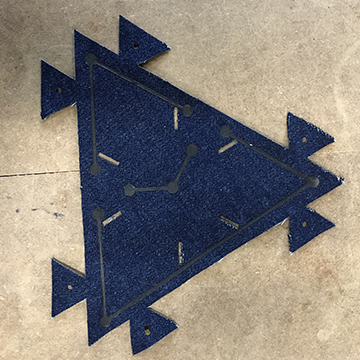
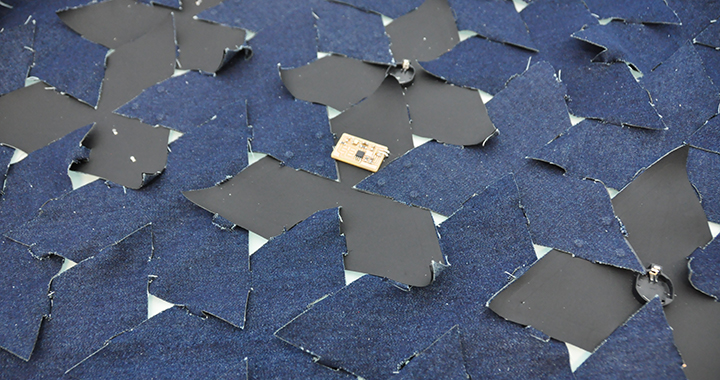
At the same time, I developed a layout and found a system for modules to link to each other. This is made by having connection points between modules in the front and in the back. So, in the front, the connection points are in the edges' midpoints. In the back, the connection points are in the vertexes. They should be connected alternating, if they need to conduct electricity. The grasshopper file is made in a way that if dimensions of the modules change, the connection points are precisely updated. There are 3 connection points: Groung, VCC and Data.
I was so happy with the result that I started applying it to the final modules, using a vinyl cutted mask.
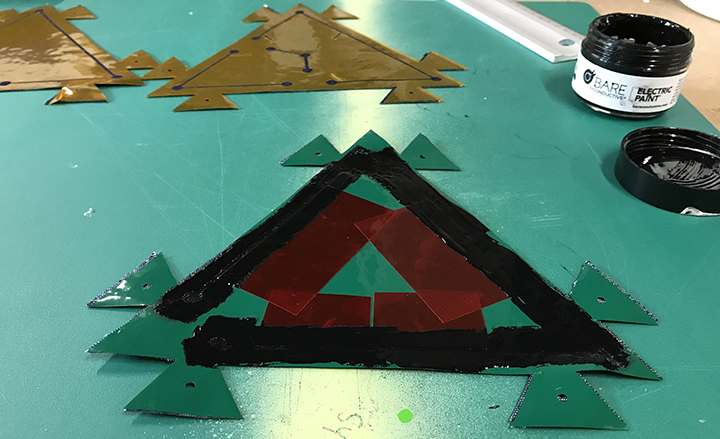

But unfortunately, I later came to realise that the conductive paint was only meant for small distances (there was too much resistance) and it was not flexible enough... so it would easily crack after the fabric has been slightly bended to adjust to a body shape or when connecting to harder elements (electronic components, magnets, etc.). In order to stick to the presentation deadline, I had to make a compromise and use copper vinyl, as explained above.
So the final process to make one module is:
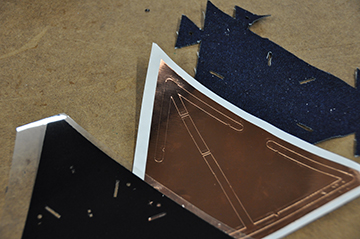
- 1. lasercut fabric;
- 2. vinylcut both copper vinyl and textile vinyl;
- 3. transfer copper vinyl to lasercutted fabric, making use of transfer tape;
- 4. add magnets to the connection points;
- 5. heatpress textile vinyl on top of the fabric (where the copper and magnets are already placed); here, I made a couple of tests to try to get to the lowest temperature and lowes time interval possible, afraid of compromising the efficiency of the magnets;
- 6. glue and solder necessary components (resistors, leds, battery holder, etc.).
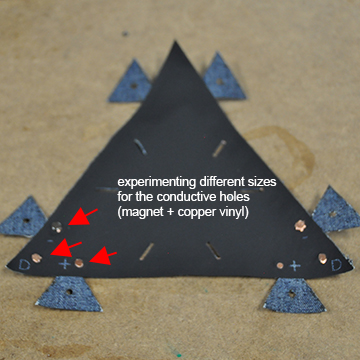
I did different tests to see how to hold well the magnet and assure a good touching area between modules.
The whole strstegy for how the modules connect efficiently (specially the ones that need to conduct electricity) is one of the most important parts of the project, I would like to work further with it beyond FabAcademy.
DEVELOP AND TEST POWER, WIRE, MIC AND LED MODULES: The layout for the different modules is quite defined, but they depend on the conductivity strategy to be finished. The microphone module is also taking more of my attention, I'm optimizing the board, making it as small as possible, and testing different strategies to make it more flexible and integrated.
MAKE SURE SYSTEMS WORKS SMOOTHLY: as explained above, I've been spending a lot of time in system integration, but have to make compromises in order to advance other parts of the project. I believe I have reached an ok level for FabAcademy, but I'd like to keep working on this aspect until I'm completely satisfied. I'm considering to partner up with a company and develop a commercial product out of this project.
APPLY IT TO AN EXAMPLE IN CLOTHING: I test this all the time, in small pieces of clothing. That has helped me make a lot of general decisions on size, shape, materials (I tried on different fabric, some were too rough and would hurt the skin, some where too thin and would fall apart, etc.). But I haven't spent the time to "weave" a bigger piece, like a dress f.x.
What have I learnt?
I have learnt to make decisions under pressure and move on! I have learnt to trust the benefits of developing a project the same way we solving a SUDOKU puzzle: if you get stuck on a part for long, you move on to another part, knowing that will give you more clues to solve the part before.
I have learnt that being too confident and investing a lot of time in developing something without small tests and samples (spiral development) is 1 out of 10 times bad time management and waste of materials and resources.
So, I believe mindset and project management skills have been the most important skills of this course. However, what makes it trully meaningful is developing those aspects with fast pace practical assignments as a steering wheel.
