The assignments
This week, there was a group assignment and individual assignments. The group assignment was to make lasercutter test parts, varying cutting settings and slot dimensions. The individual assignments were to cut something on the vinyl cutter and design a parametric press-fit construction kit, which could be assembled in multiple ways.
Group assignment and “kerf”
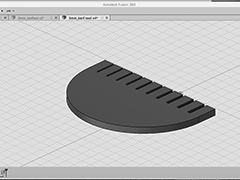
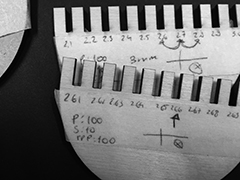
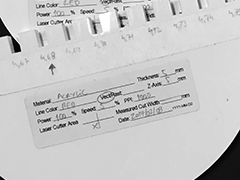
The group assignment for the week was to get a practical understanding of how the laser cutter works, the impact of its settings (power, speed, frequency, etc.), and how to determine and design accounting for the kerf - kerf is the cutting width, the portion of material the laser burns away when it cuts through; it varies according to material properties, machine condition and settings.
In order to do that, we started by designing a file in Fusion 360, a line of slots, where the slot width would increase by 0.1mm. By using parameters and constraints in Fusion 360, we rapidly applied the same drawing to different material thicknesses.
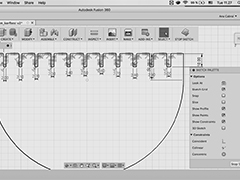
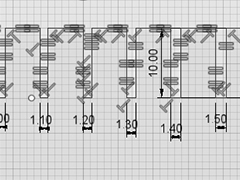
Then we edited the files in Adobe Illustrator or Inkscape (line thickness and color), so the laser cutter could read them. After laser cutting a first time, we needed more refined investigations. For example, in the case of 3mm MDF, the 2.7mm slot was too tight and the 2.8 too lose. So we repeated the tool, this time with 0.01mm increases between the values in question.
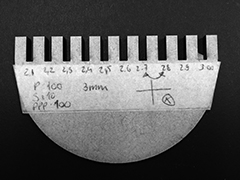
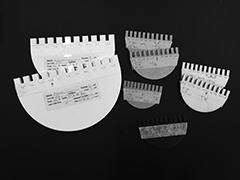
We did that for different materials, verifying that:
- MDF, 3mm -> best fits in 2,76mm slot (kerf of 0.24mm)
- Birch wood, 3mm -> best fits in 2.66mm slot (kerf of 0.34mm)
- Acrylic, 3mm -> best fits in 2.8mm slot (kerf of 0.2mm)
- Acrylic, 5mm -> best fits in 4,68mm slot (kerf of 0.32mm)
- Cardboard, 1.5mm -> best fits in 1.1mm slot (kerf of 0.4mm)
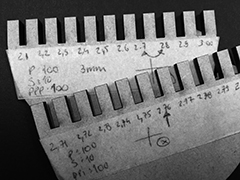
We are well aware that not only material properties and machine settings have an impact on “kerf”, but also machine conditions. We could already verify that the machine was performing differently according to placement of the file in the cutting area - probably due to irregularities of the honeycomb cutting table. Therefore, we labeled the tests, with date, settings used and placement in cutting table - the labels have actually been developed by a user and volunteer of our FabLab. We uploaded the files to FabLab SH Google Drive, so that other users can make use of it. See here.
Individual assignment: vinyl cutter
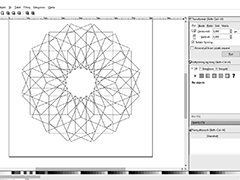
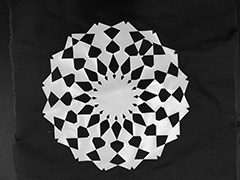
To do the vinyl cutter assignment, I got inspired by Lene Egly, a pattern designer and user of our FabLab. She has developed a workshop in collaboration with FabLab SH in April 2015, entitled “The beauty of mathematics”, where she decomposed her designs, step by step, revealing the math behind them. Find the file here. So I followed the instructions on the file, and vinyl cutted in regular vinyl and textile vinyl. Textile vinyl was then transferred to a piece of fabric using a heat presser. I would like to make more experiments, exploring patterns that can be combined with conductive paint (using screen print) and copper tape.
Individual assignment: laser cutter
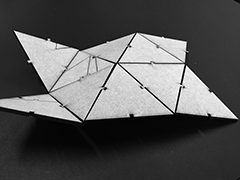
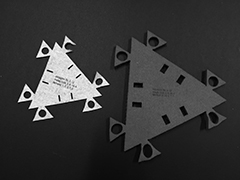
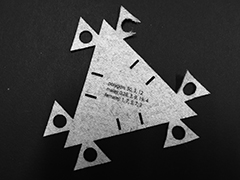
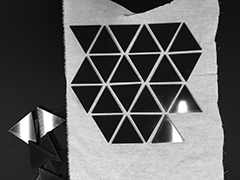
For the press-fit construction kit, I decided to work with triangles, so it could fit to organic shapes/designs like a dress.
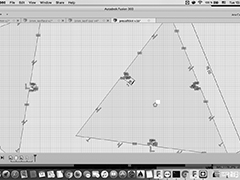
I started by designing triangles in Fusion 360, some with male and other with female joints. When I was done, I did an offset equivalent to the kerf valued figured out during the group assignment. I was laser cutting in 3mm MDF, so applied an offset of 0.12mm - half the kerf -, towards the outside of the triangular shape.
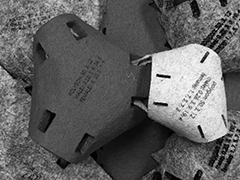
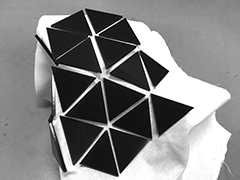
The idea was to assemble them flat, instead of perpendicular to each other, resembling a mesh. Turned out to be a very fragile assembly, way stronger if pieces are assembled perpendicularly to each other, only making use of the triangles with female joints.
Working towards the final project
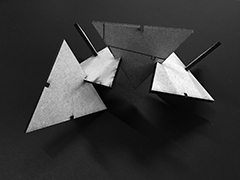
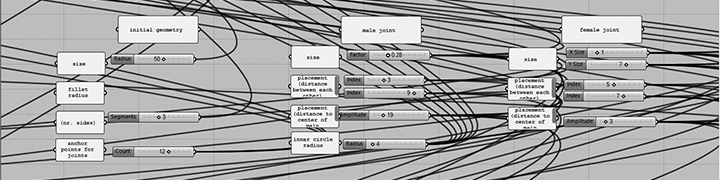
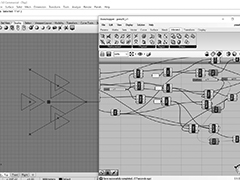
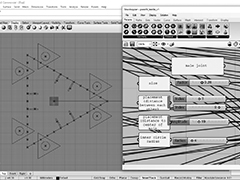
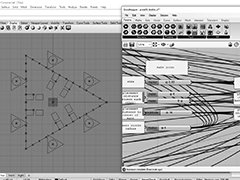
Where I spent most of this week’s time was on developing a parametric model for a modular system to be used in textiles. Right after the lecture, I was searching for press-fit construction kits that could be applied to textiles and stumbled into this.

I really saw the potential in applying it to my final project, so decided to model it, in order to understand it, laser cut it and explore it. Since I have been learning Grasshopper, I decided to make a script for the piece - that would give me the freedom to work parametrically later on and change sizes, placement of joints, etc. You can see my progress here.
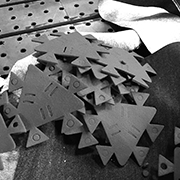
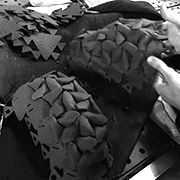
I have laser cutted the module in different sizes and materials - 5mm synthetic felt and 1.5mm wool felt. I’m quite happy about the result. The wool felt turned out to be very fragile, not only because of its thickness, but also in terms of material composition. The synthetic felt gets hard edges when lasercutted and proved to be quite resistent.
Another experiment I have made was laser cutting triangles and glueing them in fabric. Another possibility that I might explore in the future is to have flexure surfaces glued onto fabric, to reinforce it, as the example on the right side, from FabTextiles webpage.

Learnings from this week
It was a great feeling being in the lab, getting physical outputs from digital drawings! But it can be challenging to keep focused when the possibilities are endless.
