Smart Blinds
Mechanical Structure
The Full CAD design
I've designed all the parts and assembled them on SolidWorks
and HERE it's the whole design in .sldprt format
Open Smart Curtain.SLDASM to open the main assembly file
the full documentation can be found on the CAD Assignment
Manufacturing the curtain parts
For manufacturing the parts of the curtain I've used laser cutter and 3d printer.
I tried to use laser cutter more than the 3d printer as it has better accuracy and less expensive.
3D Printer
I used 3d printer in making only 3 types of parts of the curtain
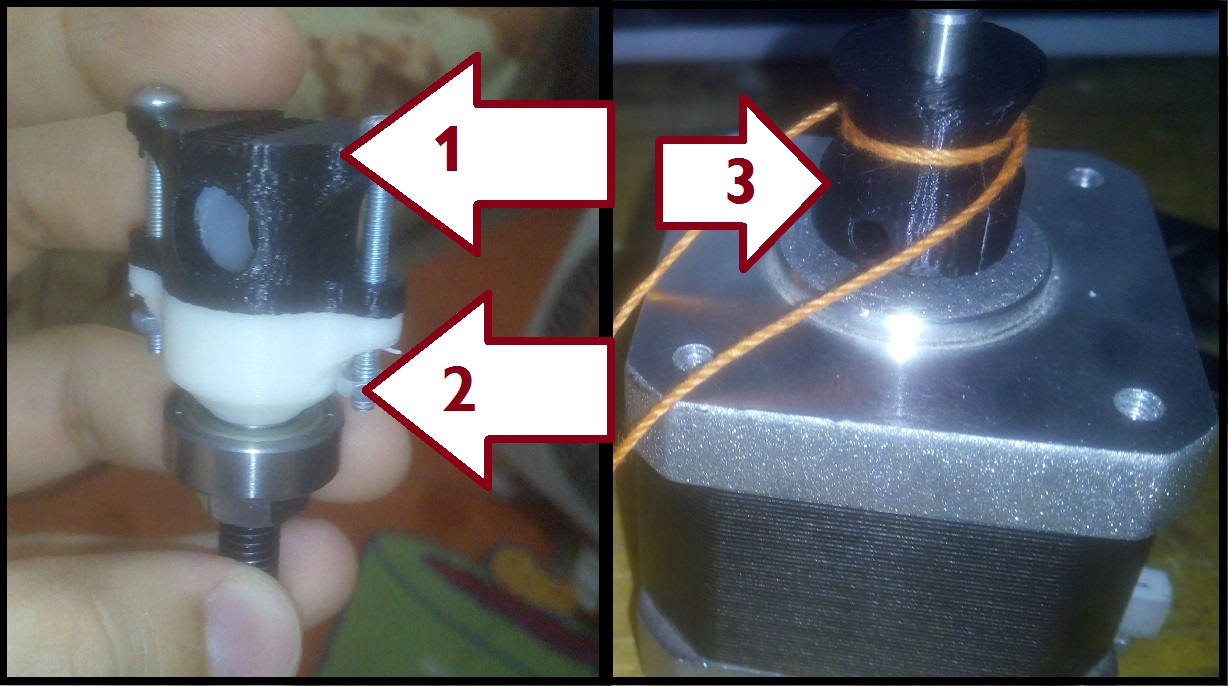
1-the top sleeve holder.(6 parts)
2-lower bolt holder.(6 parts)
3-stepper motor pulley.(1 part)
using standard settings was good.
printing method is explained in 5th Assignment.
Laser Cutter
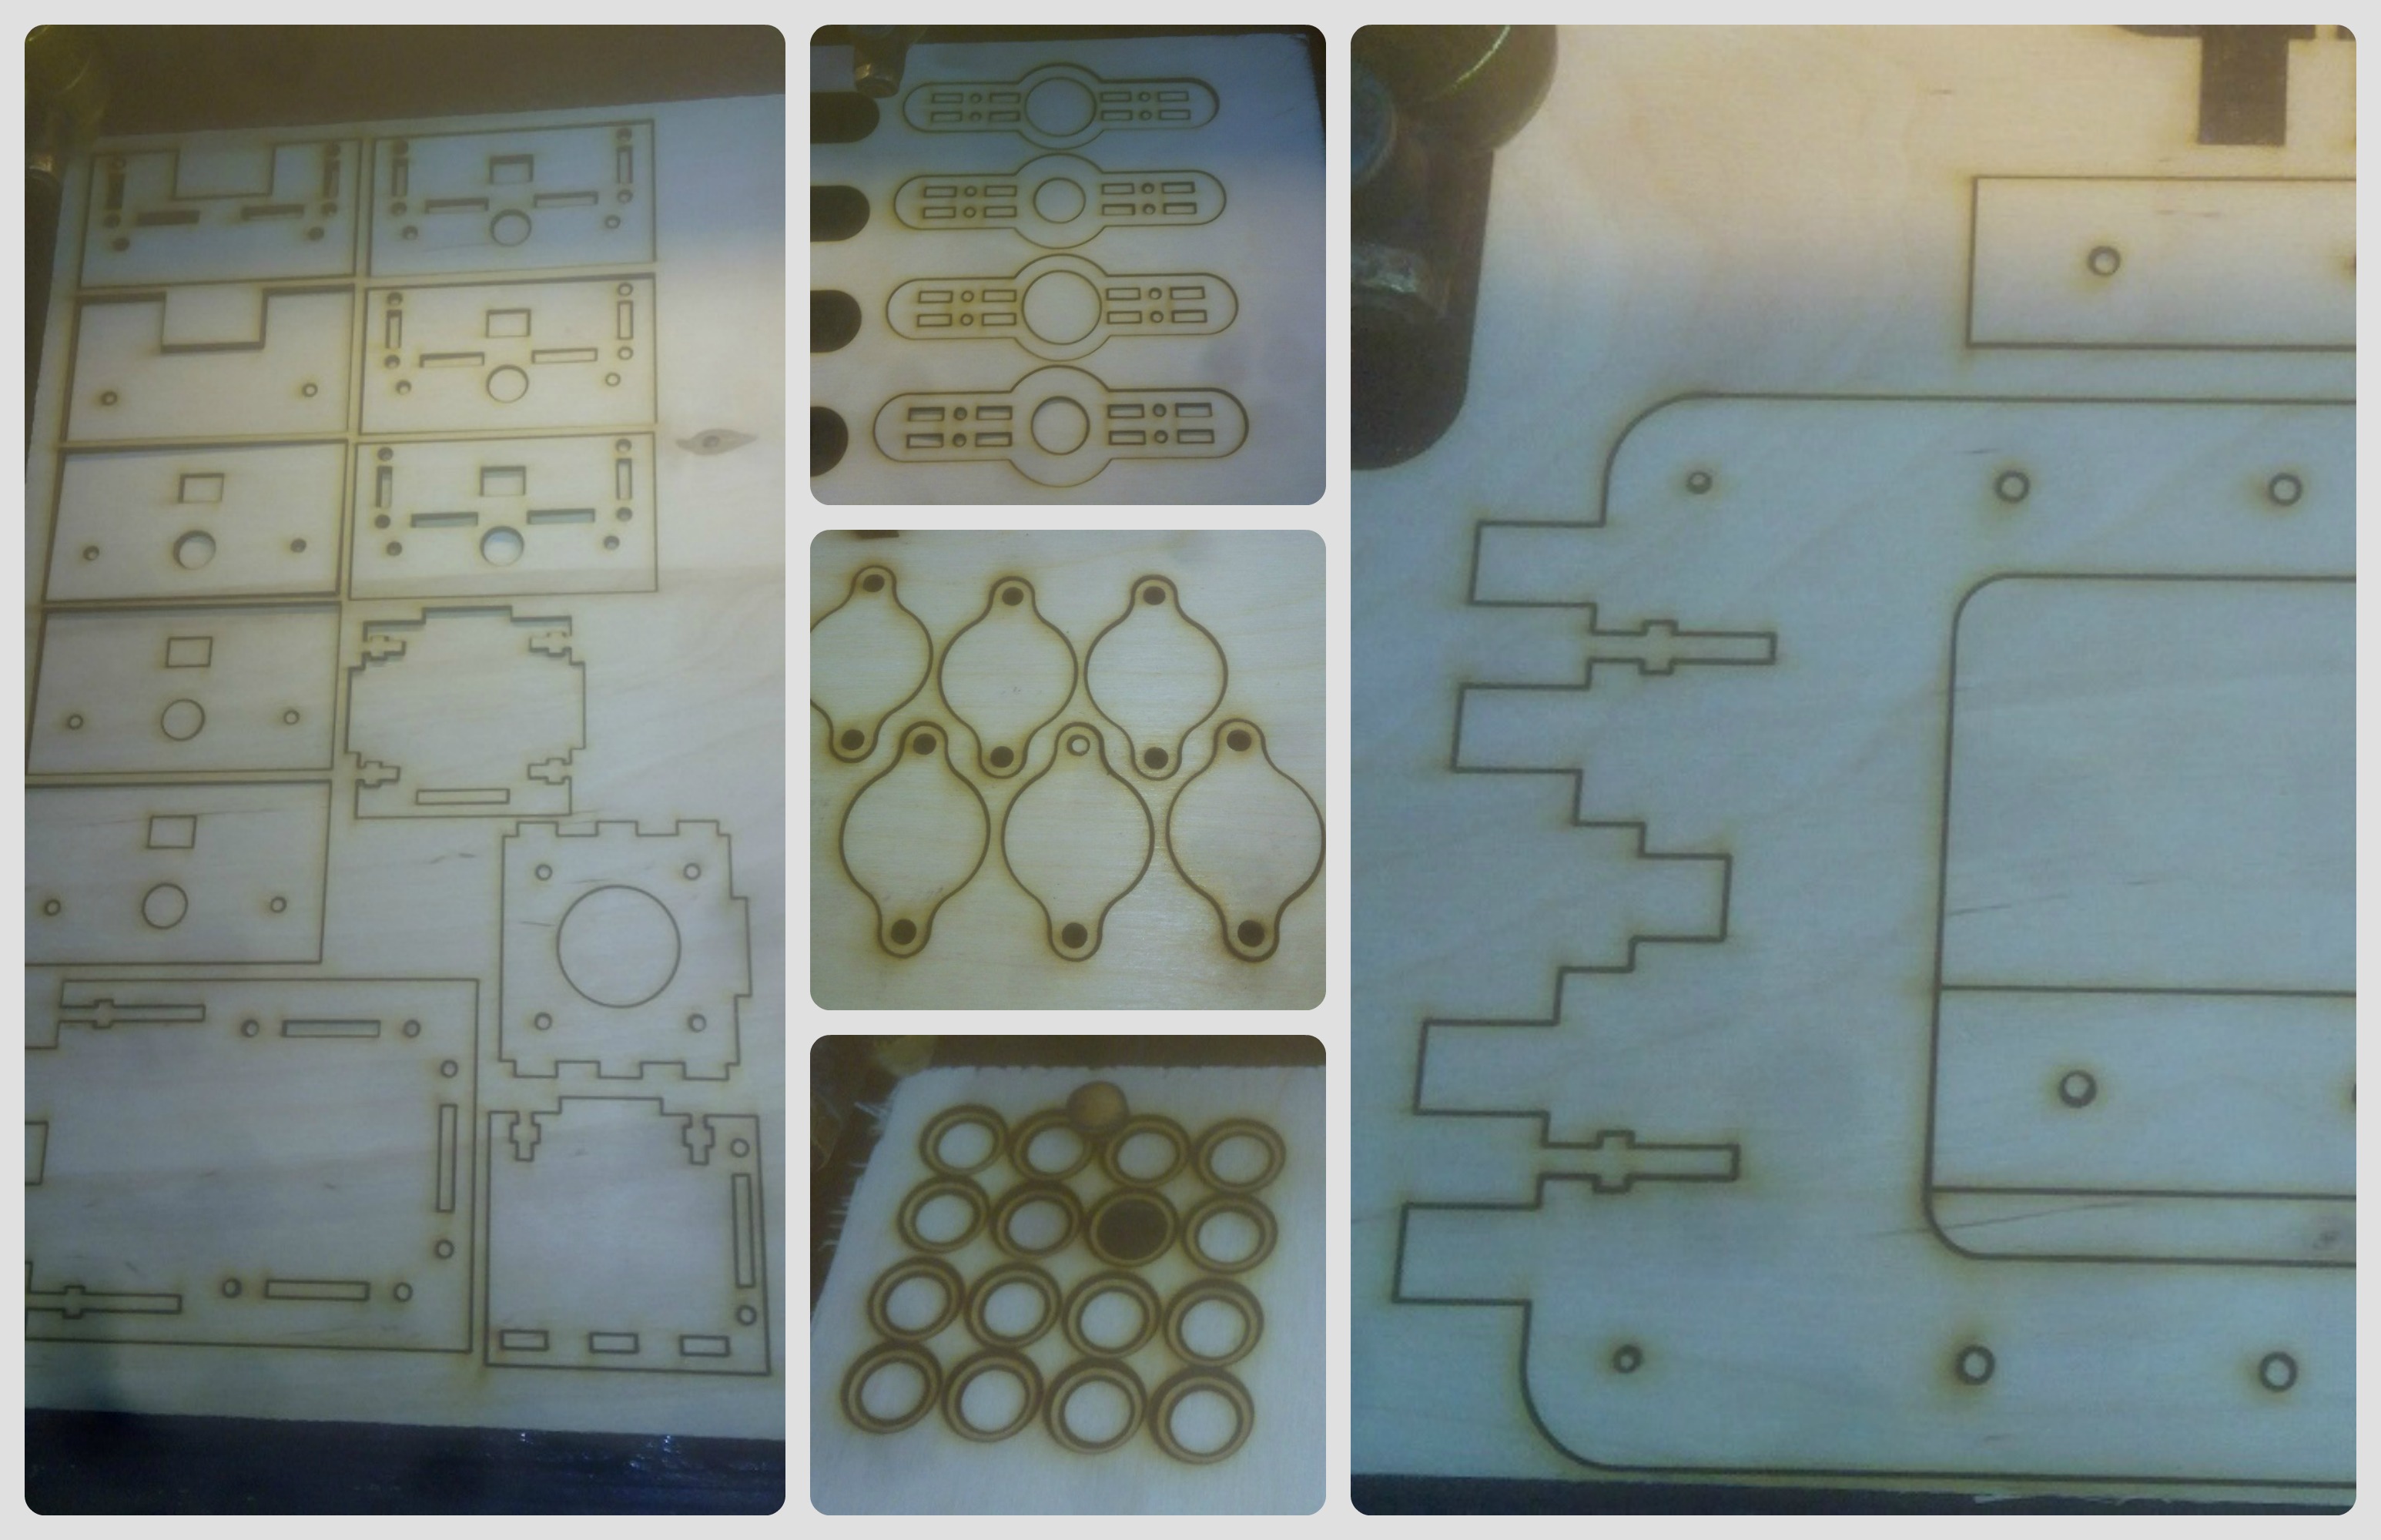
The Rest of the parts was made using Laser Cutter.
Laser Cutting method is explained in 3rd Assignment.
Assembling the parts
In this video you will find steps of assembling the curtain parts together briefly.
1- assemble the link between the rod and the blinds.
2- assemble the blinds carrier on the bearing.
3- putting this assembly of 1&2 on the rod.
in this step I make a distance between every two pieces equals ~ 10 cm, then I tight the bolt to fix it.
then it can be opened and closed fully if you want to do something in the window.
4-attaching the blinds which can be changed by any color or material.
5-the belt is used to keep the distance between the blinds and to make it easy to open it manually.
6-to make the blinds rotate with the same angle all of them are tightened (from both sides) to a string to the stepper motor pulley which gives them the angle.
7-an overview on the assembly showing where the stepper motor is placed.
the control box will be put outside the window to sense the light and it has two fixing points.