Second Assignment
Computer-Aided Design
This assignment is about Model (draw, render, animate, simulate, ...) a possible final project.

Used Softwares
In this assignment I will be using SolidWorks for 3D design and Corel Draw for 2D design.

"
SolidWorks
SolidWorks is a solid modeling computer-aided design (CAD) and computer-aided engineering (CAE) computer program that runs on Microsoft Windows.
SolidWorks is published by Dassault Systèmes.
over two million engineers and designers at more than 165,000 companies were using SolidWorks as of 2013.
Also according to the company, fiscal year 2011–12 revenue for SolidWorks totalled $483 million.

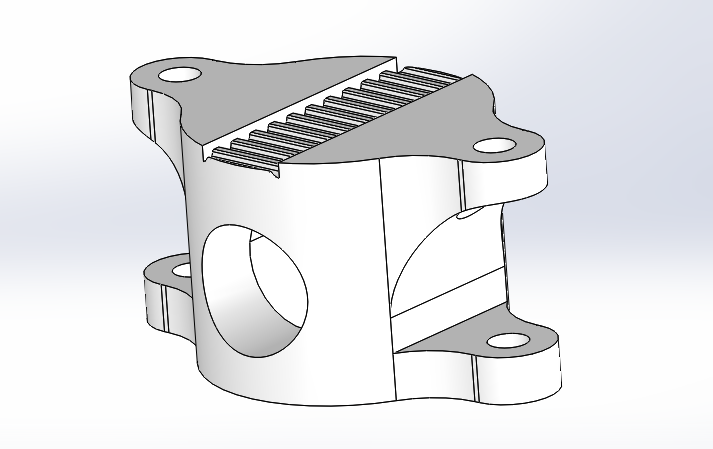
Discussed Part
In this assignment documentation I will be discussing one of the most complex parts in the final project to let you know how to use SolidWorks,
and I will be passing by the rest of the parts.
this photo is a section view ==>
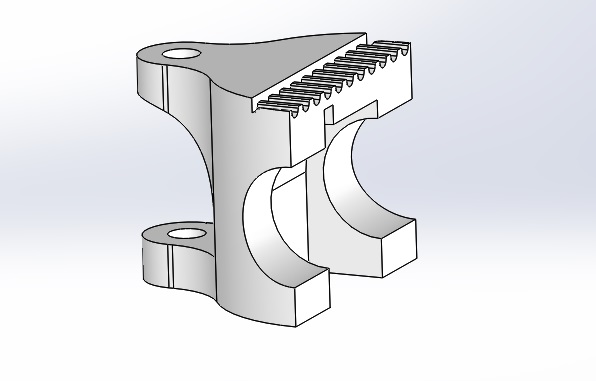
The purpose of this part
This part will be working as sleeve holder to make it easy for the blinds to slide on the shaft of the Smart Curtain, and it will also be used to keep equal distance between the blinds when the belt is put on it's profile and tightened securely.
Getting Started with SolidWorks
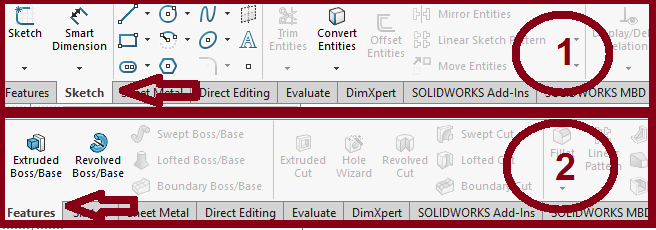
The most important parts in solidworks to get starting are SKETCH and FEATURES.
1-Sketch: lets you draw the profiles you want to make as 3d parts by any means.
2-Features:lets you turn your sketches into 3D bodies, by making many features and adding them together you can have any simple or complex part.
The first step
The first step is to draw the main profile of the part from the sketching tools.
you will find a great tutorial of the sketching tools on this link

The Second Step
Extruding your profile:-
1-Select Extrude boss from Features menu.
2-Select the Contour you want to extrude.
3-Select the depth you want to extrude to.
4-Then press enter.
I excluded the profile of the sleeve to make it the entrance of the sleeve to be seated in the part.
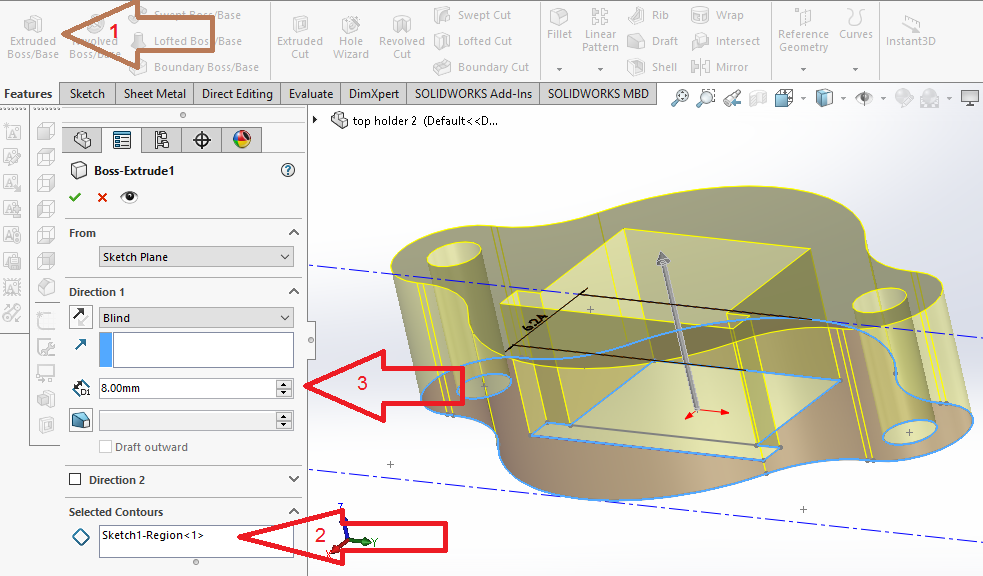
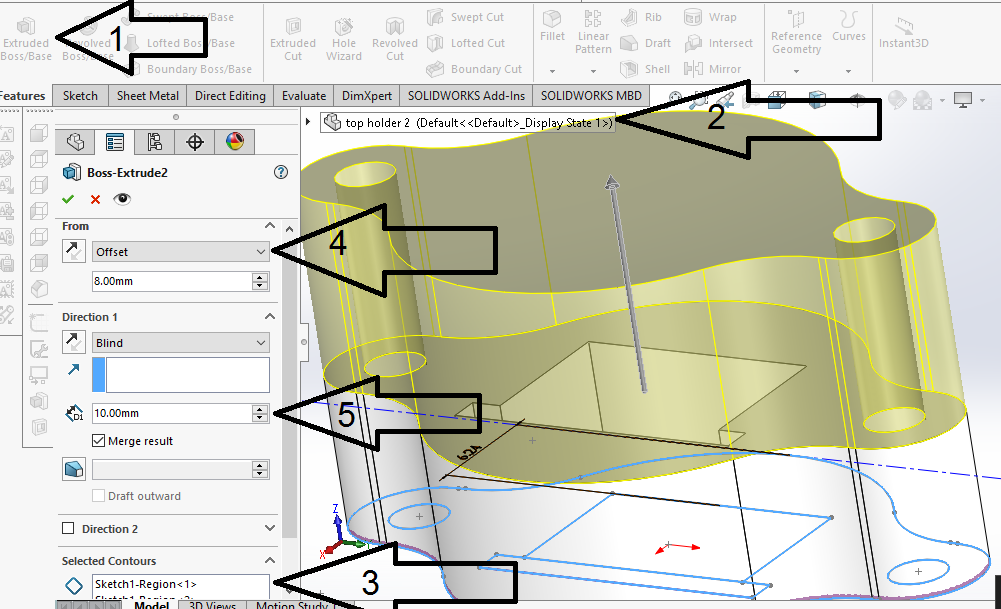
The following step
then I added another body to be the room of the sleeve:-
1-Select Extrude boss from Features menu.
2-Selected the sketch from the design tree under the previous feature.
3-Select the Contour I wanted to extrude.
4-Selected it to start from offset 8 mm
5-The depth needed.
6-enter.
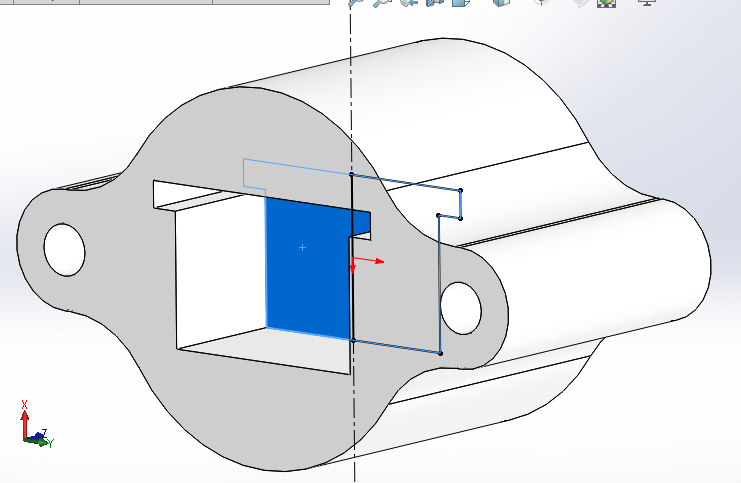
Sketch of the sleeve's groove
after drawing a sketch on this blue surface, this sketch has both the profile of the groove and the centreline that I will revolve cut around it.
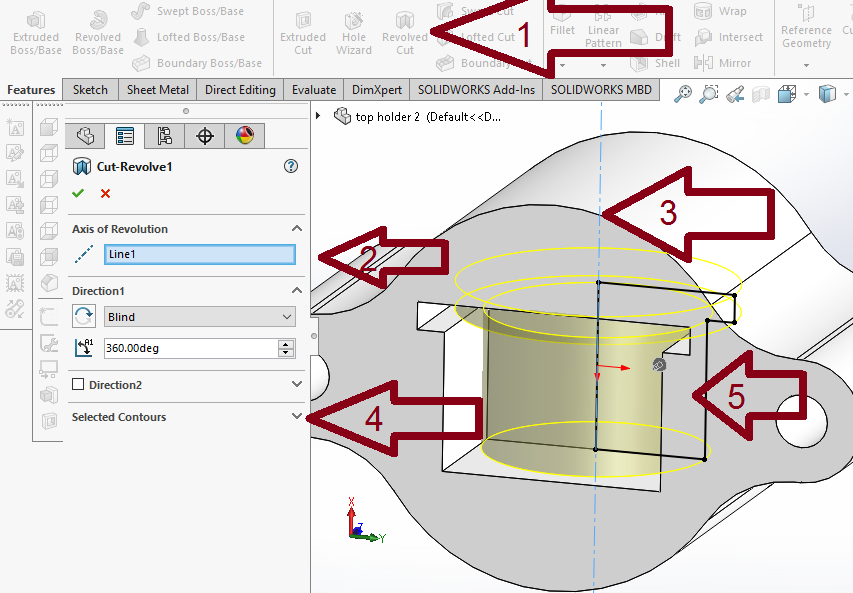
Revlolve Cut
To complete the groove of the sleeve I've made a Revolve Cut in the part:-
1-Select Revolve Cut from Features menu.
2,3-Select axis of revolution.
4,5-Select the revolved contour.
6-enter.
Extrude Cut's Sketch
Then I hade to make two extrude cuts; one to let the shaft enter the part and another one to reduce the material to make the printing time less and to reduce weight.
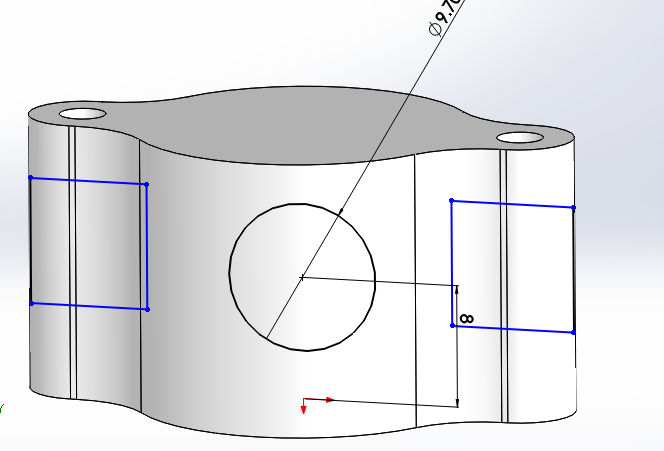
Extrude Cut
to make the extrude cut:-
1-Select extrude Cut from Features menu.
2,3-Select the required contours
4-Select through all both
5-enter.
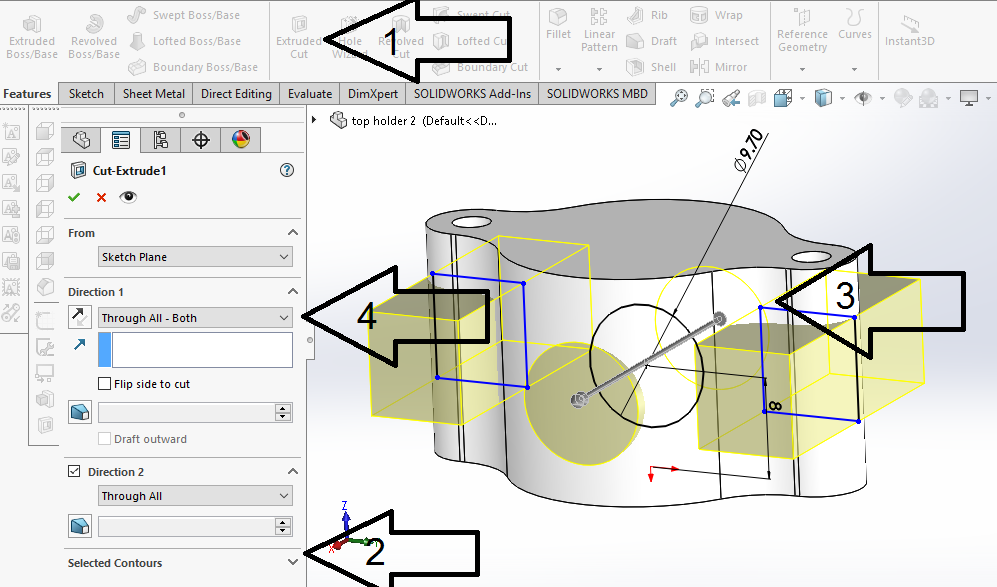
Adding fillets
I had to make a fillet to make it applicable to print this part without using supports, and to reduce stress concentration in the 90 degree edge.
to make the fillet:-
1-Select fillet from Features menu.
2,3-Select the required edges.
4-Select the fillet radius.
5-enter.
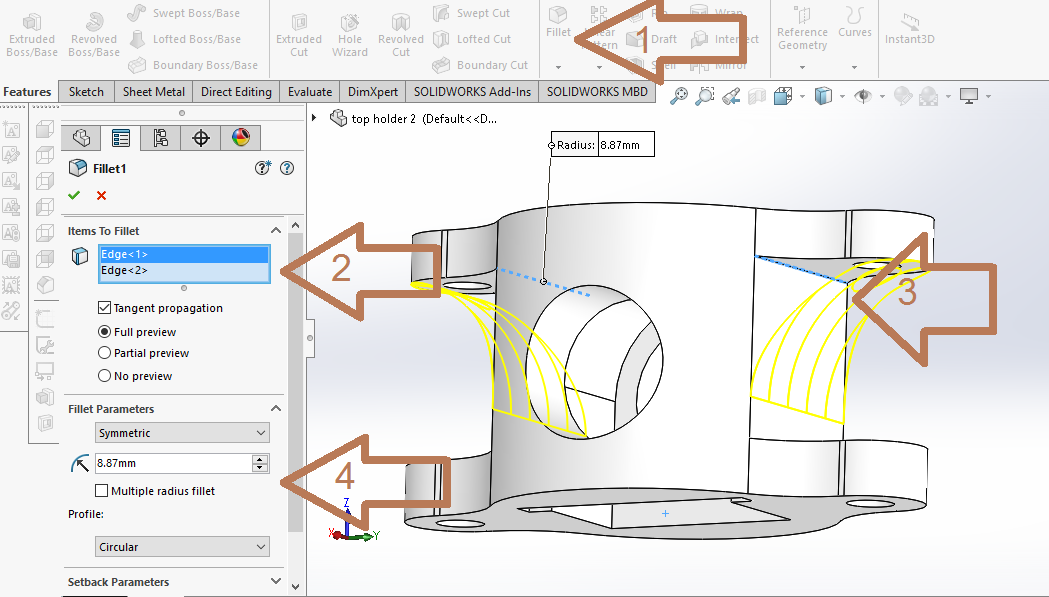
Making the belt seat
I had to make a make a place to seat the belt, the best way is to make it the same profile, it will make the most possible friction between the belt and the part.
Aaand here we go!
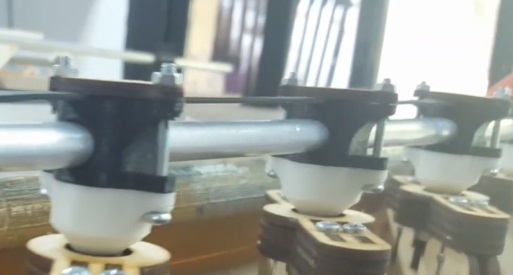
The rest of the parts
by the same way I've designed all the part which are simpler than this part. and I assembled them and here it's a tutorial for assembly.
then I've made this simple animation.
SolidWorks Animation Tutorial
and HERE it's the whole design in .sldprt format
Open Smart Curtain.SLDASM to open the main assembly file
CorelDRAW
CorelDraw (styled CorelDRAW) is a vector graphics editor developed and marketed by Corel Corporation.
It is also the name of Corel's Graphics Suite, which bundles CorelDraw with bitmap-image editor Corel Photo-Paint as well as other graphics-related programs.
The latest version is designated X8 (equivalent to version 18), and was released in March 2016.
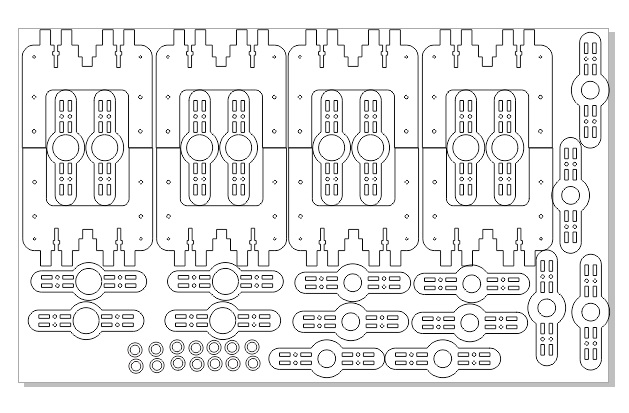
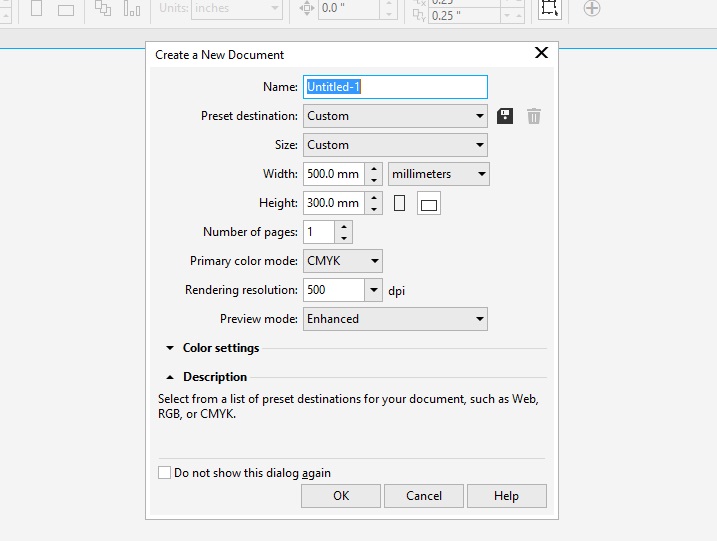
Mainly I was using CorelDRAW to arrange and nest my parts on the laser cutter.
so at first after pressing ctrl+n to creat a new file, I selected the dimensions of the sheet I am working on which equals to the space capacity of the laser cutter in our lab.
<
Using CorelDRAW in nesting
CorelDraw was proved to be better than SolidWorks in nesting the parts on the sheet.
<
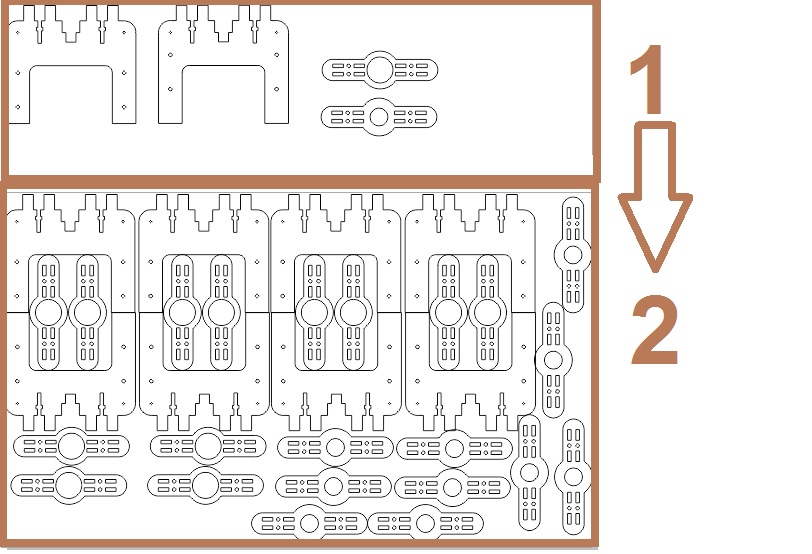
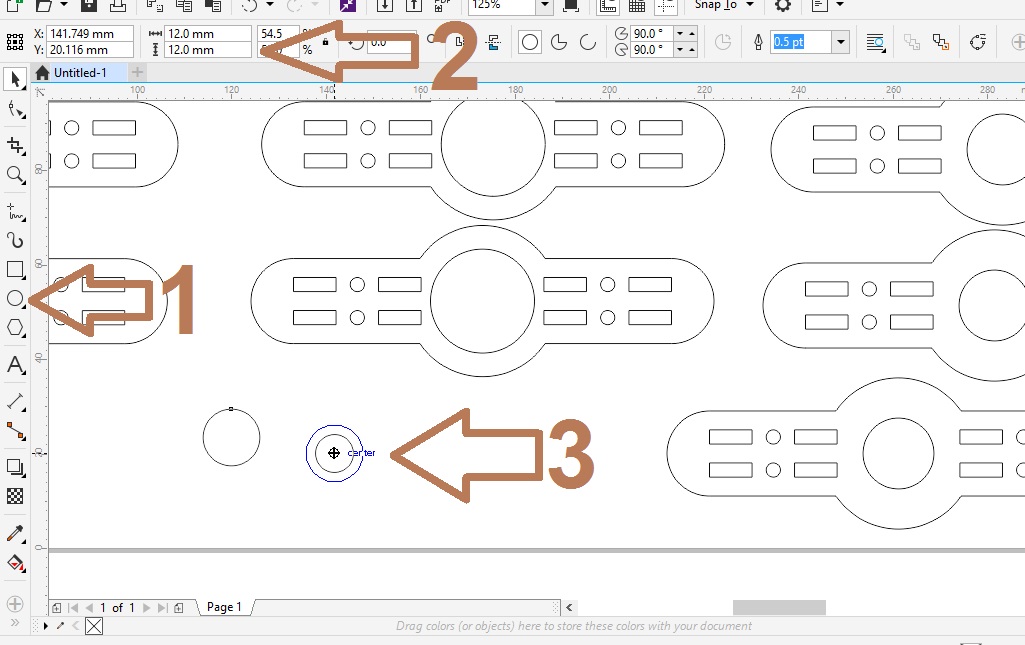
Designing in CorelDraw
I tried to make use of the remaining space of the sheet to make sleeves
1-Select the Circle drawing tool.
2-Select the Circle Dimensions.
3-reposition the Circle with easy center detection feature by CorelDRAW.
then this design will be send to RDworks which make this CAD to CAM to be laser cutted by laser cutter, this topic will be discussed in the next assignment.
<
Designing in CorelDraw
then this design will be send to RDworks which make this CAD to CAM to be laser cutted by laser cutter, this topic will be discussed in the next assignment.
Download CorelDRAW design from HERE
<