Project development
1°
To generate sounds
To generate sounds, better to say notes, I used the Arduino's Tone function, which generates square waves (that is alternating 0 and 5volts) at a specified frequency through a 50% duty cicle (half on/half 5v). I went deeper into this subject through this book called Arduino Music and Audio projects. It is actually possible to work directly with Microseconds, wich allows to handle directly the frequencies and the duration. But I decided that for my goal the Arduino Tone function was giving al I needed.
//From the Arduino Music and Audio projects book
const byte soundPin = 13;
int halfPeriod = 1000;
void setup() {
pinMode(soundPin,OUTPUT);
}
void loop() {
digitalWrite(soundPin,HIGH);
delayMicroseconds(halfPeriod);
digitalWrite(soundPin,LOW);
delayMicroseconds(halfPeriod);
}
2°
Keyboard
As I started to think how to make the keyboard I found mainly to ways. One is connecting each key (in my case each pushbutton) to an input pin. The main problem is that you need as much pins as the key you want to use (twelve in my case). Another way was the resistor ladder
, that is a voltage divider made with diferent value resistor. I found an example of keyboard made by a resistor ladder among the Arduino StarterKit sketches. The resistor ladder allows you to handle many buttons with just one input pins. But I was afraid to have problems using only resistor. .
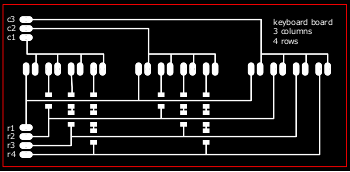
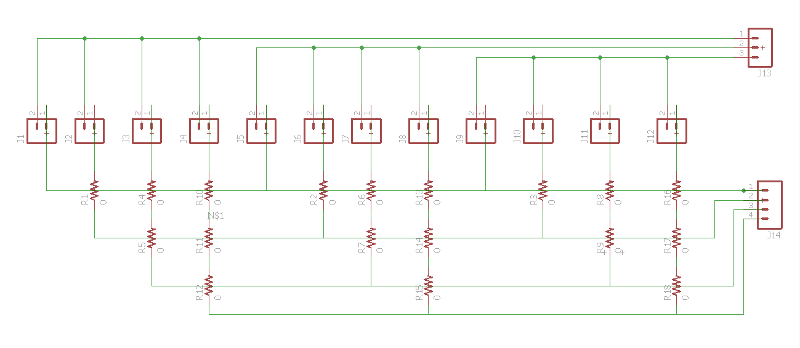
At least I found an intermediate solution, that is a circuit based on a matrix. Disassembling a toy musical keyboard I observed that lots of traces were ending in few pins and I found out that pins were arranged in columns and rows and that by pushing a button one column and one row were connected. Each button is identified by a unique combination of number of column and number of row.
Making some investigation I found out that for my goal I could use the structure and logic of a 12 keys keypad

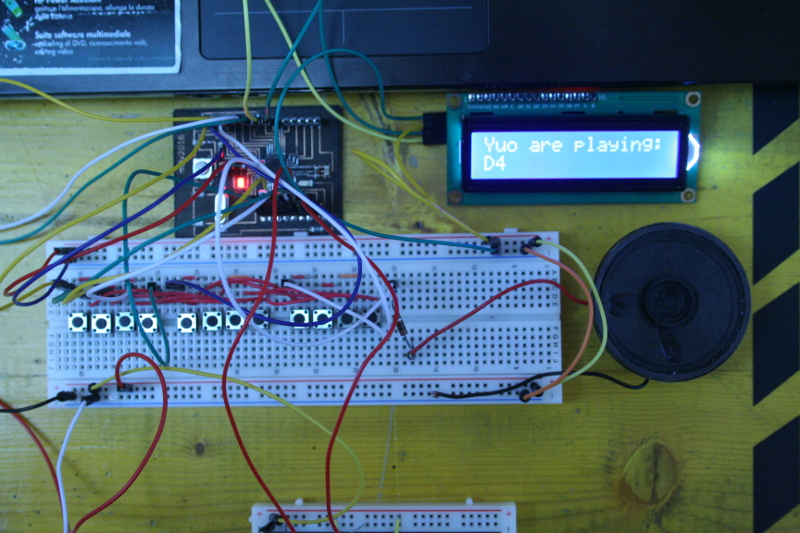
For testing purpose I made a circuit using a Satchakit and a breadboard. The buttons are connected on one side in order to constitute four sets of three buttons (corresponding to the four rows) and on the other side in order to constitute three sets of four buttons (corresponding to the three columns). Each column and each row is connected to an input pin. This way I made a 3x4 matrix using 7 pins to handle 12 buttons.

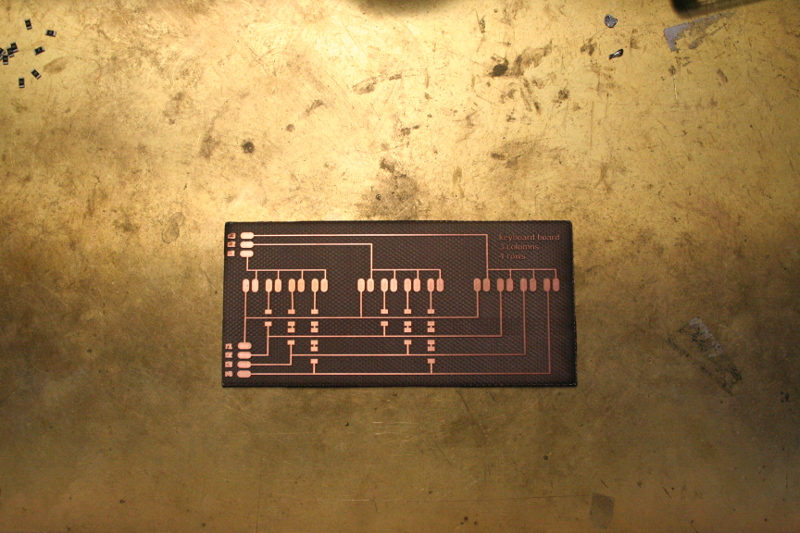
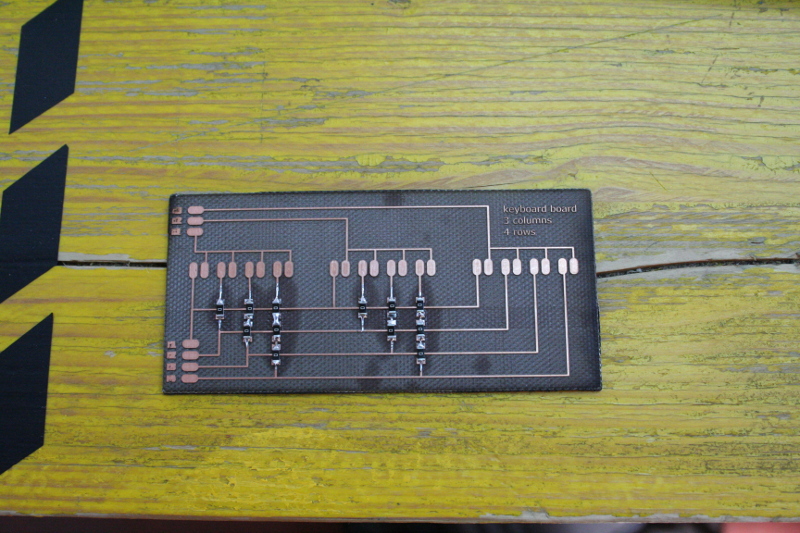
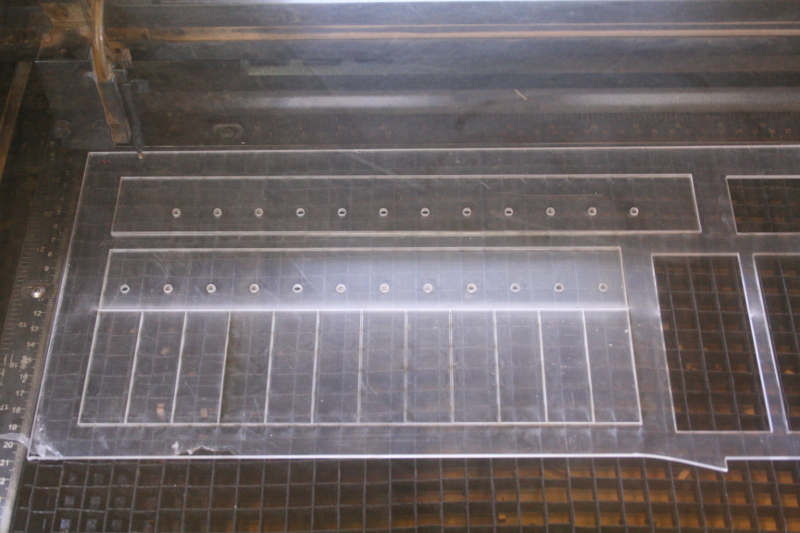
At least,as always, I exported the PNG image from Eagle a made the SVG file for the Fiber Laser cutting machine. To finish the work I soldered all the 0 value resistor used as jumper.
3°
Display
One of the function of my final project is to set the notes pitch one at a time. To get this goal I used an LCD display showing the pitches you are playing. To save pins I used an 16x2 LCD display communicating by 12c protocol. This part is been documented in my Networking and communication assignment.
4°
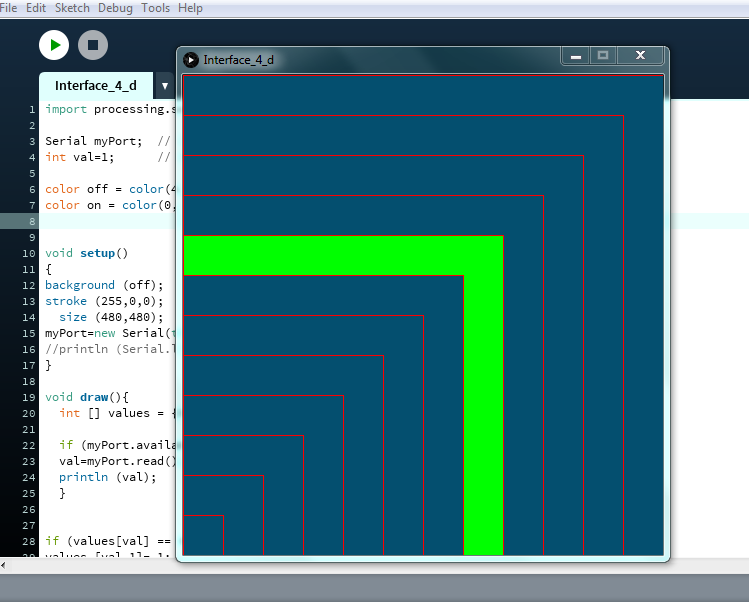
Interface
Another function of my final project was to show on a virtual piano keyboard the note you are playing. I didn't finish this part, but the principle is the same I used for the Interface and Application Programming assignment
based on Processing.
5°
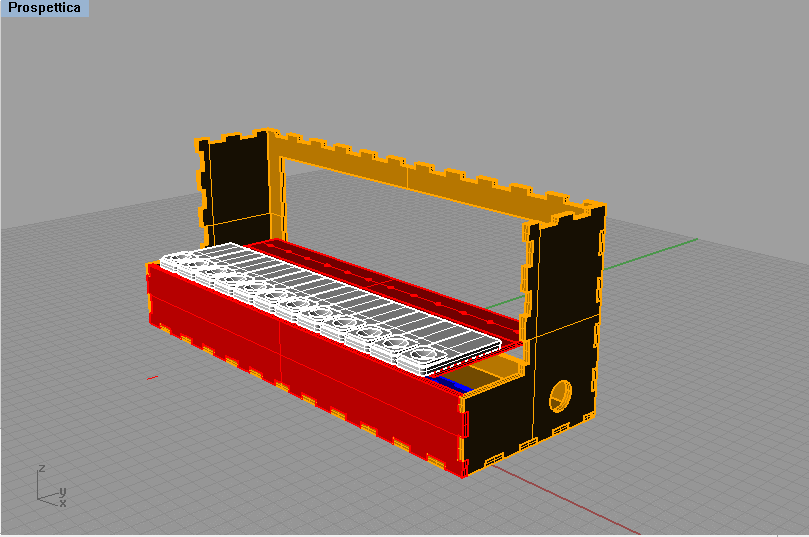
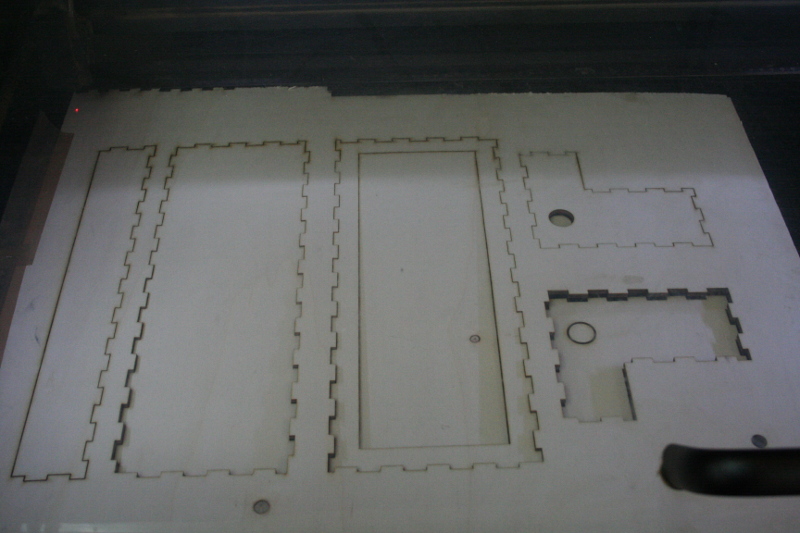
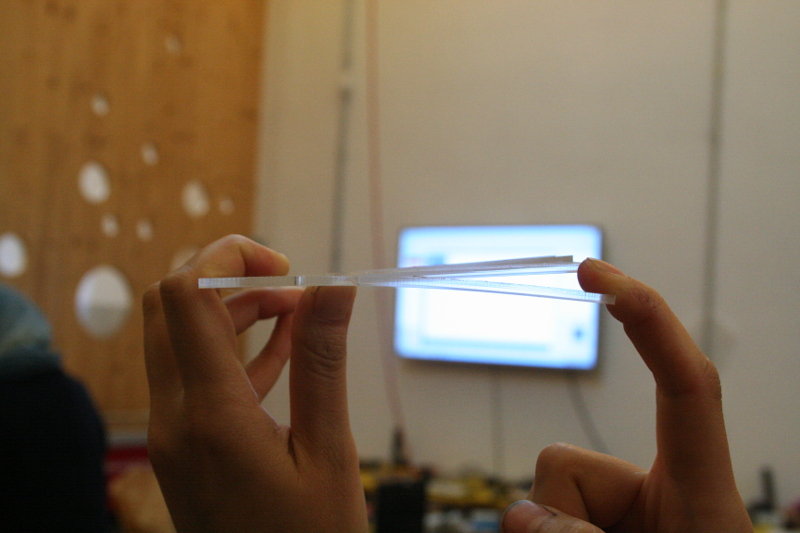
Structure
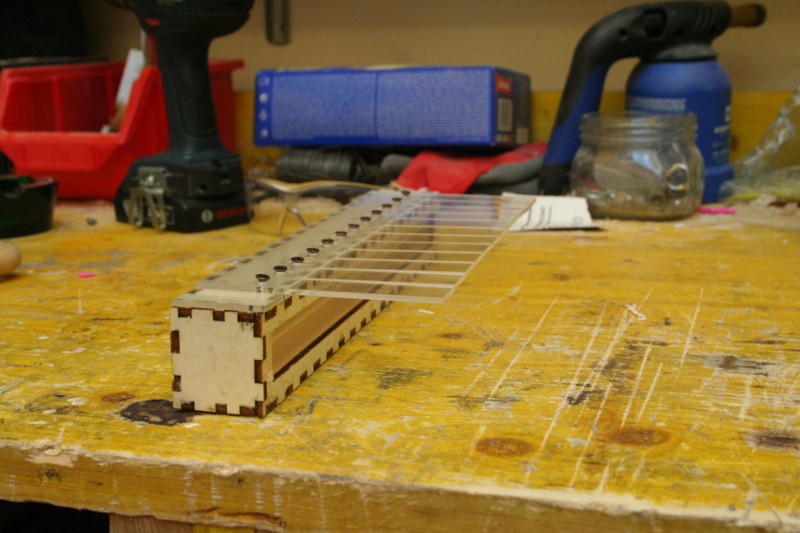
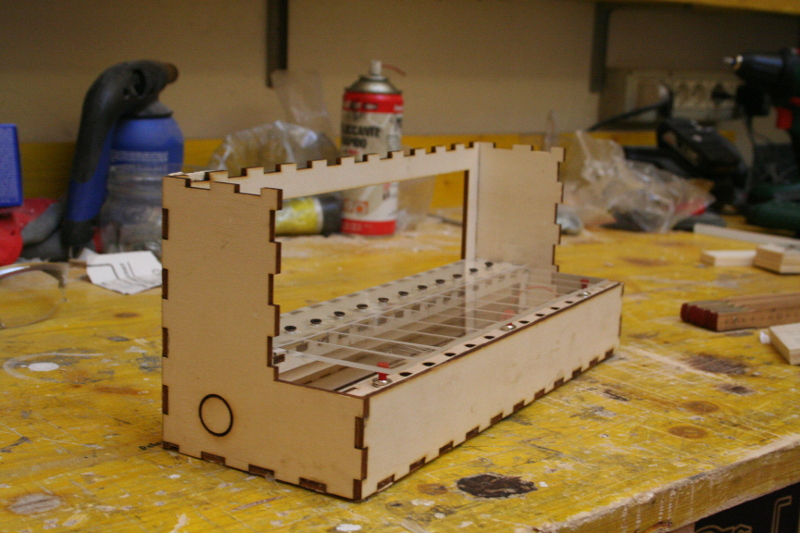
The structure has been made by laser cutting plywood, laser cutted plexiglass and casting to make the keys using gesso.


The making of the keys has been documented as Casting and Molding assignment

Code
The code is made by this parts:
- one counter for the selection key button and one counter for the pitch selection button
- the code to handle the matrix based on a
for cycle
cheking wich rows and colums are activated and an bidimensional array reproducing the the disposition of the kes on the keypad
- the array of notes linked to the pictches file
- the tone function to generate sound
                int key=0;
int keymap[numRows][numCols] =
{
  { melody[note1], melody[note5], melody[note9]} ,
  { melody[note2], melody[note6], melody[note10]} ,
  { melody[note3], melody[note7], melody[note11]} ,
  { melody[note4], melody[note8], melody[note12]}
};
  for (int column = 0; column < numCols; column++)
  {
    digitalWrite(colPins[column], LOW);
    for (int row = 0; row < numRows; row++)
    {
      if (digitalRead(rowPins[row]) == LOW)
      {
        delay (debounceTime);

        key = keymap[row][column];

      }

    }
    digitalWrite(colPins[column], HIGH);

  }

  tone (9,key);

}
                int melody[]={0,NOTE_C4,  NOTE_CS4,  NOTE_D4, NOTE_DS4,  NOTE_E4, NOTE_F4, NOTE_FS4,  NOTE_G4, NOTE_GS4,  NOTE_A4, NOTE_AS4,  NOTE_B4, NOTE_C5, NOTE_CS5,  NOTE_D5,
NOTE_DS5,  NOTE_E5, NOTE_F5, NOTE_FS5,  NOTE_G5, NOTE_GS5,  NOTE_A5, NOTE_AS5,  NOTE_B5, NOTE_C6, NOTE_CS6,  NOTE_D6, NOTE_DS6,  NOTE_E6, NOTE_F6, NOTE_FS6,  NOTE_G6,
NOTE_GS6,  NOTE_A6, NOTE_AS6,  NOTE_B6, NOTE_C7, NOTE_CS7,  NOTE_D7, NOTE_DS7,  NOTE_E7, NOTE_F7, NOTE_FS7,  NOTE_G7, NOTE_GS7,  NOTE_A7, NOTE_AS7,  NOTE_B7, NOTE_C8,
NOTE_CS8,  NOTE_D8, NOTE_DS8 };
                void loop() {
  // read the pushbutton input pin:
  buttonState = digitalRead(selModeButtonpPin);
  // compare the buttonState to its previous state
  if (buttonState != lastButtonState)
  {
    // if the state has changed, increment the counter
    if (buttonState == HIGH) {
      // if the current state is HIGH then the button
      // wend from off to on:
      buttonPushCounter++;
      Serial.println(buttonPushCounter);
      //Serial.print("number of button pushes:  ");
      //Serial.println(buttonPushCounter);
    } else {
      // if the current state is LOW then the button
      // wend from on to off:
      Serial.println("off");
    }
    // Delay a little bit to avoid bouncing
    delay(50);
  }
  // save the current state as the last state,
  //for next time through the loop
  lastButtonState = buttonState;
To generate sounds
To generate sounds, better to say notes, I used the Arduino's Tone function, which generates square waves (that is alternating 0 and 5volts) at a specified frequency through a 50% duty cicle (half on/half 5v). I went deeper into this subject through this book called Arduino Music and Audio projects. It is actually possible to work directly with Microseconds, wich allows to handle directly the frequencies and the duration. But I decided that for my goal the Arduino Tone function was giving al I needed.
//From the Arduino Music and Audio projects book
const byte soundPin = 13;
int halfPeriod = 1000;
void setup() {
pinMode(soundPin,OUTPUT);
}
void loop() {
digitalWrite(soundPin,HIGH);
delayMicroseconds(halfPeriod);
digitalWrite(soundPin,LOW);
delayMicroseconds(halfPeriod);
}
Keyboard
As I started to think how to make the keyboard I found mainly to ways. One is connecting each key (in my case each pushbutton) to an input pin. The main problem is that you need as much pins as the key you want to use (twelve in my case). Another way was the resistor ladder
, that is a voltage divider made with diferent value resistor. I found an example of keyboard made by a resistor ladder among the Arduino StarterKit sketches. The resistor ladder allows you to handle many buttons with just one input pins. But I was afraid to have problems using only resistor. .
At least I found an intermediate solution, that is a circuit based on a matrix. Disassembling a toy musical keyboard I observed that lots of traces were ending in few pins and I found out that pins were arranged in columns and rows and that by pushing a button one column and one row were connected. Each button is identified by a unique combination of number of column and number of row.
Making some investigation I found out that for my goal I could use the structure and logic of a 12 keys keypad
For testing purpose I made a circuit using a Satchakit and a breadboard. The buttons are connected on one side in order to constitute four sets of three buttons (corresponding to the four rows) and on the other side in order to constitute three sets of four buttons (corresponding to the three columns). Each column and each row is connected to an input pin. This way I made a 3x4 matrix using 7 pins to handle 12 buttons.
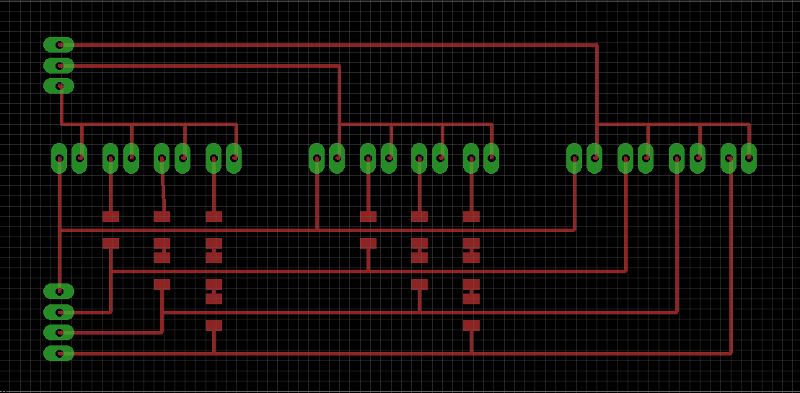
At least,as always, I exported the PNG image from Eagle a made the SVG file for the Fiber Laser cutting machine. To finish the work I soldered all the 0 value resistor used as jumper.
Display
One of the function of my final project is to set the notes pitch one at a time. To get this goal I used an LCD display showing the pitches you are playing. To save pins I used an 16x2 LCD display communicating by 12c protocol. This part is been documented in my Networking and communication assignment.
Interface
Another function of my final project was to show on a virtual piano keyboard the note you are playing. I didn't finish this part, but the principle is the same I used for the Interface and Application Programming assignment
based on Processing.
Structure
The structure has been made by laser cutting plywood, laser cutted plexiglass and casting to make the keys using gesso.
The making of the keys has been documented as Casting and Molding assignment
Code
The code is made by this parts:
- one counter for the selection key button and one counter for the pitch selection button
- the code to handle the matrix based on a
for cycle
cheking wich rows and colums are activated and an bidimensional array reproducing the the disposition of the kes on the keypad - the array of notes linked to the pictches file
- the tone function to generate sound
int key=0;
int keymap[numRows][numCols] =
{
{ melody[note1], melody[note5], melody[note9]} ,
{ melody[note2], melody[note6], melody[note10]} ,
{ melody[note3], melody[note7], melody[note11]} ,
{ melody[note4], melody[note8], melody[note12]}
};
for (int column = 0; column < numCols; column++)
{
digitalWrite(colPins[column], LOW);
for (int row = 0; row < numRows; row++)
{
if (digitalRead(rowPins[row]) == LOW)
{
delay (debounceTime);
key = keymap[row][column];
}
}
digitalWrite(colPins[column], HIGH);
}
tone (9,key);
}
int melody[]={0,NOTE_C4, NOTE_CS4, NOTE_D4, NOTE_DS4, NOTE_E4, NOTE_F4, NOTE_FS4, NOTE_G4, NOTE_GS4, NOTE_A4, NOTE_AS4, NOTE_B4, NOTE_C5, NOTE_CS5, NOTE_D5,
NOTE_DS5, NOTE_E5, NOTE_F5, NOTE_FS5, NOTE_G5, NOTE_GS5, NOTE_A5, NOTE_AS5, NOTE_B5, NOTE_C6, NOTE_CS6, NOTE_D6, NOTE_DS6, NOTE_E6, NOTE_F6, NOTE_FS6, NOTE_G6,
NOTE_GS6, NOTE_A6, NOTE_AS6, NOTE_B6, NOTE_C7, NOTE_CS7, NOTE_D7, NOTE_DS7, NOTE_E7, NOTE_F7, NOTE_FS7, NOTE_G7, NOTE_GS7, NOTE_A7, NOTE_AS7, NOTE_B7, NOTE_C8,
NOTE_CS8, NOTE_D8, NOTE_DS8 };
void loop() {
// read the pushbutton input pin:
buttonState = digitalRead(selModeButtonpPin);
// compare the buttonState to its previous state
if (buttonState != lastButtonState)
{
// if the state has changed, increment the counter
if (buttonState == HIGH) {
// if the current state is HIGH then the button
// wend from off to on:
buttonPushCounter++;
Serial.println(buttonPushCounter);
//Serial.print("number of button pushes: ");
//Serial.println(buttonPushCounter);
} else {
// if the current state is LOW then the button
// wend from on to off:
Serial.println("off");
}
// Delay a little bit to avoid bouncing
delay(50);
}
// save the current state as the last state,
//for next time through the loop
lastButtonState = buttonState;