
Week #4 3D PRINTING AND SCANNING
Assignment
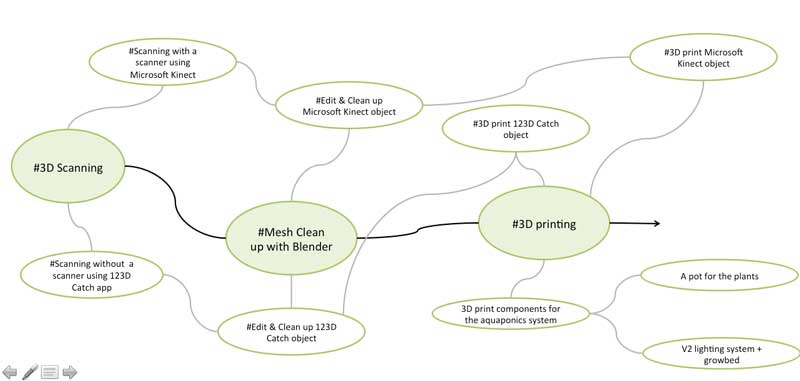
Week workflow
This is how I see my week
Softwares used
- Curra
- Blender
- Skanect
- Rhino
3D Scanning
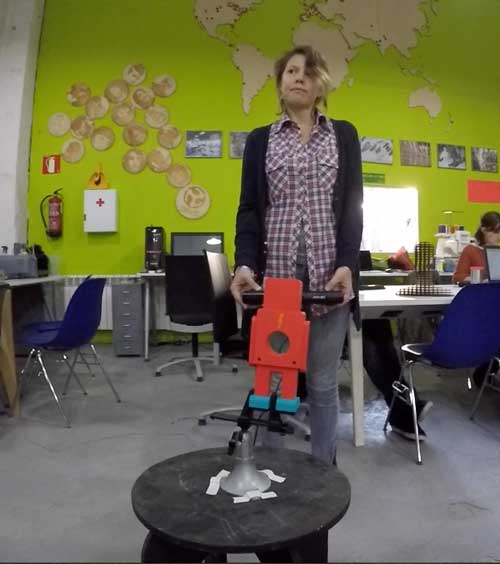
Scanning with a Scanner: Microsoft Kinect
3D scanning was a completely new experience for me, and I really enjoyed working with this tool. For the scans, I've used "Microsoft Kinect". The use of the scanner and the software is quite easy. We only need to select the type of object you want to scan and turn around the object at the same distance.
The first attempt has been with a small object.
Set up:
            Scene: Object
            Bounding Box: 0,6 x 1,2 x 0,6
            Aspect Ratio: Height x2
During the process, we got a lot of problems to capture correctly the object since the kinect was losing the trace of the object several times. It might come from the fact that the object was too small...
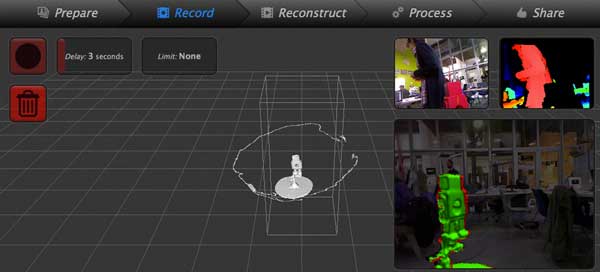
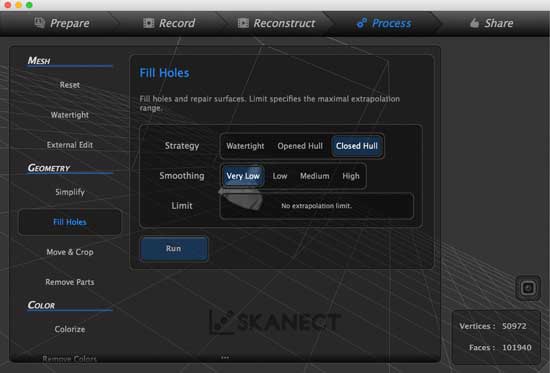
Once the object has been recorded, I followed the below instructions
Steps to follow:
Record
Reconstrcution / Fusion / Fidelity High / Run
Process
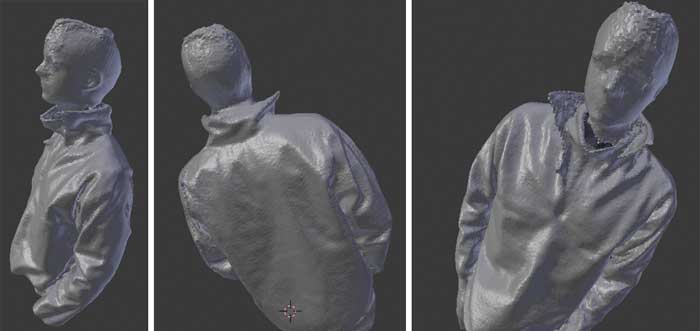
Share / export model / .stlWhen I opened the .stl file on Blender, I've realized the bad quality of the 3D scan recorded.
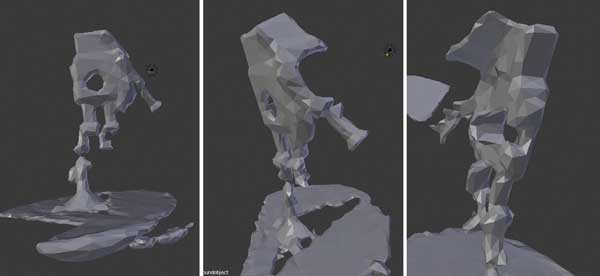
Doing a bit of research about this issue, 3D scanning with Kinect appears to not be so good for capturing fine details and may blur facial features slightly. So if the Kinect is good for creating scans of large objects, like people let's try it !
Scanning without a Scanner: 123D Catch
Another 3D scanning technique is 123D Catch app that you can freely download on your smartphone. With some 20 photos, you can generate some pretty good 3D models than you can export later on as .stl
The result turn out to be amazing !!! In regards to the details captured, the texture of the object and the mesh density created
Use Blender as a Mesh Editing Software
On thursday, Ferdi our local guru decided to give us a tutorial on Blender, a powerfull open source software that can be used for wide range of applications. To cite a few, with Blender you can do photorealistic rendering, fast modeling, animation, sculpting, game creation, etc. But in the framework of this week, this is a very good mesh clean up editor
Important commands learnt from
        Use of the mouse
        Zoom: mousewheel zoom
        Dolly: mouse middle dolly + move the mouth
        Pan: Shift +mouse middle and shift pan
        Edit object
        delete > press "x"
        move > right click on the element or press "G"
        rotate > Right click / R /Z / 45 >>> rotate for 45° on Z axis
        scale > Right click / S /x / 2 >>> scale from 2 unit on x axis
        Edit Mode
        click e > extrusion
        click "a" deselecting everything
        click "b"  trace rectangle to select what you want
        click "c"  for surface selecting (leave this mode by right clicking)
        click "ctrl" + leftclick
        switch from "solid mode" and "wireframe mode" pressing the "z" key
        **Verify and remove mesh artefacts**
        vertex select / no manifold
        press "alt f" > close the object
Mesh Cleanup using Blender
Myself
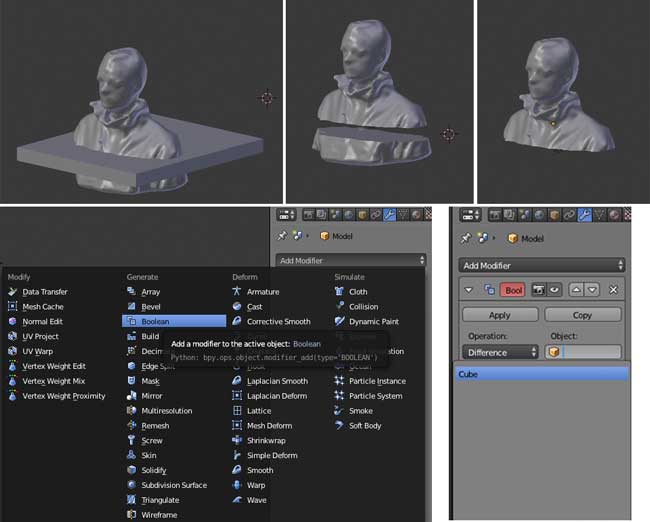
To clean up my scan, I've used the Skanect "move and crop" and "fill holes" options and exported as .stl
Then to make sure that the model has a flat based surface, I've openened it on Blender and worked with the following commands.
Commands used:
        Select Body object / Click on Add modifier / Boolean diference / difference / cube
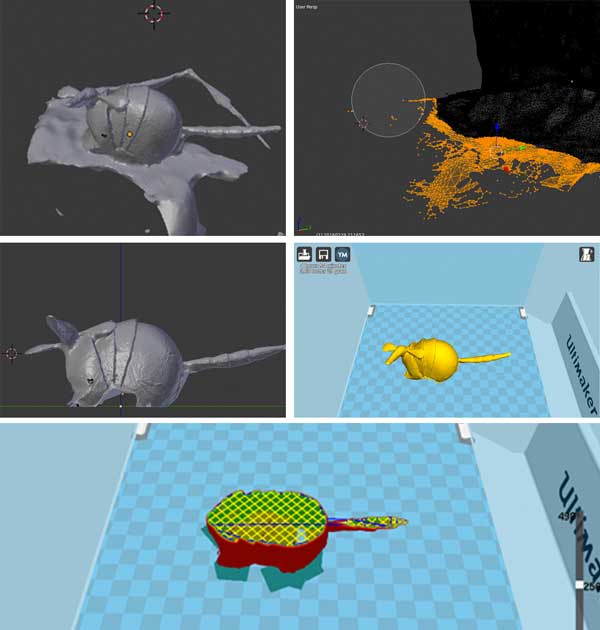
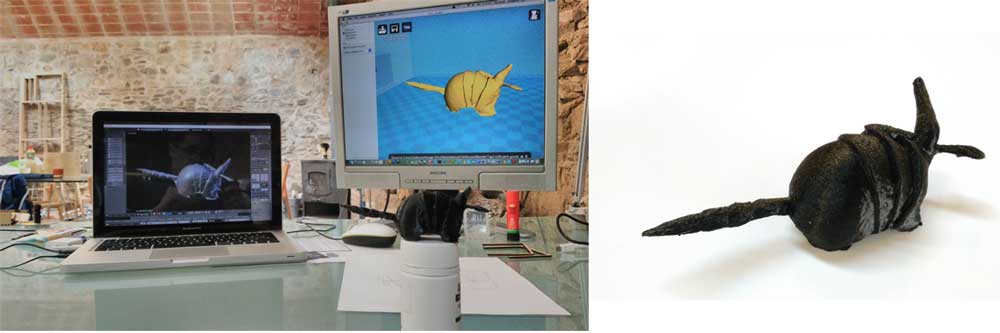
Tapir
I've used the same process to clean up the 3D Tapir using Blender.
Commands used:
        Edited object / select vertex and undesired mesh / clean them up using delete / add modifier / Boolean diference / difference with a cube to make sure the base of the object is flat / save as .stl
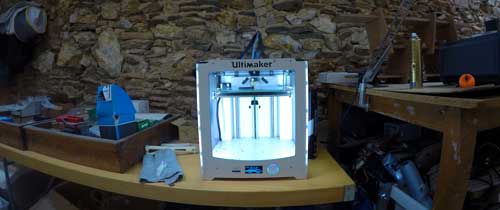
3D printing
3D printing is a technique base on creating additive. This technique has two main advantages:
One of the most interesting fields to experience in the world of 3D printers are the materials because besides creating objects, we give physical characteristics that make them suitable for specific applications. Having said that, I will intend to experiment 3D printing with different materials
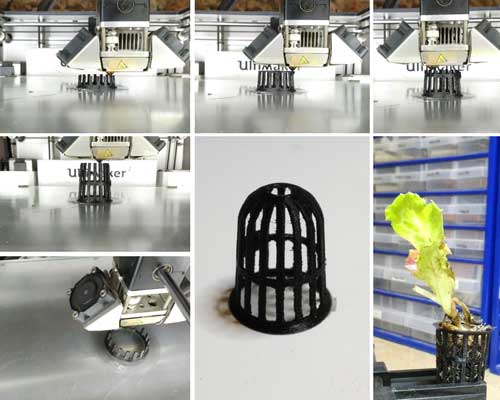
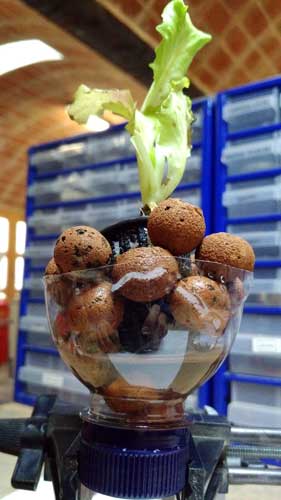
3D print components for the aquaponics system
Starting with a pot for welcoming the future plants
During week02, one of my first 3D model on Rhino, was a planter inspired by the work of 3D ponics. I decided to start with the object using different settings. CURA is an open source software that prepare our model for 3D printing. I think it's a good program because for novices it’ll do everything, and for experts there are many advanced settings.
Full settings / Basics: TIPS
Import you model as .stl
For the Layer heigh (mm): a good value is 0.2 mm but 0.3 mm good mechanical properties but need to increase the T°C
For the Shell thickness (mm): To provide optimal results, selected thickness shoud be a multiple nozzle size.
Double check with the layer option: you will see if something is wrong at the base of your object (i.e. you should see the entire object base yellowish, otherwise it is wrong).
Fill density (%): use at least 20 %
Print speed (mm/s): Lower the print speed / better will be your printing
Platform adhesion tip: Brim
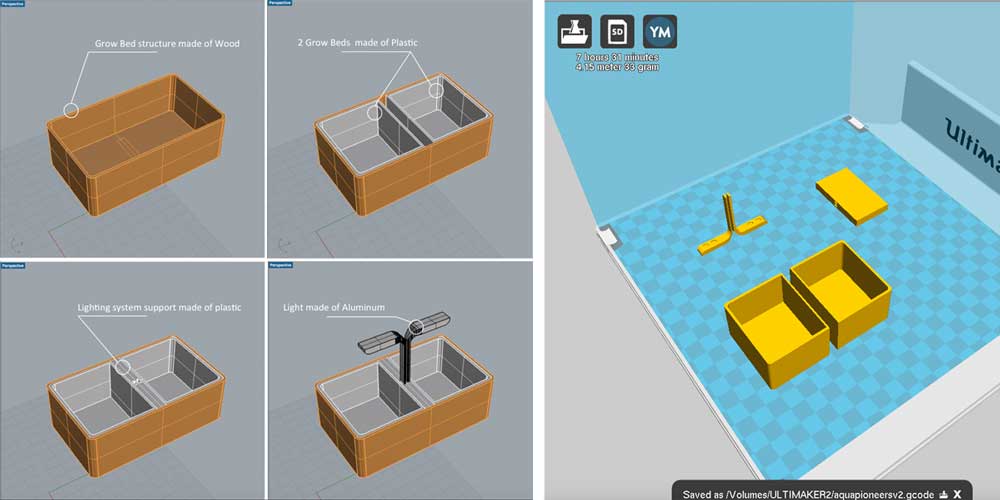
Generate Gcode save it on a SD card and you are ready to go!

In terms of material, I decided to go with PLA since it is used primarily in food packaging which is an important aspect for any plastic materials used with aquaponics. It is created from processing any number of plant products including corn, potatoes or sugar-beets. PLA is considered a more 'earth friendly' plastic compared to petroleum based ABS and can be composted at commercial compost facilities. It won't bio-degrade in your backyard or home compost pile however with the right conditions (i.e. T°C, Humidity, bacterias, etc) it is bio-degradable.
As a first try, I started with a "Rapid printing" setting
TEST 1: Rapid Printing settings
                    These are other basic parameters I used:
                    - Material: PLA
                    - Check: Print support structure
                    - Platform adhesion: brim
                    - Print speed: 100 mm/s
                    - Layer height: 0.2 mm
                    - Time 31 min
                    - Shell thickness: 0.8 mm
                    - Print temperature: 210ºC
                    - Bed temperature: 30ºC
                    - Support type: Touching buildplate
                    - Fill density: 30%
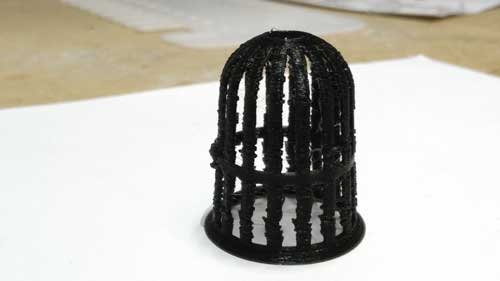
PRINT QUALITY TROUBLESHOOTING:
                    Stringing or Oozing: Lots of strings and hairs left behind when moving between different sections of the print
                    Blobs and Zits:Small blobs on the surface of print, otherwise known as zits
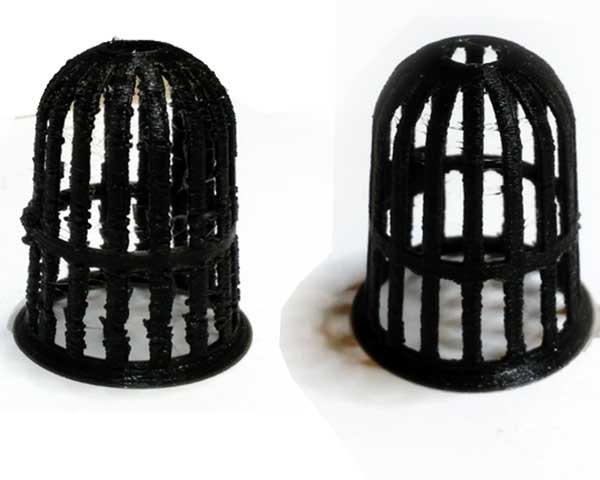
TEST 2: Normal Printing:
                    These are other basic parameters I used:
                    - Material: PLA
                    - Print speed: 25 mm/s
                    - Time : 1 hour
                    - Layer height: 0.2 mm
                    - Shell thickness: 0.8 mm
                    - Print temperature: 210ºC
                    - Bed temperature: 30ºC
                    - Support type: Touching buildplate
                    - Fill density: 30%
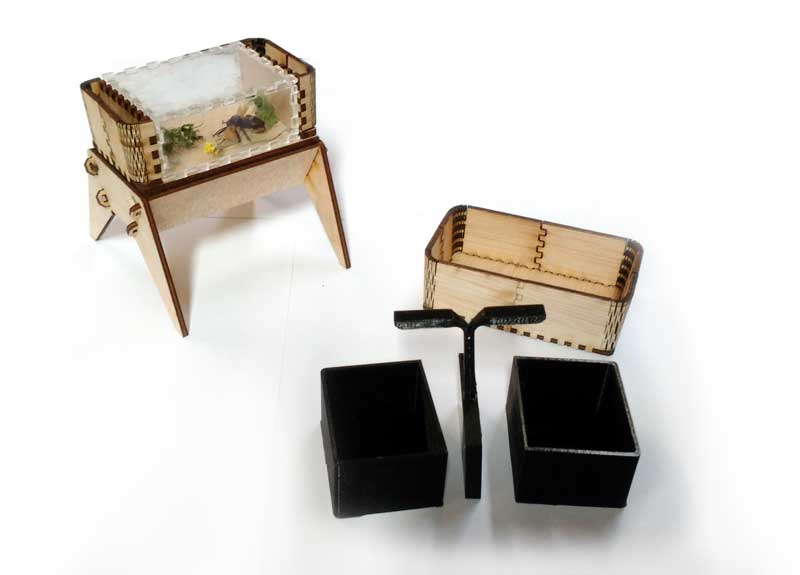
The new lighting system
In the previous week, I revisited the design of my original aquaponic lighting system with a more "organic" and "lighter" approach and thought it woul be a good idea to 3D print these components to include them in the small scale Plywood model I've laser cut during week03.
Below is the 3D model I've done on Rhino
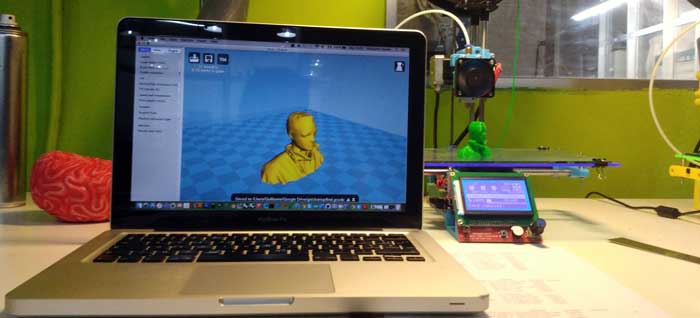
3D print myself
Now that I get more familiar with the 3D printer settings, let's print the first 3D scan body done with the Kinect and cleaned up using Blender.
 3D printer settings:
            Material: PLA
            Layer height: 0.2 mm
            Shell thickness: 0.8 mm
            Print temperature: 210ºC
            Support type: Touching buildplate
            Print speed: 50 mm/s
            Fill density: 20%
3D print the Tapir
I've followed the same process with the 3D scan object using 123D catch app.
 3D printer settings:
            Material: PLA
            Layer height: 0.2 mm
            Shell thickness: 0.8 mm
            Print temperature: 210ºC
            Support type: Touching buildplate
            Print speed: 50 mm/s
            Fill density: 20%
Download
You access and download all the files generated during this week from my google drive:
Conclusion
xxx