WEEK 14 - Composites

TASK:
Objectives:
- Reproduce 3D model of Sejima's Rolex Learning Centre
- Mill blue foam as mold
- Produce fiber composite part using linen
Reproduce 3D model of Sejima's Rolex Learning Centre
Rhino file: Sejima_RolexLearningCentre.3dm
Reference pages: Utkarsh Kumar Wikipedia

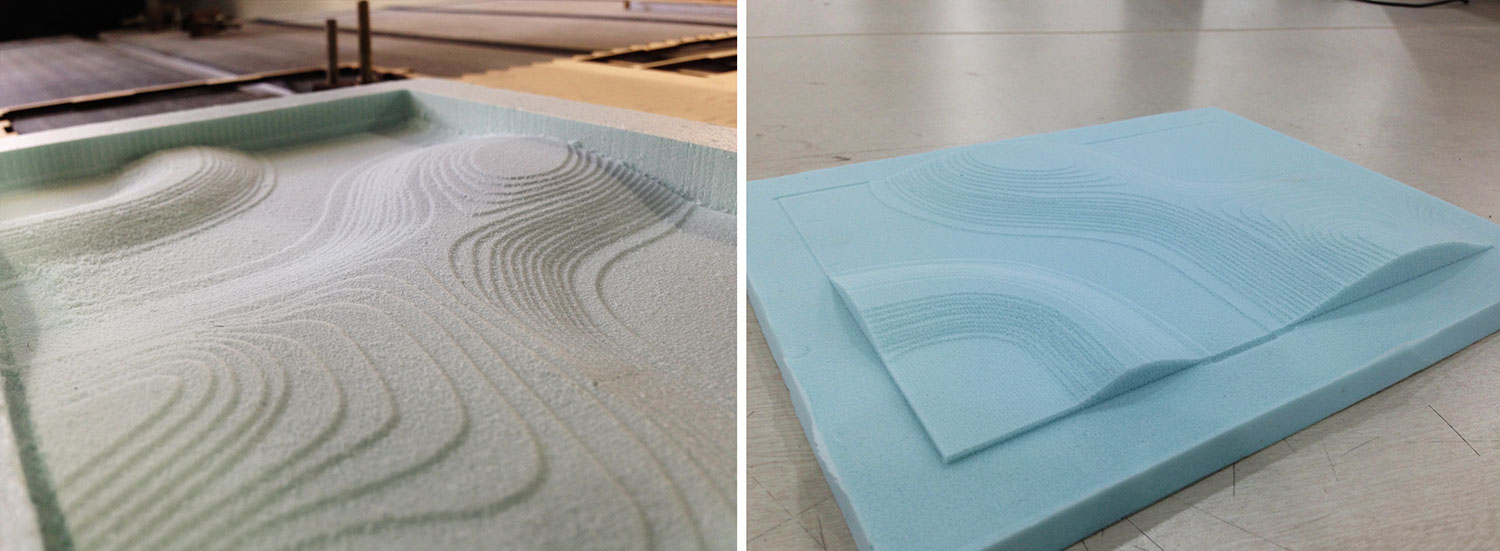
Sejima's Rolex Learning Centre has always been great fasination amongst architects and designers as it merges building with landscape, differentiation with continuity. The assignment for this week attempts to re-create the fluidus form of the Rolex Learning Centre by means of composites.
Based on Utkarsh Kumar's contour image and elevations of the building, the 3D model was created using Rhino and the dimensions were approximated visually.

Mill blue foam as mold
Milling the mold using blue foam took a while to figure out a good setting to allow fine details to surface as the contour lines were rather narrow and close to one another. For milling process, please refer to Week 7 for more details.

Here are some of the mastercam details.

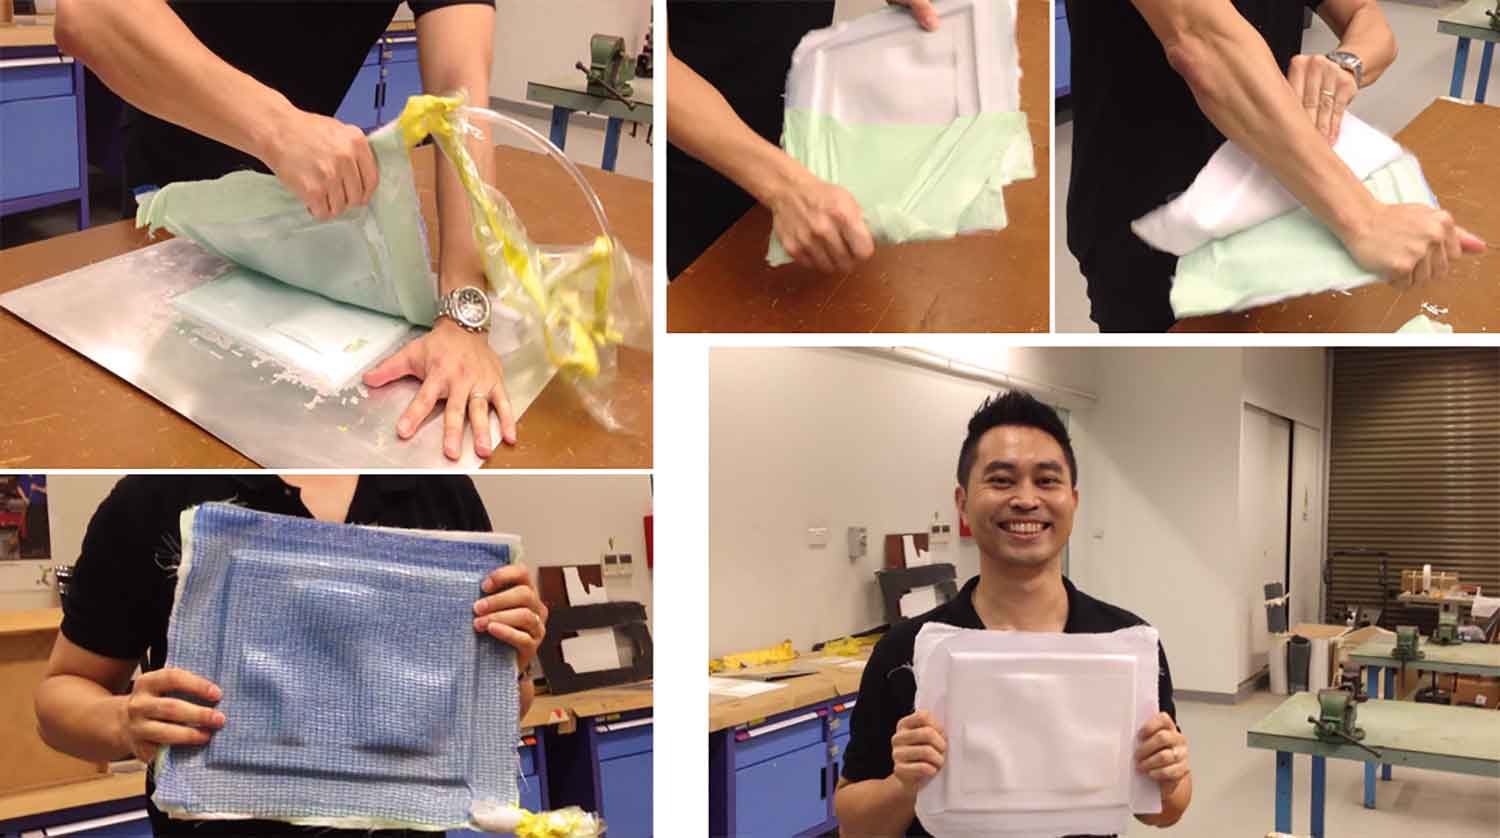
Produce fiber composite part using linen
Here's a summary of the composite process:
- Secure blue foam mold onto table/ flat surface using adhesive tack and apply a layer of mold release wax.
- Next, surround the mold with strips of Hi-temp sealant chaulks (adhesive tacks), covering all corners like a frame, to secure plastic sheet that will be put in place at a later stage.
- To prepare epoxy follow the ratio of mix below. This will require weighing of each mix by placing paper cup onto weighing machine for precise measurement:
- Mix A (Resin): 10 (135g)
- Mix A (Hardener): 6 (85g)
- When mixing epoxy mix, stir gently to prevent forming of bubbles.

- Next, prepare all composite layers at the side of molding area. This is done so as to prevent confusion during setting of layers.
- Place a layer of ply sheet over mold and apply epoxy using brush.
- Place the prepared pieces of cotton linens over mold and apply epoxy. 4 pieces were used for this process.
- Next, place another ply sheet with epoxy applied.
- Finally, place a layer of bleeder sheet (fibre-like material) and sheet of nylon net over the top layer. Apply epoxy sparingly.

- Get ready a plastic tube (approx 500mm), secure it with a piece of bleeder sheet at one end of the tube. Next, secure it at a corner of the molding area.
- Place a plastic sheet over the the molding area where the yellow adhesive tacks are and slowly remove the adhesive protectors to secure the plastic sheet around the mold.
- Once the plastic sheet has been secured tightly, attach the plastic tube into the vacuum machine to abstract air from the mold. Ensure that there's no air seeppage by listening for "hissing" sound. Compress plastic sheet over the adhesive tacks to strengthen air tightness.
- Leave the mold over night or at least 8 hours to cure.

The result turned out to be quite pleasing as the contour is clear and defined. The demounting was slightly difficult but the blue foam was still intact and the linen mold was flexible but rigid enough to hold the shape.
Reflections
Making composites has been quite an eye opening experience, witnessing the layers of materials turned into something so rigid and strong. The project could have been made a little bigger so that the details of the contours can be seen more clearly. The entrie process went quite well and with the help of fellow colleague (Siew Chin) who kindly assisted during some of the stages.
Overall, it's been an excellent week!

Related Projects