WEEK 3 - COMPUTER CONTROLLED CUTTING
TASK: design, make, and document a parametric press-fit construction kit.
* Print origami using laser cutter
* Print graphics using vinyl cutter
Print origami using laser cutter
Software Downloads: Rhino 3D Grasshopper Kangaroo
Download Rhino Grasshopper and linked files:
01_6HexOrigami_Master_LaserCutPrep.zip
01_6HexOrigami_Master_LaserCutPrep.gh
02_Tab Block_01.3dm
02_Tab Block_02.3dm
02_Tab Block_02_F.3dm
02_Tab Block_02F.3dm
02_Tab Block_03_F 001.3dm
02_Tab Block_03_F.3dm
02_Tab Block_03_M.3dm
02_Tab Block_03_M2.3dm
1) RS GH Tutorial
Map of working process:
Bake 3D origami in Grasshopper> Create a base using press fit construction> unroll components> cut out origami and fold to position> fit origami onto base.
Here are some of the critical steps:
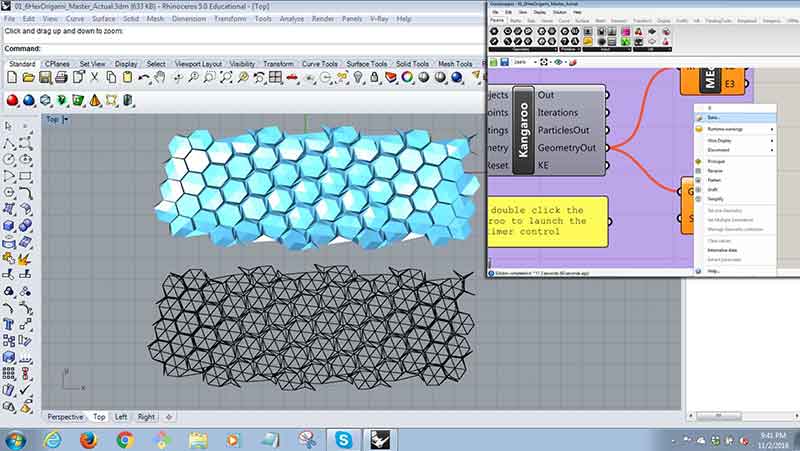
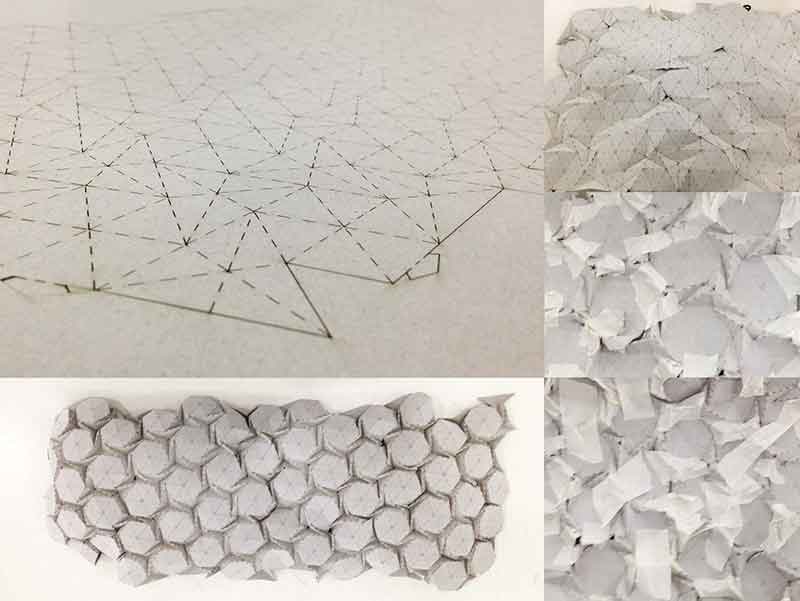
a) Move origami into position using Kangaroo. Right click Preview (under geometry) to select bake to turn grasshopper model into mesh.
b) Create a box below the baked origami model. This can be done by tracing the edge outline of the baked origami model.
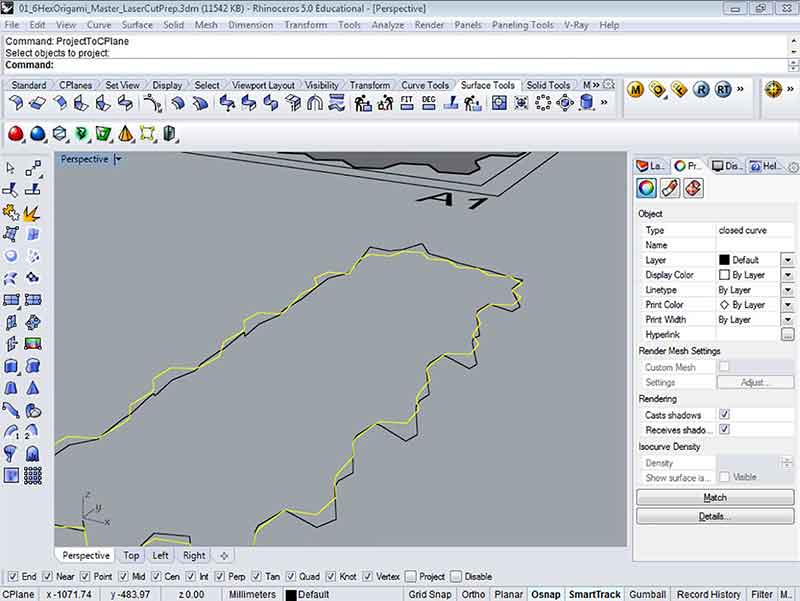
c) Next execute "ProjectToCPlane" to flatten the undulating outline and place it below the orignal curve as the base of box. Pull the top curve away from the bottom curve to define the depth of the box and "loft" the curves. This should create the box beneath the origami model.
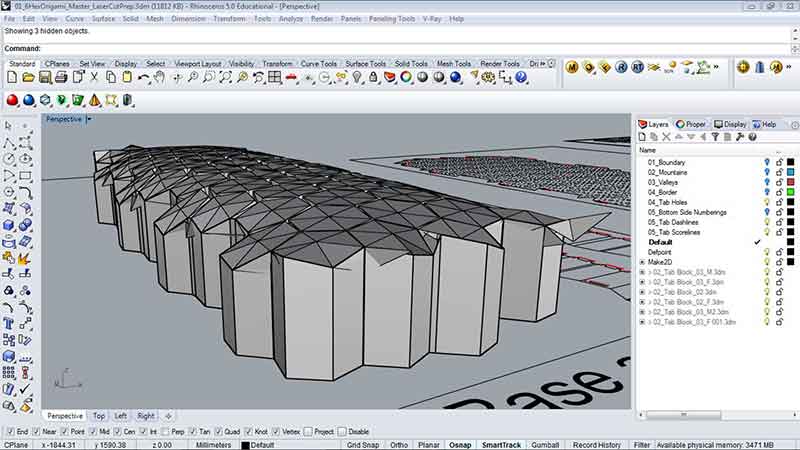
d) Once the model is done, execute command "unroll" in rhino to seperate the model into printable parts.
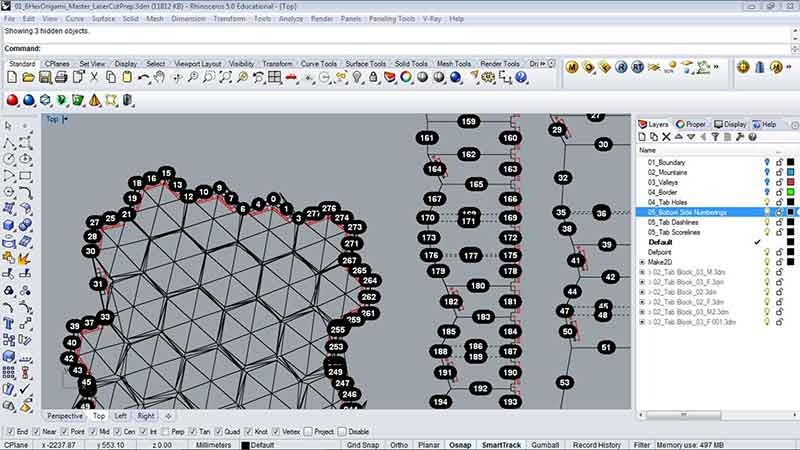
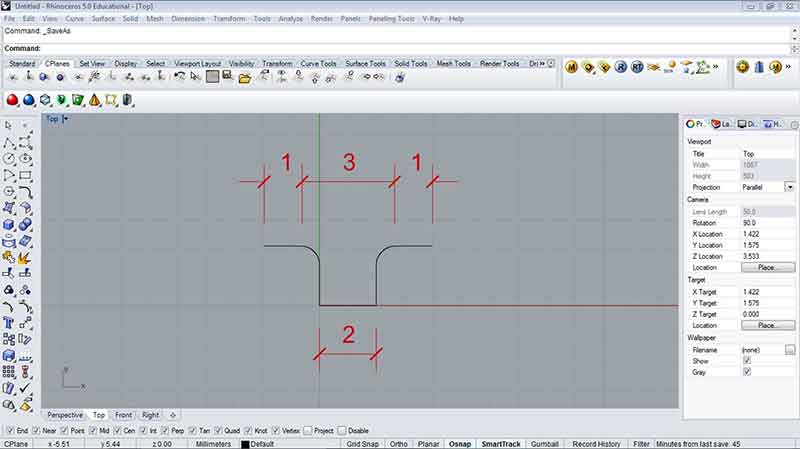
e) Next, create tabs at critical joints to connect parts together once printing is completed. This can be done by means of cloning in Rhino. First, open up a new window in Rhino and draw up a connection. You may need 2 files or more. one for Male connections and the other for female connections. Next, once the connections are drawn, "insert" them in the main drawing and duplicate them using copy and paste. Video instructions by Saverio Silli can be found here. Alternate method can be found here using grasshopper twisting lamp.
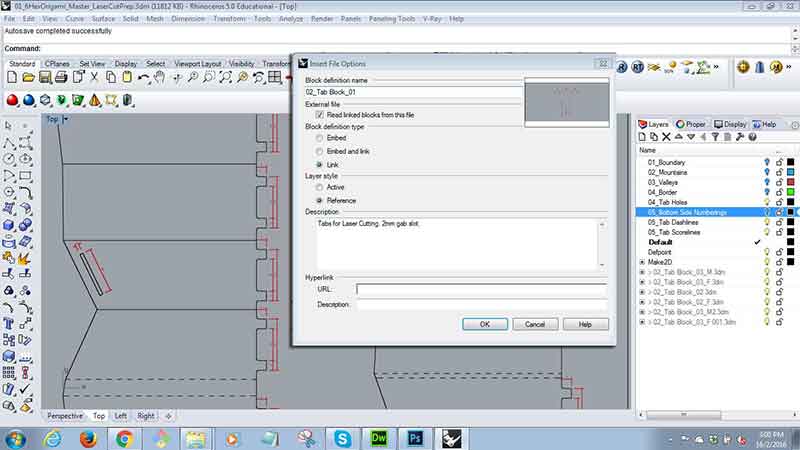
f) Remember to click "link" in the insert File Options menu. This will ensure that call instances are linked to the tab files created earlier. Any changes to the tab drawing files will automatically amend all instances in the main drawing. Very much like the "block" or "xref" function in AutoCAD.
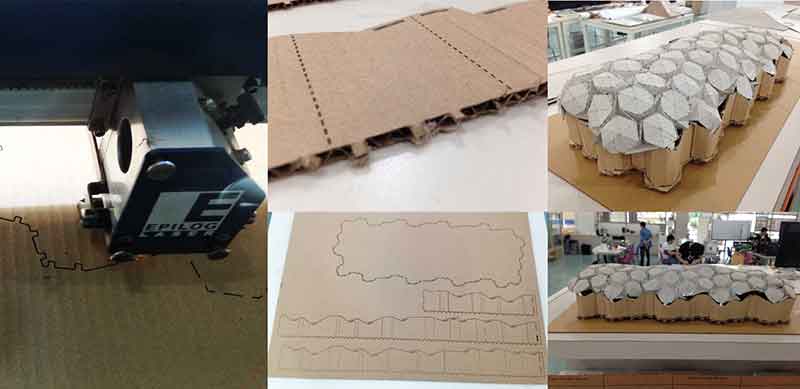
2) Printing Process
Laser Cutter:
Epilog Fusion Laser Cutter
Materials tested on:
* MDF board- 3mm
* Cardboard (Type 1)- 1mm
* Cardboard (Type 2)- 0.5mm
* Corrugated board- 3mm
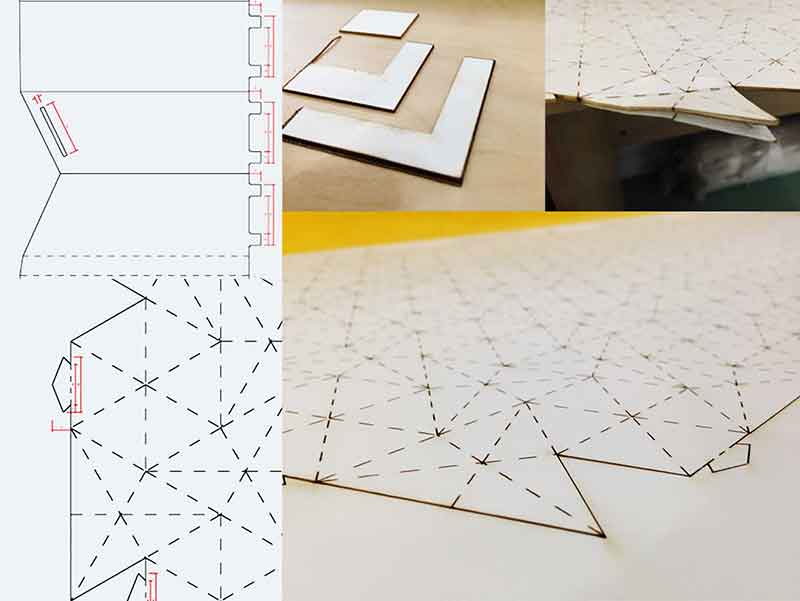
a) Main milestone for cutting the origami pattern is to have a material that is thicker than paper for stronger support and possibly a representation of a building material but yet flexible enough to bend and fold. Below is an illustration of cutting a 1mm cardboard. Arrow head connector was chosen to allow for movement of the origami and a clip -on solution. Cutter configurations are as follows:
* Speed 85% * Power 15% * Frequency 50%
* Speed 25% * Power 55% * Frequency 100% (better and lesser burn)
The result was unexpectedly disappointing due to the inflexibility of the material. Other than that, the cut was rather pleasing.
b) Next, 0.5mm cardboard was used to cut-out the origami pattern. Cutter configurations are as follows:
* Speed 85% * Power 15% * Frequency 50%
* Speed 25% * Power 55% * Frequency 100% (better and lesser burn)
The result was quite pleasing as the origami was able to be folded into shape. During the process of nudging, pinching and folding, the printed piece was accidentally torn due to the fragile material. Point of departure happened when the origami was turned over and the nudging and pinching was executed at the back. This turned out to be alot easier. Musking tapes were used to keep the folds in position.
c) The purpose of the base of the origami was to hold the origami in place. Thicker materials (3mm corrugated board) were used during construction. The print out was rather unsuccessful as the laser cutter did not completely cut through the material and the tabs were too small to be desired.
* Speed 40% * Power 50% * Frequency 50%
* Speed 60% * Power 50% * Frequency 50% (better but unable to completely cut through)
There were small test runs before the actual cut with the same cutting settings and they were able to cut through. Subsequently it was discovered that perhaps the material was placed too far away from the range where the strength of the laser is more prominent. Advice is to keep the cutting parameter within 310mm width.
More tests coming soon...
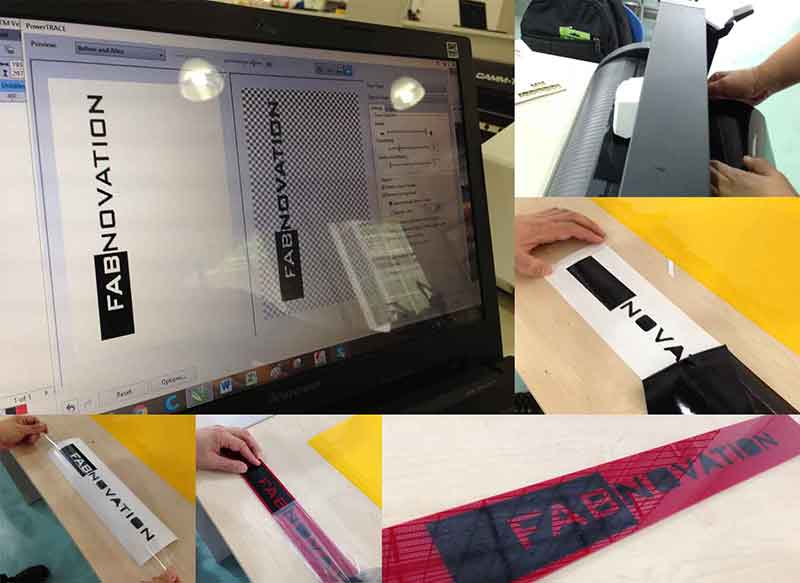
Print graphics using vinyl cutter
Software Downloads: Photoshop Corel Draw Roland CAMM-1 GS24
Right click to download png. file here
Here are some of the critical steps:
1) Export photoshop files to vector format files like pdf, eps or ai. Files were not successfully converted and was subsequently converted in Corel Draw.
2) Open file in Corel Draw (Installed in all printer connected computers). Use Power Trace to convert files into vector.
3) Installed Roland CAMM-1 GS24 software and send file directly to vinyl cutter. Settings are: 17cm/s, 90gf, 0,250mm and the pen force is set at 0.
4) Align print medium with printer rollers.
5) Once printing complete, remove excessive stickers.
6) Finally, use transfer tapes to lift graphics and paste it over the desired backing. In this case was a red laminated plastic. Ensure that backing surface is throughly cleaned before hand.
REFLECTIONS
This week has been a rush for all the participants as the machines were fully booked by students who were completing their final year projects. Thankfully, we were able to complete the works within the stipulated timeframe with results. One of the challenging aspects of the week was the attempt to prepare and experiment with different materials for laser cutting an origami pattern. The attempts were disappointing as the thinker boards were unable to folder into position and the laser cutters were difficult to execute scorelines on both side of the board. The arrow head tabs didn't work as expected as they were too short. A makeshift tap (cardboard with stapler method) was introduced to secure the origami board with the base. As for the vinyl cutter exercise, the process was easily executed and the results were pleasing.
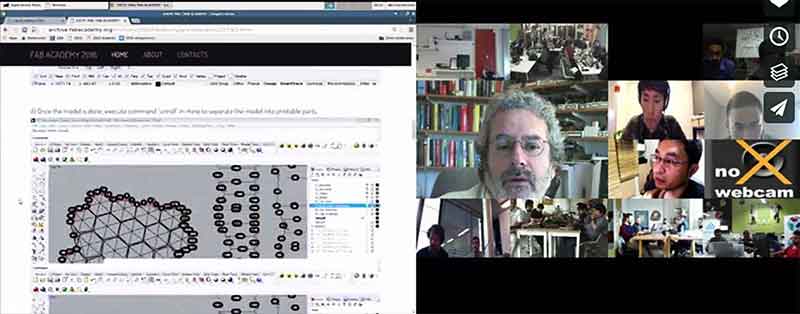
During the Wednesday conference, Singapore Fablab had a chance to present to Neil their final project and overall progress. Below are some pointers suggested and comments made during the meeting:
* Final project should experiment with methods similar to the works of Theo Jansen.
* Look at works by Achimmenges and Kirigami.
* With the vinyl cutter project, eliminate issues with converting raster to Vector by using Fabmodules.
* The experimentations and final project ideas are interesting.
* The blog or self-critical approach to website is good and should be continued.
Video of meeting can be found here.

Related Projects